Post Syndicated from Talia Nassi original https://aws.amazon.com/blogs/compute/using-amazon-mq-for-rabbitmq-as-an-event-source-for-lambda/
Amazon MQ for RabbitMQ (ARMQ) is an AWS managed version of RabbitMQ. The service manages the provisioning, setup, and maintenance of RabbitMQ, reducing operational overhead for companies.
Now, with ARMQ as an event source for AWS Lambda, you can process messages from the service. This allows you to integrate ARMQ with downstream serverless workflows without having to manage the resources used to run the cluster itself.
RabbitMQ is one of the two engines for Amazon MQ. The other one is ActiveMQ. Both of these message brokers can now be used as an event source for AWS Lambda.
In this blog post, I explain how to set up a RabbitMQ broker and networking configuration. I also show how to create a Lambda function that is invoked by messages from Amazon MQ queues.
RabbitMQ overview
RabbitMQ is an open-source message broker to which applications connect in order to transfer a message or messages between services. An example application might send a message from one service to another. If there is no queue in between the two services, and the message is not received from the consumer, data could be lost. Queues wait for a successful confirmation from the consumer before deleting messages.
The Lambda event source uses a poller for the RabbitMQ broker that constantly polls for new messages. The poller exists between the queue and Lambda and it is managed by the Lambda service. By default, it polls RabbitMQ every 100 ms to check for messages. Once a defined batch size is reached, the poller invokes the function with the entire set of messages.
Configuring Amazon MQ for RabbitMQ as an event source for Lambda
To use Amazon MQ for RabbitMQ as a highly available service, it must be configured to run in a minimum of two Availability Zones in your preferred Region. You can also run a single broker in one Availability Zone for development and test purposes.
There are three main tasks to configure ARMQ as an event source for Lambda:
- Set up AWS Secrets Manager.
- Deploy an AWS SAM template that creates the necessary resources.
- Create a queue on the broker.
Setting up AWS Secrets Manager
The Lambda service needs access to your Amazon MQ broker. In this step, you create a user name and password that is used to log in to RabbitMQ. To avoid exposing secrets in plaintext in the Lambda function, it’s best practice to use a service like Secrets Manager.
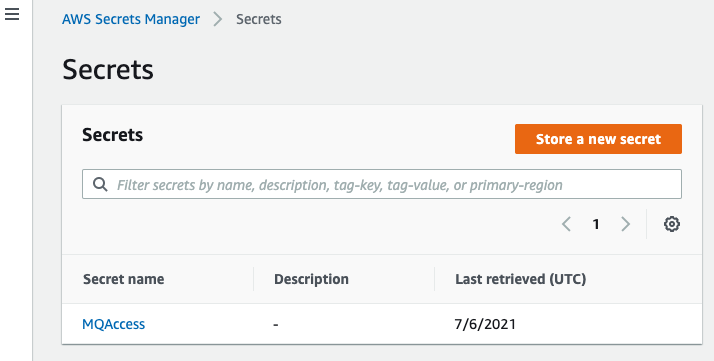
- Navigate to the Secrets Manager console and choose Store a new secret.

- For Secret type, choose Other type of secrets. In the Secret key/value, enter username for the first key and password for the second key.
- Enter the corresponding values to use to access your RabbitMQ account. Choose Next.

- For Secret name, enter ‘MQAccess’ and choose Next.

- Keep the default setting for the automatic rotation: Disable automatic rotation. Choose Next.

- Review your secret information and choose Store.


Build the Lambda function and associated permissions with AWS SAM
In this step, you use AWS SAM to create the necessary resources that are deployed for your application. You can use AWS Cloud9 or your own text editor. (If you use your own text editor, be sure you have the AWS SAM CLI installed.
- In the terminal, enter:
sam init
- Choose option 1: AWS Quick Start Templates. Then choose option 1: Zip (artifact is a zip uploaded to S3). Choose your preferred runtime. In this tutorial, use python3.7.

- In the Secrets Manager console, copy the Secret ARN.

- In the template.yaml file that is created, paste the following code. This AWS SAM template deploys an Amazon MQ for RabbitMQ broker, and a Lambda function with the corresponding event source mapping and permissions. Replace the last line of the template with the secret ARN from step 3.
AWSTemplateFormatVersion: '2010-09-09' Transform: AWS::Serverless-2016-10-31 Description: ARMQ Example Resources: MQBroker: Type: AWS::AmazonMQ::Broker Properties: AutoMinorVersionUpgrade: false BrokerName: myQueue DeploymentMode: SINGLE_INSTANCE EngineType: RABBITMQ EngineVersion: "3.8.11" HostInstanceType: mq.m5.large PubliclyAccessible: true Users: - Password: '{{resolve:secretsmanager:MQAccess:SecretString:password}}' Username: '{{resolve:secretsmanager:MQAccess:SecretString:username}}' MQConsumer: Type: AWS::Serverless::Function Properties: CodeUri: hello_world/ Timeout: 3 Handler: app.lambda_handler Runtime: python3.7 Policies: - Version: '2012-10-17' Statement: - Effect: Allow Resource: '*' Action: - mq:DescribeBroker - secretsmanager:GetSecretValue - ec2:CreateNetworkInterface - ec2:DescribeNetworkInterfaces - ec2:DescribeVpcs - ec2:DeleteNetworkInterface - ec2:DescribeSubnets - ec2:DescribeSecurityGroups Events: MQEvent: Type: MQ Properties: Broker: !GetAtt MQBroker.Arn Queues: - myQueue SourceAccessConfigurations: - Type: BASIC_AUTH URI: <your_secret_arn> - In the app.py file, replace the existing code with the following. This Lambda function decrypts the messages sent to the queue from the RabbitMQ broker:
import json import logging as log import base64 def lambda_handler(event, context): print("Target Lambda function invoked") print(event) if 'rmqMessagesByQueue' not in event: print("Invalid event data") return { 'statusCode': 404 } print(f'Div Data received from event source: ') for queue in event["rmqMessagesByQueue"]: messageCnt = len(event['rmqMessagesByQueue'][queue]) print(f'Total messages received from event source: {messageCnt}' ) for message in event['rmqMessagesByQueue'][queue]: data = base64.b64decode(message['data']) print(data) return { 'statusCode': 200, 'body': json.dumps('Hello from Lambda!') } - Run
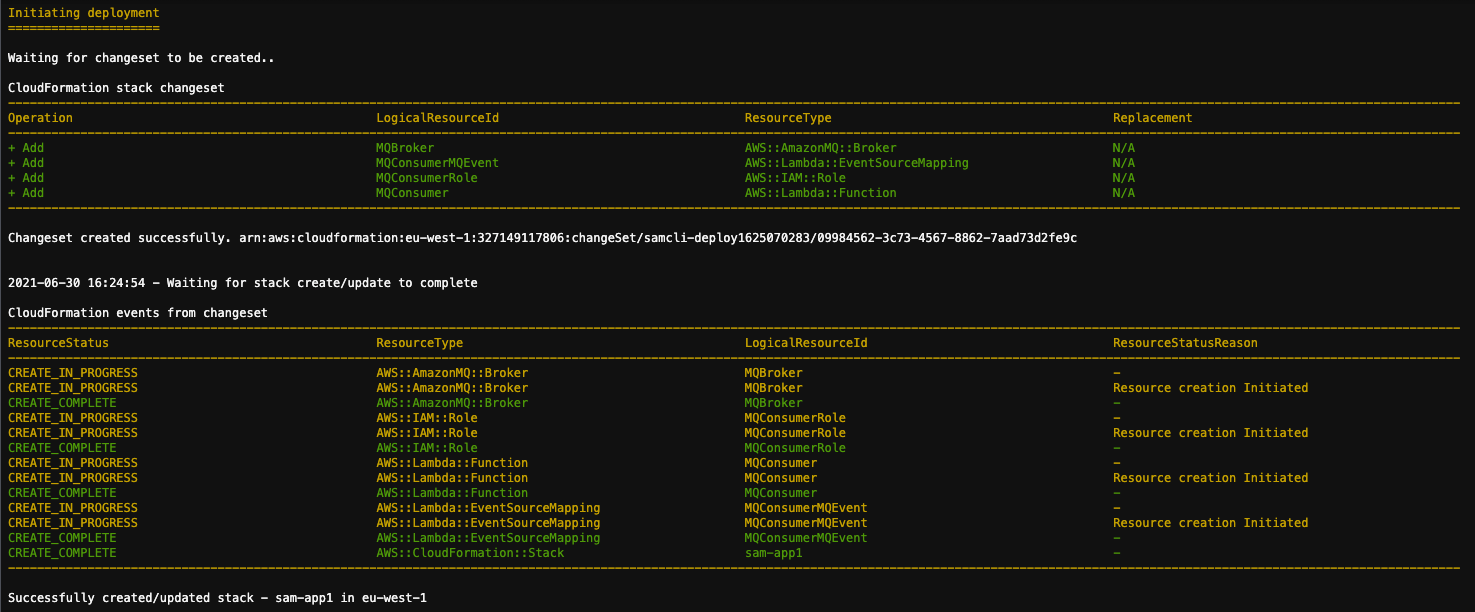
sam deploy --guidedand wait for the confirmation message. This deploys all of the resources.


Creating a queue on the broker
The poller created by the Lambda service subscribes to a queue on the broker. In this step, you create a new queue:
- Navigate to the Amazon MQ console and choose the newly created broker.

- In the Connections panel, locate the URL for the RabbitMQ web console.

- Sign in with the credentials you created and stored in the Secrets Manager earlier.
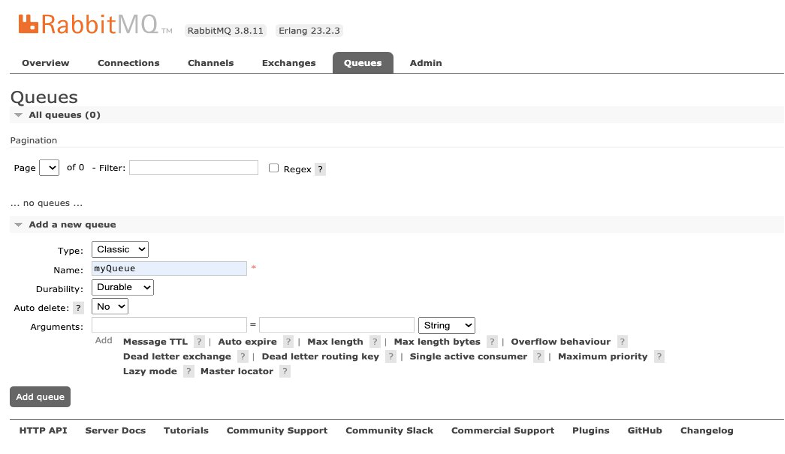
- Select Queues from the top panel and then choose Add a new queue.

- Enter ‘myQueue’ as the name for the queue and choose Add queue. (This must match exactly as that is the name you hardcoded in the AWS SAM template). Keep the other configuration options as default.


Testing the event source mapping
- In the RabbitMQ web console, choose Queues to confirm that the Lambda service is configured to consume events.

- Choose the name of the queue. Under the Publish message tab, enter a message, and choose Publish message to send.

- You see a confirmation message.

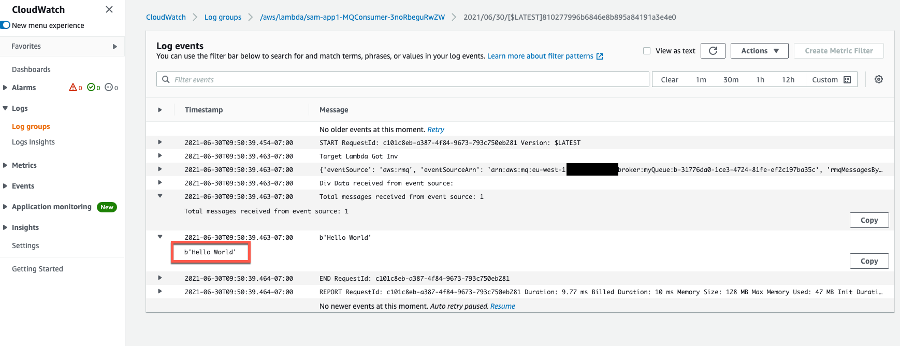
- In the MQconsumer Lambda function, select the Monitoring tab and then choose View logs in CloudWatch. The log streams show that the Lambda function is invoked by Amazon MQ and you see the message Hello World in the logs.


A single Lambda function consumes messages from a single queue in an Amazon MQ broker. You control the rate of message processing by using the Batch size property in the event source mapping. The Lambda service limits the concurrency to five execution environments per queue.
Conclusion
Amazon MQ provides a fully managed, highly available message broker service for RabbitMQ. Now, Lambda supports Amazon MQ as an event source, and you can invoke Lambda functions from messages in Amazon MQ queues to integrate into your downstream serverless workflows.
In this post, I give an overview of how to set up an Amazon MQ for RabbitMQ broker. I explain how to create credentials for the RabbitMQ broker and store them in AWS Secrets Manager. I also show how to use AWS SAM templates to deploy the necessary resources to use ARMQ as an event source for AWS Lambda. Then I show how to send a test message to the queue and view the output in the Amazon CloudWatch Logs for the Lambda function.
For more serverless learning resources, visit https://serverlessland.com, and to view the RabbitMQ to Lambda pattern, visit the Serverlessland Patterns Website.