Post Syndicated from Vikas Bajaj original https://aws.amazon.com/blogs/big-data/validate-streaming-data-over-amazon-msk-using-schemas-in-cross-account-aws-glue-schema-registry/
Today’s businesses face an unprecedented growth in the volume of data. A growing portion of the data is generated in real time by IoT devices, websites, business applications, and various other sources. Businesses need to process and analyze this data as soon as it arrives to make business decisions in real time. Amazon Managed Streaming for Apache Kafka (Amazon MSK) is a fully managed service that enables building and running stream processing applications that use Apache Kafka to collect and process data in real time.
Stream processing applications using Apache Kafka don’t communicate with each other directly; they communicate via sending and receiving messages over Kafka topics. For stream processing applications to communicate efficiently and confidently, a message payload structure must be defined in terms of attributes and data types. This structure describes the schema applications use when sending and receiving messages. However, with a large number of producer and consumer applications, even a small change in schema (removing a field, adding a new field, or change in data type) may cause issues for downstream applications that are difficult to debug and fix.
Traditionally, teams have relied on change management processes (such as approvals and maintenance windows) or other informal mechanisms (documentation, emails, collaboration tools, and so on) to inform one another of data schema changes. However, these mechanisms don’t scale and are prone to mistakes. The AWS Glue Schema Registry allows you to centrally publish, discover, control, validate, and evolve schemas for stream processing applications. With the AWS Glue Schema Registry, you can manage and enforce schemas on data streaming applications using Apache Kafka, Amazon MSK, Amazon Kinesis Data Streams, Amazon Kinesis Data Analytics for Apache Flink, and AWS Lambda.
This post demonstrates how Apache Kafka stream processing applications validate messages using an Apache Avro schema stored in the AWS Glue Schema registry residing in a central AWS account. We use the AWS Glue Schema Registry SerDe library and Avro SpecificRecord to validate messages in stream processing applications while sending and receiving messages from a Kafka topic on an Amazon MSK cluster. Although we use an Avro schema for this post, the same approach and concept applies to JSON schemas as well.
Use case
Let’s assume a fictitious rideshare company that offers unicorn rides. To draw actionable insights, they need to process a stream of unicorn ride request messages. They expect rides to be very popular and want to make sure their solution can scale. They’re also building a central data lake where all their streaming and operation data is stored for analysis. They’re customer obsessed, so they expect to add new fun features to future rides, like choosing the hair color of your unicorn, and will need to reflect these attributes in the ride request messages. To avoid issues in downstream applications due to future schema changes, they need a mechanism to validate messages with a schema hosted in a central schema registry. Having schemas in a central schema registry makes it easier for the application teams to publish, validate, evolve, and maintain schemas in a single place.
Solution overview
The company uses Amazon MSK to capture and distribute the unicorn ride request messages at scale. They define an Avro schema for unicorn ride requests because it provides rich data structures, supports direct mapping to JSON, as well as a compact, fast, and binary data format. Because the schema was agreed in advance, they decided to use Avro SpecificRecord.SpecificRecord is an interface from the Avro library that allows the use of an Avro record as a POJO. This is done by generating a Java class (or classes) from the schema, by using avro-maven-plugin. They use AWS Identity and Access Management (IAM) cross-account roles to allow producer and consumer applications from the other AWS account to safely and securely access schemas in the central Schema Registry account.
The AWS Glue Schema Registry is in Account B, whereas the MSK cluster and Kafka producer and consumer applications are in Account A. We use the following two IAM roles to enable cross-account access to the AWS Glue Schema Registry. Apache Kafka clients in Account A assume a role in Account B using an identity-based policy because the AWS Glue Schema Registry doesn’t support resource-based policies.
- Account A IAM role – Allows producer and consumer applications to assume an IAM role in Account B.
- Account B IAM role – Trusts all IAM principals from Account A and allows them to perform read actions on the AWS Glue Schema Registry in Account B. In a real use case scenario, IAM principals that can assume cross-account roles should be scoped more specifically.
The following architecture diagram illustrates the solution:

The solution works as follows:
- A Kafka producer running in Account A assumes the cross-account Schema Registry IAM role in Account B by calling the AWS Security Token Service (AWS STS)
assumeRoleAPI. - The Kafka producer retrieves the unicorn ride request Avro schema version ID from the AWS Glue Schema Registry for the schema that’s embedded in the unicorn ride request POJO. Fetching the schema version ID is internally managed by the AWS Glue Schema Registry SerDe’s serializer. The serializer has to be configured as part of the Kafka producer configuration.
- If the schema exists in the AWS Glue Schema Registry, the serializer decorates the data record with the schema version ID and then serializes it before delivering it to the Kafka topic on the MSK cluster.
- The Kafka consumer running in Account A assumes the cross-account Schema Registry IAM role in Account B by calling the AWS STS
assumeRoleAPI. - The Kafka consumer starts polling the Kafka topic on the MSK cluster for data records.
- The Kafka consumer retrieves the unicorn ride request Avro schema from the AWS Glue Schema Registry, matching the schema version ID that’s encoded in the unicorn ride request data record. Fetching the schema is internally managed by the AWS Glue Schema Registry SerDe’s deserializer. The deserializer has to be configured as part of the Kafka consumer configuration. If the schema exists in the AWS Glue Schema Registry, the deserializer deserializes the data record into the unicorn ride request POJO for the consumer to process it.
The AWS Glue Schema Registry SerDe library also supports optional compression configuration to save on data transfers. For more information about the Schema Registry, see How the Schema Registry works.
Unicorn ride request Avro schema
The following schema (UnicornRideRequest.avsc) defines a record representing a unicorn ride request, which contains ride request attributes along with the customer attributes and system-recommended unicorn attributes:
Prerequisites
To use this solution, you must have two AWS accounts:
- Account A – For the MSK cluster, Kafka producer and consumer Amazon Elastic Compute Cloud (Amazon EC2) instances, and AWS Cloud9 environment
- Account B – For the Schema Registry and schema
For this solution, we use Region us-east-1, but you can change this as per your requirements.
Next, we create the resources in each account using AWS CloudFormation templates.
Create resources in Account B
We create the following resources in Account B:
- A schema registry
- An Avro schema
- An IAM role with the
AWSGlueSchemaRegistryReadonlyAccessmanaged policy and an instance profile, which allows all Account A IAM principals to assume it - The
UnicornRideRequest.avscAvro schema shown earlier, which is used as a schema definition in the CloudFormation template
Make sure you have the appropriate permissions to create these resources.
- Log in to Account B.
- Launch the following CloudFormation stack.
- For Stack name, enter
SchemaRegistryStack. - For Schema Registry name, enter
unicorn-ride-request-registry. - For Avro Schema name, enter
unicorn-ride-request-schema-avro. - For the Kafka client’s AWS account ID, enter your Account A ID.
- For ExternalId, enter a unique random ID (for example,
demo10A), which should be provided by the Kafka clients in Account A while assuming the IAM role in this account.
For more information about cross-account security, see The confused deputy problem.
- When the stack is complete, on the Outputs tab of the stack, copy the value for
CrossAccountGlueSchemaRegistryRoleArn.
The Kafka producer and consumer applications created in Account A assume this role to access the Schema Registry and schema in Account B.
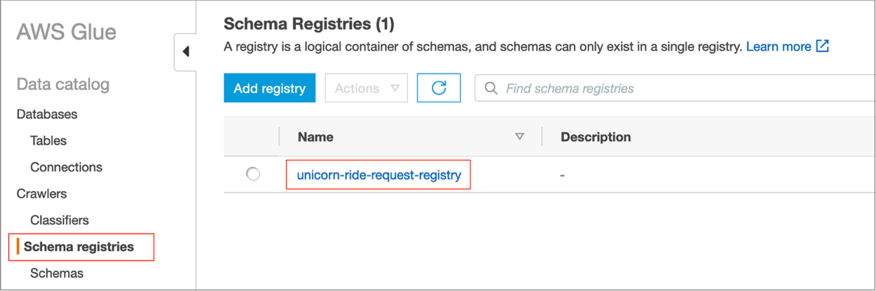
- To verify the resources were created, on the AWS Glue console, choose Schema registries in the navigation bar, and locate
unicorn-ride-request-registry.

- Choose the registry
unicorn-ride-request-registryand verify that it containsunicorn-ride-request-schema-avroin the Schemas section. - Choose the schema to see its content.


The IAM role created by the SchemaRegistryStack stack allows all Account A IAM principals to assume it and perform read actions on the AWS Glue Schema Registry. Let’s look at the trust relationships of the IAM role.
- On the
SchemaRegistryStackstack Outputs tab, copy the value forCrossAccountGlueSchemaRegistryRoleName. - On the IAM console, search for this role.
- Choose Trust relationships and look at its trusted entities to confirm that Account A is listed.
- In the Conditions section, confirm that
sts:ExternalIdhas the same unique random ID provided during stack creation.
Create resources in Account A
We create the following resources in Account A:
- A VPC
- EC2 instances for the Kafka producer and consumer
- An AWS Cloud9 environment
- An MSK cluster
As a prerequisite, create an EC2 keypair and download it on your machine to be able to SSH into EC2 instances. Also create an MSK cluster configuration with default values. You need to have permissions to create the CloudFormation stack, EC2 instances, AWS Cloud9 environment, MSK cluster, MSK cluster configuration, and IAM role.
- Log in to Account A.
- Launch the following CloudFormation stack to launch the VPC, EC2 instances, and AWS Cloud9 environment.
- For Stack name, enter
MSKClientStack. - Provide the VPC and subnet CIDR ranges.
- For EC2 Keypair, choose an existing EC2 keypair.
- For the latest EC2 AMI ID, select the default option.
- For the cross-account IAM role ARN, use the value for
CrossAccountGlueSchemaRegistryRoleArn(available on the Outputs tab ofSchemaRegistryStack). - Wait for the stack to create successfully.
- Launch the following CloudFormation stack to create the MSK cluster.
- For Stack name, enter
MSKClusterStack. - Use Amazon MSK version 2.7.1.
- For the MSK cluster configuration ARN, enter the MSK cluster configuration ARN. One that you created as part of the prerequisite.
- For the MSK cluster configuration revision number, enter 1 or change it according to your version.
- For the client CloudFormation stack name, enter
MSKClientStack(the stack name that you created prior to this stack).
Configure the Kafka producer
To configure the Kafka producer accessing the Schema Registry in the central AWS account, complete the following steps:
- Log in to Account A.
- On the AWS Cloud9 console, choose the
Cloud9EC2Bastionenvironment created by theMSKClientStackstack. - On the File menu, choose Upload Local Files.
- Upload the EC2 keypair file that you used earlier while creating the stack.

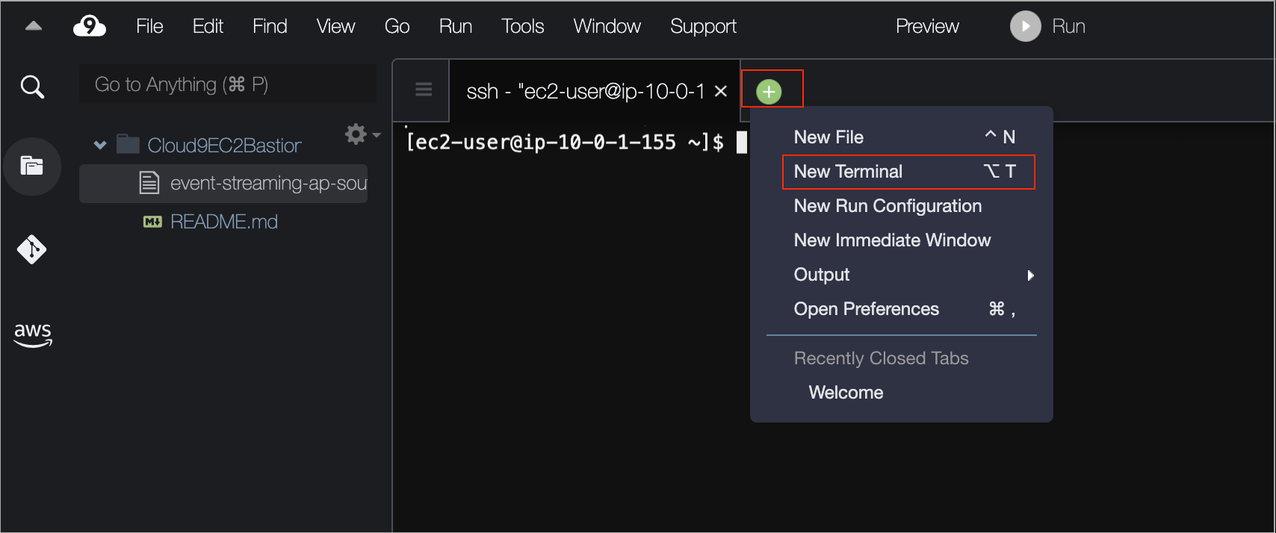
- Open a new terminal and change the EC2 keypair permissions:
- SSH into the
KafkaProducerInstanceEC2 instance and set the Region as per your requirement: - Set the environment variable
MSK_CLUSTER_ARNpointing to the MSK cluster’s ARN:

Change the .ClusterName value in the code if you used a different name for the MSK cluster CloudFormation stack. The cluster name is the same as the stack name.
- Set the environment variable
BOOTSTRAP_BROKERSpointing to the bootstrap brokers: - Verify the environment variables:
- Create a Kafka topic called
unicorn-ride-request-topicin your MSK cluster, which is used by the Kafka producer and consumer applications later:
The MSKClientStack stack copied the Kafka producer client JAR file called kafka-cross-account-gsr-producer.jar to the KafkaProducerInstance instance. It contains the Kafka producer client that sends messages to the Kafka topic unicorn-ride-request-topic on the MSK cluster and accesses the unicorn-ride-request-schema-avro Avro schema from the unicorn-ride-request-registry schema registry in Account B. The Kafka producer code, which we cover later in this post, is available on GitHub.
- Run the following commands and verify
kafka-cross-account-gsr-producer.jarexists: - Run the following command to run the Kafka producer in the
KafkaProducerInstanceterminal:
The code has the following parameters:
- -bs –
$BOOTSTRAP_BROKERS(the MSK cluster bootstrap brokers) - -rn – The
CrossAccountGlueSchemaRegistryRoleArnvalue from theSchemaRegistryStackstack outputs in Account B - -topic – the Kafka topic
unicorn-ride-request-topic - -reg –
us-east-1(change it according to your Region, it’s used for the AWS STS endpoint and Schema Registry) - -nm:
500(the number of messages the producer application sends to the Kafka topic) - -externalId – The same external ID (for example,
demo10A) that you used while creating the CloudFormation stack in Account B
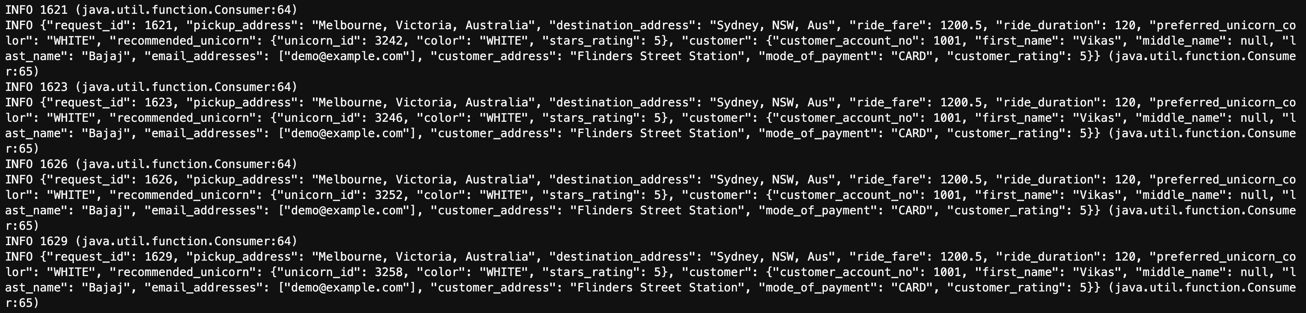
The following screenshot shows the Kafka producer logs showing Schema Version Id received..., which means it has retrieved the Avro schema unicorn-ride-request-schema-avro from Account B and messages were sent to the Kafka topic on the MSK cluster in Account A.

Kafka producer code
The complete Kafka producer implementation is available on GitHub. In this section, we break down the code.
getProducerConfig()initializes the producer properties, as shown in the following code:- VALUE_SERIALIZER_CLASS_CONFIG – The
GlueSchemaRegistryKafkaSerializer.class.getName()AWS serializer implementation that serializes data records (the implementation is available on GitHub) - REGISTRY_NAME – The Schema Registry from Account B
- SCHEMA_NAME – The schema name from Account B
- AVRO_RECORD_TYPE –
AvroRecordType.SPECIFIC_RECORD
- VALUE_SERIALIZER_CLASS_CONFIG – The
startProducer()assumes the role in Account B to be able to connect with the Schema Registry in Account B and sends messages to the Kafka topic on the MSK cluster:
assumeGlueSchemaRegistryRole()as shown in the following code uses AWS STS to assume the cross-account Schema Registry IAM role in Account B. (For more information, see Temporary security credentials in IAM.) The response fromstsClient.assumeRole(roleRequest)contains the temporary credentials, which includeaccessKeyId,secretAccessKey, and asessionToken. It then sets the temporary credentials in the system properties. The AWS SDK for Java uses these credentials while accessing the Schema Registry (through the Schema Registry serializer). For more information, see Using Credentials.createUnicornRideRequest()uses the Avro schema (unicorn ride request schema) generated classes to create aSpecificRecord. For this post, the unicorn ride request attributes values are hard-coded in this method. See the following code:
Configure the Kafka consumer
The MSKClientStack stack created the KafkaConsumerInstance instance for the Kafka consumer application. You can view all the instances created by the stack on the Amazon EC2 console.
To configure the Kafka consumer accessing the Schema Registry in the central AWS account, complete the following steps:
- Open a new terminal in the
Cloud9EC2BastionAWS Cloud9 environment.

- SSH into the
KafkaConsumerInstanceEC2 instance and set the Region as per your requirement: - Set the environment variable
MSK_CLUSTER_ARNpointing to the MSK cluster’s ARN:
Change the .ClusterName value if you used a different name for the MSK cluster CloudFormation stack. The cluster name is the same as the stack name.
- Set the environment variable
BOOTSTRAP_BROKERSpointing to the bootstrap brokers: - Verify the environment variables:
The MSKClientStack stack copied the Kafka consumer client JAR file called kafka-cross-account-gsr-consumer.jar to the KafkaConsumerInstance instance. It contains the Kafka consumer client that reads messages from the Kafka topic unicorn-ride-request-topic on the MSK cluster and accesses the unicorn-ride-request-schema-avro Avro schema from the unicorn-ride-request-registry registry in Account B. The Kafka consumer code, which we cover later in this post, is available on GitHub.
- Run the following commands and verify
kafka-cross-account-gsr-consumer.jarexists: - Run the following command to run the Kafka consumer in the
KafkaConsumerInstanceterminal:
The code has the following parameters:
- -bs –
$BOOTSTRAP_BROKERS(the MSK cluster bootstrap brokers) - -rn – The
CrossAccountGlueSchemaRegistryRoleArnvalue from theSchemaRegistryStackstack outputs in Account B - -topic – The Kafka topic
unicorn-ride-request-topic - -reg –
us-east-1(change it according to your Region, it’s used for the AWS STS endpoint and Schema Registry) - -externalId – The same external ID (for example,
demo10A) that you used while creating the CloudFormation stack in Account B
The following screenshot shows the Kafka consumer logs successfully reading messages from the Kafka topic on the MSK cluster in Account A and accessing the Avro schema unicorn-ride-request-schema-avro from the unicorn-ride-request-registry schema registry in Account B.
If you see the similar logs, it means both the Kafka consumer applications have been able to connect successfully with the centralized Schema Registry in Account B and are able to validate messages while sending and consuming messages from the MSK cluster in Account A.
Kafka consumer code
The complete Kafka consumer implementation is available on GitHub. In this section, we break down the code.
getConsumerConfig()initializes consumer properties, as shown in the following code:- VALUE_DESERIALIZER_CLASS_CONFIG – The
GlueSchemaRegistryKafkaDeserializer.class.getName()AWS deserializer implementation that deserializes theSpecificRecordas per the encoded schema ID from the Schema Registry (the implementation is available on GitHub). - AVRO_RECORD_TYPE –
AvroRecordType.SPECIFIC_RECORD
- VALUE_DESERIALIZER_CLASS_CONFIG – The
startConsumer()assumes the role in Account B to be able to connect with the Schema Registry in Account B and reads messages from the Kafka topic on the MSK cluster:
assumeGlueSchemaRegistryRole()as shown in the following code uses AWS STS to assume the cross-account Schema Registry IAM role in Account B. The response fromstsClient.assumeRole(roleRequest)contains the temporary credentials, which includeaccessKeyId,secretAccessKey, and asessionToken. It then sets the temporary credentials in the system properties. The SDK for Java uses these credentials while accessing the Schema Registry (through the Schema Registry serializer). For more information, see Using Credentials.
Compile and generate Avro schema classes
Like any other part of building and deploying your application, schema compilation and the process of generating Avro schema classes should be included in your CI/CD pipeline. There are multiple ways to generate Avro schema classes; we use avro-maven-plugin for this post. The CI/CD process can also use avro-tools to compile Avro schema to generate classes. The following code is an example of how you can use avro-tools:
Implementation overview
To recap, we start with defining and registering an Avro schema for the unicorn ride request message in the AWS Glue Schema Registry in Account B, the central data lake account. In Account A, we create an MSK cluster and Kafka producer and consumer EC2 instances with their respective application code (kafka-cross-account-gsr-consumer.jar and kafka-cross-account-gsr-producer.jar) and deployed in them using the CloudFormation stack.
When we run the producer application in Account A, the serializer (GlueSchemaRegistryKafkaSerializer) from the AWS Glue Schema Registry SerDe library provided as the configuration gets the unicorn ride request schema (UnicornRideRequest.avsc) from the central Schema Registry residing in Account B to serialize the unicorn ride request message. It uses the IAM role (temporary credentials) in Account B and Region, schema registry name (unicorn-ride-request-registry), and schema name (unicorn-ride-request-schema-avro) provided as the configuration to connect to the central Schema Registry. After the message is successfully serialized, the producer application sends it to the Kafka topic (unicorn-ride-request-topic) on the MSK cluster.
When we run the consumer application in Account A, the deserializer (GlueSchemaRegistryKafkaDeserializer) from the Schema Registry SerDe library provided as the configuration extracts the encoded schema ID from the message read from the Kafka topic (unicorn-ride-request-topic) and gets the schema for the same ID from the central Schema Registry in Account B. It then deserializes the message. It uses the IAM role (temporary credentials) in Account B and the Region provided as the configuration to connect to the central Schema Registry. The consumer application also configures Avro’s SPECIFIC_RECORD to inform the deserializer that the message is of a specific type (unicorn ride request). After the message is successfully deserialized, the consumer application processes it as per the requirements.
Clean up
The final step is to clean up. To avoid unnecessary charges, you should remove all the resources created by the CloudFormation stacks used for this post. The simplest way to do so is to delete the stacks. First delete the MSKClusterStack followed by MSKClientStack from Account A. Then delete the SchemaRegistryStack from Account B.
Conclusion
In this post, we demonstrated how to use AWS Glue Schema Registry with Amazon MSK and stream processing applications to validate messages using an Avro schema. We created a distributed architecture where the Schema Registry resides in a central AWS account (data lake account) and Kafka producer and consumer applications reside in a separate AWS account. We created an Avro schema in the schema registry in the central account to make it efficient for the application teams to maintain schemas in a single place. Because AWS Glue Schema Registry supports identity-based access policies, we used the cross-account IAM role to allow the Kafka producer and consumer applications running in a separate account to securely access the schema from the central account to validate messages. Because the Avro schema was agreed in advance, we used Avro SpecificRecord to ensure type safety at compile time and avoid runtime schema validation issues at the client side. The code used for this post is available on GitHub for reference.
To learn more about the services and resources in this solution, refer to AWS Glue Schema Registry, the Amazon MSK Developer Guide, the AWS Glue Schema Registry SerDe library, and IAM tutorial: Delegate access across AWS accounts using IAM roles.
About the Author
 Vikas Bajaj is a Principal Solutions Architect at Amazon Web Service. Vikas works with digital native customers and advises them on technology architecture and modeling, and options and solutions to meet strategic business objectives. He makes sure designs and solutions are efficient, sustainable, and fit-for-purpose for current and future business needs. Apart from architecture and technology discussions, he enjoys watching and playing cricket.