Post Syndicated from Sneha Natekar original https://github.blog/2023-08-24-unleashing-github-codespaces-templates-to-ignite-your-development/
Ever found yourself struggling to set up a brand-new Integrated Development Environment (IDE) for a project? The overwhelming process of dealing with build errors, dependencies, and configurations can leave you feeling frustrated and short on time. Trust me, I’ve been there, too. As an avid developer, I understand the struggles and challenges firsthand.
That’s when I discovered GitHub Codespaces, and it’s a game-changer. GitHub Codespaces is a cloud-based coding environment for collaborative development accessible through a browser. Templates include specific configurations of tools, libraries, and settings within GitHub Codespaces, enabling developers to quickly create consistent coding environments for various projects without having to set up everything from scratch.
With customizable environments, streamlined workflows, and easy setup sharing, you can be more productive and focus on creating exceptional software.
With the rich offering of existing templates available at my disposal, I quickly realized there are many possibilities. As I was working on My Android app, I was looking for a template that would let me build My Android app. However, because there was no Android template, I decided to build my own.
Together, let’s conquer setup challenges and unlock a world of coding possibilities. With great power comes great coding!
Step 1: Customizing a GitHub Codespaces template and connecting to a repository
While you can find a number of templates for React, Django, and Ruby on Rails in the template library, I couldn’t find the one I needed for Android.
Fortunately, creating a custom template is a breeze! Just head to GitHub Codespaces and select the “Blank” template. Starting with a blank template opens a codespace that I can configure per my needs.
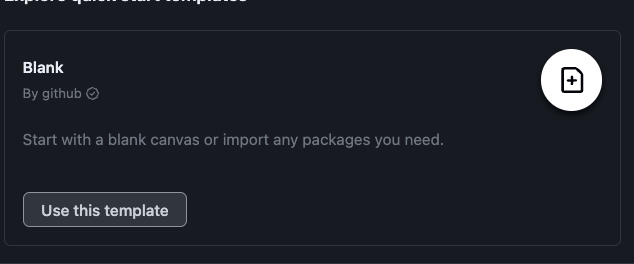
Clicking on “Use this template” launches a codespace in a separate tab within your browser.
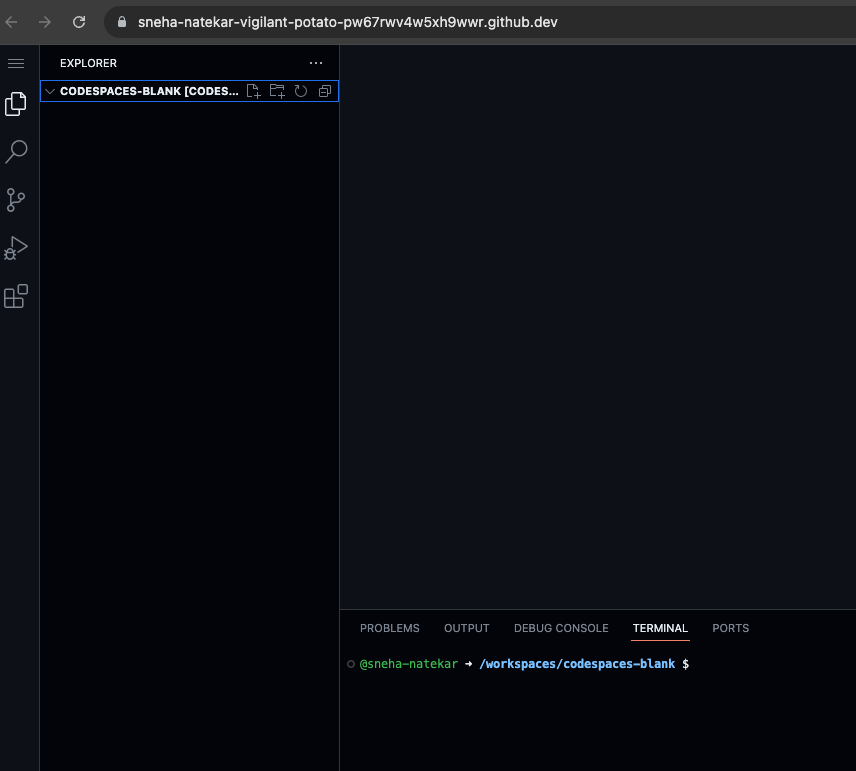
My new codespace is called “vigilant potato” as you can see from the URL in the screenshot above. Your codespace will get its own unique, and maybe cute, name.
If you get distracted by something else, and need to come back to your codespace, you can access it from github.com/codespaces by looking for the “vigilant potato” among the list of codespaces—you might need to scroll down to find it if you have other codespaces.

Click on the three horizontal dots at the end of the row and select “Publish to a new repository.” This flow seamlessly lets you create a new repository and preserves your development environment and any code you might have added that belongs to your project.
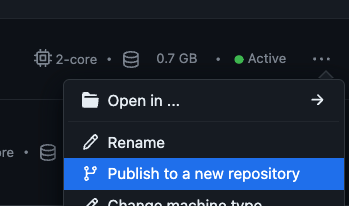
Once your repository is created, you’ll be able to see it in your GitHub Settings > your repositories. Or, if you’d like to connect to an existing repository, you can do so through the terminal.
Step 2: Configuring your environment: devcontainer.json/Dockerfile
There are two ways to customize your environment in a template. The two ways: using either a devcontainer.json file or a Dockerfile. The devcontainer.json file focuses on configuring the development environment within Visual Studio Code, while a Dockerfile allows you to create a custom Docker image that forms the basis of the entire development environment. Both files are essential for defining and customizing the development environment to meet the specific requirements of your project.
For my Android development environment, I have to create a Dockerfile. To harness this power, I simply navigate to the root of my repository and create a new file called Dockerfile. You can define the base image, specify environment variables, copy files and directories, install dependencies, execute commands, expose ports, define the working directory, run services, and set the entrypoint or command. These instructions allow you to tailor the Docker image to include the necessary tools, configurations, and dependencies required for your project.
Watch the magic unfold as a tailored, fully-configured development environment materializes in the cloud. In an instant, you’ll be immersed in a seamless coding experience, equipped with all the necessary tools. Say goodbye to setup hassles and dive straight into your code. With a customized codespace template, you’ll have a portable development sanctuary that follows you everywhere. For my Android repository, I very easily followed these steps and a brand new codespace built from the blank template opened for my repository in a separate browser tab.
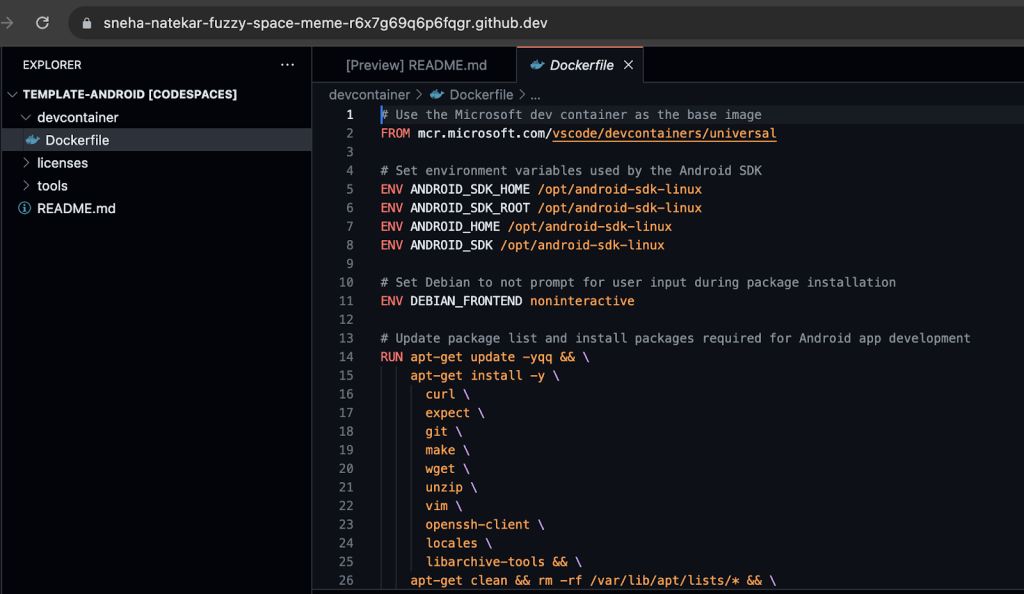
Here are a few snippets from my Android Dockerfile to demonstrate its power.
Automating Android SDK installation
# Update package list and install packages required for Android app development
RUN apt-get update -yqq && \
apt-get install -y \
curl \
expect \
git \
make \
wget \
unzip \
vim \
openssh-client \
locales \
libarchive-tools && \
apt-get clean && rm -rf /var/lib/apt/lists/* && \
localedef -i en_US -c -f UTF-8 -A /usr/share/locale/locale.alias en_US.UTF-8
In this example, I am using regular shell commands to install the Android SDK.
Setting environment variables
# Set environment variables used by the Android SDK
ENV ANDROID_SDK_HOME /opt/android-sdk-linux
ENV ANDROID_SDK_ROOT /opt/android-sdk-linux
ENV ANDROID_HOME /opt/android-sdk-linux
ENV ANDROID_SDK /opt/android-sdk-linux
This snippet showcases how the Dockerfile lets you set environment variables that are necessary for development.
This remarkable file guarantees a breeze for anyone cloning my repository, effortlessly setting up a standardized development environment. Say goodbye to manual setup hassles and welcome a seamless and efficient collaborative experience.
Conclusion
By embracing these steps, I’ve discovered that the entire process of creating and using GitHub Codespaces templates can be incredibly easy, enjoyable, and efficient. Leveraging the power of templates and devcontainer.json files means I never have to start from scratch again. What used to be a painstaking, day plus process of downloading and installing all of the Android SDK and Java components, setting the environment variables, getting the libraries, and maintaining their updates is no more through using my pre-configured Android template. I have created additional templates for work that are Java and Python development environments.
Remember, with great coding comes great responsibility,and a lot fewer debugging sessions! Happy coding, and may the bugs be ever in your favor!
If you’re also an Android developer, try out my template or explore the other templates GitHub offers and customize your own.
The post Unleashing GitHub Codespaces templates to ignite your development appeared first on The GitHub Blog.