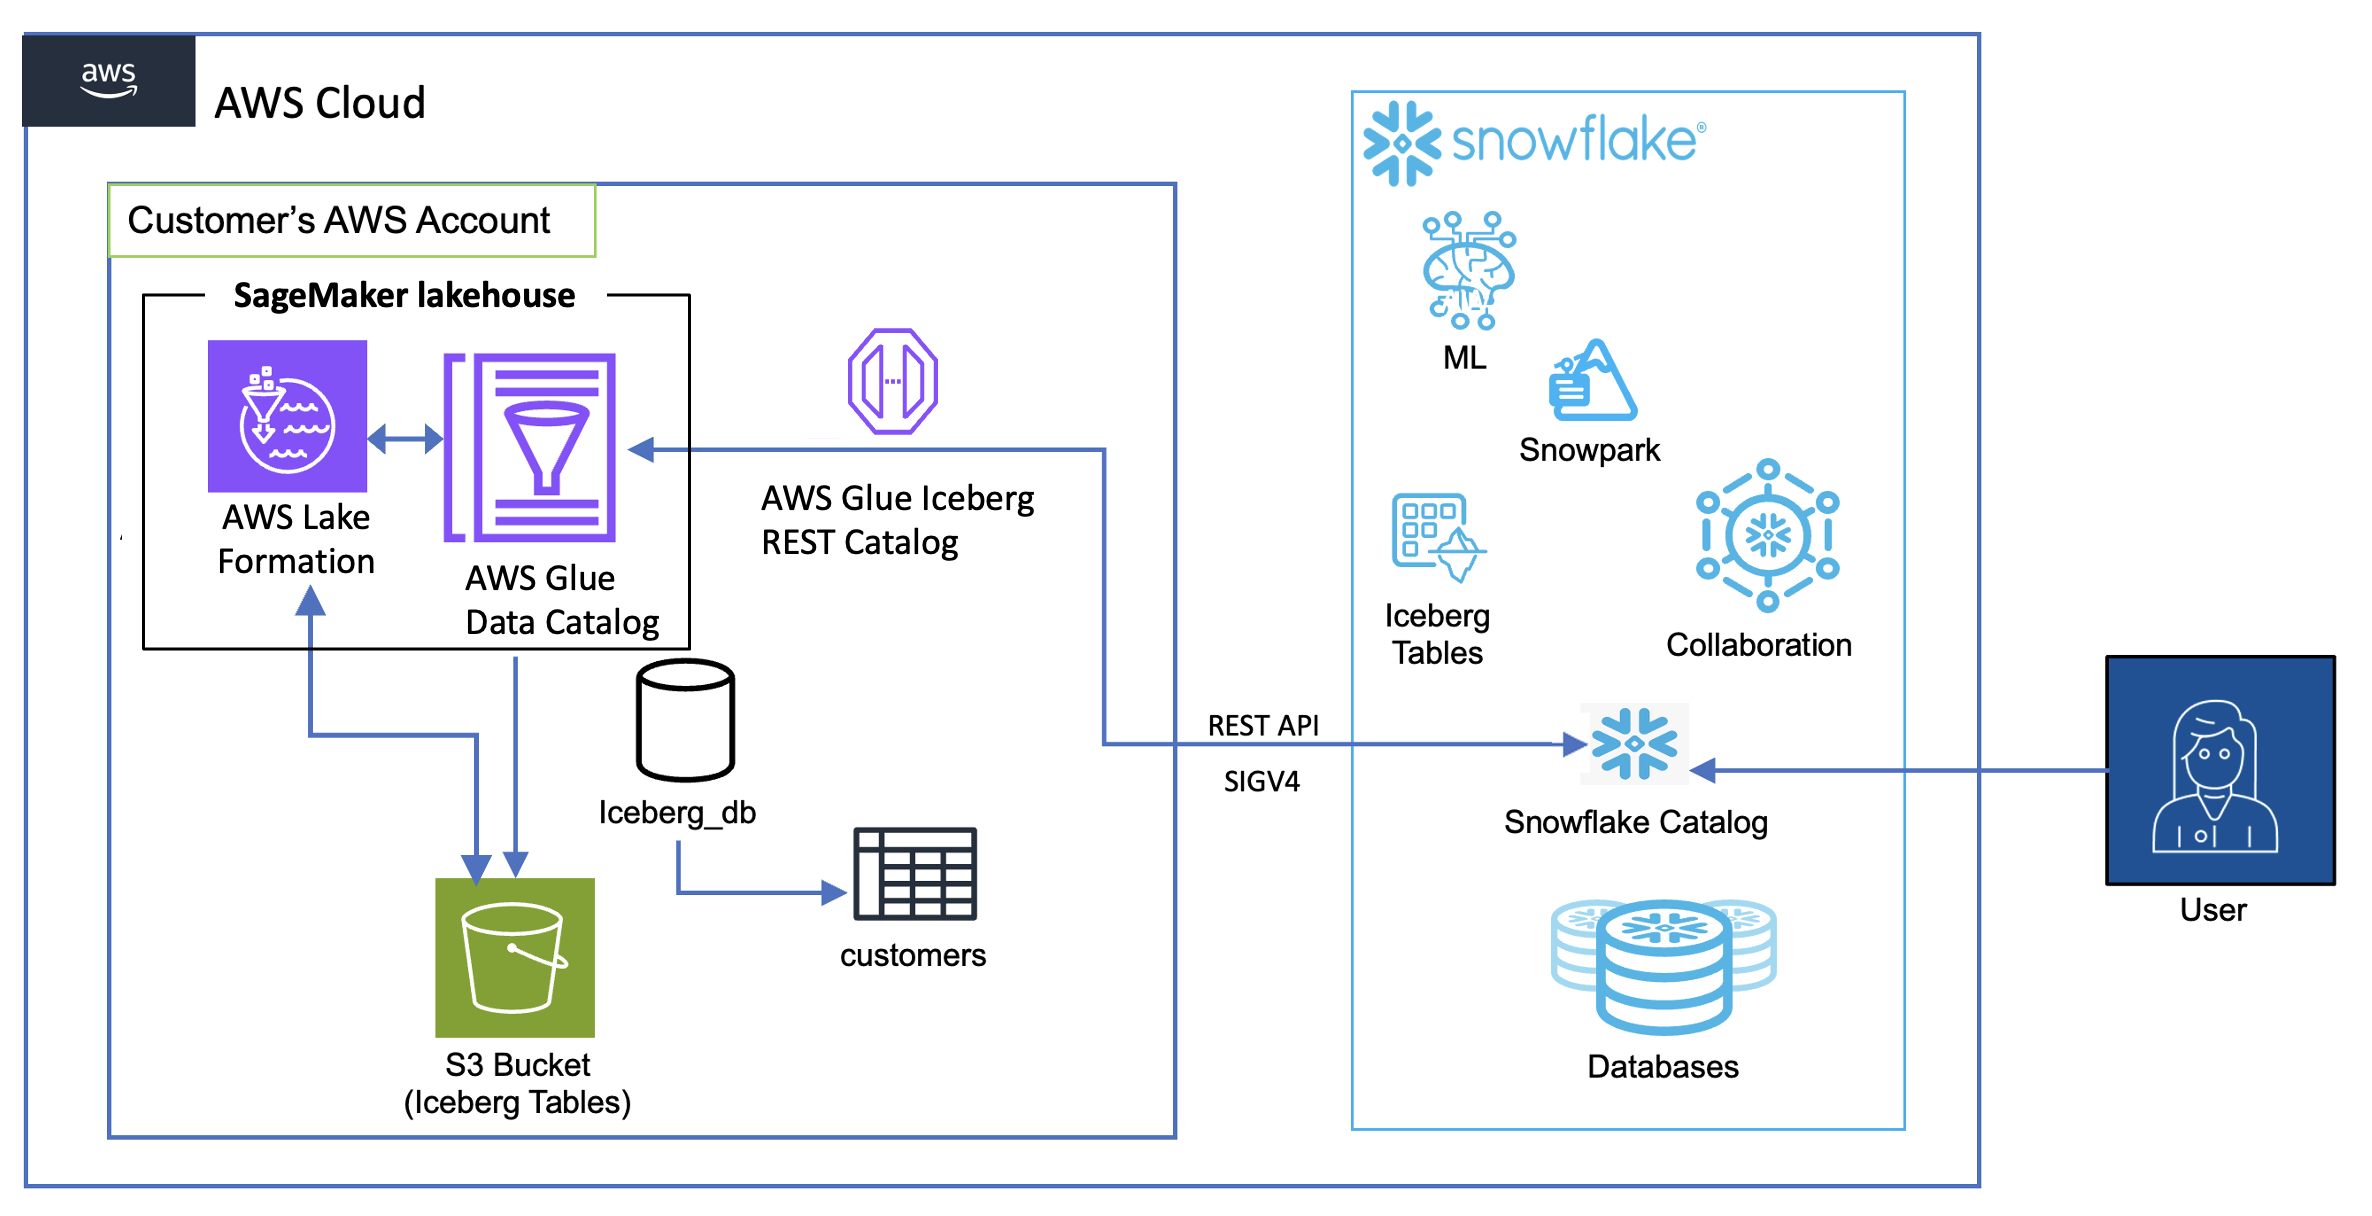
Post Syndicated from Nidhi Gupta original https://aws.amazon.com/blogs/architecture/introducing-the-snowflake-and-aws-custom-lens-for-the-aws-well-architected-framework/
Running Snowflake on AWS means navigating two distinct sets of best practices simultaneously: AWS Well-Architected guidance for infrastructure, and Snowflake Well-Architected Framework guidance for compute, data organization, and governance. Without a unified review framework, security controls go unmapped to Snowflake configurations. Production readiness timelines stretch as teams reconcile guidance from two separate review processes, and compliance posture becomes difficult to demonstrate when audit evidence spans disconnected sources. The Snowflake and AWS Custom Well-Architected Framework Lens closes that gap.
The lens brings together AWS Well-Architected best practices and Snowflake guidance into a single review experience, with integrated recommendations that reflect how the two services compose in production. It evaluates your architecture across the seven AWS Well-Architected pillars: security, reliability, performance efficiency, cost optimization, operational excellence, and sustainability. A single review surfaces findings like misconfigured Snowflake network policies alongside Amazon Virtual Private Cloud (Amazon VPC) controls, or cost inefficiencies that span both Snowflake virtual warehouse sizing and Amazon Elastic Compute Cloud (Amazon EC2) instance selection. In this post, we walk through each pillar, the three access points (AWS Management Console, Kiro, and Snowflake Cortex Code), and how to run your first review.
What’s in the lens?
The Snowflake and AWS Custom WAF Lens defines seven pillars for joint Snowflake-on-AWS architectures, drawing from both the seven-pillar AWS Well-Architected Framework and the five-pillar Snowflake Well-Architected Framework.
Pillar 1: Security and identity
Security for Snowflake on AWS requires coordinated identity and access controls across two distinct planes. On the AWS infrastructure side, services like AWS Key Management Service (AWS KMS), AWS IAM Identity Center, and Amazon VPC configurations govern access and encryption. On the Snowflake side, network policies, role-based access control (RBAC) hierarchies, and OAuth or key pair authentication control who can access data. The following table maps the most critical security domains (identity, network, authentication, and authorization) across both services, with integrated recommendations for where the two layers must align to help prevent unauthorized access.
| Domain | AWS guidance | Snowflake guidance | Integrated recommendation |
| Network security | Amazon VPC design, AWS PrivateLink endpoints, AWS service endpoints, Amazon EC2 security groups | Network policies, IP allow lists | Use AWS PrivateLink between Amazon VPC and Snowflake; layer Snowflake network policies on top of EC2 security groups for defense-in-depth |
| Identity and access | AWS Identity and Access Management (IAM) roles, federation, least privilege | Database roles, role hierarchy, MFA | Federate Snowflake authentication through AWS IAM Identity Center; map identity provider groups to Snowflake database roles for consistent RBAC |
| Authentication | MFA for human IAM users; integrate with corporate IdP via IAM Identity Center | RSA key pair for service accounts; SAML SSO or OAuth for humans; disable-password only | Store private keys in AWS Secrets Manager; rotate via automation; unified IdP for both systems via SAML federation |
| Authorization | Service control policies at organization level as hard guardrails; permission boundaries on delegated roles | Role hierarchy with inheritance; SECURITYADMIN for grants separate for SYSADMIN | Map AWS IAM roles 1:1 to Snowflake functional roles with workload identity federation |
Pillar 2: Data governance and compliance
Protecting data itself, independent of who accesses it, spans two complementary layers. On the AWS infrastructure side, services like AWS KMS, AWS IAM Identity Center, and Amazon Simple Storage Service (Amazon S3) lifecycle policies govern encryption, classification, and retention of data at rest. On the Snowflake side, dynamic data masking, row access policies, Tri-Secret Secure, and automatic classification protect sensitive data at the query layer. The following table maps the most critical governance domains (classification, dynamic data masking, lineage, retention, and compliance) across both systems, with integrated recommendations for maintaining consistent data protection end-to-end.
| Domain | AWS guidance | Snowflake guidance | Integrated recommendation |
| Data protection | AWS KMS customer-managed keys, Amazon S3 encryption | Dynamic masking, row access policies, Tri-Secret Secure | Use AWS KMS with Snowflake Tri-Secret Secure for dual-custody encryption; apply Snowflake masking policies for column-level protection |
| Audit and compliance | AWS CloudTrail, AWS Config, AWS Security Hub | Event tables, Account Usage, Access History, Sensitive data classification | Stream Snowflake audit logs to Amazon CloudWatch or Amazon OpenSearch Service using Amazon S3 and Amazon EventBridge for consolidated compliance monitoring. AWS provides compliance-enabling capabilities; your team uses them to support and demonstrate compliance. |
| Row access policies | AWS Lake Formation row-level filters, Amazon S3 Access Points for team-scoped access | Row access policies for multi-tenant isolation or regional data residency; role-based row visibility | Define row-level security once in Snowflake (single enforcement point); restrict AWS-side to pipeline service account |
Pillar 3: Reliability
Reliability in a Snowflake on AWS architecture depends on how well the two systems coordinate during failure scenarios, from AWS infrastructure disruptions to Snowflake service availability events. The following table covers the key reliability domains, including cross-Region replication, failover configuration, and workload isolation, with integrated guidance for building a resilient architecture across both systems.
| Domain | AWS guidance | Snowflake guidance | Integrated recommendation |
| Disaster recovery | Multi-AZ, cross-Region replication, Amazon Route 53 failover | Database replication, failover groups, client redirect | Configure Snowflake cross-Region replication to a secondary AWS Region; use Snowflake client redirect for automated failover to the secondary Region |
| Data durability | Amazon S3 11-nines durability, versioning | Time Travel, Fail-safe, zero-copy clones | Align Snowflake Time Travel retention with Amazon S3 versioning policies; use zero-copy clones for pre-deployment testing without storage overhead |
| Recovery objectives | RTO and RPO planning, backup strategies | Replication lag monitoring, failover SLAs | Define joint RTO and RPO targets that account for both Snowflake replication lag and AWS infrastructure recovery time |
Pillar 4: Performance optimization
Performance efficiency for Snowflake on AWS requires tuning at both the infrastructure and application levels. AWS instance selection, network throughput, and storage configuration directly affect how Snowflake warehouses perform. Snowflake-specific patterns like warehouse sizing, query optimization, and clustering keys determine how efficiently compute is used. The following table covers the primary performance domains with integrated recommendations for both layers.
| Domain | AWS guidance | Snowflake guidance | Integrated recommendation |
| Compute sizing | Amazon EC2 instance selection, automatic scaling | Warehouse sizing, multi-cluster warehouses, auto-suspend | Right-size Snowflake warehouses based on query profiling; use multi-cluster warehouses for concurrency scaling aligned with application tier automatic scaling |
| Data organization | Amazon S3 partitioning, file format optimization | Clustering keys, search optimization, materialized views | Optimize Amazon S3 staging file sizes for Snowpipe ingestion; apply clustering keys on frequently filtered columns, ordered from lowest to highest cardinality Note: This ordering is specific to Snowflake’s micro-partition architecture. Unlike traditional databases where high-cardinality columns are typically indexed first, Snowflake achieves better partition pruning when the lowest-cardinality column leads the clustering key. |
| Caching and latency | Amazon CloudFront, Amazon ElastiCache | Result cache, warehouse cache, query acceleration | Design query patterns to maximize Snowflake result cache hits; use Amazon ElastiCache for application-layer caching of frequently accessed Snowflake results |
Pillar 5: Cost optimization and FinOps
Cost optimization across Snowflake and AWS involves two distinct billing models that you must manage together. AWS infrastructure costs follow a consumption and reservation model, and Snowflake charges are driven by compute credits and storage. Without a unified view, teams often optimize one application at the expense of the other. The following table addresses the key cost domains with integrated recommendations for reducing spend across both billing models.
| Domain | AWS guidance | Snowflake guidance | Integrated recommendation |
| Cost visibility | AWS Cost Explorer, AWS Budgets, AWS Cost and Usage Reports (CUR) | Resource monitors, account usage views, credit tracking | Combine AWS Cost Explorer data with Snowflake credit consumption in an integrated FinOps dashboard; tag resources with matching cost-center labels |
| Compute efficiency |
AWS Savings Plans, Amazon EC2 Spot Instances Note: Savings Plans and Spot apply to customer-managed AWS compute (ETL pipelines, application tier) that feeds Snowflake, not to Snowflake warehouse compute itself. |
Auto-suspend, warehouse right-sizing, serverless features | Pair Snowflake capacity commitments with AWS Savings Plans for predictable baseline; use auto-suspend aggressively for development warehouses |
| Storage efficiency | Amazon S3 lifecycle policies, S3 Intelligent-Tiering | Time Travel retention optimization, transient tables | Align Snowflake Time Travel retention (1 day for development, 90 days for regulated data) with Amazon S3 lifecycle transitions to Amazon S3 Glacier |
Pillar 6: Operational excellence
Operational excellence for Snowflake on AWS means building observability, automation, and incident response workflows that span both applications. Amazon CloudWatch, AWS Systems Manager, and Snowflake’s query history and task monitoring each provide partial visibility, but a well-operated architecture connects them into a coherent operational picture. The following table covers the core operational domains with integrated guidance for managing both applications as a single system.
| Domain | AWS guidance | Snowflake guidance | Integrated recommendation |
| Monitoring | Amazon CloudWatch, AWS X-Ray, Amazon OpenSearch Service | Snowsight dashboards, Account Usage, query history | Export Snowflake metrics to Amazon CloudWatch using Amazon S3 integration for unified operational dashboards |
| Automation and IaC | AWS CloudFormation, AWS Cloud Development Kit (AWS CDK), Terraform | Snowflake Terraform provider, CI/CD pipelines | Manage Snowflake objects alongside AWS infrastructure in the same Terraform state; use CI/CD pipelines for database migration workflows |
| Incident response | Amazon EventBridge, Amazon Simple Notification Service (Amazon SNS), AWS Lambda auto-remediation | Alerts, resource monitors, task monitoring | Trigger AWS Lambda auto-remediation from Snowflake resource monitor alerts via notification integrations and Amazon SNS |
Pillar 7: Sustainability
This is the first joint ISV-AWS WAF lens to treat the sustainability pillar as a first-class concern. For Snowflake on AWS, sustainability decisions span AWS Region selection and energy efficiency choices on the infrastructure side, and warehouse consolidation, query efficiency, and data lifecycle management on the Snowflake side. The following table covers the sustainability domains with integrated recommendations that reduce the environmental footprint of your combined architecture.
| Domain | AWS guidance | Snowflake guidance | Integrated recommendation |
| Region selection | AWS Customer Carbon Footprint Tool, region-level carbon intensity | Snowflake Region availability | Select AWS Regions aligned with sustainability goals for non-latency-sensitive Snowflake workloads; prefer secondary Regions with high renewable energy percentages for DR |
| Compute efficiency | AWS Compute Optimizer, Amazon EC2 Auto Scaling | Warehouse auto-suspend, serverless tasks | Enforce aggressive auto-suspend policies for development and batch workloads to alleviate idle compute; prefer serverless features for intermittent workloads |
| Data lifecycle | Amazon S3 Intelligent-Tiering, Amazon S3 Glacier lifecycle policies | Time Travel retention, transient tables, zero-copy clones | Minimize storage footprint by aligning Time Travel retention to actual recovery needs; replace full data copies with zero-copy clones for development and testing |
| Query efficiency | Batch and real-time processing best practices | Query profiling, clustering keys, materialized views, result caching | Optimize query patterns to reduce total compute-seconds; apply clustering keys to avoid full table scans |
Three ways to use the lens
You can access the lens across three environments, each designed for a different workflow and team preference. Whether your team works primarily in the AWS Management Console, prefers an AI-assisted review inside an IDE, or operates within Snowflake, you can run a full Well-Architected review without switching contexts.
1. AWS Well-Architected Tool console
The lens is available directly in the AWS Well-Architected Tool console for structured reviews against your Snowflake on AWS workloads. A structured questionnaire covers all seven pillars with Snowflake-specific questions, and each best practice is risk-rated as High Risk, Medium Risk, or No Risk Identified. The review generates an improvement plan with prioritized actions and links to AWS and Snowflake documentation, milestone tracking to measure progress over time, and PDF or JSON export for stakeholder reporting and compliance evidence.
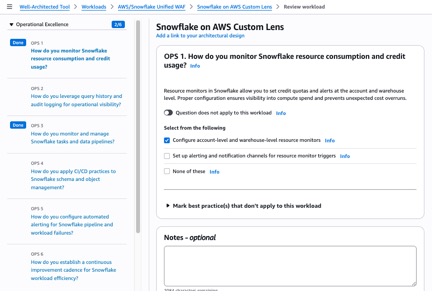
To get started:
- Download the Snowflake AWS Custom Lens JSON file to your local computer.
- Sign in to the AWS Well-Architected Tool console and choose Custom lenses in the navigation pane.
- Choose Create custom lens, upload the downloaded JSON file, and choose Submit.
2. Kiro
For teams that prefer an AI-assisted, conversational approach, the Snowflake and AWS WAF Lens is available as a Kiro Power, an integrated capability within Kiro, the AI-powered IDE of AWS. The review runs conversationally inside the IDE with checkbox-based questions for each pillar, so you can avoid navigating a separate console. Findings are classified using a Red, Yellow, Green system for quick risk identification. Recommendations are organized into three time horizons: Now (1–2 weeks), Next (30–60 days), and Later (90 or more days). The output includes automation mapping for Proactive Health Checks and Blueprint defaults, and supports both customer-ready and internal delivery plan formats. Guidance is context-aware, accounting for your specific workload type, compliance requirements, and multi-Region needs.
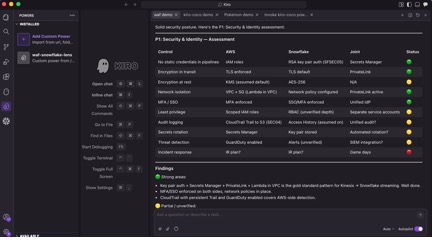
To get started:
- Download the Snowflake WAF Power to your local computer and unzip it.
- In Kiro, choose Open Folder and select the unzipped folder.
- Enter “Run a Snowflake and AWS WAF review” in the chat to begin.
3. Snowflake Cortex Code
In addition to using the AWS Well-Architected Tool and Kiro, you can also opt for the Cortex Code coding assistant path. The joint Well-Architected review is packaged as a Cortex Code skill that you can invoke to start the review process. When invoked, the skill opens with an architecture overview and asks how you want to proceed. You can run the full review interactively with AI-guided recommendations. Cortex Code is available as both a CLI and directly within Snowsight, so you can choose whichever fits your workflow.
Option A: Cortex Code CLI (local terminal)
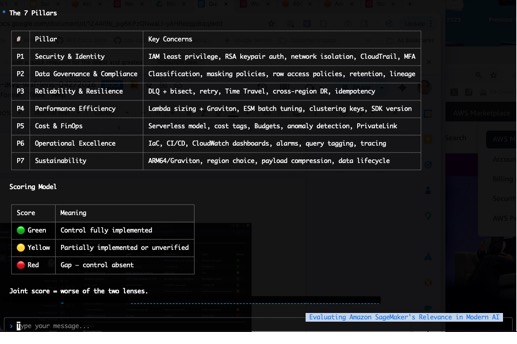
To get started:
-
- Download the Cortex Code zip file for AWS WAF Lens to a location that you want on your local computer and unzip it.
- Open a terminal window on your computer and enter
cortex skill add <path_to_the_unzipped_folder>at the shell prompt. The following screenshot shows an example.

- Launch Cortex Code CLI by entering
cortexat the shell prompt. - In the Cortex Code CLI chat window, enter
invoke the joint-waf-aws-lens skillto get started.
Option B: Cortex Code in Snowsight (browser-based)
For teams that prefer to stay within the Snowflake UI, Cortex Code is also available directly in Snowsight, with no local install required.
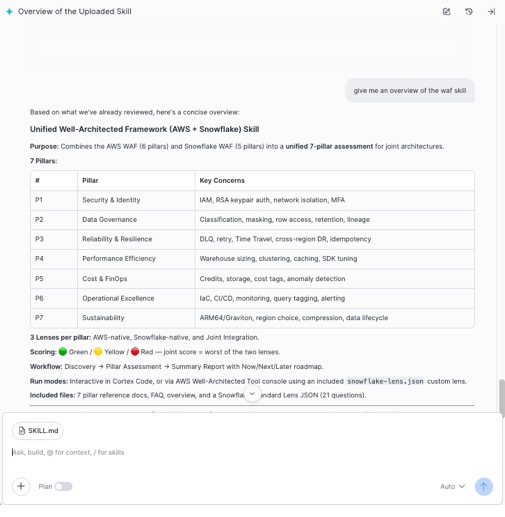
To get started:
- Download the Cortex Code zip file for AWS WAF Lens and unzip it.
- In Snowsight, navigate to Projects > Workspaces and open (or create) a workspace where you want to run this skill.
- Choose the Cortex Code icon in the lower-right corner of Snowsight to open the assistant panel.
- Choose + Add context in the chat area of the assistant panel and select Upload Skill Folder(s), then choose the unzipped skill folder.
- In the message box, enter
run the joint-waf skilland press Enter to begin the review.
How the pillars come together
What makes this lens unique is that it integrates AWS infrastructure guidance directly into Snowflake-specific best practices.
Rather than running separate reviews for each application, the lens helps identify Snowflake architectural risks alongside the corresponding AWS remediation paths, showing where both layers need to be aligned.
Built for Snowflake on AWS
This lens reflects integrated expertise across both services:
- Unified security model – AWS provides network isolation, encryption infrastructure, and identity federation. Snowflake provides data-layer protections like dynamic masking, row access policies, and Tri-Secret Secure. The lens shows how these layers compose into a coherent security posture.
- FinOps integration – The cost pillar addresses the challenge of optimizing spend across two billing models: AWS infrastructure costs and Snowflake consumption costs.
- Operational coherence – The operational excellence pillar bridges AWS-native observability (Amazon CloudWatch, Amazon OpenSearch Service) and Snowflake-native monitoring (Snowsight, Account Usage), so you can build connected dashboards and incident response workflows that span both services.
- Sustainability as a first-class pillar – This is the first joint ISV-AWS WAF lens to include sustainability as a first-class pillar. It combines AWS Region selection strategies with warehouse consolidation, query efficiency optimization, and data lifecycle management.
Getting started with the Snowflake and AWS WAF Lens
To get the most out of your first review, start with the Security and Reliability pillars, where integrated AWS and Snowflake guidance surfaces the highest-impact findings for most production workloads. Use the improvement plan output to prioritize actions across your team, and export the results as PDF or JSON for stakeholder reporting and compliance evidence.
The following resources will help you go deeper on the AWS services and Snowflake capabilities referenced throughout this post.
- AWS Well-Architected Tool
- AWS Well-Architected Framework
- Kiro Documentation
- Snowflake Cortex Code
- Snowflake WAF
- Tri-Secret Secure in Snowflake
- Snowflake Snowpipe
- Snowflake zero-copy cloning
- Snowflake Workload Identity Federation
- Snowflake sensitive data classification
What’s next
This is the first release of the Snowflake and AWS WAF Lens, and we’re actively expanding its coverage with deeper guidance on Snowflake on AWS architecture.
We’re committed to making Snowflake on AWS well-architected in the cloud. Start your first review in either the AWS Well-Architected Tool or Snowflake Cortex Code CLI today, or reach out to your AWS account team or Snowflake account team to schedule a guided workshop.