Post Syndicated from Sam Palani original https://aws.amazon.com/blogs/architecture/field-notes-how-to-boost-your-search-results-using-amazon-kendra-relevance-tuning/
One challenge enterprises face when they implement an intelligent search solution for their large data sources, is the ability to quickly provide relevant search results. When working with large data sources, not all features or attributes within your data will be equally relevant to all your users. We want to prioritize identifying and boosting specific attributes for your users to provide the most relevant search results.
Relevance in Amazon Kendra tuning allows you to give a boost to a result in the response when the query includes terms that match the attribute. For example, you might have two similar documents but one is created more recently. A good practice is to boost the relevance for the newer (or earlier) document.
Relevance tuning in Amazon Kendra can be performed manually at the Index level or at the query level. In this blog post, we show how to tune an existing index that is connected to external data sources, and ultimately optimize your internal search results.
Solution overview
We will walk through how you can manually tune your index using boosting techniques to achieve the best results. This enables you to prioritize the results from a specific data source so your users get the most relevant results when they perform searches.
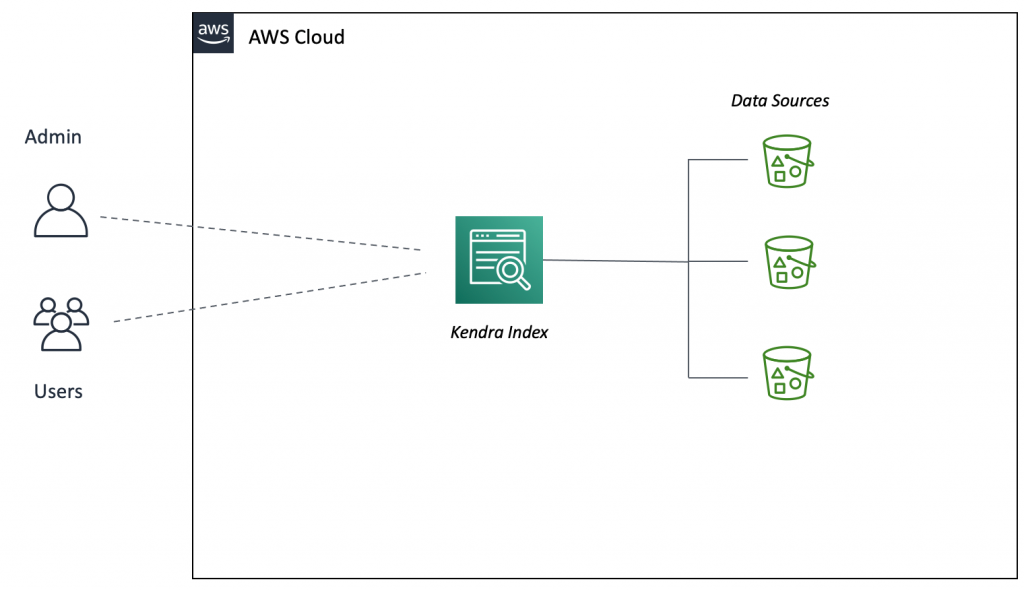
Figure 1. Amazon Kendra setup
Figure 1 illustrates a standard Amazon Kendra setup. An Amazon Kendra index is connected to different Amazon Simple Storage Service (Amazon S3) buckets with multiple data sources.
There are two types of user personas. The first persona is administrators who are responsible for managing the index and performing administrative tasks such as access control, index tuning, and so forth. The second persona is users who access Amazon Kendra either directly or through a custom application that can make API search requests on an Amazon Kendra index. You can use relevance tuning to boost results from one of these data sources to provide a more relevant search result.
Prerequisites
This solution requires the following:
- AWS account
- IAM users and roles
- Amazon Kendra index
- Amazon Kendra data source that is synced and available
If you do not have these prerequisites set up, you might check out Create and query an index that walks you through how to create and query an index in Amazon Kendra.
Furthermore, the AWS services you use in this tutorial are within the AWS Free Tier under a 30-day trial.
Step 1 – Check facet definition
First, review your facet definition and confirm it is facetable, displayable, searchable, and sortable.
In the Amazon Kendra console, select your Amazon Kendra index, then select Facet definition in the Data management panel. Confirm that _data_source_id has all of its attributes checked.
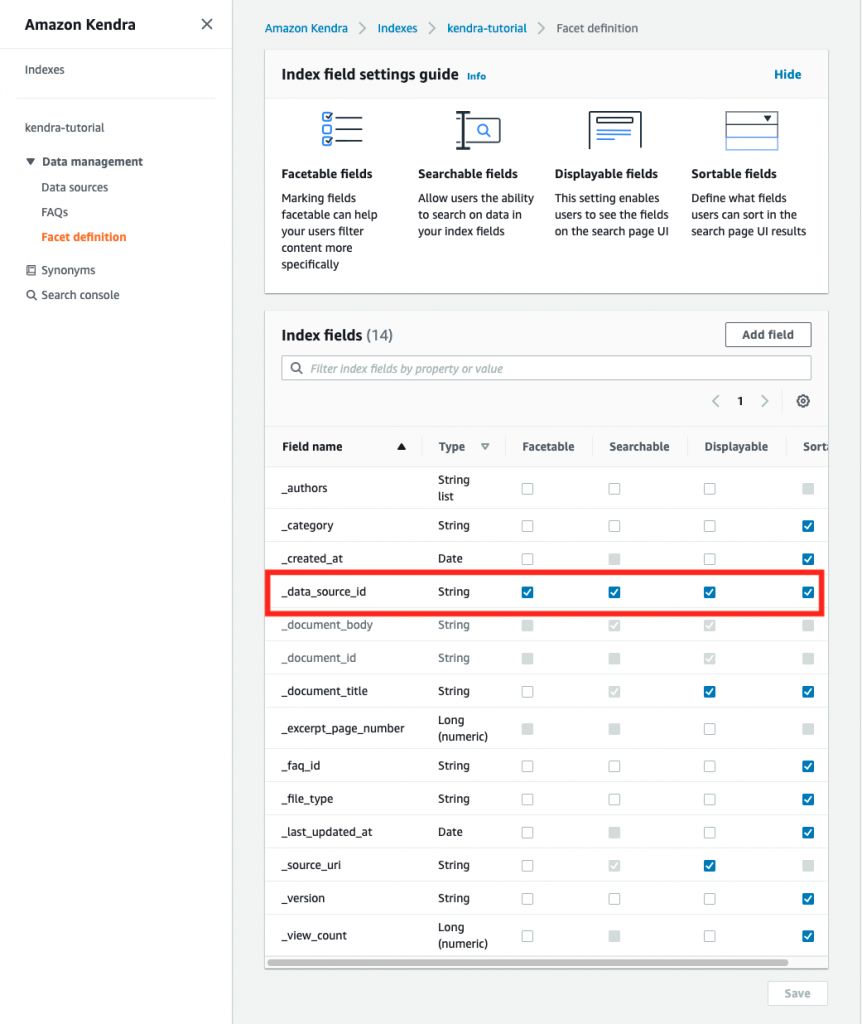
Figure 2. Check facet definition
Step 2 – Review data sources
Next, verify that you have at least two data sources for your Amazon Kendra index.
In the Amazon Kendra console, select your Amazon Kendra index, and then select Data sources in the Data management panel. Confirm that your data sources are correctly synced and available. In our example, data-source-2 is an earlier version and contains unprocessed documents compared to sample-datasource that has newer versions and has more relevant content.
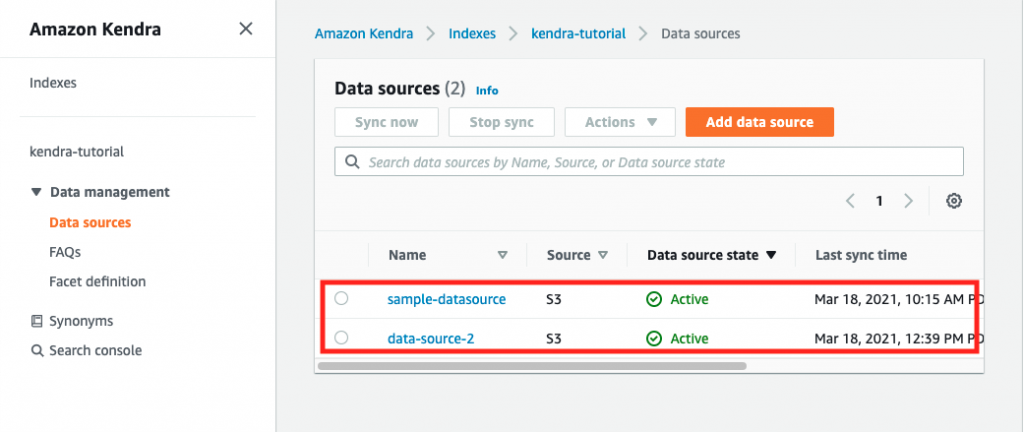
Figure 3. Verify data sources
Step 3 – Perform a regular Amazon Kendra search
Next, we will test a regular search without any relevance tuning. Select Search console, and enter the search term Amazon Kendra VPC. Review your search results.
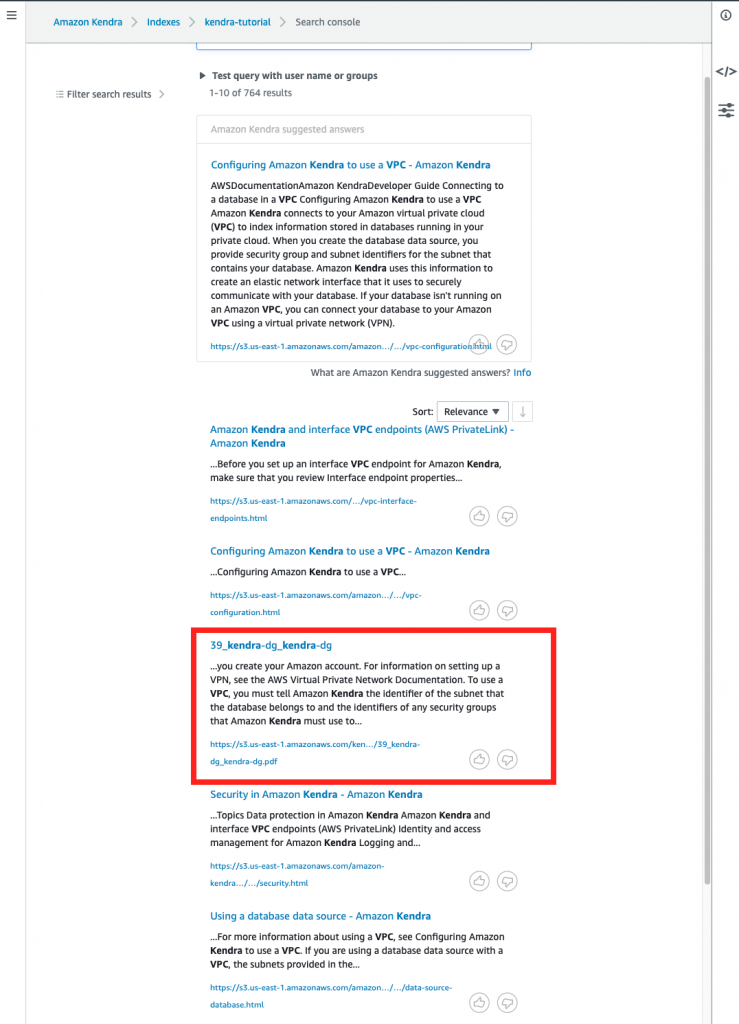
Figure 4. Regular Amazon Kendra search
In our example search results, the document from the second data source 39_kendra-dg_kendra-dg appears as the third result.
Step 4 – Relevance tuning through boosting
Now we will boost the first data source so documents from the first data source are displayed ahead of the other data sources.
Select data source, and boost the first data source sample-datasource to 8. Press the Save button to save your tuning. Wait several seconds for the changes to propagate.
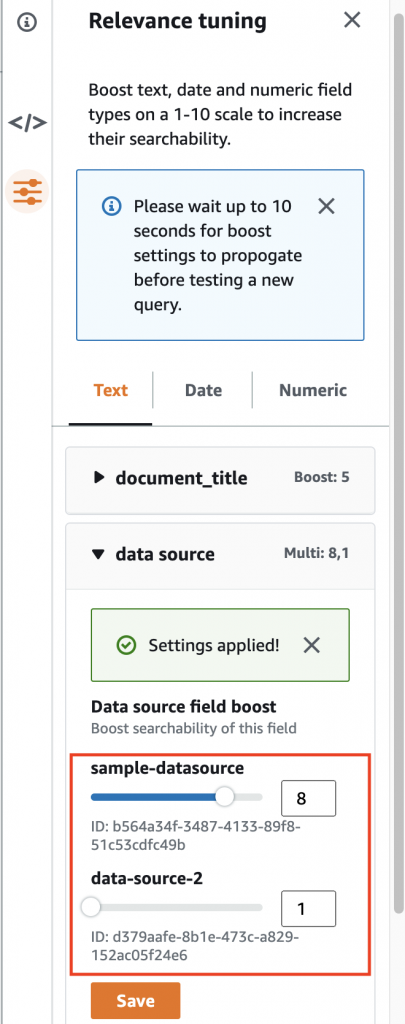
Figure 5. Boost sample-datasource
Step 5 – Perform the search after boosting
Next, we will test the search with relevance tuning applied. In the search text box enter the search term Amazon Kendra VPC. Review your search results.
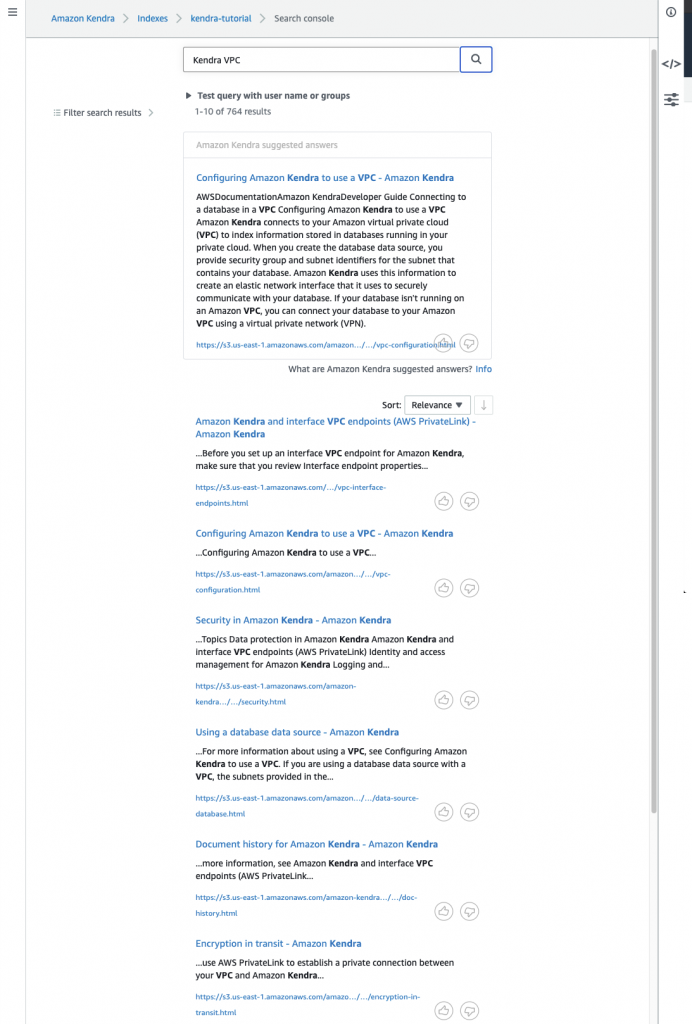
Figure 6. Searching after boosting
Notice that the search result no longer contains the document from the second data source.
Cleaning up
To avoid incurring any future charges, remove any index created specifically for this tutorial. In the Amazon Kendra console, select your index. Then select Actions, and choose Delete.
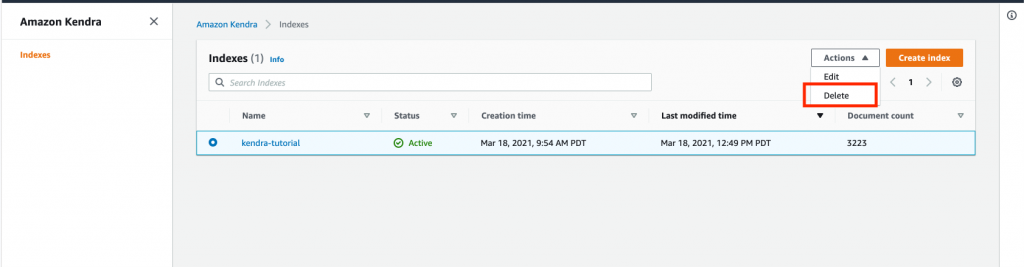
Figure 7. Delete index
Conclusion
In this blog post, we showed you how relevance tuning can be used to produce results ranked by their relevance. We also walked you through an example regarding how to manually perform relevance tuning at the index level in Amazon Kendra to boost your search results.
In addition to relevance tuning at the index level, you can also perform relevance tuning at the query level. Finally, check out the What is Amazon Kendra? and Relevance tuning with Amazon Kendra blog posts to learn more.