Post Syndicated from Rucha Deshpande original https://aws.amazon.com/blogs/devops/extend-aws-codebuild-for-cpp-apps/
AWS CodeBuild is a fully managed build service that offers curated Docker images. These managed images provide build environments for programming languages and runtimes such as Android, Go, Java, Node.js, PHP, Python, Ruby, Docker, and .Net Core. However, there are a lot of existing CPP-based applications, and developers may have difficulties integrating these applications with the AWS CPP SDK. CodeBuild doesn’t provide Docker images to build CPP code. This requires building a custom Docker image to use with CodeBuild.
This post demonstrates how you can create a custom build environment to build CPP applications using aws-sdk-cpp. We provide an example Docker file to build a custom Docker image and demonstrate how CodeBuild can use it. We also provide a unit test that calls the data transfer manager API to transfer the data to an Amazon Simple Storage Service (Amazon S3) bucket using the custom Docker image. We hope this can help you extend any C++ applications with AWS functionalities by integrating the AWS CPP SDK in your applications.
Set up the Amazon ECR repository
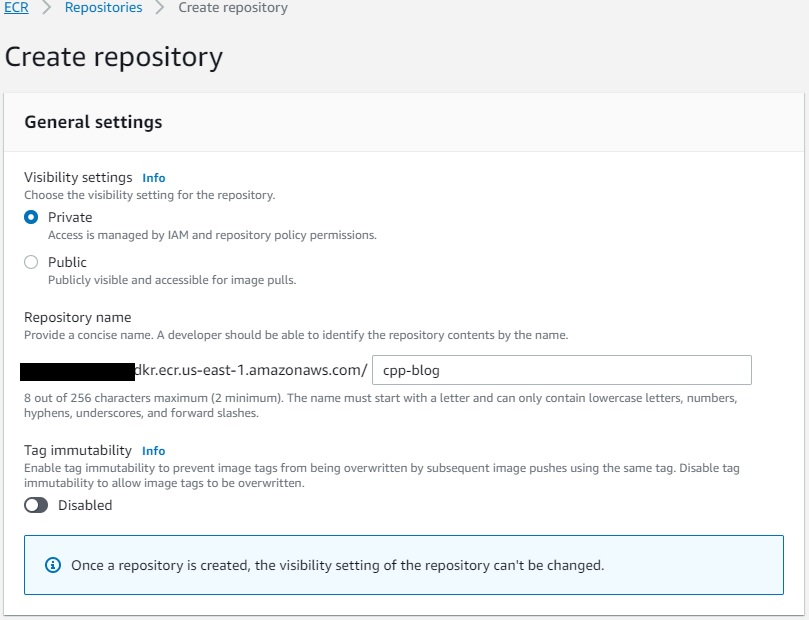
Amazon Elastic Container Registry (Amazon ECR) manages public and private image repositories. You can push or pull images from it. In this section, we walk through setting up a repository.
- On the Amazon ECR console, create a private repository called
cpp-blog.
- On the repository details page, choose Permissions.
- Choose Edit policy JSON.
- Add the following code so CodeBuild can push and pull images from the repository:
{
    "Version": "2012-10-17",
    "Statement": [{
        "Sid": "AllowPushPull",
        "Effect": "Allow",
        "Principal": {
            "Service": "codebuild.amazonaws.com"
        },
        "Action": [
            "ecr:BatchCheckLayerAvailability",
            "ecr:BatchGetImage",
            "ecr:CompleteLayerUpload",
            "ecr:GetDownloadUrlForLayer",
            "ecr:InitiateLayerUpload",
            "ecr:PutImage",
            "ecr:UploadLayerPart"
        ]
    }]
}
After we create the repository, we can create the custom CodeBuild image.
- Set up a CodeCommit repository
cpp_custom_build_image. - In the repository, create a file named
Dockerfileand enter the following code.
Note here that we’re not building the entire aws-sdk-cpp. The -DBUILD_ONLY="s3;transfer" flag determines which packages you want to build. You can customize this flag according to your application’s needs.
# base image
FROM public.ecr.aws/lts/ubuntu:18.04_stable
ENV DEBIAN_FRONTEND=noninteractive
# build as root
USER 0
# install required build tools via packet manager
RUN apt-get update -y && apt-get install -y ca-certificates curl build-essential git cmake libz-dev libssl-dev libcurl4-openssl-dev
# AWSCPPSDK we build s3 and transfer manager
RUN git clone --recurse-submodules https://github.com/aws/aws-sdk-cpp \
    && mkdir sdk_build && cd sdk_build \
    && cmake ../aws-sdk-cpp/ -DCMAKE_BUILD_TYPE=Release -DBUILD_ONLY="s3;transfer" -DENABLE_TESTING=OFF -DBUILD_SHARED_LIBS=OFF \
    && make -j $(nproc) && make install \
    && cd .. \
    && rm -rf sdk_build
# finalize the build
WORKDIR /- Create a file named
buildspec.yamland enter the following code to build the custom image and push it to the repository:
version: 0.2

phases:
  pre_build:
    commands:
      - echo "Logging in to Amazon ECR..."
      - aws ecr get-login-password --region $AWS_REGION | docker login --username AWS --password-stdin ${ECR_PATH}
  build:
    commands:
      - docker build -t cpp-blog:v1 .
      - docker tag cpp-blog:v1 ${ECR_REGISTRY}:v1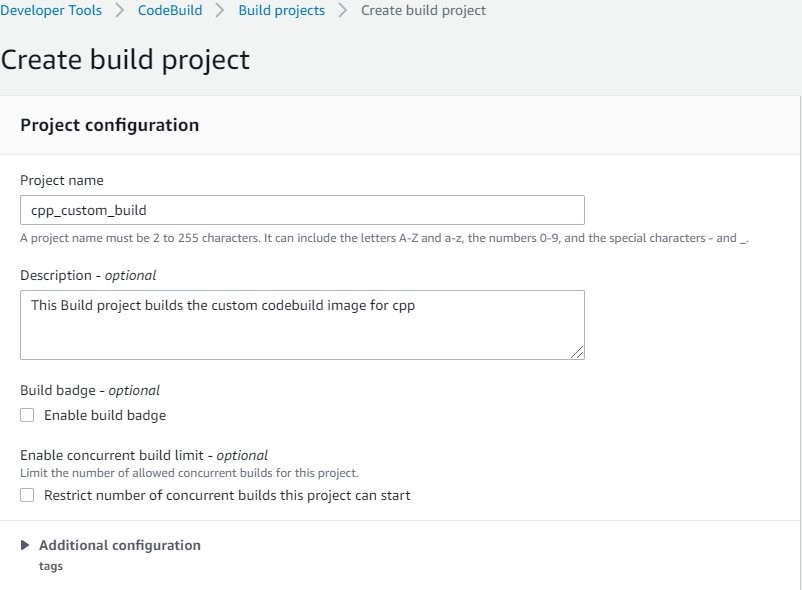
- docker push ${ECR_REGISTRY}:v1- Create a CodeBuild project named
cpp_custom_build.
- For Source provider, choose AWS CodeCommit.
- For Repository, choose the repository you created (
cpp_custom_build_image). - For Reference type, select Branch.
- For Branch, choose main.

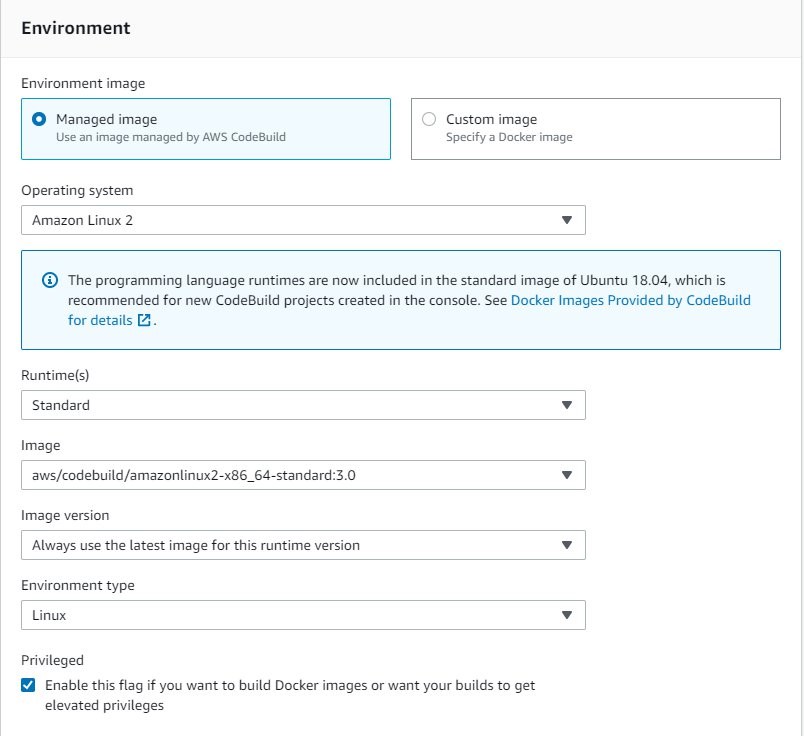
- For Environment image, select Managed image.
- Choose the latest standard available image to you.
- Select Privileged to allow CodeBuild to build the Docker image.
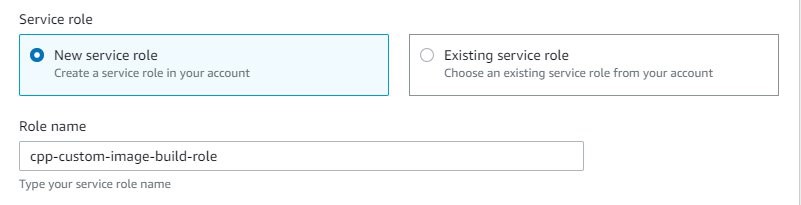
- For Service role, select New service role.
- For Role name, enter
cpp-custom-image-build-role.
- Under Additional configuration, because we build Amazon S3 and transfer manager, select 7 GB memory (the AWS CPP SDK build requires at least 4 GB).
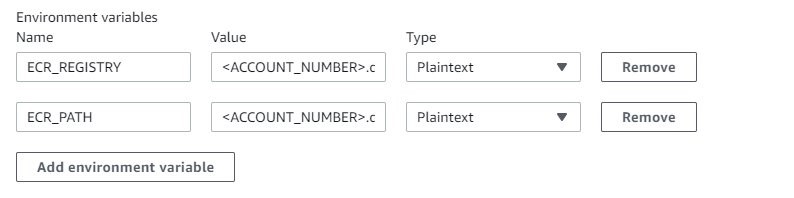
- Add the following environment variables:
a.ECR_REGISTRY = <ACCOUNT_NUMBER>.ecr.<AWS_REGION>.amazonaws.com/cpp-blog
b.ECR_PATH = <ACCOUNT_NUMBER>.ecr.<AWS_REGION>.amazonaws.com

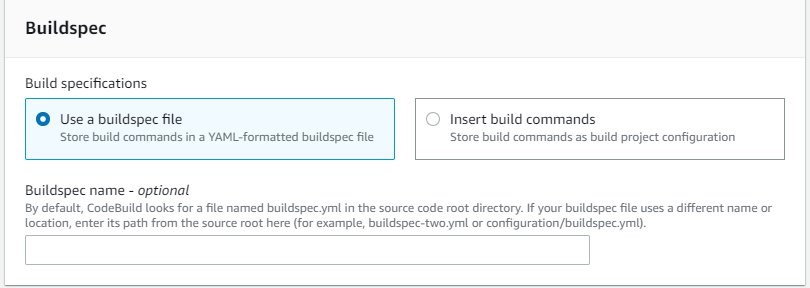
- For Build specifications, select Use a buildspec file.
- Leave Buildspec name empty.
By default, it uses buildspec.yaml from the CodeCommit repository.
- Choose Create build project.
Next, you update the AWS Identity and Access Management (IAM) service role with permissions to push and pull images from Amazon ECR.
- On the IAM console, choose Roles.
- Search for and choose the role you created (
cpp-custom-image-build-role). - Choose Edit policy.
- On the JSON tab, add the following code: Here replace the
<account_id>with your AWS account ID andus-east-1with AWS region you are working in.
{
    "Version": "2012-10-17",
    "Statement": [
        {
            "Effect": "Allow",
            "Resource": [
                "arn:aws:logs:us-east-1:<account_id>:log-group:/aws/codebuild/cpp_custom_build",
                "arn:aws:logs:us-east-1:<account_id>:log-group:/aws/codebuild/cpp_custom_build:*"
            ],
            "Action": [
                "logs:CreateLogGroup",
                "logs:CreateLogStream",
                "logs:PutLogEvents"
            ]
        },
        {
            "Effect": "Allow",
            "Resource": [
                "arn:aws:codecommit:us-east-1:<account_id>:cpp_custom_build_image"
            ],
            "Action": [
                "codecommit:GitPull"
            ]
        },
        {
            "Effect": "Allow",
            "Action": [
                "codebuild:CreateReportGroup",
                "codebuild:CreateReport",
                "codebuild:UpdateReport",
                "codebuild:BatchPutTestCases",
                "codebuild:BatchPutCodeCoverages"
            ],
            "Resource": [
                "arn:aws:codebuild:us-east-1:<account_id>:report-group/cpp_custom_build-*"
            ]
        },
        {
            "Effect": "Allow",
            "Action": [
                "ecr:GetAuthorizationToken",
                "ecr:BatchCheckLayerAvailability",
                "ecr:GetDownloadUrlForLayer",
                "ecr:GetRepositoryPolicy",
                "ecr:DescribeRepositories",
                "ecr:ListImages",
                "ecr:DescribeImages",
                "ecr:BatchGetImage",
                "ecr:GetLifecyclePolicy",
                "ecr:GetLifecyclePolicyPreview",
                "ecr:ListTagsForResource",
                "ecr:DescribeImageScanFindings",
                "ecr:InitiateLayerUpload",
                "ecr:UploadLayerPart",
                "ecr:CompleteLayerUpload",
                "ecr:PutImage"
            ],
            "Resource": "*"
        }
    ]
}- Choose Review policy and choose Save changes.
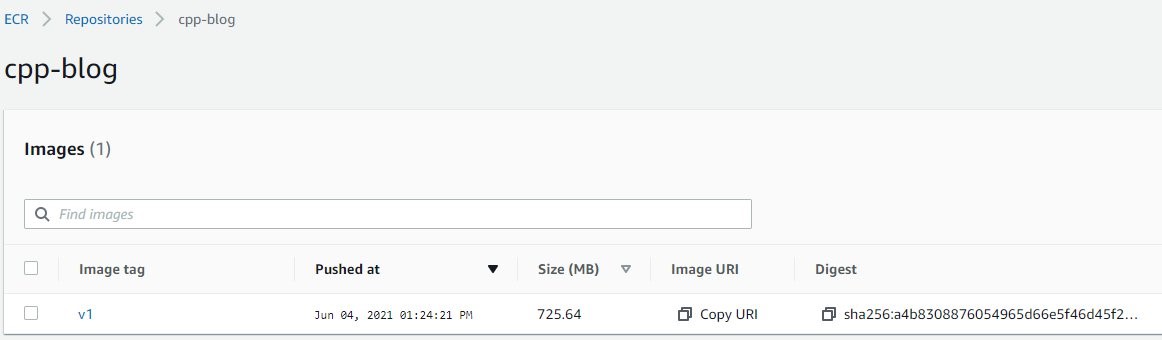
- Run the build project.
- Validate that the Amazon ECR repository has the newly created image.
Test the custom CodeBuild image with a sample CPP application
Now we use a sample CPP application that calls transfer manager and Amazon S3 APIs from aws-sdk-cpp to test our custom image.
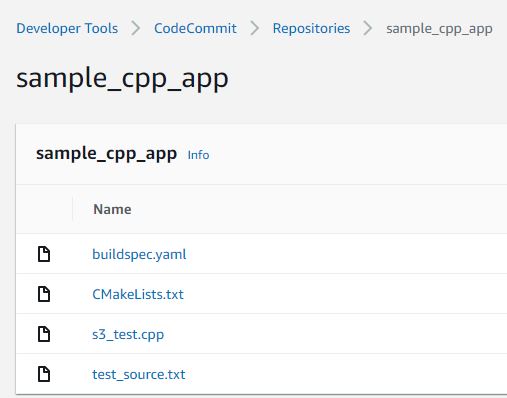
- Set up the CodeCommit repository
sample_cpp_app. - Create a file named
s3_test.cppand enter the following code into it.
We use transfer manager to test our image created in the previous step:
#include <aws/s3/S3Client.h>
#include <aws/core/Aws.h>
#include <aws/core/auth/AWSCredentialsProvider.h>
#include <aws/transfer/TransferManager.h>
#include <aws/transfer/TransferHandle.h>
#include <iostream>
#include <fstream>

/*
 *  usage: ./s3_test srcFile bucketName destFile region
 *  this function is using tranfer manager to copy a local file to the bucket
 */
int main(int argc, char *argv[])
{
    if(argc != 5){
        std::cout << "usage: ./s3_test srcFile bucketName destFile region\n";
        return 1;
    }
    std::string fileName = argv[1]; //local FileName to be uploaded to s3 bucket
    std::string bucketName = argv[2];  //bucketName, make sure that bucketName exists
    std::string objectName = argv[3];
    std::string region = argv[4];
    Aws::SDKOptions options;
    options.loggingOptions.logLevel = Aws::Utils::Logging::LogLevel::Info;
    Aws::InitAPI(options);

    Aws::Client::ClientConfiguration config;
    config.region = region;

    auto s3_client = std::make_shared<Aws::S3::S3Client>(config);

    auto thread_executor = Aws::MakeShared<Aws::Utils::Threading::DefaultExecutor>("s3_test");
    Aws::Transfer::TransferManagerConfiguration transferConfig(thread_executor.get());
    transferConfig.s3Client = s3_client;
    auto buffer = Aws::MakeShared<Aws::FStream>("PutObjectInputStream", fileName.c_str(), std::ios_base::in | std::ios_base::binary);

    auto transferManager = Aws::Transfer::TransferManager::Create(transferConfig);
    auto transferHandle = transferManager->UploadFile(buffer,
                            bucketName.c_str(), objectName.c_str(), "multipart/form-data",
                            Aws::Map<Aws::String, Aws::String>());

    transferHandle->WaitUntilFinished();
    thread_executor = nullptr;
    Aws::ShutdownAPI(options);
}- Create a file named
CMakeLists.txtand add the below code to it.
Because we only use Amazon S3 and transfer components from aws-sdk-cpp in our example, we use find_package to locate these two components:
cmake_minimum_required(VERSION 3.3)
project(s3_test)
set(CMAKE_CXX_STANDARD 11)
find_package(CURL REQUIRED)
find_package( AWSSDK  REQUIRED COMPONENTS s3 transfer)
add_executable(s3_test s3_test.cpp)
target_link_libraries(s3_test ${AWSSDK_LINK_LIBRARIES})- Create a file named
buildspec.yamland enter the following code into it:
version: 0.2
phases:
  build:
    commands:
      # configure application executable, source files and linked libraries.
      - cmake .
      # build the application
      - make
      # unit test. we can test the s3_test executable by copying a local file, for example test_source.txt to an existing s3 bucket and name the file as test_dest.txt
      - ./s3_test $SOURCE_FILE $BUCKET_NAME $DEST_FILE $REGION
artifacts:
  files: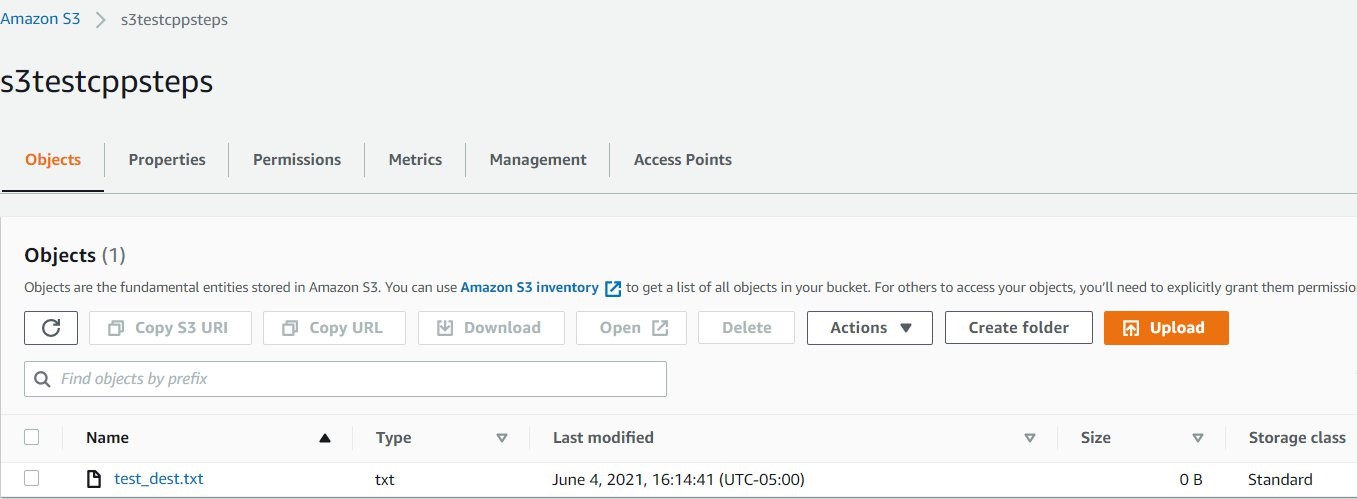
- s3_test- Create a file to be copied to Amazon S3 as part of testing the solution.
For example, we create test_source.txt in the sample_cpp_app CodeCommit repository.
- After setting up the project, create an S3 bucket to use in the next step.
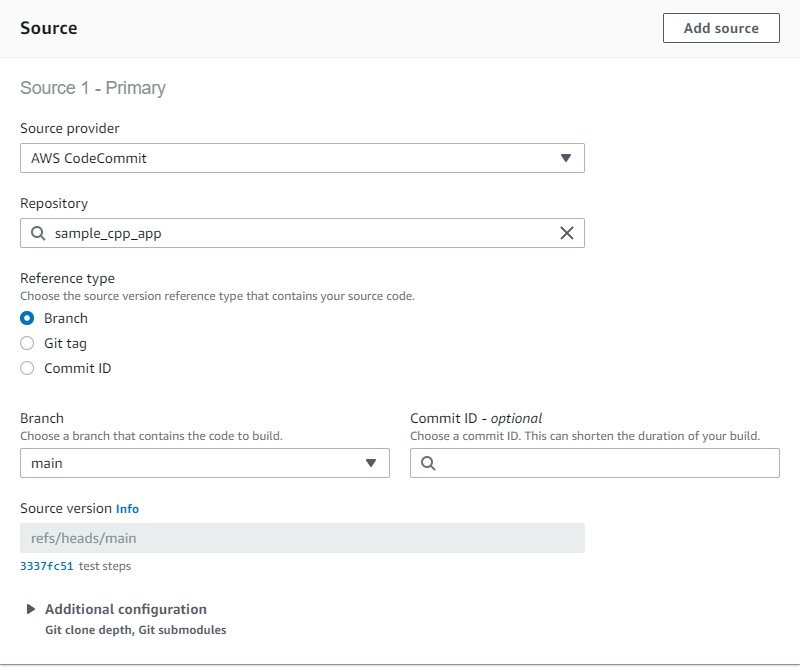
- Create another CodeBuild project called
cpp-test.

- For Source provider, choose AWS CodeCommit.
- For Repository, enter the repository you created (
sample_cpp_app). - For Reference type, select Branch.
- For Branch, choose main.
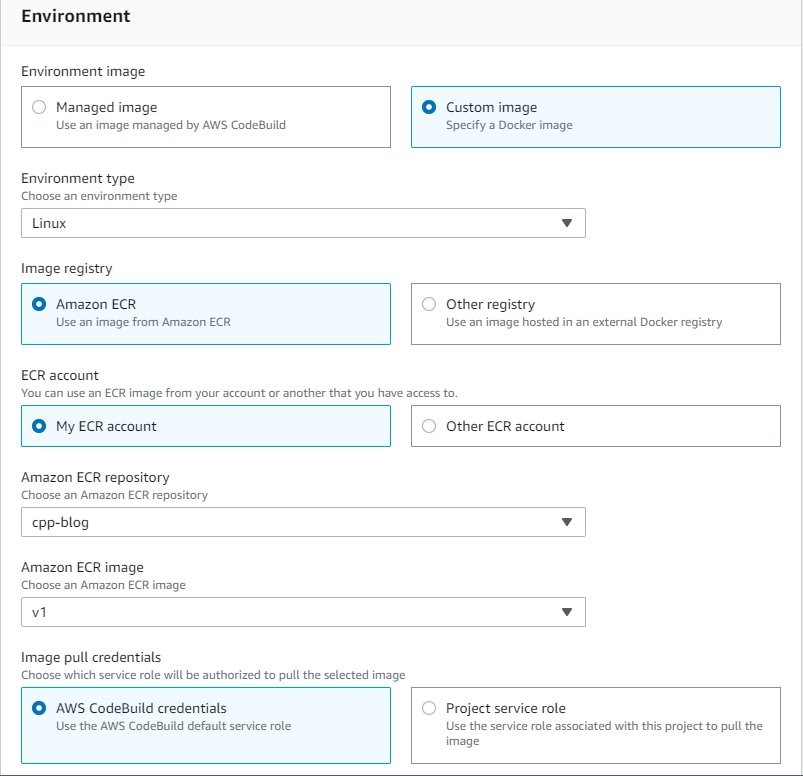
- In the Environment section, select Custom image.
- For Image registry, select Amazon ECR.
- For Amazon ECR repository, choose the
cpp-blogrepository. - For Amazon ECR image, choose v1.
- For Image pull credentials, select AWS CodeBuild credentials.
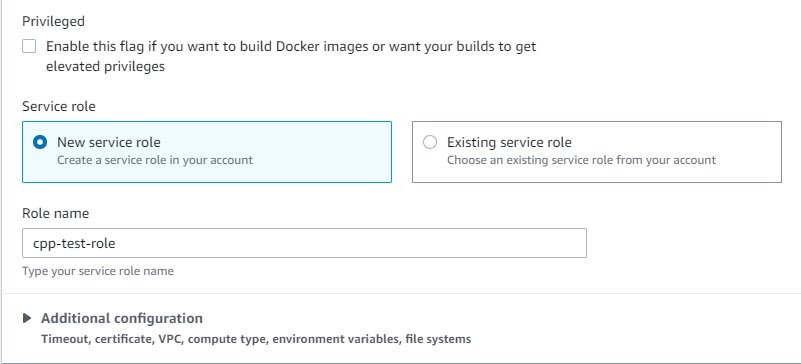
- For Service role, select New service role.
- For Role name, enter
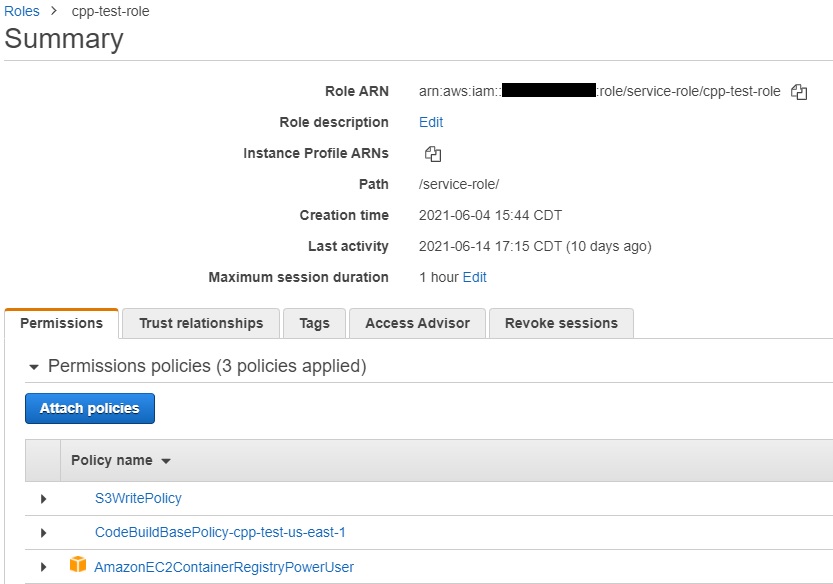
cpp-test-role.
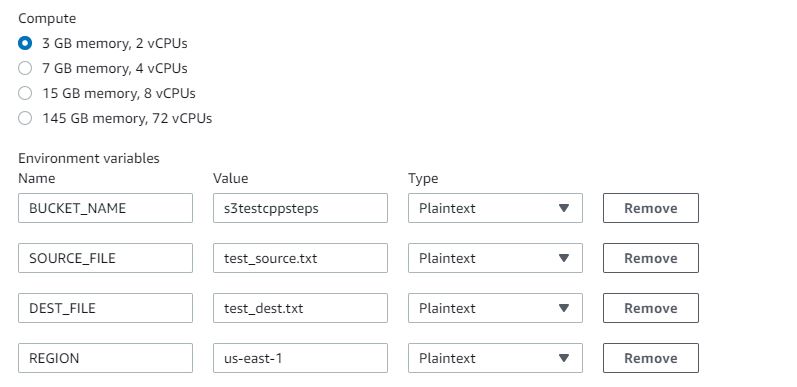
- For Compute, select 3 GB memory.
- For Environment variables, enter the variables used to test
sample_cpp_app. - Add the value for
BUCKET_NAMEthat you created earlier.
Now we update the IAM service role with permissions to push and pull images and to copy files to Amazon S3.
- On the IAM console, choose Policies.
- Choose Create policy.
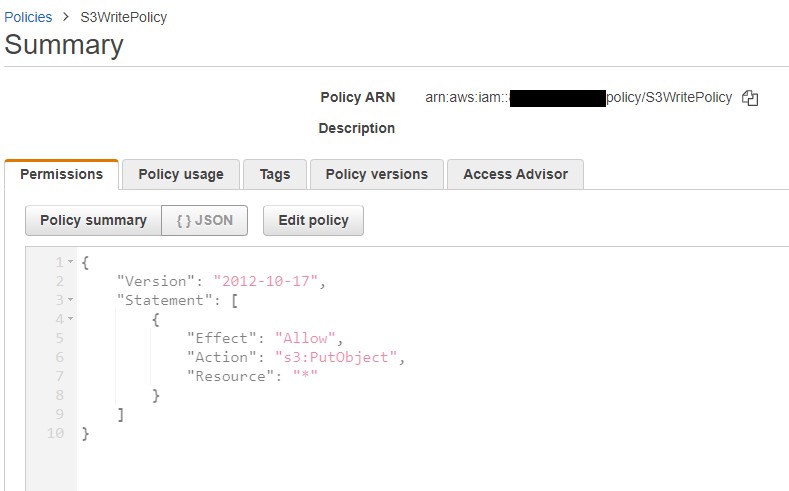
- On the JSON tab, enter the following code:
{
    "Version": "2012-10-17",
    "Statement": [{
        "Effect": "Allow",
        "Action": "s3:PutObject",
        "Resource": "*"
    }]
}- Review and create the policy, called
S3WritePolicy.On the Roles page, locate the rolecpp-test-role.
- Choose Attach policies.
- Add the following policies to the role.

- Run the build project.
- Validate that the
test_source.txtfile was copied to the S3 bucket with the new nametest_dest.txt.
Clean up
When you’ve completed all steps and are finished testing, follow these steps to delete resources to avoid incurring costs:
- On the ECR console, from Repositories, choose
cpp-blogthen Delete. - On the CodeCommit console, choose Repositories.
- Choose
cpp_custom_build_imagerepository and choose Delete repository; - Choose
sample_cpp_apprepository and choose Delete repository. - On the Amazon S3 console, choose the test bucket created, choose Empty. Confirm the deletion by typing ‘permanently delete’. Choose Empty.
- Choose the test bucket created and Delete.
- On the IAM console, choose Roles.
- Search for
cpp-custom-image-build-roleand Delete; Search forcpp-test-roleand Delete. - On the Policies page, choose
S3WritePolicyand choose Policy Actions and Delete. - Go to the CodeBuild console. From Build projects, choose
cpp_custom_build, Choose Delete build project; Choosecpp-testand choose Delete build project.
Conclusion
In this post, we demonstrated how you can create a custom Docker image using CodeBuild and use it to build CPP applications. We also successfully tested the build image using a sample CPP application.
You can extend the Docker file used to build the custom image to include any specific libraries your applications may require. Also, you can build the libraries included in this Docker file from source if your application requires a specific version of the library.
About the authors

Rucha Deshpande
Rucha Deshpande is a Solutions Developer at Amazon Web Services. She works on architecture and implementation of microservices. In her free time, she enjoys reading, gardening and travelling.

Yunhua Koglin
Yunhua Koglin is a Software Dev Engineer at AWS working on OSDU in Houston, TX. She is passionate about software development and a nature lover.