Post Syndicated from original https://www.raspberrypi.org/blog/new-raspberry-pi-os-release-december-2020/
Well, in a year as disrupted and strange as 2020, it’s nice to know that there are some things you can rely on, for example the traditional end-of-year new release of Raspberry Pi OS, which we launch today. Here’s a run-through of the main new features that you’ll find in it.
Chromium
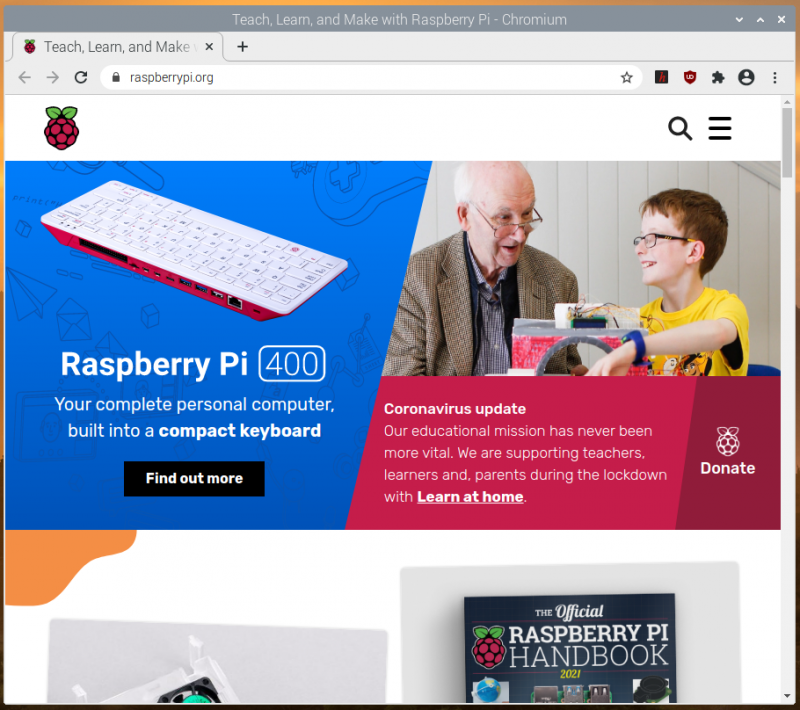
We’ve updated the Chromium browser to version 84. This has taken us a bit longer than we would have liked, but it’s always quite a lot of work to get our video hardware acceleration integrated with new releases of the browser. That’s done now, so you should see good-quality video playback on sites like YouTube. We’ve also, given events this year, done a lot of testing and tweaking on video conferencing clients such as Google Meet, Microsoft Teams, and Zoom, and they should all now work smoothly on your Raspberry Pi’s Chromium.
There’s one more thing to mention on the subject of web browsers. We’ve been shipping Adobe’s Flash Player as part of our Chromium install for several years now. Flash Player is being retired by Adobe at the end of the year, so this release will be the last that includes it. Most websites have now stopped requiring Flash Player, so this hopefully isn’t something that anyone notices!
PulseAudio
From this release onwards, we are switching Raspberry Pi OS to use the PulseAudio sound server.
First, a bit of background. Audio on Linux is really quite complicated. There are multiple different standards for handling audio input and output, and it does sometimes seem that what has happened, historically, is that whenever anyone wanted to use audio in Linux, they looked at the existing libraries and programs and went “Hmmm… I don’t like that, I’ll write something new and better.” This has resulted in a confused mass of competing and conflicting software, none of which quite works the way anyone wants it to!
The most common audio interface, which lies underneath most Linux systems somewhere, is called ALSA, the Advanced Linux Sound Architecture. This is a fairly reliable low-level audio interface — indeed, it is what Raspberry Pi OS has used up until now — but it has quite a lot of limitations and is starting to show its age. For example, it can only handle one input and one output at a time. So for example, if ALSA is being used by your web browser to play sound from a YouTube video to the HDMI output on your Raspberry Pi, nothing else can produce sound at the same time; if you were to try playing a video or an audio file in VLC, you’d hear nothing but the audio from YouTube. Similarly, if you want to switch the sound from your YouTube video from HDMI to a USB sound card, you can’t do it while the video is playing; it won’t change until the sound stops. These aren’t massive problems, but most modern operating systems do handle audio in a more flexible fashion.
More significant is that ALSA doesn’t handle Bluetooth audio at all, so various other extensions and additional bits of software are required to even get audio into and out of Bluetooth devices on an ALSA-based system. We’ve used a third-party library called bluez-alsa for a few years now, but it’s an additional piece of code to maintain and update, so this isn’t ideal.
PulseAudio deals with all of this. It’s a piece of software that sits as a layer between all the audio hardware and all the applications that send and receive audio, and it automatically routes everything to the right places. It can mix the audio from multiple applications together, so you can hear VLC at the same time as YouTube, and it allows the output to be moved around between different devices while it is playing. It knows how to talk to Bluetooth devices, and it greatly simplifies the job of managing default input and output devices, so it makes it much easier to make sure audio ends up where it is supposed to be!
One area where it is particularly helpful is in managing audio input and output streams to web browsers like Chromium; in our testing, the use of PulseAudio made setting up video conferencing sessions much easier and more reliable, particularly with Bluetooth headsets and webcam audio.
The good news for Raspberry Pi users is that, if we’ve got it right, you shouldn’t even notice the change. PulseAudio now runs by default, and while the volume control and audio input/output selector on the taskbar looks almost identical to the one in previous releases of the OS, it is now controlling PulseAudio rather than ALSA. You can use it just as before: select your output and input devices, adjust the volume, and you’re good to go.
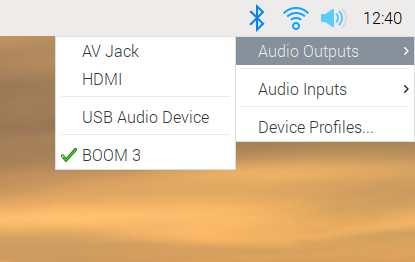
There is one small change to the input/output selector, which is the menu option at the bottom for Device Profiles. In PulseAudio, any audio device has one or more profiles, which select which outputs and inputs are used on any device with multiple connections. (For example, some audio HATs and USB sound cards have both analogue and digital outputs — there will usually be a profile for each output to select where the audio actually comes out.)
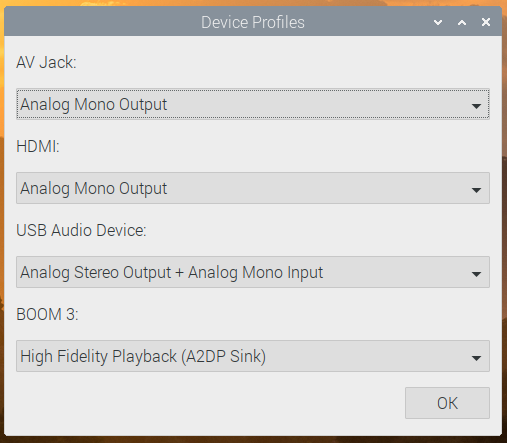
Profiles are more important for Bluetooth devices. If a Bluetooth device has both an input and an output (such as a headset with both a microphone and an earphone), it usually supports two different profiles. One of these is called HSP (HeadSet Profile), and this allows you to use both the microphone and the earphone, but with relatively low sound quality — equivalent to that you hear on a mobile phone call, so fine for speech but not great for music. The other profile is called A2DP (Advanced Audio Distribution Profile), which gives much better sound quality, but is output-only: it does not allow you to use the microphone. So if you are making a call, you want your Bluetooth device to use HSP, but if you are listening to music, you want it to use A2DP.
We’ve automated some of this, so if you select a Bluetooth device as the default input, then that device is automatically switched to HSP. If you want to switch a device which is in HSP back to A2DP, just reselect it from the output menu. Its microphone will then be deactivated, and it will switch to A2DP. But sometimes you might want to take control of profiles manually, and the Device Profiles dialog allows you to do that.
(Note that if you are only using the Raspberry Pi’s internal sound outputs, you don’t need to worry about profiles at all, as there is only one, and it’s automatically selected for you.)
Some people who have had experience of PulseAudio in the past may be a little concerned by this change, because PulseAudio hasn’t always been the most reliable piece of software, but it has now reached the point where it solves far more problems than it creates, which is why many other Linux distributions, such as Ubuntu, now use it by default. Most users shouldn’t even notice the change; there may be occasional issues with some older applications such as Sonic Pi, but the developers of these applications will hopefully address any issues in the near future.
Printing
One thing which has always been missing from Raspberry Pi OS is an easy way to connect to and configure printers. There is a Linux tool for this, called CUPS, the Common Unix Printing System. (It’s actually owned by Apple and is the underlying printing system used by macOS X, but it is still free software and available for use by Linux distributions.)
CUPS has always been available in apt, so could be installed on any Raspberry Pi, but the standard web-based interface is a bit unfriendly. Various third-party front-end tools have been written to make CUPS a bit easier to use, and we have decided to use one called system-config-printer. (Like PulseAudio, this is also used as standard by Ubuntu.)
So both CUPS and system-config-printer are now installed as part of Raspberry Pi OS. If you are a glutton for punishment, you can access the CUPS web interface by opening the Chromium browser and going to http://localhost:631, but instead of doing that, we suggest just going into the Preferences section in the main menu and opening Print Settings.
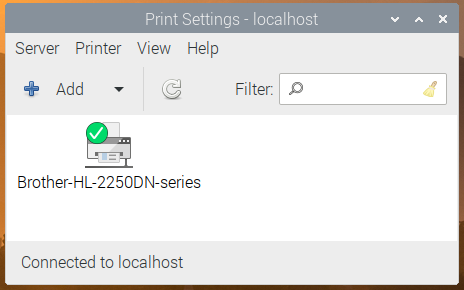
This shows the system-config-printer dialog, from which you can add new printers, remove old ones, set one as the default, and access the print queue for each printer, just as you should be familiar with from other operating systems.
Like most things in Linux, this relies on user contributions, so not every printer is supported. We’ve found that most networked printers work fine, but USB printers are a bit hit-and-miss as to whether there is a suitable driver; in general, the older your printer is, the more likely it is to have a CUPS driver available. The best thing to do is to try it and see, and perhaps ask for help on our forums if your particular printer doesn’t seem to work.
This fills in one of the last things missing in making Raspberry Pi a complete desktop computer, by making it easy to set up a printer and print from applications such as LibreOffice.
Accessibility
One of the areas we have tried to improve in the Desktop this year is to make it more accessible to those with visual impairments. We added support for the Orca screen reader at the start of the year, and the display magnifier plugin over the summer.
While there are no completely new accessibility features this time, we have made some improvements to Orca support in applications like Raspberry Pi Configuration and Appearance Settings, to make them read what they are doing in a more helpful fashion; we’ve also worked with the maintainers of Orca to raise and fix a few bugs. It’s still not perfect, but we’re doing our best!
One of the benefits of switching to PulseAudio is that it now means that screen reader audio can be played through Bluetooth devices; this was not possible using the old ALSA system, so visually-impaired users who wish to use the screen reader with a Bluetooth headset or external speaker can now do so.
One feature we have added is an easy way to install Orca; it is still available through Recommended Software as before, but given that is not easy to navigate for a visually-impaired person, there is now a keyboard shortcut: just hold down
And if you can’t remember that shortcut, when you first boot a new image, if you don’t do anything for thirty seconds or so, the startup wizard will now speak to you to remind you how to do it…
Finally, we had hoped to be able to say that Chromium was now compatible with Orca; screen reader support was being added to versions 8x. Unfortunately, for now this seems to only have been added for Windows and Mac versions, not the Linux build we use. Hopefully Google will address this in a future release, but for now if you need a web browser compatible with Orca, you’ll need to install Firefox from apt.
New hardware options
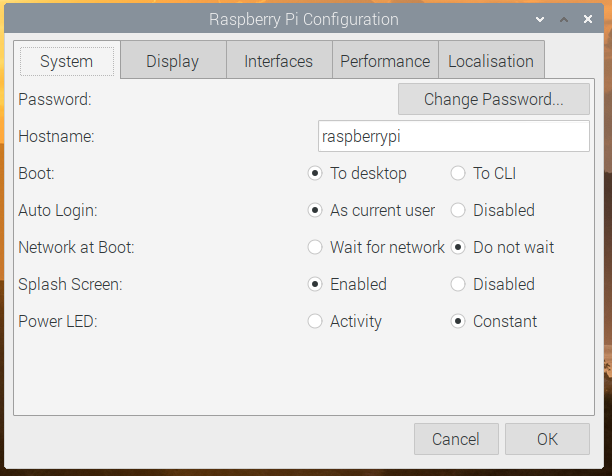
We’ve added a couple of options to the Raspberry Pi Configuration tool.
On the System tab, if you are running on Raspberry Pi with a single status LED (i.e. a Raspberry Pi Zero or the new Raspberry Pi 400), there is now an option to select whether the LED just shows that the power is on, or if it flickers off to show drive activity.
On the Performance tab, there are options to allow you to control the new Raspberry Pi Case Fan: you can select the GPIO pin to which it is connected and set the temperature at which it turns on and off.

How do I get it?
The latest image can be installed on a new card using the Raspberry Pi Imager, or can be downloaded from our Downloads page.
To apply the updates to an existing image, you’ll need to enter the usual commands in a terminal window:
sudo apt update
sudo apt full-upgrade
(It is safe to just accept the default answer to any questions you are asked during the update procedure.)
Then, to install the PulseAudio Bluetooth support, you will need to enter the following commands in the terminal window:
sudo apt purge bluealsa
sudo apt install pulseaudio-module-bluetooth
Now reboot.
To swap over the volume and input selector on the taskbar from ALSA to PulseAudio, after your Raspberry Pi has restarted, right-click a blank area on the taskbar and choose Add / Remove Panel Items. Find the plugin labelled Volume Control (ALSA/BT) in the list, select it and click Remove; then click the Add button, find the plugin labelled Volume Control (PulseAudio) and click Add. Alternatively, just open the Appearance Settings application from the Preferences section of the Main Menu, go to the Defaults tab and press one of the Set Defaults buttons.
As ever, do let us know what you think in the comments.
The post New Raspberry Pi OS release — December 2020 appeared first on Raspberry Pi.