Post Syndicated from Jan Michael Go Tan original https://aws.amazon.com/blogs/big-data/build-a-data-sharing-workflow-with-aws-lake-formation-for-your-data-mesh/
A key benefit of a data mesh architecture is allowing different lines of business (LOBs) and organizational units to operate independently and offer their data as a product. This model not only allows organizations to scale, but also gives the end-to-end ownership of maintaining the product to data producers that are the domain experts of the data. This ownership entails maintaining the data pipelines, debugging ETL scripts, fixing data quality issues, and keeping the catalog entries up to date as the dataset evolves over time.
On the consumer side, teams can search the central catalog for relevant data products and request access. Access to the data is done via the data sharing feature in AWS Lake Formation. As the amount of data products grow and potentially more sensitive information is stored in an organization’s data lake, it’s important that the process and mechanism to request and grant access to specific data products are done in a scalable and secure manner.
This post describes how to build a workflow engine that automates the data sharing process while including a separate approval mechanism for data products that are tagged as sensitive (for example, containing PII data). Both the workflow and approval mechanism are customizable and should be adapted to adhere to your company’s internal processes. In addition, we include an optional workflow UI to demonstrate how to integrate with the workflow engine. The UI is just one example of how the interaction works. In a typical large enterprise, you can also use ticketing systems to automatically trigger both the workflow and the approval process.
Solution overview
A typical data mesh architecture for analytics in AWS contains one central account that collates all the different data products from multiple producer accounts. Consumers can search the available data products in a single location. Sharing data products to consumers doesn’t actually make a separate copy, but instead just creates a pointer to the catalog item. This means any updates that producers make to their products are automatically reflected in the central account as well as in all the consumer accounts.
Building on top of this foundation, the solution contains several components, as depicted in the following diagram:

The central account includes the following components:
- AWS Glue – Used for Data Catalog purposes.
- AWS Lake Formation – Used to secure access to the data as well as provide the data sharing capabilities that enable the data mesh architecture.
- AWS Step Functions – The actual workflow is defined as a state machine. You can customize this to adhere to your organization’s approval requirements.
- AWS Amplify – The workflow UI uses the Amplify framework to secure access. It also uses Amplify to host the React-based application. On the backend, the Amplify framework creates two Amazon Cognito components to support the security requirements:
- User pools – Provide a user directory functionality.
- Identity pools – Provide federated sign-in capabilities using Amazon Cognito user pools as the location of the user details. The identity pools vend temporary credentials so the workflow UI can access AWS Glue and Step Functions APIs.
- AWS Lambda – Contains the application logic orchestrated by the Step Functions state machine. It also provides the necessary application logic when a producer approves or denies a request for access.
- Amazon API Gateway – Provides the API for producers to accept and deny requests.
The producer account contains the following components:
- Amazon Simple Notification Service (Amazon SNS) – Producers maintain their list of approvers in an SNS topic. The workflow engine publishes a message in the respective data owner’s SNS topic when an approval is required.
- AWS Identity and Access Management (IAM) – The
ProducerWorkflowRolerole is assumed by the workflow engine if it needs to send an approval request to the producer’s SNS topic.
The consumer account contains the following components:
- AWS Glue – Used for Data Catalog purposes.
- AWS Lake Formation – After the data has been made available, consumers can grant access to its own users via Lake Formation.
- AWS Resource Access Manager (AWS RAM) – If the grantee account is in the same organization as the grantor account, the shared resource is available immediately to the grantee. If the grantee account is not in the same organization, AWS RAM sends an invitation to the grantee account to accept or reject the resource grant. For more details about Lake Formation cross-account access, see Cross-Account Access: How It Works.
The solution is split into multiple steps:
- Deploy the central account backend, including the workflow engine and its associated components.
- Deploy the backend for the producer accounts. You can repeat this step multiple times depending on the number of producer accounts that you’re onboarding into the workflow engine.
- Deploy the optional workflow UI in the central account to interact with the central account backend.
Workflow overview
The following diagram illustrates the workflow. In this particular example, the state machine checks if the table or database (depending on what is being shared) has the pii_flag parameter and if it’s set to TRUE. If both conditions are valid, it sends an approval request to the producer’s SNS topic. Otherwise, it automatically shares the product to the requesting consumer.

This workflow is the core of the solution, and can be customized to fit your organization’s approval process. In addition, you can add custom parameters to databases, tables, or even columns to attach extra metadata to support the workflow logic.
Prerequisites
The following are the deployment requirements:
- A data mesh set up
- NodeJS v14.x
- Yarn v1.22.10+
- The AWS Cloud Development Kit (AWS CDK) CLI v1.119.0+
- The Amplify CLI v5.3.0+ (for the workflow UI)
- AWS profiles for each of the accounts (central and producers) that you’re deploying in
You can clone the workflow UI and AWS CDK scripts from the GitHub repository.
Deploy the central account backend
To deploy the backend for the central account, go to the root of the project after cloning the GitHub repository and enter the following code:
This deploys the following:
- IAM roles used by the Lambda functions and Step Functions state machine
- Lambda functions
- The Step Functions state machine (the workflow itself)
- An API Gateway
When the deployment is complete, it generates a JSON file in the src/cfn-output.json location. This file is used by the UI deployment script to generate a scoped-down IAM policy and workflow UI application to locate the state machine that was created by the AWS CDK script.
The actual AWS CDK scripts for the central account deployment are in infra/central/. This also includes the Lambda functions (in the infra/central/functions/ folder) that are used by both the state machine and the API Gateway.
Lake Formation permissions
The following table contains the minimum required permissions that the central account data lake administrator needs to grant to the respective IAM roles for the backend to have access to the AWS Glue Data Catalog.
| Role | Permission | Grantable |
| WorkflowLambdaTableDetails |
|
N/A |
| WorkflowLambdaShareCatalog |
|
|
Workflow catalog parameters
The workflow uses the following catalog parameters to provide its functionality.
| Catalog Type | Parameter Name | Description |
| Database | data_owner |
(Required) The account ID of the producer account that owns the data products. |
| Database | data_owner_name |
A readable friendly name that identifies the producer in the UI. |
| Database | pii_flag |
A flag (true/false) that determines whether the data product requires approval (based on the example workflow). |
| Column | pii_flag |
A flag (true/false) that determines whether the data product requires approval (based on the example workflow). This is only applicable if requesting table-level access. |
You can use UpdateDatabase and UpdateTable to add parameters to database and column-level granularity, respectively. Alternatively, you can use the CLI for AWS Glue to add the relevant parameters.
Use the AWS CLI to run the following command to check the current parameters in your database:
You get the following response:
To update the database with the parameters indicated in the preceding table, we first create the input JSON file, which contains the parameters that we want to update the database with. For example, see the following code:
Run the following command to update the Data Catalog:
Deploy the producer account backend
To deploy the backend for your producer accounts, go to the root of the project and run the following command:
This deploys the following:
- An SNS topic where approval requests get published.
- The
ProducerWorkflowRoleIAM role with a trust relationship to the central account. This role allows Amazon SNS publish to the previously created SNS topic.
You can run this deployment script multiple times, each time pointing to a different producer account that you want to participate in the workflow.
To receive notification emails, subscribe your email in the SNS topic that the deployment script created. For example, our topic is called DataLakeSharingApproval. To get the full ARN, you can either go to the Amazon Simple Notification Service console or run the following command to list all the topics and get the ARN for DataLakeSharingApproval:
After you have the ARN, you can subscribe your email by running the following command:
You then receive a confirmation email via the email address that you subscribed. Choose Confirm subscription to receive notifications from this SNS topic.
Deploy the workflow UI
The workflow UI is designed to be deployed in the central account where the central data catalog is located.
To start the deployment, enter the following command:
This deploys the following:
- Amazon Cognito user pool and identity pool
- React-based application to interact with the catalog and request data access
The deployment command prompts you for the following information:
- Project information – Use the default values.
- AWS authentication – Use your profile for the central account. Amplify uses this profile to deploy the backend resources.
UI authentication – Use the default configuration and your username. Choose No, I am done when asked to configure advanced settings.
- UI hosting – Use hosting with the Amplify console and choose manual deployment.
The script gives a summary of what is deployed. Entering Y triggers the resources to be deployed in the backend. The prompt looks similar to the following screenshot:

When the deployment is complete, the remaining prompt is for the initial user information such as user name and email. A temporary password is automatically generated and sent to the email provided. The user is required to change the password after the first login.
The deployment script grants IAM permissions to the user via an inline policy attached to the Amazon Cognito authenticated IAM role:
The last remaining step is to grant Lake Formation permissions (DESCRIBE for both databases and tables) to the authenticated IAM role associated with the Amazon Cognito identity pool. You can find the IAM role by running the following command:
The IAM role name is in the AuthRoleName property under the awscloudformation key. After you grant the required permissions, you can use the URL provided in your browser to open the workflow UI.
Your temporary password is emailed to you so you can complete the initial login, after which you’re asked to change your password.
The first page after logging in is the list of databases that consumers can access.

Choose Request Access to see the database details and the list of tables.

Choose Request Per Table Access and see more details at the table level.

Going back in the previous page, we request database-level access by entering the consumer account ID that receives the share request.

Because this database has been tagged with a pii_flag, the workflow needs to send an approval request to the product owner. To receive this approval request email, the product owner’s email needs to be subscribed to the DataLakeSharingApproval SNS topic in the product account. The details should look similar to the following screenshot:

The email looks similar to the following screenshot:

The product owner chooses the Approve link to trigger the Step Functions state machine to continue running and share the catalog item to the consumer account.
For this example, the consumer account is not part of an organization, so the admin of the consumer account has to go to AWS RAM and accept the invitation.
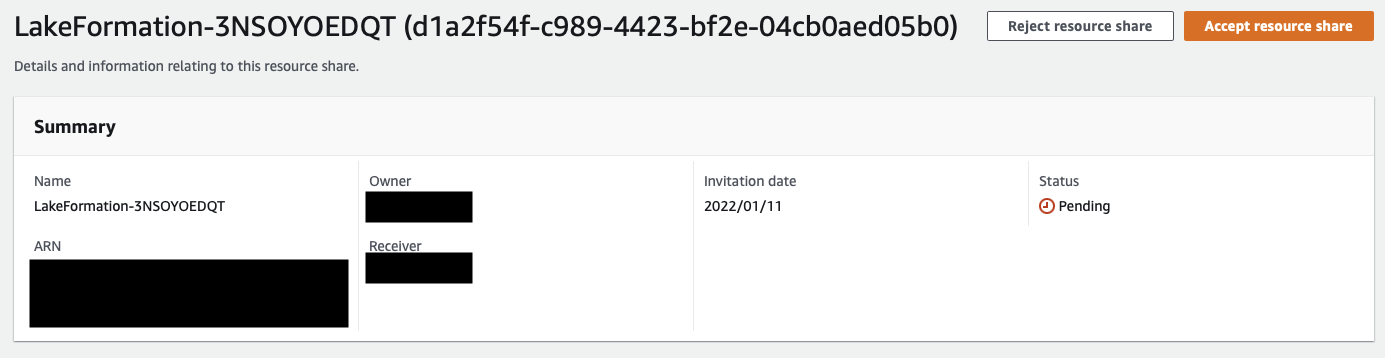
After the resource share is accepted, the shared database appears in the consumer account’s catalog.
Clean up
If you no longer need to use this solution, use the provided cleanup scripts to remove the deployed resources.
Producer account
To remove the deployed resources in producer accounts, run the following command for each producer account that you deployed in:
Central account
Run the following command to remove the workflow backend in the central account:
Workflow UI
The cleanup script for the workflow UI relies on an Amplify CLI command to initiate the teardown of the deployed resources. Additionally, you can use a custom script to remove the inline policy in the authenticated IAM role used by Amazon Cognito so that Amplify can fully clean up all the deployed resources. Run the following command to trigger the cleanup:
This command doesn’t require the profile parameter because it uses the existing Amplify configuration to infer where the resources are deployed and which profile was used.
Conclusion
This post demonstrated how to build a workflow engine to automate an organization’s approval process to gain access to data products with varying degrees of sensitivity. Using a workflow engine enables data sharing in a self-service manner while codifying your organization’s internal processes to be able to safely scale as more data products and teams get onboarded.
The provided workflow UI demonstrated one possible integration scenario. Other possible integration scenarios include integration with your organization’s ticketing system to trigger the workflow as well as receive and respond to approval requests, or integration with business chat applications to further shorten the approval cycle.
Lastly, a high degree of customization is possible with the demonstrated approach. Organizations have complete control over the workflow, how data product sensitivity levels are defined, what gets auto-approved and what needs further approvals, the hierarchy of approvals (such as a single approver or multiple approvers), and how the approvals get delivered and acted upon. You can take advantage of this flexibility to automate your company’s processes to help them safely accelerate towards being a data-driven organization.
About the Author
 Jan Michael Go Tan is a Principal Solutions Architect for Amazon Web Services. He helps customers design scalable and innovative solutions with the AWS Cloud.