Post Syndicated from Pat Patterson original https://www.backblaze.com/blog/looking-forward-to-backblaze-cloud-replication-everything-you-need-to-know/
Backblaze Cloud Replication—currently in private beta—enables Backblaze customers to store files in multiple regions, or create multiple copies of files in one region, across the Backblaze Storage Cloud. This capability, as we explained in an earlier blog post, allows you to create geographically separate copies of data for compliance and continuity, keep data closer to its consumers, or maintain a live copy of production data for testing and staging. Today we’ll look at how you can get started with Cloud Replication, so you’ll be ready for its release, likely early next month.
Backblaze Cloud Replication: The Basics
Backblaze B2 Cloud Storage organizes data into files (equivalent to Amazon S3’s objects) in buckets. Very simply, Cloud Replication allows you to create rules that control replication of files from a source bucket to a destination bucket. The source and destination buckets can be in the same or different accounts, or in the same or different regions.
Here’s a simple example: Suppose I want to replicate files from my-production-bucket to my-staging-bucket in the same account, so I can run acceptance tests on an application with real-life data. Using either the Backblaze web interface or the B2 Native API, I would simply create a Cloud Replication rule specifying the source and destination buckets in my account. Let’s walk through a couple of examples in each interface.
Cloud Replication via the Web Interface
Log in to the account containing the source bucket for your replication rule. Note that the account must have a payment method configured to participate in replication. Cloud Replication will be accessible via a new item in the B2 Cloud Storage menu on the left of the web interface:
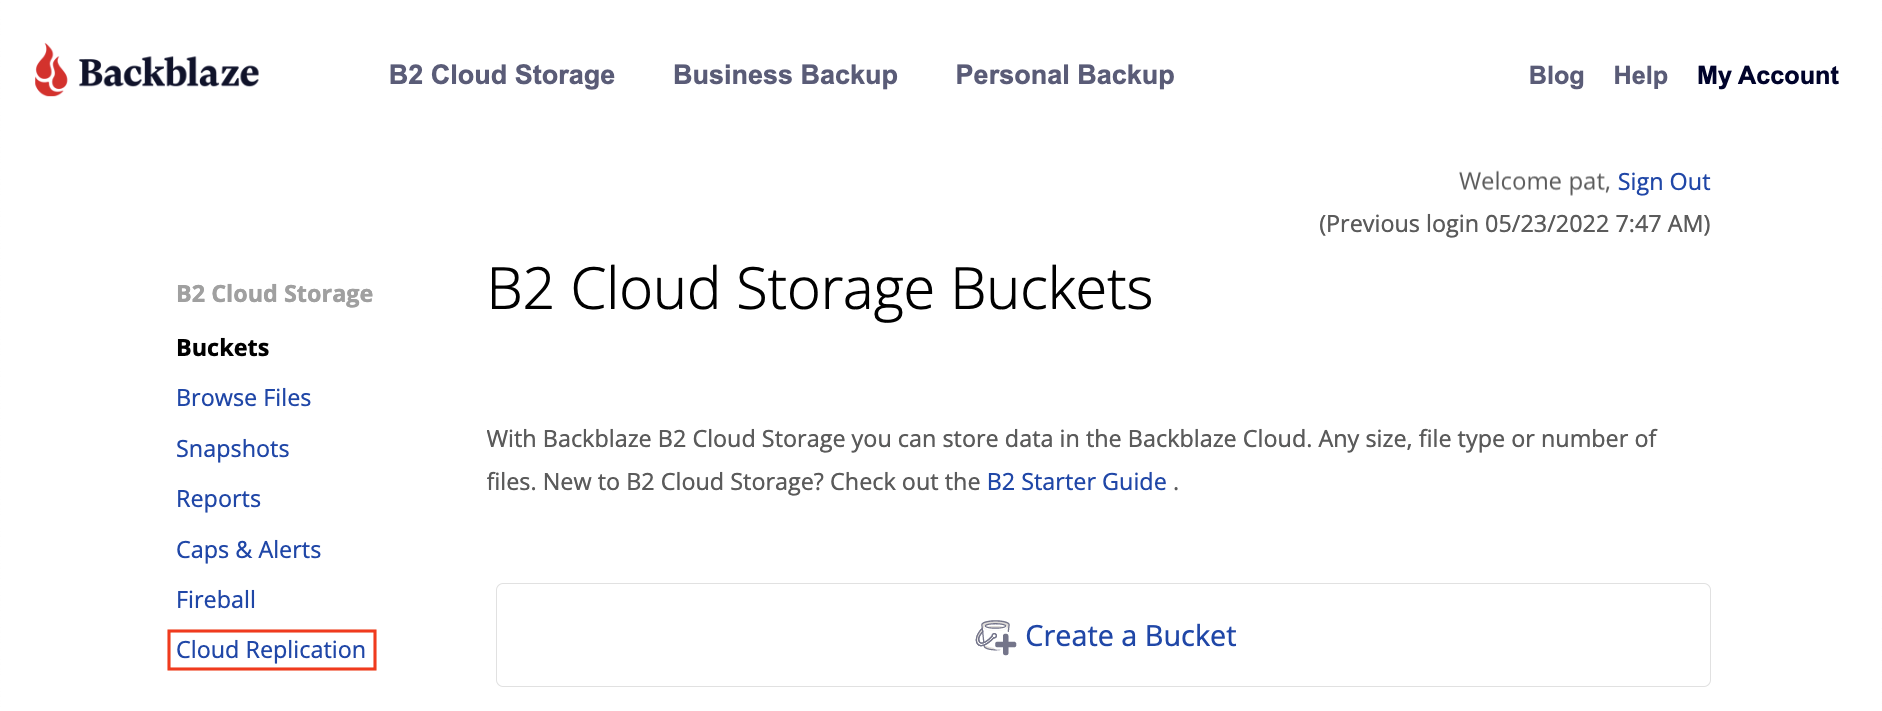
Clicking Cloud Replication opens a new page in the web interface:
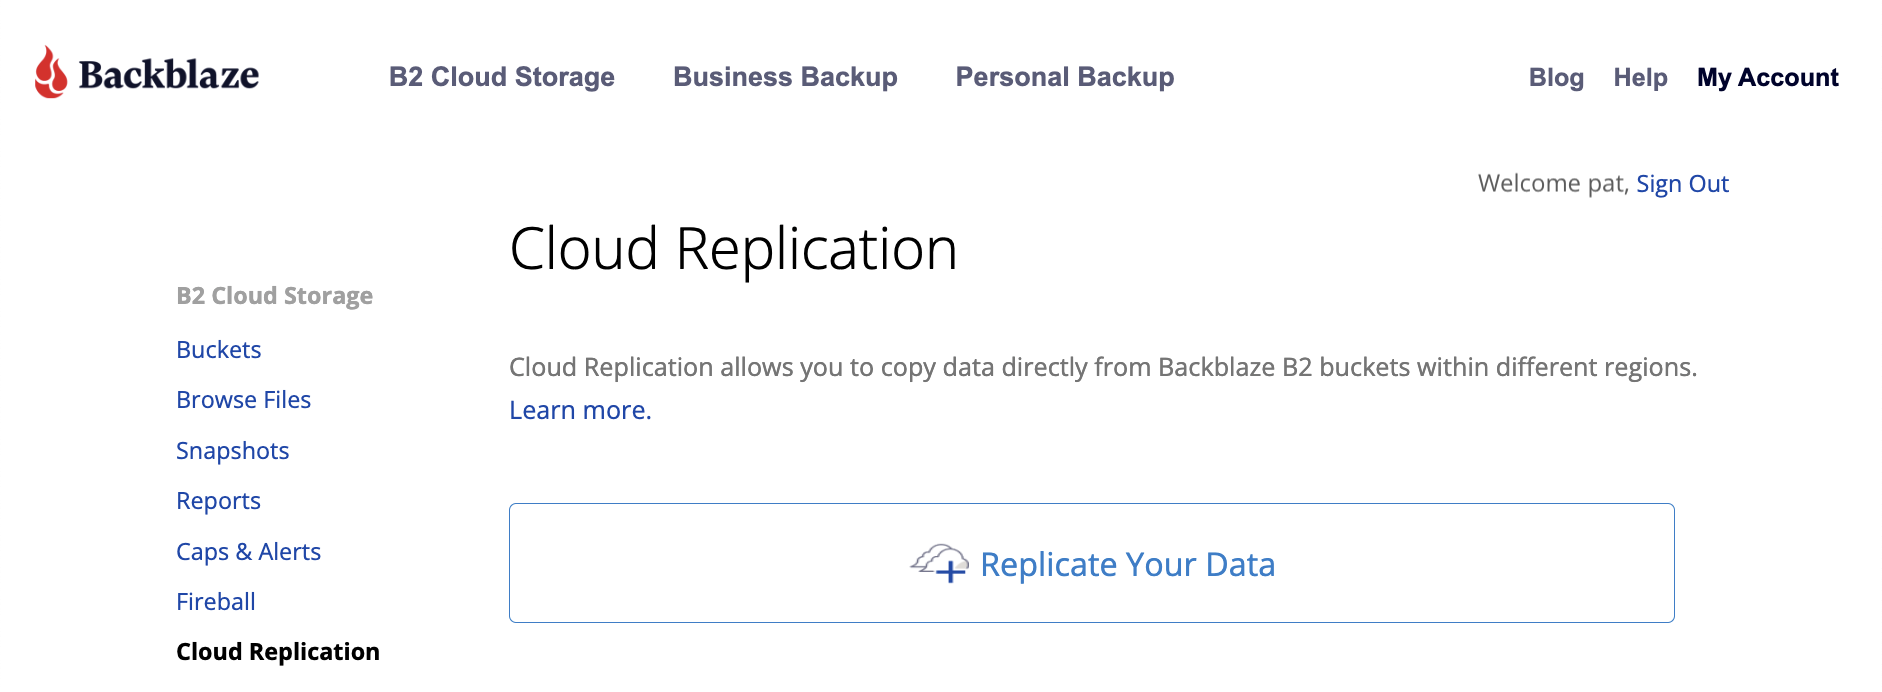
Click Replicate Your Data to create a new replication rule:
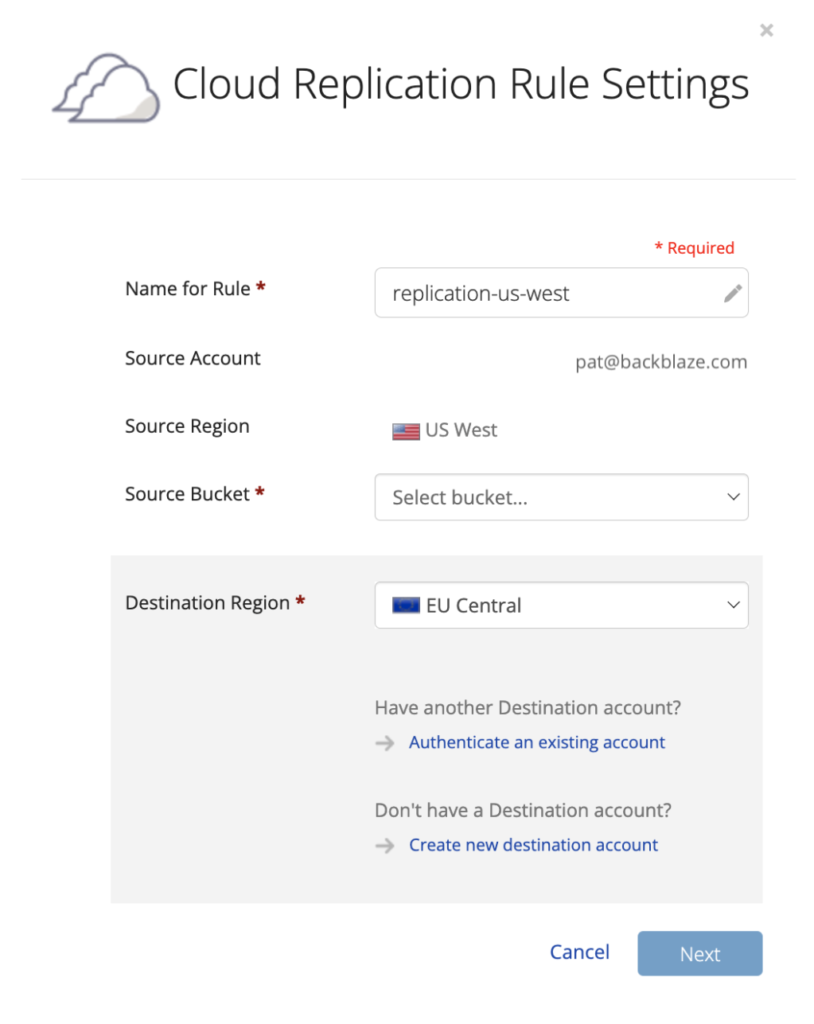
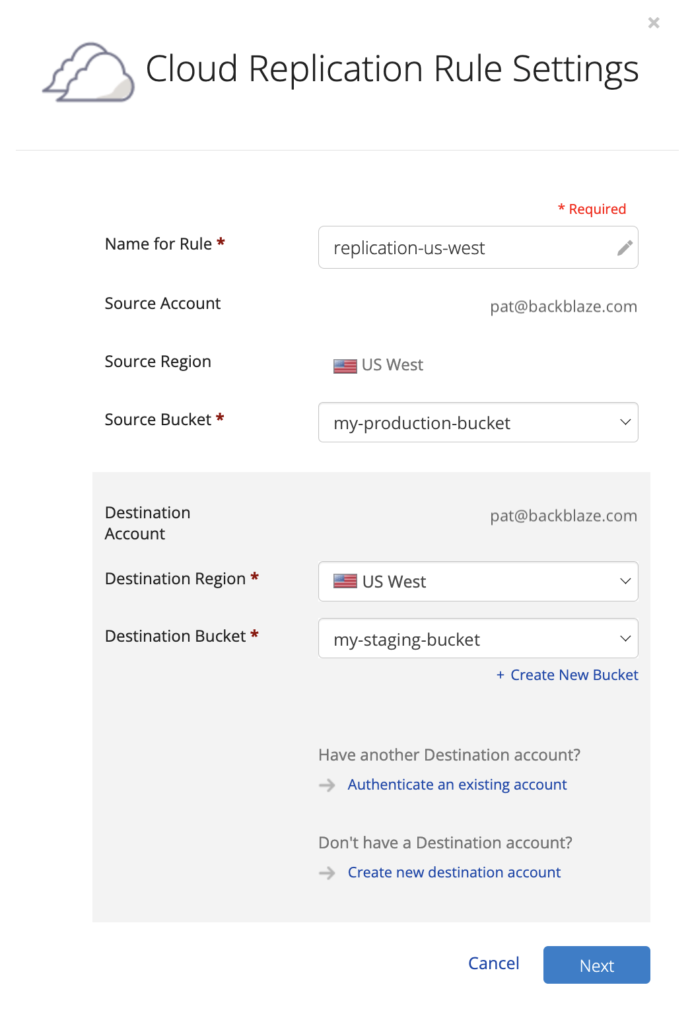
Configuring Replication Within the Same Account
To implement the simple rule, “replicate files from my-production-bucket to my-staging-bucket in the same account,” all you need to do is select the source bucket, set the destination region the same as the source region, and select or create the destination bucket:
Configuring Replication to a Different Account
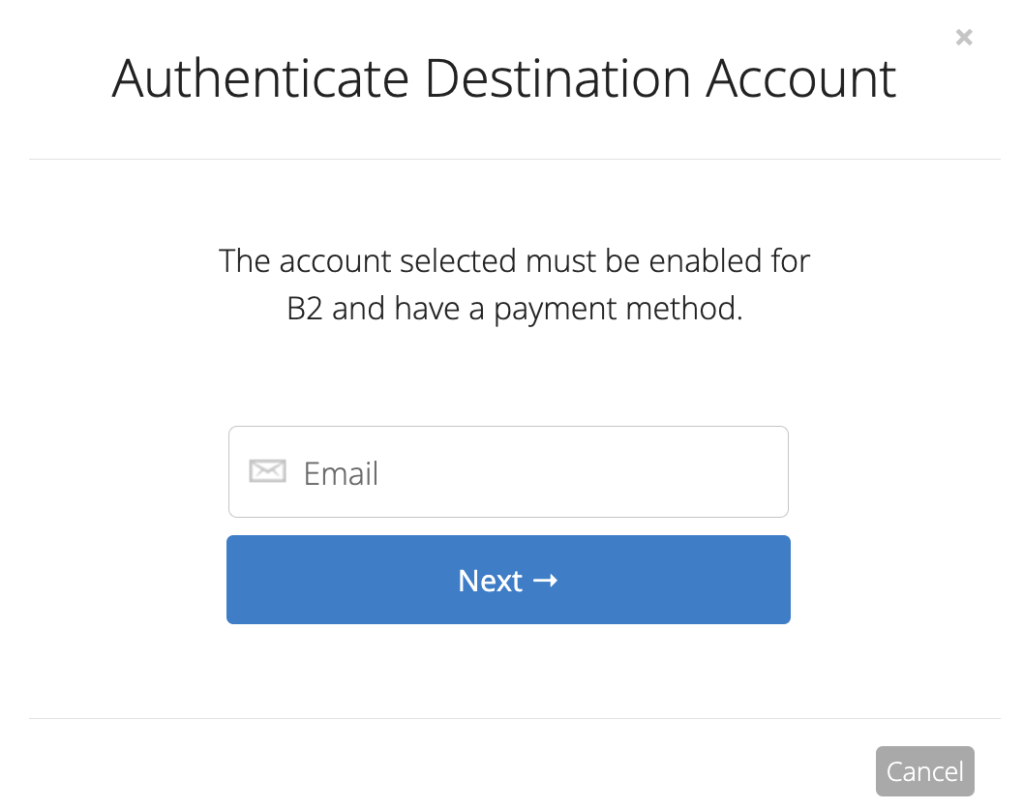
To replicate data via the web interface to a different account, you must be able to log in to the destination account. Click Authenticate an existing account to log in. Note that the destination account must be enabled for Backblaze B2 and, again, must have a payment method configured:
After authenticating, you must select a bucket in the destination account. The process is the same whether the destination account is in the same or a different region:

Note that, currently, you may configure a bucket as a source in a maximum of two replication rules. A bucket can be configured as a destination in any number of rules.
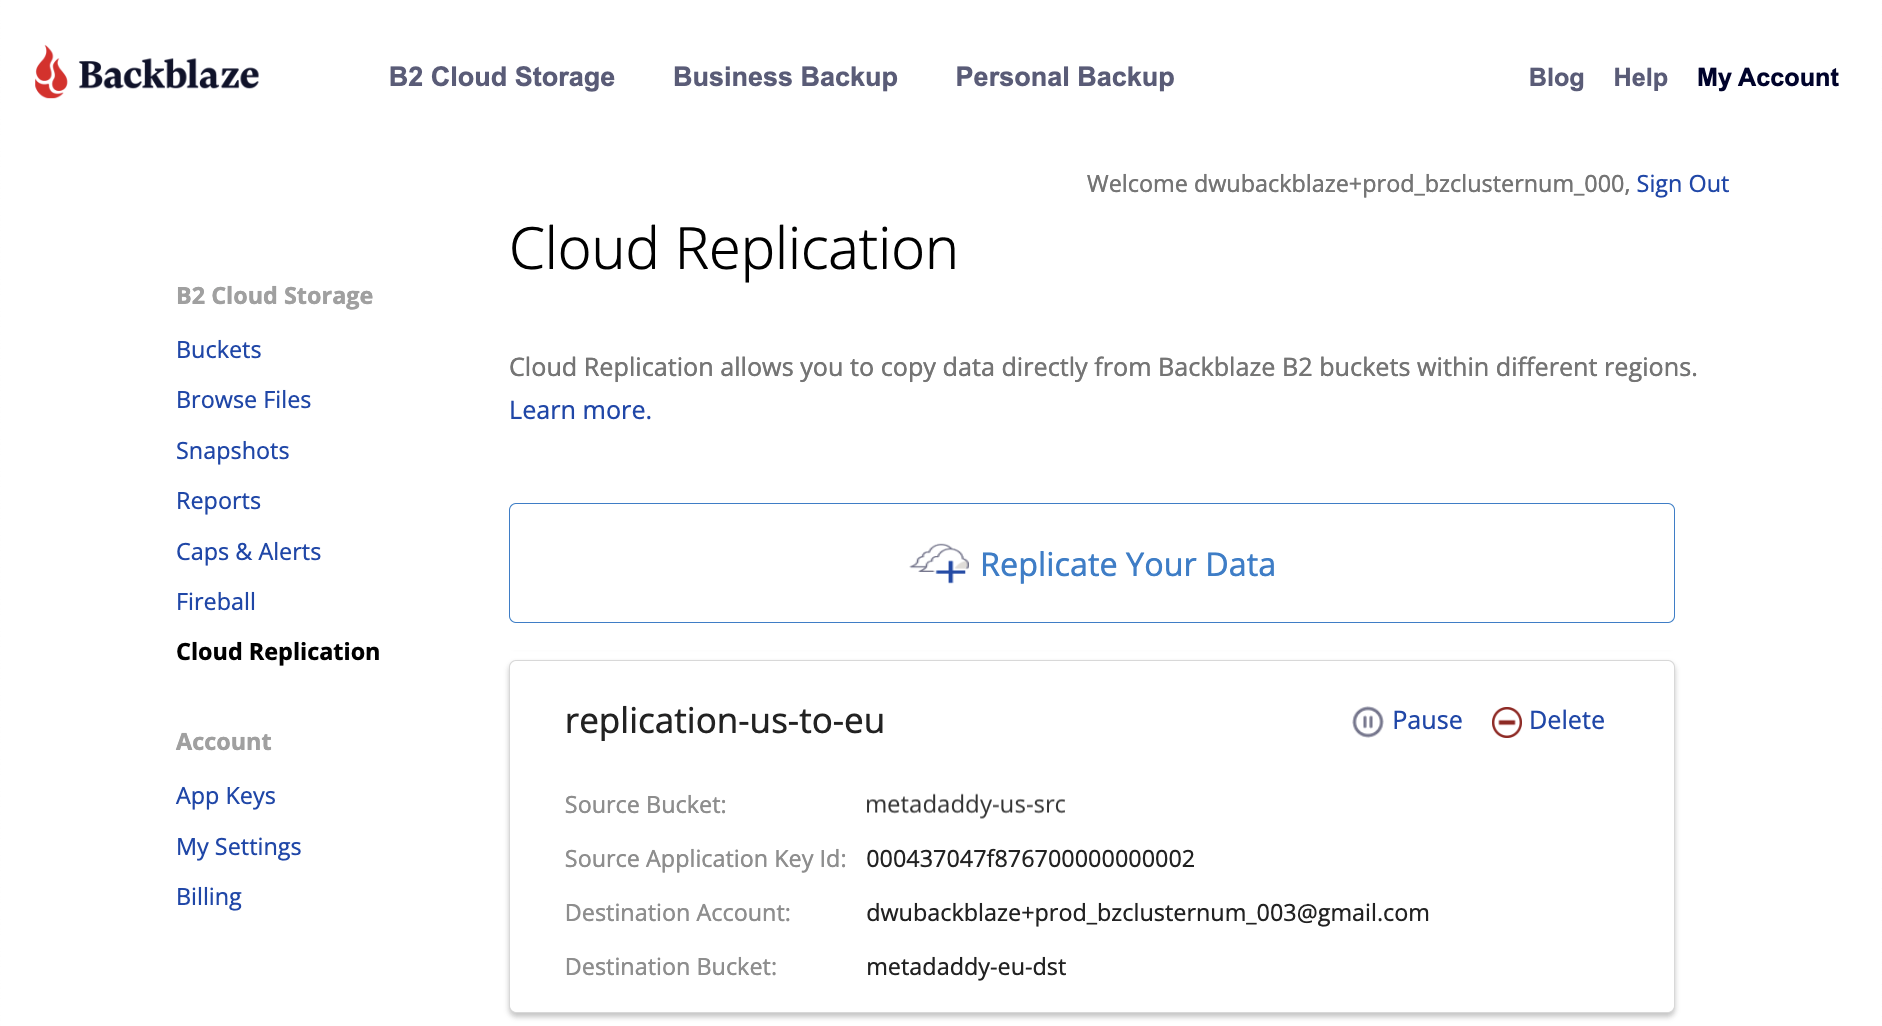
Once you’ve created the rule, it is accessible via the web interface. You can pause a running rule, run a paused rule, or delete the rule altogether:
Replicating Data
Once you have created the replication rule, you can manipulate files in the source bucket as you normally would. By default, existing files in the source bucket will be copied to the destination bucket. New files, and new versions of existing files, in the source bucket will be replicated regardless of whether they are created via the Backblaze S3 Compatible API, the B2 Native API, or the Backblaze web interface. Note that the replication engine runs on a distributed system, so the time to complete replication is based on the number of other replication jobs scheduled, the number of files to replicate, and the size of the files to replicate.
Checking Replication Status
Click on a source or destination file in the web interface to see its details page. The file’s replication status is at the bottom of the list of attributes:
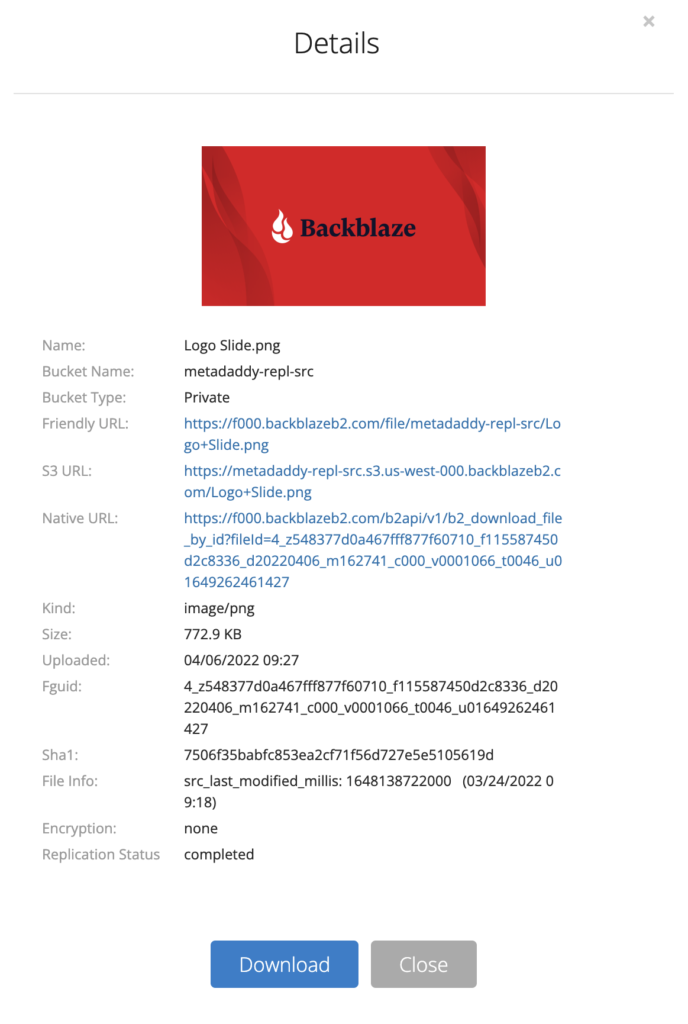
There are four possible values of replication status:
pending: The file is in the process of being replicated. If there are two rules, at least one of the rules is processing. (Reminder: Currently, you may configure a bucket as a source in a maximum of two replication rules.) Check again later to see if it has left this status.completed: This status represents a successful replication. If two rules are configured, both rules have completed successfully.failed: A non-recoverable error has occurred, such as insufficient permissions to write the file into the destination bucket. The system will not try again to process this file. If two rules are configured, at least one has failed.replica: This file was created by the replication process. Note that replica files cannot be used as the source for further replication.
Cloud Replication and Application Keys
There’s one more detail to examine in the web interface before we move on to the API. Creating a replication rule creates up to two Application Keys; one with read permissions for the source bucket, if the source bucket is not already associated with an Application Key, and one with write permissions for the destination bucket.
The keys are visible in the App Keys page of the web interface:
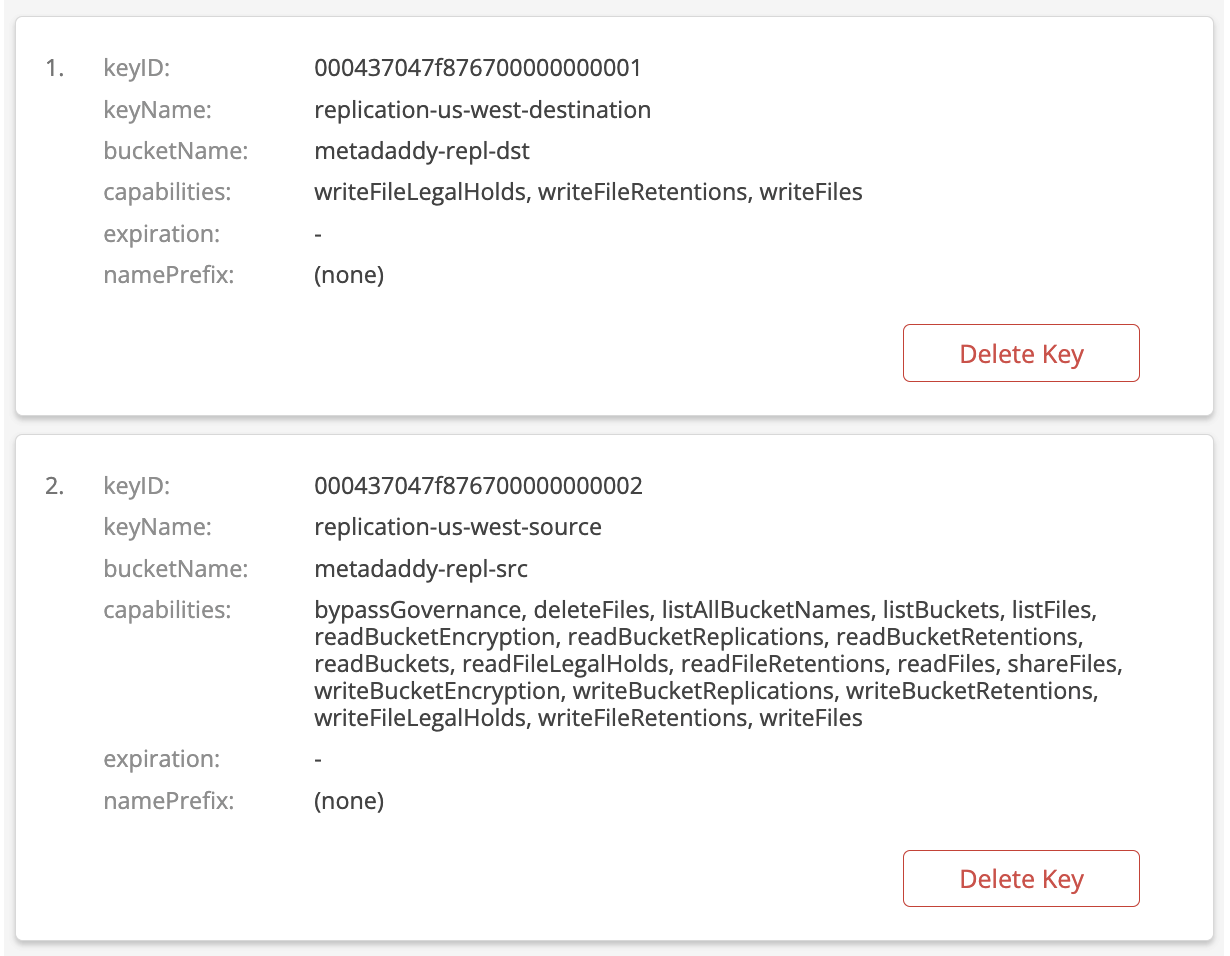
You don’t need to worry about these keys if you are using the web interface, but it is useful to see how the pieces fit together if you are planning to go on to use the B2 Native API to configure Cloud Replication.
This short video walks you through setting up Cloud Replication in the web interface:
Cloud Replication via the B2 Native API
Configuring cloud replication in the web interface is quick and easy for a single rule, but quickly becomes burdensome if you have to set up multiple replication rules. The B2 Native API allows you to programmatically create replication rules, enabling automation and providing access to two features not currently accessible via the web interface: setting a prefix to constrain the set of files to be replicated and excluding existing files from the replication rule.
Configuring Replication
To create a replication rule, you must include replicationConfiguration when you call b2_create_bucket or b2_update_bucket. The source bucket’s replicationConfiguration must contain asReplicationSource, and the destination bucket’s replicationConfiguration must contain asReplicationDestination. Note that both can be present where a given bucket is the source in one replication rule and the destination in another.
Let’s illustrate the process with a concrete example. Let’s say you want to replicate newly created files with the prefix master_data/, and new versions of those files, from a bucket in the U.S. West region to one in the EU Central region so that you have geographically separate copies of that data. You don’t want to replicate any files that already exist in the source bucket.
Assuming the buckets already exist, you would first create a pair of Application Keys: one in the source account, with read permissions for the source bucket, and another in the destination account, with write permissions for the destination bucket.
Next, call b2_update_bucket with the following message body to configure the source bucket:
{
    "accountId": "<source account id/>",
    "bucketId": "<source bucket id/>",
    "replicationConfiguration": {
        "asReplicationSource": {
            "replicationRules": [
                {
                    "destinationBucketId": "<destination bucket id>",
                    "fileNamePrefix": "master_data/",
                    "includeExistingFiles": false,
                    "isEnabled": true,
                    "priority": 1,
                    "replicationRuleName": "replicate-master-data"
                }
            ],
            "sourceApplicationKeyId": "<source application key id/>"
        }
    }
}
Finally, call b2_update_bucket with the following message body to configure the destination bucket:
{
  "accountId": "<destination account id>",
  "bucketId": "<destination bucket id>",
  "replicationConfiguration": {
    "asReplicationDestination": {
      "sourceToDestinationKeyMapping": {
        "<source application key id/>": "<destination application key id>"
      }
    },
    "asReplicationSource": null
  }
}
You can check your work in the web interface:

Note that the “file prefix” and “include existing buckets” configuration is not currently visible in the web interface.
Viewing Replication Rules
If you are planning to use the B2 Native API to set up replication rules, it’s a good idea to experiment with the web interface first and then call b2_list_buckets to examine the replicationConfiguration property.
Here’s an extract of the configuration of a bucket that is both a source and destination:
{
  "accountId": "e92db1923dce",
  "bucketId": "2e2982ddebf12932830d0c1e",
  ...
  "replicationConfiguration": {
    "isClientAuthorizedToRead": true,
    "value": {
      "asReplicationDestination": {
        "sourceToDestinationKeyMapping": {
          "000437047f876700000000005": "003e92db1923dce0000000004"
        }
      },
      "asReplicationSource": {
        "replicationRules": [
          {
            "destinationBucketId": "0463b7a0a467fff877f60710",
            "fileNamePrefix": "",
            "includeExistingFiles": true,
            "isEnabled": true,
            "priority": 1,
            "replicationRuleName": "replication-eu-to-us"
          }
        ],
        "sourceApplicationKeyId": "003e92db1923dce0000000003"
      }
    }
  },
  ...
}
Checking a File’s Replication Status
To see the replication status of a file, including whether the file is itself a replica, call b2_get_file_info and examine the replicationStatus field. For example, looking at the same file as in the web interface section above:
{
  ...
  "bucketId": "548377d0a467fff877f60710",
  ...
  "fileId": "4_z548377d0a467fff877f60710_f115587450d2c8336_d20220406_
m162741_c000_v0001066_t0046_u01649262461427",
  ...
  "fileName": "Logo Slide.png",
  ...
  "replicationStatus": "completed",
  ...
}
This short video runs through the various API calls:
How Much Will This Cost?
The majority of fees for Cloud Replication are identical to standard B2 Cloud Storage billing: You pay for the total data you store, replication (download) fees, and for any related transaction fees. For details regarding billing, click here.
The replication fee is only incurred between cross-regional accounts. For example, a source in the U.S. West and a destination in EU Central would incur replication fees, which are priced identically to our standard download fee. If the replication rule is created within a region—for example, both source and destination are located in our U.S. West region—there is no replication fee.
How to Start Replicating
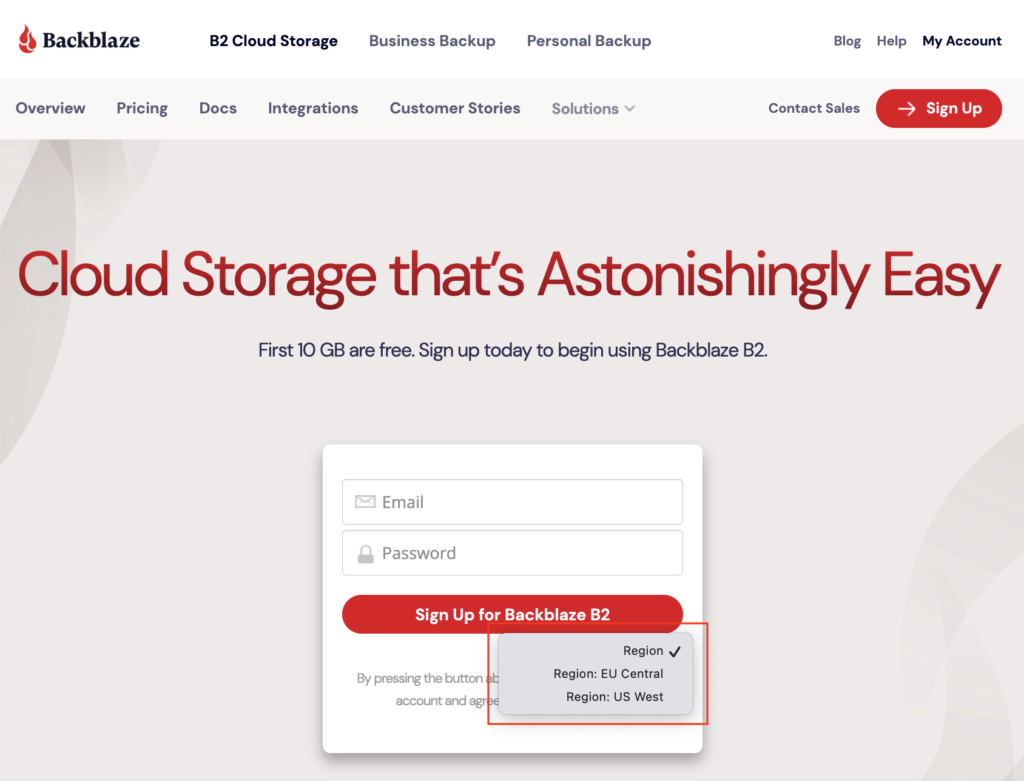
Watch the Backblaze Blog for an announcement when we make Backblaze Cloud Replication generally available (GA), likely early next month. As mentioned above, you will need to set up a payment method on accounts included in replication rules. If you don’t yet have a Backblaze B2 account, or you need to set up a Backblaze B2 account in a different region from your existing account, sign up here and remember to select the region from the dropdown before hitting “Sign Up for Backblaze B2.”
The post Looking Forward to Backblaze Cloud Replication: Everything You Need to Know appeared first on Backblaze Blog | Cloud Storage & Cloud Backup.