Post Syndicated from Shirin Bano original https://aws.amazon.com/blogs/architecture/field-notes-integrating-active-directory-federation-service-with-aws-single-sign-on/
Enterprises use Active Directory Federation Services (AD FS) with single sign-on, to solve operational and security challenges by allowing the usage of a single set of credentials for multiple applications. This improves the user experience and helps manage access to the applications in a centralized way.
AWS offers a native cloud-based single sign-on solution called AWS Single Sign-On (AWS SSO). This service helps centrally manage SSO access and user permissions to all the AWS accounts and cloud applications. AWS SSO supports identity federation with SAML 2.0, allowing integration with AD FS solutions. This helps enterprises migrate to AWS, who have a hybrid environment with on-premises AD FS and need access to AWS accounts and cloud applications. Users can sign in to the AWS SSO portal with their corporate credentials thus reducing the admin overhead of maintaining separate credentials on AWS SSO.
Note: you can skip AD FS and connect your Active Directory to AWS SSO directly, instead. This gives you a simpler integration and with AD FS, enables you to use WebAuthn and TOTP MFA, and gives you a free and easy SAML IdP for apps. However, if you have specific constraints that require using AD FS, this blog will help you configure that.
This section explains the authentication flow with AD FS and AWS SSO integration. You can use Identity Provider (AD FS) initiated or Service Provider (AWS SSO) initiated authentication methods.
Following are the steps involved for both Identity Provider (IdP) and Service Provider (SP) initiated authentication methods:
1. IdP Initiated Authentication Flow
Authentication Flow:
You access the SSO user-portal URL. The authentication flow depends on how you initiate the login request. There are 2 methods in which you can access the SSO user-portal.
IdP (AD FS) Initiated Authentication Method
1.a. This method is followed when users access the AD FS SSO user-portal URL. Some organizations prefer this method when they have a federation system built into their on-premises network and they start using AWS Services. The AWS SSO and AD FS integration allows them to continue using the AD FS user-portal URL, and to login even after they move to AWS.
The following diagram outlines the architecture for the IdP (AD FS) Initiated Authentication Method.

2. SP Initiated Authentication Flow
The following diagram outlines the architecture for an SP Initiated Authentication flow.

SP (AWS SSO) Initiated Authentication Method
- This method is followed when users access the AWS SSO user-portal URL, for example, https://d-12345c789.awsapps.com/start.
- Once the request arrives at the AWS SSO endpoint, it is redirected to the AD FS user-portal URL.
- The user then goes to the AD FS user-portal URL, for example, https://acmecorp.com/adfs/ls after which the traffic flow is similar to the IdP Initiated Authentication method.
- You are asked to enter the username and password after which it is authenticated against the Active Directory.
- You receive a SAML assertion, as an authentication response, from AD FS. The assertion identifies you and includes attributes about you as the user.
- You are redirected to the AWS SSO endpoint and it posts the SAML Assertion.
- AWS SSO endpoint calls the AssumeRoleWithSAML API to the STS service for temporary security credentials on your behalf. This creates a console sign-in URL that uses those credentials.
- AWS sends the sign-in URL back to you as a redirect. You are then re-directed to the AWS SSO Application page, where you can choose the account to log into or the cloud/custom application to use.
Process to Integrate AD FS with AWS SSO
In this section, we show the configurations needed to establish a trust between AD FS and AWS SSO. This allows you to log into AWS accounts using the credentials configured in AD FS.
Step 1: Build SAML Trust Relationship between AD FS and AWS SSO
- Get AWS SSO SAML metadata information.
- Log into the AWS account where you have configured AWS SSO. On the AWS SSO console, select Dashboard and then Choose your identity source.
- On the settings page, select Change, next to the Identity source.
- Change the identity source and select External identity provider.
- Under Service provider metadata, select show individual metadata information.
- Make a note of AWS SSO Sign-in URL, AWS SSO ACS URL, and AWS SSO issuer URL, as these will be used to configure AWS SSO as the relying party in the AD FS settings.
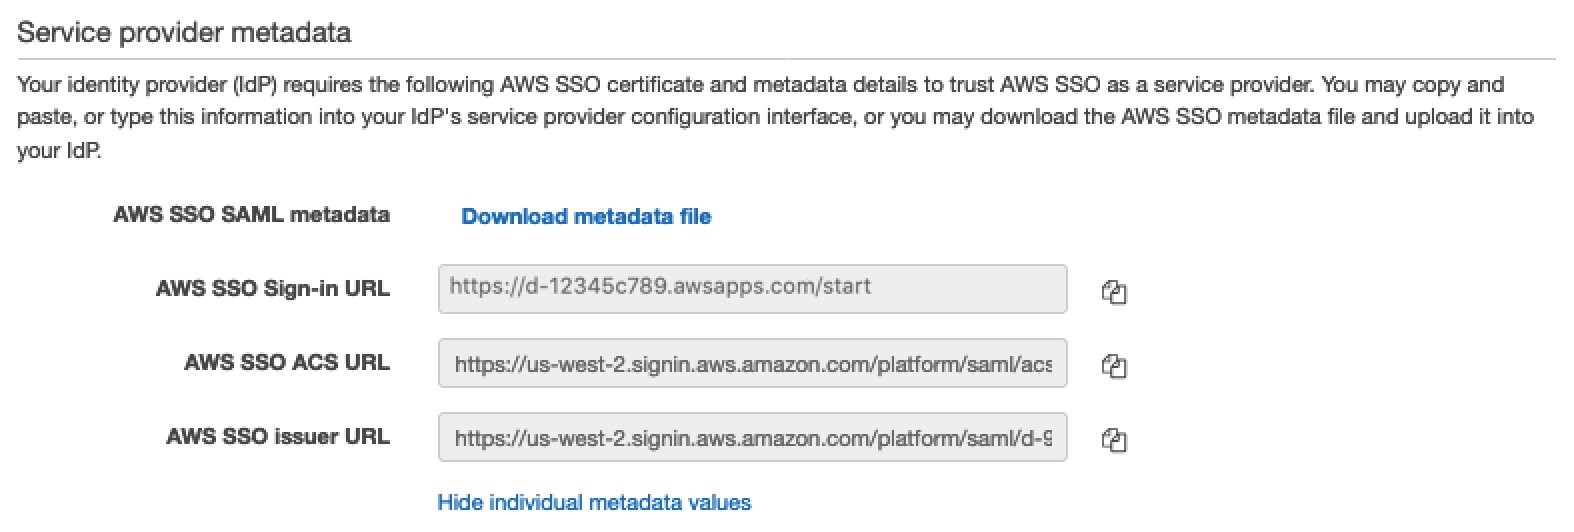
Figure 1 – Service Provider metadata
Add AWS SSO as a Relying Party in AD FS
- Go to AD FS Management from the Tools menu in the Server Manager.
- Select Add Relying Party Trust.
- For Add Relying Party Trust Wizard, choose Claims aware and select Start.
- For Select Data Source, select Enter data about the relying party manually.
- For Specify Display Name add a user-friendly name for example – AWS SSO.
- For Configure URL, select the option Enable support for the SAML 2.0 WebSSO protocol.
- Enter the value for AWS SSO ACS URL that you got in the previous step (Figure-1).
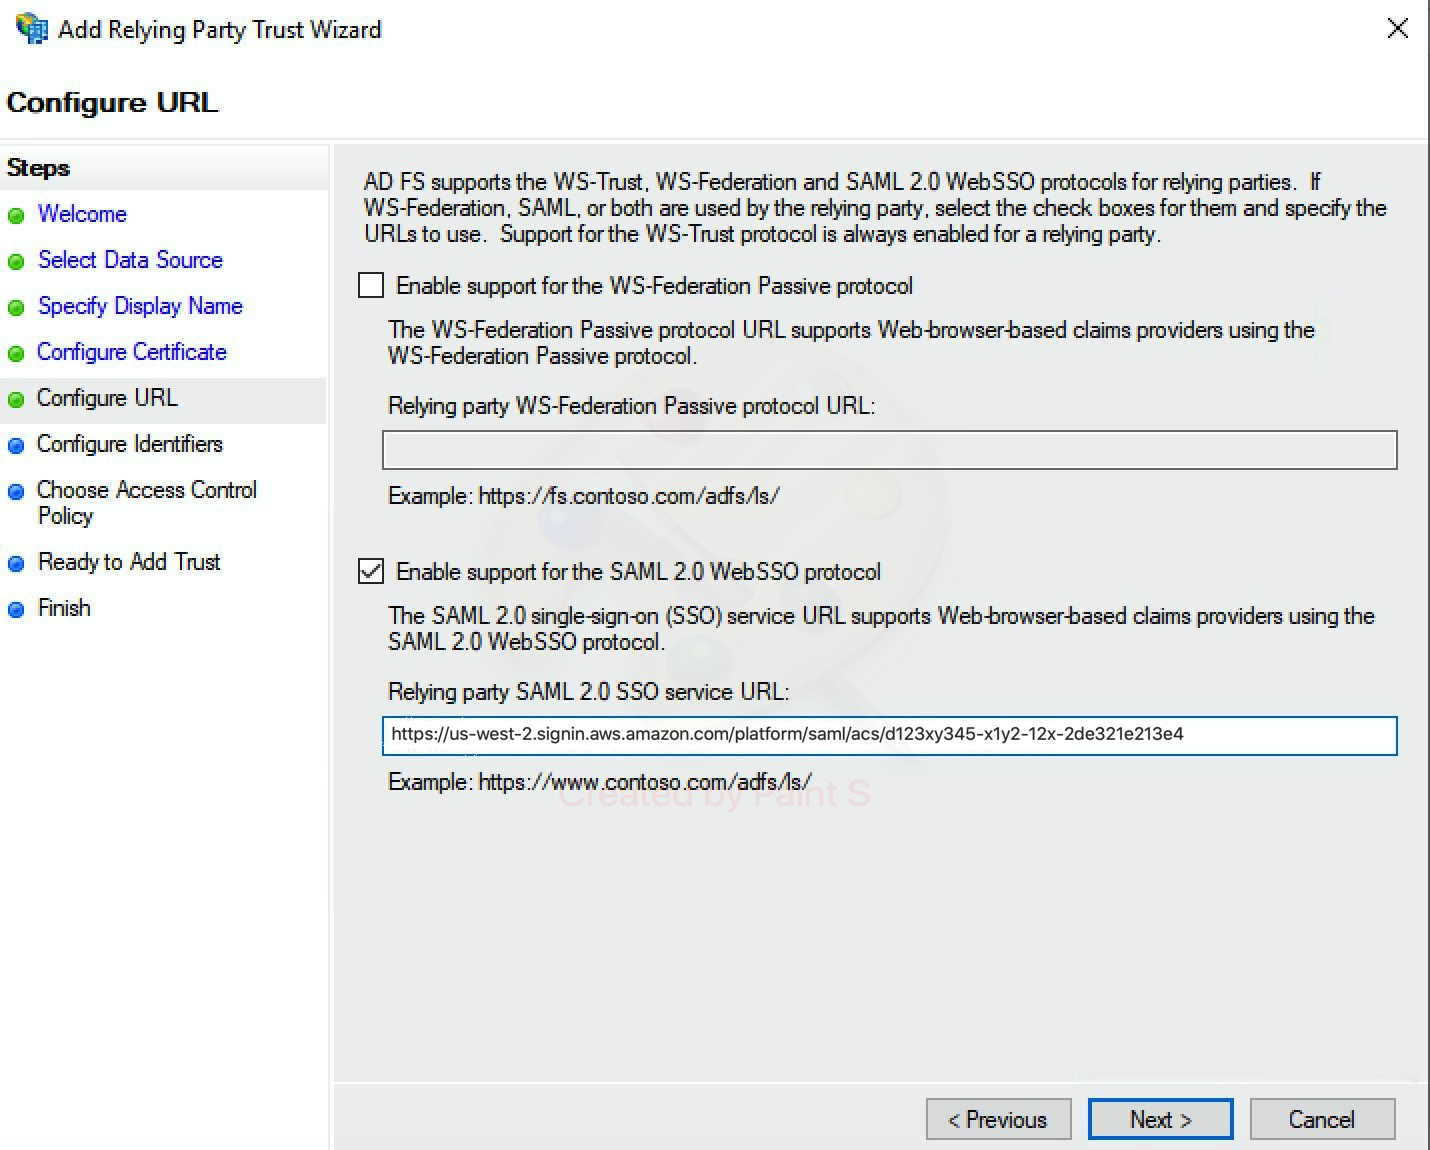
Figure 2 – Add AWS SSO as a Relying Party in AD FS
8. For Configure Identifiers, add the AWS SSO Issuer URL (Figure-1), in the Relying party trust identifiers box and select Add.
9. Leave the rest of the configuration as default and click Next until the relying party trust is successfully added.

Figure 3 – Configure Identifiers
Add Claim Issuance Policy
- Select the Relying Party Trust you created in the previous step and go to Edit Claim Issuance Policy.
- In the Edit Claim Issuance Policy for AWS SSO dialog box, select Add rule.
- In the Add Transform Claim Rule Wizard from the drop-down menu for Claim rule template, select Transform an incoming claim.
- Enter a name for the claim rule, for this example – Rule for SSO.
- Select UPN for Incoming claim type, Name ID for Outgoing claim type and Email for Outgoing name ID format.

Figure 4 – Transform Claim Rule
Note: The rule language for the above rule is:
c:[Type == "http://schemas.xmlsoap.org/ws/2005/05/identity/claims/upn"]
=> issue(Type = "http://schemas.xmlsoap.org/ws/2005/05/identity/claims/nameidentifier", Issuer = c.Issuer, OriginalIssuer = c.OriginalIssuer, Value = c.Value, ValueType = c.ValueType, Properties["http://schemas.xmlsoap.org/ws/2005/05/identity/claimproperties/format"] = "urn:oasis:names:tc:SAML:1.1:nameid-format:emailAddress");
Get AD FS metadata from the Windows machine
1. Enter this meta-data document endpoint URL, https://acmecorp.com/federationmetadata/2007-06/federationmetadata.xml, in your web browser, replacing acmecorp.com with your domain used for AD DS.
2. Download the federationmetadata.xml file on your local machine as it will be needed for the AWS SSO configuration.
Upload AD FS metadata to AWS SSO
- From the AWS SSO console, select Dashboard and go to Choose your identity source.
- On the settings page, select Change next to the Identity source.
- Change the identity source and select External identity provider.
- Under Identity provider metadata, Browse and upload the AD FS metadata.
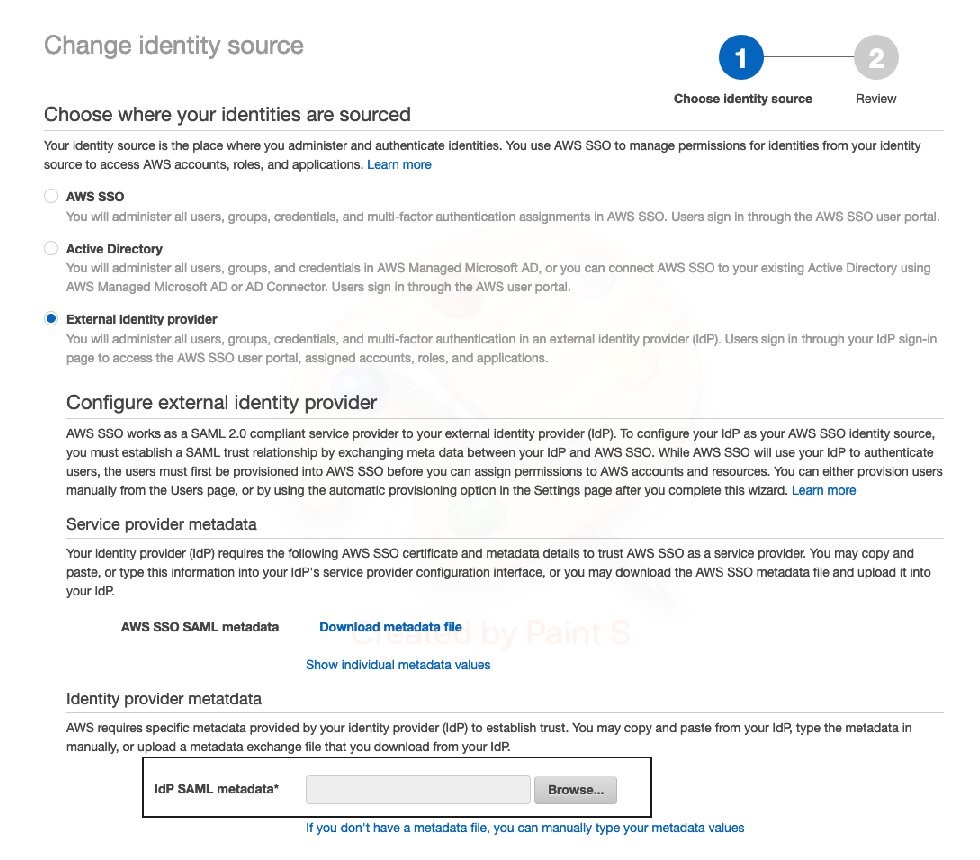
Figure 5 – Upload AD FS metadata to AWS SSO
Step 2: Provision Users in AWS SSO
You must provision users in AWS SSO, to make it aware of the users in your IdP. There are 2 ways of provisioning the users in AWS SSO:
- Automatic Provisioning
With SAML, we do not have a way to query the IdP to learn about the users and groups. However, AWS SSO support System for Cross-domain Identity Management (SCIM) v2.0 standard. With SCIM you can keep the identities in AWS SSO in sync with the identities from your IdP which support SCIM (like Azure AD). Refer to the guide on Automatic Provisioning for more information.
- Manual Provisioning
Some IdPs do not support SCIM. In that case, you will need to manually provision the users in AWS SSO. The username in AWS SSO should be identical to the username configured in your IdP. In this setup, we are using the email address as the username. Adding users manually can be tedious and is prone to errors. You can implement this solution to programmatically create users and groups into AWS SSO from a CSV file with user and group information.
For this demonstration, we show how to manually provision the user in AWS SSO. You can also go with Automatic Provisioning, if your IdP supports it.
Manually Provision user in AWS SSO
- Add User from the Users section in AWS SSO console
- For Username, enter the email address of the user that was created in Windows AD
Note: Since the Outgoing NameId format is set as email address (Figure 3), the username should match the email address of the user configured in Windows AD. Make sure that the values entered for Username and Email address exactly match the values in AD DS, as the credentials are verified against the values in AD DS.
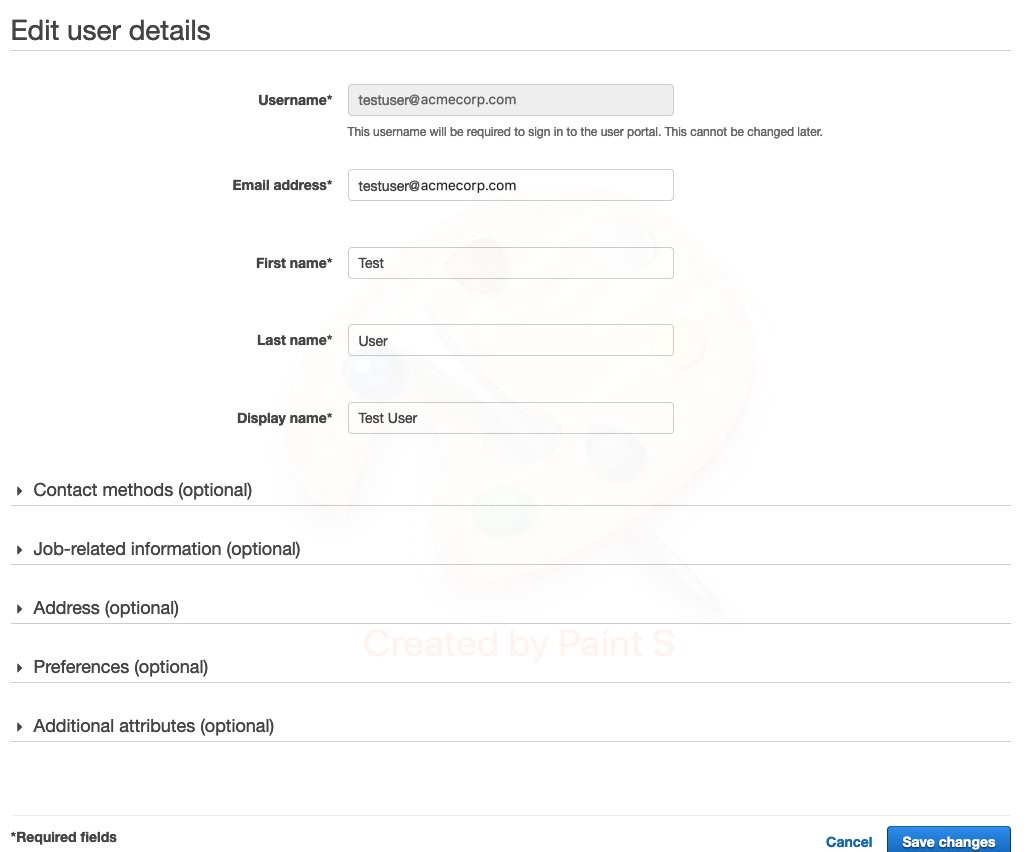
Figure 6 – Edit user details
Next, we show how to create a new Permission Set and how a user is assigned to an AWS account. If you already have the permission set configured and users assigned to accounts, skip to Step-4 to verify your settings.
Step 3: Manage Access Permissions for the User
This step defines the permission boundaries for the user provisioned in AWS SSO that allows them to access AWS Accounts.
AWS SSO is integrated with AWS Organizations and users have the capability to use their IdP credentials to log into the accounts in the Organization. You can access the primary (master) account as well as the member accounts. Permission sets define the level of access for the users and groups for the AWS accounts. Refer to this Permission Sets document for more details.
In this example, we create a custom permission set for Read Only access to CloudWatch Logs for the log archive account in the organization.
We have not covered how to manage access to your custom application with AWS SSO. For more details on this, review our documentation on Manage SSO to your applications.
Create a Custom Permission Set
- On the AWS SSO Console, choose AWS Accounts and then select Permission Sets. Select Create permission Set.
- Select Create a custom permission set on the Create new permission set page and select Next.
- Enter Name and description for the Permission Set and select Attach AWS managed policies.
- Choose CloudWatchLogsReadOnlyAccess, from the list of AWS managed policies
Assign a User to AWS Accounts
This step is used to define which AWS Accounts a user can access. It also defines the Permission Set that the user can use while accessing an AWS Account.
- On the AWS SSO console, select AWS Accounts and choose the AWS Organizations tab. You will see the list of accounts in the organization.
- Select the account(s) for which the user should have access. You can select multiple accounts.
- Choose Assign users and select the user from the list of users. You have the option of selecting multiple users or groups.
- In the next step, select the permission set we created in the previous step.
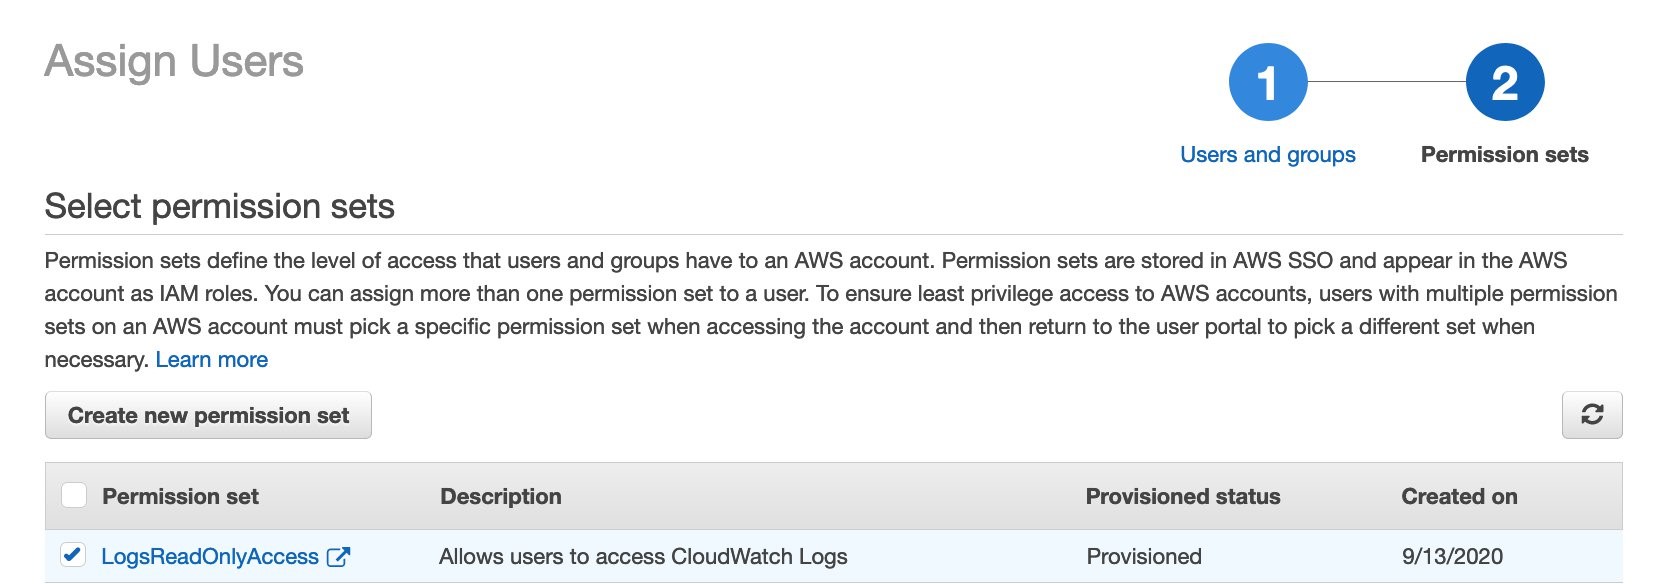
Figure 7 – Assign a User to AWS Accounts
5. Select Finish.
Step 4: Verify your settings
The AD FS and AWS SSO configurations are now complete. It is now time to verify the configurations.
1. If you follow the SP initiated authentication method and entered the AWS SSO user-portal URL, it will re-direct you to the IdP URL and you will land on the same page.You should see the following login page:
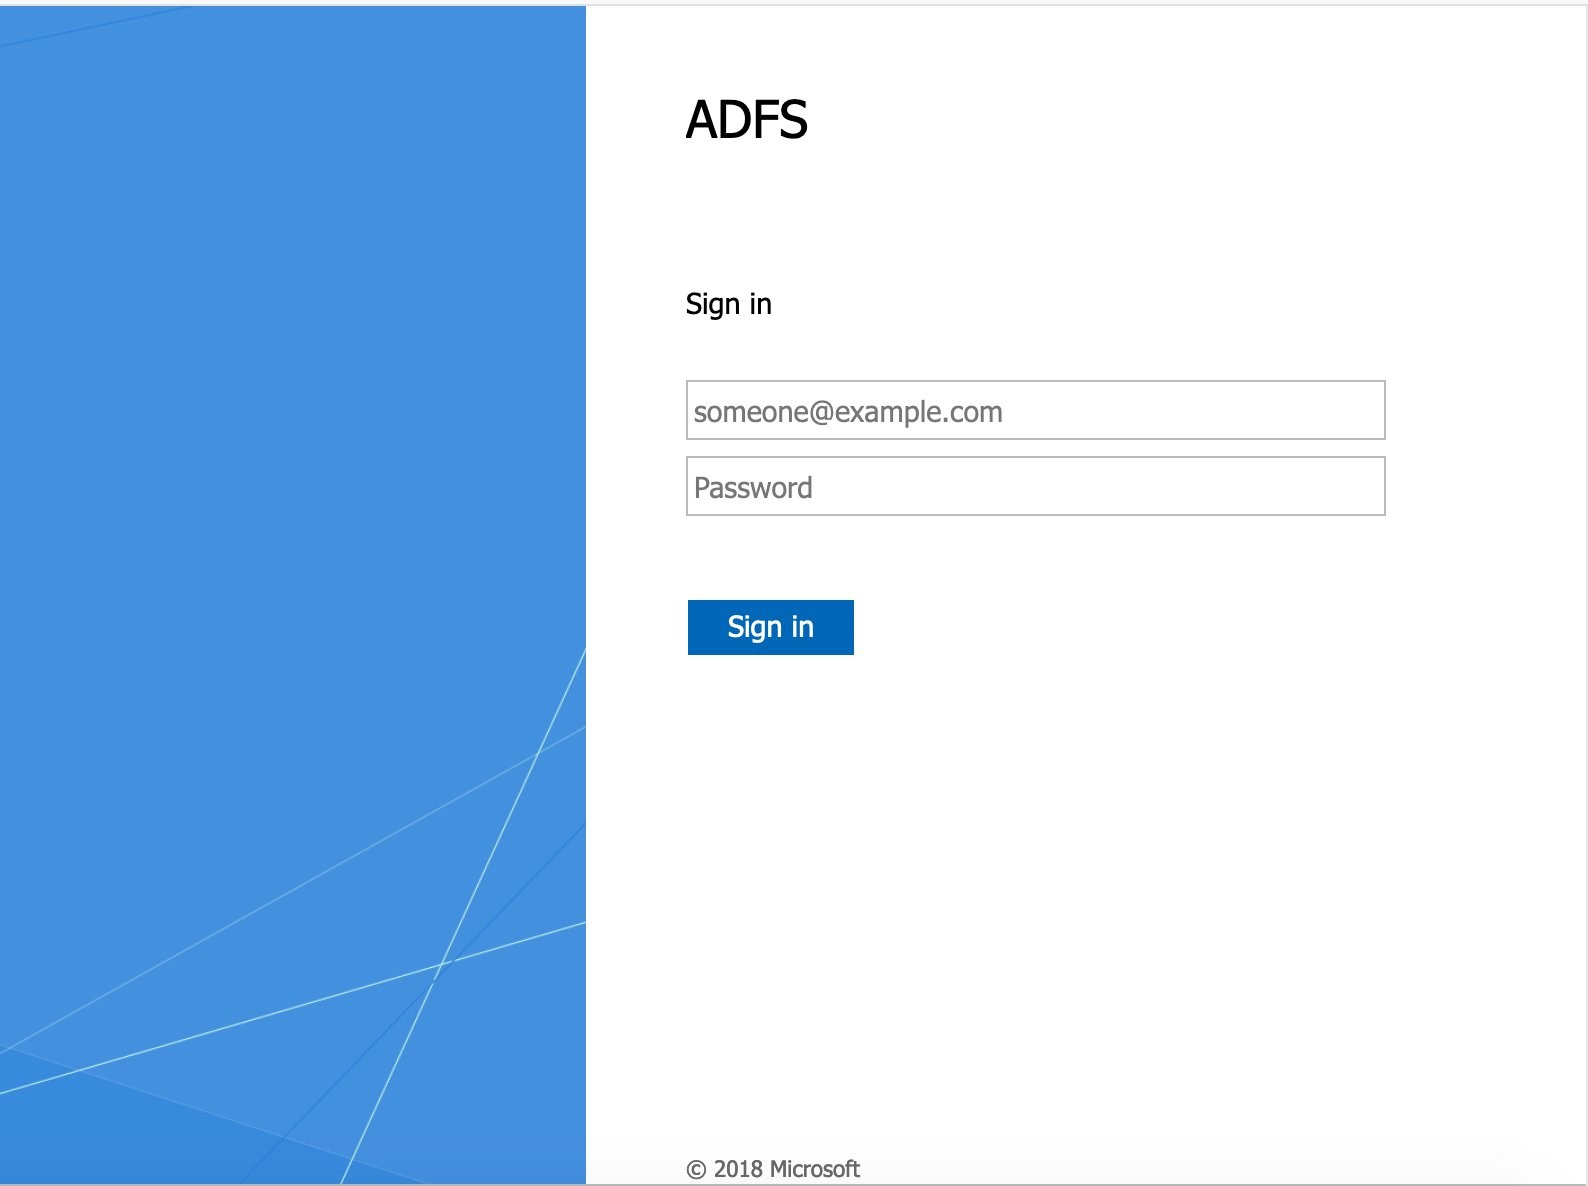
Figure 8 – AD FS Login page
If you follow the SP initiated authentication method and entered the AWS SSO user-portal URL, it will re-direct you to the IdP URL and you will land on the same page.
2. After you enter the user credentials, i.e the email address and password for the user. You will be re-directed to the AWS SSO page. All the accounts and applications for which the user is provisioned for are shown on the following page. You can see the permission set(s) for the user after selecting the account
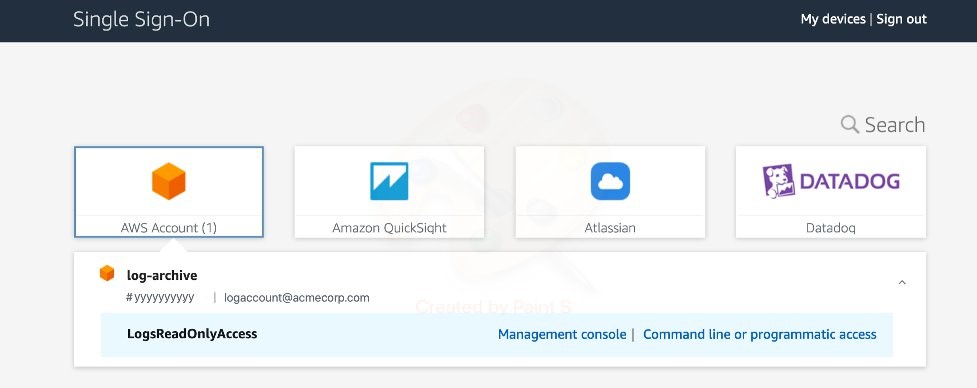
Figure 9 – AWS SSO Sign On Page
3. Select Management console to access the console of the account.
4. Go to the CloudWatch Console and then to logs to verify your access.
Conclusion
In this walk-through, we showed how you can use your corporate credentials in AD FS, to log in to your AWS account and cloud applications. This eliminated the need to maintain separate credentials on AWS, thereby giving a better user experience. We did this by establishing a trust between AD FS and AWS SSO. We described the steps on how to manually add users in AWS SSO. We also demonstrated how to create a permission set and assign a user to an account using that permission set. In addition, we provided illustrations of what you should see when accessing AWS SSO user-portal URL (SP Initiated) or the AD FS user-portal URL (IdP Initiated).
We hope this post helps you to understand how the AWS SSO integrates with Windows AD FS.
If you have any questions or feedback, please leave a comment below.