Tag Archives: AWS Single Sign-On (SSO)

Top 2021 AWS service launches security professionals should review – Part 2

Post Syndicated from Marta Taggart original https://aws.amazon.com/blogs/security/top-2021-aws-service-launches-security-professionals-should-review-part-2/

In Part 1 of this two-part series, we shared an overview of some of the most important 2021 Amazon Web Services (AWS) Security service and feature launches. In this follow-up, we’ll dive deep into additional launches that are important for security professionals to be aware of and understand across all AWS services. There have already been plenty in the first half of 2022, so we’ll highlight those soon, as well.

AWS Identity

You can use AWS Identity Services to build Zero Trust architectures, help secure your environments with a robust data perimeter, and work toward the security best practice of granting least privilege. In 2021, AWS expanded the identity source options, AWS Region availability, and support for AWS services. There is also added visibility and power in the permission management system. New features offer new integrations, additional policy checks, and secure resource sharing across AWS accounts.
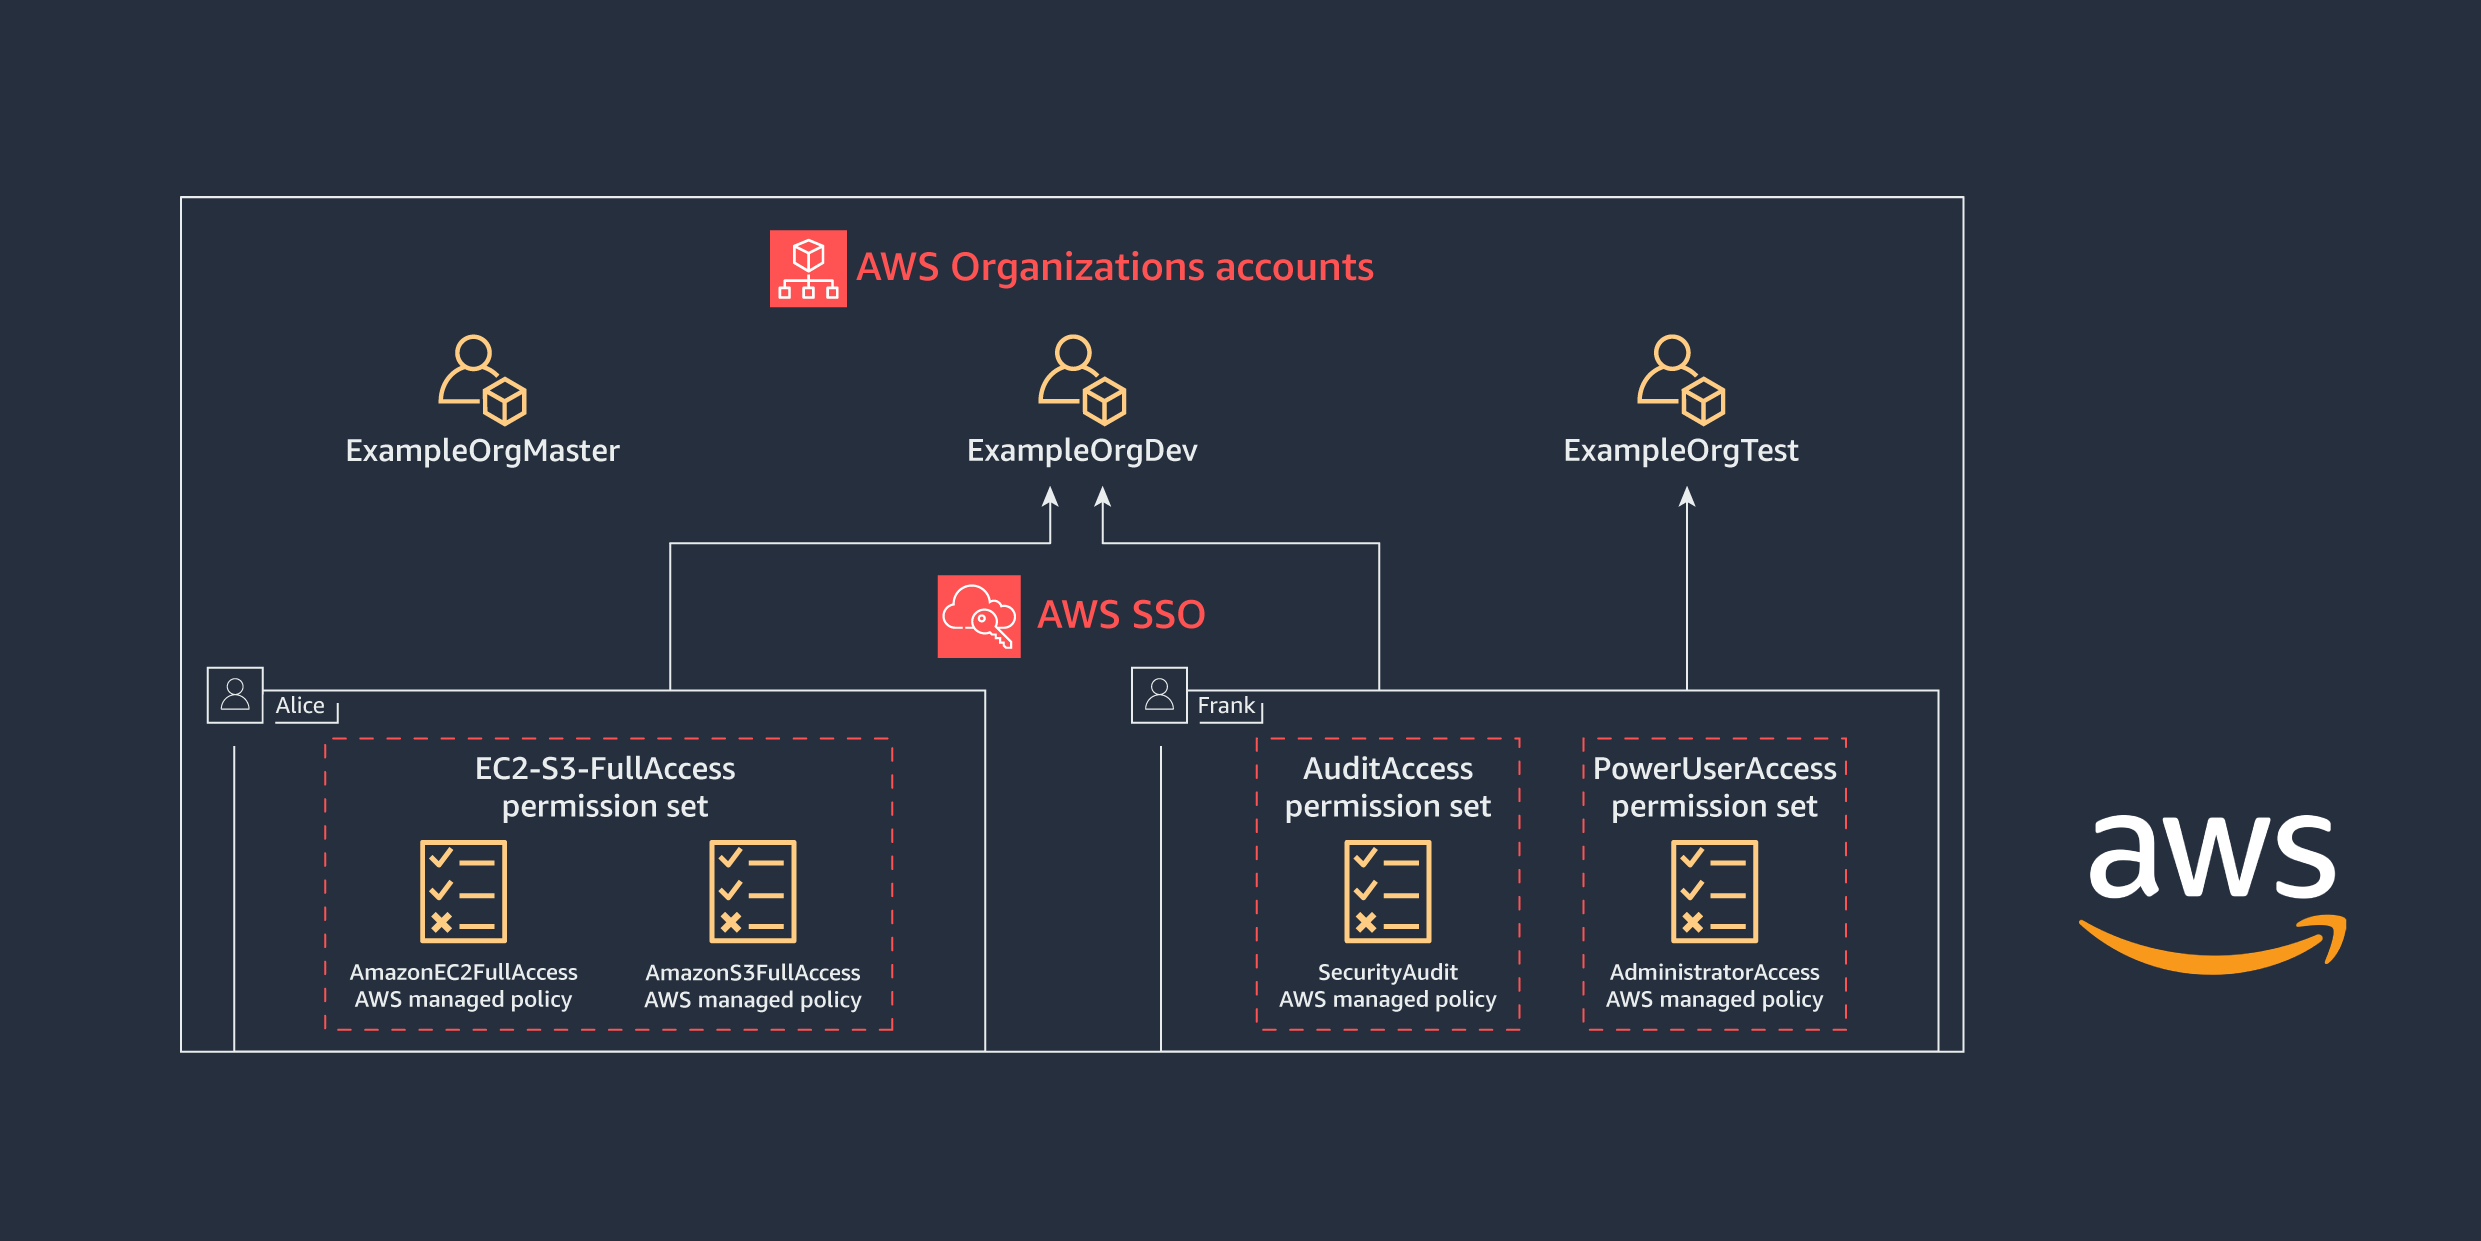
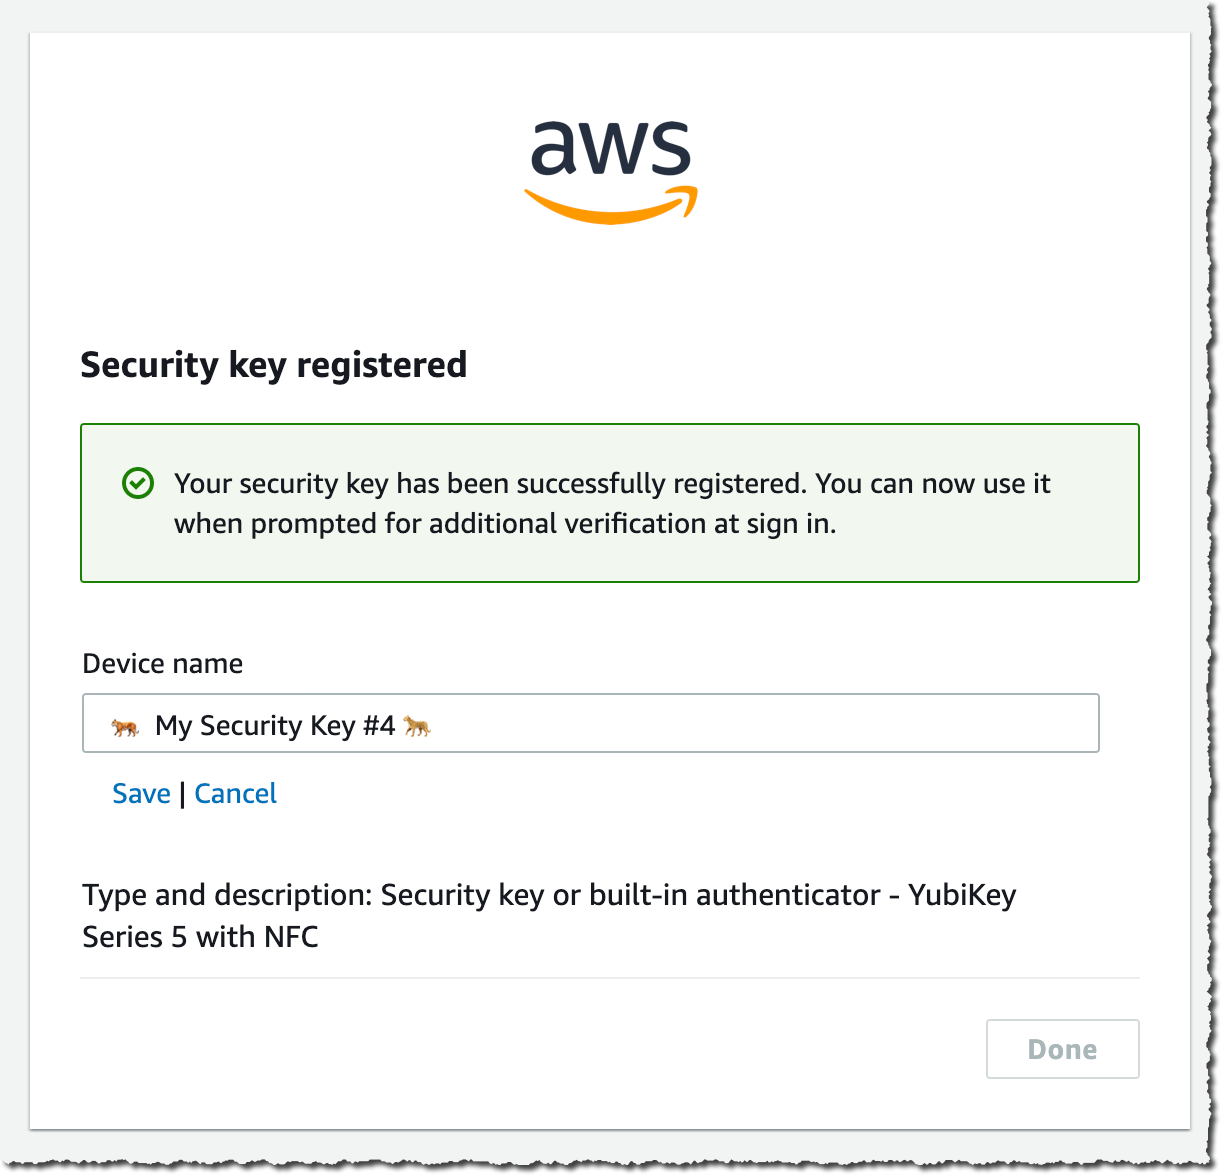
AWS Single Sign-On

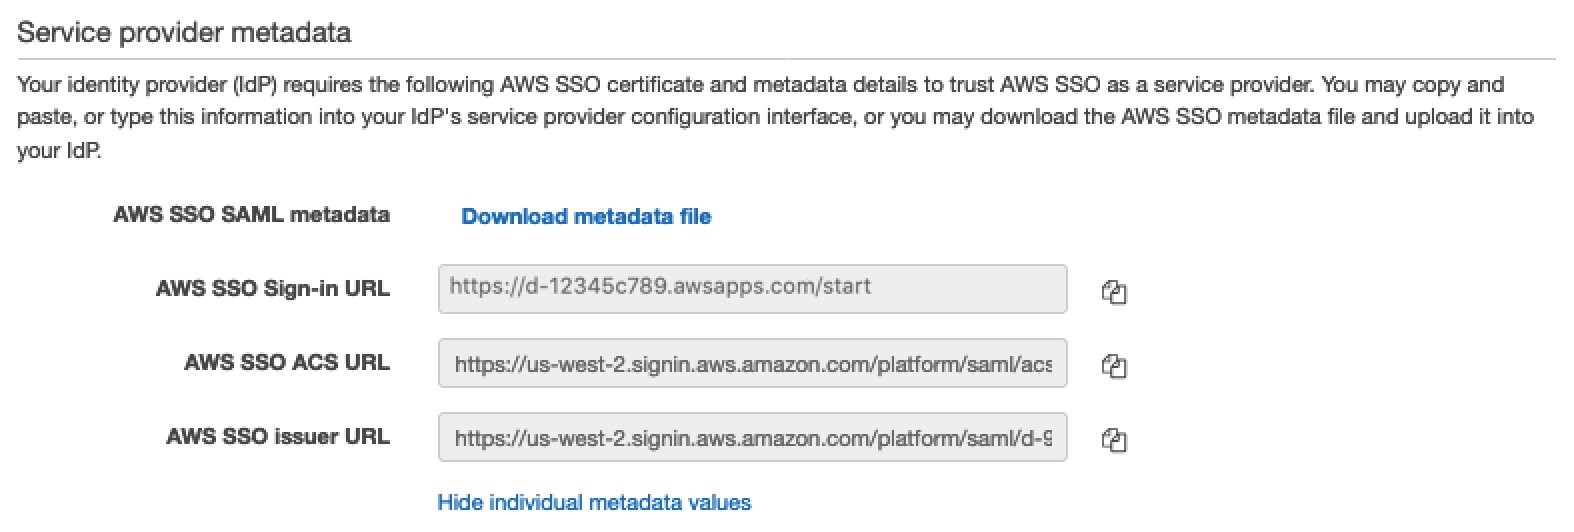
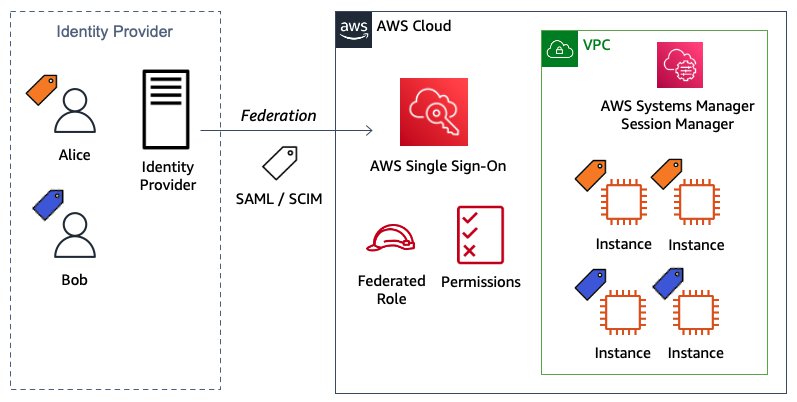
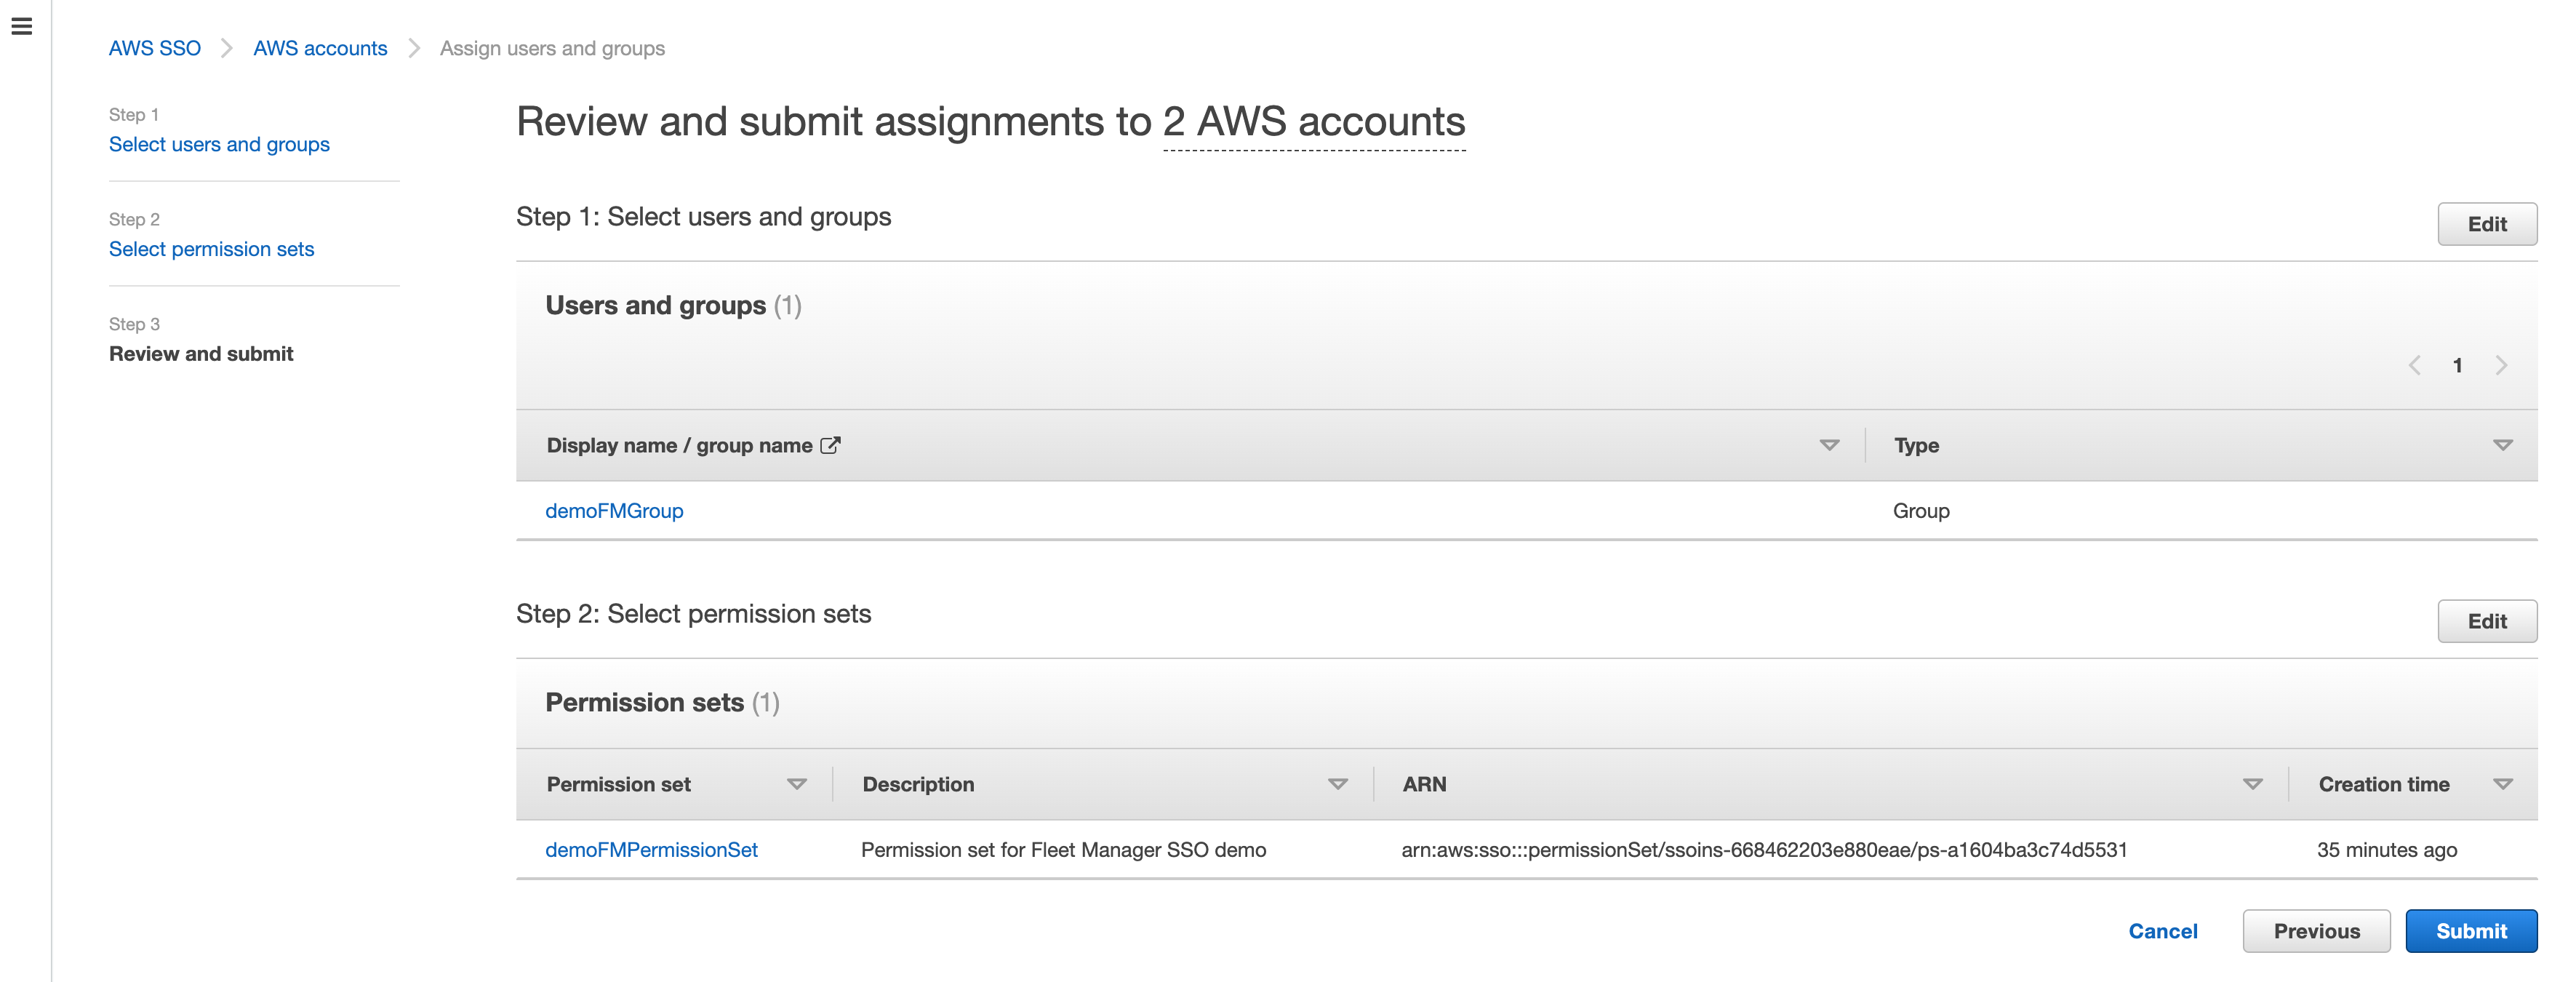
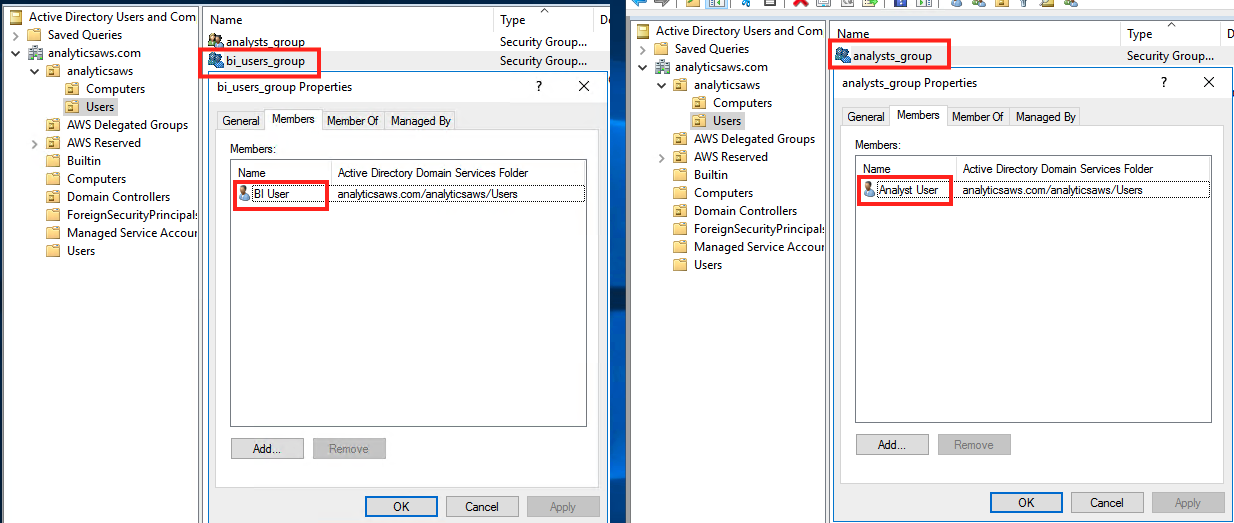
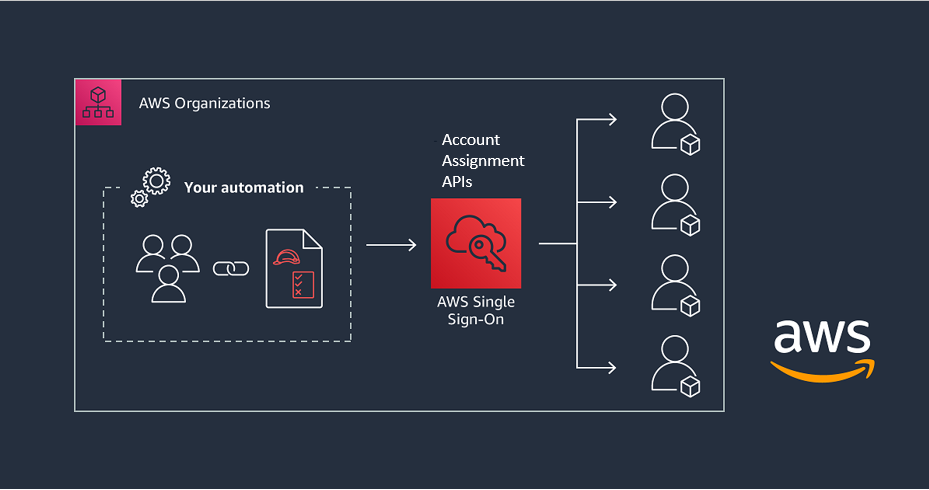
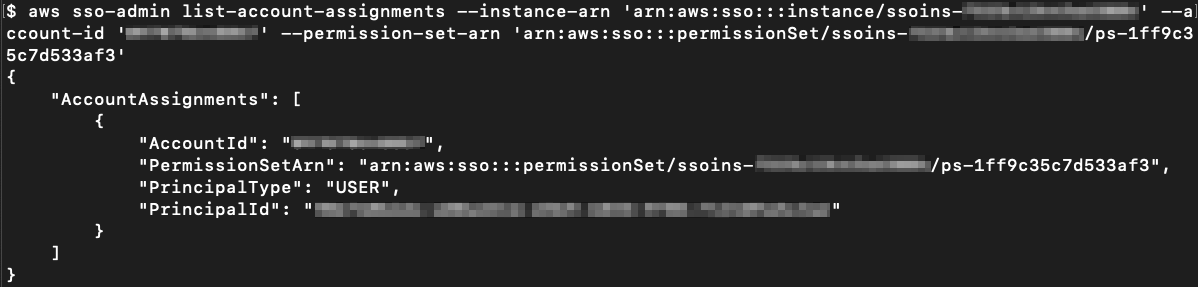
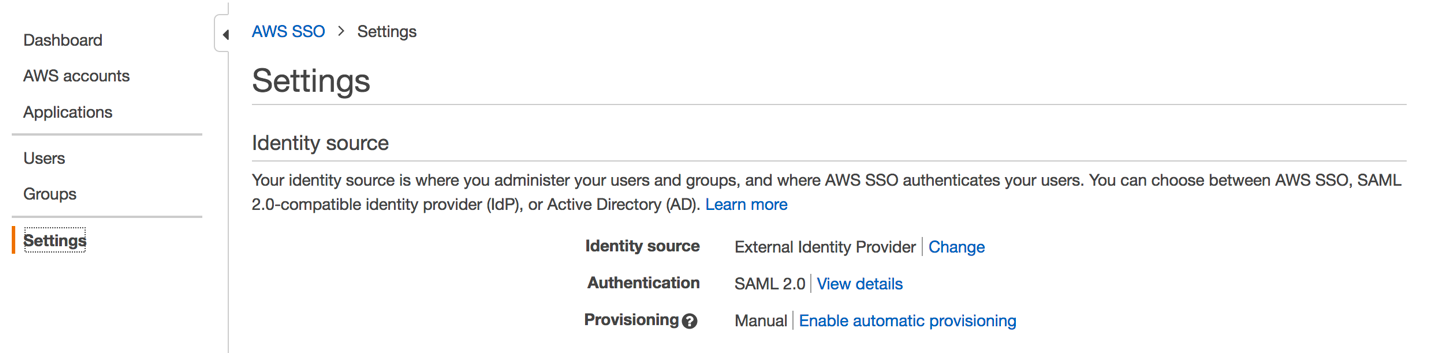
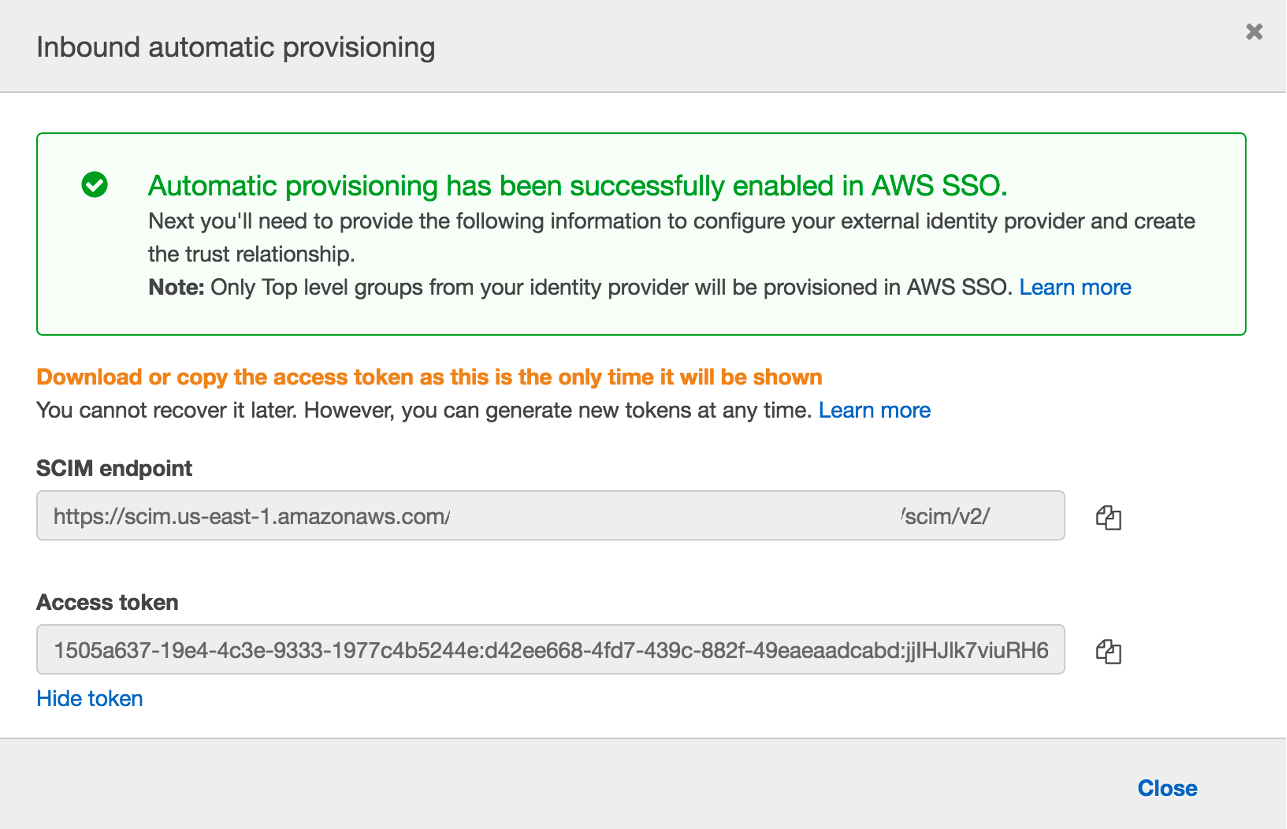
For identity management, AWS Single Sign-On (AWS SSO) is where you create, or connect, your workforce identities in AWS once and manage access centrally across your AWS accounts in AWS Organizations. In 2021, AWS SSO announced new integrations for JumpCloud and CyberArk users. This adds to the list of providers that you can use to connect your users and groups, which also includes Microsoft Active Directory Domain Services, Okta Universal Directory, Azure AD, OneLogin, and Ping Identity.

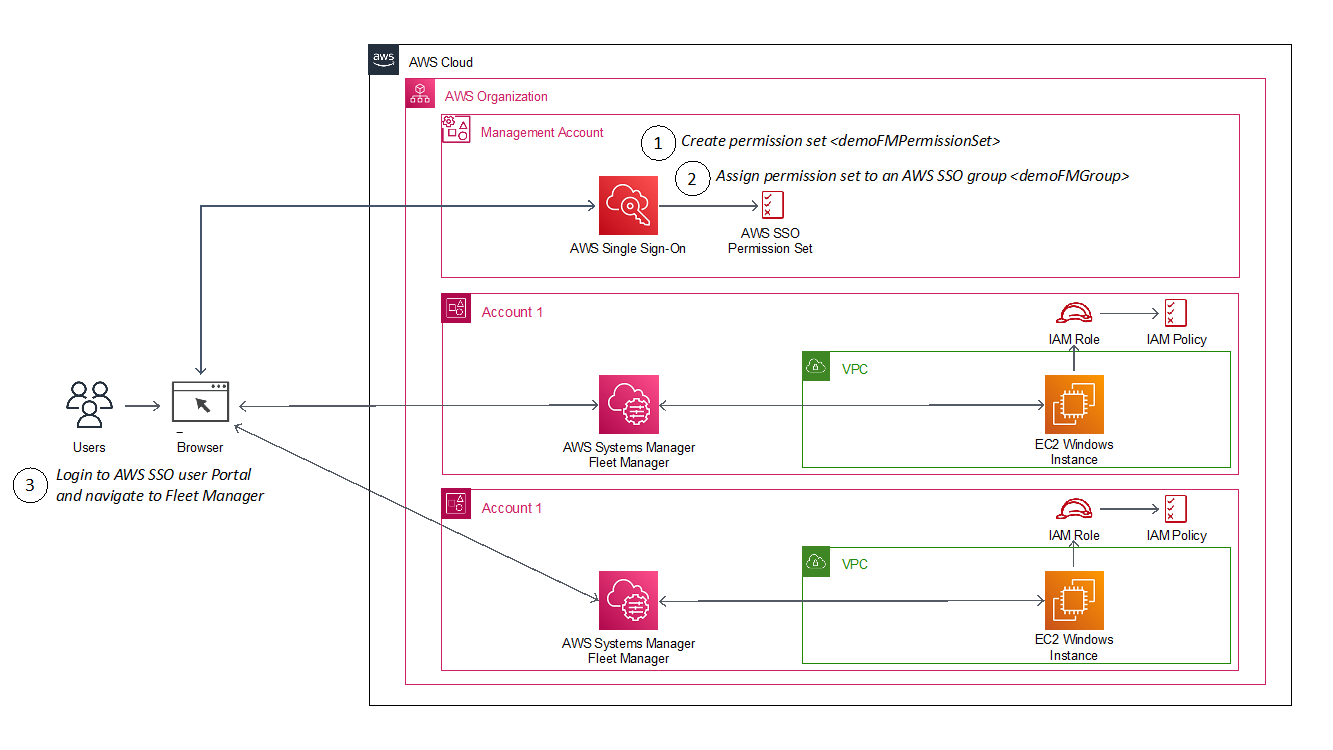
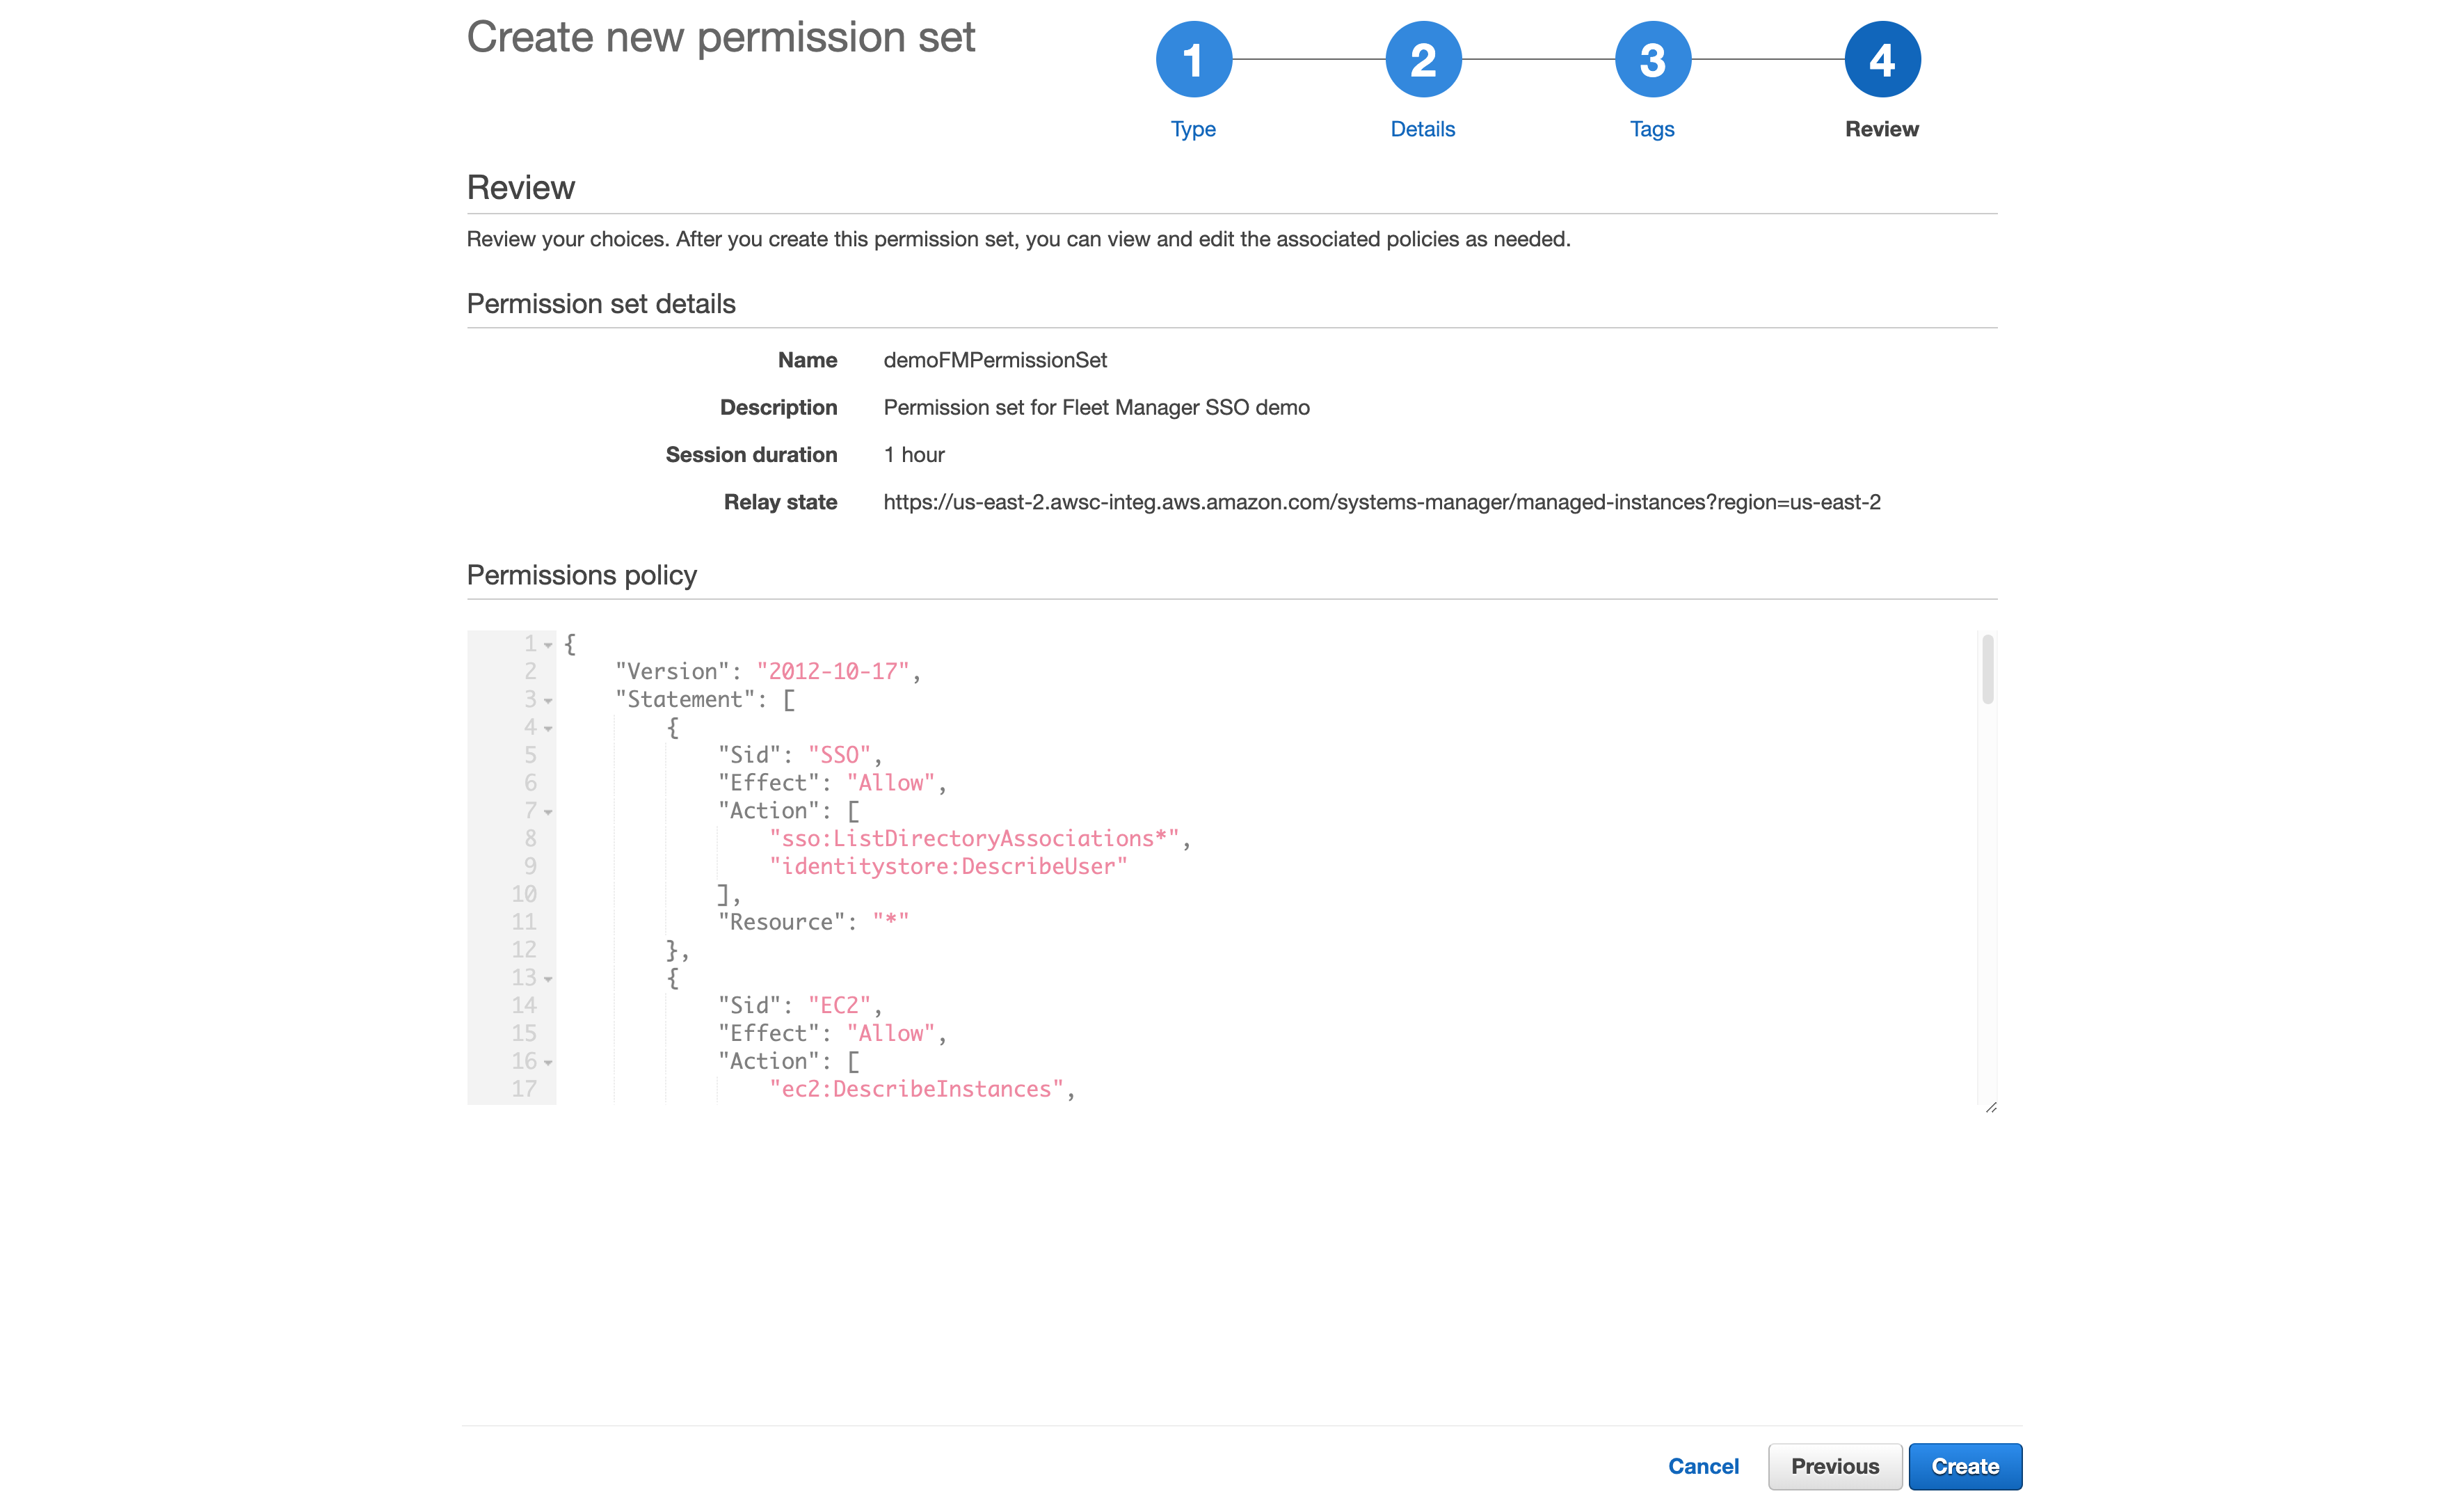
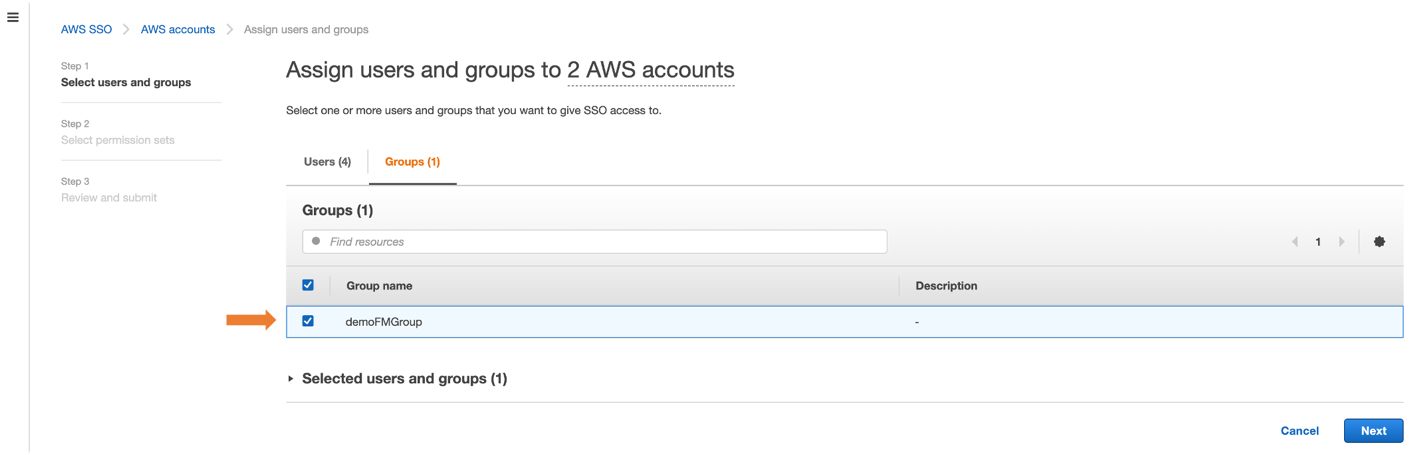
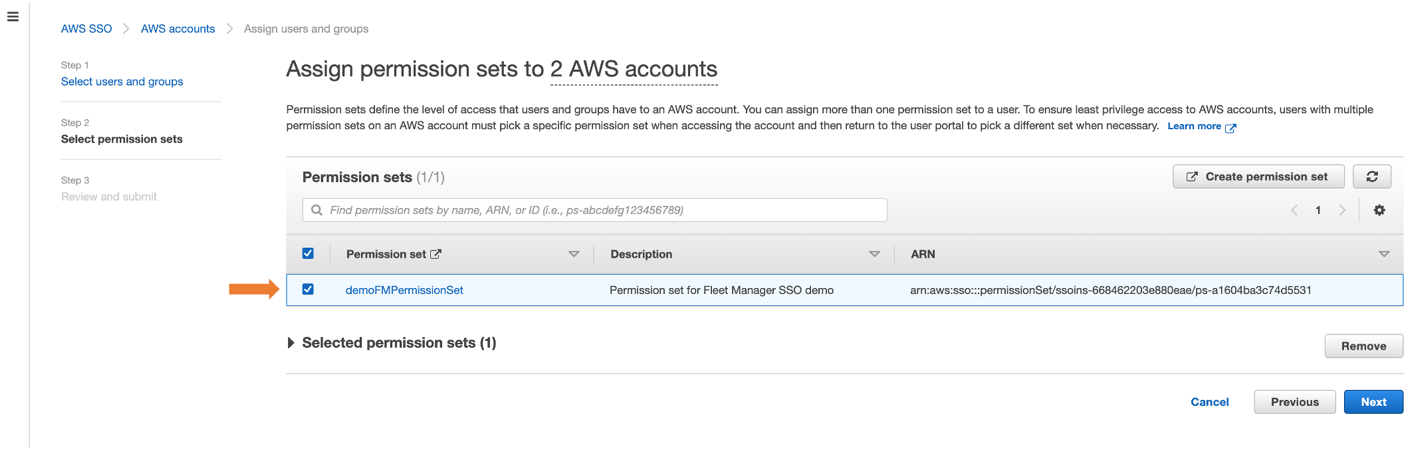
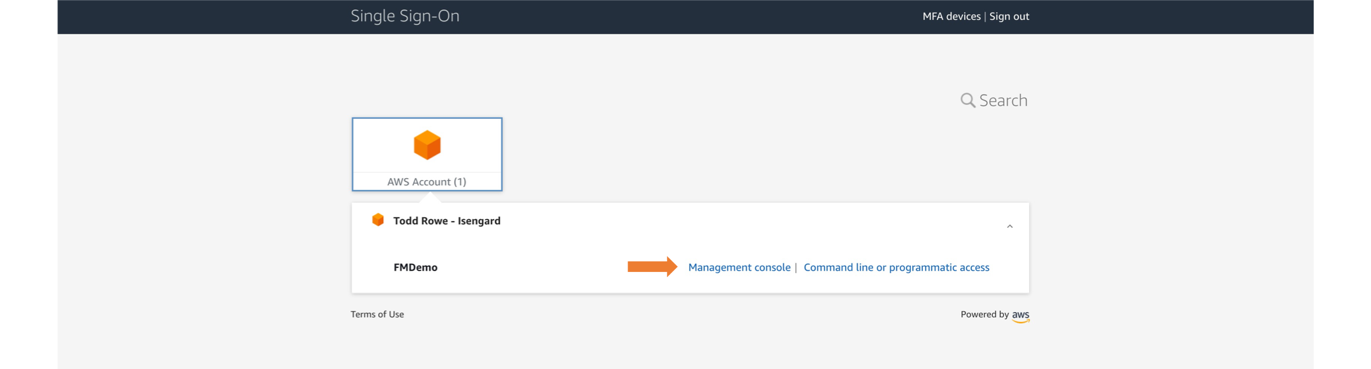
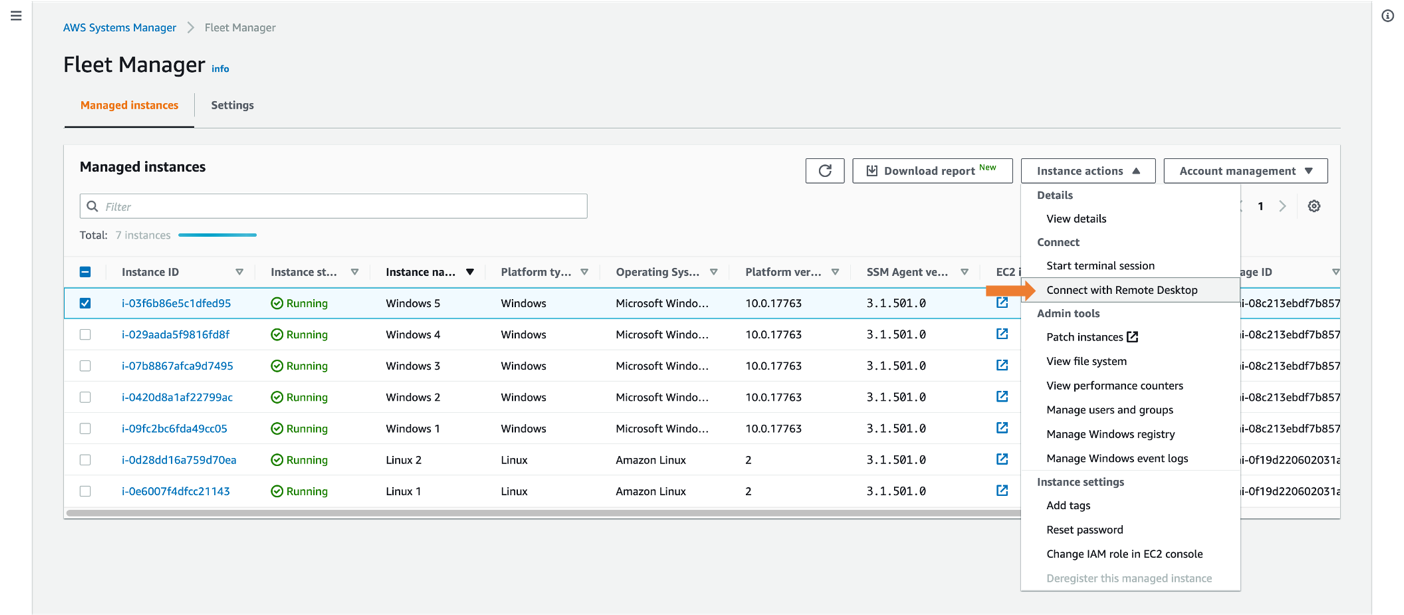
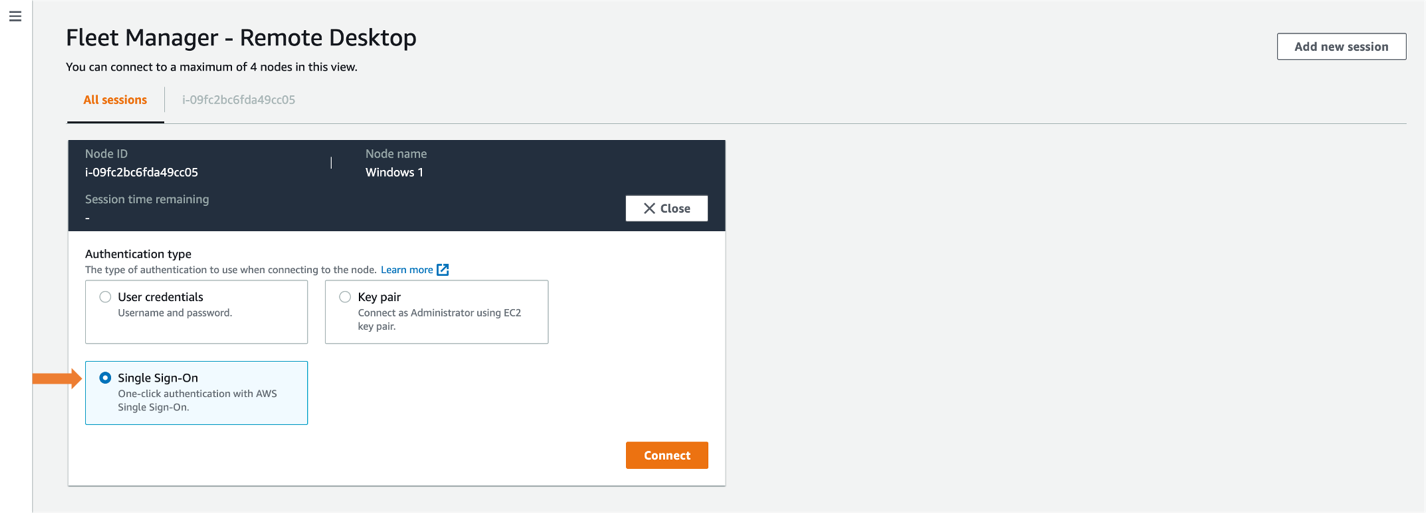
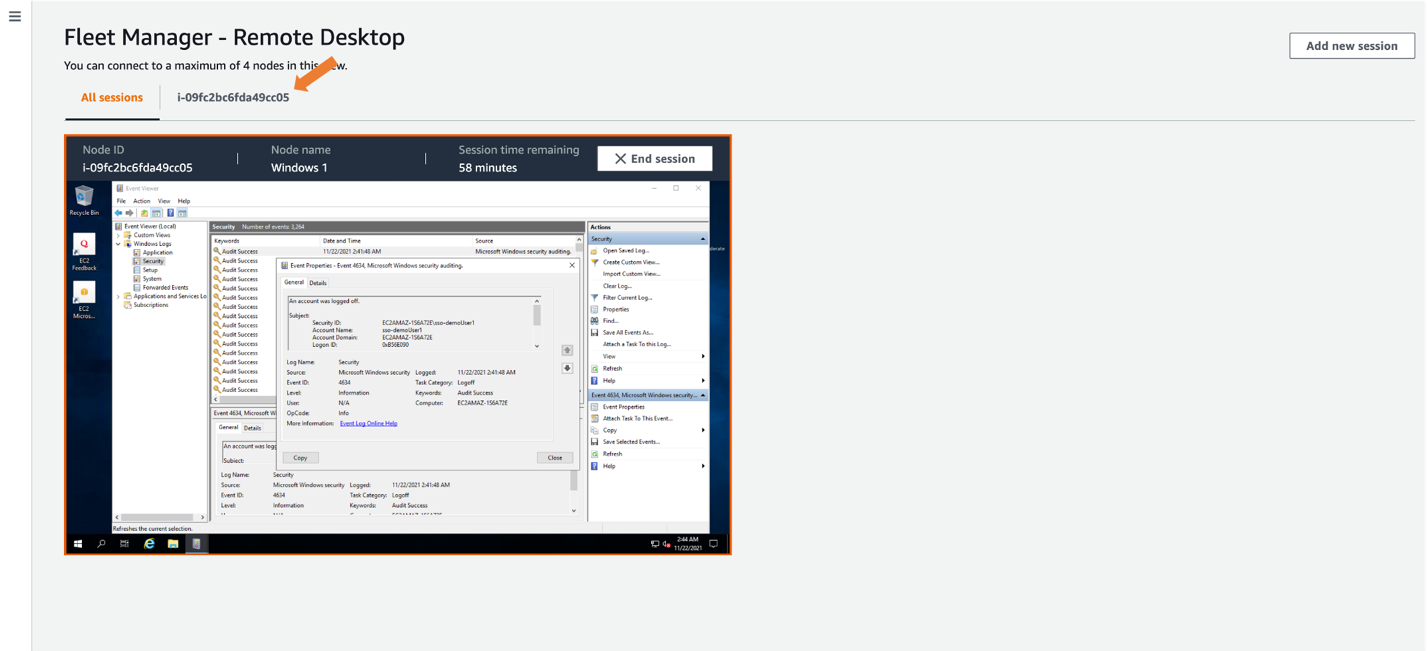
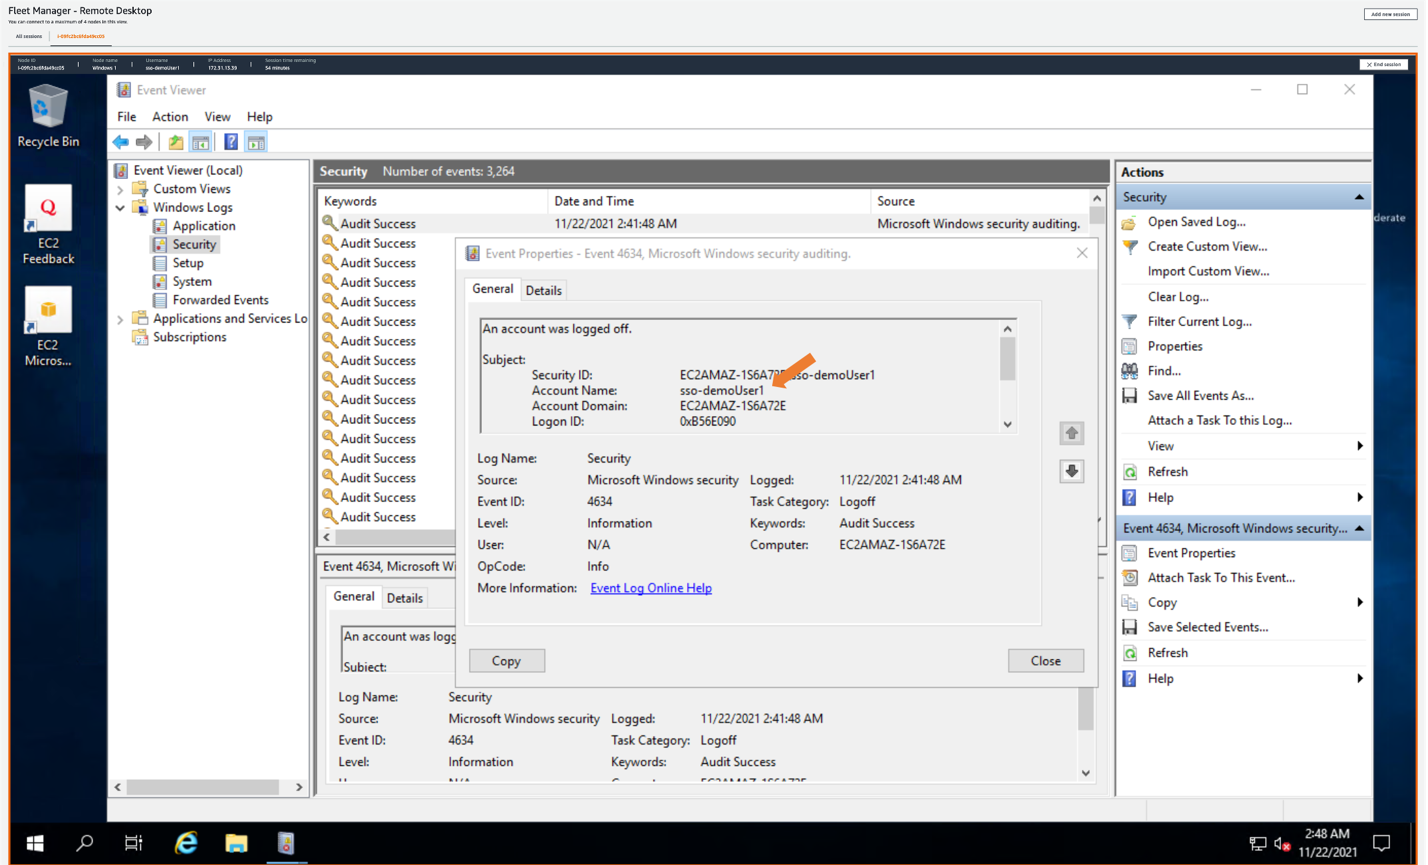
AWS SSO expanded its availability to new Regions: AWS GovCloud (US), Europe (Paris), and South America (São Paulo) Regions. Another very cool AWS SSO development is its integration with AWS Systems Manager Fleet Manager. This integration enables you to log in interactively to your Windows servers running on Amazon Elastic Compute Cloud (Amazon EC2) while using your existing corporate identities—try it, it’s fantastic!

AWS Identity and Access Management

For access management, there have been a range of feature launches with AWS Identity and Access Management (IAM) that have added up to more power and visibility in the permissions management system. Here are some key examples.

IAM made it simpler to relate a user’s IAM role activity to their corporate identity. By setting the new source identity attribute, which persists through role assumption chains and gets logged in AWS CloudTrail, you can find out who is responsible for actions that IAM roles performed.

IAM added support for policy conditions, to help manage permissions for AWS services that access your resources. This important feature launch of service principal conditions helps you to distinguish between API calls being made on your behalf by a service principal, and those being made by a principal inside your account. You can choose to allow or deny the calls depending on your needs. As a security professional, you might find this especially useful in conjunction with the aws:CalledVia condition key, which allows you to scope permissions down to specify that this account principal can only call this API if they are calling it using a particular AWS service that’s acting on their behalf. For example, your account principal can’t generally access a particular Amazon Simple Storage Service (Amazon S3) bucket, but if they are accessing it by using Amazon Athena, they can do so. These conditions can also be used in service control policies (SCPs) to give account principals broader scope across an account, organizational unit, or organization; they need not be added to individual principal policies or resource policies.

Another very handy new IAM feature launch is additional information about the reason for an access denied error message. With this additional information, you can now see which of the relevant access control policies (for example, IAM, resource, SCP, or VPC endpoint) was the cause of the denial. As of now, this new IAM feature is supported by more than 50% of all AWS services in the AWS SDK and AWS Command Line Interface, and a fast-growing number in the AWS Management Console. We will continue to add support for this capability across services, as well as add more features that are designed to make the journey to least privilege simpler.

IAM Access Analyzer

AWS Identity and Access Management (IAM) Access Analyzer provides actionable recommendations to set secure and functional permissions. Access Analyzer introduced the ability to preview the impact of policy changes before deployment and added over 100 policy checks for correctness. Both of these enhancements are integrated into the console and are also available through APIs. Access Analyzer also provides findings for external access allowed by resource policies for many services, including a previous launch in which IAM Access Analyzer was directly integrated into the Amazon S3 management console.

IAM Access Analyzer also launched the ability to generate fine-grained policies based on analyzing past AWS CloudTrail activity. This feature provides a great new capability for DevOps teams or central security teams to scope down policies to just the permissions needed, making it simpler to implement least privilege permissions. IAM Access Analyzer launched further enhancements to expand policy checks, and the ability to generate a sample least-privilege policy from past activity was expanded beyond the account level to include an analysis of principal behavior within the entire organization by analyzing log activity stored in AWS CloudTrail.

AWS Resource Access Manager

AWS Resource Access Manager (AWS RAM) helps you securely share your resources across unrelated AWS accounts within your organization or organizational units (OUs) in AWS Organizations. Now you can also share your resources with IAM roles and IAM users for supported resource types. This update enables more granular access using managed permissions that you can use to define access to shared resources. In addition to the default managed permission defined for each shareable resource type, you now have more flexibility to choose which permissions to grant to whom for resource types that support additional managed permissions. Additionally, AWS RAM added support for global resource types, enabling you to provision a global resource once, and share that resource across your accounts. A global resource is one that can be used in multiple AWS Regions; the first example of a global resource is found in AWS Cloud WAN, currently in preview as of this publication. AWS RAM helps you more securely share an AWS Cloud WAN core network, which is a managed network containing AWS and on-premises networks. With AWS RAM global resource sharing, you can use the Cloud WAN core network to centrally operate a unified global network across Regions and accounts.

AWS Directory Service

AWS Directory Service for Microsoft Active Directory, also known as AWS Managed Microsoft Active Directory (AD), was updated to automatically provide domain controller and directory utilization metrics in Amazon CloudWatch for new and existing directories. Analyzing these utilization metrics helps you quantify your average and peak load times to identify the need for additional domain controllers. With this, you can define the number of domain controllers to meet your performance, resilience, and cost requirements.

Amazon Cognito

Amazon Cognito identity pools (federated identities) was updated to enable you to use attributes from social and corporate identity providers to make access control decisions and simplify permissions management in AWS resources. In Amazon Cognito, you can choose predefined attribute-tag mappings, or you can create custom mappings using the attributes from social and corporate providers’ access and ID tokens, or SAML assertions. You can then reference the tags in an IAM permissions policy to implement attribute-based access control (ABAC) and manage access to your AWS resources. Amazon Cognito also launched a new console experience for user pools and now supports targeted sign out through refresh token revocation.

Governance, control, and logging services

There were a number of important releases in 2021 in the areas of governance, control, and logging services.

AWS Organizations

AWS Organizations added a number of important import features and integrations during 2021. Security-relevant services like Amazon Detective, Amazon Inspector, and Amazon Virtual Private Cloud (Amazon VPC) IP Address Manager (IPAM), as well as others like Amazon DevOps Guru, launched integrations with Organizations. Others like AWS SSO and AWS License Manager upgraded their Organizations support by adding support for a Delegated Administrator account, reducing the need to use the management account for operational tasks. Amazon EC2 and EC2 Image Builder took advantage of the account grouping capabilities provided by Organizations to allow cross-account sharing of Amazon Machine Images (AMIs) (for more details, see the Amazon EC2 section later in this post). Organizations also got an updated console, increased quotas for tag policies, and provided support for the launch of an API that allows for programmatic creation and maintenance of AWS account alternate contacts, including the very important security contact (although that feature doesn’t require Organizations). For more information on the value of using the security contact for your accounts, see the blog post Update the alternate security contact across your AWS accounts for timely security notifications.

AWS Control Tower

2021 was also a good year for AWS Control Tower, beginning with an important launch of the ability to take over governance of existing OUs and accounts, as well as bulk update of new settings and guardrails with a single button click or API call. Toward the end of 2021, AWS Control Tower added another valuable enhancement that allows it to work with a broader set of customers and use cases, namely support for nested OUs within an organization.

AWS CloudFormation Guard 2.0

Another important milestone in 2021 for creating and maintaining a well-governed cloud environment was the re-launch of CloudFormation Guard as Cfn-Guard 2.0. This launch was a major overhaul of the Cfn-Guard domain-specific language (DSL), a DSL designed to provide the ability to test infrastructure-as-code (IaC) templates such as CloudFormation and Terraform to make sure that they conform with a set of constraints written in the DSL by a central team, such as a security organization or network management team.

This approach provides a powerful new middle ground between the older security models of prevention (which provide developers only an access denied message, and often can’t distinguish between an acceptable and an unacceptable use of the same API) and a detect and react model (when undesired states have already gone live). The Cfn-Guard 2.0 model gives builders the freedom to build with IaC, while allowing central teams to have the ability to reject infrastructure configurations or changes that don’t conform to central policies—and to do so with completely custom error messages that invite dialog between the builder team and the central team, in case the rule is unnuanced and needs to be refined, or if a specific exception needs to be created.

For example, a builder team might be allowed to provision and attach an internet gateway to a VPC, but the team can do this only if the routes to the internet gateway are limited to a certain pre-defined set of CIDR ranges, such as the public addresses of the organization’s branch offices. It’s not possible to write an IAM policy that takes into account the CIDR values of a VPC route table update, but you can write a Cfn-Guard 2.0 rule that allows the creation and use of an internet gateway, but only with a defined and limited set of IP addresses.

AWS Systems Manager Incident Manager

An important launch that security professionals should know about is AWS Systems Manager Incident Manager. Incident Manager provides a number of powerful capabilities for managing incidents of any kind, including operational and availability issues but also security issues. With Incident Manager, you can automatically take action when a critical issue is detected by an Amazon CloudWatch alarm or Amazon EventBridge event. Incident Manager runs pre-configured response plans to engage responders by using SMS and phone calls, can enable chat commands and notifications using AWS Chatbot, and runs automation workflows with AWS Systems Manager Automation runbooks. The Incident Manager console integrates with AWS Systems Manager OpsCenter to help you track incidents and post-incident action items from a central place that also synchronizes with third-party management tools such as Jira Service Desk and ServiceNow. Incident Manager enables cross-account sharing of incidents using AWS RAM, and provides cross-Region replication of incidents to achieve higher availability.

AWS CloudTrail

AWS CloudTrail added some great new logging capabilities in 2021, including logging data-plane events for Amazon DynamoDB and Amazon Elastic Block Store (Amazon EBS) direct APIs (direct APIs allow access to EBS snapshot content through a REST API). CloudTrail also got further enhancements to its machine-learning based CloudTrail Insights feature, including a new one called ErrorRate Insights.

Amazon S3

Amazon Simple Storage Service (Amazon S3) is one of the most important services at AWS, and its steady addition of security-related enhancements is always big news. Here are the 2021 highlights.

Access Points aliases

Amazon S3 introduced a new feature, Amazon S3 Access Points aliases. With Amazon S3 Access Points aliases, you can make the access points backwards-compatible with a large amount of existing code that is programmed to interact with S3 buckets rather than access points.

To understand the importance of this launch, we have to go back to 2019 to the launch of Amazon S3 Access Points. Access points are a powerful mechanism for managing S3 bucket access. They provide a great simplification for managing and controlling access to shared datasets in S3 buckets. You can create up to 1,000 access points per Region within each of your AWS accounts. Although bucket access policies remain fully enforced, you can delegate access control from the bucket to its access points, allowing for distributed and granular control. Each access point enforces a customizable policy that can be managed by a particular workgroup, while also avoiding the problem of bucket policies needing to grow beyond their maximum size. Finally, you can also bind an access point to a particular VPC for its lifetime, to prevent access directly from the internet.

With the 2021 launch of Access Points aliases, Amazon S3 now generates a unique DNS name, or alias, for each access point. The Access Points aliases look and acts just like an S3 bucket to existing code. This means that you don’t need to make changes to older code to use Amazon S3 Access Points; just substitute an Access Points aliases wherever you previously used a bucket name. As a security team, it’s important to know that this flexible and powerful administrative feature is backwards-compatible and can be treated as a drop-in replacement in your various code bases that use Amazon S3 but haven’t been updated to use access point APIs. In addition, using Access Points aliases adds a number of powerful security-related controls, such as permanent binding of S3 access to a particular VPC.

Bucket Keys

Amazon S3 launched support for S3 Inventory and S3 Batch Operations to identify and copy objects to use S3 Bucket Keys, which can help reduce the costs of server-side encryption (SSE) with AWS Key Management Service (AWS KMS).

S3 Bucket Keys were launched at the end of 2020, another great launch that security professionals should know about, so here is an overview in case you missed it. S3 Bucket Keys are data keys generated by AWS KMS to provide another layer of envelope encryption in which the outer layer (the S3 Bucket Key) is cached by S3 for a short period of time. This extra key layer increases performance and reduces the cost of requests to AWS KMS. It achieves this by decreasing the request traffic from Amazon S3 to AWS KMS from a one-to-one model—one request to AWS KMS for each object written to or read from Amazon S3—to a one-to-many model using the cached S3 Bucket Key. The S3 Bucket Key is never stored persistently in an unencrypted state outside AWS KMS, and so Amazon S3 ultimately must always return to AWS KMS to encrypt and decrypt the S3 Bucket Key, and thus, the data. As a result, you still retain control of the key hierarchy and resulting encrypted data through AWS KMS, and are still able to audit Amazon S3 returning periodically to AWS KMS to refresh the S3 Bucket Keys, as logged in CloudTrail.

Returning to our review of 2021, S3 Bucket Keys gained the ability to use Amazon S3 Inventory and Amazon S3 Batch Operations automatically to migrate objects from the higher cost, slightly lower-performance SSE-KMS model to the lower-cost, higher-performance S3 Bucket Keys model.

Simplified ownership and access management

The final item from 2021 for Amazon S3 is probably the most important of all. Last year was the year that Amazon S3 achieved fully modernized object ownership and access management capabilities. You can now disable access control lists to simplify ownership and access management for data in Amazon S3.

To understand this launch, we need to go in time to the origins of Amazon S3, which is one of the oldest services in AWS, created even before IAM was launched in 2011. In those pre-IAM days, a storage system like Amazon S3 needed to have some kind of access control model, so Amazon S3 invented its own: Amazon S3 access control lists (ACLs). Using ACLs, you could add access permissions down to the object level, but only with regard to access by other AWS account principals (the only kind of identity that was available at the time), or public access (read-only or read-write) to an object. And in this model, objects were always owned by the creator of the object, not the bucket owner.

After IAM was introduced, Amazon S3 added the bucket policy feature, a type of resource policy that provides the rich features of IAM, including full support for all IAM principals (users and roles), time-of-day conditions, source IP conditions, ability to require encryption, and more. For many years, Amazon S3 access decisions have been made by combining IAM policy permissions and ACL permissions, which has served customers well. But the object-writer-is-owner issue has often caused friction. The good news for security professionals has been that a deny by either type of access control type overrides an allow by the other, so there were no security issues with this bi-modal approach. The challenge was that it could be administratively difficult to manage both resource policies—which exist at the bucket and access point level—and ownership and ACLs—which exist at the object level. Ownership and ACLs might potentially impact the behavior of only a handful of objects, in a bucket full of millions or billions of objects.

With the features released in 2021, Amazon S3 has removed these points of friction, and now provides the features needed to reduce ownership issues and to make IAM-based policies the only access control system for a specified bucket. The first step came in 2020 with the ability to make object ownership track bucket ownership, regardless of writer. But that feature applied only to newly-written objects. The final step is the 2021 launch we’re highlighting here: the ability to disable at the bucket level the evaluation of all existing ACLs—including ownership and permissions—effectively nullifying all object ACLs. From this point forward, you have the mechanisms you need to govern Amazon S3 access with a combination of S3 bucket policies, S3 access point policies, and (within the same account) IAM principal policies, without worrying about legacy models of ACLs and per-object ownership.

Additional database and storage service features

AWS Backup Vault Lock

AWS Backup added an important new additional layer for backup protection with the availability of AWS Backup Vault Lock. A vault lock feature in AWS is the ability to configure a storage policy such that even the most powerful AWS principals (such as an account or Org root principal) can only delete data if the deletion conforms to the preset data retention policy. Even if the credentials of a powerful administrator are compromised, the data stored in the vault remains safe. Vault lock features are extremely valuable in guarding against a wide range of security and resiliency risks (including accidental deletion), notably in an era when ransomware represents a rising threat to data.

Prior to AWS Backup Vault Lock, AWS provided the extremely useful Amazon S3 and Amazon S3 Glacier vault locking features, but these previous vaulting features applied only to the two Amazon S3 storage classes. AWS Backup, on the other hand, supports a wide range of storage types and databases across the AWS portfolio, including Amazon EBS, Amazon Relational Database Service (Amazon RDS) including Amazon Aurora, Amazon DynamoDB, Amazon Neptune, Amazon DocumentDB, Amazon Elastic File System (Amazon EFS), Amazon FSx for Lustre, Amazon FSx for Windows File Server, Amazon EC2, and AWS Storage Gateway. While built on top of Amazon S3, AWS Backup even supports backup of data stored in Amazon S3. Thus, this new AWS Backup Vault Lock feature effectively serves as a vault lock for all the data from most of the critical storage and database technologies made available by AWS.

Finally, as a bonus, AWS Backup added two more features in 2021 that should delight security and compliance professionals: AWS Backup Audit Manager and compliance reporting.

Amazon DynamoDB

Amazon DynamoDB added a long-awaited feature: data-plane operations integration with AWS CloudTrail. DynamoDB has long supported the recording of management operations in CloudTrail—including a long list of operations like CreateTable, UpdateTable, DeleteTable, ListTables, CreateBackup, and many others. What has been added now is the ability to log the potentially far higher volume of data operations such as PutItem, BatchWriteItem, GetItem, BatchGetItem, and DeleteItem. With this launch, full database auditing became possible. In addition, DynamoDB added more granular control of logging through DynamoDB Streams filters. This feature allows users to vary the recording in CloudTrail of both control plane and data plane operations, at the table or stream level.

Amazon EBS snapshots

Let’s turn now to a simple but extremely useful feature launch affecting Amazon Elastic Block Store (Amazon EBS) snapshots. In the past, it was possible to accidently delete an EBS snapshot, which is a problem for security professionals because data availability is a part of the core security triad of confidentiality, integrity, and availability. Now you can manage that risk and recover from accidental deletions of your snapshots by using Recycle Bin. You simply define a retention policy that applies to all deleted snapshots, and then you can define other more granular policies, for example using longer retention periods based on snapshot tag values, such as stage=prod. Along with this launch, the Amazon EBS team announced EBS Snapshots Archive, a major price reduction for long-term storage of snapshots.

AWS Certificate Manager Private Certificate Authority

2021 was a big year for AWS Certificate Manager (ACM) Private Certificate Authority (CA) with the following updates and new features:

Network and application protection

We saw a lot of enhancements in network and application protection in 2021 that will help you to enforce fine-grained security policies at important network control points across your organization. The services and new capabilities offer flexible solutions for inspecting and filtering traffic to help prevent unauthorized resource access.

AWS WAF

AWS WAF launched AWS WAF Bot Control, which gives you visibility and control over common and pervasive bots that consume excess resources, skew metrics, cause downtime, or perform other undesired activities. The Bot Control managed rule group helps you monitor, block, or rate-limit pervasive bots, such as scrapers, scanners, and crawlers. You can also allow common bots that you consider acceptable, such as status monitors and search engines. AWS WAF also added support for custom responses, managed rule group versioning, in-line regular expressions, and Captcha. The Captcha feature has been popular with customers, removing another small example of “undifferentiated work” for customers.

AWS Shield Advanced

AWS Shield Advanced now automatically protects web applications by blocking application layer (L7) DDoS events with no manual intervention needed by you or the AWS Shield Response Team (SRT). When you protect your resources with AWS Shield Advanced and enable automatic application layer DDoS mitigation, Shield Advanced identifies patterns associated with L7 DDoS events and isolates this anomalous traffic by automatically creating AWS WAF rules in your web access control lists (ACLs).

Amazon CloudFront

In other edge networking news, Amazon CloudFront added support for response headers policies. This means that you can now add cross-origin resource sharing (CORS), security, and custom headers to HTTP responses returned by your CloudFront distributions. You no longer need to configure your origins or use custom Lambda@Edge or CloudFront Functions to insert these headers.

CloudFront Functions were another great 2021 addition to edge computing, providing a simple, inexpensive, and yet highly secure method for running customer-defined code as part of any CloudFront-managed web request. CloudFront functions allow for the creation of very efficient, fine-grained network access filters, such the ability to block or allow web requests at a region or city level.

Amazon Virtual Private Cloud and Route 53

Amazon Virtual Private Cloud (Amazon VPC) added more-specific routing (routing subnet-to-subnet traffic through a virtual networking device) that allows for packet interception and inspection between subnets in a VPC. This is particularly useful for highly-available, highly-scalable network virtual function services based on Gateway Load Balancer, including both AWS services like AWS Network Firewall, as well as third-party networking services such as the recently announced integration between AWS Firewall Manager and Palo Alto Networks Cloud Next Generation Firewall, powered by Gateway Load Balancer.

Another important set of enhancements to the core VPC experience came in the area of VPC Flow Logs. Amazon VPC launched out-of-the-box integration with Amazon Athena. This means with a few clicks, you can now use Athena to query your VPC flow logs delivered to Amazon S3. Additionally, Amazon VPC launched three associated new log features that make querying more efficient by supporting Apache Parquet, Hive-compatible prefixes, and hourly partitioned files.

Following Route 53 Resolver’s much-anticipated launch of DNS logging in 2020, the big news for 2021 was the launch of its DNS Firewall capability. Route 53 Resolver DNS Firewall lets you create “blocklists” for domains you don’t want your VPC resources to communicate with, or you can take a stricter, “walled-garden” approach by creating “allowlists” that permit outbound DNS queries only to domains that you specify. You can also create alerts for when outbound DNS queries match certain firewall rules, allowing you to test your rules before deploying for production traffic. Route 53 Resolver DNS Firewall launched with two managed domain lists—malware domains and botnet command and control domains—enabling you to get started quickly with managed protections against common threats. It also integrated with Firewall Manager (see the following section) for easier centralized administration.

AWS Network Firewall and Firewall Manager

Speaking of AWS Network Firewall and Firewall Manager, 2021 was a big year for both. Network Firewall added support for AWS Managed Rules, which are groups of rules based on threat intelligence data, to enable you to stay up to date on the latest security threats without writing and maintaining your own rules. AWS Network Firewall features a flexible rules engine enabling you to define firewall rules that give you fine-grained control over network traffic. As of the launch in late 2021, you can enable managed domain list rules to block HTTP and HTTPS traffic to domains identified as low-reputation, or that are known or suspected to be associated with malware or botnets. Prior to that, another important launch was new configuration options for rule ordering and default drop, making it simpler to write and process rules to monitor your VPC traffic. Also in 2021, Network Firewall announced a major regional expansion following its initial launch in 2020, and a range of compliance achievements and eligibility including HIPAA, PCI DSS, SOC, and ISO.

Firewall Manager also had a strong 2021, adding a number of additional features beyond its initial core area of managing network firewalls and VPC security groups that provide centralized, policy-based control over many other important network security capabilities: Amazon Route 53 Resolver DNS Firewall configurations, deployment of the new AWS WAF Bot Control, monitoring of VPC routes for AWS Network Firewall, AWS WAF log filtering, AWS WAF rate-based rules, and centralized logging of AWS Network Firewall logs.

Elastic Load Balancing

Elastic Load Balancing now supports forwarding traffic directly from Network Load Balancer (NLB) to Application Load Balancer (ALB). With this important new integration, you can take advantage of many critical NLB features such as support for AWS PrivateLink and exposing static IP addresses for applications that still require ALB.

In addition, Network Load Balancer now supports version 1.3 of the TLS protocol. This adds to the existing TLS 1.3 support in Amazon CloudFront, launched in 2020. AWS plans to add TLS 1.3 support for additional services.

The AWS Networking team also made Amazon VPC private NAT gateways available in both AWS GovCloud (US) Regions. The expansion into the AWS GovCloud (US) Regions enables US government agencies and contractors to move more sensitive workloads into the cloud by helping them to address certain regulatory and compliance requirements.

Compute

Security professionals should also be aware of some interesting enhancements in AWS compute services that can help improve their organization’s experience in building and operating a secure environment.

Amazon Elastic Compute Cloud (Amazon EC2) launched the Global View on the console to provide visibility to all your resources across Regions. Global View helps you monitor resource counts, notice abnormalities sooner, and find stray resources. A few days into 2022, another simple but extremely useful EC2 launch was the new ability to obtain instance tags from the Instance Metadata Service (IMDS). Many customers run code on Amazon EC2 that needs to introspect about the EC2 tags associated with the instance and then change its behavior depending on the content of the tags. Prior to this launch, you had to associate an EC2 role and call the EC2 API to get this information. That required access to API endpoints, either through a NAT gateway or a VPC endpoint for Amazon EC2. Now, that information can be obtained directly from the IMDS, greatly simplifying a common use case.

Amazon EC2 launched sharing of Amazon Machine Images (AMIs) with AWS Organizations and Organizational Units (OUs). Previously, you could share AMIs only with specific AWS account IDs. To share AMIs within AWS Organizations, you had to explicitly manage sharing of AMIs on an account-by-account basis, as they were added to or removed from AWS Organizations. With this new feature, you no longer have to update your AMI permissions because of organizational changes. AMI sharing is automatically synchronized when organizational changes occur. This feature greatly helps both security professionals and governance teams to centrally manage and govern AMIs as you grow and scale your AWS accounts. As previously noted, this feature was also added to EC2 Image Builder. Finally, Amazon Data Lifecycle Manager, the tool that manages all your EBS volumes and AMIs in a policy-driven way, now supports automatic deprecation of AMIs. As a security professional, you will find this helpful as you can set a timeline on your AMIs so that, if the AMIs haven’t been updated for a specified period of time, they will no longer be considered valid or usable by development teams.

Looking ahead

In 2022, AWS continues to deliver experiences that meet administrators where they govern, developers where they code, and applications where they run. We will continue to summarize important launches in future blog posts. If you’re interested in learning more about AWS services, join us for AWS re:Inforce, the AWS conference focused on cloud security, identity, privacy, and compliance. AWS re:Inforce 2022 will take place July 26–27 in Boston, MA. Registration is now open. Register now with discount code SALxUsxEFCw to get $150 off your full conference pass to AWS re:Inforce. For a limited time only and while supplies last. We look forward to seeing you there!

To stay up to date on the latest product and feature launches and security use cases, be sure to read the What’s New with AWS announcements (or subscribe to the RSS feed) and the AWS Security Blog.

 
If you have feedback about this post, submit comments in the Comments section below. If you have questions about this post, contact AWS Support.

Want more AWS Security news? Follow us on Twitter.

Author

Marta Taggart

Marta is a Seattle-native and Senior Product Marketing Manager in AWS Security Product Marketing, where she focuses on data protection services. Outside of work you’ll find her trying to convince Jack, her rescue dog, not to chase squirrels and crows (with limited success).

Mark Ryland

Mark Ryland

Mark is the director of the Office of the CISO for AWS. He has over 30 years of experience in the technology industry and has served in leadership roles in cybersecurity, software engineering, distributed systems, technology standardization and public policy. Previously, he served as the Director of Solution Architecture and Professional Services for the AWS World Public Sector team.

Field Notes: Integrating Active Directory Federation Service with AWS Single Sign-On

Post Syndicated from Shirin Bano original https://aws.amazon.com/blogs/architecture/field-notes-integrating-active-directory-federation-service-with-aws-single-sign-on/

Enterprises use Active Directory Federation Services (AD FS) with single sign-on, to solve operational and security challenges by allowing the usage of a single set of credentials for multiple applications. This improves the user experience and helps manage access to the applications in a centralized way.

AWS offers a native cloud-based single sign-on solution called AWS Single Sign-On (AWS SSO). This service helps centrally manage SSO access and user permissions to all the AWS accounts and cloud applications. AWS SSO supports identity federation with SAML 2.0, allowing integration with AD FS solutions. This helps enterprises migrate to AWS, who have a hybrid environment with on-premises AD FS and need access to AWS accounts and cloud applications. Users can sign in to the AWS SSO portal with their corporate credentials thus reducing the admin overhead of maintaining separate credentials on AWS SSO.

Note: you can skip AD FS and connect your Active Directory to AWS SSO directly, instead. This gives you a simpler integration and with AD FS, enables you to use WebAuthn and TOTP MFA, and gives you a free and easy SAML IdP for apps. However, if you have specific constraints that require using AD FS, this blog will help you configure that.

This section explains the authentication flow with AD FS and AWS SSO integration. You can use Identity Provider (AD FS) initiated or Service Provider (AWS SSO) initiated authentication methods.

Following are the steps involved for both Identity Provider (IdP) and Service Provider (SP) initiated authentication methods:

1. IdP Initiated Authentication Flow 

Authentication Flow:

You access the SSO user-portal URL. The authentication flow depends on how you initiate the login request. There are 2 methods in which you can access the SSO user-portal.

IdP (AD FS) Initiated Authentication Method

1.a. This method is followed when users access the AD FS SSO user-portal URL. Some organizations prefer this method when they have a federation system built into their on-premises network and they start using AWS Services. The AWS SSO and AD FS integration allows them to continue using the AD FS user-portal URL, and to login even after they move to AWS.

The following diagram outlines the architecture for the IdP (AD FS) Initiated Authentication Method.

AD FS Reference Architecture

2. SP Initiated Authentication Flow

The following diagram outlines the architecture for an SP Initiated Authentication flow.

SP Initiated Authentication Flow

SP (AWS SSO) Initiated Authentication Method

  1. This method is followed when users access the AWS SSO user-portal URL, for example, https://d-12345c789.awsapps.com/start.
  2. Once the request arrives at the AWS SSO endpoint, it is redirected to the AD FS user-portal URL.
  3. The user then goes to the AD FS user-portal URL, for example, https://acmecorp.com/adfs/ls after which the traffic flow is similar to the IdP Initiated Authentication method.
  4. You are asked to enter the username and password after which it is authenticated against the Active Directory.
  5. You receive a SAML assertion, as an authentication response, from AD FS. The assertion identifies you and includes attributes about you as the user.
  6. You are redirected to the AWS SSO endpoint and it posts the SAML Assertion.
  7. AWS SSO endpoint calls the AssumeRoleWithSAML API to the STS service for temporary security credentials on your behalf. This creates a console sign-in URL that uses those credentials.
  8. AWS sends the sign-in URL back to you as a redirect. You are then re-directed to the AWS SSO Application page, where you can choose the account to log into or the cloud/custom application to use.

Process to Integrate AD FS with AWS SSO

In this section, we show the configurations needed to establish a trust between AD FS and AWS SSO. This allows you to log into AWS accounts using the credentials configured in AD FS.

Step 1: Build SAML Trust Relationship between AD FS and AWS SSO

  1. Get AWS SSO SAML metadata information.
  2. Log into the AWS account where you have configured AWS SSO. On the AWS SSO console, select Dashboard and then Choose your identity source.
  3. On the settings page, select Change, next to the Identity source.
  4. Change the identity source and select External identity provider.
  5. Under Service provider metadata, select show individual metadata information.
  6. Make a note of AWS SSO Sign-in URL, AWS SSO ACS URL, and AWS SSO issuer URL, as these will be used to configure AWS SSO as the relying party in the AD FS settings.
Service Provider metadata

Figure 1 – Service Provider metadata

Add AWS SSO as a Relying Party in AD FS

  1. Go to AD FS Management from the Tools menu in the Server Manager.
  2. Select Add Relying Party Trust.
  3. For Add Relying Party Trust Wizard, choose Claims aware and select Start.
  4. For Select Data Source, select Enter data about the relying party manually.
  5. For Specify Display Name add a user-friendly name for example – AWS SSO.
  6. For Configure URL, select the option Enable support for the SAML 2.0 WebSSO protocol.
  7. Enter the value for AWS SSO ACS URL that you got in the previous step (Figure-1).
Figure 2 - Add AWS SSO as a Relying Party in AD FS

Figure 2 – Add AWS SSO as a Relying Party in AD FS

8. For Configure Identifiers, add the AWS SSO Issuer URL (Figure-1), in the Relying party trust identifiers box and select Add.

9. Leave the rest of the configuration as default and click Next until the relying party trust is successfully added.

Figure 3 - Configure Identifiers

Figure 3 – Configure Identifiers

Add Claim Issuance Policy

  1. Select the Relying Party Trust you created in the previous step and go to Edit Claim Issuance Policy.
  2. In the Edit Claim Issuance Policy for AWS SSO dialog box, select Add rule.
  3. In the Add Transform Claim Rule Wizard from the drop-down menu for Claim rule template, select Transform an incoming claim.
  4. Enter a name for the claim rule, for this example – Rule for SSO.
  5. Select UPN for Incoming claim type, Name ID for Outgoing claim type and Email for Outgoing name ID format.
Transform Claim Rule

Figure 4 – Transform Claim Rule

Note: The rule language for the above rule is:

c:[Type == "http://schemas.xmlsoap.org/ws/2005/05/identity/claims/upn"]

=> issue(Type = "http://schemas.xmlsoap.org/ws/2005/05/identity/claims/nameidentifier", Issuer = c.Issuer, OriginalIssuer = c.OriginalIssuer, Value = c.Value, ValueType = c.ValueType, Properties["http://schemas.xmlsoap.org/ws/2005/05/identity/claimproperties/format"] = "urn:oasis:names:tc:SAML:1.1:nameid-format:emailAddress");

Get AD FS metadata from the Windows machine

1.      Enter this meta-data document endpoint URL,  https://acmecorp.com/federationmetadata/2007-06/federationmetadata.xml, in your web browser, replacing acmecorp.com with your domain used for AD DS.

2.     Download the federationmetadata.xml file on your local machine as it will be needed for the AWS SSO configuration.

Upload AD FS metadata to AWS SSO

  1. From the AWS SSO console, select Dashboard and go to Choose your identity source.
  2. On the settings page, select Change next to the Identity source.
  3. Change the identity source and select External identity provider.
  4. Under Identity provider metadata, Browse and upload the AD FS metadata.
Upload AD FS metadata to AWS SSO

Figure 5 – Upload AD FS metadata to AWS SSO

Step 2: Provision Users in AWS SSO

You must provision users in AWS SSO, to make it aware of the users in your IdP. There are 2 ways of provisioning the users in AWS SSO:

  • Automatic Provisioning

With SAML, we do not have a way to query the IdP to learn about the users and groups. However, AWS SSO support System for Cross-domain Identity Management (SCIM) v2.0 standard. With SCIM you can keep the identities in AWS SSO in sync with the identities from your IdP which support SCIM (like Azure AD). Refer to the guide on Automatic Provisioning for more information.

  • Manual Provisioning

Some IdPs do not support SCIM. In that case, you will need to manually provision the users in AWS SSO. The username in AWS SSO should be identical to the username configured in your IdP. In this setup, we are using the email address as the username. Adding users manually can be tedious and is prone to errors. You can implement this solution to programmatically create users and groups into AWS SSO from a CSV file with user and group information.

For this demonstration, we show how to manually provision the user in AWS SSO. You can also go with Automatic Provisioning, if your IdP supports it.

Manually Provision user in AWS SSO

  1. Add User from the Users section in AWS SSO console
  2. For Username, enter the email address of the user that was created in Windows AD

Note: Since the Outgoing NameId format is set as email address (Figure 3), the username should match the email address of the user configured in Windows AD. Make sure that the values entered for Username and Email address exactly match the values in AD DS, as the credentials are verified against the values in AD DS.

Edit user details

Figure 6 – Edit user details

Next, we show how to create a new Permission Set and how a user is assigned to an AWS account. If you already have the permission set configured and users assigned to accounts, skip to Step-4 to verify your settings.

Step 3: Manage Access Permissions for the User

This step defines the permission boundaries for the user provisioned in AWS SSO that allows them to access AWS Accounts.

AWS SSO is integrated with AWS Organizations and users have the capability to use their IdP credentials to log into the accounts in the Organization. You can access the primary (master) account as well as the member accounts. Permission sets define the level of access for the users and groups for the AWS accounts. Refer to this Permission Sets document for more details.

In this example, we create a custom permission set for Read Only access to CloudWatch Logs for the log archive account in the organization.

We have not covered how to manage access to your custom application with AWS SSO. For more details on this, review our documentation on Manage SSO to your applications.

Create a Custom Permission Set

  1. On the AWS SSO Console, choose AWS Accounts and then select Permission Sets. Select Create permission Set.
  2. Select Create a custom permission set on the Create new permission set page and select Next.
  3. Enter Name and description for the Permission Set and select Attach AWS managed policies.
  4. Choose CloudWatchLogsReadOnlyAccess, from the list of AWS managed policies

Assign a User to AWS Accounts

This step is used to define which AWS Accounts a user can access. It also defines the Permission Set that the user can use while accessing an AWS Account.

  1. On the AWS SSO console, select AWS Accounts and choose the AWS Organizations tab. You will see the list of accounts in the organization.
  2. Select the account(s) for which the user should have access. You can select multiple accounts.
  3. Choose Assign users and select the user from the list of users. You have the option of selecting multiple users or groups.
  4. In the next step, select the permission set we created in the previous step.
Assign a User to AWS Accounts

Figure 7 – Assign a User to AWS Accounts

5.     Select Finish.

Step 4: Verify your settings

The AD FS and AWS SSO configurations are now complete. It is now time to verify the configurations.

1.      If you follow the SP initiated authentication method and entered the AWS SSO user-portal URL, it will re-direct you to the IdP URL and you will land on the same page.You should see the following login page:

AD FS Login page

Figure 8 – AD FS Login page

If you follow the SP initiated authentication method and entered the AWS SSO user-portal URL, it will re-direct you to the IdP URL and you will land on the same page.

2.      After you enter the user credentials, i.e the email address and password for the user. You will be re-directed to the AWS SSO page. All the accounts and applications for which the user is provisioned for are shown on the following page. You can see the permission set(s) for the user after selecting the account

AWS SSO Sign On Page

Figure 9 – AWS SSO Sign On Page

3.      Select Management console to access the console of the account.

4.      Go to the CloudWatch Console and then to logs to verify your access.

Conclusion

In this walk-through, we showed how you can use your corporate credentials in AD FS, to log in to your AWS account and cloud applications. This eliminated the need to maintain separate credentials on AWS, thereby giving a better user experience. We did this by establishing a trust between  AD FS and AWS SSO. We described the steps on how to manually add users in AWS SSO. We also demonstrated how to create a permission set and assign a user to an account using that permission set. In addition, we provided illustrations of what you should see when accessing AWS SSO user-portal URL (SP Initiated) or the AD FS user-portal URL (IdP Initiated).

We hope this post helps you to understand how the AWS SSO integrates with Windows AD FS.

If you have any questions or feedback, please leave a comment below.

Field Notes provides hands-on technical guidance from AWS Solutions Architects, consultants, and technical account managers, based on their experiences in the field solving real-world business problems for customers.

Create cross-account, custom Amazon Managed Grafana dashboards for Amazon Redshift

Post Syndicated from Tahir Aziz original https://aws.amazon.com/blogs/big-data/create-cross-account-custom-amazon-managed-grafana-dashboards-for-amazon-redshift/

Amazon Managed Grafana recently announced a new data source plugin for Amazon Redshift, enabling you to query, visualize, and alert on your Amazon Redshift data from Amazon Managed Grafana workspaces. With the new Amazon Redshift data source, you can now create dashboards and alerts in your Amazon Managed Grafana workspaces to analyze your structured and semi-structured data across data warehouses, operational databases, and data lakes. The Amazon Redshift plugin also comes with default out-of-the-box dashboards that make it simple to get started monitoring the health and performance of your Amazon Redshift clusters.

In this post, we present a step-by-step tutorial to use the Amazon Redshift data source plugin to visualize metrics from your Amazon Redshift clusters hosted in different AWS accounts using AWS Single Sign-On (AWS SSO) as well as how to create custom dashboards visualizing data from Amazon Redshift system tables in Amazon Managed Grafana.

Solution overview

Let’s look at the AWS services that we use in our tutorial:

Amazon Managed Grafana is a fully managed service for open-source Grafana developed in collaboration with Grafana Labs. Grafana is a popular open-source analytics platform that enables you to query, visualize, alert on, and understand your operational metrics. You can create, explore, and share observability dashboards with your team, and spend less time managing your Grafana infrastructure and more time improving the health, performance, and availability of your applications. Amazon Managed Grafana natively integrates with AWS services (like Amazon Redshift) so you can securely add, query, visualize, and analyze operational and performance data across multiple accounts and Regions for the underlying AWS service.

Amazon Redshift is a fully managed, petabyte-scale data warehouse service in the cloud. You can start with just a few hundred gigabytes of data and scale to a petabyte or more. This enables you to use your data to acquire new insights for your business and customers. Today, tens of thousands of AWS customers from Fortune 500 companies, startups, and everything in between use Amazon Redshift to run mission-critical business intelligence (BI) dashboards, analyze real-time streaming data, and run predictive analytics jobs. With the constant increase in generated data, Amazon Redshift customers continue to achieve successes in delivering better service to their end-users, improving their products, and running an efficient and effective business.

AWS SSO is where you create or connect your workforce identities in AWS and manage access centrally across your AWS organization. You can choose to manage access just to your AWS accounts or cloud applications. You can create user identities directly in AWS SSO, or you can bring them from your Microsoft Active Directory or a standards-based identity provider, such as Okta Universal Directory or Azure AD. With AWS SSO, you get a unified administration experience to define, customize, and assign fine-grained access. Your workforce users get a user portal to access all their assigned AWS accounts, Amazon Elastic Compute Cloud (Amazon EC2) Windows instances, or cloud applications. AWS SSO can be flexibly configured to run alongside or replace AWS account access management via AWS Identity and Access Management (IAM).

The following diagram illustrates the solution architecture.

The solution includes the following components:

  • Captured metrics from the Amazon Redshift clusters in the development and production AWS accounts.
  • Amazon Managed Grafana, with the Amazon Redshift data source plugin added to it. Amazon Managed Grafana communicates with the Amazon Redshift cluster via the Amazon Redshift Data Service API.
  • The Grafana web UI, with the Amazon Redshift dashboard using the Amazon Redshift cluster as the data source. The web UI communicates with Amazon Managed Grafana via an HTTP API.

We walk you through the following steps in this post:

  1. Create a user in AWS SSO for Amazon Managed Grafana workspace access.
  2. Configure an Amazon Managed Grafana workspace.
  3. Set up two Amazon Redshift clusters as the data sources in Grafana.
  4. Import the Amazon Redshift dashboard supplied with the data source.
  5. Create a custom Amazon Redshift dashboard to visualize metrics from the Amazon Redshift clusters.

Prerequisites

To follow along with this post, you should have the following prerequisites:

Set up AWS SSO

In this section, we set up AWS SSO and register users.

In addition to AWS SSO integration, Amazon Managed Grafana also supports direct SAML integration with SAML 2.0 identity providers.

  1. If you don’t have AWS SSO enabled, open the AWS SSO console and choose Enable AWS SSO.
  2. After AWS SSO is enabled, choose Users in the navigation pane.
  3. Choose Add user.
  4. Enter the user details and choose Next: Groups.
  5. Choose Add user.

Set up your Amazon Grafana workspace

In this section, we demonstrate how to set up a Grafana workspace using Amazon Managed Grafana. We set up authentication using AWS SSO, register data sources, and add administrative users for the workspace.

  1. On the Amazon Managed Grafana console, choose Create workspace.
  2. For Workspace name, enter a suitable name.
  3. Choose Next.
  4. For Authentication access, select AWS Single Sign-On.
  5. For Permission type, select Service managed.
  6. Choose Next.
  7. Select Current account.
  8. For Data sources, select Amazon Redshift.
  9. Choose Next.
  10. Review the details and choose Create workspace.

    Now we assign a user to the workspace.
  11. On the Workspaces page, choose the workspace you created.
  12. Note the IAM role attached to your workspace.
  13. Choose Assign new user or group.
  14. Select the user to assign to the workspace.
  15. Choose Assign users and groups.

    For the purposes of this post, we need an admin user.
  16. To change the permissions of the user you just assigned, select the user name and choose Make admin.

For the cross-account setup, we use two Amazon Redshift clusters: production and development. In the next section, we configure IAM roles in both the production and development accounts so that the Grafana in the production account is able to connect to the Amazon Redshift clusters in the production account as well as in the development account.

Configure an IAM role for the development account

In this section, we set up the IAM role in the AWS account hosting the development environment. This role is assumed by the Amazon Managed Grafana service from the production AWS account to establish the connection between Amazon Managed Grafana and Amazon Redshift cluster in the development account.

  1. On the IAM console, choose Roles in the navigation pane.
  2. Choose Create role.
  3. Select Custom trust policy.
  4. Use the following policy code (update the account number for your production account and the Grafana service role attached to the workspace):
    {
        "Version": "2012-10-17",
        "Statement": [
            {
                "Effect": "Allow",
                "Principal": {
                    "AWS": "arn:aws:iam::<production-account-number>:role/service-role/AmazonGrafanaServiceRole-xxxxxxxxxx",
                    "Service": "grafana.amazonaws.com"
                },
                "Action": "sts:AssumeRole"
            }
        ]
    }

  5. Choose Next.
  6. Attach the managed IAM policy AmazonGrafanaRedshiftAccess to this role. For instructions, refer to Modifying a role permissions policy (console).
  7. Provide a role name, description, and tags (optional), and create the role.

Configure an IAM role for the production account

Next, we configure the IAM role created by the Amazon Managed Grafana service in order to establish the connection between Amazon Managed Grafana and the Amazon Redshift cluster in the production account.

  1. On the IAM console, choose Roles in the navigation pane.
  2. Search for the AmazonGrafanaServiceRole-xxxxxxx role attached to your Grafana workspace.
  3. Create an inline IAM policy and attach it to this role with the following policy code:
    {
    	"Version": "2012-10-17",
    	"Statement": [{
    		"Sid": "VisualEditor0",
    		"Effect": "Allow",
    		"Action": [
    			"sts:AssumeRole"
    		],
    		"Resource":"arn:aws:iam::<dev-account-number>:role/<DevAccountRoleName>"
    	}]
    }

  4. Provide a role name, description, and tags (optional), and create the role.

Import the default dashboard

In this section, we connect to the Amazon Redshift clusters in the production and development accounts from the Amazon Managed Grafana console and import the default dashboard.

  1. On the Amazon Managed Grafana console, choose Workspaces in the navigation pane.
  2. Choose the workspace you just created (authenticate and sign in if needed).
  3. In the navigation pane, choose Settings and on the Configuration menu, choose Data sources.
  4. Choose Add data source.
  5. Search for and choose Amazon Redshift.
  6. On the Settings tab, for Authentication provider, choose Workspace IAM role.
  7. For Default Region, choose us-east-1.
  8. Under Redshift Details, choose Temporary credentials.
  9. Enter the cluster identifier and database name for your Amazon Redshift cluster in the development account.
  10. For Database user, enter redshift_data_api_user.
  11. Choose Save & test.
    When the connection is successfully established, a message appears that the data source is working. You can now move on to the next step.
  12. Repeat these steps to add another data source to connect to the Amazon Redshift cluster in the development account.
  13. On the Settings tab, for Authentication provider, choose Workspace IAM role.
  14. Enter the workspace role as the ARN of the IAM role you created earlier (arn:aws:iam::dev-account-number:role/cross-account-role-name).
  15. For Default Region, choose us-east-1.
  16. Under Redshift Details, choose Temporary credentials.
  17. Enter the cluster identifier and database name for your Amazon Redshift cluster in the development account.
  18. For Database user, enter redshift_data_api_user.
  19. Choose Save & test.
    When the connection is successfully established, a message appears that the data source is working.
  20. On the Dashboards tab, choose Import next to Amazon Redshift.

On the dashboard page, you can change the data source between your production and development clusters on a drop-down menu.

The default Amazon Redshift dashboard, as shown in the following screenshot, makes it easy to monitor the overall health of the cluster by showing different cluster metrics, like total storage capacity used, storage utilization per node, open and closed connections, WLM mode, AQUA status, and more.

Additionally, the default dashboard displays several table-level metrics such as size of the tables, total number of rows, unsorted rows percentage, and more, in the Schema Insights section.

Add a custom dashboard for Amazon Redshift

The Amazon Redshift data source plugin allows you to query and visualize Amazon Redshift data metrics from within Amazon Managed Grafana. It’s preconfigured with general metrics. To add a custom metric from the Amazon Redshift cluster, complete the following steps:

  1. On the Amazon Managed Grafana console, choose All workspaces in the navigation pane.
  2. Choose the Grafana workspace URL for the workspace you want to modify.
  3. Choose Sign in with AWS SSO and provide your credentials.
  4. On the Amazon Managed Grafana workspace page, choose the plus sign and on the Create menu, choose Dashboard.
  5. Choose Add a new panel.
  6. Add the following custom SQL to get the data from the Amazon Redshift cluster:
    select 
    p.usename,
    count(*) as Num_Query,
    SUM(DATEDIFF('second',starttime,endtime)) as Total_Execution_seconds from stl_query s 
    inner join pg_user p on s.userid= p.usesysid where starttime between $__timeFrom() and $__timeTo()
    and s.userid>1 group by 1

    For this post, we use the default settings, but you can control and link the time range using the $__timeFrom() and $__timeTo() macros; they’re bound with the time range control of your dashboard. For more information and details about the supported expressions, see Query Redshift data.

  7. To inspect the data, choose Query inspector to test the custom query outcome.
    Amazon Managed Grafana supports a variety of visualizations. For this post, we create a bar chart.
  8. On the Visualizations tab in the right pane, choose Bar chart.
  9. Enter a title and description for the custom chart, and leave all other properties as default.
    For more information about supported properties, see Visualizations.
  10. Choose Save.
  11. In the pop-up window, enter a dashboard name and choose Save.

    A new dashboard is created with a custom metric.
  12. To add more metrics, choose the Add panel icon, choose Add a new panel, and repeat the previous steps.

Clean up

To avoid incurring future charges, complete the following steps:

  1. Delete the Amazon Managed Grafana workspace.
  2. If you created a new Amazon Redshift cluster for this demonstration, delete the cluster.

Conclusion

In this post, we demonstrated how to use AWS SSO and Amazon Managed Grafana to create an operational view to monitor the health and performance of Amazon Redshift clusters. We learned how to extend your default dashboard by adding custom and insightful dashboards to your Grafana workspace.

We look forward to hearing from you about your experience. If you have questions or suggestions, please leave a comment.


About the Authors

Tahir Aziz is an Analytics Solution Architect at AWS. He has worked with building data warehouses and big data solutions for over 13 years. He loves to help customers design end-to-end analytics solutions on AWS. Outside of work, he enjoys traveling and cooking.

Shawn Sachdev is a Sr. Analytics Specialist Solutions Architect at AWS. He works with customers and provides guidance to help them innovate and build well-architected and high-performance data warehouses and implement analytics at scale on the AWS platform. Before AWS, he worked in several analytics and system engineering roles. Outside of work, he loves watching sports, and is an avid foodie and craft beer enthusiast.

Ekta Ahuja is an Analytics Specialist Solutions Architect at AWS. She is passionate about helping customers build scalable and robust data and analytics solutions. Before AWS, she worked in several different data engineering and analytics roles. Outside of work, she enjoys baking, traveling, and board games.

Monitoring and alerting break-glass access in an AWS Organization

Post Syndicated from Haresh Nandwani original https://aws.amazon.com/blogs/architecture/monitoring-and-alerting-break-glass-access-in-an-aws-organization/

Organizations building enterprise-scale systems require the setup of a secure and governed landing zone to deploy and operate their systems. A landing zone is a starting point from which your organization can quickly launch and deploy workloads and applications with confidence in your security and infrastructure environment as described in What is a landing zone?. Nationwide Building Society (Nationwide) is the world’s largest building society. It is owned by its 16 million members and exists to serve their needs. The Society is one of the UK’s largest providers for mortgages, savings and current accounts, as well as being a major provider of ISAs, credit cards, personal loans, insurance, and investments.

For one of its business initiatives, Nationwide utilizes AWS Control Tower to build and operate their landing zone which provides a well-established pattern to set up and govern a secure, multi-account AWS environment. Nationwide operates in a highly regulated industry and our governance assurance requires adequate control of any privileged access to production line-of-business data or to resources which have access to them. We chose for this specific business initiative to deploy our landing zone using AWS Organizations, to benefit from ongoing account management and governance as aligned with AWS implementation best practices. We also utilized AWS Single Sign-On (AWS SSO) to create our workforce identities in AWS once and manage access centrally across our AWS Organization. In this blog, we describe the integrations required across AWS Control Tower and AWS SSO to implement a break-glass mechanism that makes access reporting publishable to system operators as well as to internal audit systems and processes. We will outline how we used AWS SSO for our setup as well as the three architecture options we considered, and why we went with the chosen solution.

Sourcing AWS SSO access data for near real-time monitoring

In our setup, we have multiple AWS Accounts and multiple trails on each of these accounts. Users will regularly navigate across multiple accounts as they operate our infrastructure, and their journeys are marked across these multiple trails. Typically, AWS CloudTrail would be our chosen resource to clearly and unambiguously identify account or data access.  The key challenge in this scenario was to design an efficient and cost-effective solution to scan these trails to help identify and report on break-glass user access to account and production data. To address this challenge, we developed the following two architecture design options.

Option 1: A decentralized approach that uses AWS CloudFormation StackSets, Amazon EventBridge and AWS Lambda

Our solution entailed a decentralized approach by deploying a CloudFormation StackSet to create, update, or delete stacks across multiple accounts and AWS Regions with a single operation. The Stackset created Amazon EventBridge rules and target AWS Lambda functions. These functions post to EventBridge in our audit account. Our audit account has a set of Lambda functions running off EventBridge to initiate specific events, format the event message and post to Slack, our centralized communication platform for this implementation. Figure 1 depicts the overall architecture for this option.

De-centralized logging using Amazon EventBridge and AWS Lambda

Figure 1. De-centralized logging using Amazon EventBridge and AWS Lambda

Option 2: Use an organization trail in the Organization Management account

This option uses the centralized organization trail in the Organization Management account to source audit data. Details of how to create an organization trail can be found in the AWS CloudTrail User Guide. CloudTrail was configured to send log events to CloudWatch Logs. These events are then sent via Lambda functions to Slack using webhooks. We used a public terraform module in this GitHub repository to build this Lambda Slack integration. Figure 2 depicts the overall architecture for this option.

Centralized logging pattern using Amazon CloudWatch

Figure 2. Centralized logging pattern using Amazon CloudWatch

This was our preferred option and is the one we finally implemented.

We also evaluated a third option which was to use centralized logging and auditing feature enabled by Control Tower. Users authenticate and federate to target accounts from a central location so it seemed possible to source this info from the centralized logs. These log events arrive as .gz compressed json objects, which meant having to expand these archives repeatedly for inspection. We therefore decided against this option.

A centralized, economic, extensible solution to alert of SSO break-glass

Our requirement was to identify break-glass access across any of the access mechanisms supported by AWS, including CLI and User Portal access. To ensure we have comprehensive coverage across all access mechanisms, we identified all the events initiated for each access mechanism:

  1. User Portal/AWS Console access events
    • Authenticate
    • ListApplications
    • ListApplicationProfiles
    • Federate – this event contains the role that the user is federating into
  2. CLI access events
    • CreateToken
    • ListAccounts
    • ListAccountRoles
    • GetRoleCredentials – this event contains the role that the user is federating into

EventBridge is able to initiate actions after events only when the event is trying to perform changes (when the “readOnly” attribute on the event record body equals “false”).

The AWS support team was aware of this attribute and recommended that we, change the data flow we were using to one able to initiate actions after any kind of event, regardless of the value on its readOnly attribute. The solution in our case was to send the CloudTrail logs to CloudWatch Logs. This then and initiates the Lambda function through a filter subscription that detects the desired event names on the log content.

The filter used is as follows:

{($.eventSource = sso.amazonaws.com) && ($.eventName = Federate||$.eventName = GetRoleCredentials)}

Due to the query size in the CloudWatch Log queries we had to remove the subscription filters and do the parsing of the content of the log lines inside the lambda function. In order to determine what accounts would initiate the notifications, we sent the list of accounts and roles to it as an environment variable at runtime.

Considerations with cross-account SSO access

With direct federation users get an access token. This is most obvious in AWS single sign on at the chiclet page as “Command line or programmatic access”. SSO tokens have a limited lifetime (we use the default 1-hour). A user does not have to get a new token to access a target resource until the one they are using is expired. This means that a user may repeatedly access a target account using the same token during its lifetime. Although the token is made available at the chiclet page, the GetRoleCredentials event does not occur until it is used to authenticate an API call to the target AWS account.

Conclusion

In this blog, we discussed how AWS Control Tower and AWS Single Sign-on enabled Nationwide to build and govern a secure, multi-account AWS environment for one of their business initiatives and centralize access management across our implementation. The integration was important for us to accurately and comprehensively identify and audit break-glass access for our implementation. As a result, we were able to satisfy our security and compliance audit requirements for privileged access to our AWS accounts.

Getting started with AWS SSO delegated administration

Post Syndicated from Chris Mercer original https://aws.amazon.com/blogs/security/getting-started-with-aws-sso-delegated-administration/

Recently, AWS launched the ability to delegate administration of AWS Single Sign-On (AWS SSO) in your AWS Organizations organization to a member account (an account other than the management account). This post will show you a practical approach to using this new feature. For the documentation for this feature, see Delegated administration in the AWS Single Sign-On User Guide.

With AWS Organizations, your enterprise organization can manage your accounts more securely and at scale. One of the benefits of Organizations is that it integrates with many other AWS services, so you can centrally manage accounts and how the services in those accounts can be used.

AWS SSO is where you can create, or connect, your workforce identities in AWS just once, and then manage access centrally across your AWS organization. You can create user identities directly in AWS SSO, or you can bring them from your Microsoft Active Directory or a standards-based identity provider, such as Okta Universal Directory or Azure AD. With AWS SSO, you get a unified administration experience to define, customize, and assign fine-grained access.

By default, the management account in an AWS organization has the power and authority to manage member accounts in the organization. Because of these additional permissions, it is important to exercise least privilege and tightly control access to the management account. AWS recommends that enterprises create one or more accounts specifically designated for security of the organization, with proper controls and access management policies in place. AWS provides a method in which many services can be administered for the organization from a member account; this is usually referred to as a delegated administrator account. These accounts can reside in a security organizational unit (OU), where administrators can enforce organizational policies. Figure 1 is an example of a recommended set of OUs in Organizations.

Figure 1: Recommended AWS Organizations OUs

Figure 1: Recommended AWS Organizations OUs

Many AWS services support this delegated administrator model, including Amazon GuardDuty, AWS Security Hub, and Amazon Macie. For an up-to-date complete list, see AWS services that you can use with AWS Organizations. AWS SSO is now the most recent addition to the list of services in which you can delegate administration of your users, groups, and permissions, including third-party applications, to a member account of your organization.

How to configure a delegated administrator account

In this scenario, your enterprise AnyCompany has an organization consisting of a management account, an account for managing security, as well as a few member accounts. You have enabled AWS SSO in the organization, but you want to enable the security team to manage permissions for accounts and roles in the organization. AnyCompany doesn’t want you to give the security team access to the management account, and they also want to make sure the security team can’t delete the AWS SSO configuration or manage access to that account, so you decide to delegate the administration of AWS SSO to the security account.

Note: There are a few things to consider when making this change, which you should review before you enable delegated administration. These items are covered in the console during the process, and are described in the section Considerations when delegating AWS SSO administration in this post.

To delegate AWS SSO administration to a security account

  1. In the AWS Organizations console, log in to the management account with a user or role that has permission to use organizations:RegisterDelegatedAdministrator, as well as AWS SSO management permissions.
  2. In the AWS SSO console, navigate to the Region in which AWS SSO is enabled.
  3. Choose Settings on the left navigation pane, and then choose the Management tab on the right side.
  4. Under Delegated administrator, choose Register account, as shown in Figure 2.
    Figure 2: The registered account button in AWS SSO

    Figure 2: The Register account button in AWS SSO

  5. Consider the implications of designating a delegated administrator account (as described in the section Considerations when delegating AWS SSO administration). Select the account you want to be able to manage AWS SSO, and then choose Register account, as shown in Figure 3.
    Figure 3: Choosing a delegated administrator account in AWS SSO

    Figure 3: Choosing a delegated administrator account in AWS SSO

You should see a success message to indicate that the AWS SSO delegated administrator account is now setup.

To remove delegated AWS SSO administration from an account

  1. In the AWS Organizations console, log in to the management account with a user or role that has permission to use organizations:DeregisterDelegatedAdministrator.
  2. In the AWS SSO console, navigate to the Region in which AWS SSO is enabled.
  3. Choose Settings on the left navigation pane, and then choose the Management tab on the right side.
  4. Under Delegated administrator, select Deregister account, as shown in Figure 4.
    Figure 4: The Deregister account button in AWS SSO

    Figure 4: The Deregister account button in AWS SSO

  5. Consider the implications of removing a delegated administrator account (as described in the section Considerations when delegating AWS SSO administration), then enter the account name that is currently administering AWS SSO, and choose Deregister account, as shown in Figure 5.
    Figure 5: Considerations of deregistering a delegated administrator in AWS SSO

    Figure 5: Considerations of deregistering a delegated administrator in AWS SSO

Considerations when delegating AWS SSO administration

There are a few considerations you should keep in mind when you delegate AWS SSO administration. The first consideration is that the delegated administrator account will not be able to perform the following actions:

  • Delete the AWS SSO configuration.
  • Delegate (to other accounts) administration of AWS SSO.
  • Manage user or group access to the management account.
  • Manage permission sets that are provisioned (have a user or group assigned) in the organization management account.

For examples of those last two actions, consider the following scenarios:

In the first scenario, you are managing AWS SSO from the delegated administrator account. You would like to give your colleague Saanvi access to all the accounts in the organization, including the management account. This action would not be allowed, since the delegated administrator account cannot manage access to the management account. You would need to log in to the management account (with a user or role that has proper permissions) to provision that access.

In a second scenario, you would like to change the permissions Paulo has in the management account by modifying the policy attached to a ManagementAccountAdmin permission set, which Paulo currently has access to. In this scenario, you would also have to do this from inside the management account, since the delegated administrator account does not have permissions to modify the permission set, because it is provisioned to a user in the management account.

With those caveats in mind, users with proper access in the delegated administrator account will be able to control permissions and assignments for users and groups throughout the AWS organization. For more information about limiting that control, see Allow a user to administer AWS SSO for specific accounts in the AWS Single Sign-On User Guide.

Deregistering an AWS SSO delegated administrator account will not affect any permissions or assignments in AWS SSO, but it will remove the ability for users in the delegated account to manage AWS SSO from that account.

Additional considerations if you use Microsoft Active Directory

There are additional considerations for you to keep in mind if you use Microsoft Active Directory (AD) as an identity provider, specifically if you use AWS SSO configurable AD sync, and which AWS account the directory resides in. In order to use AWS SSO delegated administration when the identity source is set to Active Directory, AWS SSO configurable AD sync must be enabled for the directory. Your organization’s administrators must synchronize Active Directory users and groups you want to grant access to into an AWS SSO identity store. When you enable AWS SSO configurable AD sync, a new feature that launched in April, Active Directory administrators can choose which users and groups get synced into AWS SSO, similar to how other external identity providers work today when using the System for Cross-domain Identity Management (SCIM) v2.0 protocol. This way, AWS SSO knows about users and groups even before they are granted access to specific accounts or roles, and AWS SSO administrators don’t have to manually search for them.

Another thing to consider when delegating AWS SSO administration when using AD as an identity source is where your directory resides, that is which AWS account owns the directory. If you decide to change the AWS SSO identity source from any other source to Active Directory, or change it from Active Directory to any other source, then the directory must reside in (be owned by) the account that the change is being performed in. For example, if you are currently signed in to the management account, you can only change the identity source to or from directories that reside in (are owned by) the management account. For more information, see Manage your identity source in the AWS Single Sign-On User Guide.

Best practices for managing AWS SSO with delegated administration

AWS recommends the following best practices when using delegated administration for AWS SSO:

  • Maintain separate permission sets for use in the organization management account (versus the rest of the accounts). This way, permissions can be kept separate and managed from within the management account without causing confusion among the delegated administrators.
  • When granting access to the organization management account, grant the access to groups (and permission sets) specifically for access in that account. This helps enable the principal of least privilege for this important account, and helps ensure that AWS SSO delegated administrators are able to manage the rest of the organization as efficiently as possible (by reducing the number of users, groups, and permission sets that are off limits to them).
  • If you plan on using one of the AWS Directory Services for Microsoft Active Directory (AWS Managed Microsoft AD or AD Connector) as your AWS SSO identity source, locate the directory and the AWS SSO delegated administrator account in the same AWS account.

Conclusion

In this post, you learned about a helpful new feature of AWS SSO, the ability to delegate administration of your users and permissions to a member account of your organization. AWS recommends as a best practice that the management account of an AWS organization be secured by a least privilege access model, in which as few people as possible have access to the account. You can enable delegated administration for supported AWS services, including AWS SSO, as a useful tool to help your organization minimize access to the management account by moving that control into an AWS account designated specifically for security or identity services. We encourage you to consider AWS SSO delegated administration for administrating access in AWS. To learn more about the new feature, see Delegated administration in the AWS Single Sign-On User Guide.

If you have feedback about this post, submit comments in the Comments section below. If you have questions about this post, start a new thread on the AWS IAM forum or contact AWS Support.

Want more AWS Security how-to content, news, and feature announcements? Follow us on Twitter.

Author

Chris Mercer

Chris is a security specialist solutions architect. He helps AWS customers implement sophisticated, scalable, and secure solutions to business challenges. He has experience in penetration testing, security architecture, and running military IT systems and networks. Chris holds a Master’s Degree in Cybersecurity, several AWS certifications, OSCP, and CISSP. Outside of AWS, he is a professor, student pilot, and Cub Scout leader.

Configure AWS SSO ABAC for EC2 instances and Systems Manager Session Manager

Post Syndicated from Rodrigo Ferroni original https://aws.amazon.com/blogs/security/configure-aws-sso-abac-for-ec2-instances-and-systems-manager-session-manager/

In this blog post, I show you how to configure AWS Single Sign-On to define attribute-based access control (ABAC) permissions to manage Amazon Elastic Compute Cloud (Amazon EC2) instances and AWS Systems Manager Session Manager for federated users. This combination allows you to control access to specific Amazon EC2 instances based on users’ attributes. I show you how defined AWS SSO identity source attributes like login and department can be used, and how custom attributes like SSMSessionRunAs can be used to pass these attributes into Amazon Web Services (AWS) from an external identity provider (IdP) using  SAML 2.0 assertion.

AWS SSO added support for ABAC to enable you to create fine-grained permissions for your workforce in AWS using user attributes. Using user attributes as tags in AWS helps you simplify the process of creating fine-grained permissions in AWS and enables you to ensure that your workforce has access only to the AWS resources with matching tags.

The new feature works with any supported AWS SSO identity source. This post walks you through the steps to enable attributes for access control, create permission sets and manage assignments when using a supported external IdP as your identity source.

Solution overview

The following architecture diagram—Figure 1—presents an overview of the solution.

Figure 1: Solution architecture diagram

Figure 1: Solution architecture diagram

In the example in Figure 1, Alice and Bob are users who each have the attributes
login
, department, and SSMSessionRunAs. These attributes are created and updated in the external directory—Okta in this example—under those users’ profiles. The first two attributes are automatically synchronized by using System for Cross-domain Identity Management (SCIM) protocol between AWS SSO and Okta and configured within AWS SSO settings. The third custom attribute is passed directly from Okta into the AWS accounts as a new SAML assertion.

Both users are using the same AWS SSO custom permission set that allows them to launch a new Amazon EC2 instance with proper tags enforcement. Based on those tags, they can start, stop, and restart the EC2 instance if they are in the same department, and to terminate it if they are the owner. Also, they can connect using Session Manager if they’re in the same department. Users can sign in to those instances using the Linux OS user defined in the attribute SSMSessionRunAs.

Prerequisites

To perform the steps to use AWS SSO attributes for ABAC, you must already have deployed AWS SSO for your AWS Organizations and have connected with an external identity source using SAML and SCIM protocols. For more information, see Checklist: Configuring ABAC in AWS using AWS SSO.

You need two test users for implementing and testing the solution. You can use two existing users, or create new users named Alice and Bob to match the solution and testing described in the following sections.

Implement the solution

The basic steps to implement the solution are:

  1. Confirm in AWS SSO settings that you have defined an external IdP, authentication via SAML 2.0, and provisioning via SCIM protocol.
  2. Enable attributes for access control and define the two supported attributes: login and department.
  3. Create a new user attribute in the Okta Directory.
  4. Edit and confirm the users’ attributes defined in the Okta Directory profile.
  5. Configure the SAML attribute statement in the Okta AWS SSO application.
  6. Create a new permission set using an ABAC policy.
  7. Create an AWS account assignment to the users using the permission set created in the previous step.

Confirm AWS SSO configuration

In this first step, you confirm that AWS SSO has been properly configured. Go to AWS SSO console SSO settings to check that the configuration of your identity source, authentication, and provisioning is as follows:

Identity source: External Identity Provider
Authentication: SAML 2.0
Provisioning: SCIM

  1. Confirm authentication is working as expected, by going to your user portal URL in a new browser instance (to ensure your user authentication doesn’t overwrite your existing authentication). The user portal offers a single place to access all the assigned AWS accounts, roles, and applications. For example, it should look like https://exampledomain.awsapps.com/start. Once you access it, the process automatically redirects the request to your external provider for authentication, and then returns the user to the AWS SSO user portal.
  2. To confirm provisioning, go to the AWS SSO console and choose Users from the right panel. You should see your Okta users assigned to the AWS SSO application being synchronized by SCIM protocol. Select any user to see the Created by SCIM and Updated by SCIM information for that user.

Enable AWS SSO attributes for access control

In this step, you enable ABAC and then configure AWS SSO attributes. This solution uses the Attributes for access control page in the AWS Management Console to enter the key and value pairs.

To enable attributes for access control

  1. Open the AWS SSO console.
  2. Choose Settings.
  3. On the Settings page, under Identity source, next to Attributes for access control, select Enable. As shown in Figure 2.
Figure 2: Attributes for access control settings (enable ABAC)

Figure 2: Attributes for access control settings (enable ABAC)

Once ABAC is enabled, you can select the attributes to be synchronized. For this use case, select login and department.

To select your attributes using the AWS SSO console

  1. Open the AWS SSO console.
  2. Choose Settings.
  3. On the Settings page, under Identity source, next to Attributes for access control, choose View details.
  4. On the Attributes for access control page, notice the Key and Value columns. This is where you will be mapping the attribute from your identity source to an attribute that AWS SSO passes as a session tag. Set the first key and value pair by entering login as the key and ${path:userName} as the value. Set the second key and value pair to department and ${path:enterprise.department}. The settings are shown in Figure 3 below.

    Figure 3: Map attributes using the Attributes for access control page

    Figure 3: Map attributes using the Attributes for access control page

  5. Choose Save changes.

Create a new attribute in Okta Directory

In this third step, you create the new custom attribute SSMSessionRunAs.

To create a new user attribute

  1. Open the Okta console.
  2. Under Directory, choose Profile Editor.
  3. Choose Edit Profile for Okta User (default).
  4. Under Attributes, choose Add Attribute as follows:
    Data type: Select String
    Display Name: Enter SSMSessionRunAs
    Variable Name: Enter SSMSessionRunAs
    Attribute Length: Select Less than and enter 10 (max).
  5. Choose Save.

Edit and confirm users’ attributes defined in Okta Directory profile

Now that you have the new attribute SSMSessionRunAs created, go to the users’ profiles to enter the Department and SSMSessionRunAs values for both users.

To edit and confirm users’ attributes

  1. Open the Okta console.
  2. Under Directory, choose People.
  3. Select user Bob.
  4. Under Profile tab choose Edit as follows:

    For the key Department, enter blue as the value.

    For the key SSMSessionRunAs, enter bob as the value.

  5. Choose Save.
  6. Repeat steps 1 through 5 for Alice. For the key Department, enter amber as the value and for SSMSessionRunAs, enter alice as the value.
  7. Confirm that the attributes of both users are defined in the external directory as follows:Username (login): [email protected]
    First name (firstName): Bob
    Last name (lastName): Rodriguez
    Display name (displayName): Bob
    Department (department): blue
    SSMSessionRunAs (SSMSessionRunAs): bob

    Username (login): [email protected]
    First name (firstName): Alice
    Last name (lastName): Rosalez
    Display name (displayName): Alice
    Department (department): amber
    SSMSessionRunAs (SSMSessionRunAs): alice

Configure SAML attribute statement in Okta AWS SSO application

The attribute SSMSessionRunAs isn’t available as an attribute within AWS SSO. However, you can include it by defining SAML attribute statements, which are inserted into the SAML assertions.

To create a new SAML attribute

  1. Open the Okta Application console.
  2. Choose AWS Single Sign-on application.
  3. On the Sign On tab, choose Edit Settings.
  4. Under SAML 2.0 Attributes Statements enter the following:
    • For Name, enter https://aws.amazon.com/SAML/Attributes/AccessControl:SSMSessionRunAs
    • For Name format, select URI Reference
    • For Value, enter user.SSMSessionRunAs
  5. Choose Save.

Create a new permission set using an ABAC policy

In this step, you create a permissions policy that determines who can access your AWS resources based on the configured attribute value. When you enable ABAC and specify attributes, AWS SSO passes the attribute value of the authenticated user into AWS Identity and Access Management (IAM) for use in policy evaluation.

To create a permission set

  1. Open the AWS SSO console.
  2. Choose AWS accounts.
  3. Select the Permission sets tab.
  4. Choose Create permission set.
  5. On the Create new permission set page, choose Create a custom permission set.
    1. Choose Next: Details.
    2. Under Create a custom permission set, enter a name that will identify this permission set in AWS SSO. This name will also appear as an IAM role in the user portal for any users who have access to it. For this solution, name it myCustomPermissionSetEC2SSM.
    3. Choose Create a custom permissions policy and paste in the following ABAC policy document:
      {
        "Version": "2012-10-17",
        "Statement": [
          {
            "Sid": "AllowDescribeList",
            "Action": [
              "ec2:Describe*",
              "ssm:Describe*",
              "ssm:Get*",
              "ssm:List*",
              "iam:ListInstanceProfiles",
              "cloudwatch:DescribeAlarms"
            ],
            "Effect": "Allow",
            "Resource": "*"
          },
          {
            "Sid": "AllowRunInstancesResources",
            "Effect": "Allow",
            "Action": "ec2:RunInstances",
            "Resource": [
              "arn:aws:ec2:*::image/*",
              "arn:aws:ec2:*::snapshot/*",
              "arn:aws:ec2:*:*:subnet/*",
              "arn:aws:ec2:*:*:key-pair/*",
              "arn:aws:ec2:*:*:security-group/*",
              "arn:aws:ec2:*:*:network-interface/*"
            ]
          },
          {
            "Sid": "AllowRunInstancesConditions",
            "Effect": "Allow",
            "Action": "ec2:RunInstances",
            "Resource": [
              "arn:aws:ec2:*:*:instance/*",
              "arn:aws:ec2:*:*:volume/*",
              "arn:aws:ec2:*:*:network-interface/*"
            ],
            "Condition": {
              "StringLike": {
                "aws:RequestTag/Name": "*"
              },
              "StringEquals": {
                "aws:RequestTag/Owner": "${aws:PrincipalTag/login}",
                "aws:RequestTag/Department": "${aws:PrincipalTag/department}"
              },
              "ForAllValues:StringEquals": {
                "aws:TagKeys": [
                  "Name",
                  "Owner",
                  "Department"
                ]
              }
            }
          },
          {
            "Sid": "AllowCreateTagsOnRunInstance",
            "Effect": "Allow",
            "Action": "ec2:CreateTags",
            "Resource": [
              "arn:aws:ec2:*:*:volume/*",
              "arn:aws:ec2:*:*:instance/*",
              "arn:aws:ec2:*:*:network-interface/*"
            ],
            "Condition": {
              "StringEquals": {
                "ec2:CreateAction": "RunInstances"
              }
            }
          },
          {
            "Sid": "AllowPassRoleSpecificRole",
            "Effect": "Allow",
            "Action": "iam:PassRole",
            "Resource": "arn:aws:iam::*:role/EC2UbuntuSSMRole"
          },
          {
            "Sid": "AllowEC2ActionsConditions",
            "Effect": "Allow",
            "Action": [
              "ec2:StartInstances",
              "ec2:StopInstances",
              "ec2:RebootInstances"
            ],
            "Resource": "*",
            "Condition": {
              "StringEquals": {
                "ec2:ResourceTag/Department": "${aws:PrincipalTag/department}"
              }
            }
          },
          {
            "Sid": "AllowTerminateConditions",
            "Effect": "Allow",
            "Action": [
              "ec2:TerminateInstances"
            ],
            "Resource": "*",
            "Condition": {
              "StringEquals": {
                "ec2:ResourceTag/Owner": "${aws:PrincipalTag/login}"
              }
            }
          },
          {
            "Sid": "AllowStartSessionConditions",
            "Effect": "Allow",
            "Action": [
              "ssm:StartSession"
            ],
            "Resource": "*",
            "Condition": {
              "StringEquals": {
                "ssm:resourceTag/Department": "${aws:PrincipalTag/department}"
              }
            }
          },
          {
            "Sid": "AllowTerminateSessionConditions",
            "Effect": "Allow",
            "Action": [
              "ssm:TerminateSession"
            ],
            "Resource": [
              "arn:aws:ssm:*:*:session/${aws:PrincipalTag/login}-*"
            ]
          }
        ]
      }
      

    4. Choose Next: Tags.
    5. Review the selections you made, and then choose Create.

The policy described above uses SAML session tags for the ABAC to define permissions based on attributes. These attributes are the tags passed in the AssumeRoleWithSAML operation when the SAML-based federation occurs.

A combination of global (aws:TagKeys, aws:PrincipalTag, aws:RequestTag) and service (ec2:ResourceTag, ec2:CreateAction, ssm:resourceTag) condition keys is used to assign the permissions.

To learn more about AWS global and service conditions keys, see AWS global condition context keys and The condition keys table for AWS services.

Assign users to an AWS account

In this step, you use the permission set created in the previous step to assign access to the users for a specified AWS account.

To assign access to users

  1. Open the AWS SSO console.
  2. Choose AWS accounts.
  3. Under the AWS organization tab, in the list of AWS accounts, select one or more accounts to which you want to assign access.
  4. Choose Assign users.
  5. On the Select users or groups page, select both test users from the list of users as shown in Figure 4.

    Note: You can use the search box to look for specific users.

    Figure 4: Select users to assign to AWS accounts

    Figure 4: Select users to assign to AWS accounts

  6. Choose Next: Permission sets.
  7. On the Select permission sets page, select the permission sets that you created in step 5 to apply to the users from the table as shown in Figure 5.

    Figure 5: Select permissions sets

    Figure 5: Select permissions sets

  8. Choose Finish to start the configuration of your AWS account. When configuration is complete, a message is displayed stating that you have successfully configured your AWS account as shown in Figure 6.

    Figure 6: Confirmation that configuration is complete

    Figure 6: Confirmation that configuration is complete

Test the solution

Now that you have everything in place, let’s test the solution. To test the solution, you’ll log in to AWS SSO, access the AWS account and check the event logs, and test the Amazon EC2 operations.

Log in to AWS SSO as Bob through your external IdP

Enter the user portal URL in a browser window and log in to AWS SSO as Bob. AWS SSO redirects to the external provider for the log in process. After successful authentication, the external provider redirects to the AWS SSO portal, which shows you a list of the AWS accounts that you have access to. In this case, Bob has access to one AWS account as shown in Figure 7.

Figure 7: AWS SSO showing AWS accounts that the user has access to

Figure 7: AWS SSO showing AWS accounts that the user has access to

Access the AWS account using the permission set and confirm the event logs

Select the Management console link for the AWS account that has the myCustomPermissionSetEC2SSM permission set that you created earlier. This action federates into the AWS account and is logged in to AWS CloudTrail with the API AssumeRoleWithSAML. To confirm that the SAML session tags are being passed in the session, look at the API event log in the CloudTrail Event history console. In the following example, you can check the principalTags keys and their values under requestParameters.

{
     "eventVersion": "1.08",
     "userIdentity": {
          "type": "SAMLUser",
          "principalId": "d/UbWH0ijLBmlakaboZwi5CA/30=:[email protected]",
          "userName": "[email protected]",
          "identityProvider": "d/UbWH0ijLBmlakaboZwi5CA/30="
},
     "eventTime": "2021-05-13T16:08:48Z",
     "eventSource": "sts.amazonaws.com",
     "eventName": "AssumeRoleWithSAML",
     ...
     "requestParameters": {
        "sAMLAssertionID": "_5072d119-64f5-4341-aeed-30d9b7c24b5b",
        "roleSessionName": "[email protected]",
        "principalTags": {
            "SSMSessionRunAs": "bob",
            "department": "blue",
            "login": "[email protected]"
        },
        "durationSeconds": 3600,
        "roleArn": "arn:aws:iam::555555555555:role/aws-reserved/sso.amazonaws.com/AWSReservedSSO_myCustomPermissionSetEC2SSM_9e80ec498218bbea",
        "principalArn": "arn:aws:iam::555555555555:saml-provider/AWSSSO_5f872b6782a0507a_DO_NOT_DELETE"
    },
     "responseElements": {
     ...

Test EC2 operations

  1. Open the Amazon EC2 console:
    For this example, when opening the Amazon EC2 console there are already three running EC2 instances to test the ABAC policy that have been created with proper tags explained in the following step. From the top menu, you can also confirm the federated login AWSReservedSSO_myCustomPermissionSetEC2SSM_9e80ec498218bbea/[email protected] that represents the AWS SSO managed role and the user as shown in Figure 8.

    Figure 8: EC2 instances and user information

    Figure 8: EC2 instances and user information

  2. Launch a new EC2 instance:
    Start testing the ABAC policy by launching a new EC2 instance. This action is authorized only when you fill in the three required tags: Name, Owner, and Department.

    1. From the Amazon EC2 console, choose Launch Instances.
    2. Set the AMI, for this example select an Ubuntu-based OS.
    3. Set the Instance Type, a t2.micro will work.
    4. Configure the EC2 instance. Choose an IAM role to allow Systems Manager to manage the new EC2 instance. In this case, you have to create the IAM role EC2UbuntuSSMRole with the AWS managed policy AmazonEC2RoleforSSM attached in advanced with proper IAM permissions since the user Bob is not allow to do so. Then, you must use the user data to create the OS Ubuntu user—Bob—that you need to log in to the EC2 instance by using Session Manager. You can copy and paste the following to create the user “Bob”:#!/bin/bash
      sudo useradd -m bob
    5. Add storage using the default settings.
    6. Add tags. From the ABAC policy previously created, you can confirm that tag key Name can be anything as the condition StringLike is indicated with a wildcard (*). The tag keys Owner and Department have to match the principal session tags passed through federation. In this case, enter [email protected] as the key Owner, and enter blue as the Department, as shown in Figure 9.

      Figure 9: EC2 tags describing key value pairs

      Figure 9: EC2 tags describing key value pairs

    7. Configure security groups. When configuring security groups, you can choose an existing security group that doesn’t allow any inbound traffic to the SSH port. Since when using Session Manager you connect to the EC2 instance through an API that is going to be an outbound connection. This way you can safely leave the security group inbound rules close.
    8. Review and launch. It will ask you about selecting or creating a key pair. You don’t need one, because you’re using Session Manager. Proceed without selecting or creating a new SSH key pair. When launching the EC2 instance with the correct tag keys and values, you get the success message shown in Figure 10.
      Figure 10: EC2 success message launching an instance with the correct tags

      Figure 10: EC2 success message launching an instance with the correct tags

      If there are any missing tag keys or the values aren’t correct, the action will be denied as shown in Figure 11. For more information, you can decode the authorization error message using the API DecodeAuthorizationMessage.

      Figure 11: EC2 failed message launching an instance with incorrect tags

      Figure 11: EC2 failed message launching an instance with incorrect tags

  3. Stop, reboot, and terminate EC2 instances.
    The next tests are to be stop, reboot, and terminate the EC2 instances. In the ABAC policy you defined that only users who have the same department value as the resource can perform the first two actions. You can terminate and EC2 instance only if you are an owner. To stop, reboot, and terminate instances, open the EC2 Console, choose Instances, and select the instance you want to affect. Choose Instance state and choose the action you want to test: Stop instance, Reboot instance or Terminate instance.

    Trying to stop the EC2 instance amber-instance where Department is amber is shown in Figure 12.

    Figure 12: EC2 console showing how to stop an instance

    Figure 12: EC2 console showing how to stop an instance

    The action should fail as shown in Figure 13.

    Figure 13: EC2 instance failure message stopping an instance with wrong tags

    Figure 13: EC2 instance failure message stopping an instance with wrong tags

    Only when the department value of the EC2 instance is blue is it possible to stop or reboot the instance as shown in Figure 14.

    Figure 14: EC2 success message stopping an instance with correct tags

    Figure 14: EC2 success message stopping an instance with correct tags

    Only when the owner who launched the EC2 instance matches with the federated login is it possible to terminate the instance. Trying to terminate an EC2 instance that was launched by anyone other than the owner will lead to a failed action as shown in Figure 15.

    Figure 15: EC2 failed message terminating an instance with incorrect tags

    Figure 15: EC2 failed message terminating an instance with incorrect tags

  4. Try to modify tags. Because ABAC policies rely on tags, you cannot modify tags after the resources have been created. This is set in the ABAC policy statement AllowCreateTagsOnRunInstance in Create a new permission set using an ABAC policy. If you try to modify any tag keys or values on existing resources, the changes will be denied. For example, if you try to modify the owner of a tag on an existing EC2 instance, you get the “Failed to update tags” error message as shown in Figure 16.

    Figure 16: Failed message when attempting to modify tags

    Figure 16: Failed message when attempting to modify tags

  5. Connect to the EC2 instance using Session Manager.
    1. Test logging in to the EC2 instance by choosing the new instance and choosing Connect as shown in Figure 17.

      Figure 17: EC2 console selecting an instance to connect

      Figure 17: EC2 console selecting an instance to connect

    2.  Then choose the Session Manager tab and choose Connect as shown in Figure 18.
      Figure 18: EC2 console selecting Session Manager to connect

      Figure 18: EC2 console selecting Session Manager to connect

      This will open a new tab in the browser redirecting to a Systems Manager session where you can confirm that the Ubuntu OS user is Bob as shown in Figure 19.

      Figure 19: Systems Manager session started confirming Ubunto OS user

      Figure 19: Systems Manager session started confirming Ubunto OS user

      Note: By default, sessions are launched using the credentials of a system-generated account named ssm-user that is created on a managed instance. However, you can instead launch sessions using any OS user by enabling the run as feature in SSM. To learn more about this, see Enable run as support for Linux and macOS instances in the Systems Manager Session Manager user guide.

    3. Performing the same action in an EC2 instance with a different Department tag will lead to a denied action as shown in Figure 20. This is because the ABAC policy allows the StartSession action only when the Department key matches the Department value in the EC2 instance.

      Figure 20: Systems Manager StartSession failed message

      Figure 20: Systems Manager StartSession failed message

Conclusion

In this blog post, you learned how to use AWS SSO with the two methods of passing attributes to AWS account using session tags for ABAC. You also learned how to build policies with tags as conditions to simplify and reuse custom permission sets. You have seen working examples with services like EC2, and Systems Manager Session Manager. To learn more about ABAC policies, SAML session tags, and how to pass session tags in federation, see IAM tutorial: Use SAML session tags for ABAC and Passing session tags using AssumeRoleWithSAML.

If you have feedback about this post, submit comments in the Comments section below.

Want more AWS Security news? Follow us on Twitter.

Author

Rodrigo Ferroni

Rodrigo Ferroni is a senior Security Specialist at AWS Enterprise Support. He is certified in CISSP, AWS Security Specialist, and AWS Solutions Architect Associate. He enjoys helping customers to continue adopting AWS security services to improve their security posture in the cloud. Outside of work, he loves to travel as much as he can. In every winter he enjoys snowboarding with his friends.

How to enable secure seamless single sign-on to Amazon EC2 Windows instances with AWS SSO

Post Syndicated from Todd Rowe original https://aws.amazon.com/blogs/security/how-to-enable-secure-seamless-single-sign-on-to-amazon-ec2-windows-instances-with-aws-sso/

Today, we’re launching new functionality that simplifies the experience to securely access your AWS compute instances running Microsoft Windows. We took on this update to respond to customer feedback around creating a more streamlined experience for administrators and users to more securely access their EC2 Windows instances. The new experience utilizes your existing identity solutions to run and manage your Microsoft Windows workloads on AWS. You can create and administer users in AWS Single Sign-On (AWS SSO) or an AWS SSO supported identity provider (such as Okta, Ping, and OneLogin), and provide a one-click single sign-on to your EC2 Windows instances from the AWS Fleet Manager console. You can also use your existing corporate usernames, passwords, and multi-factor authentication devices to securely access your EC2 windows instances, without having to enter your credentials multiple times.

Using AWS SSO eliminates the use of shared administrator credentials and the need to configure remote access client software. You can centrally grant and revoke access to your EC2 Windows instances at scale across multiple AWS accounts. For example, if you remove an employee from your AWS SSO integrated identity system, their access to all AWS resources (including EC2 Windows instances) is automatically revoked. Individual user actions can now be viewed in the Amazon EC2 Windows instances event log, making it easier to meet audit and compliance requirements.

AWS SSO background

AWS SSO simplifies managing SSO access to AWS accounts and business applications, and it is the central location where you can create or connect your workforce identities in AWS. You can control SSO access and user permissions across all your AWS accounts in AWS Organizations. You can choose to manage access to your AWS accounts, to cloud applications, or both.

When managing access to AWS accounts, AWS SSO enables you to define and assign roles centrally across your AWS Organizations account using permission sets. Permission sets are role definitions (templates) that AWS SSO uses to create and maintain roles in your AWS Organizations accounts. The permission set defines the session duration and policies for the role. When you assign a permission set to a user or group in a selected AWS account, AWS SSO creates a corresponding role in the target account, and AWS SSO controls access to the role through the AWS SSO user portal.

This post uses a permission set that manages access to AWS Fleet Manager to deliver one-click access into EC2 instances.

You will accomplish this in three steps:

  1. Create an AWS SSO permission set (for example, demoFMPermissionSet)
  2. Assign the permission set to an existing AWS SSO group (for example, demoFMGroup)
  3. Login to the AWS SSO User Portal and connect to your EC2 Windows instance via the AWS Fleet Manager console

Prerequisites

The prerequisites for this example are that you have:

  1. Configured AWS SSO in your account with provisioned users and groups
  2. An EC2 Windows instance managed by AWS Systems Manager Fleet Manager

Solution architecture

The following diagram shows the steps you will follow to configure and use an AWS SSO user identity to login to an EC2 Windows instance. 

Figure 1: Architecture diagram showing steps implemented in this solution

Figure 1: Architecture diagram showing steps implemented in this solution

How it works

The AWS SSO permission set creates a role in a target account that gives an authorized user permissions to use AWS Fleet Manager to sign into EC2 Windows instances. When a user chooses the role in the account, the user signs onto the AWS Fleet Manager console and selects the EC2 instance where they want to sign in.

AWS Fleet Manager creates a local Windows user account and a credential for that user, and then automates their sign-in to the instance.

To create an AWS SSO permission set

This procedure creates a permission set that grants assigned users and groups permissions to use AWS Fleet Manager for single sign-on to EC2 instances.

  1. From the AWS SSO console, go to AWS Accounts, select the Permission sets tab, select Create permission set and choose Create a custom permission set.
  2. Name your permission set, and fill out the required fields, making sure to select Create a custom permissions policy at the bottom of the page. See Sample custom permissions policy below for details on the policy.
  3. After creating the custom permissions policy, you can also apply optional tagging. When you are done, review and choose Create to complete creating your custom permission set, as shown in Figure 2.


Figure 2: Reviewing the custom permission set

Figure 2: Reviewing the custom permission set

Sample custom permissions policy

This is the sample policy you’ll use; you can download it here.
Code sample

This permission policy contains a separate statement ID (Sid) for each service, with the required actions for each.

On line 84, notice the reference to an AWSSSO-CreateSSOUser document resource. This document is responsible for creating a local Windows account based on the AWS SSO logged in user, as well as setting/resetting the user’s password for automatic log in to the Windows instance.

On lines 96-98, you will see a new ssm-guiconnect action. This is used to make the secure connection to your EC2 Windows instance, and render the GUI desktop in the Fleet Manager console.

To assign your AWS SSO group

Assign your AWS SSO group to the AWS Fleet Manager permission set in your selected accounts

In this procedure, we will select two AWS accounts in our AWS organization, and grant our AWS SSO group access to the previously-created permission set that enables sign-in via Fleet manager.

  1. From the AWS SSO console, navigate to AWS accounts and select an account (for example, demoAccount1 and demoAccount2), as shown in Figure 3.
  2. Choose the Assign users button. If you wish, you may also assign access to multiple groups or to users individually.
  3.  

    Figure 3: Selecting AWS Account to assign users or groups

    Figure 3: Selecting AWS Account to assign users or groups

  4. To enable multiple AWS SSO users to access this feature, choose an AWS SSO group from the Groups tab and then choose the Next button, as shown in Figure 4
  5.  

    Figure 4: Assigning group to AWS accounts

    Figure 4: Assigning group to AWS accounts

  6. Select the permission set you created previously and choose the Next button.
  7.  

    Figure 5: Selecting permission set to AWS accounts

    Figure 5: Selecting permission set to AWS accounts

  8. Review your choices, and press Submit to submit your assignments, as shown in Figure 6.
  9.  

    Figure 6: Reviewing submit assignments to AWS accounts

    Figure 6: Reviewing submit assignments to AWS accounts

AWS SSO will now use the permission set definition to create a role in each selected account, which grants users access to sign in via Fleet Manager. Users gain access to that role by signing into the AWS SSO user portal.

To access Fleet Managed EC2 instances

  1. From the console, navigate to your AWS SSO user portal URL and login as any AWS SSO user who is a member of the group (e.g., demoFMGroup) you selected in step 3 above.
  2. From the AWS SSO user portal page, choose Management console and navigate to the Fleet Manager console where you have your EC2 Windows managed instance, as shown in Figure 7
  3.  

    Figure 7: Navigating to the Management console from the user portal

    Figure 7: Navigating to the Management console from the user portal

  4. Select a managed Windows instance and select Instance actions and then Connect with Remote Desktop as shown in Figure 8.
  5.  

    Figure 8: Connecting with Remote Desktop

    Figure 8: Connecting with Remote Desktop

  6. Select Single Sign-On and then select Connect, as shown in Figure 9.
  7. This automatically logs you in using your AWS SSO credential. If this is the first time connecting to the instance, a new local user will be created. 

    Figure 9: Selecting Single Sign-On

    Figure 9: Selecting Single Sign-On

    Once connected, you will see your EC2 Windows instance in the All sessions tab, enabling you to have up to four concurrent sessions in a single view, as shown in Figure 10. For a single session view, select the Instance ID tab. 

    Figure 10: Selecting expanded desktop view

    Figure 10: Selecting expanded desktop view

  8. From the single session tab, we can see that AWS Fleet Manager created a local Windows Server user for the AWS SSO user (demoUser1).

After creating the local user, AWS Fleet Manager used the credentials it created to sign into the EC2 Windows server as sso-demoUser1 from the Windows Event Viewer, giving you individual user logging on your EC2 Windows servers. These logs are also available from within the Fleet Manager console. 

Figure 11: Showing AWS SSO username in Amazon EC2 Windows instance event log

Figure 11: Showing AWS SSO username in Amazon EC2 Windows instance event log

Conclusion

This post described how to provide a single sign-in experience to Windows EC2 instances using AWS Fleet Manager with AWS Single Sign-On. Doing this allows you to create users in AWS SSO, or to connect any supported identity provider to AWS SSO, and to give users one-click access to their EC2 instances through AWS Fleet Manager.

This is done by creating an AWS SSO permission set that grants users access to AWS Fleet Manager, then assigning a group from AWS SSO to the permission set in the selected AWS accounts. Users can sign into the AWS SSO user portal, navigate to the AWS Fleet Manager, select their Windows EC2 instance, and land in the Windows user experience without having to enter Windows credentials separately.

To learn more about AWS SSO, visit the AWS Single Sign-On Documentation. To learn more about Fleet Manager, visit the AWS Systems Manager Fleet Manager Documentation.

If you have feedback about this blog post, submit comments in the Comments section below. If you have questions about this post, start a new thread on the AWS Single Sign-On forum.

Want more AWS Security news? Follow us on Twitter.

Author

Todd Rowe

Todd is a Principal Product Manager focused on AWS workforce identity products. He enjoys tackling complex customer problems through intuitive connected solutions. Outside of work, Todd enjoys all water sports, mountain biking, and live music.

Journey to Adopt Cloud-Native Architecture Series: #4 – Governing Security at Scale and IAM Baselining

Post Syndicated from Anuj Gupta original https://aws.amazon.com/blogs/architecture/journey-to-adopt-cloud-native-architecture-series-4-governing-security-at-scale-and-iam-baselining/

In Part 3 of this series, Improved Resiliency and Standardized Observability, we talked about design patterns that you can adopt to improve resiliency, achieve minimum business continuity, and scale applications with lengthy transactions (more than 3 minutes).

As a refresher from previous blogs in this series, our example ecommerce company’s “Shoppers” application runs in the cloud. The company experienced hypergrowth, which posed a number of platform and technology challenges, namely, they needed to scale on the backend without impacting users.

Because of this hypergrowth, distributed denial of service (DDoS) attacks on the ecommerce company’s services increased 10 times in 6 months. Some of these attacks led to downtime and loss of revenue. This blog post shows you how we addressed these threats by implementing a multi-account strategy and applying AWS Identity and Access Management (IAM) best practices.

A multi-account strategy ensures security at scale

Originally, the company’s production and non-production services were running in a single account. This meant non-production vulnerabilities like frequently changing code or privileged access could impact the production environment. Additionally, the application experienced issues due to unexpectedly reaching service quotas. These include (but are not limited to) number of read replicas per master in Amazon Relational Database Service (Amazon RDS) and total storage for all DB instances in Auto Scaling Service Quotas for Amazon Elastic Compute Cloud (Amazon EC2).

To address these issues, we followed multi-account strategy best practices. We established the multi-account hierarchy shown in Figure 1 that includes the following eight organizational units (OUs) to meet business requirements:

  1. Security PROD OU
  2. Security SDLC OU
  3. Infrastructure PROD OU
  4. Infrastructure SDLC OU
  5. Workload PROD OU
  6. Workload SDLC OU
  7. Sandbox OU
  8. Transitional OU

To identify the right fit for our needs, we evaluated AWS Landing Zone and AWS Control Tower. To reduce operation overhead of maintaining a solution, we used AWS Control Tower to deploy guardrails as service control policies (SCPs). These guardrails were then separated into production and non-production environments, creating the hierarchy shown in Figure 1.

We created a new Payer (or Management) Account with Sandbox OU and Transitional OU under Root OU. We then moved existing AWS accounts under the Transitional OU and Sandbox OU. We provisioned new accounts with Account Factory and gradually migrated services from existing AWS accounts into the newly formed Log Archive Account, Security Account, Network Account, and Shared Services Account and applied appropriate guardrails. We then registered Sandbox OU with Control Tower. Additionally, we migrated the centralized logging solution from Part 3 of this blog series to the Security Account. We moved non-production applications into the Dev and Test Accounts, respectively, to isolate workloads. We then moved existing accounts that had production services from the Transitional OU to Workload PROD OU.

Multi-account hierarchy

Figure 1. Multi-account hierarchy

Implementing a multi-account strategy alleviated service quota challenges. It isolated variable demand non-production environments from more consistent production environments, which reduced the downtime caused by unplanned scaling events. The multi-account strategy enforces governance at scale, but also promotes innovation by allocating separate accounts with distinct security requirements for proof of concepts and experimentation. This reduces impact risks to production accounts and allows the required guardrails to be automatically applied.

Improving access management and least privilege access

When the company experienced hypergrowth, they not only had to scale their application’s infrastructure, but they also had to increase how often they release their code. They also hired and onboarded new internal teams.

To strengthen new/existing employees’ credentials, we used AWS Trusted Advisor for IAM Access Key Rotation. This identifies IAM users whose access keys have not been rotated for more than 90 days and created an automated way to rotate them. We then generated an IAM credential report to identify IAM users that don’t need console access or that don’t need access keys. We gradually assigned these users role-based access versus IAM access keys.

During a Well-Architected Security Pillar review, we identified some applications that used hardcoded passwords that hadn’t been updated for more than 90 days. We re-factored these applications to get passwords from AWS Secrets Manager and followed best practices for performance.

Additionally, we set up a system to automatically change passwords for RDS databases and wrote an AWS Lambda function to update passwords for third-party integration. Some applications on Amazon EC2 were using IAM access keys to access AWS services. We re-factored them to get permissions from the EC2 instance role attached to the EC2 instances, which reduced operational burden of rotating access keys.

Using IAM Access Analyzer, we analyzed AWS CloudTrail logs and generated policies for IAM roles. This helped us determine the least privilege permissions required for the roles as mentioned in the IAM Access Analyzer makes it easier to implement least privilege permissions by generating IAM policies based on access activity blog.

To streamline access for internal users, we migrated users to AWS Single Sign-On (AWS SSO) federated access. We enabled all features in AWS Organizations to use AWS SSO and created permission sets to define access boundaries for different functions. We assigned permission sets to different user groups and assigned users to user groups based on their job function. This allowed us to reduce the number of IAM policies and use tag-based control when defining AWS SSO permissions policies.

We followed the guidance in the Attribute-based Access Control with AWS SSO blog post to map user attributes and use tags to define permissions boundaries for user groups. This allowed us to provide access to users based on specific teams, projects, and departments. We enforced multi-factor authentication (MFA) for all AWS SSO users by configuring MFA settings to allow sign in only when an MFA device has been registered.

These improvements ensure that only the right people have access to the required resources for the right time. They reduce the risk of compromised security credentials by using AWS Security Token Service (AWS STS) to generate temporary credentials when needed. System passwords are better protected from unwanted access and automatically rotated for improved security. AWS SSO also allows us to enforce permissions at scale when people’s job functions change within or across teams.

Conclusion

In this blog post, we described design patterns we used to implement security governance at scale using multi-account strategy and AWS SSO integrations. We also talked about patterns you can adopt for IAM baselining that allow least privilege access, checking for IAM best practices, and proactively detecting unwanted access.

This blog post also covers why you need to refresh your threat model during hyperscale growth and how different services can make it easier to enforce security controls. In the next blog, we will talk about more security design patterns to improve infrastructure security and incident response during hyperscale.

Find out more

Other blogs in this series

Related information

Federated authentication to Amazon Redshift using AWS Single Sign-On

Post Syndicated from Manash Deb original https://aws.amazon.com/blogs/big-data/federated-authentication-to-amazon-redshift-using-aws-single-sign-on/

Managing database users through identity federation allows you to manage authentication and authorization procedures centrally. Amazon Redshift, a fast, fully managed cloud data warehouse, provides browser-based plugins for JDBC/ODBC drivers, which helps you easily implement identity federation capabilities added with multi-factor authentication (MFA) to secure your data warehouse, and also helps automation and enforcement of data access policies across the organization.

AWS Single Sign-On (AWS SSO) provides tools to federate access to users to the AWS environment. AWS SSO integrates with AWS Organizations to manage access to all the AWS accounts under the organization. In our previous post, we explained how you can integrate the Amazon Redshift browser-based Security Assertion Markup Language (SAML) plugin to add SSO and MFA capability with your federation identity provider (IdP). We expand on that in this post to show how you can set up this federated authentication to connect users to Amazon Redshift through AWS SSO integrated with a supported identity source directory of your choice, such as the native AWS SSO identity store, AWS managed or self-managed or on-premises Microsoft Active Directory (AD), or an external IdP such as Okta, Azure AD, or Ping.

Solution overview

When you connect to Amazon Redshift using a JDBC/ODBC client, you can use the Amazon Redshift browser SAML plugin to launch a custom AWS SSO SAML application, which provides the SAML attributes required to connect to Amazon Redshift, after authenticating the user identity against the identity source directory that you have integrated with AWS SSO. The SAML application uses the user’s identity source credentials to get their user and group attributes, and grants the appropriate Amazon Redshift database access privileges to the user. The following diagram illustrates this workflow.

The following are the high-level steps for this setup:

  1. Enable AWS SSO (linked with your preferred identity source directory) and set up custom SAML applications in AWS SSO with the appropriate user or group association and attribute mappings.
  2. Set up a SAML IdP for AWS SSO and link it to an AWS Identity and Access Management (IAM) role with appropriate permissions to access Amazon Redshift.
  3. Set up the Amazon Redshift cluster and database groups that correspond to your AWS SSO directory groups.
  4. Configure the JDBC/ODBC client to authenticate with your AWS SSO SAML application and obtain federated IAM credentials to access the Amazon Redshift cluster.

Prerequisites

You need the following prerequisites to set up this solution:

Use case

In this example use case, we use AWS SSO integrated with AWS Managed Microsoft AD as the identity source to connect to an Amazon Redshift cluster as users from two different AD groups: BI users and analysts. We create two SAML applications in AWS SSO to map these two groups with their respective users and then connect to Amazon Redshift using SQL Workbench/J client via AWS SSO using their Microsoft AD user credentials.

As a prerequisite step, we have already set up an AWS Managed Microsoft AD directory with sample directory groups and user mappings, and attached it to AWS SSO as the identity source.

The following screenshots show our AD groups and user mappings.

The following screenshot shows our AWS SSO identity source mapping.

Configure AWS SSO

As mentioned in the prerequisites section, you need to enable AWS SSO in your account, and map it with a supported identity source. If AWS SSO isn’t configured in your account, follow the steps in Getting Started.

In this step, you create two custom SAML applications in AWS SSO.

  1. On the AWS SSO console, choose Applications in the navigation pane.
  2. Choose Add a new application.
  3. Choose Add a custom SAML 2.0 application.
  4. For Display name, enter an appropriate name for the SAML application (for this post, because we create two applications, we first enter Redshift-SAML-BI-User).
  5. In the Application metadata section, choose the option to manually enter the metadata values.
  6. For Application ACS URL, enter http://localhost:7890/redshift/.
  7. For Application SAML audience, enter urn:amazon:webservices:redshift.
  8. On the Configuration tab, choose Download to download the AWS SSO SAML metadata file.

We use this file later to create the IdP.

  1. On the Assigned users tab, choose Assign users to add bi_users_group to this application.
  2. On the Attribute mappings tab, add the custom attribute mappings from the following table.
User attribute in the application Maps to this string value or user attribute in AWS SSO Description
Subject ${user:email} User identity
https://aws.amazon.com/SAML/Attributes/RoleSessionName ${user:email} Identification for the user session, which in most cases is the email_id of the user
https://redshift.amazon.com/SAML/Attributes/AutoCreate True If this parameter is set, new users authenticated by the IdP are automatically created in Amazon Redshift
https://aws.amazon.com/SAML/Attributes/Role arn:aws:iam::<yourAWSAccountID>:role/redshift-federation-role,arn:aws:iam:: <yourAWSAccountID>:saml-provider/redshift-federation-saml-provider aws_idp_iam_role_arn, aws_identity_provider_arn
https://redshift.amazon.com/SAML/Attributes/DbUser ${user:email} Identification for the user session, which in most cases is the email_id of the user
https://redshift.amazon.com/SAML/Attributes/DbGroups bi_users_group Amazon Redshift database group names for the user, which in most cases is the same as the directory groups the user belongs to

The IAM role and IdP names and ARN strings entered for the https://aws.amazon.com/SAML/Attributes/Role attribute mapping must match the names given while creating those IAM resources for the BI user group during the IAM role setup in the next section.

  1. Choose Dashboard in the navigation pane and choose the User portal URL link to launch the user portal’s login page in a new browser window.
  2. Log in to the AWS SSO user portal using your Microsoft AD user credentials for the BI user.

After logging in, you can see the new SAML application we created.

  1. Choose the application (right-click) and copy the link address.

We need this application login URL in a later step to connect to Amazon Redshift using AWS SSO federation.

  1. Similar to the preceding steps, create another SAML application called Redshift-SAML-Analyst-User and assign the analyst group to this application.
  2. On the application’s Attribute mappings tab, add all the attribute mappings similar to the previous application, but with different mapping values for the Role and DbGroups attributes:
    1. The DbGroups parameter should be mapped to analysts_group.
    2. The Role parameter value entered should match the names of IAM resources created for the analyst user group in the next section.
  1. Log in to the AWS SSO user portal using your Microsoft AD user credentials for the analyst user.
  2. Copy the application link address, which you need in a later step to connect to Amazon Redshift using AWS SSO federation.

Set up IAM roles and SAML IdPs

In this step, you set up two SAML IdPs and two IAM roles with appropriate permissions for the two AD directory groups to access your Amazon Redshift cluster. You need the SAML Metadata XML files downloaded from your AWS SSO SAML applications from the previous section. As outlined in our earlier post, you may follow the step-by-step process to add the IdPs and IAM roles manually, or use the following AWS CloudFormation template.

Next, you need to confirm or replace the role ARN and the IdP ARN values in the two SAML applications’ attribute mappings. Refer to the following screenshot for the location of the two ARN values on the IAM console.

Set up an Amazon Redshift cluster

If you haven’t set up an Amazon Redshift cluster yet, see Getting started with Amazon Redshift for a step-by-step guide to create a new cluster in your AWS account.

If you already have an Amazon Redshift cluster, note the admin user credentials for that cluster and connect to that cluster using a SQL client like SQL Workbench/J and the latest Amazon Redshift JDBC driver.

After logging in to your Amazon Redshift cluster as an admin user, you can set up database objects and appropriate access permissions for them. In the following code, we set up two schemas for analysts and BI users, and then grant access on them to the relevant groups:

CREATE GROUP analysts_group;
CREATE GROUP bi_users_group;

CREATE SCHEMA IF NOT EXISTS analysts_schema;
GRANT USAGE ON SCHEMA analysts_schema TO GROUP analysts_group;
ALTER DEFAULT PRIVILEGES IN SCHEMA analysts_schema GRANT SELECT ON TABLES TO GROUP analysts_group;
GRANT SELECT ON ALL TABLES IN SCHEMA analysts_schema TO GROUP analysts_group;

CREATE SCHEMA IF NOT EXISTS bi_schema;
GRANT USAGE ON SCHEMA bi_schema TO GROUP bi_users_group;
ALTER DEFAULT PRIVILEGES IN SCHEMA bi_schema GRANT SELECT ON TABLES TO GROUP bi_users_group;
GRANT SELECT ON ALL TABLES IN SCHEMA bi_schema TO GROUP bi_users_group;

Connect to Amazon Redshift with AWS SSO federation

In this step, you connect to your Amazon Redshift cluster from your SQL Workbench/J client using AWS SSO federation.

  1. Create a new connection in SQL Workbench/J and choose Amazon Redshift as the driver.
  2. Enter the following code in the URL section of your connection properties (provide your Amazon Redshift cluster endpoint):
    jdbc:redshift:iam://your_cluster_endpoint

  3. Choose Extended Properties and add the following three properties:
    1. login_url – Enter the BI user group’s SAML application’s login URL you copied in an earlier step.
    2. plugin_name – Enter com.amazon.redshift.plugin.BrowserSamlCredentialsProvider.
    3. idp_response_timeout – Enter 60.
  4. Choose OK, and connect to your cluster.

This launches your AWS SSO SAML application’s sign-in page in a browser window. After you successfully authenticate using the BI user’s AD user credentials in the browser, the SQL client connects you to Amazon Redshift as the BI user under the bi_users_group database group. You can verify the user’s database session and group association by running the following SQL:

select * from stv_sessions where starttime &gt; sysdate-1 order by 1 desc;

  1. Similar to the BI user, you can create a new database connection to test an analyst user login. Instead of adding the extended properties in SQL Workbench, you can also use an initialization file to add the JDBC connection properties. For that, create a file rsjdbc.ini on your file system with the following contents (provide the analyst group’s SAML application’s login URL you copied earlier):
[ANALYST]
login_url=https://xxxxxxxxxx.awsapps.com/start/#/saml/default/Redshift-SAML-Analyst-User/ins-xxxxxxxx
plugin_name=com.amazon.redshift.plugin.BrowserSamlCredentialsProvider
idp_response_timeout=60
  1. Enter the following in the URL section of your connection properties (provide your cluster endpoint and file system path for the rsjdbc.ini file you created in the previous step):
jdbc:redshift:iam://your_cluster_endpoint?inifile=/network_path/rsjdbc.ini&amp;IniSection=ANALYST

Your connection profile should look like the following screenshot.

  1. Choose OK to connect.

After you authenticate using the analyst user’s AD user credentials in the browser, you should be logged in to Amazon Redshift as the analyst user mapped to the analysts_group, as shown in the following screenshot.

Conclusion

In this post, we showed how you can use AWS SSO with AWS Managed Microsoft AD to federate access to Amazon Redshift using identity federation. The same setup instructions can also work with any other supported identity source directory of your choice, such as the native AWS SSO identity store, self-managed or on-premises Active Directory, or an external identity provider (IdP) such as Okta, Azure AD, and Ping.


About the Authors

Manash Deb is a Software Development Engineer in AWS Redshift team. He has worked on building end-to-end data-driven solutions in different database and data warehousing technologies for over 15 years. He loves to learn new technologies and solving, automating, and simplifying customer problems with easy-to-use cloud data solutions on AWS.


Manish Vazirani is an Analytics Specialist Solutions Architect at Amazon Web Services.


Rajesh Mohan is an SDE-II at Amazon Studios where he engineers solutions to build a media supply chain to integrate content vendors with Prime Video. In his free time, he enjoys wandering the streets of New York City, trekking the mountains of California and binging on food videos while chomping away on delicious food from around the world.

Authenticate AWS Client VPN users with AWS Single Sign-On

Post Syndicated from Sylvia Qi original https://aws.amazon.com/blogs/security/authenticate-aws-client-vpn-users-with-aws-single-sign-on/

AWS Client VPN is a managed client-based VPN service that enables users to use an OpenVPN-based client to securely access their resources in Amazon Web Services (AWS) and in their on-premises network from any location. In this blog post, we show you how you can integrate Client VPN with your existing AWS Single Sign-On via a custom SAML 2.0 application to authenticate and authorize your Client VPN connections and traffic.

Maintaining a separate set of credentials to authenticate users and authorize access for each resource is not only tedious, it’s not scalable. A common way to solve this challenge is to use a central identity store such as AWS SSO, which functions as your identity provider (IdP). You can then use Security Assertion Markup Language 2.0 (SAML 2.0) to integrate AWS SSO with each of your resources or applications, also known as service providers (SPs). The IdP authenticates users and passes their identity and security information to the SP via SAML. With SAML, you can enable a single sign-on experience for your users across many SAML-enabled applications and services. Users authenticate with the IdP once using a single set of credentials, and then have access to multiple applications and services without additional sign-ins.

Client VPN supports identity federation with SAML 2.0 for Client VPN endpoints. Deploying custom SAML applications can present some challenges, specifically around the mapping of attributes between what the SP expects to receive and what the IdP can provide. We’ve taken the guesswork out of the process and show you the exact mappings needed for the Client VPN to AWS SSO integration. The integration lets you use AWS SSO groups to not only grant access to create a Client VPN connection, but also to allow access to specific network ranges based upon group membership. We walk you through setting up all of the components required to implement the authentication workflow described in Figure 1. This consists of creating the custom SAML applications and tying them into AWS Identity and Access Management (IAM), creating and configuring the Client VPN endpoint, creating a Client VPN connection with an AWS SSO user, and testing your connectivity.
 

Figure 1: Authentication workflow

Figure 1: Authentication workflow

The steps illustrated in Figure 1 are:

  1. The user opens the AWS-provided VPN client on their device and initiates a connection to the Client VPN endpoint.
  2. The Client VPN endpoint sends an IdP URL and authentication request back to the client, based on the information that was provided in the IAM SAML provider.
  3. The AWS provided VPN client opens a new browser window on the user’s device. The browser makes a request to the IdP and displays a sign-in page. This is the same sign-in experience as the AWS SSO user portal, as the IdP URL points to a custom SAML application created within AWS SSO.
  4. The user enters their credentials on the sign-in page, and the IdP sends a signed SAML assertion back to the client in the form of an HTTP POST to the AWS provided VPN client.
  5. The SAML assertion is passed from the AWS provided VPN client to the Client VPN endpoint.
  6. The endpoint validates the assertion and either allows or denies access to the user.

Prerequisites

Here are the requirements to complete the VPN and SSO setup:

  • AWS SSO is configured to use the internal AWS SSO identity store. Refer to the AWS Single Sign-On Getting Started guide for help configuring AWS SSO. AWS SSO can exist in a different AWS account than the account where you deploy Client VPN endpoints. The steps outlined in this blog post are specific to the internal AWS SSO identity store, however they could be adapted to support other identity stores that support SAML 2.0.
  • Two AWS SSO users and two AWS SSO groups for testing. Each user should be a member of only one of the SSO groups. The purpose of this configuration is to demonstrate how access can be allowed or denied based upon group membership.
  • An Amazon Virtual Private Cloud (Amazon VPC) with an Amazon Elastic Compute Cloud (Amazon EC2) instance for connectivity testing.
  • An x.509 certificate imported into AWS Certificate Manager (ACM). You can generate a self-signed certificate for this walkthrough, however you should review the prerequisites for importing certificates into ACM. This certificate will be used for encrypted communication between the client VPN software and the client VPN endpoint.
  • Administrative access to your AWS environment, or at least sufficient access to create AWS SSO applications, ACM certificates, EC2 Instances, and Client VPN endpoints.
  • A client device running Windows or macOS with the latest version of Client VPN software installed. You can download it from the AWS Client VPN download.

Solution walkthrough

For this solution, you’ll complete the following steps:

  1. Establish trust with your IdP
  2. Create and configure Client VPN SAML applications in AWS SSO.
  3. Integrate the Client VPN SAML applications with IAM.
  4. Create and configure the Client VPN endpoint.
  5. Test the solution.
  6. Cleanup the test environment.

Establish trust with your IdP

In this walkthrough, Client VPN is the SAML SP and AWS SSO is the SAML IdP. One of the key steps to deploying this solution is to establish trust between the SP and IdP. This one-time configuration is done by creating custom SAML applications within AWS SSO and exporting application-specific metadata information from the applications. This metadata is then uploaded—in the form of IAM IdPs—into your AWS account where the Client VPN endpoint is created. IAM IdPs let you manage your user identities in a centralized identity store, such as AWS SSO, and grant those user identities permissions to AWS resources within your account. For organizations with multiple AWS accounts, the use of IAM IdPs resolves the management, scalability, and security issues associated with creating IAM users directly within each account.

Create and configure the Client VPN SAML applications in AWS SSO

Create two custom SAML 2.0 applications in AWS SSO. One will be the IdP for the Client VPN software, the other will be a self-service portal that allows users to download their Client VPN software and client configuration file.

To create the VPN client SAML application:

  1. In the AWS SSO console, select Applications from the left pane and select Add a new application.
  2. Select Add a custom SAML 2.0 application to use as the IdP for the Client VPN software.
     
    Figure 2: Add a SAML application

    Figure 2: Add a SAML application

  3. In the Details section, set Display name to VPN Client.
  4. In the Application Metadata section, select If you don’t have a metadata file, you can manually type your metadata values and enter the following values:
    • Application ACS URL: http://127.0.0.1:35001
    • Application SAML audience: urn:amazon:webservices:clientvpn
  5. Accept the default values for all other fields.
  6. Choose Save Changes.
  7. Select the Attribute mappings tab and configure the mappings as shown in the table and Figure 3 below.

    Note: For production environments, you should grant access to these applications via an AWS SSO group instead of individual users as shown in this walkthrough.

    User attribute in the application Maps to this string value or user attribute in AWS SSO Format
    Subject ${user:email} emailAddress
    Name ${user:email} unspecified
    FirstName ${user:givenName} unspecified
    LastName ${user:familyName} unspecified
    memberOf ${user:groups} unspecified
    Figure 3: VPN client attribute mappings

    Figure 3: VPN client attribute mappings

  8. On the Assign users tab, add your two test user accounts.
  9. On the application configuration page, choose the download link for AWS SSO SAML metadata. Save the file to use in a later step.

To create the VPN client self-service SAML application

  1. In the AWS SSO console, select Applications from the left pane and select Add a new application.
  2. Select Add a custom SAML 2.0 application to use as the application that will serve as the IdP for the Client VPN software.
     
    Figure 4: Add a SAML application

    Figure 4: Add a SAML application

  3. In the Details section, set Display name to VPN Client Self Service.
  4. In the Application Metadata section, select If you don’t have a metadata file, you can manually type your metadata values and enter the following values:
    • Application ACS URL: https://self-service.clientvpn.amazonaws.com/api/auth/sso/saml
    • Application SAML audience: urn:amazon:webservices:clientvpn
  5. Accept the default values for all other fields.
  6. Choose Save Changes.
  7. Choose the Attribute mappings tab and configure the mappings as shown in the following table and in Figure 5.

    Note: For production environments you should grant access to these applications via an AWS SSO group instead of individual users as shown in this walkthrough. For the purposes of this walkthrough, you grant individual users access to the SAML applications but grant network access via group membership. This is done to allow easier demonstration of the ability to grant or deny network specific access via groups when testing the solution.

    User attribute in the application Maps to this string value or user attribute in AWS SSO Format
    Subject ${user:email} emailAddress
    Name ${user:email} unspecified
    FirstName ${user:givenName} unspecified
    LastName ${user:familyName} unspecified
    memberOf ${user:groups} unspecified
    Figure 5: VPN Client self-service attribute mappings

    Figure 5: VPN Client self-service attribute mappings

  8. On the Assign users tab, add your two test user accounts.
  9. On the application’s Configuration page, choose the download link for AWS SSO SAML metadata. Save the file to use in a later step.

Integrate the Client VPN SAML applications with IAM

Client VPN requires a unique IdP definition in IAM. You must set up the IdP in the same AWS account where the Client VPN endpoint will be created.

To create the IAM IdP:

  1. In the IAM console, select Identity providers and Add provider. Name the provider aws-client-vpn and upload the metadata document that you downloaded from the VPN Client SAML application.
  2. Add a second provider, name the provider aws-client-vpn-self-service and upload the metadata document that you downloaded from the VPN Client Self Service SAML application.

Create and configure the Client VPN endpoint

All Client VPN sessions end at the Client VPN endpoint. You configure the Client VPN endpoint to manage and control all Client VPN sessions. In the following steps, you create a Client VPN endpoint and configure it to use the newly added IAM IdPs. You then associate the endpoint with a VPC and configure authorization rules to allow traffic into the VPC, then set up the Client VPN self-service portal.

To create the Client VPN endpoint

  1. Open the AWS VPC console and select Client VPN Endpoints and then select Create Client VPN endpoint.
  2. Enter a Name Tag and Description for the endpoint.
  3. Enter 172.16.0.0/22 for the Client IPv4 CIDR. This is the IP range that will be allocated to your VPN clients. It shouldn’t overlap the CIDR of your AWS VPCs or of the network that your client device is connected to and must be at least a /22 bitmask. You can adjust this value as needed for your specific network requirements. The Client IPv4 CIDR value can only be set during endpoint creation.

    Note: For production environments you should review the Client VPN documentation for scaling considerations before you create the endpoint.

  4. In the Server certificate ARN drop down menu, select the ACM certificate that you created for your VPN clients.
  5. Set the Authentication Options to Use user-based authentication with Federated authentication. Select the aws-client-vpn IAM IdP for the SAML provider ARN, and select the aws-client-vpn-self-service IAM IdP as the Self-service SAML provider ARN.
     
    Figure 6: Authentication settings

    Figure 6: Authentication settings

  6. For this walkthrough, set Connection Logging to No. Connection logging is a feature of Client VPN that enables you to capture connection logs for your Client VPN endpoint. Those logs are published to an Amazon CloudWatch Logs log group in your account. For production environments or for troubleshooting purposes, you can enable connection logging while or after you create the endpoint.
  7. Select the VPC ID to associate with the endpoint. This should be the VPC with an EC2 instance deployed that can be used to test connectivity. You can select an existing security group, or create a new one for the VPN endpoint. The only requirement for this walkthrough is that it has outbound rules that allow access to your test EC2 instance. For additional flexibility, you can create and apply multiple security groups that use different rulesets to the endpoint to provide fine-grained control of which resources can be accessed within the VPC.
  8. Select Enable self-service portal and—if desired—select Enable split-tunnel. Split tunneling is designed to ensure that only client traffic destined for the IP ranges configured on the Client VPN endpoint is routed to your VPC. By default, all traffic, including internet bound traffic, is routed through your VPC.
  9. Choose Create Client VPN endpoint.

To configure the Client VPN endpoint

  1. On the Client VPN endpoint Associations tab, select Associate. Select the same VPC that you chose when you set up the endpoint and select a subnet to associate. This creates an elastic network interface (ENI) in the selected subnet that will be the ingress point from VPN clients into your AWS VPC. For production environments, you should select at least two subnets based upon your redundancy requirements.
  2. Authorizing VPN ingress traffic from your users can be done either globally for all users or via group membership. When granting access via an AWS SSO group, you must use the group ID of the AWS SSO group, not the friendly name of the group. After selecting a group in the AWS SSO management console, you can find group ID in the Details section. You can also obtain the group ID by using AWS Command Line Interface (AWS CLI) to issue the following command, replacing the <AWSRegion>, <Identity Store ID>, and <AWS SSO Group Display Name> variables with your information. This command should be issued within the same AWS account where AWS SSO is configured. The identity store ID can be found in the AWS SSO console under Settings.
    aws identitystore list-groups --region <AWSRegion> --identity-store-id <Identity Store ID> --filter AttributePath=DisplayName,AttributeValue=<AWS SSO Group Display Name>
    

  3. Create an ingress authorization rule by selecting Authorize Ingress on the Authorization tab. Configure the destination network to enable as 0.0.0.0/0, set Grant access to: Allow access to users in a specific access group and enter the access group ID that you discovered in the previous step. This should be the group that contains one of your test user accounts. For production environments, you should follow the principle of least privilege and narrow the destination network range to only what is required. Ingress authorization rules can be used to restrict network access to specific network ranges based upon IdP group membership. You can use a client connection handler to enforce additional security policies on Client VPN connections. Refer to the Client VPN documentation for additional details.
    Figure 7: Add authorization rule

    Figure 7: Add authorization rule

  4. From the Client VPN Endpoint Summary tab, copy the Self-service portal URL to use in the next step.

To set up the Client VPN self-service portal

  1. Open the Client VPN self-service SAML application in the AWS SSO management console to edit the configuration.
  2. In the Application start URL textbox, paste the Client VPN endpoint self-service portal URL that you copied in the previous section. This ties the Client VPN self-service SAML application to the self-service portal URL for the specific Client VPN endpoint that you created, allowing users to download their AWS VPN Client configuration file.
     
    Figure 8: Client VPN self-service portal

    Figure 8: Client VPN self-service portal

Test the solution

During the testing phase, you download the VPN client configuration file and configure the VPN client application. You then create a Client VPN connection and validate that you have access to your target VPC. You also test the Client VPN connection with multiple user accounts in order to confirm that the ingress authorization rules are functioning as expected.

To test the Client VPN solution:

  1. Open an internet browser and sign in to your AWS SSO user portal as a user who has access to the VPN Client SAML applications and is a member of the AWS SSO group defined in the VPN endpoint ingress authorization rule. You should see two new SAML applications. Select the VPN client self-service application.
  2. In the VPN Client Self Service portal, you can download the AWS VPN Client software if you haven’t already done so. Select Download client configuration and save the file on your local device. Close the browser window that you used to sign in to the AWS SSO user portal.
  3. Open the AWS VPN Client application and configure a new profile, selecting the client configuration file that you downloaded in the previous step. Once your client profile has been created, select Connect.
     
    Figure 9: VPN Client ready to connect

    Figure 9: VPN Client ready to connect

  4. A new browser window should open automatically to an AWS SSO sign-in page. Enter the credentials of your test user who is a member of the AWS SSO group defined in your ingress authorization rule.
  5. Upon a successful connection through the VPN client, you can make a management connection (RDP, SSH, HTTP, or other) to one of the EC2 instances within your VPC. Connect to the private IPv4 address of your EC2 instance (rfc1918)—you should not attempt to connect to your EC2 instance through an EIP. You might need to adjust the security group rules on your EC2 instance to allow traffic from the subnets that you selected when you created the VPN endpoint associations.
  6. Once you have a successful connection to your test EC2 instance and you know that your Client VPN connectivity is working, you should also validate that access is denied for users who aren’t a member of the group specified in your ingress authorization rule.
    1. Disconnect from your Client VPN connection and close all browser windows.
    2. Depending upon your internet browser and its configuration, you might need to delete any cookies associated with your AWS SSO user portal in order to sign in as a different AWS SSO user.
    3. Initiate a new Client VPN connection and sign in as the test user account that is not a member of the AWS SSO group specified in the ingress authorization rule.
    4. You should be able to successfully establish the Client VPN connection, but not to access your test EC2 instance. This validates that the ingress authorization rule isn’t allowing Client VPN traffic from users who aren’t a member of the AWS SSO group to enter your VPC.

Troubleshooting

If you have any issues completing the walkthrough and testing, here are some things that you can check:

  • In the AWS VPC management console, review the Connections tab to verify that you see a connection from your test user account and that it’s active.
  • Confirm that your test user account is in the group that was defined in your ingress authorization rule.
  • Confirm that the access group ID specified in the ingress authorization rule is for the AWS SSO group that your test user is a member of.
  • Confirm that the AWS SSO group still exists and hasn’t been deleted. You might encounter an error message similar to the one shown in Figure 10 if you attempt a Client VPN connection but the AWS SSO group no longer exists.
     
    Figure 10: Error message

    Figure 10: Error message

  • If you receive a credential error when attempting to sign in to the AWS SSO browser window that’s launched by the VPN Client application, you might have an issue with the ACM certificate that you’re using. There can be authentication related issues if the root CA certificates aren’t correct or if any part of the certificate chain is missing.
  • Validate your EC2 instance security group rules and VPC route table configuration. From a routing perspective, your test EC2 instance must be accessible from the subnet that you selected when you created the Client VPN endpoint association.
  • If you want to see the SAML assertion that’s being sent to the AWS VPN client application. Sign in to the AWS SSO user portal, and hold down the Shift key while selecting the VPN client SAML application. A new browser tab will open with the SAML assertion visible. The SAML assertion contains the access group IDs of all groups that your test user is a member of. You can use this information to validate that the correct group memberships and group IDs are defined in your ingress authorization rules.
  • Make sure that TCP port 35001 is available on your client device. It shouldn’t be used by any other process or blocked by a firewall. Port 35001 only needs to be open on your localhost interface. The SAML assertion is sent to localhost on port 35001 as an HTTP POST from the browser window opened by the AWS VPN client application after a successful sign-in.

Clean up the test environment

To avoid charges for the use of AWS EC2, Client VPN, SSO, or ACM services, remove any components that were created as part of this walkthrough. Components that can be deleted if applicable are:

  1. The Client VPN endpoint. You must first remove all associations that were created for the endpoint.
  2. The EC2 instance and VPC.
  3. The test IdPs from IAM.
  4. The VPN client custom SAML applications from AWS SSO.
  5. AWS SSO users and groups.
  6. The ACM certificate.

Conclusion

In this blog post, we’ve shown how you can integrate Client VPN and AWS SSO to provide a familiar and seamless VPN connection experience to your users. By adding the Client VPN self-service portal, you can reduce the effort needed to deploy the solution by allowing users to perform their own VPN client application installation and configuration. We demonstrated the creation of IdPs using AWS SSO custom applications and then showed you how to configure a Client VPN endpoint to use SAML-based federated authentication and associate it with the IdPs. Client VPN users can then use their centralized credentials to connect to the Client VPN endpoint and access specific network ranges based upon their group membership or further refined through a client connection handler.

If you have feedback about this post, submit comments in the Comments section below.

Want more AWS Security how-to content, news, and feature announcements? Follow us on Twitter.

Author

Drew Marumoto

Drew is a DevOps Consultant with Aws Professional Service. A long time system administrator with a passion for automation and orchestration, he enjoys solving difficult problems for customers and helping them achieve their business goals.

Author

Sylvia Qi

Sylvia is a DevOps Consultant focusing on architecting and automating DevOps processes, helping customers through their DevOps transformation journey, and achieving their goals. In her spare time, she enjoyes biking, swimming, painting, and photograhy.

Build an end-to-end attribute-based access control strategy with AWS SSO and Okta

Post Syndicated from Louay Shaat original https://aws.amazon.com/blogs/security/build-an-end-to-end-attribute-based-access-control-strategy-with-aws-sso-and-okta/

This blog post discusses the benefits of using an attribute-based access control (ABAC) strategy and also describes how to use ABAC with AWS Single Sign-On (AWS SSO) when you’re using Okta as an identity provider (IdP).

Over the past two years, Amazon Web Services (AWS) has invested heavily in making ABAC available across the majority of our services. With ABAC, you can simplify your access control strategy by granting access to groups of resources, which are specified by tags, instead of managing long lists of individual resources. Each tag is a label that consists of a user-defined key and value, and you can use these to assign metadata to your AWS resources. Tags can help you manage, identify, organize, search for, and filter resources. You can create tags to categorize resources by purpose, owner, environment, or other criteria. To learn more about tags and AWS best practices for tagging, see Tagging AWS resources.

The ability to include tags in sessions—combined with the ability to tag AWS Identity and Access Management (IAM) users and roles—means that you can now incorporate user attributes from your identity provider as part of your tagging and authorization strategy. Additionally, user attributes help organizations to make permissions more intuitive, because the attributes are easier to relate to teams and functions. A tag that represents a team or a job function is easier to audit and understand.

For more information on ABAC in AWS, see our ABAC documentation.

Why use ABAC?

ABAC is a strategy that that can help organizations to innovate faster. Implementing a purely role-based access control (RBAC) strategy requires identity and security teams to define a large number of RBAC policies, which can lead to complexity and time delays. With ABAC, you can make use of attributes to build more dynamic policies that provide access based on matching the attribute conditions. AWS supports both RBAC and ABAC as co-existing strategies, so you can use ABAC alongside your existing RBAC strategy.

A good example that uses ABAC is the scenario where you have two teams that require similar access to their secrets in AWS Secrets Manager. By using ABAC, you can build a single role or policy with a condition based on the Department attribute from your IdP. When the user is authenticated, you can pass the Department attribute value and use a condition to provide access to resources that have the identical tag, as shown in the following code snippet. In this post, I show how to use ABAC for this example scenario.

"Condition": {
                "StringEquals": {
                    "secretsmanager:ResourceTag/Department": "${aws:PrincipalTag/Department}"

ABAC provides organizations with a more dynamic way of working with permissions. There are four main benefits for organizations that use ABAC:

  • Scale your permissions as you innovate: As developers create new project resources, administrators can require specific attributes to be applied when resources are created. This can include applying tags with attributes that give developers immediate access to the new resources they create, without requiring an update to their own permissions.
  • Help your teams to change and grow quickly: Because permissions are based on user attributes from a corporate identity source such as an IdP, changing user attributes in the IdP that you use for access control in AWS automatically updates your permissions in AWS.
  • Create fewer AWS SSO permission sets and IAM roles: With ABAC, multiple users who are using the same AWS SSO permission set and IAM role can still get unique permissions, because permissions are now based on user attributes. Administrators can author IAM policies that grant users access only to AWS resources that have matching attributes. This helps to reduce the number of IAM roles you need to create for various use cases in a single AWS account.
  • Efficiently audit who performed an action: By using attributes that are logged in AWS CloudTrail next to every action that is performed in AWS by using an IAM role, you can make it easier for security administrators to determine the identity that takes actions in a role session.

Prerequisites

In this section, I describe some higher-level prerequisites for using ABAC effectively. ABAC in AWS relies on the use of tags for access-control decisions, so it’s important to have in place a tagging strategy for your resources. To help you develop an effective strategy, see the AWS Tagging Strategies whitepaper.

Organizations that implement ABAC can enhance the use of tags across their resources for the purpose of identity access. Making sure that tagging is enforced and secure is essential to an enterprise-wide strategy. For more information about enforcing a tagging policy, see the blog post Enforce Centralized Tag Compliance Using AWS Service Catalog, DynamoDB, Lambda, and CloudWatch Events.

You can use the service AWS Resource Groups to identify untagged resources and to find resources to tag. You can also use Resource Groups to remediate untagged resources.

Use AWS SSO with Okta as an IdP

AWS SSO gives you an efficient way to centrally manage access to multiple AWS accounts and business applications, and to provide users with single sign-on access to all their assigned accounts and applications from one place. With AWS SSO, you can manage access and user permissions to all of your accounts in AWS Organizations centrally. AWS SSO configures and maintains all the necessary permissions for your accounts automatically, without requiring any additional setup in the individual accounts.

AWS SSO supports access control attributes from any IdP. This blog post focuses on how you can use ABAC attributes with AWS SSO when you’re using Okta as an external IdP.

Use other single sign-on services with ABAC

This post describes how to turn on ABAC in AWS SSO. To turn on ABAC with other federation services, see these links:

Implement the solution

Follow these steps to set up Okta as an IdP in AWS SSO and turn on ABAC.

To set up Okta and turn on ABAC

  1. Set up Okta as an IdP for AWS SSO. To do so, follow the instructions in the blog post Single Sign-On Between Okta Universal Directory and AWS. For more information on the supported actions in AWS SSO with Okta, see our documentation.
  2. Enable attributes for access control (in other words, turn on ABAC) in AWS SSO by using these steps:
    1. In the AWS Management Console, navigate to AWS SSO in the AWS Region you selected for your implementation.
    2. On the Dashboard tab, select Choose your identity source.
    3. Next to Attributes for access control, choose Enable.

      Figure 1: Turn on ABAC in AWS SSO

      Figure 1: Turn on ABAC in AWS SSO

    You should see the message “Attributes for access control has been successfully enabled.”

  3. Enable updates for user attributes in Okta provisioning. Now that you’ve turned on ABAC in AWS SSO, you need to verify that automatic provisioning for Okta has attribute updates enabled.Log in to Okta as an administrator and locate the application you created for AWS SSO. Navigate to the Provisioning tab, choose Edit, and verify that Update User Attributes is enabled.

    Figure 2: Enable automatic provisioning for ABAC updates

    Figure 2: Enable automatic provisioning for ABAC updates

  4. Configure user attributes in Okta for use in AWS SSO by following these steps:
    1. From the same application that you created earlier, navigate to the Sign On tab.
    2. Choose Edit, and then expand the Attributes (optional) section.
    3. In the Attribute Statements (optional) section, for each attribute that you will use for access control in AWS SSO, do the following:
      1. For Name, enter https://aws.amazon.com/SAML/Attributes/AccessControl:<AttributeName>. Replace <AttributeName> with the name of the attribute you’re expecting in AWS SSO, for example https://aws.amazon.com/SAML/Attributes/AccessControl:Department.
      2. For Name Format, choose URI reference.
      3. For Value, enter user.<AttributeName>. Replace <AttributeName> with the Okta default user profile variable name, for example user.department. To view the Okta default user profile, see these instructions.


    Figure 3: Configure two attributes for users in Okta

    Figure 3: Configure two attributes for users in Okta

    In the example shown here, I added two attributes, Department and Division. The result should be similar to the configuration shown in Figure 3.

  5. Add attributes to your users by using these steps:
    1. In your Okta portal, log in as administrator. Navigate to Directory, and then choose People.
    2. Locate a user, navigate to the Profile tab, and then choose Edit.
    3. Add values to the attributes you selected.
    Figure 4: Addition of user attributes in Okta

    Figure 4: Addition of user attributes in Okta

  6. Confirm that attributes are mapped. Because you’ve enabled automatic provisioning updates from Okta, you should be able to see the attributes for your user immediately in AWS SSO. To confirm this:
    1. In the console, navigate to AWS SSO in the Region you selected for your implementation.
    2. On the Users tab, select a user that has attributes from Okta, and select the user. You should be able to see the attributes that you mapped from Okta.
    Figure 5: User attributes in Okta

    Figure 5: User attributes in Okta

Now that you have ABAC attributes for your users in AWS SSO, you can now create permission sets based on those attributes.

Note: Step 4 ensures that users will not be successfully authenticated unless the attributes configured are present. If you don’t want this enforcement, do not perform step 4.

Build an ABAC permission set in AWS SSO

For demonstration purposes, I’ll show how you can build a permission set that is based on ABAC attributes for AWS Secrets Manager. The permission set will match resource tags to user tags, in order to control which resources can be managed by Secrets Manager administrators. You can apply this single permission set to multiple teams.

To build the ABAC permission set

  1. In the console, navigate to AWS SSO, and choose AWS Accounts.
  2. Choose the Permission sets tab.
  3. Choose Create permission set, and then choose Create a custom permission set.
  4. Fill in the fields as follows.
    1. For Name, enter a name for your permission set that will be visible to your users, for example, SecretsManager-Profile.
    2. For Description, enter ABAC SecretsManager Profile.
    3. Select the appropriate session duration.
    4. For Relay State, for my example I will enter the URL for Secrets Manager: https://console.aws.amazon.com/secretsmanager/home. This will give a better user experience when the user signs in to AWS SSO, with an automatic redirect to the Secrets Manager console.
    5. For the field What policies do you want to include in your permission set?, choose Create a custom permissions policy.
    6. Under Create a custom permissions policy, paste the following policy.
      {
          "Version": "2012-10-17",
          "Statement": [
              {
                  "Sid": "SecretsManagerABAC",
                  "Effect": "Allow",
                  "Action": [
                      "secretsmanager:DescribeSecret",
                      "secretsmanager:PutSecretValue",
                      "secretsmanager:CreateSecret",
                      "secretsmanager:ListSecretVersionIds",
                      "secretsmanager:UpdateSecret",
                      "secretsmanager:GetResourcePolicy",
                      "secretsmanager:GetSecretValue",
                      "secretsmanager:ListSecrets",
                      "secretsmanager:TagResource"
                  ],
                  "Resource": "*",
                  "Condition": {
                      "StringEquals": {
                          "secretsmanager:ResourceTag/Department": "${aws:PrincipalTag/Department}"
                      }
                  }
              },
              {
                  "Sid": "NeededPermissions",
                  "Effect": "Allow",
                  "Action": [
             "kms:ListKeys",
             "kms:ListAliases",
                      "rds:DescribeDBInstances",
                      "redshift:DescribeClusters",
                      "rds:DescribeDBClusters",
                      "secretsmanager:ListSecrets",
                      "tag:GetResources",
                      "lambda:ListFunctions"
                  ],
                  "Resource": "*"
              }
          ]
      }
      

    This policy grants users the ability to create and list secrets that belong to their department. The policy is configured to allow Secrets Manager users to manage only the resources that belong to their department. You can modify this policy to perform matching on more attributes, in order to have more granular permissions.

    Note: The RDS permissions in the policy enable users to select an RDS instance for the secret and the Lambda Permissions are to enable custom key rotation.

    If you look closely at the condition

    “secretsmanager:ResourceTag/Department”: “${aws:PrincipalTag/Department}”

    …the condition states that the user can only access Secrets Manager resources that have a Department tag, where the value of that tag is identical to the value of the Department tag from the user.

  5. Choose Next: Tags.
  6. Tag your permission set. For my example, I’ll add Key: Service and Value: SecretsManager.
  7. Choose Next: Review and create.
  8. Assign the permission set to a user or group and to the appropriate accounts that you have in AWS Organizations.

Test an ABAC permission set

Now you can test the ABAC permission set that you just created for Secrets Manager.

To test the ABAC permission set

  1. In the AWS SSO console, on the Dashboard page, navigate to the User Portal URL.
  2. Sign in as a user who has the attributes that you configured earlier in AWS SSO. You will assume the permission set that you just created.
  3. Choose Management console. This will take you to the console that you specified in the Relay State setting for the permission set, which in my example is the Secrets Manager console.

    Figure 6: AWS SSO ABAC profile access

    Figure 6: AWS SSO ABAC profile access

  4. Try to create a secret with no tags:
    1. Choose Store a new secret.
    2. Choose Other type of secrets.
    3. You can add any values you like for the other options, and then choose Next.
    4. Give your secret a name, but don’t add any tags. Choose Next.
    5. On the Configure automatic rotation page, choose Next, and then choose Store.

    You should receive an error stating that the user failed to create the secret, because the user is not authorized to perform the secretsmanager:CreateSecret action.

    Figure 7: Failure to create a secret (no attributes)

    Figure 7: Failure to create a secret (no attributes)

  5. Choose Previous twice, and then add the appropriate tag. For my example, I’ll add a tag with the key Department and the value Serverless.

    Figure 8: Adding tags for a secret

    Figure 8: Adding tags for a secret

  6. Choose Next twice, and then choose Store. You should see a message that your secret creation was successful.

    Figure 9: Successful secret creation

    Figure 9: Successful secret creation

Now administrators who assume this permission set can view, create, and manage only the secrets that belong to their team or department, based on the tags that you defined. You can reuse this permission set across a large number of teams, which can reduce the number of permission sets you need to create and manage.

Summary

In this post, I’ve talked about the benefits organizations can gain from embracing an ABAC strategy, and walked through how to turn on ABAC attributes in Okta and AWS SSO. I’ve also shown how you can create ABAC-driven permission sets to simplify your permission set management. For more information on AWS services that support ABAC—in other words, authorization based on tags—see our updated AWS services that work with IAM page.

If you have feedback about this blog post, submit comments in the Comments section below. If you have questions about this post, start a new thread on the AWS Single Sign-On forum.

Want more AWS Security how-to content, news, and feature announcements? Follow us on Twitter.

Author

Louay Shaat

Louay is a Security Solutions Architect with AWS. He spends his days working with customers, from startups to the largest of enterprises helping them build cool new capabilities and accelerating their cloud journey. He has a strong focus on security and automation helping customers improve their security, risk, and compliance in the cloud.

How to delegate management of identity in AWS Single Sign-On

Post Syndicated from Louay Shaat original https://aws.amazon.com/blogs/security/how-to-delegate-management-of-identity-in-aws-single-sign-on/

In this blog post, I show how you can use AWS Single Sign-On (AWS SSO) to delegate administration of user identities. Delegation is the process of providing your teams permissions to manage accounts and identities associated with their teams. You can achieve this by using the existing integration that AWS SSO has with AWS Organizations, and by using tags and conditions in AWS Identity and Access Management (IAM).

AWS SSO makes it easy to centrally manage access to multiple Amazon Web Services (AWS) accounts and business applications, and to provide users with single sign-on access to all their assigned accounts and applications from one place.

AWS SSO uses permission sets—a collection of administrator-defined policies—to determine a user’s effective permissions to access a given AWS account. Permission sets can contain either AWS managed policies or custom policies that are stored in AWS SSO. Policies are documents that act as containers for one or more permission statements. These statements represent individual access controls (allow or deny) for various tasks, which determine what tasks users can or cannot perform within the AWS account. Permission sets are provisioned as IAM roles in your organizational accounts, and are managed centrally using AWS SSO.

AWS SSO is tightly integrated with AWS Organizations, and runs in your AWS Organizations management account. This integration enables AWS SSO to retrieve and manage permission sets across your AWS Organizations configuration.

As you continue to build more of your workloads on AWS, managing access to AWS accounts and services becomes more time consuming for team members that manage identities. With a centralized identity approach that uses AWS SSO, there’s an increased need to delegate control of permission sets and accounts to domain and application owners. Although this is a valid use case, access to the management account in Organizations should be tightly guarded as a security best practice. As an administrator in the management account of an organization, you can control how teams and users access your AWS accounts and applications.

This post shows how you can build comprehensive delegation models in AWS SSO to securely and effectively delegate control of identities to various teams.

Solution overview

Suppose you’ve implemented AWS SSO in Organizations to manage identity across your entire AWS environment. Your organization is growing and the number of accounts and teams that need access to your AWS environment is also growing. You have a small Identity team that is constantly adding, updating, or deleting users or groups and permission sets to enable your teams to gain access to their required services and accounts.

Note: You can learn how to enable AWS SSO from the Introducing AWS Single Sign-On blog post.

As the number of teams grows, you want to start using a delegation model to enable account and application owners to manage access to their resources, in order to reduce the heavy lifting that is done by teams that manage identities.

Figure 1 shows a simple organizational structure that your organization implemented.
 

Figure 1: AWS SSO with AWS Organizations

Figure 1: AWS SSO with AWS Organizations

In this scenario, you’ve already built a collection of organizational-approved permission sets that are used across your organization. You have a tagging strategy for permission sets, and you’ve implemented two tags across all your permission sets:

  • Environment: The values for this tag are Production or Development. You only apply Production permission sets to Production accounts.
  • OU: This tag identifies the organizational unit (OU) that the permission set belongs to.

A value of All can be assigned to either tag to identify organization-wide use of the permission set.

You identified three models of delegation that you want to enable based on the setup just described, and your Identity team has identified three use cases that they want to implement:

  • A simple delegation model for a team to manage all permission sets for a set of accounts.
  • A delegation model for support teams to apply read-only permission sets to all accounts.
  • A delegation model based on AWS Organizations, where a team can manage only the permission sets intended for a specific OU.

The AWS SSO delegation model enables three key conditions for restricting user access:

  • Permission sets.
  • Accounts
  • Tags that use the condition aws:ResourceTag, to ensure that tags are present on your permission sets as part of your delegation model.

In the rest of this blog post, I show you how AWS SSO administrators can use these conditions to implement the use cases highlighted here to build a delegation model.

See Delegating permission set administration and Actions, resources, and condition keys for AWS SSO for more information.

Important: The use cases that follow are examples that can be adopted by your organization. The permission sets in these use cases show only what is needed to delegate the components discussed. You need to add additional policies to give users and groups access to AWS SSO.

Some examples:

Identify your permission set and AWS SSO instance IDs

You can use either the AWS Command Line Interface (AWS CLI) v2 or the AWS Management Console to identify your permission set and AWS SSO instance IDs.

Use the AWS CLI

To use the AWS CLI to identify the Amazon resource names (ARNs) of the AWS SSO instance and permission set, make sure you have AWS CLI v2 installed.

To list the AWS SSO instance ID ARN

Run the following command:

aws sso-admin list-instances

To list the permission set ARN

Run the following command:

aws sso-admin list-permission-sets --instance-arn <instance arn from above>

Use the console

You can also use the console to identify your permission sets and AWS SSO instance IDs.

To list the AWS SSO Instance ID ARN

  1. Navigate to the AWS SSO in your Region. Choose the Dashboard and then choose Choose your identity source.
  2. Copy the AWS SSO ARN ID.
Figure 2: AWS SSO ID ARN

Figure 2: AWS SSO ID ARN

To list the permission set ARN

  1. Navigate to the AWS SSO Service in your Region. Choose AWS Accounts and then Permission Sets.
  2. Select the permission set you want to use.
  3. Copy the ARN of the permission set.
Figure 3: Permission set ARN

Figure 3: Permission set ARN

Use case 1: Accounts-based delegation model

In this use case, you create a single policy to allow administrators to assign any permission set to a specific set of accounts.

First, you need to create a custom permission set to use with the following example policy.

The example policy is as follows.

            "Sid": "DelegatedAdminsAccounts",
            "Effect": "Allow",
            "Action": [
                "sso:ProvisionPermissionSet",
                "sso:CreateAccountAssignment",
                "sso:DeleteInlinePolicyFromPermissionSet",
                "sso:UpdateInstanceAccessControlAttributeConfiguration",
                "sso:PutInlinePolicyToPermissionSet",
                "sso:DeleteAccountAssignment",
                "sso:DetachManagedPolicyFromPermissionSet",
                "sso:DeletePermissionSet",
                "sso:AttachManagedPolicyToPermissionSet",
                "sso:CreatePermissionSet",
                "sso:UpdatePermissionSet",
                "sso:CreateInstanceAccessControlAttributeConfiguration",
                "sso:DeleteInstanceAccessControlAttributeConfiguration"
            ],
            "Resource": [
                "arn:aws:sso:::account/112233445566",
                "arn:aws:sso:::account/223344556677",
                "arn:aws:sso:::account/334455667788"
            ]
        }

This policy specifies that delegated admins are allowed to provision any permission set to the three accounts listed in the policy.

Note: To apply this permission set to your environment, replace the account numbers following Resource with your account numbers.

Use case 2: Permission-based delegation model

In this use case, you create a single policy to allow administrators to assign a specific permission set to any account. The policy is as follows.

{
                    "Sid": "DelegatedPermissionsAdmin",
                    "Effect": "Allow",
                    "Action": [
                        "sso:ProvisionPermissionSet",
                        "sso:CreateAccountAssignment",
                        "sso:DeleteInlinePolicyFromPermissionSet",
                        "sso:UpdateInstanceAccessControlAttributeConfiguration",
                        "sso:PutInlinePolicyToPermissionSet",
                        "sso:DeleteAccountAssignment",
                        "sso:DetachManagedPolicyFromPermissionSet",
                        "sso:DeletePermissionSet",
                        "sso:AttachManagedPolicyToPermissionSet",
                        "sso:CreatePermissionSet",
                        "sso:UpdatePermissionSet",
                        "sso:CreateInstanceAccessControlAttributeConfiguration",
                        "sso:DeleteInstanceAccessControlAttributeConfiguration",
                        "sso:ProvisionApplicationInstanceForAWSAccount"
                    ],
                    "Resource": [
                        "arn:aws:sso:::instance/ssoins-1111111111",
                        "arn:aws:sso:::account/*",
                        "arn:aws:sso:::permissionSet/ssoins-1111111111/ps-112233abcdef123"

            ]


        },          

This policy specifies that delegated admins are allowed to provision only the specific permission set listed in the policy to any account.

Note:

Use case 3: OU-based delegation model

In this use case, the Identity team wants to delegate the management of the Development permission sets (identified by the tag key Environment) to the Test OU (identified by the tag key OU). You use the Environment and OU tags on permission sets to restrict access to only the permission sets that contain both tags.

To build this permission set for delegation, you need to create two policies in the same permission set:

  • A policy that filters the permission sets based on both tags—Environment and OU.
  • A policy that filters the accounts belonging to the Development OU.

The policies are as follows.

{
                    "Sid": "DelegatedOUAdmin",
                    "Effect": "Allow",
                    "Action": [
                        "sso:ProvisionPermissionSet",
                        "sso:CreateAccountAssignment",
                        "sso:DeleteInlinePolicyFromPermissionSet",
                        "sso:UpdateInstanceAccessControlAttributeConfiguration",
                        "sso:PutInlinePolicyToPermissionSet",
                        "sso:DeleteAccountAssignment",
                        "sso:DetachManagedPolicyFromPermissionSet",
                        "sso:DeletePermissionSet",
                        "sso:AttachManagedPolicyToPermissionSet",
                        "sso:CreatePermissionSet",
                        "sso:UpdatePermissionSet",
                        "sso:CreateInstanceAccessControlAttributeConfiguration",
                        "sso:DeleteInstanceAccessControlAttributeConfiguration",
                        "sso:ProvisionApplicationInstanceForAWSAccount"
                    ],
                    "Resource": "arn:aws:sso:::permissionSet/*/*",
                    "Condition": {
                        "StringEquals": {
                            "aws:ResourceTag/Environment": "Development",
                            "aws:ResourceTag/OU": "Test"
                        }
                    }
        },
        {
            "Sid": "Instance",
            "Effect": "Allow",
            "Action": [
                "sso:ProvisionPermissionSet",
                "sso:CreateAccountAssignment",
                "sso:DeleteInlinePolicyFromPermissionSet",
                "sso:UpdateInstanceAccessControlAttributeConfiguration",
                "sso:PutInlinePolicyToPermissionSet",
                "sso:DeleteAccountAssignment",
                "sso:DetachManagedPolicyFromPermissionSet",
                "sso:DeletePermissionSet",
                "sso:AttachManagedPolicyToPermissionSet",
                "sso:CreatePermissionSet",
                "sso:UpdatePermissionSet",
                "sso:CreateInstanceAccessControlAttributeConfiguration",
                "sso:DeleteInstanceAccessControlAttributeConfiguration",
                "sso:ProvisionApplicationInstanceForAWSAccount"
            ],
            "Resource": [
                "arn:aws:sso:::instance/ssoins-82593a6ed92c8920",
                "arn:aws:sso:::account/112233445566",
                "arn:aws:sso:::account/223344556677",
                "arn:aws:sso:::account/334455667788"

            ]
        }

In the delegated policy, the user or group is only allowed to provision permission sets that have both tags, OU and Environment, set to “Development” and only to accounts in the Development OU.

Note: In the example above arn:aws:sso:::instance/ssoins-11112222233333 is the ARN for the AWS SSO Instance ID. To get your AWS SSO Instance ID, refer to Identify your permission set and AWS SSO Instance IDs.

Create a delegated admin profile in AWS SSO

Now that you know what’s required to delegate permissions, you can create a delegated profile and deploy that to your users and groups.

To create a delegated AWS SSO profile

  1. In the AWS SSO console, sign in to your management account and browse to the Region where AWS SSO is provisioned.
  2. Navigate to AWS Accounts and choose Permission sets, and then choose Create permission set.
     
    Figure 4: AWS SSO permission sets menu

    Figure 4: AWS SSO permission sets menu

  3. Choose Create a custom permission set.
     
    Figure 5: Create a new permission set

    Figure 5: Create a new permission set

  4. Give a name to your permission set based on your naming standards and select a session duration from your organizational policies.
  5. For Relay state, enter the following URL:
    https://<region>.console.aws.amazon.com/singlesignon/home?region=<region>#/accounts/organization 
    

    where <region> is the AWS Region in which you deployed AWS SSO.

    The relay state will automatically redirect the user to the Accounts section in the AWS SSO console, for simplicity.
     

    Figure 6: Custom permission set

    Figure 6: Custom permission set

  6. Choose Create new permission set. Here is where you can decide the level of delegation required for your application or domain administrators.
     
    Figure 7: Assign users

    Figure 7: Assign users

    See some of the examples in the earlier sections of this post for the permission set.

  7. If you’re using AWS SSO with AWS Directory Service for Microsoft Active Directory, you’ll need to provide access to AWS Directory Service in order for your administrator to assign permission sets to users and groups.

    To provide this access, navigate to the AWS Accounts screen in the AWS SSO console, and select your management account. Assign the required users or groups, and select the permission set that you created earlier. Then choose Finish.

  8. To test this delegation, sign in to AWS SSO. You’ll see the newly created permission set.
     
    Figure 8: AWS SSO sign-on page

    Figure 8: AWS SSO sign-on page

  9. Next to developer-delegated-admin, choose Management console. This should automatically redirect you to AWS SSO in the AWS Accounts submenu.

If you try to provision access by assigning or creating new permission sets to accounts or permission sets you are not explicitly allowed, according to the policies you specified earlier, you will receive the following error.
 

Figure 9: Error based on lack of permissions

Figure 9: Error based on lack of permissions

Otherwise, the provisioning will be successful.

Summary

You’ve seen that by using conditions and tags on permission sets, application and account owners can use delegation models to manage the deployment of permission sets across the accounts they manage, providing them and their teams with secure access to AWS accounts and services.

Additionally, because AWS SSO supports attribute-based access control (ABAC), you can create a more dynamic delegation model based on attributes from your identity provider, to match the tags on the permission set.

If you have feedback about this blog post, submit comments in the Comments section below. If you have questions about this post, start a new thread on the AWS Single Sign-On forum.

Want more AWS Security how-to content, news, and feature announcements? Follow us on Twitter.

Author

Louay Shaat

Louay is a Security Solutions Architect with AWS. He spends his days working with customers, from startups to the largest of enterprises, helping them build cool new capabilities and accelerating their cloud journey. He has a strong focus on security and automation to help customers improve their security, risk, and compliance in the cloud.

How AWS SSO Active Directory sync enhances AWS application experiences

Post Syndicated from Sharanya Ramakrishnan original https://aws.amazon.com/blogs/security/how-aws-sso-active-directory-sync-enhances-aws-application-experiences/

Identity management is easiest when you can manage identities in a centralized location and use these identities across various accounts and applications. You also want to be able to use these identities for other purposes within applications, like searching through groups, finding members of a certain group, and sharing projects with other users or groups. For example, when you use AWS Systems Manager Change Manager, you might want to search for groups or distinguish a user from a list of users with the same name based on their email address. You expect that the user and group details you see are consistent with the details that appear in a different application.

AWS Single Sign-On (AWS SSO) streamlines identity management by enabling you to connect an identity provider (IdP), such as the AWS internal directory or a range of partners and use the IdP identity information for access and collaboration within applications. Now you can get the same benefits when you connect your Microsoft Active Directory (AD) as your AWS SSO identity source. With the release of AWS SSO AD sync, you’ll be able to access AD groups, along with AD users, from AWS SSO-integrated applications, and use these groups and users for collaborative experiences. AD sync automatically brings identity information from your Active Directory into AWS SSO and makes this information available to you within applications. It makes sure that the user and group details you access in Amazon Web Services (AWS) stay consistent with information in Active Directory through periodic synchronizations.

In this post, I’ll walk you through key use cases that highlight how applications use the user and group information that is synchronized from Active Directory and how the AD synchronization capability works to make this possible.

Access control

Your ability to manage who can access which parts of an application or who has the necessary permissions to drive certain tasks within an application relies on the application’s ability to retrieve user and group information. It’s also important that any access that you configure is updated dynamically when there are any changes at the source. For example, if you define approval access to a group in an application and a member leaves the group when they change roles within the company, their group-based access within the application should be revoked. With AD sync, AWS SSO-integrated applications can utilize user and group information that is periodically updated, and therefore stays current.

Suppose you’ve set up an approval template in Systems Manager Change Manager for patching instances and want to require that all members of the IT Security Operations team approve any change requests created with this template. AD sync enhances this process by giving you the option to define approvers at the AD group level. If you have an IT Security Operations group in Active Directory and the group has permissions set up to access AWS SSO, this group will be available to you in Change Manager to select as an approver in your template. If a member of the IT Security Operations group switches roles and leaves the team, AD sync helps to ensure that the member’s access to approve patching-related change requests is revoked, by dynamically updating the IT Security Operations group in Change Manager once the member is removed from the group in Active Directory.

It’s common for teams at companies to work on cross-functional initiatives that involve sharing projects, reports, or dashboards with members of different teams for their review and feedback, or for collaboration. In such cases, you want to be able to easily search for users and groups within the application and share out relevant artifacts. AD sync makes it possible to access users and groups within AWS SSO-integrated applications, and you can then use this information for searching and sharing.

For example, if you use an AWS SSO-integrated application like AWS IoT SiteWise to create and share dashboards for metrics reviews with leadership or to collaborate with other teams in your organization, you’ll now be able to see all users with access to AWS. AD sync makes it possible for AWS IoT SiteWise to access all users, rather than only the users who signed in to AWS at least once.

Administrative efficiency

If you’re a platform admin or cloud admin who manages access to AWS SSO in your company, assigning users and groups with access to AWS accounts and resources is a routine task that requires administrative effort. Because AD sync periodically syncs AD groups into AWS SSO, you only need to pre-define access to resources for an AD group once. After that point, any new member, such as a new employee, who is added to the AD group in Active Directory will gain access to resources tied to the AD group. The new employee will also be added to AWS SSO through AD sync, and their information will stay current through periodic syncs. Therefore, the administrative effort involved on your end for managing users is reduced.

Similarly, if an employee leaves the company, you will no longer have to worry about deleting their information in AWS, because AD sync automatically deletes user and group objects that you delete in Active Directory. This simplifies your user lifecycle management and reduces the manual effort involved in the process.

How Active Directory sync works in the background

This new AD sync feature is for customers who want to use their AD identities with AWS SSO, without setting up a separate IdP, such as AD Federation Service or Azure AD. To use this capability, you must connect AWS SSO to your Active Directory by using AWS SSO with either AWS Directory Service for Microsoft Active Directory (AWS Managed Microsoft AD) or AD Connector. Learn more about using AWS Managed Microsoft AD and AD Connector.

AD sync brings in user and group information from your Active Directory and stores it in the AWS SSO identity store. Once this information is synchronized, AWS SSO-integrated applications can use the user and group information to deliver collaborative experiences, such as sharing a dashboard with other users.

AD sync obtains a list of users and groups to be synchronized from Active Directory based on the assignments that you make to AWS accounts and applications. It then syncs those users and groups (including the group members) into the AWS identity store, keeping the information updated through periodic syncs, as shown in Figure 1.

Figure 1: Active Directory synchronization of users and groups

Figure 1: Active Directory synchronization of users and groups

If a user has assignments based on attribute-based access-control (ABAC) and changes departments, attributes will automatically update at the next sync. If a user happens to sign in before the next sync, the attributes will be updated at sign-in to maintain consistency. The user will now see their assignments updated based on their new department.

AD sync also syncs in all members of a group, including sub-groups or nested groups. It flattens members of the nested groups, that is, it adds them to the parent group in the AWS SSO identity store. For example, if Group B is a member or nested group of Group A in Active Directory, then members of Group B are also synced into AWS SSO and added directly to Group A, as shown in Figure 2. So, only Group A can be used in AWS SSO accounts and applications.

Figure 2: Members of nested Group B flattened and added to parent Group A

Figure 2: Members of nested Group B flattened and added to parent Group A

If you delete a user or group in Active Directory, AD sync automatically deletes the user or group from the AWS SSO identity store. You won’t see the deleted identity appear in AWS SSO-integrated applications, either. However, if you only delete the assignments for a user or group, the user or group will remain in AWS SSO and won’t be automatically deleted.

Summary

In this blog post, I explained how user and group synchronization can help deliver better application experiences with less administrative effort. I also covered how the AWS SSO AD sync capability delivers this benefit for applications such as AWS Systems Manager and AWS IoT SiteWise. AD sync capability is available to you at no additional cost in all AWS Regions supported by AWS SSO. If you want to get started with AWS SSO or learn more about AD sync, see the AWS SSO User Guide.

If you have feedback about this post, submit comments in the Comments section below. If you have questions about this post, start a new thread on the AWS SSO forum or contact AWS Support.

Want more AWS Security how-to content, news, and feature announcements? Follow us on Twitter.

Author

Sharanya Ramakrishnan

Sharanya is a Senior Technical Product Manager in the AWS Identity team. She enjoys solving customer problems through meaningful products, particularly in the dynamic security and identity space. Outside of work, Sharanya likes to travel and enjoys hiking and reading.

Use new account assignment APIs for AWS SSO to automate multi-account access

Post Syndicated from Akhil Aendapally original https://aws.amazon.com/blogs/security/use-new-account-assignment-apis-for-aws-sso-to-automate-multi-account-access/

In this blog post, we’ll show how you can programmatically assign and audit access to multiple AWS accounts for your AWS Single Sign-On (SSO) users and groups, using the AWS Command Line Interface (AWS CLI) and AWS CloudFormation.

With AWS SSO, you can centrally manage access and user permissions to all of your accounts in AWS Organizations. You can assign user permissions based on common job functions, customize them to meet your specific security requirements, and assign the permissions to users or groups in the specific accounts where they need access. You can create, read, update, and delete permission sets in one place to have consistent role policies across your entire organization. You can then provide access by assigning permission sets to multiple users and groups in multiple accounts all in a single operation.

AWS SSO recently added new account assignment APIs and AWS CloudFormation support to automate access assignment across AWS Organizations accounts. This release addressed feedback from our customers with multi-account environments who wanted to adopt AWS SSO, but faced challenges related to managing AWS account permissions. To automate the previously manual process and save your administration time, you can now use the new AWS SSO account assignment APIs, or AWS CloudFormation templates, to programmatically manage AWS account permission sets in multi-account environments.

With AWS SSO account assignment APIs, you can now build your automation that will assign access for your users and groups to AWS accounts. You can also gain insights into who has access to which permission sets in which accounts across your entire AWS Organizations structure. With the account assignment APIs, your automation system can programmatically retrieve permission sets for audit and governance purposes, as shown in Figure 1.

Figure 1: Automating multi-account access with the AWS SSO API and AWS CloudFormation

Figure 1: Automating multi-account access with the AWS SSO API and AWS CloudFormation

Overview

In this walkthrough, we’ll illustrate how to create permission sets, assign permission sets to users and groups in AWS SSO, and grant access for users and groups to multiple AWS accounts by using the AWS Command Line Interface (AWS CLI) and AWS CloudFormation.

To grant user permissions to AWS resources with AWS SSO, you use permission sets. A permission set is a collection of AWS Identity and Access Management (IAM) policies. Permission sets can contain up to 10 AWS managed policies and a single custom policy stored in AWS SSO.

A policy is an object that defines a user’s permissions. Policies contain statements that represent individual access controls (allow or deny) for various tasks. This determines what tasks users can or cannot perform within the AWS account. AWS evaluates these policies when an IAM principal (a user or role) makes a request.

When you provision a permission set in the AWS account, AWS SSO creates a corresponding IAM role on that account, with a trust policy that allows users to assume the role through AWS SSO. With AWS SSO, you can assign more than one permission set to a user in the specific AWS account. Users who have multiple permission sets must choose one when they sign in through the user portal or the AWS CLI. Users will see these as IAM roles.

To learn more about IAM policies, see Policies and permissions in IAM. To learn more about permission sets, see Permission Sets.

Assume you have a company, Example.com, which has three AWS accounts: an organization management account (ExampleOrgMaster), a development account (ExampleOrgDev), and a test account (ExampleOrgTest). Example.com uses AWS Organizations to manage these accounts and has already enabled AWS SSO.

Example.com has the IT security lead, Frank Infosec, who needs PowerUserAccess to the test account (ExampleOrgTest) and SecurityAudit access to the development account (ExampleOrgDev). Alice Developer, the developer, needs full access to Amazon Elastic Compute Cloud (Amazon EC2) and Amazon Simple Storage Service (Amazon S3) through the development account (ExampleOrgDev). We’ll show you how to assign and audit the access for Alice and Frank centrally with AWS SSO, using the AWS CLI.

The flow includes the following steps:

  1. Create three permission sets:
    • PowerUserAccess, with the PowerUserAccess policy attached.
    • AuditAccess, with the SecurityAudit policy attached.
    • EC2-S3-FullAccess, with the AmazonEC2FullAccess and AmazonS3FullAccess policies attached.
  2. Assign permission sets to the AWS account and AWS SSO users:
    • Assign the PowerUserAccess and AuditAccess permission sets to Frank Infosec, to provide the required access to the ExampleOrgDev and ExampleOrgTest accounts.
    • Assign the EC2-S3-FullAccess permission set to Alice Developer, to provide the required permissions to the ExampleOrgDev account.
  3. Retrieve the assigned permissions by using Account Entitlement APIs for audit and governance purposes.

    Note: AWS SSO Permission sets can contain either AWS managed policies or custom policies that are stored in AWS SSO. In this blog we attach AWS managed polices to the AWS SSO Permission sets for simplicity. To help secure your AWS resources, follow the standard security advice of granting least privilege access using AWS SSO custom policy while creating AWS SSO Permission set.

Figure 2: AWS Organizations accounts access for Alice and Frank

Figure 2: AWS Organizations accounts access for Alice and Frank

To help simplify administration of access permissions, we recommend that you assign access directly to groups rather than to individual users. With groups, you can grant or deny permissions to groups of users, rather than having to apply those permissions to each individual. For simplicity, in this blog you’ll assign permissions directly to the users.

Prerequisites

Before you start this walkthrough, complete these steps:

Use the AWS SSO API from the AWS CLI

In order to call the AWS SSO account assignment API by using the AWS CLI, you need to install and configure AWS CLI v2. For more information about AWS CLI installation and configuration, see Installing the AWS CLI and Configuring the AWS CLI.

Step 1: Create permission sets

In this step, you learn how to create EC2-S3FullAccess, AuditAccess, and PowerUserAccess permission sets in AWS SSO from the AWS CLI.

Before you create the permission sets, run the following command to get the Amazon Resource Name (ARN) of the AWS SSO instance and the Identity Store ID, which you will need later in the process when you create and assign permission sets to AWS accounts and users or groups.

aws sso-admin list-instances

Figure 3 shows the results of running the command.

Figure 3: AWS SSO list instances

Figure 3: AWS SSO list instances

Next, create the permission set for the security team (Frank) and dev team (Alice), as follows.

Permission set for Alice Developer (EC2-S3-FullAccess)

Run the following command to create the EC2-S3-FullAccess permission set for Alice, as shown in Figure 4.

aws sso-admin create-permission-set --instance-arn '<Instance ARN>' --name 'EC2-S3-FullAccess' --description 'EC2 and S3 access for developers'
Figure 4: Creating the permission set EC2-S3-FullAccess

Figure 4: Creating the permission set EC2-S3-FullAccess

Permission set for Frank Infosec (AuditAccess)

Run the following command to create the AuditAccess permission set for Frank, as shown in Figure 5.

aws sso-admin create-permission-set --instance-arn '<Instance ARN>' --name 'AuditAccess' --description 'Audit Access for security team on ExampleOrgDev account'
Figure 5: Creating the permission set AuditAccess

Figure 5: Creating the permission set AuditAccess

Permission set for Frank Infosec (PowerUserAccess)

Run the following command to create the PowerUserAccess permission set for Frank, as shown in Figure 6.

aws sso-admin create-permission-set --instance-arn '<Instance ARN>' --name 'PowerUserAccess' --description 'Power User Access for security team on ExampleOrgDev account'
Figure 6: Creating the permission set PowerUserAccess

Figure 6: Creating the permission set PowerUserAccess

Copy the permission set ARN from these responses, which you will need when you attach the managed policies.

Step 2: Assign policies to permission sets

In this step, you learn how to assign managed policies to the permission sets that you created in step 1.

Attach policies to the EC2-S3-FullAccess permission set

Run the following command to attach the amazonec2fullacess AWS managed policy to the EC2-S3-FullAccess permission set, as shown in Figure 7.

aws sso-admin attach-managed-policy-to-permission-set --instance-arn '<Instance ARN>' --permission-set-arn '<Permission Set ARN>' --managed-policy-arn 'arn:aws:iam::aws:policy/amazonec2fullaccess'
Figure 7: Attaching the AWS managed policy amazonec2fullaccess to the EC2-S3-FullAccess permission set

Figure 7: Attaching the AWS managed policy amazonec2fullaccess to the EC2-S3-FullAccess permission set

Run the following command to attach the amazons3fullaccess AWS managed policy to the EC2-S3-FullAccess permission set, as shown in Figure 8.

aws sso-admin attach-managed-policy-to-permission-set --instance-arn '<Instance ARN>' --permission-set-arn '<Permission Set ARN>' --managed-policy-arn 'arn:aws:iam::aws:policy/amazons3fullaccess'
Figure 8: Attaching the AWS managed policy amazons3fullaccess to the EC2-S3-FullAccess permission set

Figure 8: Attaching the AWS managed policy amazons3fullaccess to the EC2-S3-FullAccess permission set

Attach a policy to the AuditAccess permission set

Run the following command to attach the SecurityAudit managed policy to the AuditAccess permission set that you created earlier, as shown in Figure 9.

aws sso-admin attach-managed-policy-to-permission-set --instance-arn '<Instance ARN>' --permission-set-arn '<Permission Set ARN>' --managed-policy-arn 'arn:aws:iam::aws:policy/SecurityAudit'
Figure 9: Attaching the AWS managed policy SecurityAudit to the AuditAccess permission set

Figure 9: Attaching the AWS managed policy SecurityAudit to the AuditAccess permission set

Attach a policy to the PowerUserAccess permission set

The following command is similar to the previous command; it attaches the PowerUserAccess managed policy to the PowerUserAccess permission set, as shown in Figure 10.

aws sso-admin attach-managed-policy-to-permission-set --instance-arn '<Instance ARN>' --permission-set-arn '<Permission Set ARN>' --managed-policy-arn 'arn:aws:iam::aws:policy/PowerUserAccess'
Figure 10: Attaching AWS managed policy PowerUserAccess to the PowerUserAccess permission set

Figure 10: Attaching AWS managed policy PowerUserAccess to the PowerUserAccess permission set

In the next step, you assign users (Frank Infosec and Alice Developer) to their respective permission sets and assign permission sets to accounts.

Step 3: Assign permission sets to users and groups and grant access to AWS accounts

In this step, you assign the AWS SSO permission sets you created to users and groups and AWS accounts, to grant the required access for these users and groups on respective AWS accounts.

To assign access to an AWS account for a user or group, using a permission set you already created, you need the following:

  • The principal ID (the ID for the user or group)
  • The AWS account ID to which you need to assign this permission set

To obtain a user’s or group’s principal ID (UserID or GroupID), you need to use the AWS SSO Identity Store API. The AWS SSO Identity Store service enables you to retrieve all of your identities (users and groups) from AWS SSO. See AWS SSO Identity Store API for more details.

Use the first two commands shown here to get the principal ID for the two users, Alice (Alice’s user name is [email protected]) and Frank (Frank’s user name is [email protected]).

Alice’s user ID

Run the following command to get Alice’s user ID, as shown in Figure 11.

aws identitystore list-users --identity-store-id '<Identity Store ID>' --filter AttributePath='UserName',AttributeValue='[email protected]'
Figure 11: Retrieving Alice’s user ID

Figure 11: Retrieving Alice’s user ID

Frank’s user ID

Run the following command to get Frank’s user ID, as shown in Figure 12.

aws identitystore list-users --identity-store-id '<Identity Store ID>'--filter AttributePath='UserName',AttributeValue='[email protected]'
Figure 12: Retrieving Frank’s user ID

Figure 12: Retrieving Frank’s user ID

Note: To get the principal ID for a group, use the following command.

aws identitystore list-groups --identity-store-id '<Identity Store ID>' --filter AttributePath='DisplayName',AttributeValue='<Group Name>'

Assign the EC2-S3-FullAccess permission set to Alice in the ExampleOrgDev account

Run the following command to assign Alice access to the ExampleOrgDev account using the EC2-S3-FullAccess permission set. This will give Alice full access to Amazon EC2 and S3 services in the ExampleOrgDev account.

Note: When you call the CreateAccountAssignment API, AWS SSO automatically provisions the specified permission set on the account in the form of an IAM policy attached to the AWS SSO–created IAM role. This role is immutable: it’s fully managed by the AWS SSO, and it cannot be deleted or changed by the user even if the user has full administrative rights on the account. If the permission set is subsequently updated, the corresponding IAM policies attached to roles in your accounts won’t be updated automatically. In this case, you will need to call ProvisionPermissionSet to propagate these updates.

aws sso-admin create-account-assignment --instance-arn '<Instance ARN>' --permission-set-arn '<Permission Set ARN>' --principal-id '<user/group ID>' --principal-type '<USER/GROUP>' --target-id '<AWS Account ID>' --target-type AWS_ACCOUNT
Figure 13: Assigning the EC2-S3-FullAccess permission set to Alice on the ExampleOrgDev account

Figure 13: Assigning the EC2-S3-FullAccess permission set to Alice on the ExampleOrgDev account

Assign the AuditAccess permission set to Frank Infosec in the ExampleOrgDev account

Run the following command to assign Frank access to the ExampleOrgDev account using the EC2-S3- AuditAccess permission set.

aws sso-admin create-account-assignment --instance-arn '<Instance ARN>' --permission-set-arn '<Permission Set ARN>' --principal-id '<user/group ID>' --principal-type '<USER/GROUP>' --target-id '<AWS Account ID>' --target-type AWS_ACCOUNT
Figure 14: Assigning the AuditAccess permission set to Frank on the ExampleOrgDev account

Figure 14: Assigning the AuditAccess permission set to Frank on the ExampleOrgDev account

Assign the PowerUserAccess permission set to Frank Infosec in the ExampleOrgTest account

Run the following command to assign Frank access to the ExampleOrgTest account using the PowerUserAccess permission set.

aws sso-admin create-account-assignment --instance-arn '<Instance ARN>' --permission-set-arn '<Permission Set ARN>' --principal-id '<user/group ID>' --principal-type '<USER/GROUP>' --target-id '<AWS Account ID>' --target-type AWS_ACCOUNT
Figure 15: Assigning the PowerUserAccess permission set to Frank on the ExampleOrgTest account

Figure 15: Assigning the PowerUserAccess permission set to Frank on the ExampleOrgTest account

To view the permission sets provisioned on the AWS account, run the following command, as shown in Figure 16.

aws sso-admin list-permission-sets-provisioned-to-account --instance-arn '<Instance ARN>' --account-id '<AWS Account ID>'
Figure 16: View the permission sets (AuditAccess and EC2-S3-FullAccess) assigned to the ExampleOrgDev account

Figure 16: View the permission sets (AuditAccess and EC2-S3-FullAccess) assigned to the ExampleOrgDev account

To review the created resources in the AWS Management Console, navigate to the AWS SSO console. In the list of permission sets on the AWS accounts tab, choose the EC2-S3-FullAccess permission set. Under AWS managed policies, the policies attached to the permission set are listed, as shown in Figure 17.

Figure 17: Review the permission set in the AWS SSO console

Figure 17: Review the permission set in the AWS SSO console

To see the AWS accounts, where the EC2-S3-FullAccess permission set is currently provisioned, navigate to the AWS accounts tab, as shown in Figure 18.

Figure 18: Review permission set account assignment in the AWS SSO console

Figure 18: Review permission set account assignment in the AWS SSO console

Step 4: Audit access

In this step, you learn how to audit access assigned to your users and group by using the AWS SSO account assignment API. In this example, you’ll start from a permission set, review the permissions (AWS-managed policies or a custom policy) attached to the permission set, get the users and groups associated with the permission set, and see which AWS accounts the permission set is provisioned to.

List the IAM managed policies for the permission set

Run the following command to list the IAM managed policies that are attached to a specified permission set, as shown in Figure 19.

aws sso-admin list-managed-policies-in-permission-set --instance-arn '<Instance ARN>' --permission-set-arn '<Permission Set ARN>'
Figure 19: View the managed policies attached to the permission set

Figure 19: View the managed policies attached to the permission set

List the assignee of the AWS account with the permission set

Run the following command to list the assignee (the user or group with the respective principal ID) of the specified AWS account with the specified permission set, as shown in Figure 20.

aws sso-admin list-account-assignments --instance-arn '<Instance ARN>' --account-id '<Account ID>' --permission-set-arn '<Permission Set ARN>'
Figure 20: View the permission set and the user or group attached to the AWS account

Figure 20: View the permission set and the user or group attached to the AWS account

List the accounts to which the permission set is provisioned

Run the following command to list the accounts that are associated with a specific permission set, as shown in Figure 21.

aws sso-admin list-accounts-for-provisioned-permission-set --instance-arn '<Instance ARN>' --permission-set-arn '<Permission Set ARN>'
Figure 21: View AWS accounts to which the permission set is provisioned

Figure 21: View AWS accounts to which the permission set is provisioned

In this section of the post, we’ve illustrated how to create a permission set, assign a managed policy to the permission set, and grant access for AWS SSO users or groups to AWS accounts by using this permission set. In the next section, we’ll show you how to do the same using AWS CloudFormation.

Use the AWS SSO API through AWS CloudFormation

In this section, you learn how to use CloudFormation templates to automate the creation of permission sets, attach managed policies, and use permission sets to assign access for a particular user or group to AWS accounts.

Sign in to your AWS Management Console and create a CloudFormation stack by using the following CloudFormation template. For more information on how to create a CloudFormation stack, see Creating a stack on the AWS CloudFormation console.

//start of Template//
{
    "AWSTemplateFormatVersion": "2010-09-09",
  
    "Description": "AWS CloudFormation template to automate multi-account access with AWS Single Sign-On (Entitlement APIs): Create permission sets, assign access for AWS SSO users and groups to AWS accounts using permission sets. Before you use this template, we assume you have enabled AWS SSO for your AWS Organization, added the AWS accounts to which you want to grant AWS SSO access to your organization, signed in to the AWS Management Console with your AWS Organizations management account credentials, and have the required permissions to use the AWS SSO console.",
  
    "Parameters": {
      "InstanceARN" : {
        "Type" : "String",
        "AllowedPattern": "arn:aws:sso:::instance/(sso)?ins-[a-zA-Z0-9-.]{16}",
        "Description" : "Enter AWS SSO InstanceARN. Ex: arn:aws:sso:::instance/ssoins-xxxxxxxxxxxxxxxx",
        "ConstraintDescription": "must be the name of an existing AWS SSO InstanceARN associated with the management account."
      },
      "ExampleOrgDevAccountId" : {
        "Type" : "String",
        "AllowedPattern": "\\d{12}",
        "Description" : "Enter 12-digit Developer AWS Account ID. Ex: 123456789012"
        },
      "ExampleOrgTestAccountId" : {
        "Type" : "String",
        "AllowedPattern": "\\d{12}",
        "Description" : "Enter 12-digit AWS Account ID. Ex: 123456789012"
        },
      "AliceDeveloperUserId" : {
        "Type" : "String",
        "AllowedPattern": "^([0-9a-f]{10}-|)[A-Fa-f0-9]{8}-[A-Fa-f0-9]{4}-[A-Fa-f0-9]{4}-[A-Fa-f0-9]{4}-[A-Fa-f0-9]{12}$",
        "Description" : "Enter Developer UserId. Ex: 926703446b-f10fac16-ab5b-45c3-86c1-xxxxxxxxxxxx"
        },
        "FrankInfosecUserId" : {
            "Type" : "String",
            "AllowedPattern": "^([0-9a-f]{10}-|)[A-Fa-f0-9]{8}-[A-Fa-f0-9]{4}-[A-Fa-f0-9]{4}-[A-Fa-f0-9]{4}-[A-Fa-f0-9]{12}$",
            "Description" : "Enter Test UserId. Ex: 926703446b-f10fac16-ab5b-45c3-86c1-xxxxxxxxxxxx"
            }
    },
    "Resources": {
        "EC2S3Access": {
            "Type" : "AWS::SSO::PermissionSet",
            "Properties" : {
                "Description" : "EC2 and S3 access for developers",
                "InstanceArn" : {
                    "Ref": "InstanceARN"
                },
                "ManagedPolicies" : ["arn:aws:iam::aws:policy/amazonec2fullaccess","arn:aws:iam::aws:policy/amazons3fullaccess"],
                "Name" : "EC2-S3-FullAccess",
                "Tags" : [ {
                    "Key": "Name",
                    "Value": "EC2S3Access"
                 } ]
              }
        },  
        "SecurityAuditAccess": {
            "Type" : "AWS::SSO::PermissionSet",
            "Properties" : {
                "Description" : "Audit Access for Infosec team",
                "InstanceArn" : {
                    "Ref": "InstanceARN"
                },
                "ManagedPolicies" : [ "arn:aws:iam::aws:policy/SecurityAudit" ],
                "Name" : "AuditAccess",
                "Tags" : [ {
                    "Key": "Name",
                    "Value": "SecurityAuditAccess"
                 } ]
              }
        },    
        "PowerUserAccess": {
            "Type" : "AWS::SSO::PermissionSet",
            "Properties" : {
                "Description" : "Power User Access for Infosec team",
                "InstanceArn" : {
                    "Ref": "InstanceARN"
                },
                "ManagedPolicies" : [ "arn:aws:iam::aws:policy/PowerUserAccess"],
                "Name" : "PowerUserAccess",
                "Tags" : [ {
                    "Key": "Name",
                    "Value": "PowerUserAccess"
                 } ]
              }      
        },
        "EC2S3userAssignment": {
            "Type" : "AWS::SSO::Assignment",
            "Properties" : {
                "InstanceArn" : {
                    "Ref": "InstanceARN"
                },
                "PermissionSetArn" : {
                    "Fn::GetAtt": [
                        "EC2S3Access",
                        "PermissionSetArn"
                     ]
                },
                "PrincipalId" : {
                    "Ref": "AliceDeveloperUserId"
                },
                "PrincipalType" : "USER",
                "TargetId" : {
                    "Ref": "ExampleOrgDevAccountId"
                },
                "TargetType" : "AWS_ACCOUNT"
              }
          },
          "SecurityAudituserAssignment": {
            "Type" : "AWS::SSO::Assignment",
            "Properties" : {
                "InstanceArn" : {
                    "Ref": "InstanceARN"
                },
                "PermissionSetArn" : {
                    "Fn::GetAtt": [
                        "SecurityAuditAccess",
                        "PermissionSetArn"
                     ]
                },
                "PrincipalId" : {
                    "Ref": "FrankInfosecUserId"
                },
                "PrincipalType" : "USER",
                "TargetId" : {
                    "Ref": "ExampleOrgDevAccountId"
                },
                "TargetType" : "AWS_ACCOUNT"
              }
          },
          "PowerUserAssignment": {
            "Type" : "AWS::SSO::Assignment",
            "Properties" : {
                "InstanceArn" : {
                    "Ref": "InstanceARN"
                },
                "PermissionSetArn" : {
                    "Fn::GetAtt": [
                        "PowerUserAccess",
                        "PermissionSetArn"
                     ]
                },
                "PrincipalId" : {
                    "Ref": "FrankInfosecUserId"
                },
                "PrincipalType" : "USER",
                "TargetId" : {
                    "Ref": "ExampleOrgTestAccountId"
                },
                "TargetType" : "AWS_ACCOUNT"
              }
          }
    }
}
//End of Template//

When you create the stack, provide the following information for setting the example permission sets for Frank Infosec and Alice Developer, as shown in Figure 22:

  • The Alice Developer and Frank Infosec user IDs
  • The ExampleOrgDev and ExampleOrgTest account IDs
  • The AWS SSO instance ARN

Then launch the CloudFormation stack.

Figure 22: User inputs to launch the CloudFormation template

Figure 22: User inputs to launch the CloudFormation template

AWS CloudFormation creates the resources that are shown in Figure 23.

Figure 23: Resources created from the CloudFormation stack

Figure 23: Resources created from the CloudFormation stack

Cleanup

To delete the resources you created by using the AWS CLI, use these commands.

Run the following command to delete the account assignment.

delete-account-assignment --instance-arn '<Instance ARN>' --target-id '<AWS Account ID>' --target-type 'AWS_ACCOUNT' --permission-set-arn '<PermissionSet ARN>' --principal-type '<USER/GROUP>' --principal-id '<user/group ID>'

After the account assignment is deleted, run the following command to delete the permission set.

delete-permission-set --instance-arn '<Instance ARN>' --permission-set-arn '<PermissionSet ARN>'

To delete the resource that you created by using the CloudFormation template, go to the AWS CloudFormation console. Select the appropriate stack you created, and then choose delete. Deleting the CloudFormation stack cleans up the resources that were created.

Summary

In this blog post, we showed how to use the AWS SSO account assignment API to automate the deployment of permission sets, how to add managed policies to permission sets, and how to assign access for AWS users and groups to AWS accounts by using specified permission sets.

To learn more about the AWS SSO APIs available for you, see the AWS Single Sign-On API Reference Guide.

If you have feedback about this post, submit comments in the Comments section below. If you have questions about this post, start a new thread on the AWS SSO forum or contact AWS Support.

Want more AWS Security how-to content, news, and feature announcements? Follow us on Twitter.

Author

Akhil Aendapally

Akhil is a Solutions Architect at AWS focused on helping customers with their AWS adoption. He holds a master’s degree in Network and Computer Security. Akhil has 8+ years of experience working with different cloud platforms, infrastructure automation, and security.

Author

Yuri Duchovny

Yuri is a New York-based Solutions Architect specializing in cloud security, identity, and compliance. He supports cloud transformations at large enterprises, helping them make optimal technology and organizational decisions. Prior to his AWS role, Yuri’s areas of focus included application and networking security, DoS, and fraud protection. Outside of work, he enjoys skiing, sailing, and traveling the world.

Author

Ballu Singh

Ballu is a principal solutions architect at AWS. He lives in the San Francisco Bay area and helps customers architect and optimize applications on AWS. In his spare time, he enjoys reading and spending time with his family.

Author

Nir Ozeri

Nir is a Solutions Architect Manager with Amazon Web Services, based out of New York City. Nir specializes in application modernization, application delivery, and mobile architecture.

How to bulk import users and groups from CSV into AWS SSO

Post Syndicated from Darryn Hendricks original https://aws.amazon.com/blogs/security/how-to-bulk-import-users-and-groups-from-csv-into-aws-sso/

When you connect an external identity provider (IdP) to AWS Single Sign-On (SSO) using Security Assertion Markup Language (SAML) 2.0 standard, you must create all users and groups into AWS SSO before you can make any assignments to AWS accounts or applications. If your IdP supports user and group provisioning by way of the System for Cross-Domain Identity Management (SCIM), we strongly recommend using SCIM to simplify ongoing lifecycle management for your users and groups in AWS SSO.

If your IdP doesn’t yet support automatic provisioning, you will need to create your users and groups manually in AWS SSO. Although manual creation of users and groups is the least complicated option to get started, it can be tedious and prone to errors.

In this post, we show you how to use a comma-separated values (CSV) file to bulk create users and groups in AWS SSO.

How it works

AWS SSO supports automatic provisioning of user and group information from an external IdP into AWS SSO using the SCIM protocol. For this solution, you use a PowerShell script to simulate a SCIM server, to provision users and groups from a CSV file into AWS SSO. You create and populate the CSV file with your user and group information that is then used by the PowerShell script. Next, on your Windows, Linux, or macOS system with PowerShell Core installed, you run the PowerShell script. The PowerShell script reads users and groups from the CSV file and then programmatically creates the users and groups in AWS SSO using your SCIM configuration for AWS SSO.

Assumptions

In this blog post, we assume the following:

  • You already have an AWS SSO-enabled account (free). For more information, see Enable AWS SSO.
  • You have the permissions needed to add users and groups in AWS SSO.
  • You configured a SAML IdP with AWS SSO, as described in How to Configure SAML 2.0 for AWS Single Sign-On.
  • You’re using a Windows, MacOS, or Linux system with PowerShell Core installed.
  • If you’re not using a system with PowerShell Core installed, you’re using a Windows 7 or later system, with PowerShell 4.0 or later installed.

Note: This article was authored and the code tested on a Microsoft Windows Server 2019 system with PowerShell installed.

Enable automatic provisioning

In this step, you enable automatic provisioning in AWS SSO. You use the automatic provisioning endpoints for AWS SSO to connect and create users and groups in AWS SSO.

To enable automatic provisioning in AWS SSO

    1. On the AWS SSO Console, go to the Single Sign-On page and then go to Settings.
    2. Change the provisioning from Manual to SCIM by selecting Enable automatic provisioning.
Figure 1: Enable automatic provisioning

Figure 1: Enable automatic provisioning

    1. Copy the SCIM endpoint and the Access token (you can have up to two access token IDs). You use these values later.
Figure 2: Copy the SCIM endpoint and access token

Figure 2: Copy the SCIM endpoint and access token

Bulk create users and groups into AWS SSO

In this section, you create your users and groups from a CSV file into AWS SSO. To do this, you create a CSV file with your users’ profile information (for example: first name, last name, display name, and other values.). You also create a PowerShell script to connect to AWS SSO and create the users and groups from the CSV file in AWS SSO.

To bulk create your users from a CSV file

    1. Create a file called csv-example-users.csv with the following column headings: firstName, lastName, userName, displayName, emailAddress, and memberOf.

Note: The memberOf column will include all the groups you want to add the user to in AWS SSO. If the group you plan to add a user to isn’t in AWS SSO, the script automatically creates the group for you. If you want to add a user to multiple groups, you can add the group names separated by semicolons in the memberOf column.

    1. Populate the CSV file csv-example-users.csv with the users you want to create in AWS SSO.

Note: Before you populate the CSV file, take note of the existing users, groups, and group membership in AWS SSO. Make sure that none of the users or groups in the CSV file already exists in AWS SSO.

Note: For this to work, every user in the csv-example-users.csv must have a firstName, lastName, userName, displayName, and emailAddress value specified. If any of these values are missing, that user isn’t created. The userName and emailAddress values must not contain any spaces.

Figure 3: Create the CSV file and populate it with the users to create in AWS SSO

Figure 3: Create the CSV file and populate it with the users to create in AWS SSO

  1. Next, create a create_users.ps1 file and copy the following PowerShell code to it. Use a text editor like Notepad or TextEdit to edit the create_users.ps1 file.
    • Replace <SCIMENDPOINT> with the SCIM endpoint value you copied earlier.
    • Replace <BEARERTOKEN> with the Access token value you copied earlier.
    • Replace <CSVLOCATION> with the location of your CSV file (for example, C:\Users\testuser\Downloads\csv-example-users.csv. Relative paths are also accepted).
    #Input SCIM configuration and CSV file location
    $Url = "<SCIMENDPOINT>"
    $Bearertoken = "<BEARERTOKEN>"
    $CSVfile = "<CSVLOCATION>"
    $Headers = @{ Authorization = "Bearer $Bearertoken" }
    
    #Get users from CSV file and store in variable
    $Users = Import-Csv -Delimiter "," -Path "$CSVfile"
    
     #Read groups in CSV and groups in AWS SSO
        
        $Groups = $Users.memberOf -split ";"
        $Groups = $Groups | Sort-Object -Unique | where {$_ -ne ""}
    
        foreach($Group in $Groups){
             $SSOgroup = @{
                "displayName" = $Group.trim()
                }
    
        #Store group attribute in json format
    
        $Groupjson = $SSOgroup | ConvertTo-Json
    
        #Create groups in AWS SSO
    
        try {
        
            $Response = Invoke-RestMethod -ContentType application/json -Uri "$Url/Groups" -Method POST -Headers $Headers -Body $Groupjson -UseBasicParsing
            Write-Host "Create group: The group $($Group) has been created successfully." -foregroundcolor green
    
        }
        catch 
        {
        
          $ErrorMessage = $_.Exception.Message
    
           if ($ErrorMessage -eq "The remote server returned an error: (409) Conflict.")
           {
             Write-Host "Error creating group: A group with the name $($Group) already exists." -foregroundcolor yellow
           }
           
           else 
           {       
             Write-Host "Error has occurred: $($ErrorMessage)" -foregroundcolor Red
           }
        }
        }
    
    #Loop through each user
    foreach ($User in $Users)
    {
    
        #Get user attributes from each field
        $SSOuser = @{
                name = @{ familyName = $User.lastName.trim(); givenName = $User.firstName.trim() }
                displayName = $User.displayName.trim()
                userName = $User.userName
                emails = @(@{ value = $User.emailAddress; type = "work"; primary = "true" })
                active = "true"
                }
    
        #Store user attributes in json format
        $Userjson = $SSOuser | ConvertTo-Json
    
        #Create users in AWS SSO
    
        try {
        $Response = Invoke-RestMethod -ContentType application/json -Uri "$Url/Users" -Method POST -Headers $Headers -Body $Userjson -UseBasicParsing
        Write-Host "Create user: The user $($User.userName) has been created successfully." -foregroundcolor green
    
        }
        catch 
        {
        
          $ErrorMessage = $_.Exception.Message
    
           if ($ErrorMessage -eq "The remote server returned an error: (409) Conflict.")
           {
             Write-Host "Error creating user: A user with the same username $($User.userName) already exist" -foregroundcolor yellow
           }
           
           else 
           {       
             Write-Host "Error has occurred: $($ErrorMessage)" -foregroundcolor Red
           }
        }   
    
    #Get user information
        $UserName = $User.userName
        $UserId = (Invoke-RestMethod -ContentType application/json -Uri "$Url/Users`?filter=userName%20eq%20%22$UserName%22" -Method GET -Headers $Headers).Resources.id
        $Groups = $User.memberOf -split ";"
    
    #Loop through each group and add user to group
        foreach($Group in $Groups){
    
    If (-not [string]::IsNullOrWhiteSpace($Group)) 
    {
    #Get the GroupName and GroupId
        $GroupName = $Group.trim()
        $GroupId = (Invoke-RestMethod -ContentType application/json -Uri "$Url/Groups`?filter=displayName%20eq%20%22$GroupName%22" -Method GET -Headers $Headers).Resources.id
    
    #Store group membership in variable. 
        $AddUserToGroup = @{
                Operations = @(@{ op = "add"; path = "members"; value = @(@{ value = $UserId })})
                }
                
        #Convert to json format
        $AddUsertoGroupjson = $AddUserToGroup | ConvertTo-Json -Depth 4
    
        #Add users to group in AWS SSO
        
            try {
        $Responses = Invoke-RestMethod -ContentType application/json -Uri "$Url/Groups/$GroupId" -Method PATCH -Headers $Headers -Body $AddUsertoGroupjson -UseBasicParsing
        Write-Host "Add user to group: The user $($User.userName) has been added successfully to group $($GroupName)." -foregroundcolor green
    
        }
        catch 
        {
        
          $ErrorMessage = $_.Exception.Message
    
    	if ($ErrorMessage -eq "The remote server returned an error: (409) Conflict.")
           {
             Write-Host "Error adding user to group: The user $($User.userName) is already added to group $($GroupName)." -foregroundcolor yellow
           }
           
           else 
           {       
             Write-Host "Error has occurred: $($ErrorMessage)" -foregroundcolor Red
           }
        }
       }        
      }
    }
    

  2. Use Windows PowerShell to run the script create_users.ps1, as shown in the following figure.

    Figure 4: Run PowerShell script to create users from CSV in AWS SSO

    Figure 4: Run PowerShell script to create users from CSV in AWS SSO

  3. Use the AWS SSO console to verify that the users and groups were successfully created. In the AWS SSO console, select Users from the left menu, as shown in figure 5.

    Figure 5: View the newly created users in AWS SSO console

    Figure 5: View the newly created users in AWS SSO console

  4. Use the AWS SSO console to verify that the groups were successfully created. In the AWS SSO console, select Groups from the left menu, as shown in figure 6.

    Figure 6: View the newly created groups in AWS SSO console

    Figure 6: View the newly created groups in AWS SSO console

Your users, groups, and group memberships have been created in AWS SSO. You can now manage access for your identities in AWS SSO across your own applications, third-party applications (SaaS), and Amazon Web Services (AWS) environments.

How to run the PowerShell scripts on Linux and macOS

While this post focuses on running the PowerShell script on a Windows system. You can also run the PowerShell script on a Linux or macOS system that has PowerShell Core installed. You can then follow the steps in this post to create the required CSV files for creating a user and group and adding a user to a group. Then, on your Linux or macOS system, you can run the PowerShell script using the following command.

pwsh -File <Path to PowerShell Script>

Conclusion

In this post, we showed you how to programmatically create users and groups from a CSV file into AWS SSO. This solution isn’t a replacement for automatic provisioning. However, it can help you to quickly get up and running with AWS SSO by reducing the administration burden of manually creating users in AWS SSO.

If you have feedback about this post, submit comments in the Comments section below.

Want more AWS Security how-to content, news, and feature announcements? Follow us on Twitter.

Author

Darryn Hendricks

Darryn is a Senior Cloud Support Engineer for AWS Single Sign-On (SSO) based in Seattle, Washington. He is passionate about Cloud computing, identities, automation and helping customers leverage these key building blocks when moving to the Cloud. Outside of work, he loves spending time with his wife and daughter.

Author

Jose Ruiz

Jose is a Senior Solutions Architect – Security Specialist at AWS. He often enjoys “the road less traveled” and knows each technology has a security story often not spoken of. He takes this perspective when working with customers on highly complex solutions and driving security at the beginning of each build.

New – Attributes Based Access Control with AWS Single Sign On

Post Syndicated from Sébastien Stormacq original https://aws.amazon.com/blogs/aws/new-attributes-based-access-control-with-aws-single-sign-on/

Starting today, you can pass user attributes in the AWS session when your workforce sign-in into the cloud using AWS Single Sign-On. This gives you the centralized account access management of AWS Single Sign-On and ABAC, with the flexibility to use AWS SSO, Active Directory, or an external identity provider as your identity source. To learn more about the advantages of ABAC policies on AWS, you may read my previous blog post on the subject.

Overview
On one side, system administrators configure user attributes on the AWS Single Sign-On identity repository, or the managed Active Directory. System administrators may also configure an external identity provider, such as Okta, OneLogin or PingFederate to pass existing user attributes in the AWS sessions when their workforce federates into AWS. These attributes are known as session tags in AWS. On the other side, cloud administrators create fine-grained permissions policies such that your workforce get only access to cloud resources with matching resource tags.

Creating policies based on matching attributes instead of functional roles helps to reduce the number of distinct permissions and roles you must create and manage in your AWS environment. For example, when developers Bob from team red and Alice from team blue sign-in into AWS and assume the same AWS Identity and Access Management (IAM) role, they get distinct permissions to project resources tagged for their team. The identity system sends the team name attribute in the AWS session when Bob and Alice sign-in into AWS. The role’s permissions grant access to project resources with matching team name tags. Now, if Bob moves to team blue and system administrators update his team name in their identity provider directory, Bob automatically gets access to team blue’s project resources without requiring permissions updates in IAM.

How to Configure AWS SSO to Map User Attributes
Before to configure AWS SSO, there are two important points to highlight. First, ABAC will work with attributes from any identity source configured in AWS SSO : AWS SSO itself, a managed Active Directory, or an external identity provider. Second, there are two ways to pass attributes for access control to AWS SSO. Either you can pass attributes directly in the SAML assertion using the prefix https://aws.amazon.com/SAML/Attributes/AccessControl, or you can use attributes that are in the AWS SSO identity store. Those attributes are configured by your AWS SSO administrator for users created in AWS SSO, synchronized in from an Active Directory, or synchronized in from an external identity provider using automatic provisioning (SCIM).

For this demo, I choose to use an external identity provider and SCIM.

I can enable ABAC in AWS using AWS SSO with three steps:

Step 1: I configure my identity source with the associated user identities and attributes in the external identity provider. As of today, AWS SSO supports identity synchronization via SCIM with Azure AD, Okta, OneLogin, and PingFederate. Check this page to get an up-to-date list. The specifics depend on each identity provider.

Step 2: I configure the SCIM attributes I want to use for access control using the new Access Control Attributes global setting in the AWS SSO console or API. This screen allows me to select attributes for access control from the identity source I configured in step 1.

Attributes for Access Control

Step 3: I author ABAC rules through permission sets and resource-based policies using the attributes I configured in Step 2. More about this in a minute.

Now, when my workforce federates into an AWS account using SSO, they get access to their AWS resources based on matching attributes.

Attributes are passed as session tags. They are passed as comma-separated key:value pairs. The total character length of all the attributes together must be less than or equal to 460 characters.

What Does a Policy Look Like?
I now can use user attributes in my permission sets using the aws:PrincipalTag condition key when creating access control rules. For example, I can tag all the resources in my organization with their respective department name, and use a single permission set that grants developers access only to their department resources. Now, whenever developers federate into the AWS account, AWS SSO creates a department session tag with the value received from the identity provider. The security policies allow them to only get access to the resources in their respective department. As the team adds more developers and resources to their project, I only have to tag resources with the correct department name. As a result, as the organization adds new resources and developers to departments, developers can only manage resources aligned to their department without needing any permission updates.

An ABAC SSO permission set policy might look like this:

{
    "Version": "2012-10-17",
    "Statement": [
        {
            "Effect": "Allow",
            "Action": [ "ec2:DescribeInstances"],
            "Resource": "*"
        },
        {
            "Effect": "Allow",
            "Action": ["ec2:StartInstances","ec2:StopInstances"],
            "Resource": "*",
            "Condition": {
                "StringEquals": {
                    "ec2:ResourceTag/Department": "${aws:PrincipalTag/Department}"
                }
            }
        }
    ]
}

This policy allows anybody to DescribeInstances, but only users with a aws:PrincipalTag/Department tag’s value matching the EC2 instance ec2:ResourceTag/Department tag’s value are authorized to stop or to start instances.

I attach this policy to an AWS Account’s Permission Set. On the left part of the AWS Single Sign-On console, I click AWS Accounts and select the Permission sets tab. Then I click Create permission set. On the next screen, I select Create a customer permission set.

Create a custom permission set

I enter a name and description, I make sure Create a custom permissions policy is selected. Then I can copy/paste the previous policy allowing to start and stop EC2 instances when the department name tag value is equal to the person’s department name tag value.

Create Custom Policy for Permission Set

On the next screen, I enter some tags, then I review my configuration before clicking Create. Et voila, I am ready to go.

If you have existing federation configured with AWS Security Token Service, remember that external identity providers consider AWS SSO as a new application configuration. This means when you move from direct IAM federation to AWS SSO, you have to update your external identity provider configuration to connect with AWS SSO and to introduce attributes as session tags for this configuration.

Available Today
There is no additional charge to configure user attributes with AWS Single Sign-On. You can start to use it today in all AWS Regions where AWS SSO is available.

— seb

New – Multi-Factor Authentication with WebAuthn for AWS SSO

Post Syndicated from Sébastien Stormacq original https://aws.amazon.com/blogs/aws/multi-factor-authentication-with-webauthn-for-aws-sso/

Starting today, you can add WebAuthn as a new multi-factor authentication (MFA) to AWS Single Sign-On, in addition to currently supported one-time password (OTP) and Radius authenticators. By adding support for WebAuthn, a W3C specification developed in coordination with FIDO Alliance, you can now authenticate with a wide variety of interoperable authenticators provisioned by your system administrator or built into your laptops or smartphones. For example, you can now tap a hardware security key, touch a fingerprint sensor on your Mac, or use facial recognition on your mobile device or PC to authenticate into the AWS Management Console or AWS Command Line Interface (CLI).

With this addition, you can now self-register multiple MFA authenticators. Doing so allows you to authenticate on AWS with another device in case you lose or misplace your primary authenticator device. We make it easy for you to name your devices for long-term manageability.

WebAuthn two-factor authentication is available for identities stored in the AWS Single Sign-On internal identity store and those stored in Microsoft Active Directory, whether it is managed by AWS or not.

What are WebAuthn and FIDO2?

Before exploring how to configure two-factor authentication using your FIDO2-enabled devices, and to discover the user experience for web-based and CLI authentications, let’s recap how FIDO2, WebAuthn and other specifications fit together.

FIDO2 is made of two core specifications: Web Authentication (WebAuthn) and Client To Authenticator Protocol (CTAP).

Web Authentication (WebAuthn) is a W3C standard that provides strong authentication based upon public key cryptography. Unlike traditional code generator tokens or apps using TOTP protocol, it does not require sharing a secret between the server and the client. Instead, it relies on a public key pair and digital signature of unique challenges. The private key never leaves a secured device, the FIDO-enabled authenticator. When you try to authenticate to a website, this secured device interacts with your browser using the CTAP protocol.

WebAuthn is strong: Authentication is ideally backed by a secure element, which can safely store private keys and perform the cryptographic operations. It is scoped: A key pair is only useful for a specific origin, like browser cookies. A key pair registered at console.amazonaws.com cannot be used at console.not-the-real-amazon.com, mitigating the threat of phishing. Finally, it is attested: Authenticators can provide a certificate that helps servers verify that the public key did in fact come from an authenticator they trust, and not a fraudulent source.

To start to use FIDO2 authentication, you therefore need three elements: a website that supports WebAuthn, a browser that supports WebAuthn and CTAP protocols, and a FIDO authenticator. Starting today, the SSO Management Console and CLI now support WebAuthn. All modern web browsers are compatible (Chrome, Edge, Firefox, and Safari). FIDO authenticators are either devices you can use from one device or another (roaming authenticators), such as a YubiKey, or built-in hardware supported by Android, iOS, iPadOS, Windows, Chrome OS, and macOS (platform authenticators).

How Does FIDO2 Work?
When I first register my FIDO-enabled authenticator on AWS SSO, the authenticator creates a new set of public key credentials that can be used to sign a challenge generated by AWS SSO Console (the relaying party). The public part of these new credentials, along with the signed challenge, are stored by AWS SSO.

When I want to use WebAuthn as second factor authentication, the AWS SSO console sends a challenge to my authenticator. This challenge can then be signed with the previously generated public key credentials and sent back to the console. This way, AWS SSO console can verify that I have the required credentials.

How Do I Enable MFA With a Secure Device in the AWS SSO Console?
You, the system administrator, can enable MFA for your AWS SSO workforce when the user profiles are stored in AWS SSO itself, or stored in your Active Directory, either self-managed or a AWS Directory Service for Microsoft Active Directory.

To let my workforce register their FIDO or U2F authenticator in self-service mode, I first navigate to Settings, click Configure under Multi-Factor Authentication. On the following screen, I make four changes. First, under Users should be prompted for MFA, I select Every time they sign in. Second, under Users can authenticate with these MFA types, I check Security Keys and built-in authenticators. Third, under If a user does not yet have a registered MFA device, I check Require them to register an MFA device at sign in. Finally, under Who can manage MFA devices, I check Users can add and manage their own MFA devices. I click on Save Changes to save and return.

Configure SSO 2

That’s it. Now your workforce is prompted to register their MFA device the next time they authenticate.

What Is the User Experience?
As an AWS console user, I authenticate on the AWS SSO portal page URL that I received from my System Administrator. I sign in using my user name and password, as usual. On the next screen, I am prompted to register my authenticator. I check Security Key as device type. To use a biometric factor such as fingerprints or face recognition, I would click Built-in authenticator.

Register MFA Device

The browser asks me to generate a key pair and to send my public key. I can do that just by touching a button on my device, or providing the registered biometric, e.g. TouchID or FaceID.Register a security keyThe browser does confirm and shows me a last screen where I have the possibility to give a friendly name to my device, so I can remember which one is which. Then I click Save and Done.Confirm device registrationFrom now on, every time I sign in, I am prompted to touch my security device or use biometric authentication on my smartphone or laptop. What happens behind the scene is the server sending a challenge to my browser. The browser sends the challenge to the security device. The security device uses my private key to sign the challenge and to return it to the server for verification. When the server validates the signature with my public key, I am granted access to the AWS Management Console.

Additional verification required

At any time, I can register additional devices and manage my registered devices. On the AWS SSO portal page, I click MFA devices on the top-right part of the screen.

MFA device management

I can see and manage the devices registered for my account, if any. I click Register device to register a new device.

How to Configure SSO for the AWS CLI?
Once my devices are configured, I can configure SSO on the AWS Command Line Interface (CLI).

I first configure CLI SSO with aws configure sso and I enter the SSO domain URL that I received from my system administrator. The CLI opens a browser where I can authenticate with my user name, password, and my second-factor authentication configured previously. The web console gives me a code that I enter back into the CLI prompt.aws configure sso

When I have access to multiple AWS Accounts, the CLI lists them and I choose the one I want to use. This is a one-time configuration.

Once this is done, I can use the aws CLI as usual, the SSO authentication happens automatically behind the scene. You are asked to re-authenticate from time to time, depending on the configuration set by your system administrator.

Available today
Just like AWS Single Sign-On, FIDO2 second-factor authentication is provided to you at no additional cost, and is available in all AWS Regions where AWS SSO is available.

As usual, we welcome your feedback. The team told me they are working on other features to offer you additional authentication options in the near future.

You can start to use FIDO2 as second factor authentication for AWS Single Sign-On today. Configure it now.

— seb

On-Demand SCIM provisioning of Azure AD to AWS SSO with PowerShell

Post Syndicated from Natalie Doerr original https://aws.amazon.com/blogs/security/on-demand-scim-provisioning-of-azure-ad-to-aws-sso-with-powershell/

In this post, I will demonstrate how you can use a PowerShell script to initiate an on-demand synchronization between Azure Active Directory and AWS Single Sign-On (AWS SSO) and avoid the default 40-minute synchronization schedule between both identity providers. This solution helps enterprises quickly synchronize changes made to users, groups, or permissions within Azure AD with AWS SSO. This allows user or permission changes to be quickly reflected in associated AWS accounts.

Prerequisites

You need the following to complete this session:

This post focuses on the steps needed to set up the on-demand sync solution. You can find specifics on how to set up and use PowerShell and the Azure PowerShell modules at Installing Azure PowerShell.
 

Figure 1: Triggering the SCIM Endpoint to sync all users and groups

Figure 1: Triggering the SCIM Endpoint to sync all users and groups

Grant permission to the Graph API to access the Default Directory in Azure AD

To get started, grant the permissions needed for the application to have access to the directory endpoint.

To grant permissions

  1. Sign in to the Azure Portal and navigate to the Azure AD dashboard.
  2. From the left navigation pane, select App registrations. If you don’t see your application listed, select the All applications tab.
    For this example, I’m using an application named AWS.
     
    Figure 2: Select the AWS app registration

    Figure 2: Select the AWS app registration

  3. Choose API permissions from the navigation pane.
  4. Choose the Add a permission option.
     
    Figure 3: Select the Add API permission

    Figure 3: Select the Add API permission

  5. From the settings page that opens, choose the Microsoft Graph option.
     
    Figure 4: Request API permissions

    Figure 4: Request API permissions

    Under What type of permissions does your application require, select Delegated permissions and enter directory.readwrite.all in the permissions search field. Select Directory.ReadWrite.All and choose Add permissions at the bottom of the page.
     

    Figure 5: Request API permissions - Add permissions

    Figure 5: Request API permissions – Add permissions

  6. On the API permissions page, choose Grant admin consent for Default Directory and select Yes.
     
    Figure 6: Grant permission for the account to have administrator permissions

    Figure 6: Grant permission for the account to have administrator permissions

Create a certificate and secret to access the application

To get started, create a certificate and secret which grants secure access to the AWS application.

To create a certificate and secret

  1. Choose Certificate & secrets from the left navigation menu and then choose New client secret.
     
    Figure 7: Creating a client secret for 1 year

    Figure 7: Creating a client secret for 1 year

  2. Select the desired length of the certificate.
  3. Provide a description and choose Add.
    1. Copy the value of the certificate that’s generated and save it to use later in this process.
    2. After you’ve saved the value to use later, select Home from the top left corner of the screen.
    Figure 8: Make sure you click Copy to clipboard to store the value of the secret

    Figure 8: Make sure you click Copy to clipboard to store the value of the secret

Create a user with permissions to run the code

Now that you’ve given your application access to the directory, let’s create a user and assign the proper permissions to run the code.

To create a user and assign permissions

  1. Choose Azure Active Directory from the Azure services list.
  2. Choose Users and select New user. The User name, First name, and Last name fields are required. In this example, I set the User name and First name to Auth and the Last name to User.
    1. Take note of the password that is set for this user and save it to use later.
    2. Once completed, choose Create.
    Figure 9: Create a user in Azure AD

    Figure 9: Create a user in Azure AD

  3. Select the newly created user from the list.
    1. On the left navigation pane, select Assigned roles.
    2. Choose Add assignments.
    3. Choose Hybrid identity administrator and select Add.
    Figure 10: Assign the user the role to trigger the API

    Figure 10: Assign the user the role to trigger the API

  4. Select Default Directory from the top of the navigation pane.
    1. Choose Enterprise applications.
    2. Choose the AWS application.
    3. Select Assign users and groups.
    Figure 11: Azure Enterprise applications - Assign users and groups

    Figure 11: Azure Enterprise applications – Assign users and groups

  5. Choose + Add user at the top of the window.
    1. Select the user you created earlier. I select Auth as that was the user I created earlier.
    2. Choose Select and then Assign.
    Figure 12: Select the user we created earlier from Figure 9

    Figure 12: Select the user we created earlier from Figure 9


    Figure 13: Assign the user to the application

    Figure 13: Assign the user to the application

  6. Now that you’ve added the user, you can see that the user is assigned to the application.
     
    Figure 14: Screen now showing that the user has been assigned to the application

    Figure 14: Screen now showing that the user has been assigned to the application

  7. It’s recommended to log in to the Azure portal as the user you just created in a new incognito or private browser session. As part of the first log in, you’ll be prompted to change the password.

Prerequisites to trigger the SCIM endpoint

You need the following items to run the PowerShell code that triggers the endpoint.

  1. From the application registration, retrieve the items shown below. Note that you must use the client secret saved earlier when the certificate was created.
    • Tenant ID
    • Display name
    • Application ID
    • Client secret
    • User name
    • Password
  2. Copy the items to a notepad in the preceding order so you can enter all of them through a single copy and paste action while running the script.
  3. From the menu, select Azure Active Directory.
  4. Choose App registrations and select the AWS App that was set up.
  5. Copy the Application (client) ID and the Directory (tenant) ID.
Figure 15: App registration contains all the items needed for the PowerShell script

Figure 15: App registration contains all the items needed for the PowerShell script

Trigger the SCIM endpoint with PowerShell

Now that you’ve completed all of the previous steps, you need to copy the code from the GitHub repository to your local machine and run it. We’ve configured the code to run manually, but you can also automate it to trigger an Azure Automation runbook when users are added to Azure through Alerts. You can also configure CloudWatch Events to run a Lambda function at periodic intervals.

To trigger the SCIM endpoint

  1. Copy the code from the GitHub repository.
  2. Save the code using the code editor of your choice, or you can download Visual Studio Code. Give the file a user-friendly name, such as Sync.ps1.
  3. Navigate to the location where you saved the file and run ./sync.ps1.
  4. When prompted, enter the values from the notepad. You can paste these all at one time so you don’t have to copy and paste each individual item.

    Note: When copying and pasting in Windows, choose the PowerShell icon, then Edit > Paste.


    Figure 16: Windows Command Prompt – Select Paste to copy all items needed to trigger the sync

    Figure 16: Windows Command Prompt – Select Paste to copy all items needed to trigger the sync

After you paste the values into the PowerShell window, you see the script input as shown in the following screenshot. The client secret and password are secure values and are masked for security purposes.
 

Figure 17: PowerShell script with input values pasted in

Figure 17: PowerShell script with input values pasted in

After the job has started in PowerShell, two messages are displayed. One indicating that synchronization is starting and a following message when synchronization has completed. Both are shown in the following figure.
 

Figure 18: Output from a successful run of the PowerShell script

Figure 18: Output from a successful run of the PowerShell script

View the synchronization status and logs

To verify that the job ran successfully, you can check the completed time from the Azure portal. You can verify the time the script ran by viewing the completion time along with the current status.

To view the status and logs

  1. From the menu, choose Azure Active Directory.
  2. Choose Enterprise applications and select the AWS App.
  3. From the left navigation menu, choose Provisioning and then choose View provisioning details. This displays the last time the sync completed.
     
    Figure 19: View the Provisioning details about the job

    Figure 19: View the Provisioning details about the job

Summary

In this post, I demonstrate how you can use a PowerShell script to trigger the SCIM endpoint to on-demand synchronize Azure AD with AWS Single Sign-On. You can find the code in this GitHub repository and use it to synchronize user and group changes on demand.

If you have feedback about this post, submit comments in the Comments section below.

Want more AWS Security how-to content, news, and feature announcements? Follow us on Twitter.

Author

Aidan Keane

Aidan is a Senior Technical Account Manager for AWS Enterprise Support. He has been working with Cloud technologies for more than 5 years. Outside of technology, he is a sports enthusiast who enjoys golf, biking, and watching Liverpool FC. He spends his free time with his family and enjoys traveling to Ireland and South America.

Federated multi-account access for AWS CodeCommit

Post Syndicated from Steven David original https://aws.amazon.com/blogs/devops/federated-multi-account-access-for-aws-codecommit/

As a developer working in a large enterprise or for a group that supports multiple products, you may often find yourself accessing Git repositories from different organizations. Currently, to securely access multiple Git repositories in other popular tools, you need SSH keys, GPG keys, a Git credential helper, and a significant amount of setup by the developer hoping to commit to the repository. In addition, administrators must be aware of the various ways to remove all the permissions granted to the developer.

AWS CodeCommit is a managed source control service. Combined with AWS Single Sign-On (AWS SSO) and git-remote-codecommit, you can quickly and easily switch between repositories owned by different groups or even managed in separate AWS accounts. You can control those permissions with AWS Identity and Access Management (IAM) roles to allow for the automated removal of the user’s permission as part of their off-boarding procedure for the company.

This post demonstrates how to grant access to various CodeCommit repositories without access keys.

Solution overview

In this solution, the user’s access is controlled with federated login via AWS SSO. You can grant that access using AWS native authentication, which eliminates the need for a Git credential helper, SSH, and GPG keys. In addition, this allows the administrator to control access by adding or removing the user’s IAM role access.

The following diagram shows the code access pattern you can achieve by using AWS SSO and git-remote-codecommit to access CodeCommit across multiple accounts.

git-remote-codecommit overview diagram

Prerequisites

To complete this tutorial, you must have the following prerequisites:

  • CodeCommit repositories in two separate accounts. For instructions, see Create an AWS CodeCommit repository.
  • AWS SSO set up to handle access federation. For instructions, see Enable AWS SSO.
  • Python 3.6 or higher installed on the developer’s local machine. To download and install the latest version of Python, see the Python website.
    • On a Mac, it can be difficult to ensure that you’re using Python 3.6, because 2.7 is installed and required by the OS. For more information about checking your version of Python, see the following GitHub repo.
  • Git installed on your local machine. To download Git, see Git Downloads.
  • PIP version 9.0.3 or higher installed on your local machine. For instructions, see Installation on the PIP website.

Configuring AWS SSO role permissions

As your first step, you should make sure each AWS SSO role has the correct permissions to access the CodeCommit repositories.

  1. On the AWS SSO console, choose AWS Accounts.
  2. On the Permissions Sets tab, choose Create permission set.
  3. On the Create a new permission set page, select Create a custom permission set.
  4. For Name, enter CodeCommitDeveloperAccess.
  5. For Description, enter This permission set gives the user access to work with CodeCommit for common developer tasks.
  6. For Session duration, choose 12 hours.

Create new permissions

  1. For Relay state, leave blank.
  2. For What policies do you want to include in your permissions set?, select Create a custom permissions policy.
  3. Use the following policy:
{
    "Version": "2012-10-17",
    "Statement": [
        {
             "Sid": "CodeCommitDeveloperAccess",
             "Effect": "Allow",
             "Action": [
                 "codecommit:GitPull",
                 "codecommit:GitPush",
                 "codecommit:ListRepositories"
             ],
             "Resource": "*"
         }
      ]
}

The preceding code grants access to all the repositories in the account. You could limit to a specific list of repositories, if needed.

  1. Choose Create.

Creating your AWS SSO group

Next, we need to create the SSO Group we want to assign the permissions.

  1. On the AWS SSO console, choose Groups.
  2. Choose create group.
  3. For Group name, enter CodeCommitAccessGroup.
  4. For Description, enter Users assigned to this group will have access to work with CodeCommit.

Create Group

  1. Choose Create.

Assigning your group and permission sets to your accounts

Now that we have our group and permission sets created, we need to assign them to the accounts with the CodeCommit repositories.

  1. On the AWS SSO console, choose AWS Accounts.
  2. Choose the account you want to use in your new group.
  3. On the account Details page, choose Assign Users.
  4. On the Select users or groups page, choose Group.
  5. Select CodeCommitGroup.
  6. Choose NEXT: Permission Sets.
  7. Choose the CodeCommitDeveloperAccess permission set and choose Finish

Assign Users

  1. Choose Proceed to Accounts to return to the AWS SSO console.
  2. Repeat these steps for each account that has a CodeCommit repository.

Assigning a user to the group

To wrap up our AWS SSO configuration, we need to assign the user to the group.

  1. On the AWS SSO console, choose Groups.
  2. Choose CodeCommitAccessGroup.
  3. Choose Add user.
  4. Select all the users you want to add to this group.
  5. Choose Add user(s).
  6. From the navigation pane, choose Settings.
  7. Record the user portal URL to use later.

Enabling AWS SSO login

The second main feature we want to enable is AWS SSO login from the AWS Command Line Interface (AWS CLI) on our local machine.

  1. Run the following command from the AWS CLI. You need to enter the user portal URL from the previous step and tell the CLI what Region has your AWS SSO deployment. The following code example has AWS SSO deployed in us-east-1:
aws configure sso 
SSO start URL [None]: https://my-sso-portal.awsapps.com/start 
SSO region [None]:us-east-1

You’re redirected to your default browser.

  1. Sign in to AWS SSO.

When you return to the CLI, you must choose your account. See the following code:

There are 2 AWS accounts available to you.
> DeveloperResearch, [email protected] (123456789123)
DeveloperTrading, [email protected] (123456789444)
  1. Choose the account with your CodeCommit repository.

Next, you see the permissions sets available to you in the account you just picked. See the following code:

Using the account ID 123456789123
There are 2 roles available to you.
> ReadOnly
CodeCommitDeveloperAccess
  1. Choose the CodeCommitDeveloperAccess permissions.

You now see the options for the profile you’re creating for these AWS SSO permissions:

CLI default client Region [None]: us-west-2<ENTER>
CLI default output format [None]: json<ENTER>
CLI profile name [123456789011_ReadOnly]: DevResearch-profile<ENTER>
  1. Repeat these steps for each AWS account you want to access.

For example, I create DevResearch-profile for my DeveloperResearch account and DevTrading-profile for the DeveloperTrading account.

Installing git-remote-codecommit

Finally, we want to install the recently released git-remote-codecommit and start working with our Git repositories.

  1. Install git-remote-codecommit with the following code:
pip install git-remote-codecommit

With some operating systems, you might need to run the following code instead:

sudo pip install git-remote-codecommit
  1. Clone the code from one of your repositories. For this use case, my CodeCommit repository is named MyDemoRepo. See the following code:
git clone codecommit://DevResearch-profile@MyDemoRepo my-demo-repo
  1. After that solution is cloned locally, you can copy code from another federated profile by simply changing to that profile and referencing the repository in that account named MyDemoRepo2. See the following code:
git clone codecommit://DevTrading-profile@MyDemoRepo2 my-demo-repo2

Cleaning up

At the end of this tutorial, complete the following steps to undo the changes you made to your local system and AWS:

  1. On the AWS SSO console, remove the user from the group you created, so any future access requests fail.
  2. To remove the AWS SSO login profiles, open the local config file with your preferred tool and remove the profile.
    1. The config file is located at %UserProfile%/.aws/config for Windows and $HOME/.aws/config for Linux or Mac.
  3. To remove git-remote-codecommit, run the PIP uninstall command:
pip uninstall git-remote-codecommit

With some operating systems, you might need to run the following code instead:

sudo pip uninstall git-remote-codecommit

Conclusion

This post reviewed an approach to securely switch between repositories and work without concerns about one Git repository’s security credentials interfering with the other Git repository. User access is controlled by the permissions assigned to the profile via federated roles from AWS SSO. This allows for access control to CodeCommit without needing access keys.

About the Author

Steven David
Steven David

Steven David is an Enterprise Solutions Architect at Amazon Web Services. He helps customers build secure and scalable solutions. He has background in application development and containers.