Post Syndicated from Deral Heiland original https://blog.rapid7.com/2022/10/25/hands-on-iot-hacking-rapid7-at-def-con-30-iot-village-pt-2/

Welcome back to our blog series on Rapid7’s IoT Village exercise from DEF CON 30. Last week, we covered the basics of the exercise and achieving access to flash memory. In this post, we’ll cover how to extract partition data.
Extracting partition data
The next step in our hands-on IoT hacking exercise is to identify the active partition and extract the filesystems for modification. The method I have used for this is to examine the file date stamps – the one with the most current date is likely the current active file system.
Note: Curious why there are multiple or duplicate filesystem partitions on an embedded device? Typically, with embedded device firmware, there are two of each partition, two kernel images, and two root file system images. This is so the device’s firmware can be updated safely and prevent the device from being bricked if an error or power outage occurs during the firmware update. The firmware update process updates the files on the offline partitions, and once that is completed properly, the boot process loads the new updated partitions as active and takes the old partitions offline. This way, if a failure occurs, the old unchanged partition can be reloaded, preventing the device from being bricked.
On this cable modem, we have 7 partitions. The key ones we want to work with are Partition 5, 6, 12, 13. This cable modem has two MCU:, an ARM and an ATOM processor. Partition 5 and 6 are root filesystems for the ARM processor, which is what we will be hacking. Partition 12 and 13 are for the root filesystems for the ATOM process, which controls the RF communication on the cable.
To ensure we alter the active partition, the first thing we need to do is check the date stamps on the mounted file systems to see whether partition 5 or partition 6 is the active partition. There are several ways to do this, but the method we use is to click on partition 5 or 6 in the Disks application to highlight it, and then click on the “Mounted at:” link as shown below in Figure 4 to open the mounted file partition shown in Figure 5:
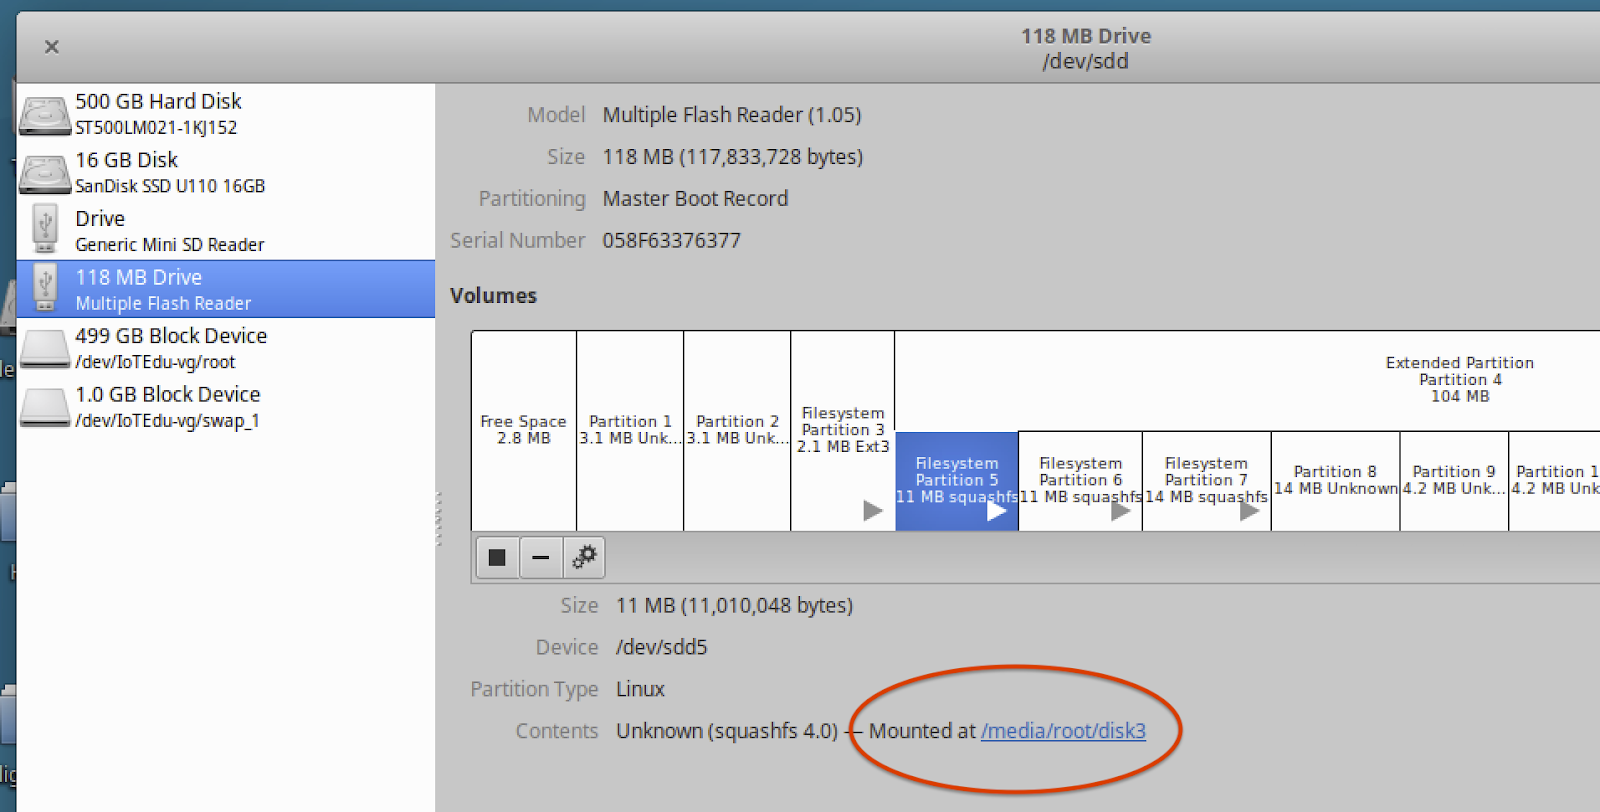
Figure 4: Partition File System Mount Locations
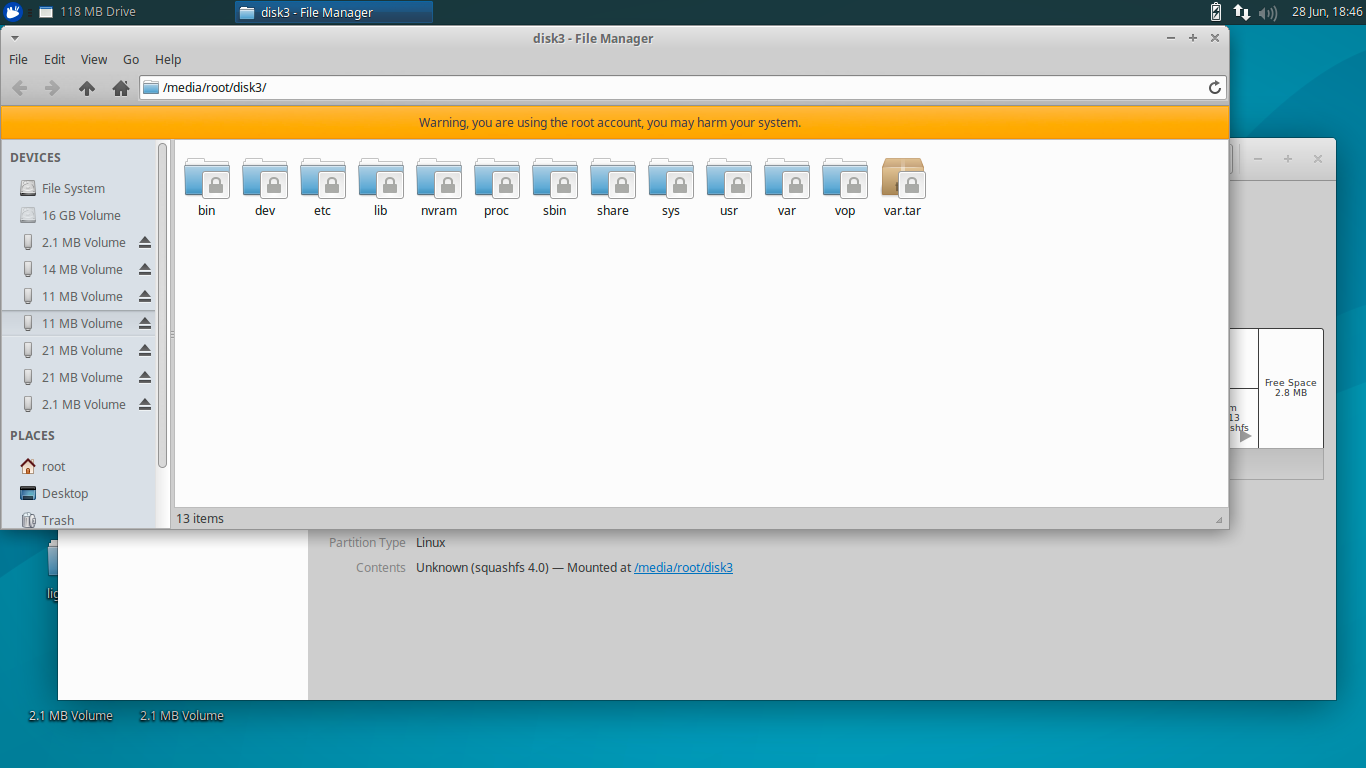
Figure 5: Mounted File System Partition 5
Once File Manager opens the folders, you can right click on the “etc” folder, select “Properties,” and check the date listed in “Modified:” as shown below in Figure 6:

Figure 6: Folder Date Stamp
You will want to do this on both partitions 5 and 6 for the cable modem to identify the partition with the most current date stamp, as this is typically the active partition. For the example cable modems we used at DEF CON IoT Village, partition 5 was found to have the most current date stamp.
Extracting the active partition
The next step is to extract the partition with the newest date stamp (Partition 5). To do this, we first need to identify which Small Computer System Interface (SCSI) disk partition 5 is attached to. This can be identified by selecting Partition 5 with the Disks application and then read the “Device:” as shown below in Figure 7:
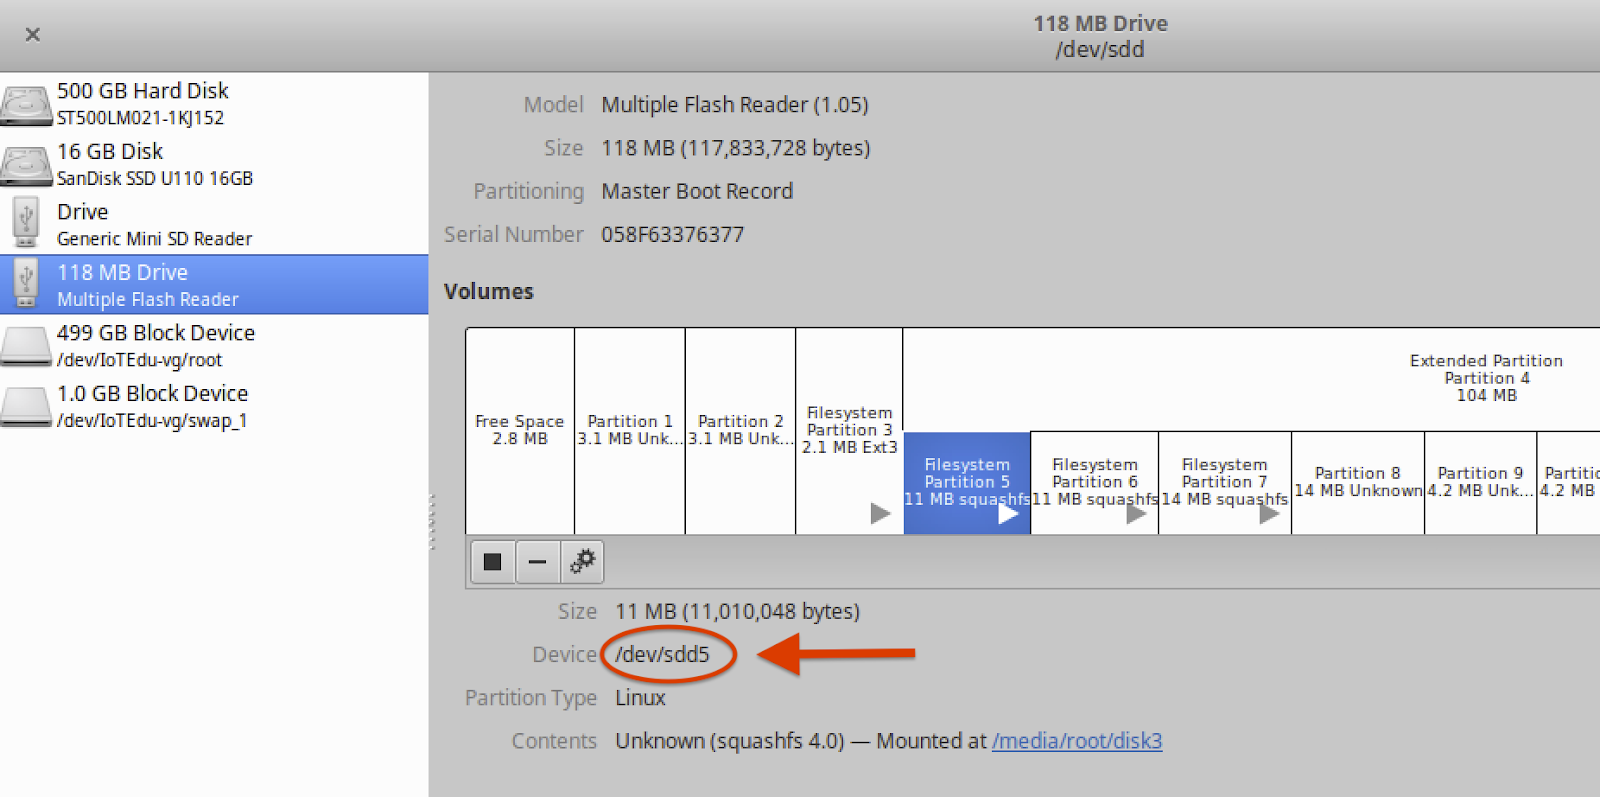
Figure 7: Device
Also remember to record the “Device:” information. You’ll need this during several of the future steps. In our example, we see that this is /dev/sdd5, as shown in Figure 7.
To extract the partition image, we launched the Terminal application on your Linux host to gain access to the command line interface (CLI). Once the CLI is opened, create a storage area to hold the partition binary and file system data. In our example, we created a folder for this called /Desktop/Work.
From CLI within the /Desktop/Work folder, we ran the Linux dd command to make a binary copy of Partition 5. We used the following command to make sure we used the device location that Partition 5 was connected to: /dev/sdd5. A sample output of this dd command is shown below in Figure 8:
- dd command arguments:
if=file Read input
of=file Write output - dd if=/dev/sdd5 of=part5.bin
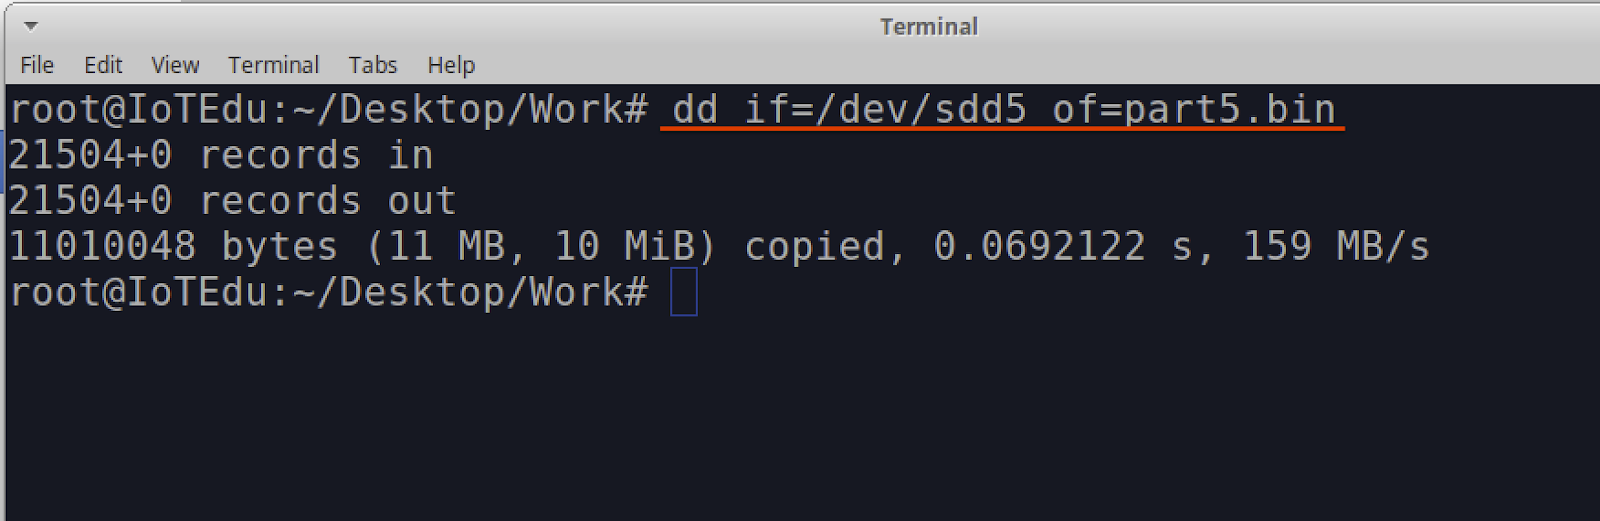
Figure 8: dd Command
Note: Before proceeding, we highly recommend that you make a binary copy of the Cable Modem full NAND flash. This may come in handy if anything goes wrong and you need to return the device to its original operation mode. This can be done by running the following dd command against the full “Device:“. In this example that would be /dev/sdd
- dd if=/dev/sdd of=Backup_Image.bin
Unsquashfs the partition binary
Next, we’ll extract the file system from the Partition 5 image that we dd’d from the cable modem in the previous steps. This file system was determined to be a Squash file system, a type commonly used on embedded devices.
Note: A Squash file system is a compressed read-only file system commonly found on embedded devices. Since the file system is read-only, it is not possible to make alteration of that files system while it is in place. To make modifications, the file system will need to be extracted from the device’s storage and uncompressed, which is what we’ll do in the following exercise steps.
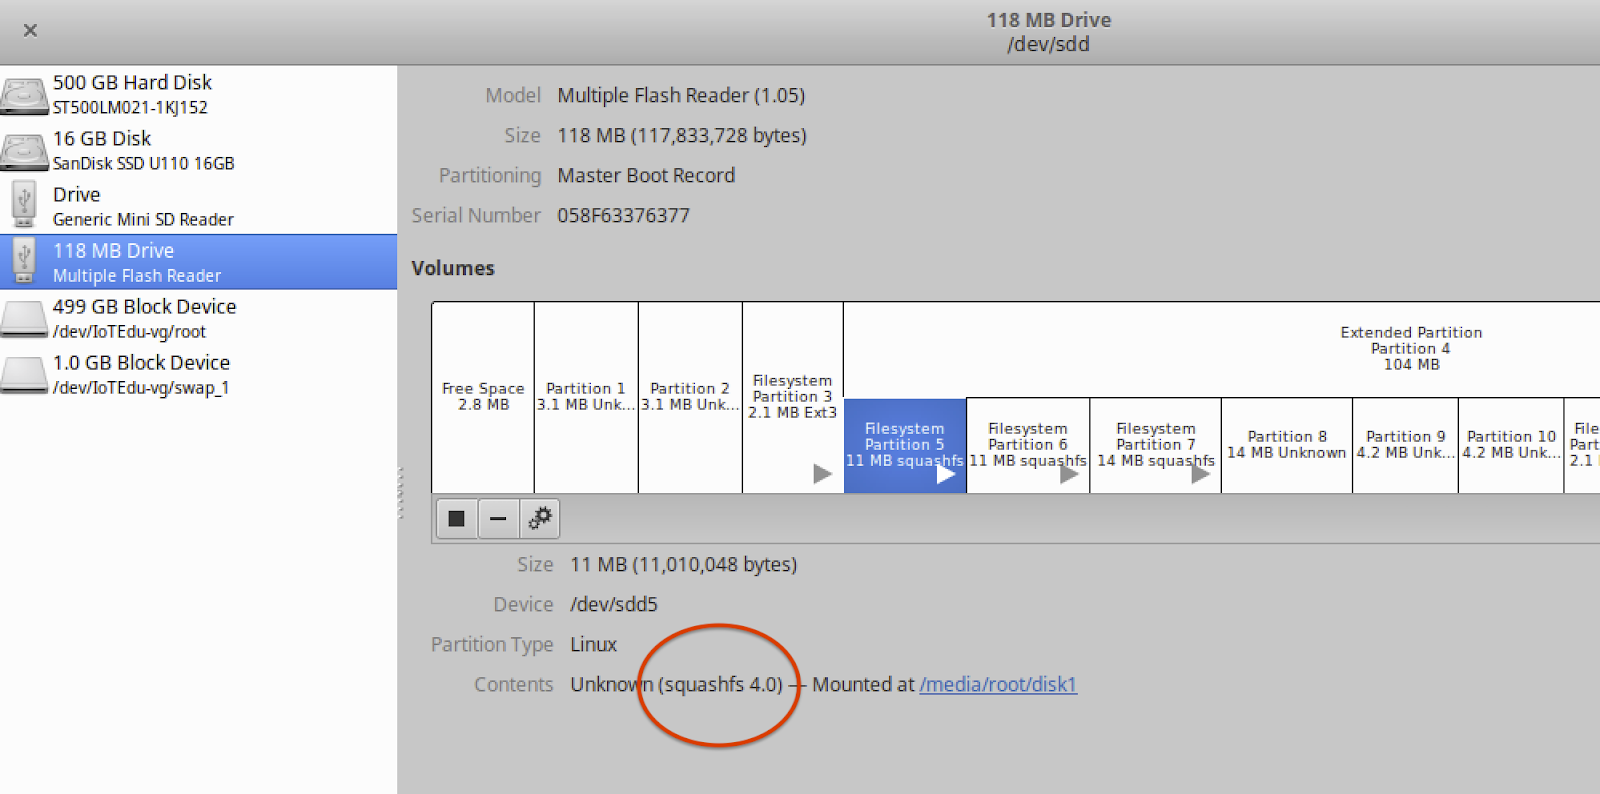
So, your first question may be, “How do we know that this is a squash file system?” If you look at the partition data in the application “disks”, you will see that “Content:” shows (squashfs 4.0)
Another simple option to identify the content of the file is to run the file command against the binary file extracted from modem with the dd command and view the output. An example of this output is shown below in Figure 9:
- file part5.bin

Figure 9: Ouput from File Command
To gain access to the partition binary squash file system, we will be extracting/unpacking the squash file system using the unsquashfs command. A squash file system is read-only and cannot be altered in place – the only way to alter a squashfs is to unpack it first. This is a simple process and is done by running the unsquashfs command against the binary file part5.bin:
- unsquashfs part5.bin

Once the command completes you should now have a folder called “squashfs-root”. This folder contains the extracted embedded Linux root file systems for the cable modem.
In our next post, we’ll cover how to modify the data we just extracted. Check back with us next week!