Post Syndicated from Deral Heiland original https://blog.rapid7.com/2022/11/01/hands-on-iot-hacking-rapid7-at-def-con-30-iot-village-pt-3/

Welcome back to our blog series on Rapid7’s IoT Village exercise from DEF CON 30. In our previous posts, we covered how to achieve access to flash memory and how to extract file system data from the device. In this post, we’ll cover how to modify the data we’ve extracted.
Modify extracted file systems data
Now that you have unsquashfs’d the Squash file system, the next step is to take a look at the extracted file system and its general structure. In our example, the unsquashed file system is located at /root/Desktop/Work/squashfs-root. To see the structure, while in the folder /Desktop/Work, you can run the following command to change director and then list the file and folders:
- cd squashfs-root
- ls -al
As you can see, we have unpacked a copy of the squash file system containing the embedded Linux root file system that was installed on the cable modem for the ARM processor.
The next goal will be to make the following three changes so we can eventually gain access to the cable modem via SSH:
- Create or add a dropbear_rsa_key to squashfs.
- Remove symbolic link to passwd and recreate it.
- Modify the inittab file to launch dropbear on startup.
To make these changes, you will first need to change the directory to the squashfs-root folder. In our IoT Village exercise example, that folder was “~/Desktop/Work/squashfs-root/etc”, and the attendees used the following command:
- cd ~/Desktop/Work/squashfs-root/etc
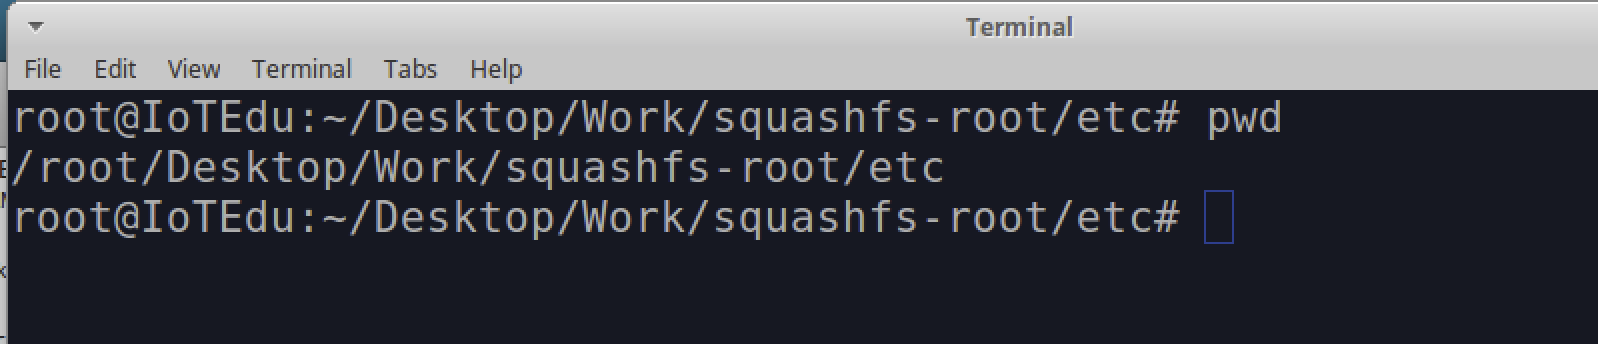
It is critical that you are in the correct directory and not in the etc directory of your local host before running any of the following commands to avoid potential damage to your laptop or desktop’s configuration. You can validate this by entering the command “pwd”, which allows you to examine the returned path results as shown below:
- pwd
The next thing we need to do is locate a copy of the dropbear_rsa_key file and copy it over to “~/Desktop/Work/squashfs-root/etc”. This RSA key is needed to support dropbear services, which allow SSH communication to the cable modem. It turns out that a usable copy of dropbear_rsa_key file is located within the etc folder on Partition 12, which in our example was found to be mounted at /media/root/disk/etc. You can use the application Disks to confirm the location of the mount point for Partition 12, similar to the method we used for Partition 5 shown in Figure 4.
By running the following command during the IoT Village exercise, attendees were successfully able to copy the dropbear_rsa_key from Partition 12 into “~/Desktop/Work/squashfs-root/etc/”:
- cp /media/root/disk/etc/dropbear_rsa_key .

Next, we had participants remove the symbolic linked passwd file and create a new passwd file that points to the correct shell. Originally, the symbolic link pointed to a passwd file that pointed the root user to a shell that prevented root from accessing the system. By changing the passwd file, we can assign a usable shell environment to the root user.
Like above, the first step is to make sure you are in the correct folder listed below:
“~/Desktop/Work/squashfs-root/etc”
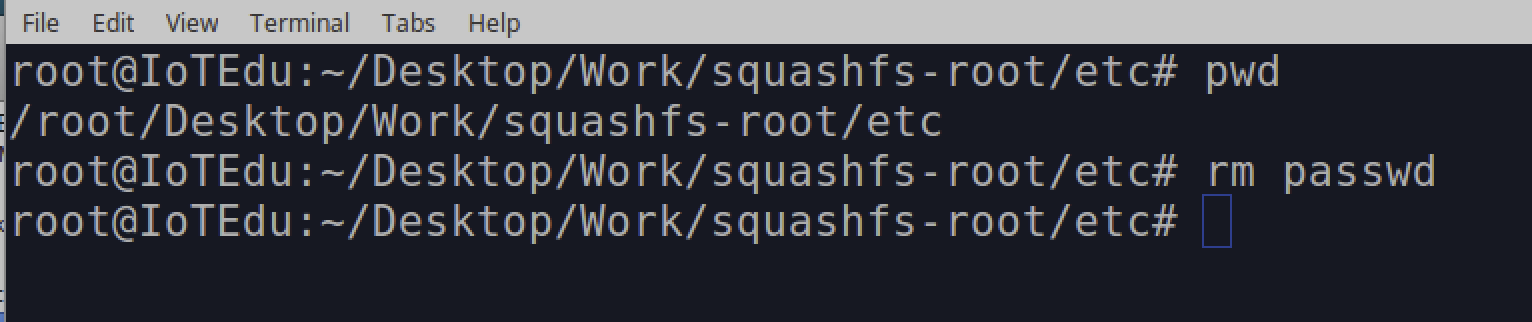
Once you have validated that you are in the correct folder, you can run the following command to delete the passwd file from the squash file systems:
- rm passwd
Once this is deleted, you can next create a new passwd file and add the following data to this file as shown below using vi:
Note: Here is a list of common vi interaction commands that are useful when working within vi:
- i = insert mode. This allows you to enter data in the file
- esc key will exit insert mode
- esc key followed by entering :wq and then the enter key will write and exit vi
- esc key followed dd will delete the line you are on
- esc key followed x will single character
- esc key followed shift a will place you in append insert mode at the end of the line
- esc key followed a will place you in append insert mode at the point of your cursor
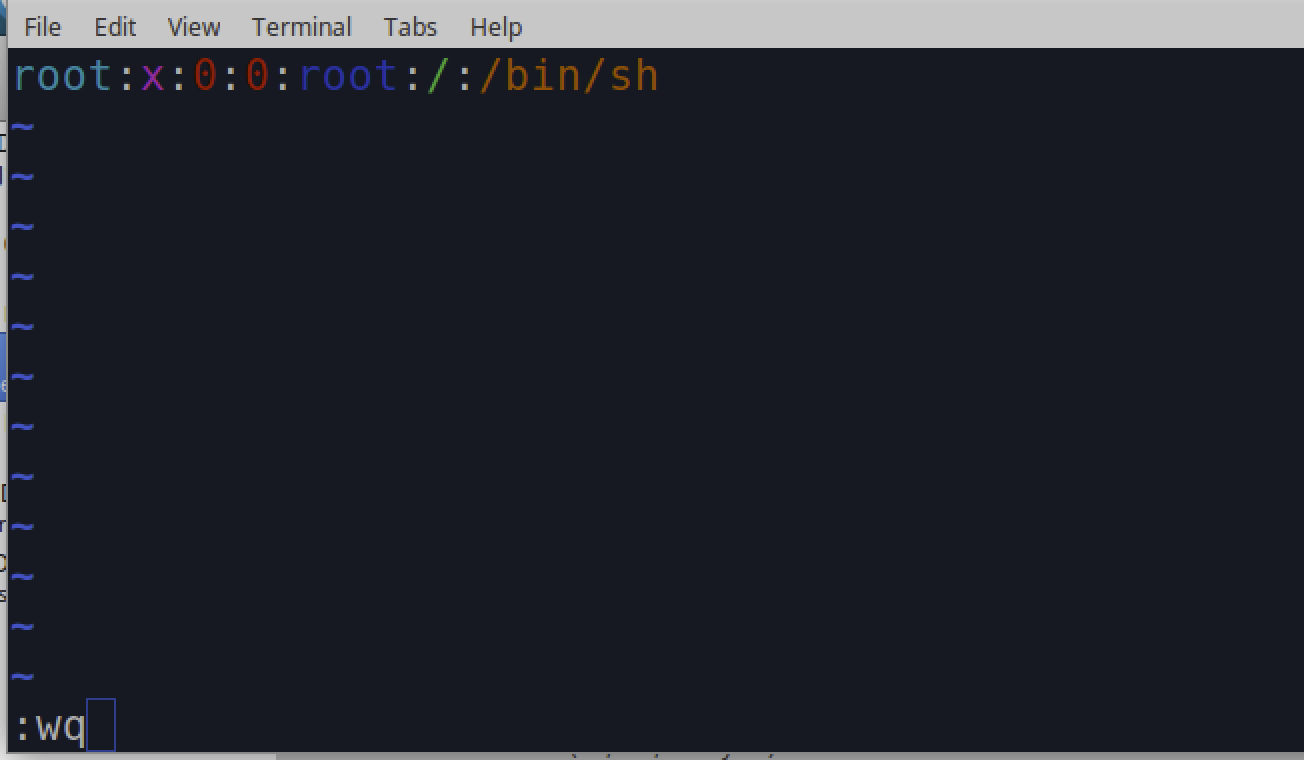
- vi passwd
Once in vi, add the following line:
root:x:0:0:root:/:/bin/sh
Next, we need to alter the inittab file. Again, make sure you are currently in the folder “/root/Desktop/Work/squashfs-root/etc”. Once this is validated, you can use vi to open and edit the inittab file.
- vi inittab
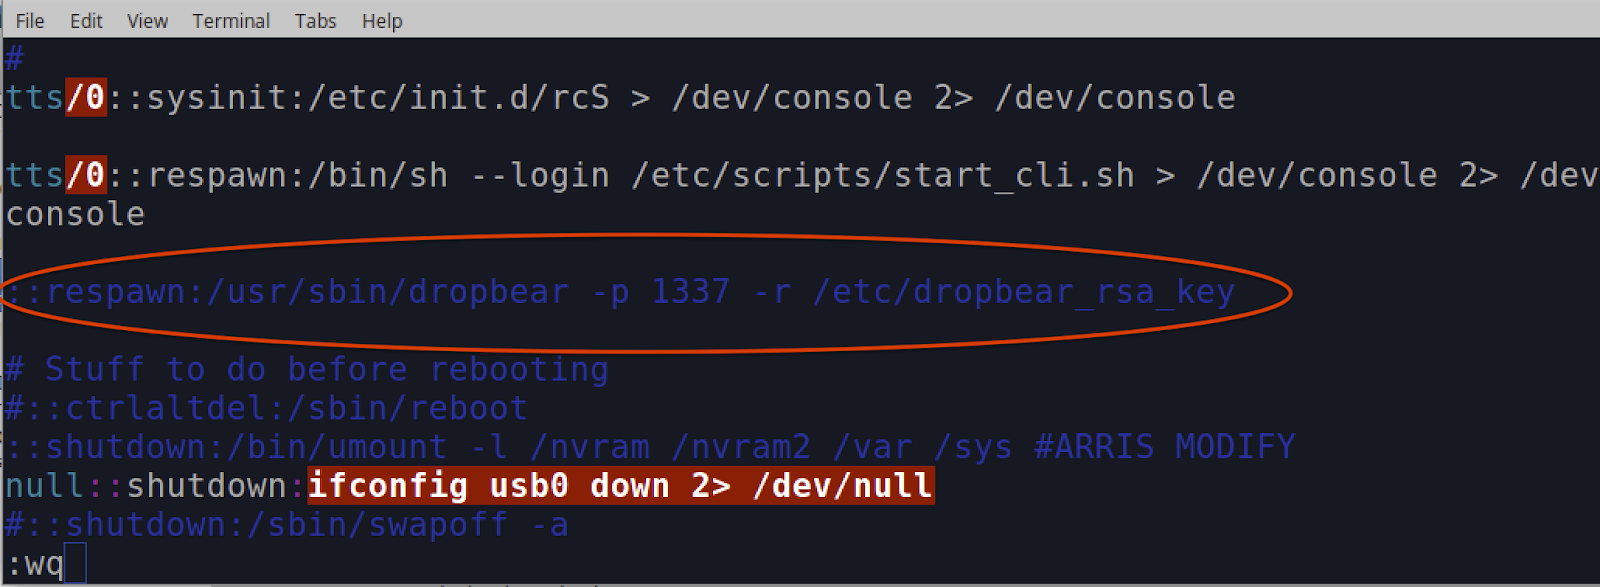
The file should originally look like this:
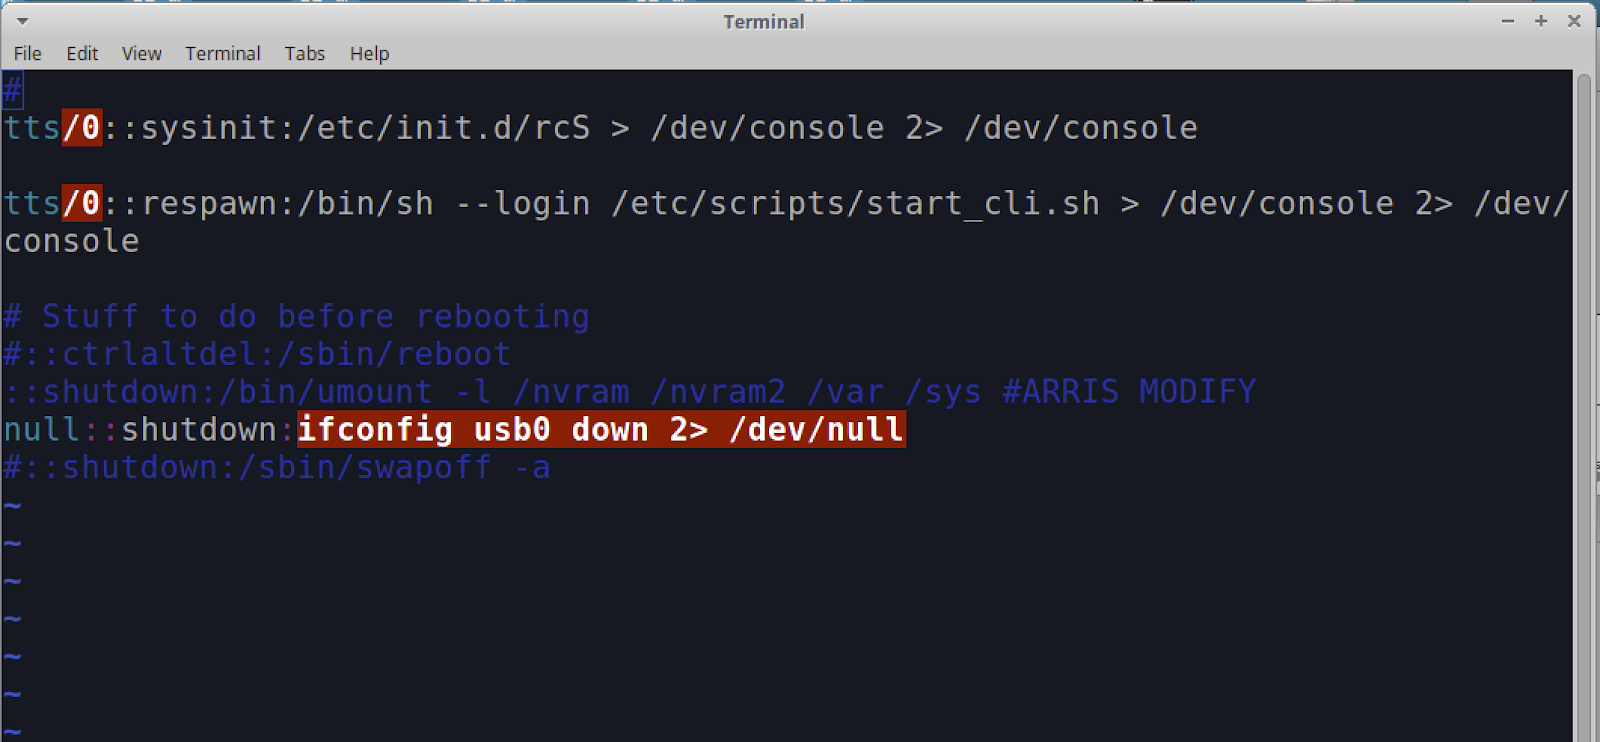
You will need to add the following line to the file:
::respawn:/usr/sbin/dropbear -p 1337 -r /etc/dropbear_rsa_key
Add the line as shown below, and save the file:
Once you’ve completed all these changes, double-check them to make sure they are correct before moving on to the next sections. This will help avoid the need to redo everything if you made an incorrect alteration.
If everything looks correct, it’s time to move repack the squash file system and write the data back to Partition 5 on the cable modem.
Repacking squash file system and rewriting back to Modem
In this step, you will be repacking the squash file system and using the Linux dd command to write the image back to the cable modems NAND Flash memory.
The first thing you will need to do is change the directory back to the working folder – in our example, that is “/Desktop/Work”. This can be done from the current location of “~/Desktop/Work/squashfs-root/etc” by running the following command:
- cd ../../

Next, you’ll use the command “mksquashfs” to repack the squash folder into a binary file called new-P5.bin. To do this, run the following command from the “/Desktop/Work” folder that you should currently be in.
- mksquashfs squashfs-root/ new-P5.bin
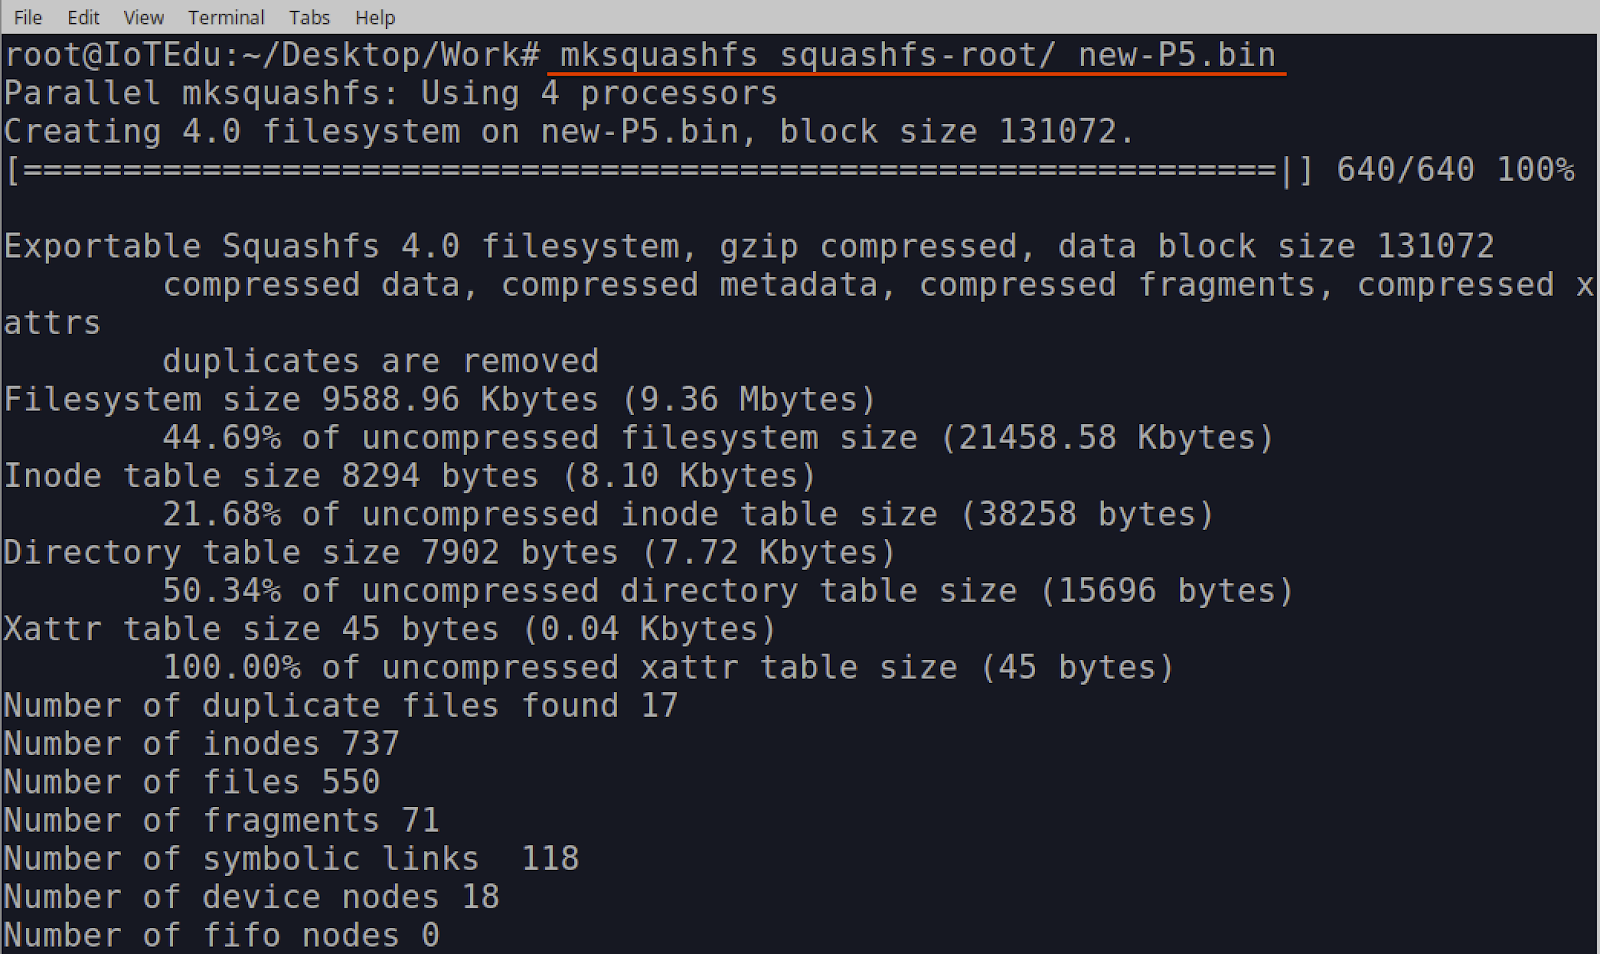
Once the above command has completed, you should have a file called new-P5.bin. This binary file contains the squashfs-root folder properly packed and ready to be copied back onto the cable modem partition 5.
Note: If for some reason you think you have made a mistake and need to rerun the “mksquashfs” command, make sure you delete the new-P5.bin file first. “mksquashfs” will not overwrite the file, but it will append the data to it. If this happens it will cause the new-P5.bin images to have duplicates of all the files which will cause your attempt to gain root access to fail. So, if you rerun mksquashfs make sure to delete the old new-P5.bin file first.
One you have run the mksquashfs and have a new-P5.bin file containing the repacked squashfs, you’ll use the Linux dd command to write the binary file back to the cable modem partition 5.
To complete this step, first make sure you have identified the correct “Device:” location using the method shown in Figure 7 from part 2 of this blog series.
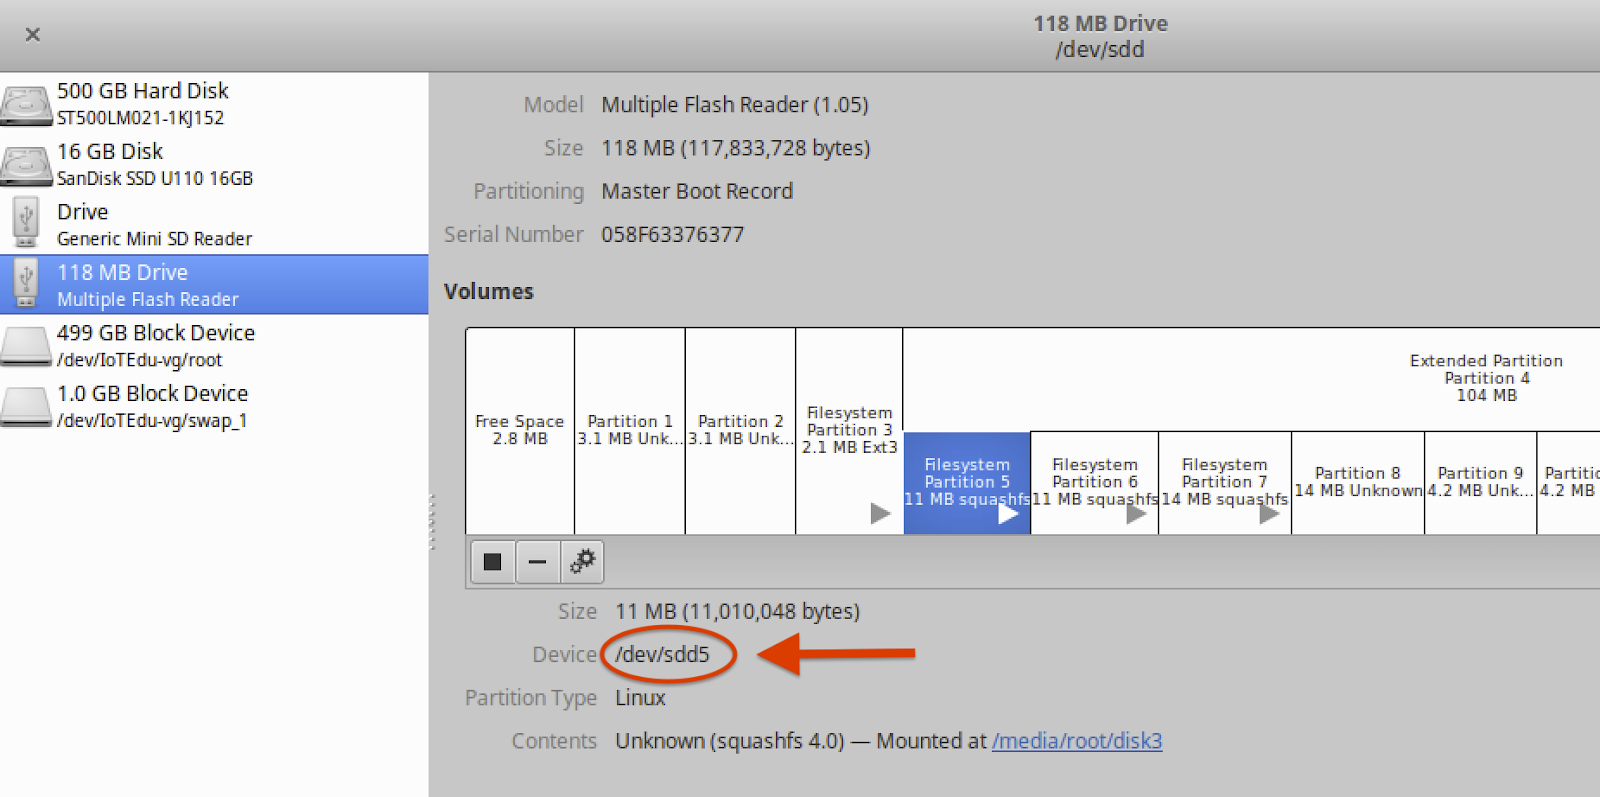
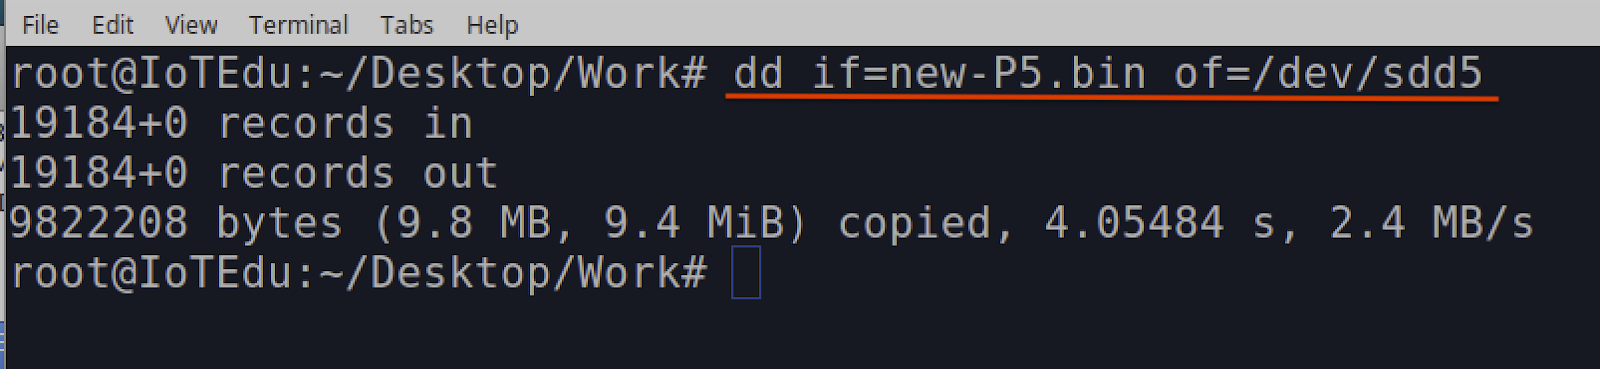
In this example, the “Device:” was determined to be sdd5. So we can write the binary images by running the following dd command:
- dd if=new-P5.bin of=/dev/sdd5
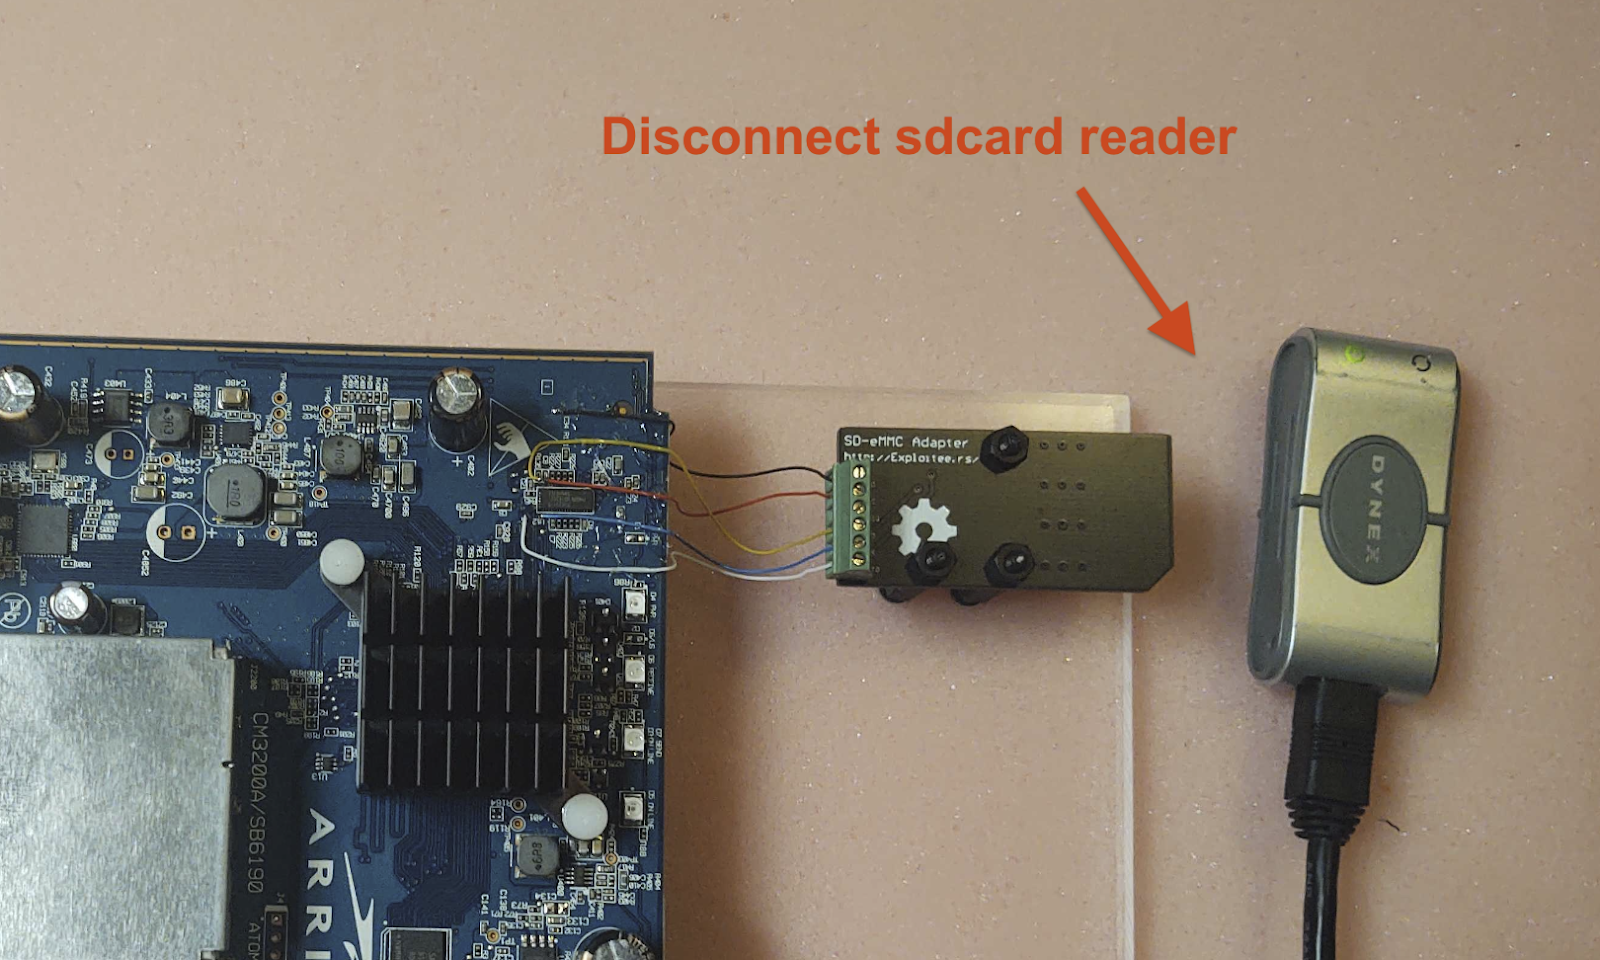
Once the dd command completes, the modified squash file system image should now be written on the modem’s NAND flash memory chip. Before proceeding, disconnect the SD Card reader from the cable modem as shown below.
Note: Attaching the SD Card Reader and 12V power supply to the cable modem at the same time will damage the cable modem and render it nonfunctional.
In our next and final post in this series, we’ll cover how to gain root access over the device’s secure shell protocol (SSH). Check back with us next week!