Post Syndicated from Laura Reith original https://aws.amazon.com/blogs/security/use-iam-identity-center-apis-to-audit-and-manage-application-assignments/
You can now use AWS IAM Identity Center application assignment APIs to programmatically manage and audit user and group access to AWS managed applications. Previously, you had to use the IAM Identity Center console to manually assign users and groups to an application. Now, you can automate this task so that you scale more effectively as your organization grows.
In this post, we will show you how to use IAM Identity Center APIs to programmatically manage and audit user and group access to applications. The procedures that we share apply to both organization instances and account instances of IAM Identity Center.
Automate management of user and group assignment to applications
IAM Identity Center is where you create, or connect, your workforce users one time and centrally manage their access to multiple AWS accounts and applications. You configure AWS managed applications to work with IAM Identity Center directly from within the relevant application console, and then manage which users or groups need permissions to the application.
You can already use the account assignment APIs to automate multi-account access and audit access assigned to your users using IAM Identity Center permission sets. Today, we expanded this capability with the new application assignment APIs. You can use these new APIs to programmatically control application assignments and develop automated workflows for auditing them.
AWS managed applications access user and group information directly from IAM Identity Center. One example of an AWS managed application is Amazon Redshift. When you configure Amazon Redshift as an AWS managed application with IAM Identity Center, and a user from your organization accesses the database, their group memberships defined in IAM Identity Center can map to Amazon Redshift database roles that grant them specific permissions. This makes it simpler for you to manage users because you don’t have to set database-object permissions for each individual. For more information, see The benefits of Redshift integration with AWS IAM Identity Center.
After you configure the integration between IAM Identity Center and Amazon Redshift, you can automate the assignment or removal of users and groups by using the DeleteApplicationAssignment and CreateApplicationAssignment APIs, as shown in Figure 1.
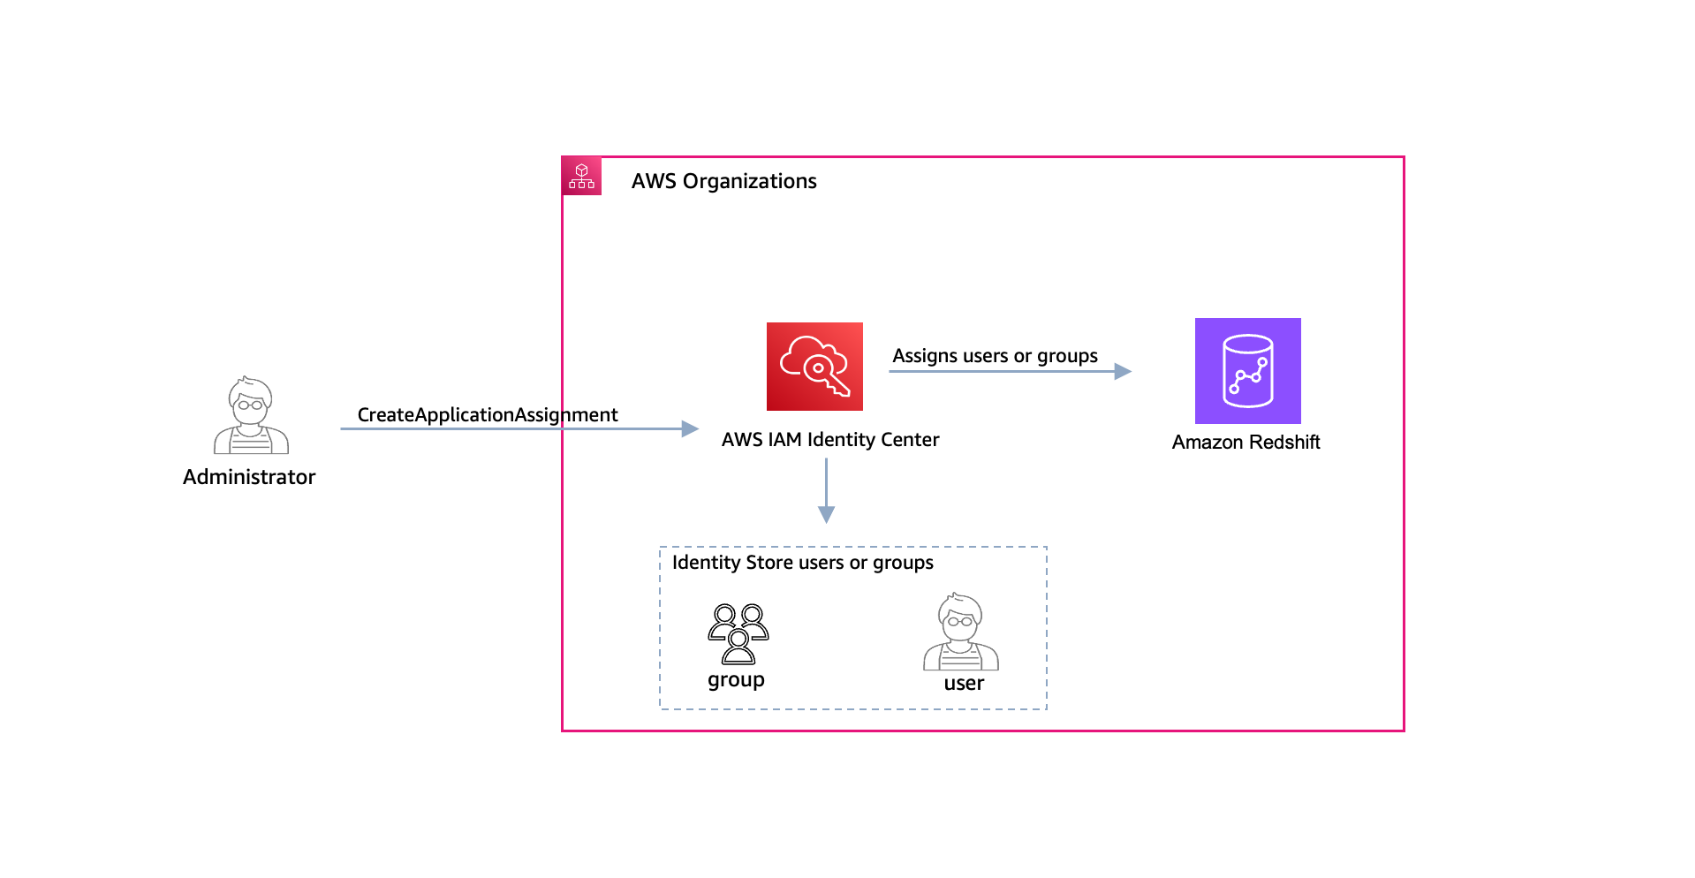
Figure 1: Use the CreateApplicationAssignment API to assign users and groups to Amazon Redshift
In this section, you will learn how to use Identity Center APIs to assign a group to your Amazon Redshift application. You will also learn how to delete the group assignment.
Prerequisites
To follow along with this walkthrough, make sure that you’ve completed the following prerequisites:
- Enable IAM Identity Center, and use the Identity Store to manage your identity data. If you use an external identity provider, then you should handle the user creation and deletion processes in those systems.
- Configure Amazon Redshift to use IAM Identity Center as its identity source. When you configure Amazon Redshift to use IAM Identity Center as its identity source, the application requires explicit assignment by default. This means that you must explicitly assign users to the application in the Identity Center console or APIs.
- Install and configure AWS Command Line Interface (AWS CLI) version 2. For this example, you will use AWS CLI v2 to call the IAM Identity Center application assignment APIs. For more information, see Installing the AWS CLI and Configuring the AWS CLI.
Step 1: Get your Identity Center instance information
The first step is to run the following command to get the Amazon Resource Name (ARN) and Identity Store ID for the instance that you’re working with:
The output should look similar to the following:
Take note of the IdentityStoreId and the InstanceArn — you will use both in the following steps.
Step 2: Create user and group in your Identity Store
The next step is to create a user and group in your Identity Store.
Note: If you already have a group in your Identity Center instance, get its GroupId and then proceed to Step 3. To get your GroupId, run the following command:
Create a new user by using the IdentityStoreId that you noted in the previous step.
The output should look similar to the following:
Create a group in your Identity Store:
In the output, make note of the GroupId — you will need it later when you create the application assignment in Step 4:
Run the following command to add the user to the group:
The result will look similar to the following:
Step 3: Get your Amazon Redshift application ARN instance
The next step is to determine the application ARN. To get the ARN, run the following command.
If you have more than one application in your environment, use the filter flag to specify the application account or the application provider. To learn more about the filter option, see the ListApplications API documentation.
In this case, we have only one application: Amazon Redshift. The response should look similar to the following. Take note of the ApplicationArn — you will need it in the next step.
Step 4: Add your group to the Amazon Redshift application
Now you can add your new group to the Amazon Redshift application managed by IAM Identity Center. The principal-id is the GroupId that you created in Step 2.
The group now has access to Amazon Redshift, but with the default permissions in Amazon Redshift. To grant access to databases, you can create roles that control the permissions available on a set of tables or views.
To create these roles in Amazon Redshift, you need to connect to your cluster and run SQL commands. To connect to your cluster, use one of the following options:
- Connect to Amazon Redshift through the query editor version 2
- Connect to Amazon Redshift through Java Database Connectivity (JDBC), Open Database Connectivity (ODBC), or Python-based tools
Figure 2 shows a connection to Amazon Redshift through the query editor v2.
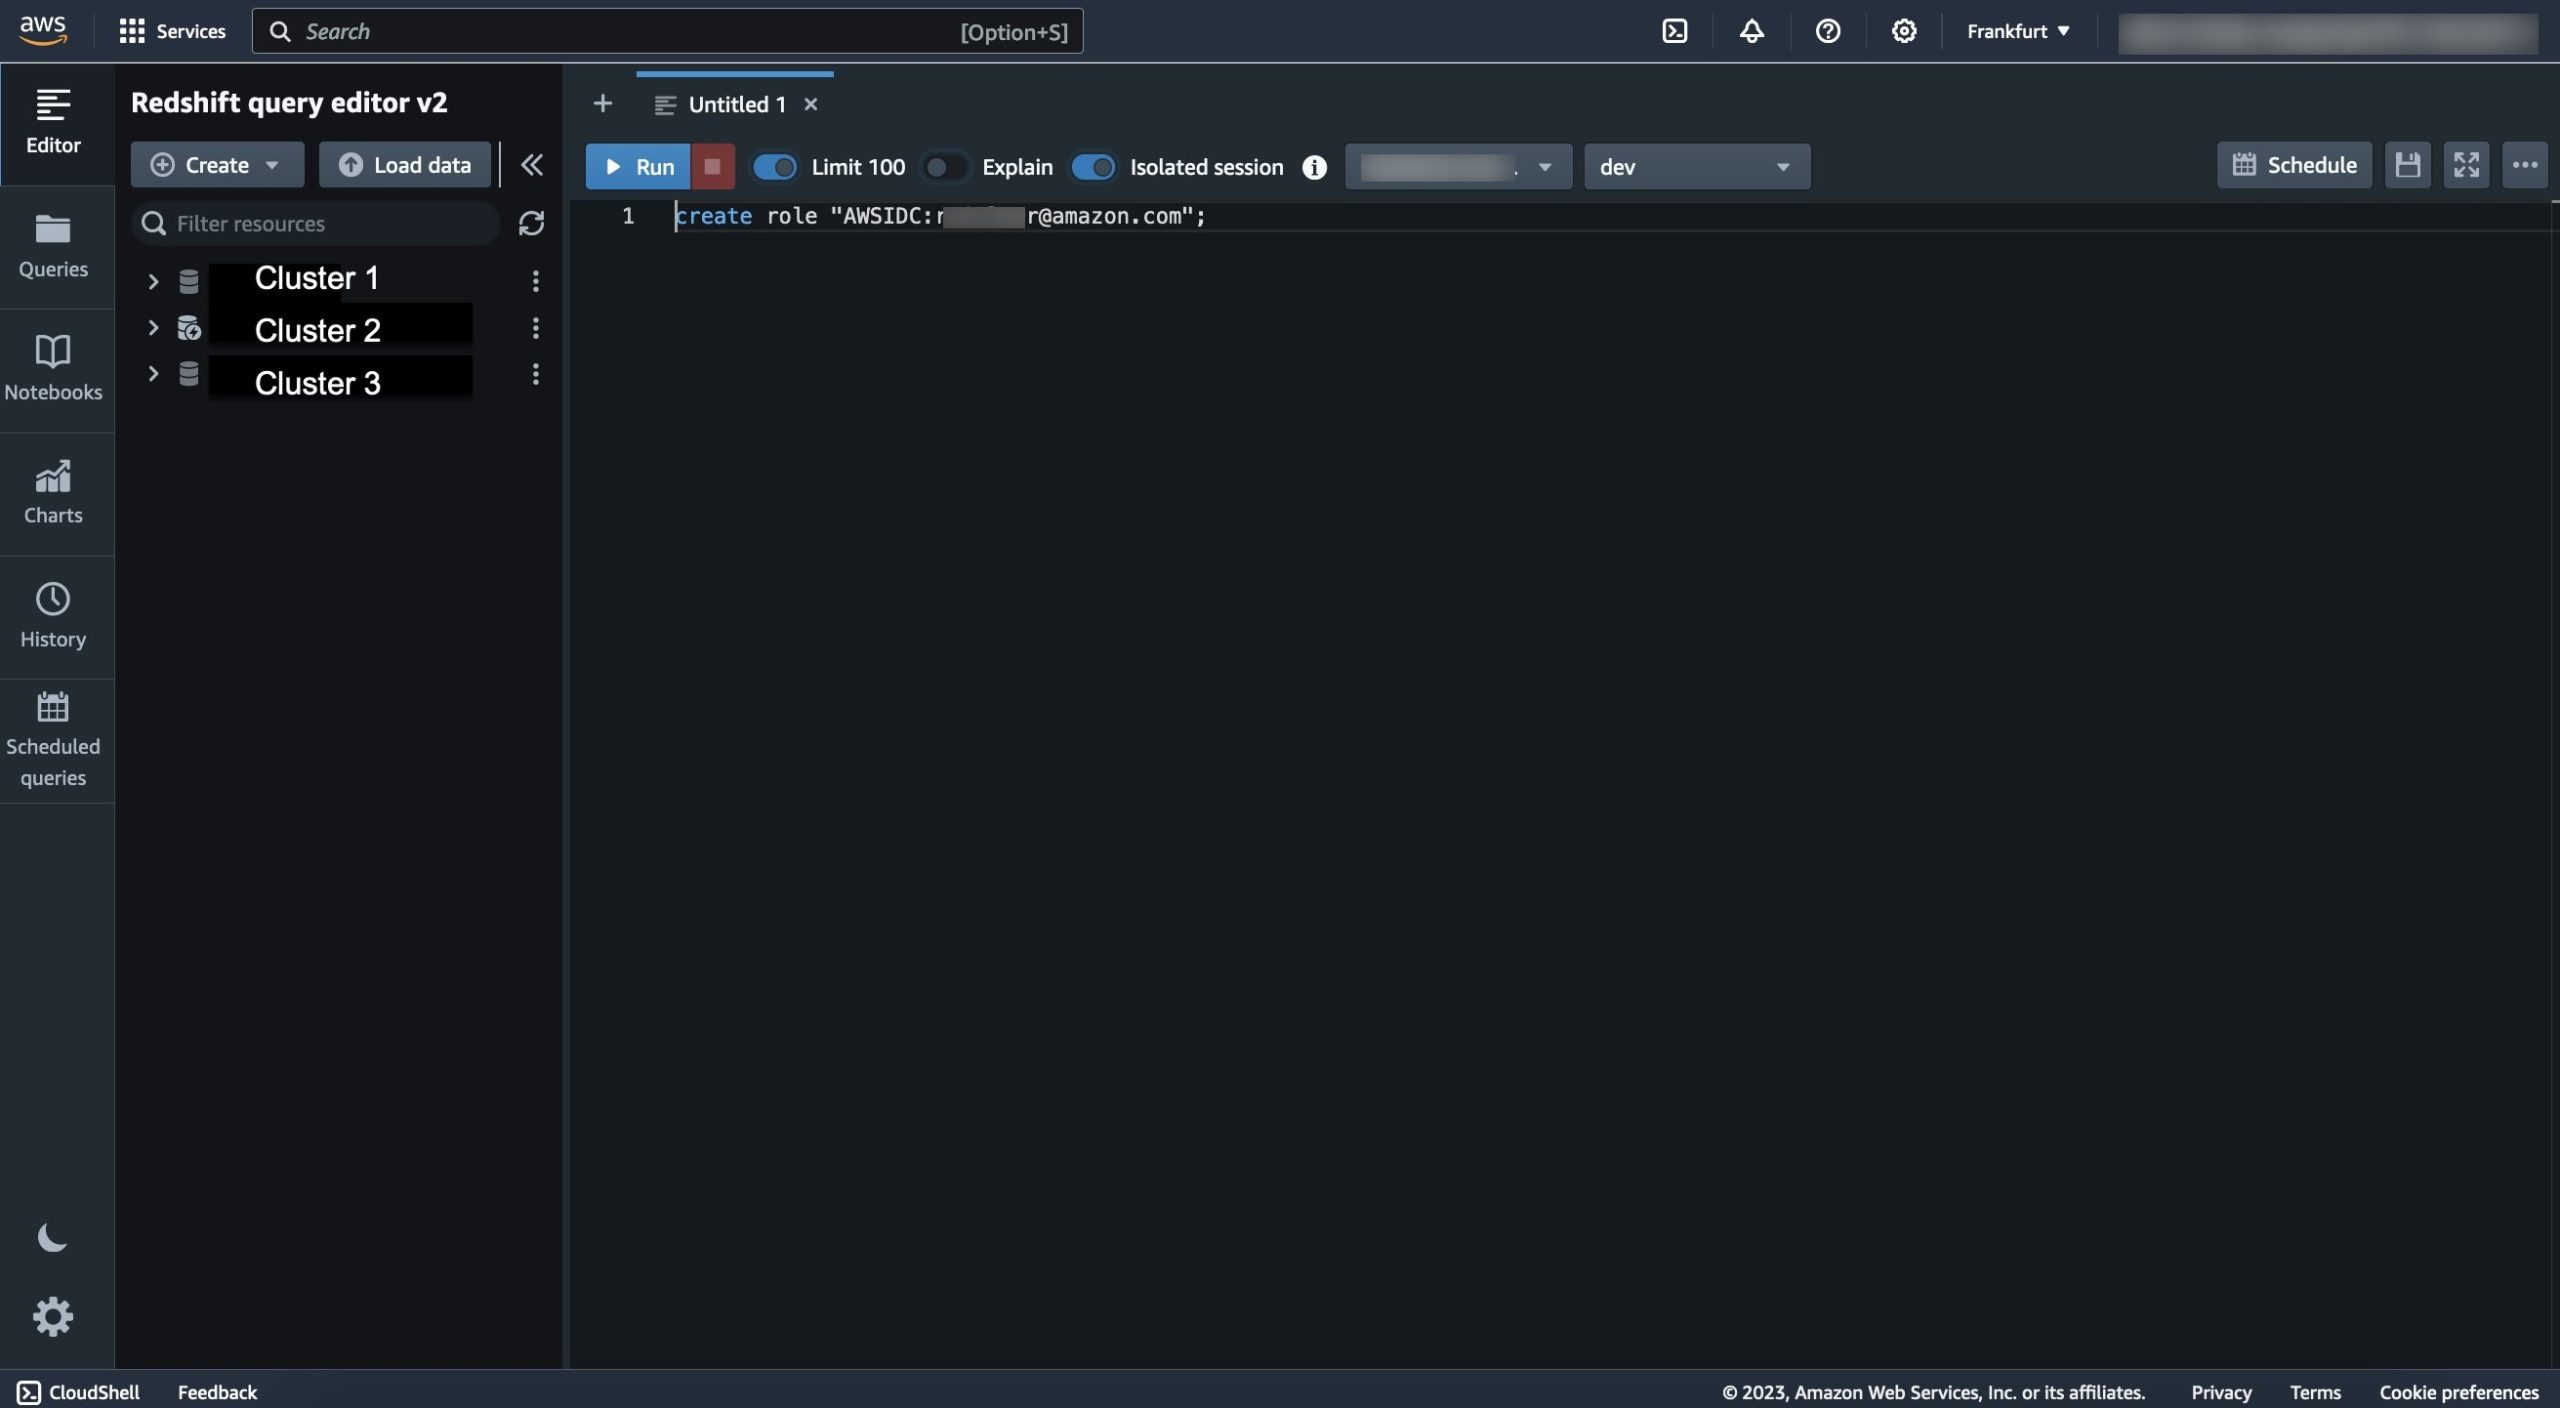
Figure 2: Query editor v2
By default, all users have CREATE and USAGE permissions on the PUBLIC schema of a database. To disallow users from creating objects in the PUBLIC schema of a database, use the REVOKE command to remove that permission. For more information, see Default database user permissions.
As the Amazon Redshift database administrator, you can create roles where the role name contains the identity provider namespace prefix and the group or user name. To do this, use the following syntax:
The rolename needs to match the group name in IAM Identity Center. Amazon Redshift automatically maps the IAM Identity Center group or user to the role created previously. To expand the permissions of a user, use the GRANT command.
The identityprovidernamespace is assigned when you create the integration between Amazon Redshift and IAM Identity Center. It represents your organization’s name and is added as a prefix to your IAM Identity Center managed users and roles in the Redshift database.
Your syntax should look like the following:
Step 5: Remove application assignment
If you decide that the new group no longer needs access to the Amazon Redshift application but should remain within the IAM Identity Center instance, run the following command:
Note: Removing an application assignment for a group doesn’t remove the group from your Identity Center instance.
When you remove or add user assignments, we recommend that you review the application’s documentation because you might need to take additional steps to completely onboard or offboard a given user or group. For example, when you remove a user or group assignment, you must also remove the corresponding roles in Amazon Redshift. You can do this by using the DROP ROLE command. For more information, see Managing database security.
Audit user and group access to applications
Let’s consider how you can use the new APIs to help you audit application assignments. In the preceding example, you used the AWS CLI to create and delete assignments to Amazon Redshift. Now, we will show you how to use the new ListApplicationAssignments API to list the groups that are currently assigned to your Amazon Redshift application.
The output should look similar to the following — in this case, you have a single group assigned to the application.
To see the group membership, use the PrincipalId information to query Identity Store and get information on the users assigned to the group with a combination of the ListGroupMemberships and DescribeGroupMembership APIs.
If you have several applications that IAM Identity Center manages, you can also create a script to automatically audit those applications. You can run this script periodically in an AWS Lambda function in your environment to maintain oversight of the members that are added to each application.
To get the script for this use case, see the multiple-instance-management-iam-identity-center GitHub repository. The repository includes instructions to deploy the script using Lambda within the AWS Organizations delegated administrator account. After deployment, you can invoke the Lambda function to get .csv files of every IAM Identity Center instance in your organization, the applications assigned to each instance, and the users that have access to those applications.
Conclusion
In this post, you learned how to use the IAM Identity Center application assignment APIs to assign users to Amazon Redshift and remove them from the application when they are no longer part of the organization. You also learned to list which applications are deployed in each account, and which users are assigned to each of those applications.
To learn more about IAM Identity Center, see the AWS IAM Identity Center user guide. To test the application assignment APIs, see the SSO-admin API reference guide.
If you have feedback about this post, submit comments in the Comments section below. If you have questions about this post, start a new thread on AWS IAM Identity Center re:Post or contact AWS Support.
Want more AWS Security news? Follow us on Twitter.