All posts by Mehdi Amrane

Build reliable voice analytics workflows with AWS Lambda durable functions and Amazon Bedrock

Post Syndicated from Mehdi Amrane original https://aws.amazon.com/blogs/compute/build-reliable-voice-analytics-workflows-with-aws-lambda-durable-functions-and-amazon-bedrock/

Contact centers handle millions of voice interactions monthly, but transforming raw call recordings into actionable insights remains a manual and fragile process. With voice analytics workflows, you can decrease the average handle time of a voice call from minutes to seconds and increase the efficiency and productivity of your support agents.

Today, these workflows often require custom code to handle non-functional requirements such as retry logic, state management and failure handling across multiple services. In addition, as the selection/determination of insights is derived from specific business objectives, it often needs to be customized for each organization.

In this post, we show a solution using AWS Lambda durable functions to create the following insights: summarization, sentiment analytics and key topics. AWS Lambda durable functions is a capability of AWS Lambda, that simplifies building multi-step applications and AI workflows. It lets you write sequential code with automatic checkpointing, built-in retries, and simplified error handling, so you can focus on the business logic rather than managing the orchestration.

The solution also simplifies the visualization of the conversation transcriptions and insights, with a web application.

Solution overview

In this post, we provide an operational overview of the solution, and then describe how to set it up with the following services:

The solution architecture is illustrated in the following diagram:
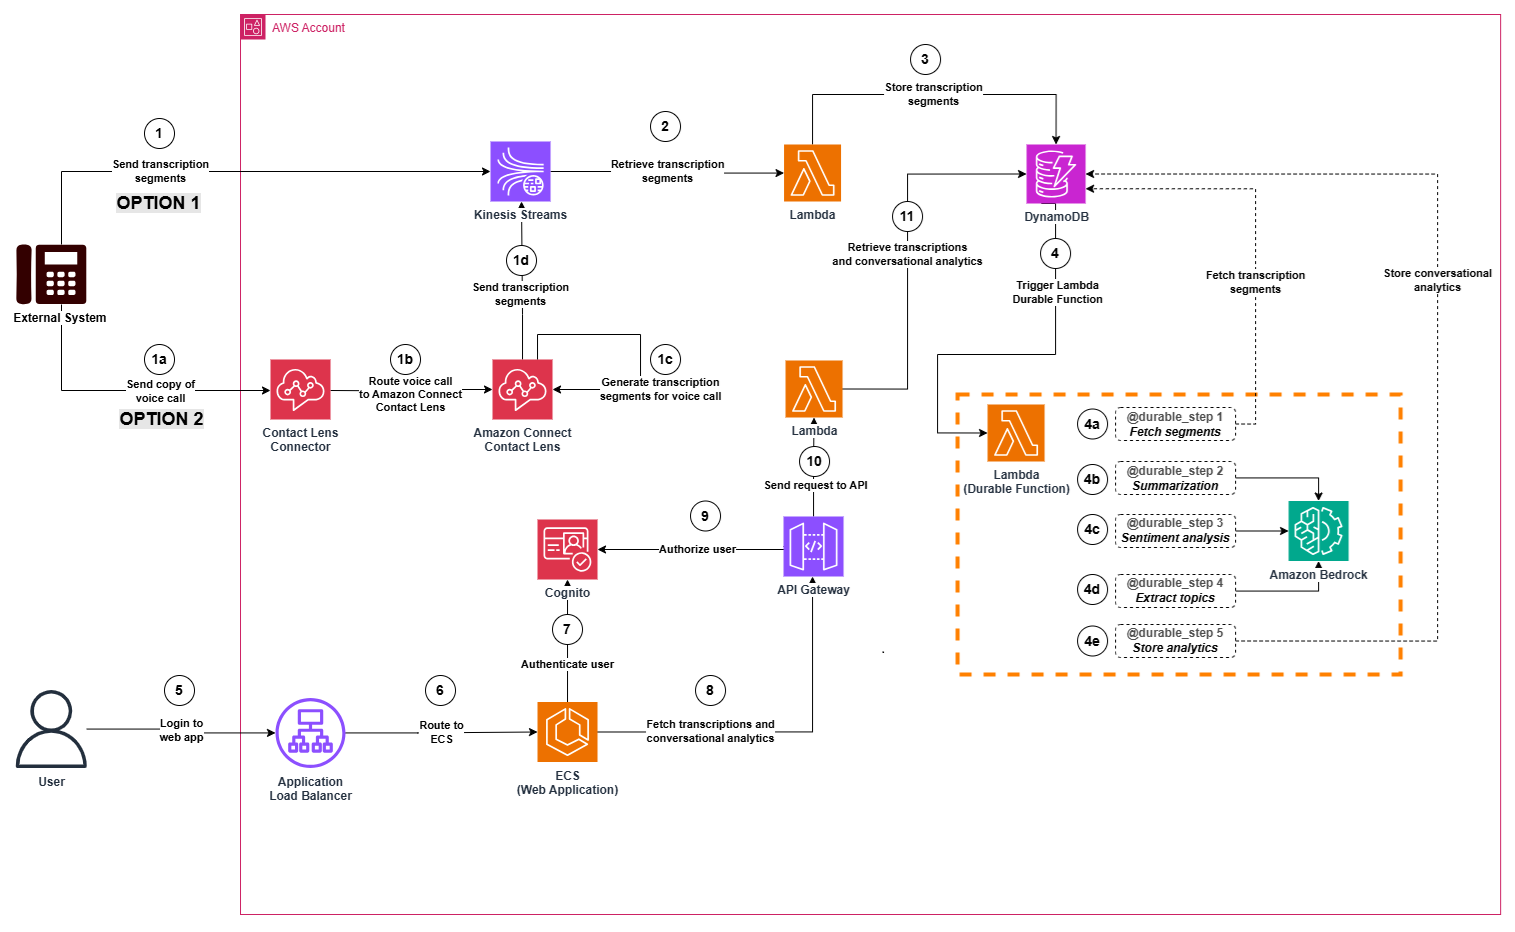
Architecture diagram showing the solution components and data flow for voice analytics with AWS Lambda durable functions and Amazon Bedrock

Step 1 (Option 1): Transcription segments are sent by an external system. The segments are stored in a stream (Amazon Kinesis Streams).

Step 1 (Option 2): Voice calls are sent by an external system to the Contact Lens Connector in AWS. The voice calls are then transcribed using Amazon Connect Contact Lens, to generate transcriptions and send these transcriptions to the stream.

  • Step 1a: The external system sends a copy of the voice call to a Contact Lens Connector.
  • Step 1b: The Contact Lens Connector routes the voice call to Amazon Connect Contact Lens.
  • Step 1c: Amazon Connect Contact Lens generates transcriptions from a voice call.
  • Step 1d: The transcription segments are stored in a stream (Amazon Kinesis Streams).

Step 2: A transcription processor function (AWS Lambda function) consumes transcription segments from the stream.

Step 3: The transcription processor function (AWS Lambda function) stores transcription segments in a transcription table in Amazon DynamoDB.

Step 4: A durable function (AWS Lambda Durable function) is triggered when new transcription segments are stored in the transcription table (the trigger is implemented using Amazon DynamoDB Streams). It orchestrates the processing of transcriptions in 5 steps.

  • Step 4a: The durable function fetches the segments received for a given transcription. If all the segments of voice call are available, the processing continues to Step 4b. Otherwise, the Lambda function is stopped (since the transcription is not complete yet).
  • Step 4b: The durable function summarizes the voice transcription using Amazon Bedrock.
  • Step 4c: The durable function generates sentiment analytics for the voice transcription using Amazon Bedrock.
  • Step 4d: The durable function extracts key topics from the voice transcription using Amazon Bedrock.
  • Step 4e: The durable function stores the conversational insights in an analytics table in Amazon DynamoDB.

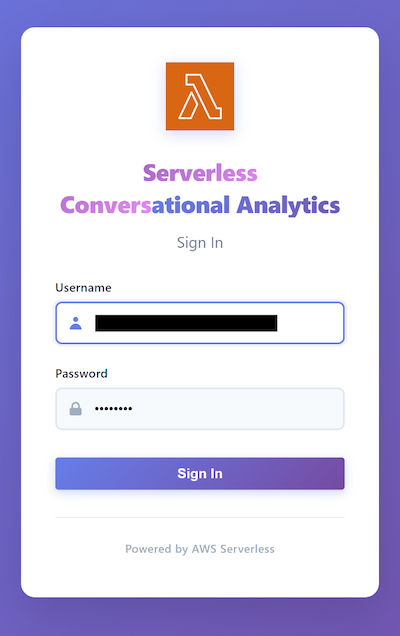
Step 5 and 6: The user accesses the web application and authenticates.

Step 7: Amazon Cognito validates the authentication details.

Step 8: Once the user is logged in, the web application sends a request to an API (Amazon API Gateway) to fetch the voice transcriptions and conversational insights.

Step 9: The API calls a Lambda authorizer to confirm that the user is authorized to retrieve the voice transcriptions and conversational insights.

Step 10: The request is sent from the API to a retriever function (AWS Lambda function to retrieve transcriptions from the transcription table and conversational insights from the analytics table).

Step 11: The Lambda function retrieves transcriptions from the transcription table and conversational insights from the analytics table.

After Step 11, the user can now consult the transcriptions and conversational insights from the web application.

Prerequisites

  • An AWS account.
  • A Unix based device (or Windows device with WSL setup to run bash scripts) with access to your AWS account with the following tools/libraries installed:
    • Node.js and npm installed.
    • Python 3.12 installed.
    • Docker (for front-end containerization).
    • AWS Command Line Interface (AWS CLI) configured with appropriate permissions.
    • CDK installed.
  • Clone the GitHub repository:
    git clone https://github.com/aws-samples/sample-sca-with-lambda-durable-and-bedrock.git

Set up network and backend infrastructure

In this section, we setup the networking and backend resources of the solution.

Navigate inside the repository and complete the following steps to create these resources:

  1. Install dependencies and build project:
    npm install
    npm run build
    cdk bootstrap

  2. Create networking infrastructure resources (Amazon Virtual Private Cloud (Amazon VPC), subnets, IAM roles, security groups and VPC endpoints):
    cdk deploy ScaNetworkStack

  3. Create backend resources (Amazon Kinesis Data Streams stream, Amazon DynamoDB tables, AWS Lambda functions, Amazon API Gateway, Amazon Cognito):
    cdk deploy ScaBackendStack

Create the web application

In this section, we create the web application of the solution.

Complete the following steps to create the web application:

  1. Create an Amazon Elastic Container Registry (Amazon ECR) repository to host the container image of the web application:
    cdk deploy ScaEcrStack

  2. Build and deploy container image in the Amazon ECR repository:
    chmod +x scripts/deploy-container.sh
    bash ./scripts/deploy-container.sh us-west-2

    Note: Replace us-west-2 with your deployment region.

  3. Deploy the web application:
    cdk deploy ScaWebAppStack

  4. Deploy CloudFront Access stack (optional). This stack adds public subnets, an internet gateway, and an Amazon CloudFront distribution.Important note: This stack allows access to the web application from a public endpoint using an Amazon CloudFront distribution. You can use this stack if you currently cannot access a web application behind a private ALB with an existing private connection (virtual private network (VPN), AWS Direct Connect, etc.).
    cdk deploy ScaCloudFrontAccessStack -c enableCloudFrontAccess=true

The web application is now available for testing.

If your web application is private, the application is deployed behind a private ALB. Access it from within the VPC using the ALB DNS name:

aws cloudformation describe-stacks --stack-name ScaWebAppStack --query 'Stacks[0].Outputs[?OutputKey==`AlbDnsName`].OutputValue' --output text

If your web application is public, the application is deployed behind an Amazon CloudFront distribution. You can access it using the CloudFront distribution URL:

aws cloudformation describe-stacks --stack-name ScaCloudFrontAccessStack --query 'Stacks[0].Outputs[?OutputKey==`CloudFrontUrl`].OutputValue' --output text

Configure the Amazon Cognito user pool

In this section, we create a user in our Amazon Cognito user pool. This user will log in to our web application.

Run the script setup-test-user.sh to create the user (make sure to provide your email address):

chmod +x scripts/setup-test-user.sh
./scripts/setup-test-user.sh [email protected]

Note: Replace [email protected] with your email address.

After you create the user, you should receive an email with a temporary password in this format: “Your username is #your-email-address# and temporary password is #temporary-password#.”

Keep note of these login details (email address and temporary password) to use later when testing the web application.

Test the solution

In this section, we test the solution by ingesting a transcription in the stream (Amazon Kinesis Data Streams) and visualize the results in the web application.

  1. Run the script ingest-transcriptions.sh to ingest a sample transcription in the stream:
    chmod +x scripts/ingest-transcriptions.sh
    ./scripts/ingest-transcriptions.sh

  2. Open the URL of the web application in your web browser (either CloudFront distribution URL or ALB DNS name as mentioned in previous section).
  3. Enter your login information (your email and the temporary password you received earlier while configuring the user pool in Amazon Cognito) and choose Sign in.
  4. When prompted, enter a new password and choose Change Password.
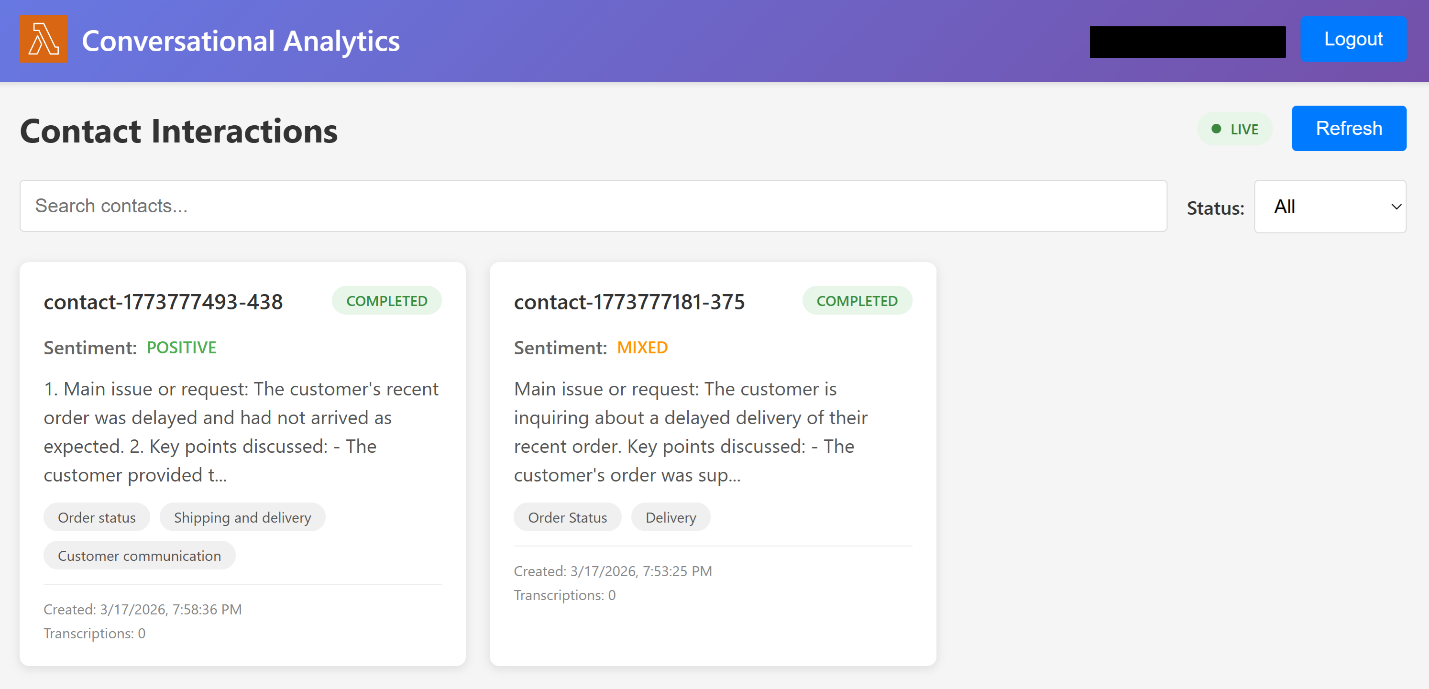
  5. You should now be able to see a web interface with a transcription as illustrated in the following screenshot:Web interface displaying a list of voice transcriptions
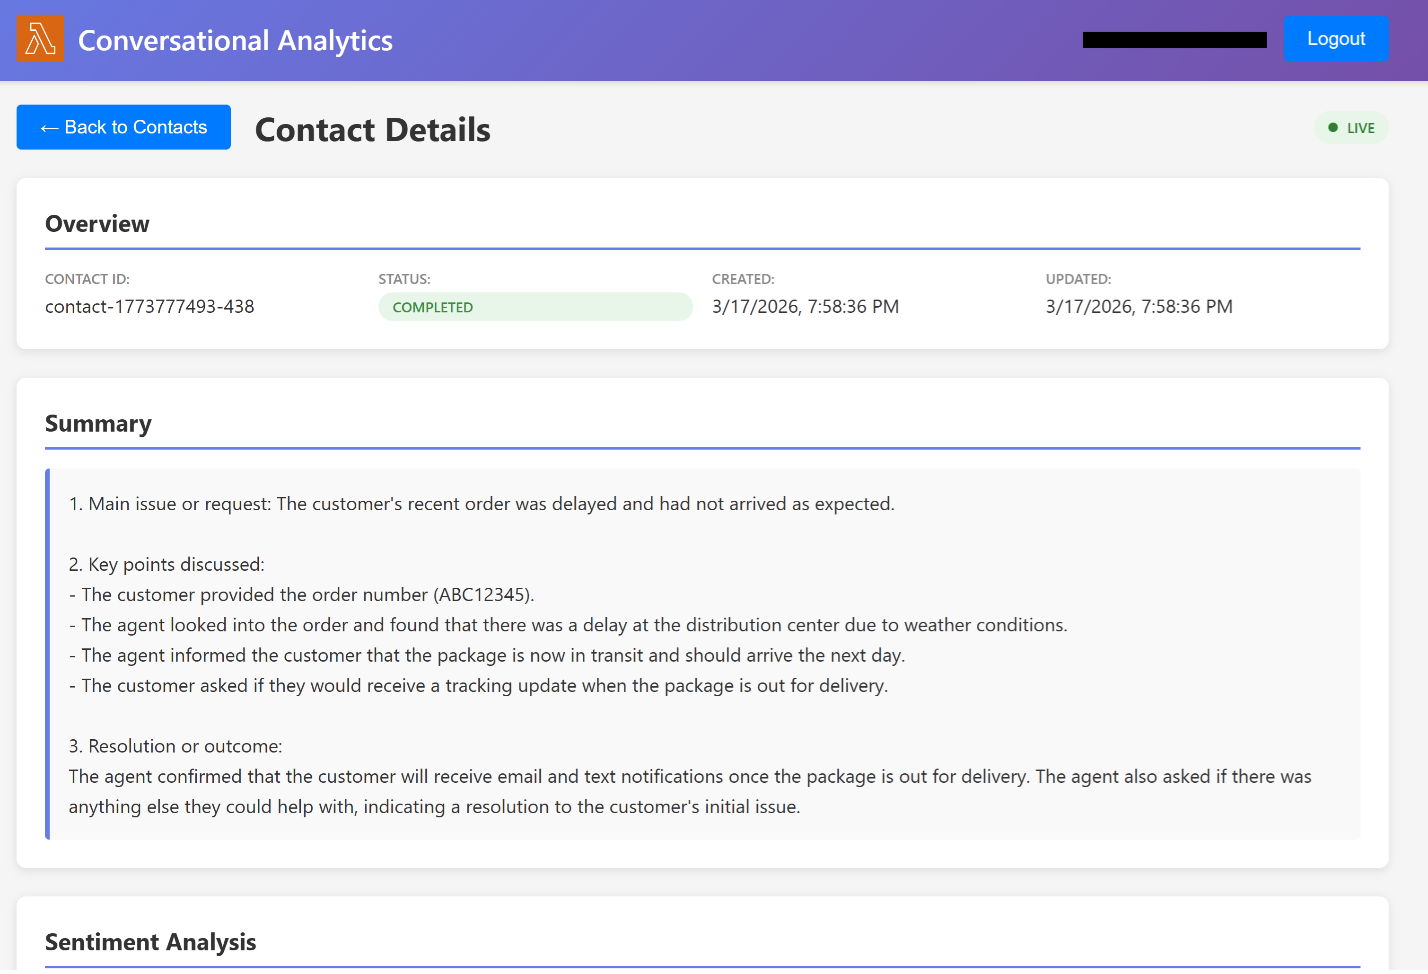
  6. Select a transcription to visualize the conversational insights as shown in the following screenshot.Conversational insights detail view showing summary, sentiment, and key topics for a selected transcription

If you want to explore an alternative option by placing a voice call using Amazon Connect (with Amazon Connect Contact Lens to generate the transcriptions):

Clean up

To make sure that no additional cost is incurred, remove the resources provisioned in your account. Make sure you’re in the correct AWS account before deleting the resources.

Important note: You should exercise caution when performing the preceding steps. Make sure you are deleting the resources in the correct AWS account.

You can navigate to the AWS CloudFormation console to delete the CloudFormation stacks associated to the resources provisioned.

You can also destroy the stacks using cdk destroy in reverse dependency order:

  1. If you deployed the optional CloudFront access stack:
    cdk destroy ScaCloudFrontAccessStack -c enableCloudFrontAccess=true

  2. If you deployed the optional Connect integration stack:
    cdk destroy ScaConnectStack -c enableConnect=true

  3. To destroy the core stacks:
    cdk destroy ScaWebAppStack
    cdk destroy ScaEcrStack
    cdk destroy ScaBackendStack
    cdk destroy ScaNetworkStack

Conclusion

In this post, we walked through a solution to create a web application to visualize voice transcriptions and related conversational insights. First, we created network and backend resources. Then we created the web application. We also configured a user pool to grant a user access to the web application. Finally, we tested solution by ingesting transcriptions then visualize them in the web application.

For further information, consult the documentation of the following services: Amazon Bedrock, AWS Lambda durable functions, Amazon ECS, Amazon API Gateway, AWS Lambda, Amazon Kinesis Streams, Amazon DynamoDB and Amazon Cognito.

To dive deeper into this solution, a GitHub repository is available at this location.

Orchestrating document processing with AWS AppSync Events and Amazon Bedrock

Post Syndicated from Mehdi Amrane original https://aws.amazon.com/blogs/compute/orchestrating-document-processing-with-aws-appsync-events-and-amazon-bedrock/

Many organizations implement intelligent document processing pipelines in order to extract meaningful insights from an increasing volume of unstructured content (such as insurance claims, loan applications and more). Traditionally, these pipelines require significant engineering efforts, as the implementation often involves using several machine learning (ML) models and orchestrating complex workflows.

As organizations integrate these pipelines to customer facing applications (such as web applications for customers to upload documents such as insurance claims, loan approval documents and more), they set goals to provide insights in real time to increase the end customer experience. These organizations also aim to run and scale these workloads with minimal operational overhead and optimizing on costs. In addition, these organizations require the implementation of common security practices such as identity and access management, to make sure that only authorized and authenticated users are allowed to perform specific actions or access specific resources.

In this post, we show you a solution to simplify the creation of an intelligent document processing pipeline, with a web application for customers to upload their files (documents and images) and derive insights from it (summarization, fields extraction and classification). The solution primarily use serverless technologies, it includes a web socket to receive insights in real time and offers several benefits, such as automatic scaling, built-in high availability, and a pay-per-use billing model to optimize on costs. The solution also includes an authentication layer and an authorization layer to manage identities and permissions.

Solution overview

In this post, we provide an operational overview of the solution, and then describe how to set it up with the following services:

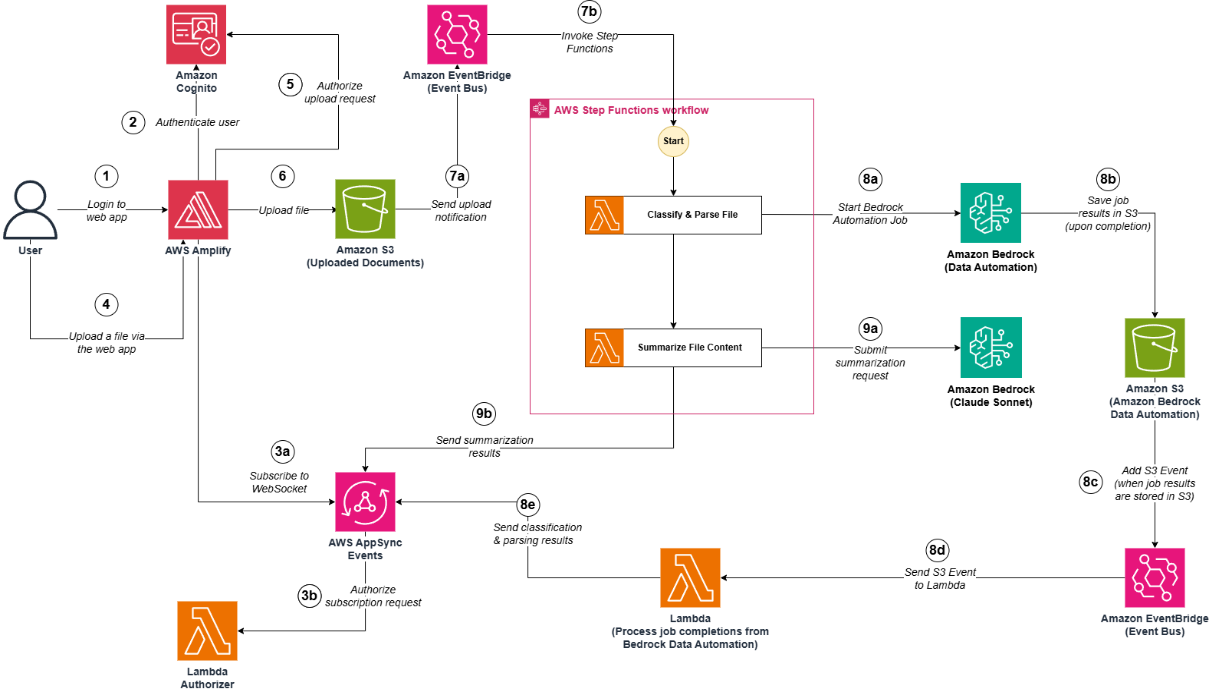
The solution architecture is illustrated in the following diagram:

Step 1: The user authenticates to the web application (hosted in AWS Amplify).
Step 2: Amazon Cognito validates the authentication details. After this, the user is now logged in the web application.
Steps 3aand 3b:

  • Step 3a: The web application (AWS Amplify) subscribes to an AWS AppSync Events web socket.
  • Step 3b: The AWS AppSync Events web socket calls an AWS Lambda authorizer to confirm that the user is authorized to subscribe to the web socket.

Step 4: The user uploads a file (document or image) using the web application.
Step 5: The web application (hosted in AWS Amplify) calls Amazon Cognito (identity pool) to confirm that the user is authorized to upload a file.
Step 6: The file is uploaded in an Amazon S3 bucket.
Steps 7a and 7b: Upon reception of an Amazon S3 upload event (which notifies that the file was uploaded in the Amazon S3 bucket) in the default Amazon Event Bridge bus, an Amazon Event Bridge bus rule triggers the execution of an AWS Step Functions state machine to start the orchestration workflow.
Step 8 (Step to extract fields from a file and classify it):

  • Step 8a: The first AWS Lambda function starts a new Amazon Bedrock Automation job (this job extracts specific fields from the uploaded file and classify it)
  • Step 8b: Once the job is completed, the results are stored in an Amazon S3 bucket.
  • Step 8c and 8d: Upon reception of an Amazon S3 event (which notifies that the results were stored in the Amazon S3 bucket) in the default Amazon Event Bridge, an Amazon Event Bridge bus rule triggers the execution of an AWS Lambda function
  • Step 8e: An AWS Lambda function publishes the results to the web socket.

Steps 9a and 9b: The second AWS Lambda function submits a prompt to an Amazon Bedrock foundation model (Sonnet 3), to request a summarization in streaming of the uploaded file. The AWS Lambda function publishes the streaming data to the web socket.

After Step 8e and Step 9b, the user can now consult the summarization result and extraction insights of the uploaded file in the web application.

Pre-requisites

To follow along and set up this solution, you must have the following:

  • An AWS account
  • A device with access to your AWS account with the following:
    • Python 3.12 installed (including pip)
    • Node.js 20.12.0 installed
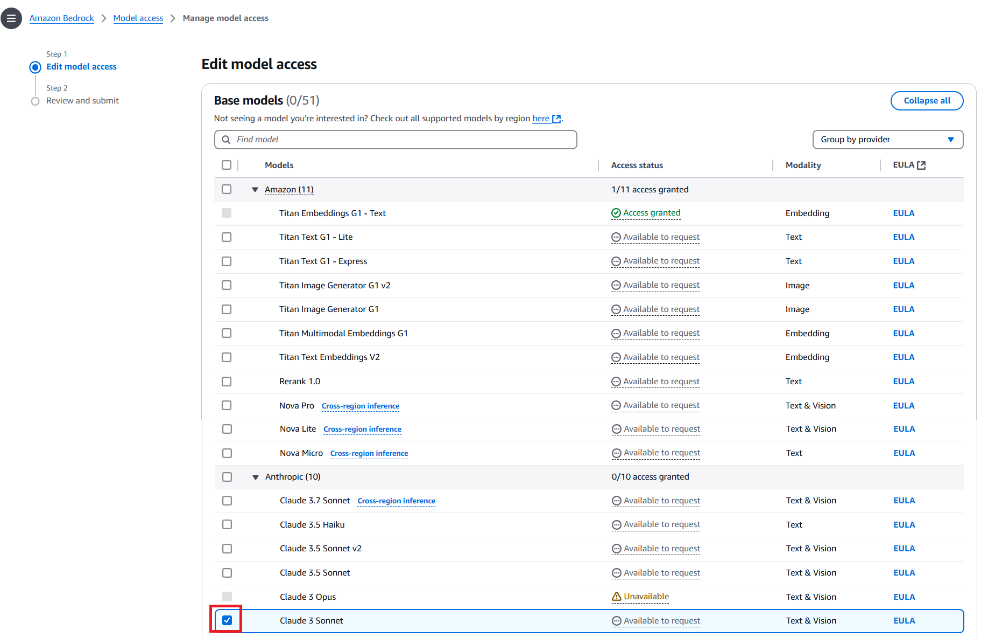
  • Enable Model Access to the Claude 3 Sonnet model in Amazon Bedrock


Note: Deploying this solution will incur costs. Review the pricing page of each AWS service used in this post for details on costs. The cost of running this solution will primarily depend on:

  • The number of documents (and the size of each document)
  • The number of active users

Setup Amazon Bedrock Data Automation

In this section, we setup an Amazon Bedrock Data Automation project and an Amazon Bedrock blueprint.

A project contains a list of blueprints, and each blueprint defines the fields to extract from different types of files (such as documents or images). In this post, we define a blueprint for a driving license.

Complete the following steps to create an Amazon Bedrock Data Automation project and a driving license blueprint:

  1. Clone the GitHub repository
    git clone https://github.com/aws-samples/sample-create-idp-with-appsyncevents-and-amazonbedrock.git

  2. Go to the sample-create-idp-with-appsyncevents-and-amazonbedrock folder
    cd sample-create-idp-with-appsyncevents-and-amazonbedrock

  3. Initialize the environment (make the shell script files, from the GitHub repository, ready to be used)
    chmod +x ./init-env.sh && source ./init-env.sh

  4. Run the script setup-bda-project.sh to create an Amazon Bedrock Data Automation project and a sample driving license blueprint:
    ./setup-bda-project.sh

Create the web socket and orchestration backend

In this section, we create the following resources:

  • A user directory for web authentication and authorization, created with an Amazon Cognito user pool. An Amazon Cognito identity pool is also created to validate that users are authorized to upload files via the web application.
  • A web socket using AWS AppSync Events. This allows our web application to receive real time updates for summarization and extraction results. An authorization layer is also created to protect the web socket from unauthorized users. This is implemented with a Lambda authorizer function to validate that incoming requests include valid authorization details.
  • A state machine using AWS Step Functions and AWS Lambda to orchestrate the summarization and extraction operations from the unstructured content
  • Amazon S3 buckets to store files for document processing, and code files for AWS Lambda functions

Complete the following steps to create the web socket and the orchestration backend of the solution, using AWS CloudFormation templates:

  1. Create Amazon S3 buckets used by the solution by running the following script. These buckets will store the files uploaded by users and code files of the AWS Lambda functions used in this solution.
    cd $CURRENT_DIR/s3; ./create-s3-buckets.sh

  2. Create the Amazon Cognito user pool and identity pool by running the create-cognito-userpool.sh script:
    cd $CURRENT_DIR/cognito; ./create-cognito-userpool.sh

  3. Create the AWS AppSync Events web socket by running the following script:
    cd $CURRENT_DIR/appsync/; ./create-appsync-api.sh

  4. Create the AWS Step Functions state machine (including AWS Lambda functions) by running the following scripts:
    cd $CURRENT_DIR/orchestration/; ./create-orchestration.sh

Configure the Amazon Cognito user pool

In this section, we create a user in our Amazon Cognito user pool. This user will log in to our web application.

Run the script create-cognito-testuser.sh to create the user (make sure to provide your email address):

cd $CURRENT_DIR/cognito; ./create-cognito-testuser.sh #your-email-address#

After you create the user, you should receive an email with a temporary password in this format: “Your username is #your-email-address# and temporary password is #temporary-password#.”

Keep note of these login details (email address and temporary password) to use later when testing the web application.

Create the web application

In this section, we build a web application using AWS Amplify and publish it to make it accessible through an endpoint URL.

Complete the following steps to create the web application:

  1. Run the script create-webapp.sh to create the web application with AWS Amplify:
    cd $CURRENT_DIR/amplify/; ./create-webapp.sh

  2. Run the script deploy.sh to deploy the web application
    cd $CURRENT_DIR/amplify/amplify-idp; ./deploy.sh

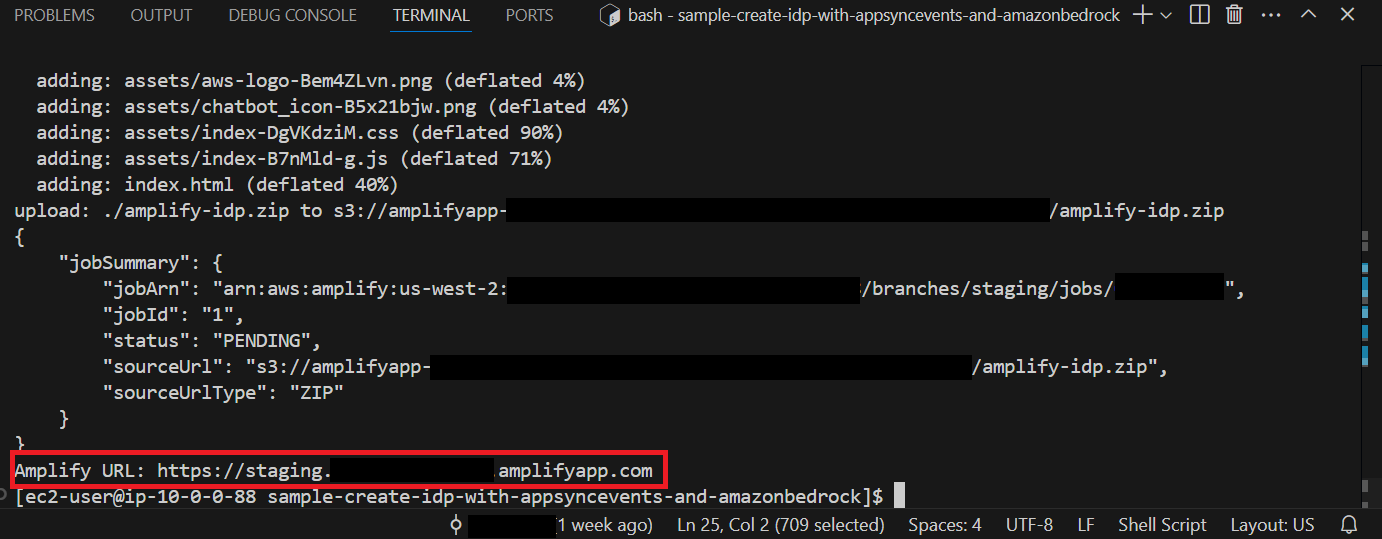
The web application is now available for testing and a URL should be displayed, as shown in the following screenshot. Take note of the URL to use in the following section.
Test the web application

In this section, we test the web application and upload a file to be processed:

  1. Open the URL of the AWS Amplify application in your web browser.
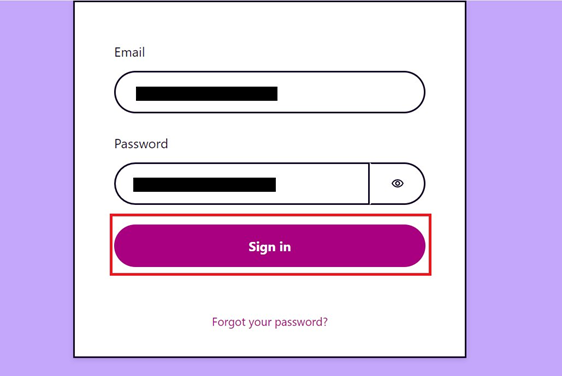
  2. Enter your login information (your email and the temporary password you received earlier while configuring the user pool in Amazon Cognito) and choose Sign in.
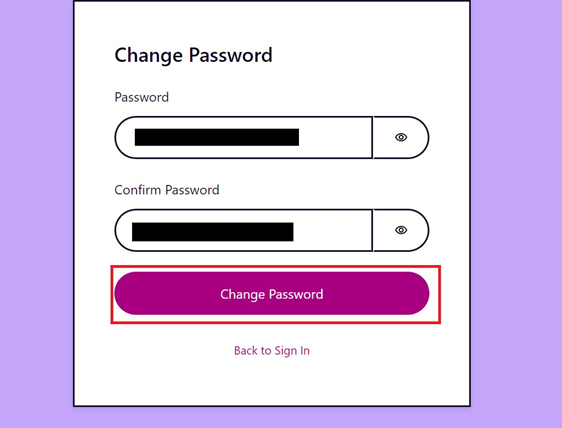
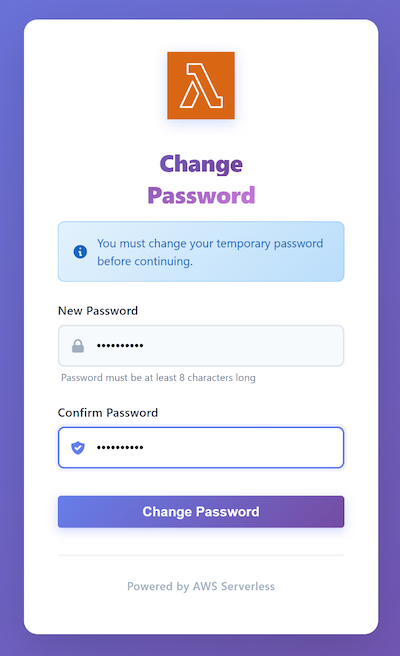
  3. When prompted, enter a new password and choose Change Password.
  4. You should now be able to see a web interface.
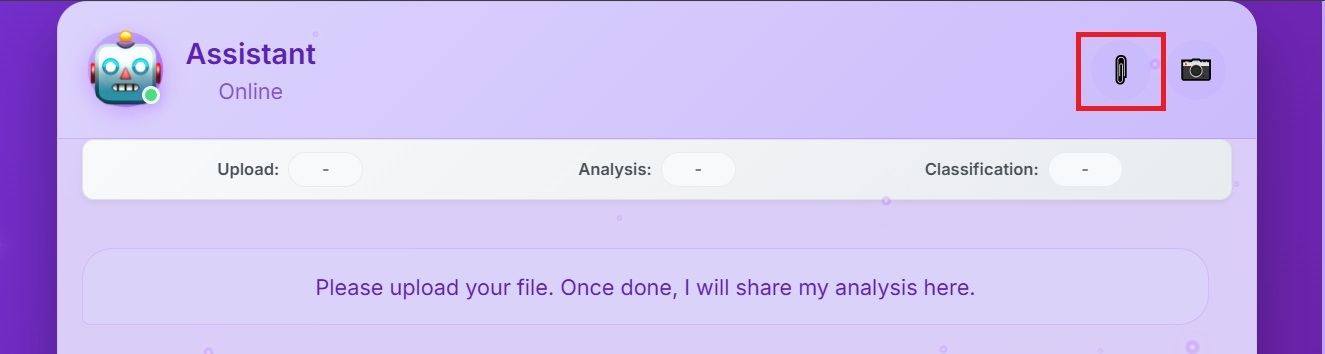
  5. Download the sample driving license at this location and upload it via the web application using either your camera or a file in your local device, as illustrated

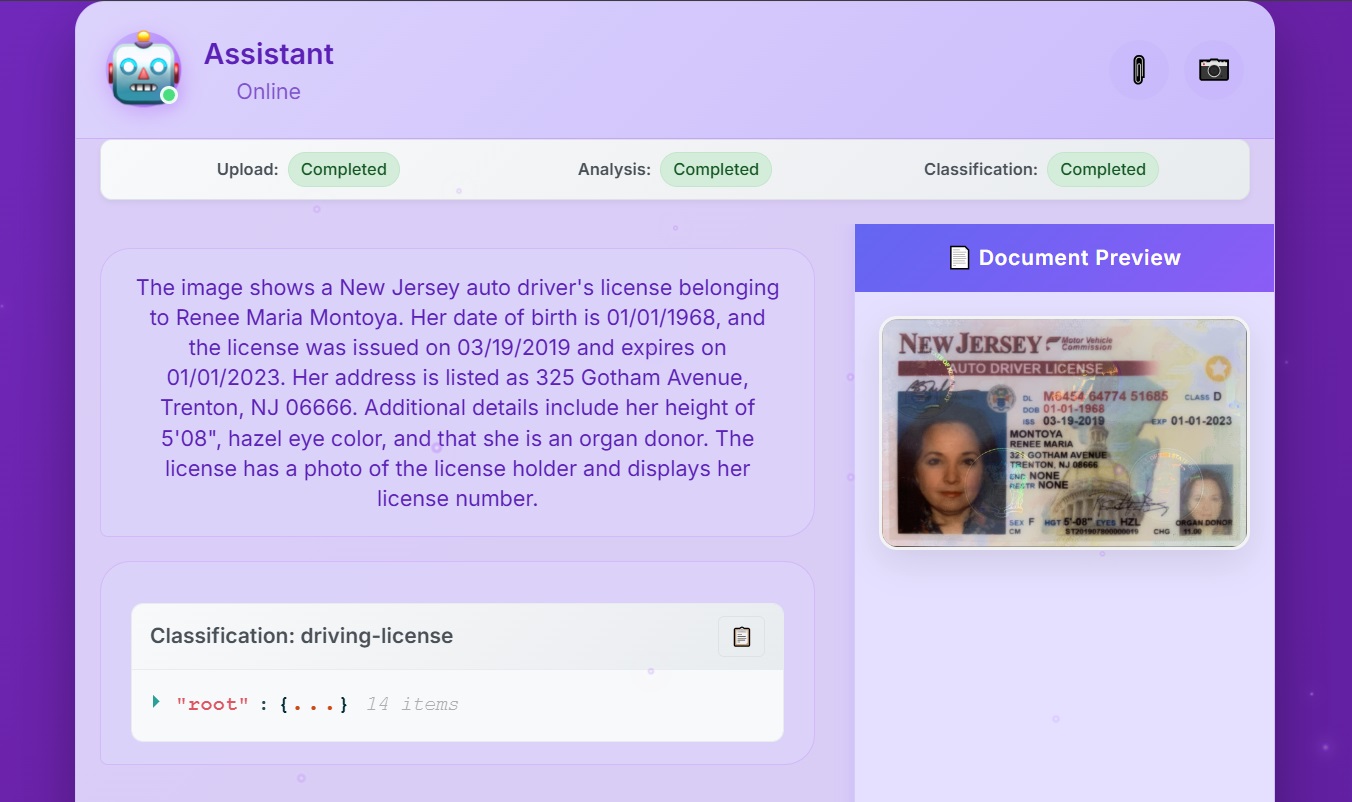
Once the file is uploaded, you should start receiving responses in the web application. When all the operations are completed, you should see a result equivalent to what is shown in the following screenshot:

Note: If you are planning to use other driving license sample images with other formats, you may have to update the existing Bedrock Data Automation blueprint we created earlier or define a new blueprint in your Bedrock Data Automation project we created earlier for these new images to work. For more information, please review the Bedrock Data Automation documentation.

Clean up

To make sure that no additional cost is incurred, remove the resources provisioned in your account. Make sure you’re in the correct AWS account before deleting the following resources.

Important note: You should exercise caution when performing the preceding steps. Make sure you are deleting the resources in the correct AWS account.

You can either navigate to the AWS CloudFormation console to delete the CloudFormation stacks associated to the resources provisioned or use the cleanup helper script cleanup.sh available at the root of the sample-create-idp-with-appsyncevents-and-amazonbedrock folder:

./cleanup.sh #region#

Conclusion

In this post, we walked through a solution to create a document processing pipeline, with a web application using serverless services. Via the web application, we were able to upload a file and receive responses in real time for different types of operations (summarization, extraction of specific fields and classification). First, we created an Amazon Bedrock Data Automation project (with a driving license blueprint). Then we created a web socket along with an orchestration solution using a state machine (AWS Step Functions and AWS Lambda functions). We also configured a user pool to grant a user access to the web application. Finally, we created the frontend of the web application in AWS Amplify.

To dive deeper into this solution, a self-paced workshop is available in AWS Workshop Studio.