Post Syndicated from Stefano Sandona original https://aws.amazon.com/blogs/big-data/integrate-custom-applications-with-aws-lake-formation-part-2/
In the first part of this series, we demonstrated how to implement an engine that uses the capabilities of AWS Lake Formation to integrate third-party applications. This engine was built using an AWS Lambda Python function.
In this post, we explore how to deploy a fully functional web client application, built with JavaScript/React through AWS Amplify (Gen 1), that uses the same Lambda function as the backend. The provisioned web application provides a user-friendly and intuitive way to view the Lake Formation policies that have been enforced.
For the purposes of this post, we use a local machine based on MacOS and Visual Studio Code as our integrated development environment (IDE), but you could use your preferred development environment and IDE.
Solution overview
AWS AppSync creates serverless GraphQL and pub/sub APIs that simplify application development through a single endpoint to securely query, update, or publish data.
GraphQL is a data language to enable client apps to fetch, change, and subscribe to data from servers. In a GraphQL query, the client specifies how the data is to be structured when it’s returned by the server. This makes it possible for the client to query only for the data it needs, in the format that it needs it in.
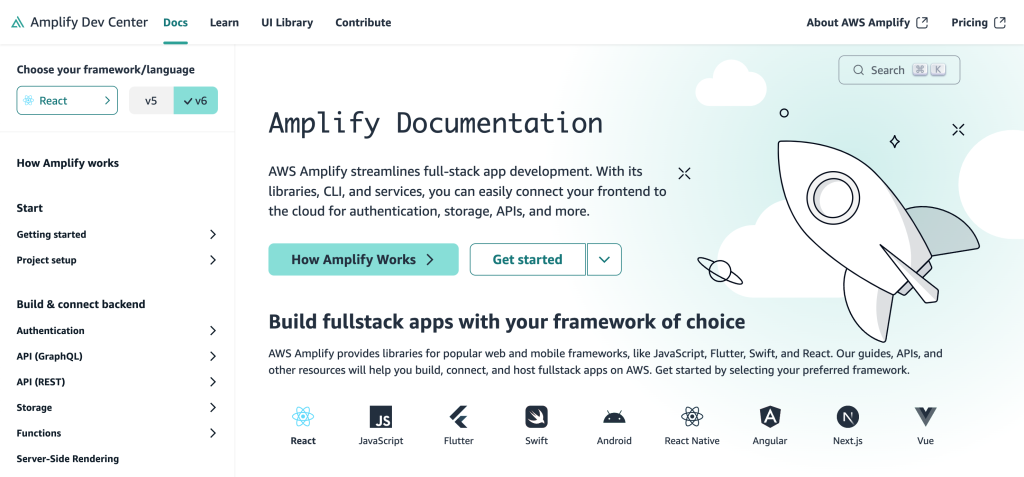
Amplify streamlines full-stack app development. With its libraries, CLI, and services, you can connect your frontend to the cloud for authentication, storage, APIs, and more. Amplify provides libraries for popular web and mobile frameworks, like JavaScript, Flutter, Swift, and React.
Prerequisites
The web application that we deploy depends on the Lambda function that was deployed in the first post of this series. Make sure the function is already deployed and working in your account.
Install and configure the AWS CLI
The AWS Command Line Interface (AWS CLI) is an open source tool that enables you to interact with AWS services using commands in your command line shell. To install and configure the AWS CLI, see Getting started with the AWS CLI.
Install and configure the Amplify CLI
To install and configure the Amplify CLI, see Set up Amplify CLI. Your development machine must have the following installed:
Create the application
We create a JavaScript application using the React framework.
- In the terminal, enter the following command:
- Enter a name for your project (we use
lfappblog), choose React for the framework, and choose JavaScript for the variant.

You can now run the next steps, ignore any warning messages. Don’t run the npm run dev command yet.
- Enter the following command:
cd lfappblog && npm install

You should now see the directory structure shown in the following screenshot.

- You can now test the newly created application by running the following command:
By default, the application is available on port 5173 on your local machine.

The base application is shown in the workspace browser.

You can close the browser window and then the test web server by entering the following in the terminal: q + enter
Set up and configure Amplify for the application
To set up Amplify for the application, complete the following steps:
- Run the following command in the application directory to initialize Amplify:
- Refer to the following screenshot for all the options required. Make sure to change the value of Distribution Directory Path to dist. The command creates and runs the required AWS CloudFormation template to create the backend environment in your AWS account.


- Install the node modules required by the application with the following command:
npm install aws-amplify \
@aws-amplify/ui-react \
ace-builds \
file-loader \
@cloudscape-design/components @cloudscape-design/global-styles

The output of this command will vary depending on the packages already installed on your development machine.
Add Amplify authentication
Amplify can implement authentication with Amazon Cognito user pools. You run this step before adding the function and the Amplify API capabilities so that the user pool created can be set as the authentication mechanism for the API, otherwise it would default to the API key and further modifications would be required.
Run the following command and accept all the defaults:

Add the Amplify API
The application backend is based on a GraphQL API with resolvers implemented as a Python Lambda function. The API feature of Amplify can create the required resources for GraphQL APIs based on AWS AppSync (default) or REST APIs based on Amazon API Gateway.
- Run the following command to add and initialize the GraphQL API:
- Make sure to set Blank Schema as the schema template (a full schema is provided as part of this post; further instructions are provided in the next sections).
- Make sure to select Authorization modes and then Amazon Cognito User Pool.

Add Amplify hosting
Amplify can host applications using either the Amplify console or Amazon CloudFront and Amazon Simple Storage Service (Amazon S3) with the option to have manual or continuous deployment. For simplicity, we use the Hosting with Amplify Console and Manual Deployment options.
Run the following command:

Copy and configure the GraphQL API schema
You’re now ready to copy and configure the GraphQL schema file and update it with the current Lambda function name.
Run the following commands:
export PROJ_NAME=lfappblog
aws s3 cp s3://aws-blogs-artifacts-public/BDB-3934/schema.graphql \
~/${PROJ_NAME}/amplify/backend/api/${PROJ_NAME}/schema.graphql
In the schema.graphql file, you can see that the lf-app-lambda-engine function is set as the data source for the GraphQL queries.

Copy and configure the AWS AppSync resolver template
AWS AppSync uses templates to preprocess the request payload from the client before it’s sent to the backend and postprocess the response payload from the backend before it’s sent to the client. The application requires a modified template to correctly process custom backend error messages.
Run the following commands:
export PROJ_NAME=lfappblog
aws s3 cp s3://aws-blogs-artifacts-public/BDB-3934/InvokeLfAppLambdaEngineLambdaDataSource.res.vtl \
~/${PROJ_NAME}/amplify/backend/api/${PROJ_NAME}/resolvers/
In the InvokeLfAppLambdaEngineLambdaDataSource.res.vtl file, you can inspect the .vtl resolver definition.

Copy the application client code
As last step, copy the application client code:
export PROJ_NAME=lfappblog
aws s3 cp s3://aws-blogs-artifacts-public/BDB-3934/App.jsx \
~/${PROJ_NAME}/src/App.jsx
You can now open App.jsx to inspect it.
Publish the full application
From the project directory, run the following command to verify all resources are ready to be created on AWS:

Run the following command to publish the full application:
This will take several minutes to complete. Accept all defaults apart from Enter maximum statement depth [increase from default if your schema is deeply nested], which must be set to 5.

All the resources are now deployed on AWS and ready for use.
Use the application
You can start using the application from the Amplify hosted domain.
- Run the following command to retrieve the application URL:

At first access, the application shows the Amazon Cognito login page.
- Choose Create Account and create a user with user name
user1 (this is mapped in the application to the role lf-app-access-role-1 for which we created Lake Formation permissions in the first post).

- Enter the confirmation code that you received through email and choose Sign In.

When you’re logged in, you can start interacting with the application.

Controls
The application offers several controls:
- Database – You can select a database registered with Lake Formation with the Describe permission.

- Table – You can choose a table with Select permission.

- Number of records – This indicates the number of records (between 5–40) to display on the Data Because this is a sample application, no pagination was implemented in the backend.
- Row type – Enable this option to display only rows that have at least one cell with authorized data. If all cells in a row are unauthorized and checkbox is selected, the row is not displayed.
Outputs
The application has four outputs, organized in tabs.
Unfiltered Table Metadata
This tab displays the response of the AWS Glue API GetUnfilteredTableMetadata policies for the selected table. The following is an example of the content:
{
  "Table": {
    "Name": "users_tbl",
    "DatabaseName": "lf-app-entities",
    "CreateTime": "2024-07-10T10:00:26+00:00",
    "UpdateTime": "2024-07-10T11:41:36+00:00",
    "Retention": 0,
    "StorageDescriptor": {
      "Columns": [
        {
          "Name": "uid",
          "Type": "int"
        },
        {
          "Name": "name",
          "Type": "string"
        },
        {
          "Name": "surname",
          "Type": "string"
        },
        {
          "Name": "state",
          "Type": "string"
        },
        {
          "Name": "city",
          "Type": "string"
        },
        {
          "Name": "address",
          "Type": "string"
        }
      ],
      "Location": "s3://lf-app-data-123456789012/datasets/lf-app-entities/users/",
      "InputFormat": "org.apache.hadoop.mapred.TextInputFormat",
      "OutputFormat": "org.apache.hadoop.hive.ql.io.HiveIgnoreKeyTextOutputFormat",
      "Compressed": false,
      "NumberOfBuckets": 0,
      "SerdeInfo": {
        "SerializationLibrary": "org.apache.hadoop.hive.serde2.lazy.LazySimpleSerDe",
        "Parameters": {
          "field.delim": ","
        }
      },
      "SortColumns": [],
      "StoredAsSubDirectories": false
    },
    "PartitionKeys": [],
    "TableType": "EXTERNAL_TABLE",
    "Parameters": {
      "classification": "csv"
    },
    "CreatedBy": "arn:aws:sts::123456789012:assumed-role/Admin/fmarelli",
    "IsRegisteredWithLakeFormation": true,
    "CatalogId": "123456789012",
    "VersionId": "1"
  },
  "AuthorizedColumns": [
    "city",
    "state",
    "uid"
  ],
  "IsRegisteredWithLakeFormation": true,
  "CellFilters": [
    {
      "ColumnName": "city",
      "RowFilterExpression": "TRUE"
    },
    {
      "ColumnName": "state",
      "RowFilterExpression": "TRUE"
    },
    {
      "ColumnName": "uid",
      "RowFilterExpression": "TRUE"
    }
  ],
  "ResourceArn": "arn:aws:glue:us-east-1:123456789012:table/lf-app-entities/users"
}
Unfiltered Partitions Metadata
This tab displays the response of the AWS Glue API GetUnfileteredPartitionsMetadata policies for the selected table. The following is an example of the content:
{
  "UnfilteredPartitions": [
    {
      "Partition": {
        "Values": [
          "1991"
        ],
        "DatabaseName": "lf-app-entities",
        "TableName": "users_partitioned_tbl",
        "CreationTime": "2024-07-10T11:34:32+00:00",
        "LastAccessTime": "1970-01-01T00:00:00+00:00",
        "StorageDescriptor": {
          "Columns": [
            {
              "Name": "uid",
              "Type": "int"
            },
            {
              "Name": "name",
              "Type": "string"
            },
            {
              "Name": "surname",
              "Type": "string"
            },
            {
              "Name": "state",
              "Type": "string"
            },
            {
              "Name": "city",
              "Type": "string"
            },
            {
              "Name": "address",
              "Type": "string"
            }
          ],
          "Location": "s3://lf-app-data-123456789012/datasets/lf-app-entities/users_partitioned/born_year=1991",
          "InputFormat": "org.apache.hadoop.mapred.TextInputFormat",
          "OutputFormat": "org.apache.hadoop.hive.ql.io.HiveIgnoreKeyTextOutputFormat",
          "Compressed": false,
          "NumberOfBuckets": 0,
          "SerdeInfo": {
            "SerializationLibrary": "org.apache.hadoop.hive.serde2.lazy.LazySimpleSerDe",
            "Parameters": {
              "field.delim": ","
            }
          },
          "BucketColumns": [],
          "SortColumns": [],
          "Parameters": {},
          "StoredAsSubDirectories": false
        },
        "CatalogId": "123456789012"
      },
      "AuthorizedColumns": [
        "address",
        "city",
        "name",
        "state",
        "surname",
        "uid"
      ],
      "IsRegisteredWithLakeFormation": true
    },
    {
      "Partition": {
        "Values": [
          "1990"
        ],
        "DatabaseName": "lf-app-entities",
        "TableName": "users_partitioned_tbl",
        "CreationTime": "2024-07-10T11:34:32+00:00",
        "LastAccessTime": "1970-01-01T00:00:00+00:00",
        "StorageDescriptor": {
          "Columns": [
            {
              "Name": "uid",
              "Type": "int"
            },
            {
              "Name": "name",
              "Type": "string"
            },
            {
              "Name": "surname",
              "Type": "string"
            },
            {
              "Name": "state",
              "Type": "string"
            },
            {
              "Name": "city",
              "Type": "string"
            },
            {
              "Name": "address",
              "Type": "string"
            }
          ],
          "Location": "s3://lf-app-data-123456789012/datasets/lf-app-entities/users_partitioned/born_year=1990",
          "InputFormat": "org.apache.hadoop.mapred.TextInputFormat",
          "OutputFormat": "org.apache.hadoop.hive.ql.io.HiveIgnoreKeyTextOutputFormat",
          "Compressed": false,
          "NumberOfBuckets": 0,
          "SerdeInfo": {
            "SerializationLibrary": "org.apache.hadoop.hive.serde2.lazy.LazySimpleSerDe",
            "Parameters": {
              "field.delim": ","
            }
          },
          "BucketColumns": [],
          "SortColumns": [],
          "Parameters": {},
          "StoredAsSubDirectories": false
        },
        "CatalogId": "123456789012"
      },
      "AuthorizedColumns": [
        "address",
        "city",
        "name",
        "state",
        "surname",
        "uid"
      ],
      "IsRegisteredWithLakeFormation": true
    }
  ]
}
Authorized Data
This tab displays a table that shows the columns, rows, and cells that the user is authorized to access.

A cell is marked as Unauthorized if the user has no permissions to access its contents, according to the cell filter definition. You can choose the unauthorized cell to view the relevant cell filter condition.

In this example, the user can’t access the value of column surname in the first row because for the row, state is canada, but the cell can only be accessed when state=’united kingdom’.
If the Only rows with authorized data control is unchecked, rows with all cells set to Unauthorized are also displayed.
All Data
This tab contains a table that contains all the rows and columns in the table (the unfiltered data). This is useful for comparison with authorized data to understand how cell filters are applied to the unfiltered data.

Test Lake Formation permissions
Log out of the application and go to the Amazon Cognito login form, choose Create Account, and create a new user with called user2 (this is mapped in the application to the role lf-app-access-role-2 that we created Lake Formation permissions for in the first post). Get table data and metadata for this user to see how Lake Formation permissions are enforced and so the two users can see different data (on the Authorized Data tab).
The following screenshot shows that the Lake Formation permissions we created grant access to the following data (all rows, all columns) of table users_partitioned_tbl to user2 (mapped to lf-app-access-role-2).

The following screenshot shows that the Lake Formation permissions we created grant access to the following data (all rows, but only city, state, and uid columns) of table users_tbl to user2 (mapped to lf-app-access-role-2).

Considerations for the GraphQL API
You can use the AWS AppSync GraphQL API deployed in this post for other applications; the responses of the GetUnfilteredTableMetadata and GetUnfileteredPartitionsMetadata AWS Glue APIs were fully mapped in the GraphQL schema. You can use the Queries page on the AWS AppSync console to run the queries; this is based on GraphiQL.

You can use the following object to define the query variables:
{
  "db": "lf-app-entities",
  "table": "users_partitioned_tbl",
  "noOfRecs": 30,
  "nonNullRowsOnly": true
}
The following code shows the queries available with input parameters and all fields defined in the schema as output:
  query GetDbs {
    getDbs {
      catalogId
      name
      description
    }
  }

  query GetTablesByDb($db: String!) {
    getTablesByDb(db: $db) {
      Name
      DatabaseName
      Location
      IsPartitioned
    }
  }

  query GetTableData(
    $db: String!
    $table: String!
    $noOfRecs: Int
    $nonNullRowsOnly: Boolean!
  ) {
    getTableData(
      db: $db
      table: $table
      noOfRecs: $noOfRecs
      nonNullRowsOnly: $nonNullRowsOnly
    ) {
      database
      name
      location
      authorizedColumns {
        Name
        Type
      }
      authorizedData
      allColumns {
        Name
        Type
      }
      allData
      filteredCellPh
      cellFilters {
        ColumnName
        RowFilterExpression
      }
    }
  }

  query GetUnfilteredTableMetadata($db: String!, $table: String!) {
    getUnfilteredTableMetadata(db: $db, table: $table) {
      JsonResp
      ApiResp {
        Table {
          Name
          DatabaseName
          Description
          Owner
          CreateTime
          UpdateTime
          LastAccessTime
          LastAnalyzedTime
          Retention
          StorageDescriptor {
            Columns {
              Name
              Type
              Comment
            }
            Location
            AdditionalLocations
            InputFormat
            OutputFormat
            Compressed
            NumberOfBuckets
            SerdeInfo {
              Name
              SerializationLibrary
            }
            BucketColumns
            SortColumns {
              Column
              SortOrder
            }
            Parameters {
              Name
              Value
            }
            SkewedInfo {
              SkewedColumnNames
              SkewedColumnValues
            }
            StoredAsSubDirectories
            SchemaReference {
              SchemaVersionId
              SchemaVersionNumber
            }
          }
          PartitionKeys {
            Name
            Type
            Comment
            Parameters {
              Name
              Value
            }
          }
          ViewOriginalText
          ViewExpandedText
          TableType
          Parameters {
            Name
            Value
          }
          CreatedBy
          IsRegisteredWithLakeFormation
          TargetTable {
            CatalogId
            DatabaseName
            Name
            Region
          }
          CatalogId
          VersionId
          FederatedTable {
            Identifier
            DatabaseIdentifier
            ConnectionName
          }
          ViewDefinition {
            IsProtected
            Definer
            SubObjects
            Representations {
              Dialect
              DialectVersion
              ViewOriginalText
              ViewExpandedText
              ValidationConnection
              IsStale
            }
          }
          IsMultiDialectView
        }
        AuthorizedColumns
        IsRegisteredWithLakeFormation
        CellFilters {
          ColumnName
          RowFilterExpression
        }
        QueryAuthorizationId
        IsMultiDialectView
        ResourceArn
        IsProtected
        Permissions
        RowFilter
      }
    }
  }

  query GetUnfilteredPartitionsMetadata($db: String!, $table: String!) {
    getUnfilteredPartitionsMetadata(db: $db, table: $table) {
      JsonResp
      ApiResp {
        Partition {
          Values
          DatabaseName
          TableName
          CreationTime
          LastAccessTime
          StorageDescriptor {
            Columns {
              Name
              Type
              Comment
            }
            Location
            AdditionalLocations
            InputFormat
            OutputFormat
            Compressed
            NumberOfBuckets
            SerdeInfo {
              Name
              SerializationLibrary
            }
            BucketColumns
            SortColumns {
              Column
              SortOrder
            }
            Parameters {
              Name
              Value
            }
            SkewedInfo {
              SkewedColumnNames
              SkewedColumnValues
            }
            StoredAsSubDirectories
            SchemaReference {
              SchemaVersionId
              SchemaVersionNumber
            }
          }
          Parameters {
            Name
            Value
          }
          LastAnalyzedTime
          CatalogId
        }
        AuthorizedColumns
        IsRegisteredWithLakeFormation
      }
    }
  }
Clean up
To remove the resources created in this post, run the following command:

Refer to Part 1 to clean up the resources created in the first part of this series.
Conclusion
In this post, we showed how to implement a web application that uses a GraphQL API implemented with AWS AppSync and Lambda as the backend for a web application integrated with Lake Formation. You should now have a comprehensive understanding of how to extend the capabilities of Lake Formation by building and integrating your own custom data processing applications.
Try out this solution for yourself, and share your feedback and questions in the comments.
About the Authors
 Stefano Sandonà is a Senior Big Data Specialist Solution Architect at AWS. Passionate about data, distributed systems, and security, he helps customers worldwide architect high-performance, efficient, and secure data platforms.
Francesco Marelli is a Principal Solutions Architect at AWS. He specializes in the design, implementation, and optimization of large-scale data platforms. Francesco leads the AWS Solution Architect (SA) analytics team in Italy. He loves sharing his professional knowledge and is a frequent speaker at AWS events. Francesco is also passionate about music.


 Stefano Sandonà is a Senior Big Data Specialist Solution Architect at AWS. Passionate about data, distributed systems, and security, he helps customers worldwide architect high-performance, efficient, and secure data platforms.
 Francesco Marelli is a Principal Solutions Architect at AWS. He specializes in the design, implementation, and optimization of large-scale data platforms. Francesco leads the AWS Solution Architect (SA) analytics team in Italy. He loves sharing his professional knowledge and is a frequent speaker at AWS events. Francesco is also passionate about music.


 Anand Komandooru is a Principal Cloud Architect at AWS. He joined AWS Professional Services organization in 2021 and helps customers build cloud-native applications on AWS cloud. He has over 20 years of experience building software and his favorite Amazon leadership principle is “
 Rama Krishna Ramaseshu is a Senior Application Architect at AWS. He joined AWS Professional Services in 2022 and with close to two decades of experience in application development and software architecture, he empowers customers to build well architected solutions within the AWS cloud. His favorite Amazon leadership principle is “
 Sachin Vighe is a Senior DevOps Architect at AWS. He joined AWS Professional Services in 2020, and specializes in designing and architecting solutions within the AWS cloud to guide customers through their DevOps and Cloud transformation journey. His favorite leadership principle is “
 Molly Wu is an Associate Cloud Developer at AWS. She joined AWS Professional Services in 2023 and specializes in assisting customers in building frontend technologies in AWS cloud. Her favorite leadership principle is “
 Andrew Yankowsky is a Security Consultant at AWS. He joined AWS Professional Services in 2023, and helps customers build cloud security capabilities and follow security best practices on AWS. His favorite leadership principle is “


