Post Syndicated from Natalie Doerr original https://aws.amazon.com/blogs/security/on-demand-scim-provisioning-of-azure-ad-to-aws-sso-with-powershell/
In this post, I will demonstrate how you can use a PowerShell script to initiate an on-demand synchronization between Azure Active Directory and AWS Single Sign-On (AWS SSO) and avoid the default 40-minute synchronization schedule between both identity providers. This solution helps enterprises quickly synchronize changes made to users, groups, or permissions within Azure AD with AWS SSO. This allows user or permission changes to be quickly reflected in associated AWS accounts.
Prerequisites
You need the following to complete this session:
- AWS SSO configured using the steps outlined in The Next Evolution in AWS Single Sign-On blog post
- An Azure account
- A local machine with Visual Studio Code, PowerShell 7,and Azure Az module installed and configured to connect to Azure Cloud
- The aws-sso-sync-script which can be downloaded from this GitHub repository
This post focuses on the steps needed to set up the on-demand sync solution. You can find specifics on how to set up and use PowerShell and the Azure PowerShell modules at Installing Azure PowerShell.

Figure 1: Triggering the SCIM Endpoint to sync all users and groups
Grant permission to the Graph API to access the Default Directory in Azure AD
To get started, grant the permissions needed for the application to have access to the directory endpoint.
To grant permissions
- Sign in to the Azure Portal and navigate to the Azure AD dashboard.
- From the left navigation pane, select App registrations. If you don’t see your application listed, select the All applications tab.
For this example, I’m using an application named AWS.

Figure 2: Select the AWS app registration
- Choose API permissions from the navigation pane.
- Choose the Add a permission option.

Figure 3: Select the Add API permission
- From the settings page that opens, choose the Microsoft Graph option.

Figure 4: Request API permissions
Under What type of permissions does your application require, select Delegated permissions and enter directory.readwrite.all in the permissions search field. Select Directory.ReadWrite.All and choose Add permissions at the bottom of the page.

Figure 5: Request API permissions – Add permissions
- On the API permissions page, choose Grant admin consent for Default Directory and select Yes.
Figure 6: Grant permission for the account to have administrator permissions


Create a certificate and secret to access the application
To get started, create a certificate and secret which grants secure access to the AWS application.
To create a certificate and secret
- Choose Certificate & secrets from the left navigation menu and then choose New client secret.

Figure 7: Creating a client secret for 1 year
- Select the desired length of the certificate.
- Provide a description and choose Add.
- Copy the value of the certificate that’s generated and save it to use later in this process.
- After you’ve saved the value to use later, select Home from the top left corner of the screen.

Figure 8: Make sure you click Copy to clipboard to store the value of the secret


Create a user with permissions to run the code
Now that you’ve given your application access to the directory, let’s create a user and assign the proper permissions to run the code.
To create a user and assign permissions
- Choose Azure Active Directory from the Azure services list.
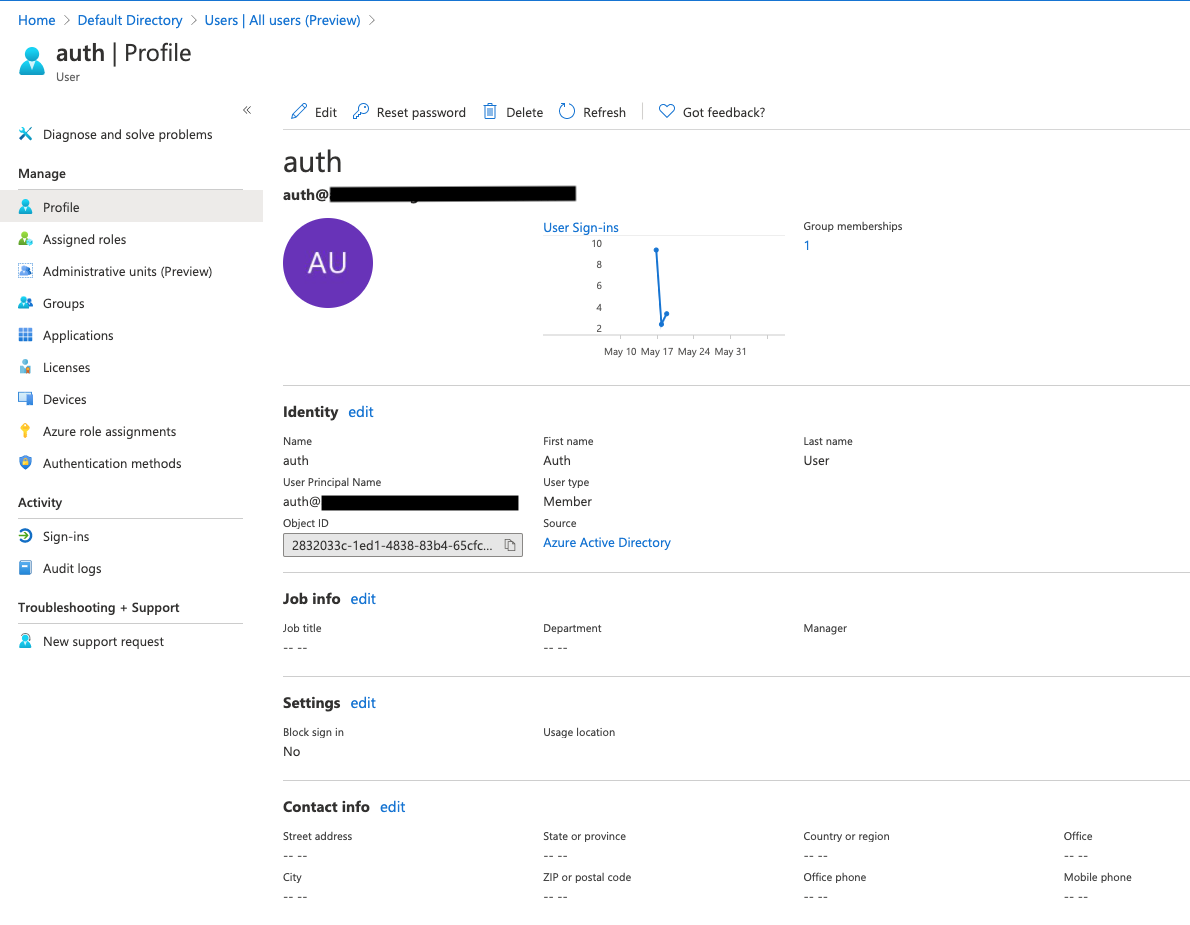
- Choose Users and select New user. The User name, First name, and Last name fields are required. In this example, I set the User name and First name to Auth and the Last name to User.
- Take note of the password that is set for this user and save it to use later.
- Once completed, choose Create.

Figure 9: Create a user in Azure AD
- Select the newly created user from the list.
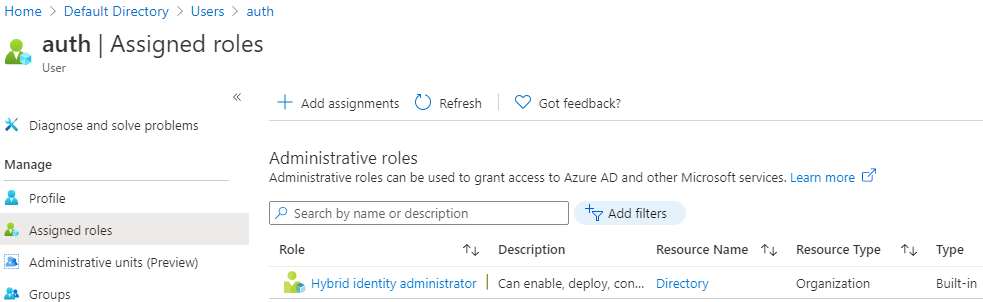
- On the left navigation pane, select Assigned roles.
- Choose Add assignments.
- Choose Hybrid identity administrator and select Add.

Figure 10: Assign the user the role to trigger the API
- Select Default Directory from the top of the navigation pane.
- Choose Enterprise applications.
- Choose the AWS application.
- Select Assign users and groups.

Figure 11: Azure Enterprise applications – Assign users and groups
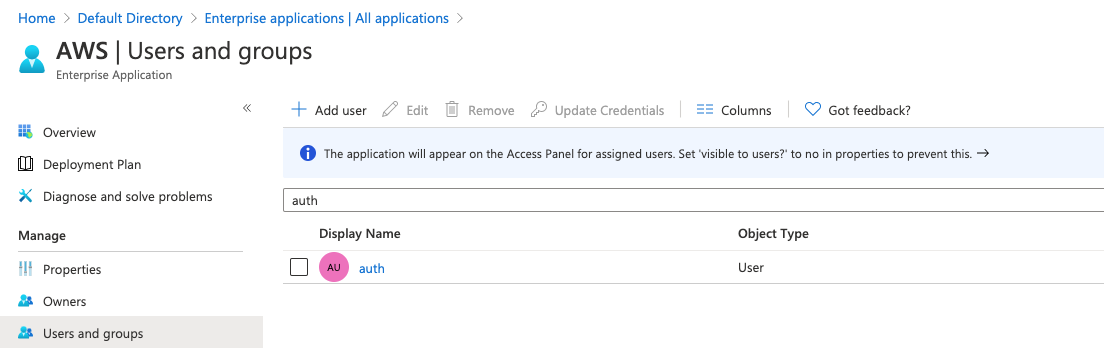
- Choose + Add user at the top of the window.
- Select the user you created earlier. I select Auth as that was the user I created earlier.
- Choose Select and then Assign.

Figure 12: Select the user we created earlier from Figure 9

Figure 13: Assign the user to the application
- Now that you’ve added the user, you can see that the user is assigned to the application.

Figure 14: Screen now showing that the user has been assigned to the application
- It’s recommended to log in to the Azure portal as the user you just created in a new incognito or private browser session. As part of the first log in, you’ll be prompted to change the password.


Prerequisites to trigger the SCIM endpoint
You need the following items to run the PowerShell code that triggers the endpoint.
- From the application registration, retrieve the items shown below. Note that you must use the client secret saved earlier when the certificate was created.
- Tenant ID
- Display name
- Application ID
- Client secret
- User name
- Password
- Copy the items to a notepad in the preceding order so you can enter all of them through a single copy and paste action while running the script.
- From the menu, select Azure Active Directory.
- Choose App registrations and select the AWS App that was set up.
- Copy the Application (client) ID and the Directory (tenant) ID.
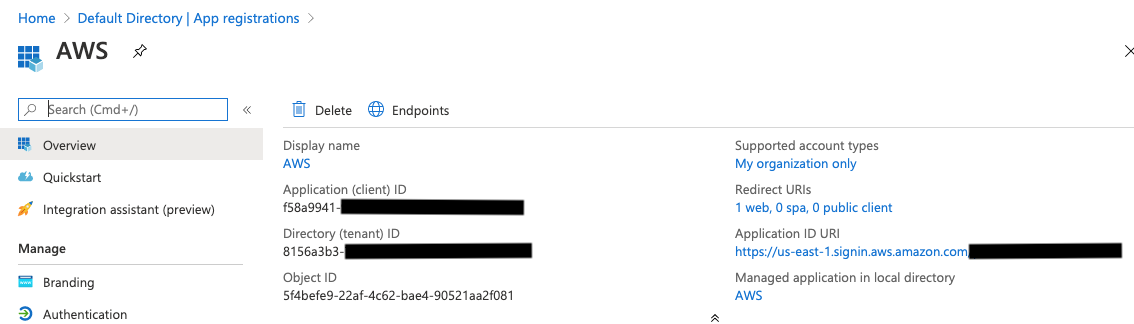
Figure 15: App registration contains all the items needed for the PowerShell script
Trigger the SCIM endpoint with PowerShell
Now that you’ve completed all of the previous steps, you need to copy the code from the GitHub repository to your local machine and run it. We’ve configured the code to run manually, but you can also automate it to trigger an Azure Automation runbook when users are added to Azure through Alerts. You can also configure CloudWatch Events to run a Lambda function at periodic intervals.
To trigger the SCIM endpoint
- Copy the code from the GitHub repository.
- Save the code using the code editor of your choice, or you can download Visual Studio Code. Give the file a user-friendly name, such as Sync.ps1.
- Navigate to the location where you saved the file and run ./sync.ps1.
- When prompted, enter the values from the notepad. You can paste these all at one time so you don’t have to copy and paste each individual item.
Note: When copying and pasting in Windows, choose the PowerShell icon, then Edit > Paste.

Figure 16: Windows Command Prompt – Select Paste to copy all items needed to trigger the sync

After you paste the values into the PowerShell window, you see the script input as shown in the following screenshot. The client secret and password are secure values and are masked for security purposes.
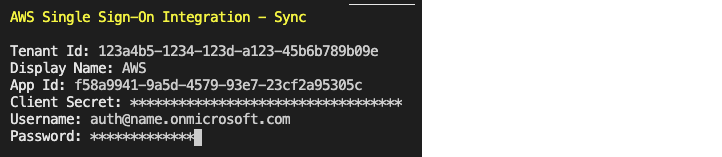
Figure 17: PowerShell script with input values pasted in
After the job has started in PowerShell, two messages are displayed. One indicating that synchronization is starting and a following message when synchronization has completed. Both are shown in the following figure.

Figure 18: Output from a successful run of the PowerShell script
View the synchronization status and logs
To verify that the job ran successfully, you can check the completed time from the Azure portal. You can verify the time the script ran by viewing the completion time along with the current status.
To view the status and logs
- From the menu, choose Azure Active Directory.
- Choose Enterprise applications and select the AWS App.
- From the left navigation menu, choose Provisioning and then choose View provisioning details. This displays the last time the sync completed.

Figure 19: View the Provisioning details about the job

Summary
In this post, I demonstrate how you can use a PowerShell script to trigger the SCIM endpoint to on-demand synchronize Azure AD with AWS Single Sign-On. You can find the code in this GitHub repository and use it to synchronize user and group changes on demand.
If you have feedback about this post, submit comments in the Comments section below.
Want more AWS Security how-to content, news, and feature announcements? Follow us on Twitter.