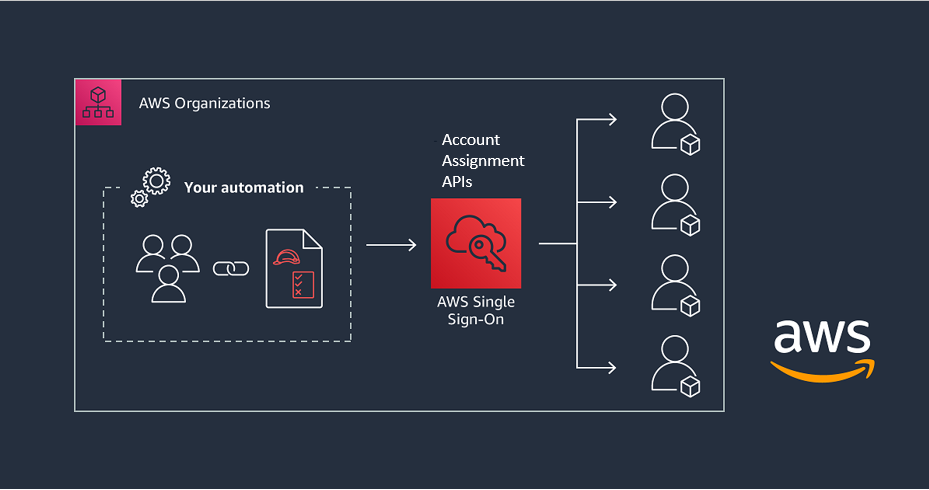
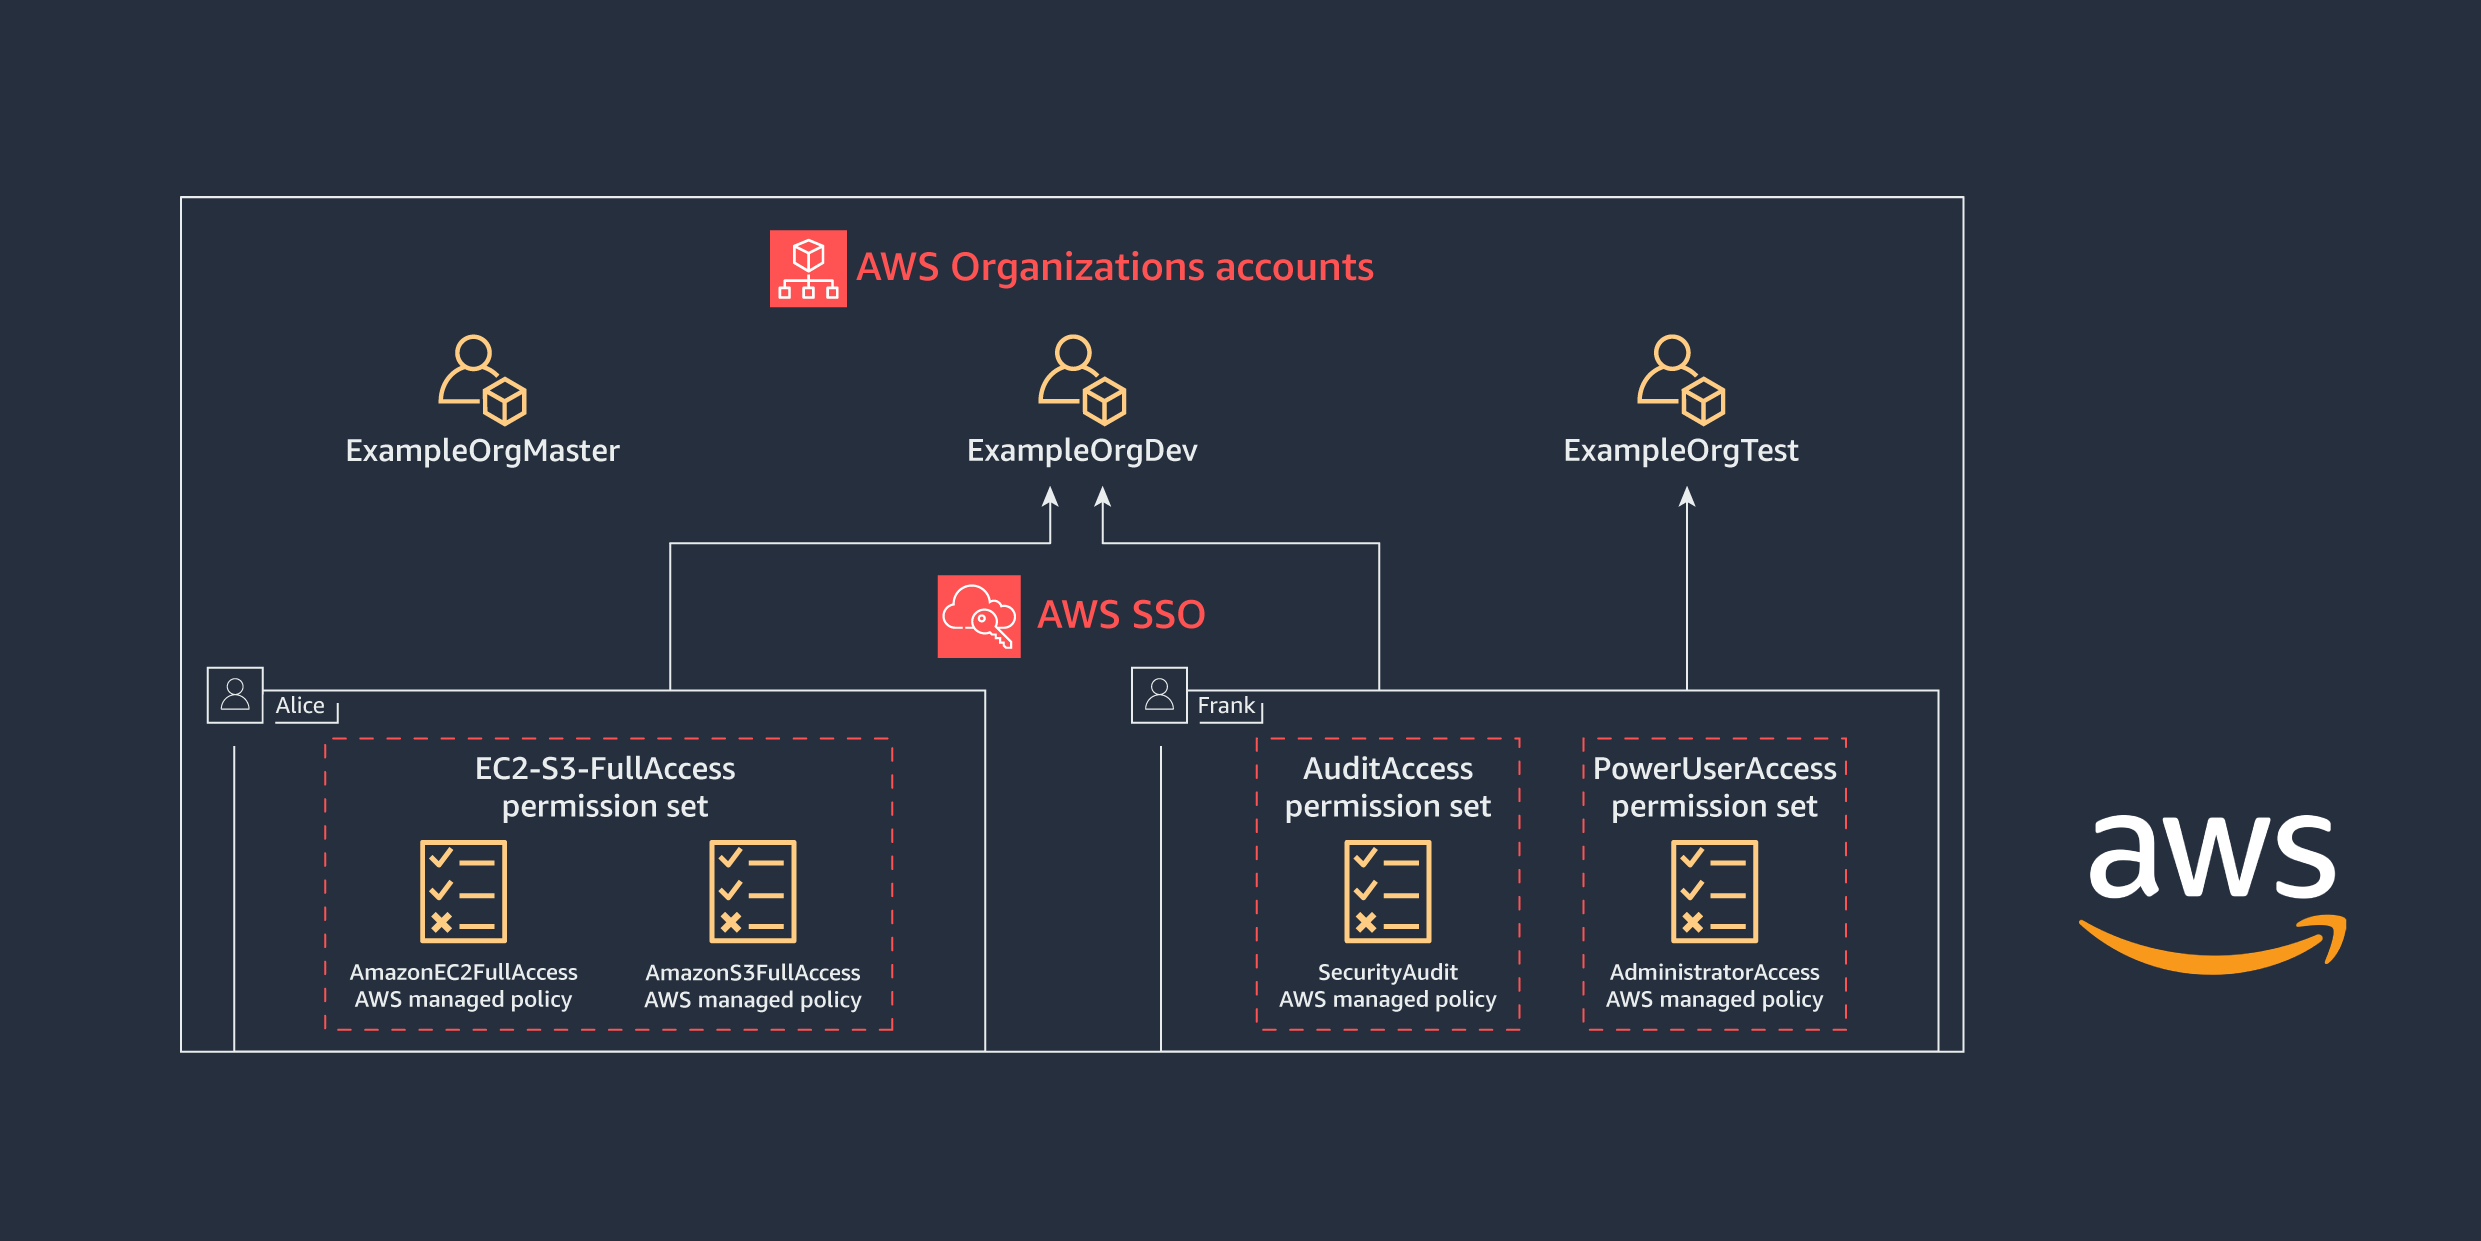
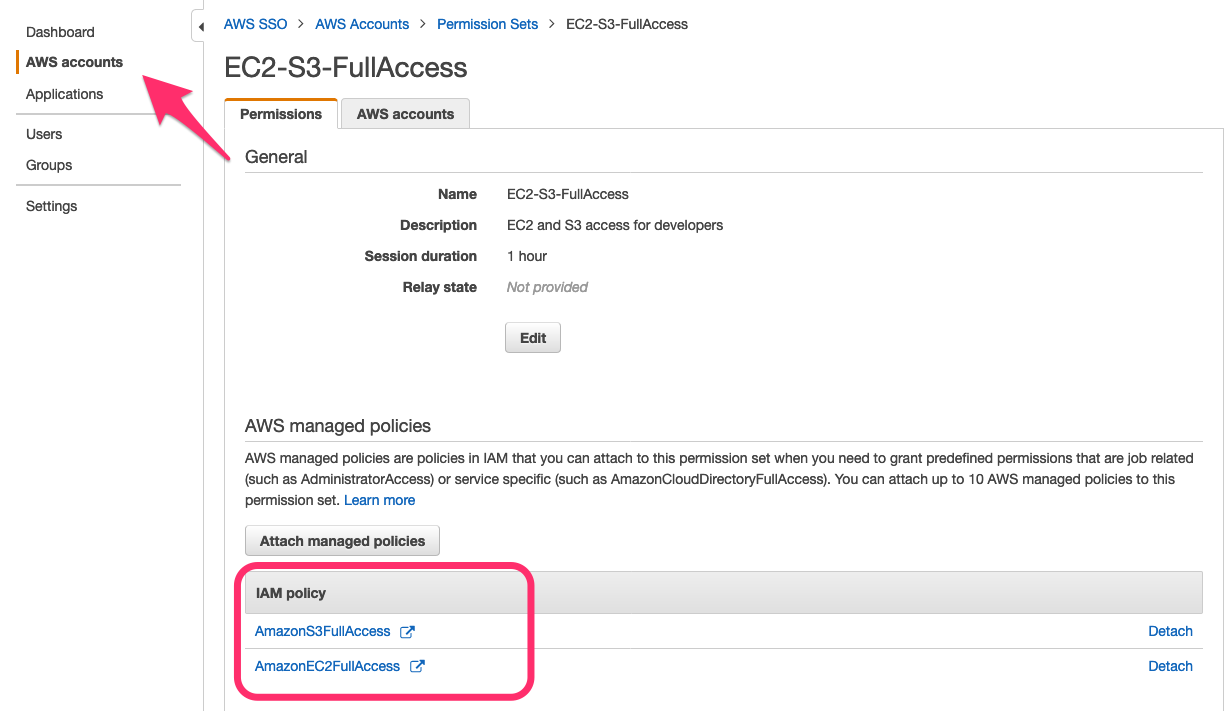
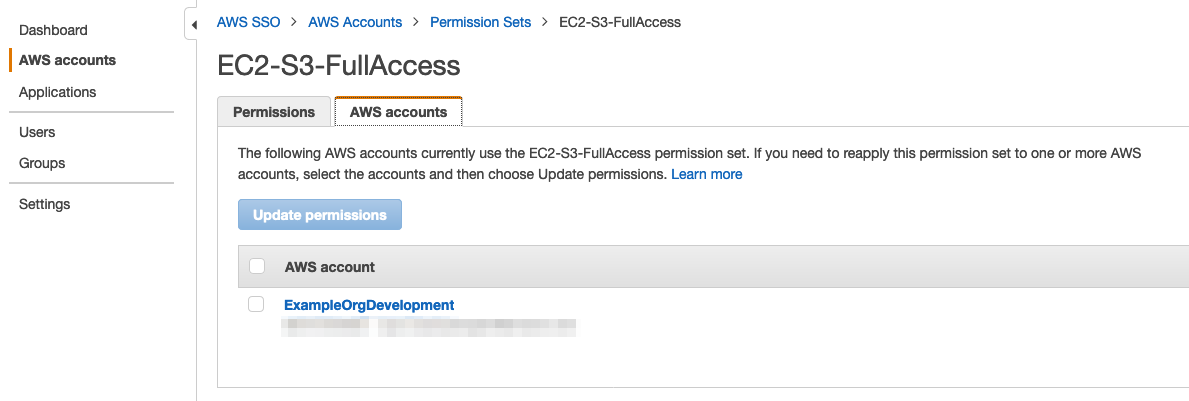
Tag Archives: AWS SSO

How to use customer managed policies in AWS IAM Identity Center for advanced use cases

Post Syndicated from Ron Cully original https://aws.amazon.com/blogs/security/how-to-use-customer-managed-policies-in-aws-single-sign-on-for-advanced-use-cases/

Are you looking for a simpler way to manage permissions across all your AWS accounts? Perhaps you federate your identity provider (IdP) to each account and divide permissions and authorization between cloud and identity teams, but want a simpler administrative model. Maybe you use AWS IAM Identity Center (successor to AWS Single Sign-On) but are running out of room in your permission set policies; or need a way to keep the role models you have while tailoring the policies in each account to reference their specific resources. Or perhaps you are considering IAM Identity Center as an alternative to per-account federation, but need a way to reuse the customer managed policies that you have already created. Great news! Now you can use customer managed policies (CMPs) and permissions boundaries (PBs) to help with these more advanced situations.

In this blog post, we explain how you can use CMPS and PBs with IAM Identity Center to address these considerations. We describe how IAM Identity Center works, how these types of policies work with IAM Identity Center, and how to best use CMPs and PBs with IAM Identity Center. We also show you how to configure and use CMPs in your IAM Identity Center deployment.

IAM Identity Center background

With IAM Identity Center, you can centrally manage access to multiple AWS accounts and business applications, while providing your workplace users a single sign-on experience with your choice of identity system. Rather than manage identity in each account individually, IAM Identity Center provides one place to connect an existing IdP, Microsoft Active Directory Domain Services (AD DS), or workforce users that you create directly in AWS. Because IAM Identity Center integrates with AWS Organizations, it also provides a central place to define your roles, assign them to your users and groups, and give your users a portal where they can access their assigned accounts.

With AWS Identity Center, you manage access to accounts by creating and assigning permission sets. These are AWS Identity and Access Management (IAM) role templates that define (among other things) which policies to include in a role. If you’re just getting started, you can attach AWS managed policies to the permission set. These policies, created by AWS service teams, enable you to get started without having to learn how to author IAM policies in JSON.

For more advanced cases, where you are unable to express policies sufficiently using inline policies, you can create a custom policy in the permission set. When you assign a permission set to users or groups in a specified account, IAM Identity Center creates a role from the template and then controls single sign-on access to the role. During role creation, IAM Identity Center attaches any specified AWS managed policies, and adds any custom policy to the role as an inline policy. These custom policies must be within the 10,240 character IAM quota of inline policies.

IAM provides two other types of custom policies that increase flexibility when managing access in AWS accounts. Customer managed policies (CMPs) are standalone policies that you create and can attach to roles in your AWS accounts to grant or deny access to AWS resources. Permissions boundaries (PBs) provide an advanced feature that specifies the maximum permissions that a role can have. For both CMPs and PBs, you create the custom policy in your account and then attach it to roles. IAM Identity Center now supports attaching both of these to permission sets so you can handle cases where AWS Managed Policies and inline policies may not be enough.

How CMPs and PBs work with IAM Identity Center

Although you can create IAM users to manage access to AWS accounts and resources, AWS recommends that you use roles instead of IAM users for this purpose. Roles act as an identity (sometimes called an IAM principal), and you assign permissions (identity-based policies) to the role. If you use the AWS Management Console or the AWS Command Line Interface to assume a role, you get the permissions of the role that you assumed. With its simpler way to maintain your users and groups in one AWS location and its ability to centrally manage and assign roles, AWS recommends that you use IAM Identity Center to manage access to your AWS accounts.

With this new IAM Identity Center release, you have the option to specify the names of CMPs and one PB in your permission set (role definition). Doing so modifies how IAM Identity Center provisions roles into accounts. When you assign a user or group to a permission set, IAM Identity Center checks the target account to verify that all specified CMPs and the PB are present. If they are all present, IAM Identity Center creates the role in the account and attaches the specified policies. If any of the specified CMPs or the PB are missing, IAM Identity Center fails the role creation.

This all sounds simple enough, but there are important implications to consider.

If you modify the permission set, IAM Identity Center updates the corresponding roles in all accounts to which you assigned the permission set. What is different when using CMPs and PBs is that IAM Identity Center is uninvolved in the creation or maintenance of the CMPs or PBs. It’s your responsibility to make sure that the CMPs and PBs are created and managed in all of the accounts to which you assign permission sets that use the CMPs and PBs. This means that you must be careful in how you name, create, and maintain these policies in your accounts, to avoid unintended consequences. For example, if you do not apply changes to CMPs consistently across all your accounts, the behavior of an IAM Identity Center created role will vary between accounts.

What CMPs do for you

By using CMPs with permission sets, you gain four main benefits:

  1. If you federate to your accounts directly and have CMPs already, you can reuse your CMPs with permission sets in IAM Identity Center. We describe exceptions later in this post.
  2. If you are running out of space in your permission set inline policies, you can add permission sets to increase the aggregate size of your policies.
  3. Policies often need to refer to account-specific resources by Amazon Resource Name (ARN). Designing an inline policy that does this correctly across all your accounts can be challenging and, in some cases, may not be possible. By specifying a CMP in a permission set, you can tailor the CMPs in each of your accounts to reference the resources of the account. When IAM Identity Center creates the role and attaches the CMPs of the account, the policies used by the IAM Identity Center–generated role are now specific to the account. We highlight this example later in this post.
  4. You get the benefit of a central location to define your roles, which gives you visibility of all the policies that are in use across the accounts where you assigned permission sets. This enables you to have a list of CMP and PB names that you should monitor for change across your accounts. This helps you ensure that you are maintaining your policies correctly.

Considerations and best practices

Start simple, avoid complex – If you’re just starting out, try using AWS managed policies first. With managed policies, you don’t need to know JSON policy to get started. If you need more advanced policies, start by creating identity-based inline custom policies in the permission set. These policies are provisioned as inline policies, and they will be identical in all your accounts. If you need larger policies or more advanced capabilities, use CMPs as your next option. In most cases, you can accomplish what you need with inline and customer managed policies. When you can’t achieve your objective using CMPs, use PBs. For information about intended use cases for PBs, see the blog post When and where to use IAM permissions boundaries.

Permissions boundaries don’t constrain IAM Identity Center admins who create permission sets – IAM Identity Center administrators (your staff) that you authorize to create permission sets can create inline policies and attach CMPs and PBs to permission sets, without restrictions. Permissions boundary policies set the maximum permissions of a role and the maximum permissions that the role can grant within an account through IAM only. For example, PBs can set the maximum permissions of a role that uses IAM to create other roles for use by code or services. However, a PB doesn’t set maximum permissions of the IAM Identity Center permission set creator. What does that mean? Suppose you created an IAM Identity Center Admin permission set that has a PB attached, and you assigned it to John Doe. John Doe can then sign in to IAM Identity Center and modify permission sets with any policy, regardless of what you put in the PB. The PB doesn’t restrict the policies that John Doe can put into a permission set.

In short, use PBs only for roles that need to create IAM roles for use by code or services. Don’t use PBs for permission sets that authorize IAM Identity Center admins who create permission sets.

Create and use a policy naming plan – IAM Identity Center doesn’t consider the content of a named policy that you attach to a permission set. If you assign a permission set in multiple accounts, make sure that all referenced policies have the same intent. Failure to do this will result in unexpected and inconsistent role behavior between different accounts. Imagine a CMP named “S3” that grants S3 read access in account A, and another CMP named “S3” that grants S3 administrative permissions over all S3 buckets in account B. A permission set that attaches the S3 policy and is assigned in accounts A and B will be confusing at best, because the level access is quite different in each of the accounts. It’s better to have more specific names, such as “S3Reader” and “S3Admin,” for your policies and ensure they are identical except for the account-specific resource ARNs.

Use automation to provision policies in accounts – Using tools such as AWS CloudFormation stacksets, or other infrastructure-as-code tools, can help ensure that naming and policies are consistent across your accounts. It also helps reduce the potential for administrators to modify policies in undesirable ways.

Policies must match the capabilities of IAM Identity Center – Although IAM Identity Center supports most IAM semantics, there are exceptions:

  1. If you use an identity provider as your identity source, IAM Identity Center passes only PrincipalTag attributes that come through SAML assertions to IAM. IAM Identity Center doesn’t process or forward other SAML assertions to IAM. If you have CMPs or PBs that rely on other information from SAML assertions, they won’t work. For example, IAM Identity Center doesn’t provide multi-factor authentication (MFA) context keys or SourceIdentity.
  2. Resource policies that reference role names or tags as part of trust policies don’t work with IAM Identity Center. You can use resource policies that use attribute-based access control (ABAC). IAM Identity Center role names are not static, and you can’t tag the roles that IAM Identity Center creates from its permission sets.

How to use CMPs with permission sets

Now that you understand permission sets and how they work with CMPs and PBs, let’s take a look at how you can configure a permission set to use CMPs.

In this example, we show you how to use one or more permission sets that attach a CMP that enables Amazon CloudWatch operations to the log group of specified accounts. Specifically, the AllowCloudWatch_permission set attaches a CMP named AllowCloudWatchForOperations. When we assign the permission set in two separate accounts, the assigned users can perform CloudWatch operations against the log groups of the assigned account only. Because the CloudWatch operations policies are in CMPs rather than inline policies, the log groups can be account specific, and you can reuse the CMPs in other permission sets if you want to have CloudWatch operations available through multiple permission sets.

Note: For this blog post, we demonstrate using CMPs by utilizing the IAM Management Console to create policies and assignments. We recommend that after you learn how to do this, you create your policies through automation for production environments. For example, use AWS CloudFormation. The intent of this example is to demonstrate how you can have a policy in two separate accounts that refer to different resources; something that is harder to accomplish using inline policies. The use case itself is not that advanced, but the use of CMPs to have different resources referenced in each account is a more advanced idea. We kept this simple to make it easier to focus on the feature than the use case.

Prerequisites

In this example, we assume that you know how to use the AWS Management Console, create accounts, navigate between accounts, and create customer managed policies. You also need administrative privileges to enable IAM Identity Center and to create policies in your accounts.

Before you begin, enable IAM Identity Center in your AWS Organizations management account in an AWS Region of your choice. You need to create at least two accounts within your AWS Organization. In this example, the account names are member-account and member-account-1. After you set up the accounts, you can optionally configure IAM Identity Center for administration in a delegated member account.

Configure an IAM Identity Center permission set to use a CMP

Follow these four procedures to use a CMP with a permission set:

  1. Create CMPs with consistent names in your target accounts
  2. Create a permission set that references the CMP that you created
  3. Assign groups or users to the permission set in accounts where you created CMPs
  4. Test your assignments

Step 1: Create CMPs with consistent names in your target accounts

In this step, you create a customer managed policy named AllowCloudWatchForOperations in two member accounts. The policy allows your cloud operations users to access a predefined CloudWatch log group in the account.

To create CMPs in your target accounts

  1. Sign into AWS.

    Note: You can sign in to IAM Identity Center if you have existing permission sets that enable you to create policies in member accounts. Alternatively, you can sign in using IAM federation or as an IAM user that has access to roles that enable you to navigate to other accounts where you can create policies. Your sign-in should also give you access to a role that can administer IAM Identity Center permission sets.

  2. Navigate to an AWS Organizations member account.

    Note: If you signed in through IAM Identity Center, use the user portal page to navigate to the account and role. If you signed in by using IAM federation or as an IAM user, choose your sign-in name that is displayed in the upper right corner of the AWS Management Console and then choose switch role, as shown in Figure 1.

    Figure 1: Switch role for IAM user or IAM federation

    Figure 1: Switch role for IAM user or IAM federation

  3. Open the IAM console.
  4. In the navigation pane, choose Policies.
  5. In the upper right of the page, choose Create policy.
  6. On the Create Policy page, choose the JSON tab.
  7. Paste the following policy into the JSON text box. Replace <account-id> with the ID of the account in which the policy is created.

    Tip: To copy your account number, choose your sign-in name that is displayed in the upper right corner of the AWS Management Console, and then choose the copy icon next to the account ID, as shown in Figure 2.

    Figure 2: Copy account number

    Figure 2: Copy account number

    {
        "Version": "2012-10-17",
        "Statement": [
            {
                "Action": [
                    "logs:CreateLogStream",
                    "logs:DescribeLogStreams",
                    "logs:PutLogEvents",
                    "logs:GetLogEvents"
                ],
                "Effect": "Allow",
                "Resource": "arn:aws:logs:us-east-1:<account-id>:log-group:OperationsLogGroup:*"
            },
            {
                "Action": [
                    "logs:DescribeLogGroups"
                ],
                "Effect": "Allow",
                "Resource": "arn:aws:logs:us-east-1:<account-id>:log-group::log-stream:*"
            }
        ]
    }

  8. Choose Next:Tags, and then choose Next:Review.
  9. On the Create Policy/Review Policy page, in the Name field, enter AllowCloudWatchForOperations. This is the name that you will use when you attach the CMP to the permission set in the next procedure (Step 2).
  10. Repeat steps 1 through 7 in at least one other member account. Be sure to replace the <account-id> element in the policy with the account ID of each account where you create the policy. The only difference between the policies in each account is the <account-id> in the policy.

Step 2: Create a permission set that references the CMP that you created

At this point, you have at least two member accounts containing the same policy with the same policy name. However, the ResourceARN in each policy refers to log groups that belong to the respective accounts. In this step, you create a permission set and attach the policy to the permission set. Importantly, you attach only the name of the policy to the permission set. The actual attachment of the policy to the role that IAM Identity Center creates, happens when you assign the permission set to a user or group in Step 3.

To create a permission set that references the CMP

  1. Sign in to the Organizations management account or the IAM Identity Center delegated administration account.
  2. Open the IAM Identity Center console.
  3. In the navigation pane, choose Permission Sets.
  4. On the Select Permission set type screen, select Custom permission Set and choose Next.
    Figure 3: Select custom permission set

    Figure 3: Select custom permission set

  5. On the Specify policies and permissions boundary page, expand the Customer managed policies option, and choose Attach policies.
    Figure 4: Specify policies and permissions boundary

    Figure 4: Specify policies and permissions boundary

  6. For Policy names, enter the name of the policy. This name must match the name of the policy that you created in Step 1. In our example, the name is AllowCloudWatchForOperations. Choose Next.
  7. On the Permission set details page, enter a name for your permission set. In this example, use AllowCloudWatch_PermissionSet. You can alspecify additional details for your permission sets, such as session duration and relay state (these are a link to a specific AWS Management Console page of your choice).
    Figure 5: Permission set details

    Figure 5: Permission set details

  8. Choose Next, and then choose Create.

Step 3: Assign groups or users to the permission set in accounts where you created your CMPs

In the preceding steps, you created a customer managed policy in two or more member accounts, and a permission set with the customer managed policy attached. In this step, you assign users to the permission set in your accounts.

To assign groups or users to the permission set

  1. Sign in to the Organizations management account or the IAM Identity Center delegated administration account.
  2. Open the IAM Identity Center console.
  3. In the navigation pane, choose AWS accounts.
    Figure 6: AWS account

    Figure 6: AWS account

  4. For testing purposes, in the AWS Organization section, select all the accounts where you created the customer managed policy. This means that any users or groups that you assign during the process will have access to the AllowCloudWatch_PermissionSet role in each account. Then, on the top right, choose Assign users or groups.
  5. Choose the Users or Groups tab and then select the users or groups that you want to assign to the permission set. You can select multiple users and multiple groups in this step. For this example, we recommend that you select a single user for which you have credentials, so that you can sign in as that user to test the setup later. After selecting the users or groups that you want to assign, choose Next.
    Figure 7: Assign users and groups to AWS accounts

    Figure 7: Assign users and groups to AWS accounts

  6. Select the permission set that you created in Step 2 and choose Next.
  7. Review the users and groups that you are assigning and choose Submit.
  8. You will see a message that IAM Identity Center is configuring the accounts. In this step, IAM Identity Center creates roles in each of the accounts that you selected. It does this for each account, so it looks in the account for the CMP that you specified in the permission set. If the name of the CMP that you specified in the permission set matches the name that you provided when creating the CMP, IAM Identity Center creates a role from the permission set. If the names don’t match or if the CMP isn’t present in the account to which you assigned the permission set, you see an error message associated with that account. After successful submission, you will see the following message: We reprovisioned your AWS accounts successfully and applied the updated permission set to the accounts.

Step 4: Test your assignments

Congratulations! You have successfully created CMPs in multiple AWS accounts, created a permission set and attached the CMPs by name, and assigned the permission set to users and groups in the accounts. Now it’s time to test the results.

To test your assignments

  1. Go to the IAM Identity Center console.
  2. Navigate to the Settings page.
  3. Copy the user portal URL, and then paste the user portal URL into your browser.
  4. At the sign-in prompt, sign in as one of the users that you assigned to the permission set.
  5. The IAM Identity Center user portal shows the accounts and roles that you can access. In the example shown in Figure 8, the user has access to the AllowCloudWatch_PermissionSet created in two accounts.
    Figure 8: User portal

    Figure 8: User portal

    If you choose AllowCloudWatch_PermissionSet in the member-account, you will have access to the CloudWatch log group in the member-account account. If you choose the role in member-account-1, you will have access to CloudWatch Log group in member-account-1.

  6. Test the access by choosing Management Console for the AllowCloudWatch_PermissionSet in the member-account.
  7. Open the CloudWatch console.
  8. In the navigation pane, choose Log groups. You should be able to access log groups, as shown in Figure 9.
    Figure 9: CloudWatch log groups

    Figure 9: CloudWatch log groups

  9. Open the IAM console. You shouldn’t have permissions to see the details on this console, as shown in figure 10. This is because AllowCloudWatch_PermissionSet only provided CloudWatch log access.
    Figure 10: Blocked access to the IAM console

    Figure 10: Blocked access to the IAM console

  10. Return to the IAM Identity Center user portal.
  11. Repeat steps 4 through 8 using member-account-1.

Answers to key questions

What happens if I delete a CMP or PB that is attached to a role that IAM Identity Center created?
IAM prevents you from deleting policies that are attached to IAM roles.

How can I delete a CMP or PB that is attached to a role that IAM Identity Center created?
Remove the CMP or PB reference from all your permission sets. Then re-provision the roles in your accounts. This detaches the CMP or PB from IAM Identity Center–created roles. If the policies are unused by other IAM roles in your account or by IAM users, you can delete the policy.

What happens if I modify a CMP or PB that is attached to an IAM Identity Center provisioned role?
The IAM Identity Center role picks up the policy change the next time that someone assumes the role.

Conclusion

In this post, you learned how IAM Identity Center works with customer managed policies and permissions boundaries that you create in your AWS accounts. You learned different ways that this capability can help you, and some of the key considerations and best practices to succeed in your deployments. That includes the principle of starting simple and avoiding unnecessarily complex configurations. Remember these four principles:

  1. In most cases, you can accomplish everything you need by starting with custom (inline) policies.
  2. Use customer managed policies for more advanced cases.
  3. Use permissions boundary policies only when necessary.
  4. Use CloudFormation to manage your customer managed policies and permissions boundaries rather than having administrators deploy them manually in accounts.

To learn more about this capability, see the IAM Identity Center User Guide. If you have feedback about this post, submit comments in the Comments section below. If you have questions about this post, start a new thread on the AWS IAM re:Post or contact AWS Support.

Want more AWS Security news? Follow us on Twitter.

Ron Cully

Ron s a Principal Product Manager at AWS where he leads feature and roadmap planning for workforce identity products at AWS. Ron has over 20 years of industry experience in product and program management of networking and directory related products. He is passionate about delivering secure, reliable solutions that help make it easier for customers to migrate directory aware applications and workloads to the cloud.

Nitin Kulkarni

Nitin Kulkarni

Nitin is a Solutions Architect on the AWS Identity Solutions team. He helps customers build secure and scalable solutions on the AWS platform. He also enjoys hiking, baseball and linguistics.

Scale your workforce access management with AWS IAM Identity Center (previously known as AWS SSO)

Post Syndicated from Ron Cully original https://aws.amazon.com/blogs/security/scale-your-workforce-access-management-with-aws-iam-identity-center-previously-known-as-aws-sso/

AWS Single Sign-On (AWS SSO) is now AWS IAM Identity Center. Amazon Web Services (AWS) is changing the name to highlight the service’s foundation in AWS Identity and Access Management (IAM), to better reflect its full set of capabilities, and to reinforce its recommended role as the central place to manage access across AWS accounts and applications. Although the technical capabilities of the service haven’t changed with this announcement, we want to take the opportunity to walk through some of the important features that drive our recommendation to consider IAM Identity Center your front door into AWS.

If you’ve worked with AWS accounts, chances are that you’ve worked with IAM. This is the service that handles authentication and authorization requests for anyone who wants to do anything in AWS. It’s a powerful engine, processing half a billion API calls per second globally, and it has underpinned and secured the growth of AWS customers since 2011. IAM provides authentication on a granular basis—by resource, within each AWS account. Although this gives you unsurpassed ability to tailor permissions, it also requires that you establish permissions on an account-by-account basis for credentials (IAM users) that are also defined on an account-by-account basis.

As AWS customers increasingly adopted a multi-account strategy for their environments, in December 2017 we launched AWS Single Sign-On (AWS SSO)—a service built on top of IAM to simplify access management across AWS accounts. In the years since, customer adoption of multi-account AWS environments continued to increase the need for centralized access control and distributed access management. AWS SSO evolved accordingly, adding integrations with new identity providers, AWS services, and applications; features for the consistent management of permissions at scale; multiple compliance certifications; and availability in most AWS Regions. The variety of use cases supported by AWS SSO, now known as AWS IAM Identity Center, makes it our recommended way to manage AWS access for workforce users.

IAM Identity Center, just like AWS SSO before it, is offered at no extra charge. You can follow along with our walkthrough in your own console by choosing Getting started on the console main page. If you don’t have the service enabled, you will be prompted to choose Enable IAM Identity Center, as shown in Figure 1.

Figure 1: IAM Identity Center Getting Started page

Figure 1: IAM Identity Center Getting Started page

Freedom to choose your identity source

Once you’re in the IAM Identity Center console, you can choose your preferred identity source for use across AWS, as shown in Figure 2. If you already have a workforce directory, you can continue to use it by connecting, or federating, it. You can connect to the major cloud identity providers, including Okta, Ping Identity, Azure AD, JumpCloud, CyberArk, and OneLogin, as well as Microsoft Active Directory Domain Services. If you don’t have or don’t want to use a workforce directory, you have the option to create users in Identity Center. Whichever source you decide to use, you connect or create it in one place for use in multiple accounts and AWS or SAML 2.0 applications.

Figure 2 Choosing and connecting your identity source

Figure 2 Choosing and connecting your identity source

Management of fine-grained permissions at scale

As noted before, IAM Identity Center builds on the per-account capabilities of IAM. The difference is that in IAM Identity Center, you can define and assign access across multiple AWS accounts. For example, permission sets create IAM roles and apply IAM policies in multiple AWS accounts, helping to scale the access of your users securely and consistently.

You can use predefined permission sets based on AWS managed policies, or custom permission sets, where you can still start with AWS managed policies but then tailor them to your needs.

Recently, we added the ability to use IAM customer managed policies (CMPs) and permissions boundary policies as part of Identity Center permission sets, as shown in Figure 3. This helps you improve your security posture by creating larger and finer-grained policies for least privilege access and by tailoring them to reference the resources of the account to which they are applied. By using CMPs, you can maintain the consistency of your policies, because CMP changes apply automatically to the permission sets and roles that use the CMP. You can govern your CMPs and permissions boundaries centrally, and auditors can find, monitor, and review them in one place. If you already have existing CMPs for roles you manage in IAM, you can reuse them without the need to create, review, and approve new inline policies.

Figure 3: Specify permission sets in IAM Identity Center

Figure 3: Specify permission sets in IAM Identity Center

By default, users and permission sets in IAM Identity Center are administered by the management account in an organization in AWS Organizations. This management account has the power and authority to manage member accounts in the organization as well. Because of the power of this account, it is important to exercise least privilege and tightly control access to it. If you are managing a complex organization supporting multiple operations or business units, IAM Identity Center allows you to delegate a member account that can administer user permissions, reducing the need to access the AWS Organizations management account for daily administrative work.

One place for application assignments

If your workforce uses Identity Center enabled applications, such as Amazon Managed Grafana, Amazon SageMaker Studio, or AWS Systems Manager Change Manager, you can assign access to them centrally, through IAM Identity Center, and your users can have a single sign-on experience.

If you do not have a separate cloud identity provider, you have the option to use IAM Identity Center as a single place to manage user assignments to SAML 2.0-based cloud applications, such as top-tier customer relationship management (CRM) applications, document collaboration tools, and productivity suites. Figure 4 shows this option.

Figure 4: Assign users to applications in IAM Identity Center

Figure 4: Assign users to applications in IAM Identity Center

Conclusion

IAM Identity Center (the successor to AWS Single Sign-On) is where you centrally create or connect your workforce users once, and manage their access to multiple AWS accounts and applications. It’s our recommended front door into AWS, because it gives you the freedom to choose your preferred identity source for use across AWS, helps you strengthen your security posture with consistent permissions across AWS accounts and applications, and provides a convenient experience for your users. Its new name highlights the service’s foundation in IAM, while also reflecting its expanded capabilities and recommended role.

Learn more about IAM Identity Center. If you have questions about this post, start a new thread on the IAM Identity Center forum page.

Want more AWS Security news? Follow us on Twitter.

Ron Cully

Ron is a Principal Product Manager at AWS where he leads feature and roadmap planning for workforce identity products at AWS. Ron has over 20 years of industry experience in product and program management of networking and directory related products. He is passionate about delivering secure, reliable solutions that help make it easier for customers to migrate directory aware applications and workloads to the cloud.

Build a strong identity foundation that uses your existing on-premises Active Directory

Post Syndicated from Michael Miller original https://aws.amazon.com/blogs/security/build-a-strong-identity-foundation-that-uses-your-existing-on-premises-active-directory/

This blog post outlines how to use your existing Microsoft Active Directory (AD) to reliably authenticate access to your Amazon Web Services (AWS) accounts, infrastructure running on AWS, and third-party applications. The architecture we describe is designed to be highly available and extends access to your existing AD to AWS, enabling your users to use their existing credentials to access authorized AWS resources and applications.

Many customers rely on AD as their single source of truth for IT identity management. HR automation processes are often already in place to automatically add, update, and remove employee access within an organization’s AD as staffing changes occur. Using a single source of truth as the basis for all authentication and authorization, both on-premises and in the cloud, makes it easier to manage access across multiple applications and services, because you are creating, managing, and revoking access from a single location. For example, if someone leaves your organization, you can revoke access for all applications and services (including AWS accounts) from one location. Additionally, this reduces risks associated with stranded or forgotten credentials, or users needing to remember multiple different sets of credentials.

Microsoft Active Directory (AD) is deployed on Microsoft Windows Server servers called domain controllers, which replicate the contents of the directory between the domain controllers that are hosting the AD domain. Multiple domain controllers are deployed within a domain to improve the availability and performance of the directory. The AD infrastructure should be designed to provide sufficiently high levels of availability and performance, because it governs access to your organization’s IT resources. This typically requires the placement of at least one domain controller in every customer hosting location, because the lack of availability of your identity store is likely to cause authentication and authorization failures, which in turn prevent access to resources.

These design principles align with the Security Pillar of the AWS Well-Architected Framework, which is focused on implementing a strong identity foundation. The Security Pillar guidance states that you should centralize identity management and aim to eliminate reliance on long-term static credentials. By using your existing AD, you can benefit from centralized identity management and your existing group-based permissions for access to your AWS accounts. Applications that are running on domain-joined servers can use their AD service account credentials when they access other domain-joined resources, which removes the need for those credentials to be stored in application configuration files. As your AWS usage grows, it is important to give serious consideration to effective identity management, both for access to AWS and AWS resources, and for your instances that are running on AWS.

By extending your existing Active Directory to AWS, you can continue to use your existing Active Directory user credentials and group policies to manage your Microsoft Windows Server servers, whether those servers are running on-premises or on AWS, and extend these capabilities to authenticate and authorize access to the AWS Management Console and third-party applications.

This post covers networking requirements and connectivity setup to enable network connectivity to your on-premises AD; the approach to extending your AD to AWS; integrating AWS Single Sign-On with your AD; and joining Amazon Elastic Compute Cloud (Amazon EC2) instances to AD. As part of the setup, you will add additional domain controllers running on Amazon EC2 instances to your existing AD, for availability and latency reasons. You will also build a resource forest to enable your existing AD identities to access AD-integrated AWS services and resources. This enables you to have a highly available single identity source as the source of truth for your user authentication.

Networking prerequisites to extend your Active Directory to AWS

To enable Active Directory–related network communication, network connectivity needs to be established between your on-premises network and your AWS environment. You need to ensure there is connectivity between the on-premises network that is hosting your existing domain controllers and the Amazon Virtual Private Cloud (Amazon VPC) VPC that will host your AD infrastructure on AWS. Typically, hybrid network connectivity is configured within a network account within your organization, where the multiple AWS accounts within your organization are managed by using AWS Organizations. This network account effectively sits between your on-premises network and the resources, including the AD infrastructure, that are deployed in AWS.

You can provide connectivity between your on-premises network and your network account by using AWS Site-to-Site VPN or AWS Direct Connect connections. For an overview of the options to connect your on-premises network to AWS, refer to Amazon Virtual Private Cloud Connectivity Options. The necessary routing and firewall rules need to be configured to allow connectivity between these subnets and the on-premises network that is hosting your existing domain controllers. AWS recommends that you have highly resilient, fault-tolerant connectivity with dynamic routing between your on-premises network and your AWS network. You can achieve high resiliency through the use of redundant AWS Direct Connect connections, or, for less critical workloads, a VPN connection might offer sufficient resilience.

We recommend AWS Transit Gateway to provide connectivity between your AWS accounts. A transit gateway will be in your network account and then shared with your other AWS accounts that have VPCs that require access to on-premises networks or other VPCs. This enables a hub and spoke network architecture, which is used to provide connectivity both between your VPCs as needed and between your VPCs and your on-premises network. You will create a VPC, which we will refer to within this blog as the endpoint VPC, with subnets across two Availability Zones, within the network account. This endpoint VPC will be used later by Amazon Route 53 outbound endpoints for DNS resolution of AD-hosted DNS zones. Other documentation might refer to this endpoint VPC by alternative names, such as outbound VPC or egress VPC.

Your AD infrastructure that is running on AWS is typically deployed within a shared services account, sometimes referred to as an operations account. Within this shared services account, you will create a shared services VPC with at least two subnets within different Availability Zones to host your domain controller infrastructure on AWS. Your domain controller availability is increased when your architecture is configured to use multiple Availability Zones. You will attach this shared services VPC to the transit gateway that is shared from your network account. This VPC attachment provides connectivity between this VPC and your on-premises network through the transit gateway and network account. You will need to configure the subnet route table(s) and transit gateway route table(s) appropriately to provide IP connectivity between the shared services VPC and your on-premises network.

The sample architecture shown in Figure 1 illustrates the use of a transit gateway with two AWS Direct Connect connections to provide resilient connectivity between an on-premises network, the network account, and a VPC within the shared services account.

Figure 1: Foundational network connectivity between on-premises and AWS VPCs

Figure 1: Foundational network connectivity between on-premises and AWS VPCs

Active Directory relies heavily on Domain Name System (DNS) services and typically hosts its own DNS services on domain controllers. To establish name resolution of your AD-hosted DNS domains from within your VPCs, you should use Route 53 Resolver with outbound resolver endpoints and forwarding rules. Forwarding rules specify the domain name queries to forward from your VPCs to DNS servers that are authoritative for your AD DNS names. The queries will be forwarded through the outbound endpoints. The outbound endpoints will be configured in the network account on the endpoint VPC, and use the previously configured network connectivity to communicate with your existing DNS servers. You will configure your existing DNS servers as targets in the forwarding rules. Configuring Route 53 Resolver with the appropriate forwarding rules will help to enable seamless DNS resolution between your on-premises and AWS hosted resources. You need to share the Route 53 Resolver rules with your organization so that they can be used by your other AWS accounts. These shared rules are then associated with your VPCs, which need to be able to resolve names within AD-hosted DNS domains. Refer to the AWS Hybrid DNS with Active Directory technical guide for detailed step-by-step configuration guidance.

Figure 2 shows a sample flow of a DNS query from an Amazon Elastic Compute Cloud (Amazon EC2) instance through Route 53 Resolver and an outbound interface when resolving an on-premises domain name that matches a forwarding rule. In this example, the domain controllers are also the DNS servers, but splitting the DNS and AD servers is also fully supported.

Figure 2: Flow of a DNS query matching a forwarding rule through a Route 53 outbound endpoint

Figure 2: Flow of a DNS query matching a forwarding rule through a Route 53 outbound endpoint

The flow is as follows:

  1. An Amazon EC2 instance sends a DNS request for an internal name, such as ad.example.com, to the Route 53 Resolver address within the VPC.
  2. Route 53 matches this query against a forwarding rule and directs the query through the configured outbound interface.
  3. The query is sent from the outbound interface towards the target IP address, configured in the forwarding rule, of a server that is authoritative for the domain name.
  4. This target DNS server receives the query and responds.

Extend your Active Directory to AWS

AWS offers multiple options for hosting Active Directory on AWS, which are discussed in detail in the Active Directory Domain Services on AWS Design and Planning Guide. This blog post incorporates both the option of running Active Directory on Amazon EC2 and the AWS Managed Microsoft Active Directory option from that guide. The architecture covered in this post is recommended if:

To extend your existing AD to AWS, domain controllers on Amazon EC2 instances are required, because AWS Managed Microsoft AD does not support being added to an existing forest. An AWS Managed Microsoft AD resource forest is required to enable integration with AWS services that offer AD integration. This is discussed in more detail in the following sections.

Extend your on-premises AD to AWS

Your first step is to build additional AD domain controllers for your existing AD domain(s) on Amazon EC2 instances that are running Microsoft Windows Server. You would then manage these domain controllers along with your existing domain controllers. By running additional domain controllers within AWS, you remove dependencies on network links and improve reliability and performance of your directory for infrastructure that is running within AWS. Communication between the domain controllers and other domain-joined resources within AWS is designed to remain within the AWS Region. AWS recommends that a minimum of two domain controllers, spread across multiple Availability Zones for resilience, are deployed. You should deploy the domain controllers into the subnets within the shared services VPC.

Depending on your capacity planning considerations and availability goals, you may choose to deploy more than two domain controllers. The number of users, servers, and applications that access your directory will influence the required number of domain controllers. Security considerations, including the required TCP/IP ports, and management options are discussed in the blog post Securely extend and access on-premises Active Directory domain controllers in AWS.

These new domain controllers will be in a new AD site, which includes all your VPC CIDR blocks within your chosen AWS Region. In Active Directory, a site represents a group of IP subnets that are connected with fast and highly reliable network connectivity. Site information is used to locate domain controllers closest to the client, to reduce latency and unnecessary network traffic. AWS recommends that your VPCs within an AWS Region belong to the same new Active Directory site, consisting only of your IP ranges within the chosen AWS Region, and that consistent site names are used in all AD forests that are connected by trusts. Further details are available in the section Designing Active Directory sites and services topology in Active Directory Domain Services on AWS and in Designing the Site Topology.

Update targets in Route 53 Resolver rules

After you have deployed AD-integrated DNS servers to these domain controllers and opened the required TCP/IP ports on the associated security groups, you can update the targets in your Route 53 Resolver forwarding rules to use the IP addresses of these servers. This will improve performance and reliability of DNS resolution, by removing the need for DNS resolution traffic to flow between AWS and on-premises infrastructure.

Figure 3 shows Amazon EC2 instances that are configured as AD domain controllers within a shared services VPC. After they are configured, these domain controllers will replicate with the on-premises domain controllers, using the connectivity that is provided through the transit gateway.

Figure 3: On-premises AD extended to AWS by deploying additional domain controllers

Figure 3: On-premises AD extended to AWS by deploying additional domain controllers

Build a resource forest for AWS hosted infrastructure and applications

To benefit from seamless domain joins for Windows-based or Linux-based EC2 instances, Amazon RDS Windows-based authentication, and support for AWS services such as Amazon Chime and Amazon WorkSpaces, you must build a resource forest on AWS by using AWS Directory Service for Microsoft Active Directory, also referred to as AWS Managed Microsoft AD. You first set up an AWS Managed Microsoft AD directory as a resource forest, and then configure a trust with your existing on-premises AD forest.

When you select and launch this directory type, it is created as a highly available pair of domain controllers that are connected to your virtual private cloud (VPC). The domain controllers run in different Availability Zones in your choice of AWS Region. Host monitoring and recovery, data replication, snapshots, and software updates are automatically configured and managed for you. AWS Managed Microsoft AD is available in Standard and Enterprise Editions.

Enterprise Edition is recommended for all but the smallest environments, because the directory can then be shared with a larger number of AWS accounts. Enterprise Edition also allows the AWS Managed Microsoft AD directory to be replicated across multiple AWS Regions if required. This AWS Managed Microsoft AD should be deployed into your shared services account. The domain controllers should be deployed into the subnets within the shared services VPC. After you have deployed your AWS Managed Microsoft AD directory, you create a trust between this new forest and your existing on-premises forest, to enable access by existing AD users to resources within the new directory. Further information about trusts and AWS Managed Microsoft AD is available at Everything you wanted to know about trusts with AWS Managed Microsoft AD, including when to use a one-way or two-way trust. A two-way trust is recommended, because it will allow your AWS accounts to use a wider range of AD-integrated AWS services, such as AWS Single Sign-On, Amazon Chime, Amazon Connect, Amazon QuickSight, Amazon WorkSpaces, and AWS Transfer Family. Ensure that you update the default AD site name to match the name of the site for your AWS Region in your existing forest, and ensure that your sites have the correct site links and subnet associations to enable efficient location of domain controllers.

The AWS Managed Microsoft AD will be shared with your accounts within your organization to enable your other AWS accounts to access this directory and benefit from the features and services outlined previously.

With correct AD site configuration in both forests, communication between the AWS Managed Microsoft AD domain controllers and other domain-joined resources within AWS, and your existing domain’s domain controllers, remains within the chosen AWS Region. This is designed to keep your data within AWS in the country of your chosen AWS Region, to help to address possible data residency concerns.

An example of this architecture is depicted in Figure 4.

Figure 4: AWS Managed Microsoft AD resource forest with trust to on-premises AD

Figure 4: AWS Managed Microsoft AD resource forest with trust to on-premises AD

Manage access to your AWS accounts

AWS Single Sign-On (AWS SSO) enables you to centrally manage access across your AWS organization. You can choose to manage access just to your AWS accounts, or to your cloud applications as well. You can create user identities directly in AWS SSO, access your existing identifies by connecting AWS SSO to your existing Active Directory domain, or you can federate them from your Active Directory Federation Services (AD FS) or a standards-based identity provider, such as Okta Universal Directory or Azure AD. Your workforce users get a user portal to access all of their assigned AWS accounts or cloud applications. AWS SSO can be flexibly configured to run alongside or replace AWS account access management through AWS Identity and Access Management (IAM).

Identity federation is a system of trust between two parties for the purpose of authenticating third parties, such as users, and conveying information that is needed to authorize their access to resources. In this system, an identity provider (IdP) is responsible for user authentication, and a service provider (SP), such as a service or an application, controls access to resources. AWS SSO automates the setup of the identity federation that is used to provide authorized users access to your AWS accounts. AWS SSO is acting as an IdP when AWS SSO is connected to your AD and used to give access to your AWS accounts.

Although you can create users and groups directly within AWS SSO, a best practice is to use your existing identity single source of truth to simplify user and permission management. Connecting AWS SSO through to your Active Directory, which has been extended to AWS, will allow authentication of users for access to your AWS accounts to take place entirely within the AWS Region. This practice is designed to reduce dependencies on hybrid networking and resources located on-premises or in other hosting locations.

You should enforce secure access to the user portal, AWS SSO integrated apps, and the AWS CLI by enabling multi-factor authentication (MFA). AWS SSO MFA supports various MFA types, including client-side authenticator apps, security keys, and built-in authenticators. Using MFA is recommended as part of configuring strong sign-in mechanisms.

Connect AWS SSO to your Active Directory

You can connect AWS SSO to your Active Directory on AWS by using AD Connector, or through an AWS Managed Microsoft AD. Using AD Connector is often the primary mechanism considered by customers, but given the lack of support for multi-domain environments as used in this post, this blog post recommends using AWS Managed Microsoft AD.

When you use AWS Managed Microsoft AD with AWS SSO, AWS SSO requires two-way trusts to be in place between this AWS Managed Microsoft AD forest and any other forest that contains the user identities that will authenticate through AWS SSO.

Before AWS SSO supported delegated administration, AWS SSO had to be configured within the management account of your AWS organization, and required the connected AWS Managed Microsoft AD directory to also be within your organization’s management account.

With the announcement of AWS SSO delegated administration support, AWS SSO and the connected AWS Managed Microsoft AD can be configured in an account other than your management account. This post recommends using your shared services account as the AWS SSO delegated administration account. Doing so will enable AWS SSO to use the AWS Managed Microsoft AD that you configured within the shared services account in the preceding Build a resource forest for AWS hosted infrastructure and applications section.

This follows the AWS guidance to avoid deploying workloads to the organization’s management account and to limit access to the management account. Using a delegated administration account for AWS SSO reduces the need for regular access to the management account.

From within your management account, your shared services account needs to be registered as the AWS SSO delegated administration account. You can then configure and manage AWS SSO from within your shared services account. The AWS SSO delegated administration account can manage permissions across your organization, apart from assigning permissions to access the management account. Assignment of permissions to access the management account through AWS SSO needs to be configured from within the management account itself.

You should configure AWS SSO to use the AWS Managed Microsoft AD directory that is deployed in the shared services account. If you are using AWS Control Tower, or have previously configured AWS SSO, see Considerations for changing your identity source before you change the default identity source from AWS SSO to Active Directory. After this is complete, you can set up SSO access to your AWS accounts within your organization from the AWS SSO console.

Assign permission sets to Active Directory groups

Permission sets are a way to define permissions centrally in AWS SSO so that they can be applied to all your AWS accounts. After you have created your permission sets, you will assign them to your Active Directory groups to grant access to the respective AWS accounts, using the defined permission set persona. Your users will then use the AWS SSO user portal to authenticate with their AD credentials and can choose which of the assigned AWS accounts and personas they wish to access. Users can configure AWS CLI to use AWS SSO to access the roles they have been assigned.

Figure 5 shows the complete architecture covered in this blog post. The diagram includes AWS SSO within the shared services account connected to the AWS Managed Microsoft AD that is used to provide access to the forests that contain your user identities.

Figure 5: Complete AD architecture with trusts and AWS SSO using AD as the identity source

Figure 5: Complete AD architecture with trusts and AWS SSO using AD as the identity source

Access domain-joined infrastructure resources

By joining your Windows Server servers to your Active Directory resource domain, you can centralize the management of your servers by using native Microsoft tooling. Joining your Amazon EC2 Windows instances to your domain enables you to continue using existing tools, such as group policies, to manage your server estate both on-premises and in AWS.

VPCs with workloads that need to be domain joined, to access on-premises networks, or to access other VPCs will need appropriate network connectivity and DNS configuration in place. You can enable network connectivity between workload VPCs and the shared services VPC and other on-premises networks by attaching your VPCs to the transit gateway shared from the networking account. You can enable DNS resolution of your AD domains by attaching the Route 53 Resolver rules, shared from the networking account, to your workload VPCs.

Join instances to your AD domain

Amazon EC2 Windows instances can be manually or seamlessly joined to your resource domain. Manually joining an instance involves the same steps that you would follow on-premises. Seamlessly joining instances requires the AWS Systems Manager agent, which is installed by default in AWS provided Windows AMIs, on the Amazon EC2 instance and an attached instance profile with sufficient permissions. This instance profile should include the AmazonSSMManagedInstanceCore and AmazonSSMDirectoryServiceAccess policies.

In order to join the domain, either manually or seamlessly, the Amazon EC2 instance must be able to resolve the DNS name for your AD domain. This DNS resolution was enabled by the attachment of the correctly configured shared Route 53 Resolver rules to the workload VPCs. Seamlessly joining instances to the domain also requires that your shared services account AWS Managed Microsoft AD directory be shared with the workload account that contains the Amazon EC2 instances.

After your instances are joined to the domain, applications running on the servers will be able to access other domain-joined resources, if authorized by AD, through the connectivity that is provided by the transit gateway attachment on the workload VPC.

Applications that need to access AWS resources that are not domain joined, such as objects in Amazon Simple Storage Service (Amazon S3), should make use of temporary credentials associated with the attached instance profile to access AWS resources. By using these IAM temporary credentials, you can avoid using static long-term credentials. When an application requires access to credentials or other secrets, and cannot use AD or IAM temporary credentials, such as for database logins or for third-party API tokens, use a service designed to handle management of secrets, such as AWS Secrets Manager. See the AWS Well-Architected Security Pillar Identity Management documentation for further guidance.

Figure 6 shows Active Directory access through the transit gateway. The Route 53 forwarding rules, which are shared from the shared services account, are associated with the workload VPCs to enable DNS resolution of Active Directory–integrated DNS domains. Not shown in the diagram is the sharing of the AWS Managed Microsoft AD for the resource forest with the workload accounts.

Figure 6: Flow of AD network traffic through the transit gateway within the network account

Figure 6: Flow of AD network traffic through the transit gateway within the network account

Access applications and third-party services

You might have existing applications that rely on Active Directory or LDAP for user authentication. When you extend your Active Directory environment to AWS, these existing applications can be deployed to your AWS environment, and they will be able to authenticate the users of the application against your AD.

A modern approach for web-based applications is to use identity federation for user authentication. AWS SSO can serve as an identity provider to authenticate users to your AWS SSO-integrated or SAML 2.0 applications. An example of an AWS SSO SAML 2.0 integration is to use AWS SSO to authenticate your VPN users to AWS Client VPN.

You might already be using a third-party identity provider, such as Azure AD or Okta, to provide your users with access to AWS services such as AWS Client VPN or to third-party business applications such as those on the AWS SSO Cloud applications page. These third-party identity providers will typically offer an agent to replicate or synchronize necessary user information from your Active Directory to their service, in order to offer federated authentication for your users. Using these agents to replicate from your existing Active Directory means that you are still using your Active Directory as the single source of truth. To ensure reliable authentication, you should follow the vendor’s recommendations for the high-availability setup of their agent.

Figure 7 shows the steps that occur when you use AWS SSO to provide identity federation to a web application.

Figure 7: Example flow for identify federation that uses AWS SSO

Figure 7: Example flow for identify federation that uses AWS SSO

Conclusion

This post highlights the importance of implementing a cloud authentication and authorization architecture that addresses the variety of requirements for an organization’s AWS Cloud environment. In addition to console access, this post highlights the importance of considering how you will:

  • Perform authentication to AWS based Windows and Linux instances
  • Integrate AWS services that need Windows-based authentication capabilities
  • Integrate authentication for internal user applications
  • Provide a single identity source as the source of truth for all AWS user authentication
  • Enable MFA for user authentication

The proposed approach provides a highly available Active Directory (AD) infrastructure, running on AWS and integrated with your existing AD, which addresses these considerations. The approach helps you to attain reduced latencies and higher levels of availability by removing dependencies on on-premises resources, other hosting locations, and external network links. This design stores the identity information that is contained within your existing AD in your chosen AWS Region and country, across multiple Availability Zones, which can also help you meet your data residency requirements.

 
If you have feedback about this post, submit comments in the Comments section below. If you have questions about this post, contact AWS Support.

Want more AWS Security news? Follow us on Twitter.

Michael Miller

Michael Miller

Michael is a Senior Solutions Architect based in Ireland. He helps public sector customers across the UK and Ireland accelerate their cloud adoption journey. In prior roles, Michael has been responsible for designing architectures and supporting implementations across various sectors including service providers, consultancies and financial services organisations.

Brian Mycroft

Brian Mycroft

Brian Mycroft is a Chief Technologist at AWS, based in Ottawa (Canada), specializing in national security, intelligence, and the Canadian federal government. Brian is the lead architect of the AWS Secure Environment Accelerator (ASEA) and focuses on removing public sector barriers to cloud adoption.

Getting started with AWS SSO delegated administration

Post Syndicated from Chris Mercer original https://aws.amazon.com/blogs/security/getting-started-with-aws-sso-delegated-administration/

Recently, AWS launched the ability to delegate administration of AWS Single Sign-On (AWS SSO) in your AWS Organizations organization to a member account (an account other than the management account). This post will show you a practical approach to using this new feature. For the documentation for this feature, see Delegated administration in the AWS Single Sign-On User Guide.

With AWS Organizations, your enterprise organization can manage your accounts more securely and at scale. One of the benefits of Organizations is that it integrates with many other AWS services, so you can centrally manage accounts and how the services in those accounts can be used.

AWS SSO is where you can create, or connect, your workforce identities in AWS just once, and then manage access centrally across your AWS organization. You can create user identities directly in AWS SSO, or you can bring them from your Microsoft Active Directory or a standards-based identity provider, such as Okta Universal Directory or Azure AD. With AWS SSO, you get a unified administration experience to define, customize, and assign fine-grained access.

By default, the management account in an AWS organization has the power and authority to manage member accounts in the organization. Because of these additional permissions, it is important to exercise least privilege and tightly control access to the management account. AWS recommends that enterprises create one or more accounts specifically designated for security of the organization, with proper controls and access management policies in place. AWS provides a method in which many services can be administered for the organization from a member account; this is usually referred to as a delegated administrator account. These accounts can reside in a security organizational unit (OU), where administrators can enforce organizational policies. Figure 1 is an example of a recommended set of OUs in Organizations.

Figure 1: Recommended AWS Organizations OUs

Figure 1: Recommended AWS Organizations OUs

Many AWS services support this delegated administrator model, including Amazon GuardDuty, AWS Security Hub, and Amazon Macie. For an up-to-date complete list, see AWS services that you can use with AWS Organizations. AWS SSO is now the most recent addition to the list of services in which you can delegate administration of your users, groups, and permissions, including third-party applications, to a member account of your organization.

How to configure a delegated administrator account

In this scenario, your enterprise AnyCompany has an organization consisting of a management account, an account for managing security, as well as a few member accounts. You have enabled AWS SSO in the organization, but you want to enable the security team to manage permissions for accounts and roles in the organization. AnyCompany doesn’t want you to give the security team access to the management account, and they also want to make sure the security team can’t delete the AWS SSO configuration or manage access to that account, so you decide to delegate the administration of AWS SSO to the security account.

Note: There are a few things to consider when making this change, which you should review before you enable delegated administration. These items are covered in the console during the process, and are described in the section Considerations when delegating AWS SSO administration in this post.

To delegate AWS SSO administration to a security account

  1. In the AWS Organizations console, log in to the management account with a user or role that has permission to use organizations:RegisterDelegatedAdministrator, as well as AWS SSO management permissions.
  2. In the AWS SSO console, navigate to the Region in which AWS SSO is enabled.
  3. Choose Settings on the left navigation pane, and then choose the Management tab on the right side.
  4. Under Delegated administrator, choose Register account, as shown in Figure 2.
    Figure 2: The registered account button in AWS SSO

    Figure 2: The Register account button in AWS SSO

  5. Consider the implications of designating a delegated administrator account (as described in the section Considerations when delegating AWS SSO administration). Select the account you want to be able to manage AWS SSO, and then choose Register account, as shown in Figure 3.
    Figure 3: Choosing a delegated administrator account in AWS SSO

    Figure 3: Choosing a delegated administrator account in AWS SSO

You should see a success message to indicate that the AWS SSO delegated administrator account is now setup.

To remove delegated AWS SSO administration from an account

  1. In the AWS Organizations console, log in to the management account with a user or role that has permission to use organizations:DeregisterDelegatedAdministrator.
  2. In the AWS SSO console, navigate to the Region in which AWS SSO is enabled.
  3. Choose Settings on the left navigation pane, and then choose the Management tab on the right side.
  4. Under Delegated administrator, select Deregister account, as shown in Figure 4.
    Figure 4: The Deregister account button in AWS SSO

    Figure 4: The Deregister account button in AWS SSO

  5. Consider the implications of removing a delegated administrator account (as described in the section Considerations when delegating AWS SSO administration), then enter the account name that is currently administering AWS SSO, and choose Deregister account, as shown in Figure 5.
    Figure 5: Considerations of deregistering a delegated administrator in AWS SSO

    Figure 5: Considerations of deregistering a delegated administrator in AWS SSO

Considerations when delegating AWS SSO administration

There are a few considerations you should keep in mind when you delegate AWS SSO administration. The first consideration is that the delegated administrator account will not be able to perform the following actions:

  • Delete the AWS SSO configuration.
  • Delegate (to other accounts) administration of AWS SSO.
  • Manage user or group access to the management account.
  • Manage permission sets that are provisioned (have a user or group assigned) in the organization management account.

For examples of those last two actions, consider the following scenarios:

In the first scenario, you are managing AWS SSO from the delegated administrator account. You would like to give your colleague Saanvi access to all the accounts in the organization, including the management account. This action would not be allowed, since the delegated administrator account cannot manage access to the management account. You would need to log in to the management account (with a user or role that has proper permissions) to provision that access.

In a second scenario, you would like to change the permissions Paulo has in the management account by modifying the policy attached to a ManagementAccountAdmin permission set, which Paulo currently has access to. In this scenario, you would also have to do this from inside the management account, since the delegated administrator account does not have permissions to modify the permission set, because it is provisioned to a user in the management account.

With those caveats in mind, users with proper access in the delegated administrator account will be able to control permissions and assignments for users and groups throughout the AWS organization. For more information about limiting that control, see Allow a user to administer AWS SSO for specific accounts in the AWS Single Sign-On User Guide.

Deregistering an AWS SSO delegated administrator account will not affect any permissions or assignments in AWS SSO, but it will remove the ability for users in the delegated account to manage AWS SSO from that account.

Additional considerations if you use Microsoft Active Directory

There are additional considerations for you to keep in mind if you use Microsoft Active Directory (AD) as an identity provider, specifically if you use AWS SSO configurable AD sync, and which AWS account the directory resides in. In order to use AWS SSO delegated administration when the identity source is set to Active Directory, AWS SSO configurable AD sync must be enabled for the directory. Your organization’s administrators must synchronize Active Directory users and groups you want to grant access to into an AWS SSO identity store. When you enable AWS SSO configurable AD sync, a new feature that launched in April, Active Directory administrators can choose which users and groups get synced into AWS SSO, similar to how other external identity providers work today when using the System for Cross-domain Identity Management (SCIM) v2.0 protocol. This way, AWS SSO knows about users and groups even before they are granted access to specific accounts or roles, and AWS SSO administrators don’t have to manually search for them.

Another thing to consider when delegating AWS SSO administration when using AD as an identity source is where your directory resides, that is which AWS account owns the directory. If you decide to change the AWS SSO identity source from any other source to Active Directory, or change it from Active Directory to any other source, then the directory must reside in (be owned by) the account that the change is being performed in. For example, if you are currently signed in to the management account, you can only change the identity source to or from directories that reside in (are owned by) the management account. For more information, see Manage your identity source in the AWS Single Sign-On User Guide.

Best practices for managing AWS SSO with delegated administration

AWS recommends the following best practices when using delegated administration for AWS SSO:

  • Maintain separate permission sets for use in the organization management account (versus the rest of the accounts). This way, permissions can be kept separate and managed from within the management account without causing confusion among the delegated administrators.
  • When granting access to the organization management account, grant the access to groups (and permission sets) specifically for access in that account. This helps enable the principal of least privilege for this important account, and helps ensure that AWS SSO delegated administrators are able to manage the rest of the organization as efficiently as possible (by reducing the number of users, groups, and permission sets that are off limits to them).
  • If you plan on using one of the AWS Directory Services for Microsoft Active Directory (AWS Managed Microsoft AD or AD Connector) as your AWS SSO identity source, locate the directory and the AWS SSO delegated administrator account in the same AWS account.

Conclusion

In this post, you learned about a helpful new feature of AWS SSO, the ability to delegate administration of your users and permissions to a member account of your organization. AWS recommends as a best practice that the management account of an AWS organization be secured by a least privilege access model, in which as few people as possible have access to the account. You can enable delegated administration for supported AWS services, including AWS SSO, as a useful tool to help your organization minimize access to the management account by moving that control into an AWS account designated specifically for security or identity services. We encourage you to consider AWS SSO delegated administration for administrating access in AWS. To learn more about the new feature, see Delegated administration in the AWS Single Sign-On User Guide.

If you have feedback about this post, submit comments in the Comments section below. If you have questions about this post, start a new thread on the AWS IAM forum or contact AWS Support.

Want more AWS Security how-to content, news, and feature announcements? Follow us on Twitter.

Author

Chris Mercer

Chris is a security specialist solutions architect. He helps AWS customers implement sophisticated, scalable, and secure solutions to business challenges. He has experience in penetration testing, security architecture, and running military IT systems and networks. Chris holds a Master’s Degree in Cybersecurity, several AWS certifications, OSCP, and CISSP. Outside of AWS, he is a professor, student pilot, and Cub Scout leader.

Configure AWS SSO ABAC for EC2 instances and Systems Manager Session Manager

Post Syndicated from Rodrigo Ferroni original https://aws.amazon.com/blogs/security/configure-aws-sso-abac-for-ec2-instances-and-systems-manager-session-manager/

In this blog post, I show you how to configure AWS Single Sign-On to define attribute-based access control (ABAC) permissions to manage Amazon Elastic Compute Cloud (Amazon EC2) instances and AWS Systems Manager Session Manager for federated users. This combination allows you to control access to specific Amazon EC2 instances based on users’ attributes. I show you how defined AWS SSO identity source attributes like login and department can be used, and how custom attributes like SSMSessionRunAs can be used to pass these attributes into Amazon Web Services (AWS) from an external identity provider (IdP) using  SAML 2.0 assertion.

AWS SSO added support for ABAC to enable you to create fine-grained permissions for your workforce in AWS using user attributes. Using user attributes as tags in AWS helps you simplify the process of creating fine-grained permissions in AWS and enables you to ensure that your workforce has access only to the AWS resources with matching tags.

The new feature works with any supported AWS SSO identity source. This post walks you through the steps to enable attributes for access control, create permission sets and manage assignments when using a supported external IdP as your identity source.

Solution overview

The following architecture diagram—Figure 1—presents an overview of the solution.

Figure 1: Solution architecture diagram

Figure 1: Solution architecture diagram

In the example in Figure 1, Alice and Bob are users who each have the attributes
login
, department, and SSMSessionRunAs. These attributes are created and updated in the external directory—Okta in this example—under those users’ profiles. The first two attributes are automatically synchronized by using System for Cross-domain Identity Management (SCIM) protocol between AWS SSO and Okta and configured within AWS SSO settings. The third custom attribute is passed directly from Okta into the AWS accounts as a new SAML assertion.

Both users are using the same AWS SSO custom permission set that allows them to launch a new Amazon EC2 instance with proper tags enforcement. Based on those tags, they can start, stop, and restart the EC2 instance if they are in the same department, and to terminate it if they are the owner. Also, they can connect using Session Manager if they’re in the same department. Users can sign in to those instances using the Linux OS user defined in the attribute SSMSessionRunAs.

Prerequisites

To perform the steps to use AWS SSO attributes for ABAC, you must already have deployed AWS SSO for your AWS Organizations and have connected with an external identity source using SAML and SCIM protocols. For more information, see Checklist: Configuring ABAC in AWS using AWS SSO.

You need two test users for implementing and testing the solution. You can use two existing users, or create new users named Alice and Bob to match the solution and testing described in the following sections.

Implement the solution

The basic steps to implement the solution are:

  1. Confirm in AWS SSO settings that you have defined an external IdP, authentication via SAML 2.0, and provisioning via SCIM protocol.
  2. Enable attributes for access control and define the two supported attributes: login and department.
  3. Create a new user attribute in the Okta Directory.
  4. Edit and confirm the users’ attributes defined in the Okta Directory profile.
  5. Configure the SAML attribute statement in the Okta AWS SSO application.
  6. Create a new permission set using an ABAC policy.
  7. Create an AWS account assignment to the users using the permission set created in the previous step.

Confirm AWS SSO configuration

In this first step, you confirm that AWS SSO has been properly configured. Go to AWS SSO console SSO settings to check that the configuration of your identity source, authentication, and provisioning is as follows:

Identity source: External Identity Provider
Authentication: SAML 2.0
Provisioning: SCIM

  1. Confirm authentication is working as expected, by going to your user portal URL in a new browser instance (to ensure your user authentication doesn’t overwrite your existing authentication). The user portal offers a single place to access all the assigned AWS accounts, roles, and applications. For example, it should look like https://exampledomain.awsapps.com/start. Once you access it, the process automatically redirects the request to your external provider for authentication, and then returns the user to the AWS SSO user portal.
  2. To confirm provisioning, go to the AWS SSO console and choose Users from the right panel. You should see your Okta users assigned to the AWS SSO application being synchronized by SCIM protocol. Select any user to see the Created by SCIM and Updated by SCIM information for that user.

Enable AWS SSO attributes for access control

In this step, you enable ABAC and then configure AWS SSO attributes. This solution uses the Attributes for access control page in the AWS Management Console to enter the key and value pairs.

To enable attributes for access control

  1. Open the AWS SSO console.
  2. Choose Settings.
  3. On the Settings page, under Identity source, next to Attributes for access control, select Enable. As shown in Figure 2.
Figure 2: Attributes for access control settings (enable ABAC)

Figure 2: Attributes for access control settings (enable ABAC)

Once ABAC is enabled, you can select the attributes to be synchronized. For this use case, select login and department.

To select your attributes using the AWS SSO console

  1. Open the AWS SSO console.
  2. Choose Settings.
  3. On the Settings page, under Identity source, next to Attributes for access control, choose View details.
  4. On the Attributes for access control page, notice the Key and Value columns. This is where you will be mapping the attribute from your identity source to an attribute that AWS SSO passes as a session tag. Set the first key and value pair by entering login as the key and ${path:userName} as the value. Set the second key and value pair to department and ${path:enterprise.department}. The settings are shown in Figure 3 below.

    Figure 3: Map attributes using the Attributes for access control page

    Figure 3: Map attributes using the Attributes for access control page

  5. Choose Save changes.

Create a new attribute in Okta Directory

In this third step, you create the new custom attribute SSMSessionRunAs.

To create a new user attribute

  1. Open the Okta console.
  2. Under Directory, choose Profile Editor.
  3. Choose Edit Profile for Okta User (default).
  4. Under Attributes, choose Add Attribute as follows:
    Data type: Select String
    Display Name: Enter SSMSessionRunAs
    Variable Name: Enter SSMSessionRunAs
    Attribute Length: Select Less than and enter 10 (max).
  5. Choose Save.

Edit and confirm users’ attributes defined in Okta Directory profile

Now that you have the new attribute SSMSessionRunAs created, go to the users’ profiles to enter the Department and SSMSessionRunAs values for both users.

To edit and confirm users’ attributes

  1. Open the Okta console.
  2. Under Directory, choose People.
  3. Select user Bob.
  4. Under Profile tab choose Edit as follows:

    For the key Department, enter blue as the value.

    For the key SSMSessionRunAs, enter bob as the value.

  5. Choose Save.
  6. Repeat steps 1 through 5 for Alice. For the key Department, enter amber as the value and for SSMSessionRunAs, enter alice as the value.
  7. Confirm that the attributes of both users are defined in the external directory as follows:Username (login): [email protected]
    First name (firstName): Bob
    Last name (lastName): Rodriguez
    Display name (displayName): Bob
    Department (department): blue
    SSMSessionRunAs (SSMSessionRunAs): bob

    Username (login): [email protected]
    First name (firstName): Alice
    Last name (lastName): Rosalez
    Display name (displayName): Alice
    Department (department): amber
    SSMSessionRunAs (SSMSessionRunAs): alice

Configure SAML attribute statement in Okta AWS SSO application

The attribute SSMSessionRunAs isn’t available as an attribute within AWS SSO. However, you can include it by defining SAML attribute statements, which are inserted into the SAML assertions.

To create a new SAML attribute

  1. Open the Okta Application console.
  2. Choose AWS Single Sign-on application.
  3. On the Sign On tab, choose Edit Settings.
  4. Under SAML 2.0 Attributes Statements enter the following:
    • For Name, enter https://aws.amazon.com/SAML/Attributes/AccessControl:SSMSessionRunAs
    • For Name format, select URI Reference
    • For Value, enter user.SSMSessionRunAs
  5. Choose Save.

Create a new permission set using an ABAC policy

In this step, you create a permissions policy that determines who can access your AWS resources based on the configured attribute value. When you enable ABAC and specify attributes, AWS SSO passes the attribute value of the authenticated user into AWS Identity and Access Management (IAM) for use in policy evaluation.

To create a permission set

  1. Open the AWS SSO console.
  2. Choose AWS accounts.
  3. Select the Permission sets tab.
  4. Choose Create permission set.
  5. On the Create new permission set page, choose Create a custom permission set.
    1. Choose Next: Details.
    2. Under Create a custom permission set, enter a name that will identify this permission set in AWS SSO. This name will also appear as an IAM role in the user portal for any users who have access to it. For this solution, name it myCustomPermissionSetEC2SSM.
    3. Choose Create a custom permissions policy and paste in the following ABAC policy document:
      {
        "Version": "2012-10-17",
        "Statement": [
          {
            "Sid": "AllowDescribeList",
            "Action": [
              "ec2:Describe*",
              "ssm:Describe*",
              "ssm:Get*",
              "ssm:List*",
              "iam:ListInstanceProfiles",
              "cloudwatch:DescribeAlarms"
            ],
            "Effect": "Allow",
            "Resource": "*"
          },
          {
            "Sid": "AllowRunInstancesResources",
            "Effect": "Allow",
            "Action": "ec2:RunInstances",
            "Resource": [
              "arn:aws:ec2:*::image/*",
              "arn:aws:ec2:*::snapshot/*",
              "arn:aws:ec2:*:*:subnet/*",
              "arn:aws:ec2:*:*:key-pair/*",
              "arn:aws:ec2:*:*:security-group/*",
              "arn:aws:ec2:*:*:network-interface/*"
            ]
          },
          {
            "Sid": "AllowRunInstancesConditions",
            "Effect": "Allow",
            "Action": "ec2:RunInstances",
            "Resource": [
              "arn:aws:ec2:*:*:instance/*",
              "arn:aws:ec2:*:*:volume/*",
              "arn:aws:ec2:*:*:network-interface/*"
            ],
            "Condition": {
              "StringLike": {
                "aws:RequestTag/Name": "*"
              },
              "StringEquals": {
                "aws:RequestTag/Owner": "${aws:PrincipalTag/login}",
                "aws:RequestTag/Department": "${aws:PrincipalTag/department}"
              },
              "ForAllValues:StringEquals": {
                "aws:TagKeys": [
                  "Name",
                  "Owner",
                  "Department"
                ]
              }
            }
          },
          {
            "Sid": "AllowCreateTagsOnRunInstance",
            "Effect": "Allow",
            "Action": "ec2:CreateTags",
            "Resource": [
              "arn:aws:ec2:*:*:volume/*",
              "arn:aws:ec2:*:*:instance/*",
              "arn:aws:ec2:*:*:network-interface/*"
            ],
            "Condition": {
              "StringEquals": {
                "ec2:CreateAction": "RunInstances"
              }
            }
          },
          {
            "Sid": "AllowPassRoleSpecificRole",
            "Effect": "Allow",
            "Action": "iam:PassRole",
            "Resource": "arn:aws:iam::*:role/EC2UbuntuSSMRole"
          },
          {
            "Sid": "AllowEC2ActionsConditions",
            "Effect": "Allow",
            "Action": [
              "ec2:StartInstances",
              "ec2:StopInstances",
              "ec2:RebootInstances"
            ],
            "Resource": "*",
            "Condition": {
              "StringEquals": {
                "ec2:ResourceTag/Department": "${aws:PrincipalTag/department}"
              }
            }
          },
          {
            "Sid": "AllowTerminateConditions",
            "Effect": "Allow",
            "Action": [
              "ec2:TerminateInstances"
            ],
            "Resource": "*",
            "Condition": {
              "StringEquals": {
                "ec2:ResourceTag/Owner": "${aws:PrincipalTag/login}"
              }
            }
          },
          {
            "Sid": "AllowStartSessionConditions",
            "Effect": "Allow",
            "Action": [
              "ssm:StartSession"
            ],
            "Resource": "*",
            "Condition": {
              "StringEquals": {
                "ssm:resourceTag/Department": "${aws:PrincipalTag/department}"
              }
            }
          },
          {
            "Sid": "AllowTerminateSessionConditions",
            "Effect": "Allow",
            "Action": [
              "ssm:TerminateSession"
            ],
            "Resource": [
              "arn:aws:ssm:*:*:session/${aws:PrincipalTag/login}-*"
            ]
          }
        ]
      }
      

    4. Choose Next: Tags.
    5. Review the selections you made, and then choose Create.

The policy described above uses SAML session tags for the ABAC to define permissions based on attributes. These attributes are the tags passed in the AssumeRoleWithSAML operation when the SAML-based federation occurs.

A combination of global (aws:TagKeys, aws:PrincipalTag, aws:RequestTag) and service (ec2:ResourceTag, ec2:CreateAction, ssm:resourceTag) condition keys is used to assign the permissions.

To learn more about AWS global and service conditions keys, see AWS global condition context keys and The condition keys table for AWS services.

Assign users to an AWS account

In this step, you use the permission set created in the previous step to assign access to the users for a specified AWS account.

To assign access to users

  1. Open the AWS SSO console.
  2. Choose AWS accounts.
  3. Under the AWS organization tab, in the list of AWS accounts, select one or more accounts to which you want to assign access.
  4. Choose Assign users.
  5. On the Select users or groups page, select both test users from the list of users as shown in Figure 4.

    Note: You can use the search box to look for specific users.

    Figure 4: Select users to assign to AWS accounts

    Figure 4: Select users to assign to AWS accounts

  6. Choose Next: Permission sets.
  7. On the Select permission sets page, select the permission sets that you created in step 5 to apply to the users from the table as shown in Figure 5.

    Figure 5: Select permissions sets

    Figure 5: Select permissions sets

  8. Choose Finish to start the configuration of your AWS account. When configuration is complete, a message is displayed stating that you have successfully configured your AWS account as shown in Figure 6.

    Figure 6: Confirmation that configuration is complete

    Figure 6: Confirmation that configuration is complete

Test the solution

Now that you have everything in place, let’s test the solution. To test the solution, you’ll log in to AWS SSO, access the AWS account and check the event logs, and test the Amazon EC2 operations.

Log in to AWS SSO as Bob through your external IdP

Enter the user portal URL in a browser window and log in to AWS SSO as Bob. AWS SSO redirects to the external provider for the log in process. After successful authentication, the external provider redirects to the AWS SSO portal, which shows you a list of the AWS accounts that you have access to. In this case, Bob has access to one AWS account as shown in Figure 7.

Figure 7: AWS SSO showing AWS accounts that the user has access to

Figure 7: AWS SSO showing AWS accounts that the user has access to

Access the AWS account using the permission set and confirm the event logs

Select the Management console link for the AWS account that has the myCustomPermissionSetEC2SSM permission set that you created earlier. This action federates into the AWS account and is logged in to AWS CloudTrail with the API AssumeRoleWithSAML. To confirm that the SAML session tags are being passed in the session, look at the API event log in the CloudTrail Event history console. In the following example, you can check the principalTags keys and their values under requestParameters.

{
     "eventVersion": "1.08",
     "userIdentity": {
          "type": "SAMLUser",
          "principalId": "d/UbWH0ijLBmlakaboZwi5CA/30=:[email protected]",
          "userName": "[email protected]",
          "identityProvider": "d/UbWH0ijLBmlakaboZwi5CA/30="
},
     "eventTime": "2021-05-13T16:08:48Z",
     "eventSource": "sts.amazonaws.com",
     "eventName": "AssumeRoleWithSAML",
     ...
     "requestParameters": {
        "sAMLAssertionID": "_5072d119-64f5-4341-aeed-30d9b7c24b5b",
        "roleSessionName": "[email protected]",
        "principalTags": {
            "SSMSessionRunAs": "bob",
            "department": "blue",
            "login": "[email protected]"
        },
        "durationSeconds": 3600,
        "roleArn": "arn:aws:iam::555555555555:role/aws-reserved/sso.amazonaws.com/AWSReservedSSO_myCustomPermissionSetEC2SSM_9e80ec498218bbea",
        "principalArn": "arn:aws:iam::555555555555:saml-provider/AWSSSO_5f872b6782a0507a_DO_NOT_DELETE"
    },
     "responseElements": {
     ...

Test EC2 operations

  1. Open the Amazon EC2 console:
    For this example, when opening the Amazon EC2 console there are already three running EC2 instances to test the ABAC policy that have been created with proper tags explained in the following step. From the top menu, you can also confirm the federated login AWSReservedSSO_myCustomPermissionSetEC2SSM_9e80ec498218bbea/[email protected] that represents the AWS SSO managed role and the user as shown in Figure 8.

    Figure 8: EC2 instances and user information

    Figure 8: EC2 instances and user information

  2. Launch a new EC2 instance:
    Start testing the ABAC policy by launching a new EC2 instance. This action is authorized only when you fill in the three required tags: Name, Owner, and Department.

    1. From the Amazon EC2 console, choose Launch Instances.
    2. Set the AMI, for this example select an Ubuntu-based OS.
    3. Set the Instance Type, a t2.micro will work.
    4. Configure the EC2 instance. Choose an IAM role to allow Systems Manager to manage the new EC2 instance. In this case, you have to create the IAM role EC2UbuntuSSMRole with the AWS managed policy AmazonEC2RoleforSSM attached in advanced with proper IAM permissions since the user Bob is not allow to do so. Then, you must use the user data to create the OS Ubuntu user—Bob—that you need to log in to the EC2 instance by using Session Manager. You can copy and paste the following to create the user “Bob”:#!/bin/bash
      sudo useradd -m bob
    5. Add storage using the default settings.
    6. Add tags. From the ABAC policy previously created, you can confirm that tag key Name can be anything as the condition StringLike is indicated with a wildcard (*). The tag keys Owner and Department have to match the principal session tags passed through federation. In this case, enter [email protected] as the key Owner, and enter blue as the Department, as shown in Figure 9.

      Figure 9: EC2 tags describing key value pairs

      Figure 9: EC2 tags describing key value pairs

    7. Configure security groups. When configuring security groups, you can choose an existing security group that doesn’t allow any inbound traffic to the SSH port. Since when using Session Manager you connect to the EC2 instance through an API that is going to be an outbound connection. This way you can safely leave the security group inbound rules close.
    8. Review and launch. It will ask you about selecting or creating a key pair. You don’t need one, because you’re using Session Manager. Proceed without selecting or creating a new SSH key pair. When launching the EC2 instance with the correct tag keys and values, you get the success message shown in Figure 10.
      Figure 10: EC2 success message launching an instance with the correct tags

      Figure 10: EC2 success message launching an instance with the correct tags

      If there are any missing tag keys or the values aren’t correct, the action will be denied as shown in Figure 11. For more information, you can decode the authorization error message using the API DecodeAuthorizationMessage.

      Figure 11: EC2 failed message launching an instance with incorrect tags

      Figure 11: EC2 failed message launching an instance with incorrect tags

  3. Stop, reboot, and terminate EC2 instances.
    The next tests are to be stop, reboot, and terminate the EC2 instances. In the ABAC policy you defined that only users who have the same department value as the resource can perform the first two actions. You can terminate and EC2 instance only if you are an owner. To stop, reboot, and terminate instances, open the EC2 Console, choose Instances, and select the instance you want to affect. Choose Instance state and choose the action you want to test: Stop instance, Reboot instance or Terminate instance.

    Trying to stop the EC2 instance amber-instance where Department is amber is shown in Figure 12.

    Figure 12: EC2 console showing how to stop an instance

    Figure 12: EC2 console showing how to stop an instance

    The action should fail as shown in Figure 13.

    Figure 13: EC2 instance failure message stopping an instance with wrong tags

    Figure 13: EC2 instance failure message stopping an instance with wrong tags

    Only when the department value of the EC2 instance is blue is it possible to stop or reboot the instance as shown in Figure 14.

    Figure 14: EC2 success message stopping an instance with correct tags

    Figure 14: EC2 success message stopping an instance with correct tags

    Only when the owner who launched the EC2 instance matches with the federated login is it possible to terminate the instance. Trying to terminate an EC2 instance that was launched by anyone other than the owner will lead to a failed action as shown in Figure 15.

    Figure 15: EC2 failed message terminating an instance with incorrect tags

    Figure 15: EC2 failed message terminating an instance with incorrect tags

  4. Try to modify tags. Because ABAC policies rely on tags, you cannot modify tags after the resources have been created. This is set in the ABAC policy statement AllowCreateTagsOnRunInstance in Create a new permission set using an ABAC policy. If you try to modify any tag keys or values on existing resources, the changes will be denied. For example, if you try to modify the owner of a tag on an existing EC2 instance, you get the “Failed to update tags” error message as shown in Figure 16.

    Figure 16: Failed message when attempting to modify tags

    Figure 16: Failed message when attempting to modify tags

  5. Connect to the EC2 instance using Session Manager.
    1. Test logging in to the EC2 instance by choosing the new instance and choosing Connect as shown in Figure 17.

      Figure 17: EC2 console selecting an instance to connect

      Figure 17: EC2 console selecting an instance to connect

    2.  Then choose the Session Manager tab and choose Connect as shown in Figure 18.
      Figure 18: EC2 console selecting Session Manager to connect

      Figure 18: EC2 console selecting Session Manager to connect

      This will open a new tab in the browser redirecting to a Systems Manager session where you can confirm that the Ubuntu OS user is Bob as shown in Figure 19.

      Figure 19: Systems Manager session started confirming Ubunto OS user

      Figure 19: Systems Manager session started confirming Ubunto OS user

      Note: By default, sessions are launched using the credentials of a system-generated account named ssm-user that is created on a managed instance. However, you can instead launch sessions using any OS user by enabling the run as feature in SSM. To learn more about this, see Enable run as support for Linux and macOS instances in the Systems Manager Session Manager user guide.

    3. Performing the same action in an EC2 instance with a different Department tag will lead to a denied action as shown in Figure 20. This is because the ABAC policy allows the StartSession action only when the Department key matches the Department value in the EC2 instance.

      Figure 20: Systems Manager StartSession failed message

      Figure 20: Systems Manager StartSession failed message

Conclusion

In this blog post, you learned how to use AWS SSO with the two methods of passing attributes to AWS account using session tags for ABAC. You also learned how to build policies with tags as conditions to simplify and reuse custom permission sets. You have seen working examples with services like EC2, and Systems Manager Session Manager. To learn more about ABAC policies, SAML session tags, and how to pass session tags in federation, see IAM tutorial: Use SAML session tags for ABAC and Passing session tags using AssumeRoleWithSAML.

If you have feedback about this post, submit comments in the Comments section below.

Want more AWS Security news? Follow us on Twitter.

Author

Rodrigo Ferroni

Rodrigo Ferroni is a senior Security Specialist at AWS Enterprise Support. He is certified in CISSP, AWS Security Specialist, and AWS Solutions Architect Associate. He enjoys helping customers to continue adopting AWS security services to improve their security posture in the cloud. Outside of work, he loves to travel as much as he can. In every winter he enjoys snowboarding with his friends.

How to enable secure seamless single sign-on to Amazon EC2 Windows instances with AWS SSO

Post Syndicated from Todd Rowe original https://aws.amazon.com/blogs/security/how-to-enable-secure-seamless-single-sign-on-to-amazon-ec2-windows-instances-with-aws-sso/

Today, we’re launching new functionality that simplifies the experience to securely access your AWS compute instances running Microsoft Windows. We took on this update to respond to customer feedback around creating a more streamlined experience for administrators and users to more securely access their EC2 Windows instances. The new experience utilizes your existing identity solutions to run and manage your Microsoft Windows workloads on AWS. You can create and administer users in AWS Single Sign-On (AWS SSO) or an AWS SSO supported identity provider (such as Okta, Ping, and OneLogin), and provide a one-click single sign-on to your EC2 Windows instances from the AWS Fleet Manager console. You can also use your existing corporate usernames, passwords, and multi-factor authentication devices to securely access your EC2 windows instances, without having to enter your credentials multiple times.

Using AWS SSO eliminates the use of shared administrator credentials and the need to configure remote access client software. You can centrally grant and revoke access to your EC2 Windows instances at scale across multiple AWS accounts. For example, if you remove an employee from your AWS SSO integrated identity system, their access to all AWS resources (including EC2 Windows instances) is automatically revoked. Individual user actions can now be viewed in the Amazon EC2 Windows instances event log, making it easier to meet audit and compliance requirements.

AWS SSO background

AWS SSO simplifies managing SSO access to AWS accounts and business applications, and it is the central location where you can create or connect your workforce identities in AWS. You can control SSO access and user permissions across all your AWS accounts in AWS Organizations. You can choose to manage access to your AWS accounts, to cloud applications, or both.

When managing access to AWS accounts, AWS SSO enables you to define and assign roles centrally across your AWS Organizations account using permission sets. Permission sets are role definitions (templates) that AWS SSO uses to create and maintain roles in your AWS Organizations accounts. The permission set defines the session duration and policies for the role. When you assign a permission set to a user or group in a selected AWS account, AWS SSO creates a corresponding role in the target account, and AWS SSO controls access to the role through the AWS SSO user portal.

This post uses a permission set that manages access to AWS Fleet Manager to deliver one-click access into EC2 instances.

You will accomplish this in three steps:

  1. Create an AWS SSO permission set (for example, demoFMPermissionSet)
  2. Assign the permission set to an existing AWS SSO group (for example, demoFMGroup)
  3. Login to the AWS SSO User Portal and connect to your EC2 Windows instance via the AWS Fleet Manager console

Prerequisites

The prerequisites for this example are that you have:

  1. Configured AWS SSO in your account with provisioned users and groups
  2. An EC2 Windows instance managed by AWS Systems Manager Fleet Manager

Solution architecture

The following diagram shows the steps you will follow to configure and use an AWS SSO user identity to login to an EC2 Windows instance. 

Figure 1: Architecture diagram showing steps implemented in this solution

Figure 1: Architecture diagram showing steps implemented in this solution

How it works

The AWS SSO permission set creates a role in a target account that gives an authorized user permissions to use AWS Fleet Manager to sign into EC2 Windows instances. When a user chooses the role in the account, the user signs onto the AWS Fleet Manager console and selects the EC2 instance where they want to sign in.

AWS Fleet Manager creates a local Windows user account and a credential for that user, and then automates their sign-in to the instance.

To create an AWS SSO permission set

This procedure creates a permission set that grants assigned users and groups permissions to use AWS Fleet Manager for single sign-on to EC2 instances.

  1. From the AWS SSO console, go to AWS Accounts, select the Permission sets tab, select Create permission set and choose Create a custom permission set.
  2. Name your permission set, and fill out the required fields, making sure to select Create a custom permissions policy at the bottom of the page. See Sample custom permissions policy below for details on the policy.
  3. After creating the custom permissions policy, you can also apply optional tagging. When you are done, review and choose Create to complete creating your custom permission set, as shown in Figure 2.


Figure 2: Reviewing the custom permission set

Figure 2: Reviewing the custom permission set

Sample custom permissions policy

This is the sample policy you’ll use; you can download it here.
Code sample

This permission policy contains a separate statement ID (Sid) for each service, with the required actions for each.

On line 84, notice the reference to an AWSSSO-CreateSSOUser document resource. This document is responsible for creating a local Windows account based on the AWS SSO logged in user, as well as setting/resetting the user’s password for automatic log in to the Windows instance.

On lines 96-98, you will see a new ssm-guiconnect action. This is used to make the secure connection to your EC2 Windows instance, and render the GUI desktop in the Fleet Manager console.

To assign your AWS SSO group

Assign your AWS SSO group to the AWS Fleet Manager permission set in your selected accounts

In this procedure, we will select two AWS accounts in our AWS organization, and grant our AWS SSO group access to the previously-created permission set that enables sign-in via Fleet manager.

  1. From the AWS SSO console, navigate to AWS accounts and select an account (for example, demoAccount1 and demoAccount2), as shown in Figure 3.
  2. Choose the Assign users button. If you wish, you may also assign access to multiple groups or to users individually.
  3.  

    Figure 3: Selecting AWS Account to assign users or groups

    Figure 3: Selecting AWS Account to assign users or groups

  4. To enable multiple AWS SSO users to access this feature, choose an AWS SSO group from the Groups tab and then choose the Next button, as shown in Figure 4
  5.  

    Figure 4: Assigning group to AWS accounts

    Figure 4: Assigning group to AWS accounts

  6. Select the permission set you created previously and choose the Next button.
  7.  

    Figure 5: Selecting permission set to AWS accounts

    Figure 5: Selecting permission set to AWS accounts

  8. Review your choices, and press Submit to submit your assignments, as shown in Figure 6.
  9.  

    Figure 6: Reviewing submit assignments to AWS accounts

    Figure 6: Reviewing submit assignments to AWS accounts

AWS SSO will now use the permission set definition to create a role in each selected account, which grants users access to sign in via Fleet Manager. Users gain access to that role by signing into the AWS SSO user portal.

To access Fleet Managed EC2 instances

  1. From the console, navigate to your AWS SSO user portal URL and login as any AWS SSO user who is a member of the group (e.g., demoFMGroup) you selected in step 3 above.
  2. From the AWS SSO user portal page, choose Management console and navigate to the Fleet Manager console where you have your EC2 Windows managed instance, as shown in Figure 7
  3.  

    Figure 7: Navigating to the Management console from the user portal

    Figure 7: Navigating to the Management console from the user portal

  4. Select a managed Windows instance and select Instance actions and then Connect with Remote Desktop as shown in Figure 8.
  5.  

    Figure 8: Connecting with Remote Desktop

    Figure 8: Connecting with Remote Desktop

  6. Select Single Sign-On and then select Connect, as shown in Figure 9.
  7. This automatically logs you in using your AWS SSO credential. If this is the first time connecting to the instance, a new local user will be created. 

    Figure 9: Selecting Single Sign-On

    Figure 9: Selecting Single Sign-On

    Once connected, you will see your EC2 Windows instance in the All sessions tab, enabling you to have up to four concurrent sessions in a single view, as shown in Figure 10. For a single session view, select the Instance ID tab. 

    Figure 10: Selecting expanded desktop view

    Figure 10: Selecting expanded desktop view

  8. From the single session tab, we can see that AWS Fleet Manager created a local Windows Server user for the AWS SSO user (demoUser1).

After creating the local user, AWS Fleet Manager used the credentials it created to sign into the EC2 Windows server as sso-demoUser1 from the Windows Event Viewer, giving you individual user logging on your EC2 Windows servers. These logs are also available from within the Fleet Manager console. 

Figure 11: Showing AWS SSO username in Amazon EC2 Windows instance event log

Figure 11: Showing AWS SSO username in Amazon EC2 Windows instance event log

Conclusion

This post described how to provide a single sign-in experience to Windows EC2 instances using AWS Fleet Manager with AWS Single Sign-On. Doing this allows you to create users in AWS SSO, or to connect any supported identity provider to AWS SSO, and to give users one-click access to their EC2 instances through AWS Fleet Manager.

This is done by creating an AWS SSO permission set that grants users access to AWS Fleet Manager, then assigning a group from AWS SSO to the permission set in the selected AWS accounts. Users can sign into the AWS SSO user portal, navigate to the AWS Fleet Manager, select their Windows EC2 instance, and land in the Windows user experience without having to enter Windows credentials separately.

To learn more about AWS SSO, visit the AWS Single Sign-On Documentation. To learn more about Fleet Manager, visit the AWS Systems Manager Fleet Manager Documentation.

If you have feedback about this blog post, submit comments in the Comments section below. If you have questions about this post, start a new thread on the AWS Single Sign-On forum.

Want more AWS Security news? Follow us on Twitter.

Author

Todd Rowe

Todd is a Principal Product Manager focused on AWS workforce identity products. He enjoys tackling complex customer problems through intuitive connected solutions. Outside of work, Todd enjoys all water sports, mountain biking, and live music.

Build an end-to-end attribute-based access control strategy with AWS SSO and Okta

Post Syndicated from Louay Shaat original https://aws.amazon.com/blogs/security/build-an-end-to-end-attribute-based-access-control-strategy-with-aws-sso-and-okta/

This blog post discusses the benefits of using an attribute-based access control (ABAC) strategy and also describes how to use ABAC with AWS Single Sign-On (AWS SSO) when you’re using Okta as an identity provider (IdP).

Over the past two years, Amazon Web Services (AWS) has invested heavily in making ABAC available across the majority of our services. With ABAC, you can simplify your access control strategy by granting access to groups of resources, which are specified by tags, instead of managing long lists of individual resources. Each tag is a label that consists of a user-defined key and value, and you can use these to assign metadata to your AWS resources. Tags can help you manage, identify, organize, search for, and filter resources. You can create tags to categorize resources by purpose, owner, environment, or other criteria. To learn more about tags and AWS best practices for tagging, see Tagging AWS resources.

The ability to include tags in sessions—combined with the ability to tag AWS Identity and Access Management (IAM) users and roles—means that you can now incorporate user attributes from your identity provider as part of your tagging and authorization strategy. Additionally, user attributes help organizations to make permissions more intuitive, because the attributes are easier to relate to teams and functions. A tag that represents a team or a job function is easier to audit and understand.

For more information on ABAC in AWS, see our ABAC documentation.

Why use ABAC?

ABAC is a strategy that that can help organizations to innovate faster. Implementing a purely role-based access control (RBAC) strategy requires identity and security teams to define a large number of RBAC policies, which can lead to complexity and time delays. With ABAC, you can make use of attributes to build more dynamic policies that provide access based on matching the attribute conditions. AWS supports both RBAC and ABAC as co-existing strategies, so you can use ABAC alongside your existing RBAC strategy.

A good example that uses ABAC is the scenario where you have two teams that require similar access to their secrets in AWS Secrets Manager. By using ABAC, you can build a single role or policy with a condition based on the Department attribute from your IdP. When the user is authenticated, you can pass the Department attribute value and use a condition to provide access to resources that have the identical tag, as shown in the following code snippet. In this post, I show how to use ABAC for this example scenario.

"Condition": {
                "StringEquals": {
                    "secretsmanager:ResourceTag/Department": "${aws:PrincipalTag/Department}"

ABAC provides organizations with a more dynamic way of working with permissions. There are four main benefits for organizations that use ABAC:

  • Scale your permissions as you innovate: As developers create new project resources, administrators can require specific attributes to be applied when resources are created. This can include applying tags with attributes that give developers immediate access to the new resources they create, without requiring an update to their own permissions.
  • Help your teams to change and grow quickly: Because permissions are based on user attributes from a corporate identity source such as an IdP, changing user attributes in the IdP that you use for access control in AWS automatically updates your permissions in AWS.
  • Create fewer AWS SSO permission sets and IAM roles: With ABAC, multiple users who are using the same AWS SSO permission set and IAM role can still get unique permissions, because permissions are now based on user attributes. Administrators can author IAM policies that grant users access only to AWS resources that have matching attributes. This helps to reduce the number of IAM roles you need to create for various use cases in a single AWS account.
  • Efficiently audit who performed an action: By using attributes that are logged in AWS CloudTrail next to every action that is performed in AWS by using an IAM role, you can make it easier for security administrators to determine the identity that takes actions in a role session.

Prerequisites

In this section, I describe some higher-level prerequisites for using ABAC effectively. ABAC in AWS relies on the use of tags for access-control decisions, so it’s important to have in place a tagging strategy for your resources. To help you develop an effective strategy, see the AWS Tagging Strategies whitepaper.

Organizations that implement ABAC can enhance the use of tags across their resources for the purpose of identity access. Making sure that tagging is enforced and secure is essential to an enterprise-wide strategy. For more information about enforcing a tagging policy, see the blog post Enforce Centralized Tag Compliance Using AWS Service Catalog, DynamoDB, Lambda, and CloudWatch Events.

You can use the service AWS Resource Groups to identify untagged resources and to find resources to tag. You can also use Resource Groups to remediate untagged resources.

Use AWS SSO with Okta as an IdP

AWS SSO gives you an efficient way to centrally manage access to multiple AWS accounts and business applications, and to provide users with single sign-on access to all their assigned accounts and applications from one place. With AWS SSO, you can manage access and user permissions to all of your accounts in AWS Organizations centrally. AWS SSO configures and maintains all the necessary permissions for your accounts automatically, without requiring any additional setup in the individual accounts.

AWS SSO supports access control attributes from any IdP. This blog post focuses on how you can use ABAC attributes with AWS SSO when you’re using Okta as an external IdP.

Use other single sign-on services with ABAC

This post describes how to turn on ABAC in AWS SSO. To turn on ABAC with other federation services, see these links:

Implement the solution

Follow these steps to set up Okta as an IdP in AWS SSO and turn on ABAC.

To set up Okta and turn on ABAC

  1. Set up Okta as an IdP for AWS SSO. To do so, follow the instructions in the blog post Single Sign-On Between Okta Universal Directory and AWS. For more information on the supported actions in AWS SSO with Okta, see our documentation.
  2. Enable attributes for access control (in other words, turn on ABAC) in AWS SSO by using these steps:
    1. In the AWS Management Console, navigate to AWS SSO in the AWS Region you selected for your implementation.
    2. On the Dashboard tab, select Choose your identity source.
    3. Next to Attributes for access control, choose Enable.

      Figure 1: Turn on ABAC in AWS SSO

      Figure 1: Turn on ABAC in AWS SSO

    You should see the message “Attributes for access control has been successfully enabled.”

  3. Enable updates for user attributes in Okta provisioning. Now that you’ve turned on ABAC in AWS SSO, you need to verify that automatic provisioning for Okta has attribute updates enabled.Log in to Okta as an administrator and locate the application you created for AWS SSO. Navigate to the Provisioning tab, choose Edit, and verify that Update User Attributes is enabled.

    Figure 2: Enable automatic provisioning for ABAC updates

    Figure 2: Enable automatic provisioning for ABAC updates

  4. Configure user attributes in Okta for use in AWS SSO by following these steps:
    1. From the same application that you created earlier, navigate to the Sign On tab.
    2. Choose Edit, and then expand the Attributes (optional) section.
    3. In the Attribute Statements (optional) section, for each attribute that you will use for access control in AWS SSO, do the following:
      1. For Name, enter https://aws.amazon.com/SAML/Attributes/AccessControl:<AttributeName>. Replace <AttributeName> with the name of the attribute you’re expecting in AWS SSO, for example https://aws.amazon.com/SAML/Attributes/AccessControl:Department.
      2. For Name Format, choose URI reference.
      3. For Value, enter user.<AttributeName>. Replace <AttributeName> with the Okta default user profile variable name, for example user.department. To view the Okta default user profile, see these instructions.


    Figure 3: Configure two attributes for users in Okta

    Figure 3: Configure two attributes for users in Okta

    In the example shown here, I added two attributes, Department and Division. The result should be similar to the configuration shown in Figure 3.

  5. Add attributes to your users by using these steps:
    1. In your Okta portal, log in as administrator. Navigate to Directory, and then choose People.
    2. Locate a user, navigate to the Profile tab, and then choose Edit.
    3. Add values to the attributes you selected.
    Figure 4: Addition of user attributes in Okta

    Figure 4: Addition of user attributes in Okta

  6. Confirm that attributes are mapped. Because you’ve enabled automatic provisioning updates from Okta, you should be able to see the attributes for your user immediately in AWS SSO. To confirm this:
    1. In the console, navigate to AWS SSO in the Region you selected for your implementation.
    2. On the Users tab, select a user that has attributes from Okta, and select the user. You should be able to see the attributes that you mapped from Okta.
    Figure 5: User attributes in Okta

    Figure 5: User attributes in Okta

Now that you have ABAC attributes for your users in AWS SSO, you can now create permission sets based on those attributes.

Note: Step 4 ensures that users will not be successfully authenticated unless the attributes configured are present. If you don’t want this enforcement, do not perform step 4.

Build an ABAC permission set in AWS SSO

For demonstration purposes, I’ll show how you can build a permission set that is based on ABAC attributes for AWS Secrets Manager. The permission set will match resource tags to user tags, in order to control which resources can be managed by Secrets Manager administrators. You can apply this single permission set to multiple teams.

To build the ABAC permission set

  1. In the console, navigate to AWS SSO, and choose AWS Accounts.
  2. Choose the Permission sets tab.
  3. Choose Create permission set, and then choose Create a custom permission set.
  4. Fill in the fields as follows.
    1. For Name, enter a name for your permission set that will be visible to your users, for example, SecretsManager-Profile.
    2. For Description, enter ABAC SecretsManager Profile.
    3. Select the appropriate session duration.
    4. For Relay State, for my example I will enter the URL for Secrets Manager: https://console.aws.amazon.com/secretsmanager/home. This will give a better user experience when the user signs in to AWS SSO, with an automatic redirect to the Secrets Manager console.
    5. For the field What policies do you want to include in your permission set?, choose Create a custom permissions policy.
    6. Under Create a custom permissions policy, paste the following policy.
      {
          "Version": "2012-10-17",
          "Statement": [
              {
                  "Sid": "SecretsManagerABAC",
                  "Effect": "Allow",
                  "Action": [
                      "secretsmanager:DescribeSecret",
                      "secretsmanager:PutSecretValue",
                      "secretsmanager:CreateSecret",
                      "secretsmanager:ListSecretVersionIds",
                      "secretsmanager:UpdateSecret",
                      "secretsmanager:GetResourcePolicy",
                      "secretsmanager:GetSecretValue",
                      "secretsmanager:ListSecrets",
                      "secretsmanager:TagResource"
                  ],
                  "Resource": "*",
                  "Condition": {
                      "StringEquals": {
                          "secretsmanager:ResourceTag/Department": "${aws:PrincipalTag/Department}"
                      }
                  }
              },
              {
                  "Sid": "NeededPermissions",
                  "Effect": "Allow",
                  "Action": [
             "kms:ListKeys",
             "kms:ListAliases",
                      "rds:DescribeDBInstances",
                      "redshift:DescribeClusters",
                      "rds:DescribeDBClusters",
                      "secretsmanager:ListSecrets",
                      "tag:GetResources",
                      "lambda:ListFunctions"
                  ],
                  "Resource": "*"
              }
          ]
      }
      

    This policy grants users the ability to create and list secrets that belong to their department. The policy is configured to allow Secrets Manager users to manage only the resources that belong to their department. You can modify this policy to perform matching on more attributes, in order to have more granular permissions.

    Note: The RDS permissions in the policy enable users to select an RDS instance for the secret and the Lambda Permissions are to enable custom key rotation.

    If you look closely at the condition

    “secretsmanager:ResourceTag/Department”: “${aws:PrincipalTag/Department}”

    …the condition states that the user can only access Secrets Manager resources that have a Department tag, where the value of that tag is identical to the value of the Department tag from the user.

  5. Choose Next: Tags.
  6. Tag your permission set. For my example, I’ll add Key: Service and Value: SecretsManager.
  7. Choose Next: Review and create.
  8. Assign the permission set to a user or group and to the appropriate accounts that you have in AWS Organizations.

Test an ABAC permission set

Now you can test the ABAC permission set that you just created for Secrets Manager.

To test the ABAC permission set

  1. In the AWS SSO console, on the Dashboard page, navigate to the User Portal URL.
  2. Sign in as a user who has the attributes that you configured earlier in AWS SSO. You will assume the permission set that you just created.
  3. Choose Management console. This will take you to the console that you specified in the Relay State setting for the permission set, which in my example is the Secrets Manager console.

    Figure 6: AWS SSO ABAC profile access

    Figure 6: AWS SSO ABAC profile access

  4. Try to create a secret with no tags:
    1. Choose Store a new secret.
    2. Choose Other type of secrets.
    3. You can add any values you like for the other options, and then choose Next.
    4. Give your secret a name, but don’t add any tags. Choose Next.
    5. On the Configure automatic rotation page, choose Next, and then choose Store.

    You should receive an error stating that the user failed to create the secret, because the user is not authorized to perform the secretsmanager:CreateSecret action.

    Figure 7: Failure to create a secret (no attributes)

    Figure 7: Failure to create a secret (no attributes)

  5. Choose Previous twice, and then add the appropriate tag. For my example, I’ll add a tag with the key Department and the value Serverless.

    Figure 8: Adding tags for a secret

    Figure 8: Adding tags for a secret

  6. Choose Next twice, and then choose Store. You should see a message that your secret creation was successful.

    Figure 9: Successful secret creation

    Figure 9: Successful secret creation

Now administrators who assume this permission set can view, create, and manage only the secrets that belong to their team or department, based on the tags that you defined. You can reuse this permission set across a large number of teams, which can reduce the number of permission sets you need to create and manage.

Summary

In this post, I’ve talked about the benefits organizations can gain from embracing an ABAC strategy, and walked through how to turn on ABAC attributes in Okta and AWS SSO. I’ve also shown how you can create ABAC-driven permission sets to simplify your permission set management. For more information on AWS services that support ABAC—in other words, authorization based on tags—see our updated AWS services that work with IAM page.

If you have feedback about this blog post, submit comments in the Comments section below. If you have questions about this post, start a new thread on the AWS Single Sign-On forum.

Want more AWS Security how-to content, news, and feature announcements? Follow us on Twitter.

Author

Louay Shaat

Louay is a Security Solutions Architect with AWS. He spends his days working with customers, from startups to the largest of enterprises helping them build cool new capabilities and accelerating their cloud journey. He has a strong focus on security and automation helping customers improve their security, risk, and compliance in the cloud.

How AWS SSO Active Directory sync enhances AWS application experiences

Post Syndicated from Sharanya Ramakrishnan original https://aws.amazon.com/blogs/security/how-aws-sso-active-directory-sync-enhances-aws-application-experiences/

Identity management is easiest when you can manage identities in a centralized location and use these identities across various accounts and applications. You also want to be able to use these identities for other purposes within applications, like searching through groups, finding members of a certain group, and sharing projects with other users or groups. For example, when you use AWS Systems Manager Change Manager, you might want to search for groups or distinguish a user from a list of users with the same name based on their email address. You expect that the user and group details you see are consistent with the details that appear in a different application.

AWS Single Sign-On (AWS SSO) streamlines identity management by enabling you to connect an identity provider (IdP), such as the AWS internal directory or a range of partners and use the IdP identity information for access and collaboration within applications. Now you can get the same benefits when you connect your Microsoft Active Directory (AD) as your AWS SSO identity source. With the release of AWS SSO AD sync, you’ll be able to access AD groups, along with AD users, from AWS SSO-integrated applications, and use these groups and users for collaborative experiences. AD sync automatically brings identity information from your Active Directory into AWS SSO and makes this information available to you within applications. It makes sure that the user and group details you access in Amazon Web Services (AWS) stay consistent with information in Active Directory through periodic synchronizations.

In this post, I’ll walk you through key use cases that highlight how applications use the user and group information that is synchronized from Active Directory and how the AD synchronization capability works to make this possible.

Access control

Your ability to manage who can access which parts of an application or who has the necessary permissions to drive certain tasks within an application relies on the application’s ability to retrieve user and group information. It’s also important that any access that you configure is updated dynamically when there are any changes at the source. For example, if you define approval access to a group in an application and a member leaves the group when they change roles within the company, their group-based access within the application should be revoked. With AD sync, AWS SSO-integrated applications can utilize user and group information that is periodically updated, and therefore stays current.

Suppose you’ve set up an approval template in Systems Manager Change Manager for patching instances and want to require that all members of the IT Security Operations team approve any change requests created with this template. AD sync enhances this process by giving you the option to define approvers at the AD group level. If you have an IT Security Operations group in Active Directory and the group has permissions set up to access AWS SSO, this group will be available to you in Change Manager to select as an approver in your template. If a member of the IT Security Operations group switches roles and leaves the team, AD sync helps to ensure that the member’s access to approve patching-related change requests is revoked, by dynamically updating the IT Security Operations group in Change Manager once the member is removed from the group in Active Directory.

It’s common for teams at companies to work on cross-functional initiatives that involve sharing projects, reports, or dashboards with members of different teams for their review and feedback, or for collaboration. In such cases, you want to be able to easily search for users and groups within the application and share out relevant artifacts. AD sync makes it possible to access users and groups within AWS SSO-integrated applications, and you can then use this information for searching and sharing.

For example, if you use an AWS SSO-integrated application like AWS IoT SiteWise to create and share dashboards for metrics reviews with leadership or to collaborate with other teams in your organization, you’ll now be able to see all users with access to AWS. AD sync makes it possible for AWS IoT SiteWise to access all users, rather than only the users who signed in to AWS at least once.

Administrative efficiency

If you’re a platform admin or cloud admin who manages access to AWS SSO in your company, assigning users and groups with access to AWS accounts and resources is a routine task that requires administrative effort. Because AD sync periodically syncs AD groups into AWS SSO, you only need to pre-define access to resources for an AD group once. After that point, any new member, such as a new employee, who is added to the AD group in Active Directory will gain access to resources tied to the AD group. The new employee will also be added to AWS SSO through AD sync, and their information will stay current through periodic syncs. Therefore, the administrative effort involved on your end for managing users is reduced.

Similarly, if an employee leaves the company, you will no longer have to worry about deleting their information in AWS, because AD sync automatically deletes user and group objects that you delete in Active Directory. This simplifies your user lifecycle management and reduces the manual effort involved in the process.

How Active Directory sync works in the background

This new AD sync feature is for customers who want to use their AD identities with AWS SSO, without setting up a separate IdP, such as AD Federation Service or Azure AD. To use this capability, you must connect AWS SSO to your Active Directory by using AWS SSO with either AWS Directory Service for Microsoft Active Directory (AWS Managed Microsoft AD) or AD Connector. Learn more about using AWS Managed Microsoft AD and AD Connector.

AD sync brings in user and group information from your Active Directory and stores it in the AWS SSO identity store. Once this information is synchronized, AWS SSO-integrated applications can use the user and group information to deliver collaborative experiences, such as sharing a dashboard with other users.

AD sync obtains a list of users and groups to be synchronized from Active Directory based on the assignments that you make to AWS accounts and applications. It then syncs those users and groups (including the group members) into the AWS identity store, keeping the information updated through periodic syncs, as shown in Figure 1.

Figure 1: Active Directory synchronization of users and groups

Figure 1: Active Directory synchronization of users and groups

If a user has assignments based on attribute-based access-control (ABAC) and changes departments, attributes will automatically update at the next sync. If a user happens to sign in before the next sync, the attributes will be updated at sign-in to maintain consistency. The user will now see their assignments updated based on their new department.

AD sync also syncs in all members of a group, including sub-groups or nested groups. It flattens members of the nested groups, that is, it adds them to the parent group in the AWS SSO identity store. For example, if Group B is a member or nested group of Group A in Active Directory, then members of Group B are also synced into AWS SSO and added directly to Group A, as shown in Figure 2. So, only Group A can be used in AWS SSO accounts and applications.

Figure 2: Members of nested Group B flattened and added to parent Group A

Figure 2: Members of nested Group B flattened and added to parent Group A

If you delete a user or group in Active Directory, AD sync automatically deletes the user or group from the AWS SSO identity store. You won’t see the deleted identity appear in AWS SSO-integrated applications, either. However, if you only delete the assignments for a user or group, the user or group will remain in AWS SSO and won’t be automatically deleted.

Summary

In this blog post, I explained how user and group synchronization can help deliver better application experiences with less administrative effort. I also covered how the AWS SSO AD sync capability delivers this benefit for applications such as AWS Systems Manager and AWS IoT SiteWise. AD sync capability is available to you at no additional cost in all AWS Regions supported by AWS SSO. If you want to get started with AWS SSO or learn more about AD sync, see the AWS SSO User Guide.

If you have feedback about this post, submit comments in the Comments section below. If you have questions about this post, start a new thread on the AWS SSO forum or contact AWS Support.

Want more AWS Security how-to content, news, and feature announcements? Follow us on Twitter.

Author

Sharanya Ramakrishnan

Sharanya is a Senior Technical Product Manager in the AWS Identity team. She enjoys solving customer problems through meaningful products, particularly in the dynamic security and identity space. Outside of work, Sharanya likes to travel and enjoys hiking and reading.

Use new account assignment APIs for AWS SSO to automate multi-account access

Post Syndicated from Akhil Aendapally original https://aws.amazon.com/blogs/security/use-new-account-assignment-apis-for-aws-sso-to-automate-multi-account-access/

In this blog post, we’ll show how you can programmatically assign and audit access to multiple AWS accounts for your AWS Single Sign-On (SSO) users and groups, using the AWS Command Line Interface (AWS CLI) and AWS CloudFormation.

With AWS SSO, you can centrally manage access and user permissions to all of your accounts in AWS Organizations. You can assign user permissions based on common job functions, customize them to meet your specific security requirements, and assign the permissions to users or groups in the specific accounts where they need access. You can create, read, update, and delete permission sets in one place to have consistent role policies across your entire organization. You can then provide access by assigning permission sets to multiple users and groups in multiple accounts all in a single operation.

AWS SSO recently added new account assignment APIs and AWS CloudFormation support to automate access assignment across AWS Organizations accounts. This release addressed feedback from our customers with multi-account environments who wanted to adopt AWS SSO, but faced challenges related to managing AWS account permissions. To automate the previously manual process and save your administration time, you can now use the new AWS SSO account assignment APIs, or AWS CloudFormation templates, to programmatically manage AWS account permission sets in multi-account environments.

With AWS SSO account assignment APIs, you can now build your automation that will assign access for your users and groups to AWS accounts. You can also gain insights into who has access to which permission sets in which accounts across your entire AWS Organizations structure. With the account assignment APIs, your automation system can programmatically retrieve permission sets for audit and governance purposes, as shown in Figure 1.

Figure 1: Automating multi-account access with the AWS SSO API and AWS CloudFormation

Figure 1: Automating multi-account access with the AWS SSO API and AWS CloudFormation

Overview

In this walkthrough, we’ll illustrate how to create permission sets, assign permission sets to users and groups in AWS SSO, and grant access for users and groups to multiple AWS accounts by using the AWS Command Line Interface (AWS CLI) and AWS CloudFormation.

To grant user permissions to AWS resources with AWS SSO, you use permission sets. A permission set is a collection of AWS Identity and Access Management (IAM) policies. Permission sets can contain up to 10 AWS managed policies and a single custom policy stored in AWS SSO.

A policy is an object that defines a user’s permissions. Policies contain statements that represent individual access controls (allow or deny) for various tasks. This determines what tasks users can or cannot perform within the AWS account. AWS evaluates these policies when an IAM principal (a user or role) makes a request.

When you provision a permission set in the AWS account, AWS SSO creates a corresponding IAM role on that account, with a trust policy that allows users to assume the role through AWS SSO. With AWS SSO, you can assign more than one permission set to a user in the specific AWS account. Users who have multiple permission sets must choose one when they sign in through the user portal or the AWS CLI. Users will see these as IAM roles.

To learn more about IAM policies, see Policies and permissions in IAM. To learn more about permission sets, see Permission Sets.

Assume you have a company, Example.com, which has three AWS accounts: an organization management account (ExampleOrgMaster), a development account (ExampleOrgDev), and a test account (ExampleOrgTest). Example.com uses AWS Organizations to manage these accounts and has already enabled AWS SSO.

Example.com has the IT security lead, Frank Infosec, who needs PowerUserAccess to the test account (ExampleOrgTest) and SecurityAudit access to the development account (ExampleOrgDev). Alice Developer, the developer, needs full access to Amazon Elastic Compute Cloud (Amazon EC2) and Amazon Simple Storage Service (Amazon S3) through the development account (ExampleOrgDev). We’ll show you how to assign and audit the access for Alice and Frank centrally with AWS SSO, using the AWS CLI.

The flow includes the following steps:

  1. Create three permission sets:
    • PowerUserAccess, with the PowerUserAccess policy attached.
    • AuditAccess, with the SecurityAudit policy attached.
    • EC2-S3-FullAccess, with the AmazonEC2FullAccess and AmazonS3FullAccess policies attached.
  2. Assign permission sets to the AWS account and AWS SSO users:
    • Assign the PowerUserAccess and AuditAccess permission sets to Frank Infosec, to provide the required access to the ExampleOrgDev and ExampleOrgTest accounts.
    • Assign the EC2-S3-FullAccess permission set to Alice Developer, to provide the required permissions to the ExampleOrgDev account.
  3. Retrieve the assigned permissions by using Account Entitlement APIs for audit and governance purposes.

    Note: AWS SSO Permission sets can contain either AWS managed policies or custom policies that are stored in AWS SSO. In this blog we attach AWS managed polices to the AWS SSO Permission sets for simplicity. To help secure your AWS resources, follow the standard security advice of granting least privilege access using AWS SSO custom policy while creating AWS SSO Permission set.

Figure 2: AWS Organizations accounts access for Alice and Frank

Figure 2: AWS Organizations accounts access for Alice and Frank

To help simplify administration of access permissions, we recommend that you assign access directly to groups rather than to individual users. With groups, you can grant or deny permissions to groups of users, rather than having to apply those permissions to each individual. For simplicity, in this blog you’ll assign permissions directly to the users.

Prerequisites

Before you start this walkthrough, complete these steps:

Use the AWS SSO API from the AWS CLI

In order to call the AWS SSO account assignment API by using the AWS CLI, you need to install and configure AWS CLI v2. For more information about AWS CLI installation and configuration, see Installing the AWS CLI and Configuring the AWS CLI.

Step 1: Create permission sets

In this step, you learn how to create EC2-S3FullAccess, AuditAccess, and PowerUserAccess permission sets in AWS SSO from the AWS CLI.

Before you create the permission sets, run the following command to get the Amazon Resource Name (ARN) of the AWS SSO instance and the Identity Store ID, which you will need later in the process when you create and assign permission sets to AWS accounts and users or groups.

aws sso-admin list-instances

Figure 3 shows the results of running the command.

Figure 3: AWS SSO list instances

Figure 3: AWS SSO list instances

Next, create the permission set for the security team (Frank) and dev team (Alice), as follows.

Permission set for Alice Developer (EC2-S3-FullAccess)

Run the following command to create the EC2-S3-FullAccess permission set for Alice, as shown in Figure 4.

aws sso-admin create-permission-set --instance-arn '<Instance ARN>' --name 'EC2-S3-FullAccess' --description 'EC2 and S3 access for developers'
Figure 4: Creating the permission set EC2-S3-FullAccess

Figure 4: Creating the permission set EC2-S3-FullAccess

Permission set for Frank Infosec (AuditAccess)

Run the following command to create the AuditAccess permission set for Frank, as shown in Figure 5.

aws sso-admin create-permission-set --instance-arn '<Instance ARN>' --name 'AuditAccess' --description 'Audit Access for security team on ExampleOrgDev account'
Figure 5: Creating the permission set AuditAccess

Figure 5: Creating the permission set AuditAccess

Permission set for Frank Infosec (PowerUserAccess)

Run the following command to create the PowerUserAccess permission set for Frank, as shown in Figure 6.

aws sso-admin create-permission-set --instance-arn '<Instance ARN>' --name 'PowerUserAccess' --description 'Power User Access for security team on ExampleOrgDev account'
Figure 6: Creating the permission set PowerUserAccess

Figure 6: Creating the permission set PowerUserAccess

Copy the permission set ARN from these responses, which you will need when you attach the managed policies.

Step 2: Assign policies to permission sets

In this step, you learn how to assign managed policies to the permission sets that you created in step 1.

Attach policies to the EC2-S3-FullAccess permission set

Run the following command to attach the amazonec2fullacess AWS managed policy to the EC2-S3-FullAccess permission set, as shown in Figure 7.

aws sso-admin attach-managed-policy-to-permission-set --instance-arn '<Instance ARN>' --permission-set-arn '<Permission Set ARN>' --managed-policy-arn 'arn:aws:iam::aws:policy/amazonec2fullaccess'
Figure 7: Attaching the AWS managed policy amazonec2fullaccess to the EC2-S3-FullAccess permission set

Figure 7: Attaching the AWS managed policy amazonec2fullaccess to the EC2-S3-FullAccess permission set

Run the following command to attach the amazons3fullaccess AWS managed policy to the EC2-S3-FullAccess permission set, as shown in Figure 8.

aws sso-admin attach-managed-policy-to-permission-set --instance-arn '<Instance ARN>' --permission-set-arn '<Permission Set ARN>' --managed-policy-arn 'arn:aws:iam::aws:policy/amazons3fullaccess'
Figure 8: Attaching the AWS managed policy amazons3fullaccess to the EC2-S3-FullAccess permission set

Figure 8: Attaching the AWS managed policy amazons3fullaccess to the EC2-S3-FullAccess permission set

Attach a policy to the AuditAccess permission set

Run the following command to attach the SecurityAudit managed policy to the AuditAccess permission set that you created earlier, as shown in Figure 9.

aws sso-admin attach-managed-policy-to-permission-set --instance-arn '<Instance ARN>' --permission-set-arn '<Permission Set ARN>' --managed-policy-arn 'arn:aws:iam::aws:policy/SecurityAudit'
Figure 9: Attaching the AWS managed policy SecurityAudit to the AuditAccess permission set

Figure 9: Attaching the AWS managed policy SecurityAudit to the AuditAccess permission set

Attach a policy to the PowerUserAccess permission set

The following command is similar to the previous command; it attaches the PowerUserAccess managed policy to the PowerUserAccess permission set, as shown in Figure 10.

aws sso-admin attach-managed-policy-to-permission-set --instance-arn '<Instance ARN>' --permission-set-arn '<Permission Set ARN>' --managed-policy-arn 'arn:aws:iam::aws:policy/PowerUserAccess'
Figure 10: Attaching AWS managed policy PowerUserAccess to the PowerUserAccess permission set

Figure 10: Attaching AWS managed policy PowerUserAccess to the PowerUserAccess permission set

In the next step, you assign users (Frank Infosec and Alice Developer) to their respective permission sets and assign permission sets to accounts.

Step 3: Assign permission sets to users and groups and grant access to AWS accounts

In this step, you assign the AWS SSO permission sets you created to users and groups and AWS accounts, to grant the required access for these users and groups on respective AWS accounts.

To assign access to an AWS account for a user or group, using a permission set you already created, you need the following:

  • The principal ID (the ID for the user or group)
  • The AWS account ID to which you need to assign this permission set

To obtain a user’s or group’s principal ID (UserID or GroupID), you need to use the AWS SSO Identity Store API. The AWS SSO Identity Store service enables you to retrieve all of your identities (users and groups) from AWS SSO. See AWS SSO Identity Store API for more details.

Use the first two commands shown here to get the principal ID for the two users, Alice (Alice’s user name is [email protected]) and Frank (Frank’s user name is [email protected]).

Alice’s user ID

Run the following command to get Alice’s user ID, as shown in Figure 11.

aws identitystore list-users --identity-store-id '<Identity Store ID>' --filter AttributePath='UserName',AttributeValue='[email protected]'
Figure 11: Retrieving Alice’s user ID

Figure 11: Retrieving Alice’s user ID

Frank’s user ID

Run the following command to get Frank’s user ID, as shown in Figure 12.

aws identitystore list-users --identity-store-id '<Identity Store ID>'--filter AttributePath='UserName',AttributeValue='[email protected]'
Figure 12: Retrieving Frank’s user ID

Figure 12: Retrieving Frank’s user ID

Note: To get the principal ID for a group, use the following command.

aws identitystore list-groups --identity-store-id '<Identity Store ID>' --filter AttributePath='DisplayName',AttributeValue='<Group Name>'

Assign the EC2-S3-FullAccess permission set to Alice in the ExampleOrgDev account

Run the following command to assign Alice access to the ExampleOrgDev account using the EC2-S3-FullAccess permission set. This will give Alice full access to Amazon EC2 and S3 services in the ExampleOrgDev account.

Note: When you call the CreateAccountAssignment API, AWS SSO automatically provisions the specified permission set on the account in the form of an IAM policy attached to the AWS SSO–created IAM role. This role is immutable: it’s fully managed by the AWS SSO, and it cannot be deleted or changed by the user even if the user has full administrative rights on the account. If the permission set is subsequently updated, the corresponding IAM policies attached to roles in your accounts won’t be updated automatically. In this case, you will need to call ProvisionPermissionSet to propagate these updates.

aws sso-admin create-account-assignment --instance-arn '<Instance ARN>' --permission-set-arn '<Permission Set ARN>' --principal-id '<user/group ID>' --principal-type '<USER/GROUP>' --target-id '<AWS Account ID>' --target-type AWS_ACCOUNT
Figure 13: Assigning the EC2-S3-FullAccess permission set to Alice on the ExampleOrgDev account

Figure 13: Assigning the EC2-S3-FullAccess permission set to Alice on the ExampleOrgDev account

Assign the AuditAccess permission set to Frank Infosec in the ExampleOrgDev account

Run the following command to assign Frank access to the ExampleOrgDev account using the EC2-S3- AuditAccess permission set.

aws sso-admin create-account-assignment --instance-arn '<Instance ARN>' --permission-set-arn '<Permission Set ARN>' --principal-id '<user/group ID>' --principal-type '<USER/GROUP>' --target-id '<AWS Account ID>' --target-type AWS_ACCOUNT
Figure 14: Assigning the AuditAccess permission set to Frank on the ExampleOrgDev account

Figure 14: Assigning the AuditAccess permission set to Frank on the ExampleOrgDev account

Assign the PowerUserAccess permission set to Frank Infosec in the ExampleOrgTest account

Run the following command to assign Frank access to the ExampleOrgTest account using the PowerUserAccess permission set.

aws sso-admin create-account-assignment --instance-arn '<Instance ARN>' --permission-set-arn '<Permission Set ARN>' --principal-id '<user/group ID>' --principal-type '<USER/GROUP>' --target-id '<AWS Account ID>' --target-type AWS_ACCOUNT
Figure 15: Assigning the PowerUserAccess permission set to Frank on the ExampleOrgTest account

Figure 15: Assigning the PowerUserAccess permission set to Frank on the ExampleOrgTest account

To view the permission sets provisioned on the AWS account, run the following command, as shown in Figure 16.

aws sso-admin list-permission-sets-provisioned-to-account --instance-arn '<Instance ARN>' --account-id '<AWS Account ID>'
Figure 16: View the permission sets (AuditAccess and EC2-S3-FullAccess) assigned to the ExampleOrgDev account

Figure 16: View the permission sets (AuditAccess and EC2-S3-FullAccess) assigned to the ExampleOrgDev account

To review the created resources in the AWS Management Console, navigate to the AWS SSO console. In the list of permission sets on the AWS accounts tab, choose the EC2-S3-FullAccess permission set. Under AWS managed policies, the policies attached to the permission set are listed, as shown in Figure 17.

Figure 17: Review the permission set in the AWS SSO console

Figure 17: Review the permission set in the AWS SSO console

To see the AWS accounts, where the EC2-S3-FullAccess permission set is currently provisioned, navigate to the AWS accounts tab, as shown in Figure 18.

Figure 18: Review permission set account assignment in the AWS SSO console

Figure 18: Review permission set account assignment in the AWS SSO console

Step 4: Audit access

In this step, you learn how to audit access assigned to your users and group by using the AWS SSO account assignment API. In this example, you’ll start from a permission set, review the permissions (AWS-managed policies or a custom policy) attached to the permission set, get the users and groups associated with the permission set, and see which AWS accounts the permission set is provisioned to.

List the IAM managed policies for the permission set

Run the following command to list the IAM managed policies that are attached to a specified permission set, as shown in Figure 19.

aws sso-admin list-managed-policies-in-permission-set --instance-arn '<Instance ARN>' --permission-set-arn '<Permission Set ARN>'
Figure 19: View the managed policies attached to the permission set

Figure 19: View the managed policies attached to the permission set

List the assignee of the AWS account with the permission set

Run the following command to list the assignee (the user or group with the respective principal ID) of the specified AWS account with the specified permission set, as shown in Figure 20.

aws sso-admin list-account-assignments --instance-arn '<Instance ARN>' --account-id '<Account ID>' --permission-set-arn '<Permission Set ARN>'
Figure 20: View the permission set and the user or group attached to the AWS account

Figure 20: View the permission set and the user or group attached to the AWS account

List the accounts to which the permission set is provisioned

Run the following command to list the accounts that are associated with a specific permission set, as shown in Figure 21.

aws sso-admin list-accounts-for-provisioned-permission-set --instance-arn '<Instance ARN>' --permission-set-arn '<Permission Set ARN>'
Figure 21: View AWS accounts to which the permission set is provisioned

Figure 21: View AWS accounts to which the permission set is provisioned

In this section of the post, we’ve illustrated how to create a permission set, assign a managed policy to the permission set, and grant access for AWS SSO users or groups to AWS accounts by using this permission set. In the next section, we’ll show you how to do the same using AWS CloudFormation.

Use the AWS SSO API through AWS CloudFormation

In this section, you learn how to use CloudFormation templates to automate the creation of permission sets, attach managed policies, and use permission sets to assign access for a particular user or group to AWS accounts.

Sign in to your AWS Management Console and create a CloudFormation stack by using the following CloudFormation template. For more information on how to create a CloudFormation stack, see Creating a stack on the AWS CloudFormation console.

//start of Template//
{
    "AWSTemplateFormatVersion": "2010-09-09",
  
    "Description": "AWS CloudFormation template to automate multi-account access with AWS Single Sign-On (Entitlement APIs): Create permission sets, assign access for AWS SSO users and groups to AWS accounts using permission sets. Before you use this template, we assume you have enabled AWS SSO for your AWS Organization, added the AWS accounts to which you want to grant AWS SSO access to your organization, signed in to the AWS Management Console with your AWS Organizations management account credentials, and have the required permissions to use the AWS SSO console.",
  
    "Parameters": {
      "InstanceARN" : {
        "Type" : "String",
        "AllowedPattern": "arn:aws:sso:::instance/(sso)?ins-[a-zA-Z0-9-.]{16}",
        "Description" : "Enter AWS SSO InstanceARN. Ex: arn:aws:sso:::instance/ssoins-xxxxxxxxxxxxxxxx",
        "ConstraintDescription": "must be the name of an existing AWS SSO InstanceARN associated with the management account."
      },
      "ExampleOrgDevAccountId" : {
        "Type" : "String",
        "AllowedPattern": "\\d{12}",
        "Description" : "Enter 12-digit Developer AWS Account ID. Ex: 123456789012"
        },
      "ExampleOrgTestAccountId" : {
        "Type" : "String",
        "AllowedPattern": "\\d{12}",
        "Description" : "Enter 12-digit AWS Account ID. Ex: 123456789012"
        },
      "AliceDeveloperUserId" : {
        "Type" : "String",
        "AllowedPattern": "^([0-9a-f]{10}-|)[A-Fa-f0-9]{8}-[A-Fa-f0-9]{4}-[A-Fa-f0-9]{4}-[A-Fa-f0-9]{4}-[A-Fa-f0-9]{12}$",
        "Description" : "Enter Developer UserId. Ex: 926703446b-f10fac16-ab5b-45c3-86c1-xxxxxxxxxxxx"
        },
        "FrankInfosecUserId" : {
            "Type" : "String",
            "AllowedPattern": "^([0-9a-f]{10}-|)[A-Fa-f0-9]{8}-[A-Fa-f0-9]{4}-[A-Fa-f0-9]{4}-[A-Fa-f0-9]{4}-[A-Fa-f0-9]{12}$",
            "Description" : "Enter Test UserId. Ex: 926703446b-f10fac16-ab5b-45c3-86c1-xxxxxxxxxxxx"
            }
    },
    "Resources": {
        "EC2S3Access": {
            "Type" : "AWS::SSO::PermissionSet",
            "Properties" : {
                "Description" : "EC2 and S3 access for developers",
                "InstanceArn" : {
                    "Ref": "InstanceARN"
                },
                "ManagedPolicies" : ["arn:aws:iam::aws:policy/amazonec2fullaccess","arn:aws:iam::aws:policy/amazons3fullaccess"],
                "Name" : "EC2-S3-FullAccess",
                "Tags" : [ {
                    "Key": "Name",
                    "Value": "EC2S3Access"
                 } ]
              }
        },  
        "SecurityAuditAccess": {
            "Type" : "AWS::SSO::PermissionSet",
            "Properties" : {
                "Description" : "Audit Access for Infosec team",
                "InstanceArn" : {
                    "Ref": "InstanceARN"
                },
                "ManagedPolicies" : [ "arn:aws:iam::aws:policy/SecurityAudit" ],
                "Name" : "AuditAccess",
                "Tags" : [ {
                    "Key": "Name",
                    "Value": "SecurityAuditAccess"
                 } ]
              }
        },    
        "PowerUserAccess": {
            "Type" : "AWS::SSO::PermissionSet",
            "Properties" : {
                "Description" : "Power User Access for Infosec team",
                "InstanceArn" : {
                    "Ref": "InstanceARN"
                },
                "ManagedPolicies" : [ "arn:aws:iam::aws:policy/PowerUserAccess"],
                "Name" : "PowerUserAccess",
                "Tags" : [ {
                    "Key": "Name",
                    "Value": "PowerUserAccess"
                 } ]
              }      
        },
        "EC2S3userAssignment": {
            "Type" : "AWS::SSO::Assignment",
            "Properties" : {
                "InstanceArn" : {
                    "Ref": "InstanceARN"
                },
                "PermissionSetArn" : {
                    "Fn::GetAtt": [
                        "EC2S3Access",
                        "PermissionSetArn"
                     ]
                },
                "PrincipalId" : {
                    "Ref": "AliceDeveloperUserId"
                },
                "PrincipalType" : "USER",
                "TargetId" : {
                    "Ref": "ExampleOrgDevAccountId"
                },
                "TargetType" : "AWS_ACCOUNT"
              }
          },
          "SecurityAudituserAssignment": {
            "Type" : "AWS::SSO::Assignment",
            "Properties" : {
                "InstanceArn" : {
                    "Ref": "InstanceARN"
                },
                "PermissionSetArn" : {
                    "Fn::GetAtt": [
                        "SecurityAuditAccess",
                        "PermissionSetArn"
                     ]
                },
                "PrincipalId" : {
                    "Ref": "FrankInfosecUserId"
                },
                "PrincipalType" : "USER",
                "TargetId" : {
                    "Ref": "ExampleOrgDevAccountId"
                },
                "TargetType" : "AWS_ACCOUNT"
              }
          },
          "PowerUserAssignment": {
            "Type" : "AWS::SSO::Assignment",
            "Properties" : {
                "InstanceArn" : {
                    "Ref": "InstanceARN"
                },
                "PermissionSetArn" : {
                    "Fn::GetAtt": [
                        "PowerUserAccess",
                        "PermissionSetArn"
                     ]
                },
                "PrincipalId" : {
                    "Ref": "FrankInfosecUserId"
                },
                "PrincipalType" : "USER",
                "TargetId" : {
                    "Ref": "ExampleOrgTestAccountId"
                },
                "TargetType" : "AWS_ACCOUNT"
              }
          }
    }
}
//End of Template//

When you create the stack, provide the following information for setting the example permission sets for Frank Infosec and Alice Developer, as shown in Figure 22:

  • The Alice Developer and Frank Infosec user IDs
  • The ExampleOrgDev and ExampleOrgTest account IDs
  • The AWS SSO instance ARN

Then launch the CloudFormation stack.

Figure 22: User inputs to launch the CloudFormation template

Figure 22: User inputs to launch the CloudFormation template

AWS CloudFormation creates the resources that are shown in Figure 23.

Figure 23: Resources created from the CloudFormation stack

Figure 23: Resources created from the CloudFormation stack

Cleanup

To delete the resources you created by using the AWS CLI, use these commands.

Run the following command to delete the account assignment.

delete-account-assignment --instance-arn '<Instance ARN>' --target-id '<AWS Account ID>' --target-type 'AWS_ACCOUNT' --permission-set-arn '<PermissionSet ARN>' --principal-type '<USER/GROUP>' --principal-id '<user/group ID>'

After the account assignment is deleted, run the following command to delete the permission set.

delete-permission-set --instance-arn '<Instance ARN>' --permission-set-arn '<PermissionSet ARN>'

To delete the resource that you created by using the CloudFormation template, go to the AWS CloudFormation console. Select the appropriate stack you created, and then choose delete. Deleting the CloudFormation stack cleans up the resources that were created.

Summary

In this blog post, we showed how to use the AWS SSO account assignment API to automate the deployment of permission sets, how to add managed policies to permission sets, and how to assign access for AWS users and groups to AWS accounts by using specified permission sets.

To learn more about the AWS SSO APIs available for you, see the AWS Single Sign-On API Reference Guide.

If you have feedback about this post, submit comments in the Comments section below. If you have questions about this post, start a new thread on the AWS SSO forum or contact AWS Support.

Want more AWS Security how-to content, news, and feature announcements? Follow us on Twitter.

Author

Akhil Aendapally

Akhil is a Solutions Architect at AWS focused on helping customers with their AWS adoption. He holds a master’s degree in Network and Computer Security. Akhil has 8+ years of experience working with different cloud platforms, infrastructure automation, and security.

Author

Yuri Duchovny

Yuri is a New York-based Solutions Architect specializing in cloud security, identity, and compliance. He supports cloud transformations at large enterprises, helping them make optimal technology and organizational decisions. Prior to his AWS role, Yuri’s areas of focus included application and networking security, DoS, and fraud protection. Outside of work, he enjoys skiing, sailing, and traveling the world.

Author

Ballu Singh

Ballu is a principal solutions architect at AWS. He lives in the San Francisco Bay area and helps customers architect and optimize applications on AWS. In his spare time, he enjoys reading and spending time with his family.

Author

Nir Ozeri

Nir is a Solutions Architect Manager with Amazon Web Services, based out of New York City. Nir specializes in application modernization, application delivery, and mobile architecture.

How to bulk import users and groups from CSV into AWS SSO

Post Syndicated from Darryn Hendricks original https://aws.amazon.com/blogs/security/how-to-bulk-import-users-and-groups-from-csv-into-aws-sso/

When you connect an external identity provider (IdP) to AWS Single Sign-On (SSO) using Security Assertion Markup Language (SAML) 2.0 standard, you must create all users and groups into AWS SSO before you can make any assignments to AWS accounts or applications. If your IdP supports user and group provisioning by way of the System for Cross-Domain Identity Management (SCIM), we strongly recommend using SCIM to simplify ongoing lifecycle management for your users and groups in AWS SSO.

If your IdP doesn’t yet support automatic provisioning, you will need to create your users and groups manually in AWS SSO. Although manual creation of users and groups is the least complicated option to get started, it can be tedious and prone to errors.

In this post, we show you how to use a comma-separated values (CSV) file to bulk create users and groups in AWS SSO.

How it works

AWS SSO supports automatic provisioning of user and group information from an external IdP into AWS SSO using the SCIM protocol. For this solution, you use a PowerShell script to simulate a SCIM server, to provision users and groups from a CSV file into AWS SSO. You create and populate the CSV file with your user and group information that is then used by the PowerShell script. Next, on your Windows, Linux, or macOS system with PowerShell Core installed, you run the PowerShell script. The PowerShell script reads users and groups from the CSV file and then programmatically creates the users and groups in AWS SSO using your SCIM configuration for AWS SSO.

Assumptions

In this blog post, we assume the following:

  • You already have an AWS SSO-enabled account (free). For more information, see Enable AWS SSO.
  • You have the permissions needed to add users and groups in AWS SSO.
  • You configured a SAML IdP with AWS SSO, as described in How to Configure SAML 2.0 for AWS Single Sign-On.
  • You’re using a Windows, MacOS, or Linux system with PowerShell Core installed.
  • If you’re not using a system with PowerShell Core installed, you’re using a Windows 7 or later system, with PowerShell 4.0 or later installed.

Note: This article was authored and the code tested on a Microsoft Windows Server 2019 system with PowerShell installed.

Enable automatic provisioning

In this step, you enable automatic provisioning in AWS SSO. You use the automatic provisioning endpoints for AWS SSO to connect and create users and groups in AWS SSO.

To enable automatic provisioning in AWS SSO

    1. On the AWS SSO Console, go to the Single Sign-On page and then go to Settings.
    2. Change the provisioning from Manual to SCIM by selecting Enable automatic provisioning.
Figure 1: Enable automatic provisioning

Figure 1: Enable automatic provisioning

    1. Copy the SCIM endpoint and the Access token (you can have up to two access token IDs). You use these values later.
Figure 2: Copy the SCIM endpoint and access token

Figure 2: Copy the SCIM endpoint and access token

Bulk create users and groups into AWS SSO

In this section, you create your users and groups from a CSV file into AWS SSO. To do this, you create a CSV file with your users’ profile information (for example: first name, last name, display name, and other values.). You also create a PowerShell script to connect to AWS SSO and create the users and groups from the CSV file in AWS SSO.

To bulk create your users from a CSV file

    1. Create a file called csv-example-users.csv with the following column headings: firstName, lastName, userName, displayName, emailAddress, and memberOf.

Note: The memberOf column will include all the groups you want to add the user to in AWS SSO. If the group you plan to add a user to isn’t in AWS SSO, the script automatically creates the group for you. If you want to add a user to multiple groups, you can add the group names separated by semicolons in the memberOf column.

    1. Populate the CSV file csv-example-users.csv with the users you want to create in AWS SSO.

Note: Before you populate the CSV file, take note of the existing users, groups, and group membership in AWS SSO. Make sure that none of the users or groups in the CSV file already exists in AWS SSO.

Note: For this to work, every user in the csv-example-users.csv must have a firstName, lastName, userName, displayName, and emailAddress value specified. If any of these values are missing, that user isn’t created. The userName and emailAddress values must not contain any spaces.

Figure 3: Create the CSV file and populate it with the users to create in AWS SSO

Figure 3: Create the CSV file and populate it with the users to create in AWS SSO

  1. Next, create a create_users.ps1 file and copy the following PowerShell code to it. Use a text editor like Notepad or TextEdit to edit the create_users.ps1 file.
    • Replace <SCIMENDPOINT> with the SCIM endpoint value you copied earlier.
    • Replace <BEARERTOKEN> with the Access token value you copied earlier.
    • Replace <CSVLOCATION> with the location of your CSV file (for example, C:\Users\testuser\Downloads\csv-example-users.csv. Relative paths are also accepted).
    #Input SCIM configuration and CSV file location
    $Url = "<SCIMENDPOINT>"
    $Bearertoken = "<BEARERTOKEN>"
    $CSVfile = "<CSVLOCATION>"
    $Headers = @{ Authorization = "Bearer $Bearertoken" }
    
    #Get users from CSV file and store in variable
    $Users = Import-Csv -Delimiter "," -Path "$CSVfile"
    
     #Read groups in CSV and groups in AWS SSO
        
        $Groups = $Users.memberOf -split ";"
        $Groups = $Groups | Sort-Object -Unique | where {$_ -ne ""}
    
        foreach($Group in $Groups){
             $SSOgroup = @{
                "displayName" = $Group.trim()
                }
    
        #Store group attribute in json format
    
        $Groupjson = $SSOgroup | ConvertTo-Json
    
        #Create groups in AWS SSO
    
        try {
        
            $Response = Invoke-RestMethod -ContentType application/json -Uri "$Url/Groups" -Method POST -Headers $Headers -Body $Groupjson -UseBasicParsing
            Write-Host "Create group: The group $($Group) has been created successfully." -foregroundcolor green
    
        }
        catch 
        {
        
          $ErrorMessage = $_.Exception.Message
    
           if ($ErrorMessage -eq "The remote server returned an error: (409) Conflict.")
           {
             Write-Host "Error creating group: A group with the name $($Group) already exists." -foregroundcolor yellow
           }
           
           else 
           {       
             Write-Host "Error has occurred: $($ErrorMessage)" -foregroundcolor Red
           }
        }
        }
    
    #Loop through each user
    foreach ($User in $Users)
    {
    
        #Get user attributes from each field
        $SSOuser = @{
                name = @{ familyName = $User.lastName.trim(); givenName = $User.firstName.trim() }
                displayName = $User.displayName.trim()
                userName = $User.userName
                emails = @(@{ value = $User.emailAddress; type = "work"; primary = "true" })
                active = "true"
                }
    
        #Store user attributes in json format
        $Userjson = $SSOuser | ConvertTo-Json
    
        #Create users in AWS SSO
    
        try {
        $Response = Invoke-RestMethod -ContentType application/json -Uri "$Url/Users" -Method POST -Headers $Headers -Body $Userjson -UseBasicParsing
        Write-Host "Create user: The user $($User.userName) has been created successfully." -foregroundcolor green
    
        }
        catch 
        {
        
          $ErrorMessage = $_.Exception.Message
    
           if ($ErrorMessage -eq "The remote server returned an error: (409) Conflict.")
           {
             Write-Host "Error creating user: A user with the same username $($User.userName) already exist" -foregroundcolor yellow
           }
           
           else 
           {       
             Write-Host "Error has occurred: $($ErrorMessage)" -foregroundcolor Red
           }
        }   
    
    #Get user information
        $UserName = $User.userName
        $UserId = (Invoke-RestMethod -ContentType application/json -Uri "$Url/Users`?filter=userName%20eq%20%22$UserName%22" -Method GET -Headers $Headers).Resources.id
        $Groups = $User.memberOf -split ";"
    
    #Loop through each group and add user to group
        foreach($Group in $Groups){
    
    If (-not [string]::IsNullOrWhiteSpace($Group)) 
    {
    #Get the GroupName and GroupId
        $GroupName = $Group.trim()
        $GroupId = (Invoke-RestMethod -ContentType application/json -Uri "$Url/Groups`?filter=displayName%20eq%20%22$GroupName%22" -Method GET -Headers $Headers).Resources.id
    
    #Store group membership in variable. 
        $AddUserToGroup = @{
                Operations = @(@{ op = "add"; path = "members"; value = @(@{ value = $UserId })})
                }
                
        #Convert to json format
        $AddUsertoGroupjson = $AddUserToGroup | ConvertTo-Json -Depth 4
    
        #Add users to group in AWS SSO
        
            try {
        $Responses = Invoke-RestMethod -ContentType application/json -Uri "$Url/Groups/$GroupId" -Method PATCH -Headers $Headers -Body $AddUsertoGroupjson -UseBasicParsing
        Write-Host "Add user to group: The user $($User.userName) has been added successfully to group $($GroupName)." -foregroundcolor green
    
        }
        catch 
        {
        
          $ErrorMessage = $_.Exception.Message
    
    	if ($ErrorMessage -eq "The remote server returned an error: (409) Conflict.")
           {
             Write-Host "Error adding user to group: The user $($User.userName) is already added to group $($GroupName)." -foregroundcolor yellow
           }
           
           else 
           {       
             Write-Host "Error has occurred: $($ErrorMessage)" -foregroundcolor Red
           }
        }
       }        
      }
    }
    

  2. Use Windows PowerShell to run the script create_users.ps1, as shown in the following figure.

    Figure 4: Run PowerShell script to create users from CSV in AWS SSO

    Figure 4: Run PowerShell script to create users from CSV in AWS SSO

  3. Use the AWS SSO console to verify that the users and groups were successfully created. In the AWS SSO console, select Users from the left menu, as shown in figure 5.

    Figure 5: View the newly created users in AWS SSO console

    Figure 5: View the newly created users in AWS SSO console

  4. Use the AWS SSO console to verify that the groups were successfully created. In the AWS SSO console, select Groups from the left menu, as shown in figure 6.

    Figure 6: View the newly created groups in AWS SSO console

    Figure 6: View the newly created groups in AWS SSO console

Your users, groups, and group memberships have been created in AWS SSO. You can now manage access for your identities in AWS SSO across your own applications, third-party applications (SaaS), and Amazon Web Services (AWS) environments.

How to run the PowerShell scripts on Linux and macOS

While this post focuses on running the PowerShell script on a Windows system. You can also run the PowerShell script on a Linux or macOS system that has PowerShell Core installed. You can then follow the steps in this post to create the required CSV files for creating a user and group and adding a user to a group. Then, on your Linux or macOS system, you can run the PowerShell script using the following command.

pwsh -File <Path to PowerShell Script>

Conclusion

In this post, we showed you how to programmatically create users and groups from a CSV file into AWS SSO. This solution isn’t a replacement for automatic provisioning. However, it can help you to quickly get up and running with AWS SSO by reducing the administration burden of manually creating users in AWS SSO.

If you have feedback about this post, submit comments in the Comments section below.

Want more AWS Security how-to content, news, and feature announcements? Follow us on Twitter.

Author

Darryn Hendricks

Darryn is a Senior Cloud Support Engineer for AWS Single Sign-On (SSO) based in Seattle, Washington. He is passionate about Cloud computing, identities, automation and helping customers leverage these key building blocks when moving to the Cloud. Outside of work, he loves spending time with his wife and daughter.

Author

Jose Ruiz

Jose is a Senior Solutions Architect – Security Specialist at AWS. He often enjoys “the road less traveled” and knows each technology has a security story often not spoken of. He takes this perspective when working with customers on highly complex solutions and driving security at the beginning of each build.

On-Demand SCIM provisioning of Azure AD to AWS SSO with PowerShell

Post Syndicated from Natalie Doerr original https://aws.amazon.com/blogs/security/on-demand-scim-provisioning-of-azure-ad-to-aws-sso-with-powershell/

In this post, I will demonstrate how you can use a PowerShell script to initiate an on-demand synchronization between Azure Active Directory and AWS Single Sign-On (AWS SSO) and avoid the default 40-minute synchronization schedule between both identity providers. This solution helps enterprises quickly synchronize changes made to users, groups, or permissions within Azure AD with AWS SSO. This allows user or permission changes to be quickly reflected in associated AWS accounts.

Prerequisites

You need the following to complete this session:

This post focuses on the steps needed to set up the on-demand sync solution. You can find specifics on how to set up and use PowerShell and the Azure PowerShell modules at Installing Azure PowerShell.
 

Figure 1: Triggering the SCIM Endpoint to sync all users and groups

Figure 1: Triggering the SCIM Endpoint to sync all users and groups

Grant permission to the Graph API to access the Default Directory in Azure AD

To get started, grant the permissions needed for the application to have access to the directory endpoint.

To grant permissions

  1. Sign in to the Azure Portal and navigate to the Azure AD dashboard.
  2. From the left navigation pane, select App registrations. If you don’t see your application listed, select the All applications tab.
    For this example, I’m using an application named AWS.
     
    Figure 2: Select the AWS app registration

    Figure 2: Select the AWS app registration

  3. Choose API permissions from the navigation pane.
  4. Choose the Add a permission option.
     
    Figure 3: Select the Add API permission

    Figure 3: Select the Add API permission

  5. From the settings page that opens, choose the Microsoft Graph option.
     
    Figure 4: Request API permissions

    Figure 4: Request API permissions

    Under What type of permissions does your application require, select Delegated permissions and enter directory.readwrite.all in the permissions search field. Select Directory.ReadWrite.All and choose Add permissions at the bottom of the page.
     

    Figure 5: Request API permissions - Add permissions

    Figure 5: Request API permissions – Add permissions

  6. On the API permissions page, choose Grant admin consent for Default Directory and select Yes.
     
    Figure 6: Grant permission for the account to have administrator permissions

    Figure 6: Grant permission for the account to have administrator permissions

Create a certificate and secret to access the application

To get started, create a certificate and secret which grants secure access to the AWS application.

To create a certificate and secret

  1. Choose Certificate & secrets from the left navigation menu and then choose New client secret.
     
    Figure 7: Creating a client secret for 1 year

    Figure 7: Creating a client secret for 1 year

  2. Select the desired length of the certificate.
  3. Provide a description and choose Add.
    1. Copy the value of the certificate that’s generated and save it to use later in this process.
    2. After you’ve saved the value to use later, select Home from the top left corner of the screen.
    Figure 8: Make sure you click Copy to clipboard to store the value of the secret

    Figure 8: Make sure you click Copy to clipboard to store the value of the secret

Create a user with permissions to run the code

Now that you’ve given your application access to the directory, let’s create a user and assign the proper permissions to run the code.

To create a user and assign permissions

  1. Choose Azure Active Directory from the Azure services list.
  2. Choose Users and select New user. The User name, First name, and Last name fields are required. In this example, I set the User name and First name to Auth and the Last name to User.
    1. Take note of the password that is set for this user and save it to use later.
    2. Once completed, choose Create.
    Figure 9: Create a user in Azure AD

    Figure 9: Create a user in Azure AD

  3. Select the newly created user from the list.
    1. On the left navigation pane, select Assigned roles.
    2. Choose Add assignments.
    3. Choose Hybrid identity administrator and select Add.
    Figure 10: Assign the user the role to trigger the API

    Figure 10: Assign the user the role to trigger the API

  4. Select Default Directory from the top of the navigation pane.
    1. Choose Enterprise applications.
    2. Choose the AWS application.
    3. Select Assign users and groups.
    Figure 11: Azure Enterprise applications - Assign users and groups

    Figure 11: Azure Enterprise applications – Assign users and groups

  5. Choose + Add user at the top of the window.
    1. Select the user you created earlier. I select Auth as that was the user I created earlier.
    2. Choose Select and then Assign.
    Figure 12: Select the user we created earlier from Figure 9

    Figure 12: Select the user we created earlier from Figure 9


    Figure 13: Assign the user to the application

    Figure 13: Assign the user to the application

  6. Now that you’ve added the user, you can see that the user is assigned to the application.
     
    Figure 14: Screen now showing that the user has been assigned to the application

    Figure 14: Screen now showing that the user has been assigned to the application

  7. It’s recommended to log in to the Azure portal as the user you just created in a new incognito or private browser session. As part of the first log in, you’ll be prompted to change the password.

Prerequisites to trigger the SCIM endpoint

You need the following items to run the PowerShell code that triggers the endpoint.

  1. From the application registration, retrieve the items shown below. Note that you must use the client secret saved earlier when the certificate was created.
    • Tenant ID
    • Display name
    • Application ID
    • Client secret
    • User name
    • Password
  2. Copy the items to a notepad in the preceding order so you can enter all of them through a single copy and paste action while running the script.
  3. From the menu, select Azure Active Directory.
  4. Choose App registrations and select the AWS App that was set up.
  5. Copy the Application (client) ID and the Directory (tenant) ID.
Figure 15: App registration contains all the items needed for the PowerShell script

Figure 15: App registration contains all the items needed for the PowerShell script

Trigger the SCIM endpoint with PowerShell

Now that you’ve completed all of the previous steps, you need to copy the code from the GitHub repository to your local machine and run it. We’ve configured the code to run manually, but you can also automate it to trigger an Azure Automation runbook when users are added to Azure through Alerts. You can also configure CloudWatch Events to run a Lambda function at periodic intervals.

To trigger the SCIM endpoint

  1. Copy the code from the GitHub repository.
  2. Save the code using the code editor of your choice, or you can download Visual Studio Code. Give the file a user-friendly name, such as Sync.ps1.
  3. Navigate to the location where you saved the file and run ./sync.ps1.
  4. When prompted, enter the values from the notepad. You can paste these all at one time so you don’t have to copy and paste each individual item.

    Note: When copying and pasting in Windows, choose the PowerShell icon, then Edit > Paste.


    Figure 16: Windows Command Prompt – Select Paste to copy all items needed to trigger the sync

    Figure 16: Windows Command Prompt – Select Paste to copy all items needed to trigger the sync

After you paste the values into the PowerShell window, you see the script input as shown in the following screenshot. The client secret and password are secure values and are masked for security purposes.
 

Figure 17: PowerShell script with input values pasted in

Figure 17: PowerShell script with input values pasted in

After the job has started in PowerShell, two messages are displayed. One indicating that synchronization is starting and a following message when synchronization has completed. Both are shown in the following figure.
 

Figure 18: Output from a successful run of the PowerShell script

Figure 18: Output from a successful run of the PowerShell script

View the synchronization status and logs

To verify that the job ran successfully, you can check the completed time from the Azure portal. You can verify the time the script ran by viewing the completion time along with the current status.

To view the status and logs

  1. From the menu, choose Azure Active Directory.
  2. Choose Enterprise applications and select the AWS App.
  3. From the left navigation menu, choose Provisioning and then choose View provisioning details. This displays the last time the sync completed.
     
    Figure 19: View the Provisioning details about the job

    Figure 19: View the Provisioning details about the job

Summary

In this post, I demonstrate how you can use a PowerShell script to trigger the SCIM endpoint to on-demand synchronize Azure AD with AWS Single Sign-On. You can find the code in this GitHub repository and use it to synchronize user and group changes on demand.

If you have feedback about this post, submit comments in the Comments section below.

Want more AWS Security how-to content, news, and feature announcements? Follow us on Twitter.

Author

Aidan Keane

Aidan is a Senior Technical Account Manager for AWS Enterprise Support. He has been working with Cloud technologies for more than 5 years. Outside of technology, he is a sports enthusiast who enjoys golf, biking, and watching Liverpool FC. He spends his free time with his family and enjoys traveling to Ireland and South America.

Federated multi-account access for AWS CodeCommit

Post Syndicated from Steven David original https://aws.amazon.com/blogs/devops/federated-multi-account-access-for-aws-codecommit/

As a developer working in a large enterprise or for a group that supports multiple products, you may often find yourself accessing Git repositories from different organizations. Currently, to securely access multiple Git repositories in other popular tools, you need SSH keys, GPG keys, a Git credential helper, and a significant amount of setup by the developer hoping to commit to the repository. In addition, administrators must be aware of the various ways to remove all the permissions granted to the developer.

AWS CodeCommit is a managed source control service. Combined with AWS Single Sign-On (AWS SSO) and git-remote-codecommit, you can quickly and easily switch between repositories owned by different groups or even managed in separate AWS accounts. You can control those permissions with AWS Identity and Access Management (IAM) roles to allow for the automated removal of the user’s permission as part of their off-boarding procedure for the company.

This post demonstrates how to grant access to various CodeCommit repositories without access keys.

Solution overview

In this solution, the user’s access is controlled with federated login via AWS SSO. You can grant that access using AWS native authentication, which eliminates the need for a Git credential helper, SSH, and GPG keys. In addition, this allows the administrator to control access by adding or removing the user’s IAM role access.

The following diagram shows the code access pattern you can achieve by using AWS SSO and git-remote-codecommit to access CodeCommit across multiple accounts.

git-remote-codecommit overview diagram

Prerequisites

To complete this tutorial, you must have the following prerequisites:

  • CodeCommit repositories in two separate accounts. For instructions, see Create an AWS CodeCommit repository.
  • AWS SSO set up to handle access federation. For instructions, see Enable AWS SSO.
  • Python 3.6 or higher installed on the developer’s local machine. To download and install the latest version of Python, see the Python website.
    • On a Mac, it can be difficult to ensure that you’re using Python 3.6, because 2.7 is installed and required by the OS. For more information about checking your version of Python, see the following GitHub repo.
  • Git installed on your local machine. To download Git, see Git Downloads.
  • PIP version 9.0.3 or higher installed on your local machine. For instructions, see Installation on the PIP website.

Configuring AWS SSO role permissions

As your first step, you should make sure each AWS SSO role has the correct permissions to access the CodeCommit repositories.

  1. On the AWS SSO console, choose AWS Accounts.
  2. On the Permissions Sets tab, choose Create permission set.
  3. On the Create a new permission set page, select Create a custom permission set.
  4. For Name, enter CodeCommitDeveloperAccess.
  5. For Description, enter This permission set gives the user access to work with CodeCommit for common developer tasks.
  6. For Session duration, choose 12 hours.

Create new permissions

  1. For Relay state, leave blank.
  2. For What policies do you want to include in your permissions set?, select Create a custom permissions policy.
  3. Use the following policy:
{
    "Version": "2012-10-17",
    "Statement": [
        {
             "Sid": "CodeCommitDeveloperAccess",
             "Effect": "Allow",
             "Action": [
                 "codecommit:GitPull",
                 "codecommit:GitPush",
                 "codecommit:ListRepositories"
             ],
             "Resource": "*"
         }
      ]
}

The preceding code grants access to all the repositories in the account. You could limit to a specific list of repositories, if needed.

  1. Choose Create.

Creating your AWS SSO group

Next, we need to create the SSO Group we want to assign the permissions.

  1. On the AWS SSO console, choose Groups.
  2. Choose create group.
  3. For Group name, enter CodeCommitAccessGroup.
  4. For Description, enter Users assigned to this group will have access to work with CodeCommit.

Create Group

  1. Choose Create.

Assigning your group and permission sets to your accounts

Now that we have our group and permission sets created, we need to assign them to the accounts with the CodeCommit repositories.

  1. On the AWS SSO console, choose AWS Accounts.
  2. Choose the account you want to use in your new group.
  3. On the account Details page, choose Assign Users.
  4. On the Select users or groups page, choose Group.
  5. Select CodeCommitGroup.
  6. Choose NEXT: Permission Sets.
  7. Choose the CodeCommitDeveloperAccess permission set and choose Finish

Assign Users

  1. Choose Proceed to Accounts to return to the AWS SSO console.
  2. Repeat these steps for each account that has a CodeCommit repository.

Assigning a user to the group

To wrap up our AWS SSO configuration, we need to assign the user to the group.

  1. On the AWS SSO console, choose Groups.
  2. Choose CodeCommitAccessGroup.
  3. Choose Add user.
  4. Select all the users you want to add to this group.
  5. Choose Add user(s).
  6. From the navigation pane, choose Settings.
  7. Record the user portal URL to use later.

Enabling AWS SSO login

The second main feature we want to enable is AWS SSO login from the AWS Command Line Interface (AWS CLI) on our local machine.

  1. Run the following command from the AWS CLI. You need to enter the user portal URL from the previous step and tell the CLI what Region has your AWS SSO deployment. The following code example has AWS SSO deployed in us-east-1:
aws configure sso 
SSO start URL [None]: https://my-sso-portal.awsapps.com/start 
SSO region [None]:us-east-1

You’re redirected to your default browser.

  1. Sign in to AWS SSO.

When you return to the CLI, you must choose your account. See the following code:

There are 2 AWS accounts available to you.
> DeveloperResearch, [email protected] (123456789123)
DeveloperTrading, [email protected] (123456789444)
  1. Choose the account with your CodeCommit repository.

Next, you see the permissions sets available to you in the account you just picked. See the following code:

Using the account ID 123456789123
There are 2 roles available to you.
> ReadOnly
CodeCommitDeveloperAccess
  1. Choose the CodeCommitDeveloperAccess permissions.

You now see the options for the profile you’re creating for these AWS SSO permissions:

CLI default client Region [None]: us-west-2<ENTER>
CLI default output format [None]: json<ENTER>
CLI profile name [123456789011_ReadOnly]: DevResearch-profile<ENTER>
  1. Repeat these steps for each AWS account you want to access.

For example, I create DevResearch-profile for my DeveloperResearch account and DevTrading-profile for the DeveloperTrading account.

Installing git-remote-codecommit

Finally, we want to install the recently released git-remote-codecommit and start working with our Git repositories.

  1. Install git-remote-codecommit with the following code:
pip install git-remote-codecommit

With some operating systems, you might need to run the following code instead:

sudo pip install git-remote-codecommit
  1. Clone the code from one of your repositories. For this use case, my CodeCommit repository is named MyDemoRepo. See the following code:
git clone codecommit://DevResearch-profile@MyDemoRepo my-demo-repo
  1. After that solution is cloned locally, you can copy code from another federated profile by simply changing to that profile and referencing the repository in that account named MyDemoRepo2. See the following code:
git clone codecommit://DevTrading-profile@MyDemoRepo2 my-demo-repo2

Cleaning up

At the end of this tutorial, complete the following steps to undo the changes you made to your local system and AWS:

  1. On the AWS SSO console, remove the user from the group you created, so any future access requests fail.
  2. To remove the AWS SSO login profiles, open the local config file with your preferred tool and remove the profile.
    1. The config file is located at %UserProfile%/.aws/config for Windows and $HOME/.aws/config for Linux or Mac.
  3. To remove git-remote-codecommit, run the PIP uninstall command:
pip uninstall git-remote-codecommit

With some operating systems, you might need to run the following code instead:

sudo pip uninstall git-remote-codecommit

Conclusion

This post reviewed an approach to securely switch between repositories and work without concerns about one Git repository’s security credentials interfering with the other Git repository. User access is controlled by the permissions assigned to the profile via federated roles from AWS SSO. This allows for access control to CodeCommit without needing access keys.

About the Author

Steven David
Steven David

Steven David is an Enterprise Solutions Architect at Amazon Web Services. He helps customers build secure and scalable solutions. He has background in application development and containers.