Post Syndicated from Pat Patterson original https://www.backblaze.com/blog/querying-a-decade-of-drive-stats-data/
Last week, we published Backblaze Drive Stats for Q3 2022, sharing the metrics we’ve gathered on our fleet of over 230,000 hard drives. In this blog post, I’ll explain how we’re now using the Trino open source SQL query engine in ensuring the integrity of Drive Stats data, and how we plan to use Trino in future to generate the Drive Stats result set for publication.
Converting Zipped CSV Files into Parquet
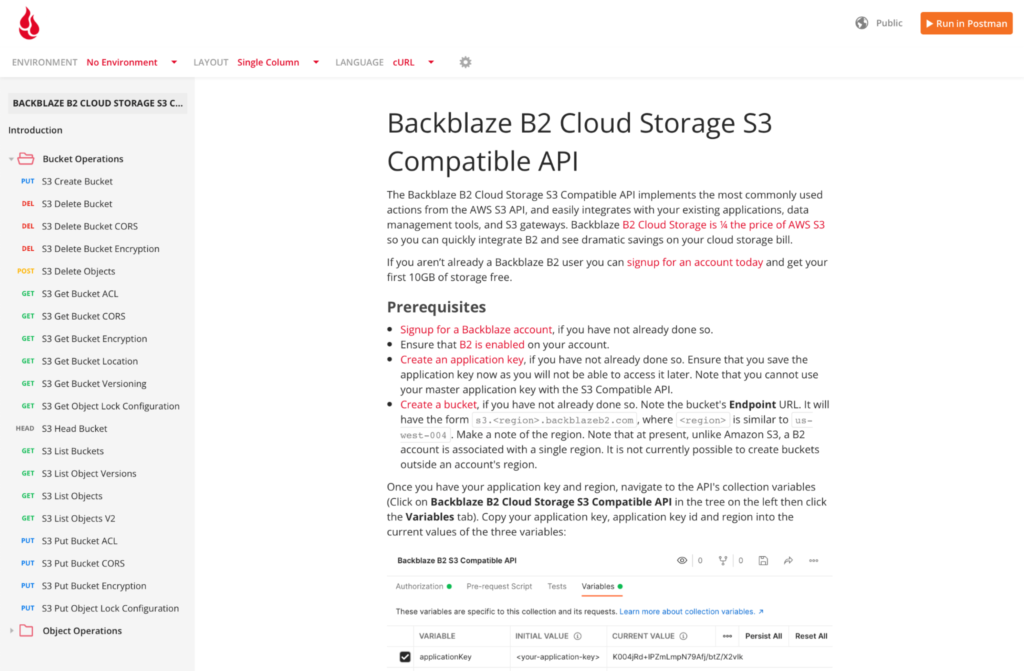
In his blog post Storing and Querying Analytical Data in Backblaze B2, my colleague Greg Hamer explained how we started using Trino to analyze Drive Stats data earlier this year. We quickly discovered that formatting the data set as Apache Parquet minimized the amount of data that Trino needed to download from Backblaze B2 Cloud Storage to process queries, resulting in a dramatic improvement in query performance over the original CSV-formatted data.
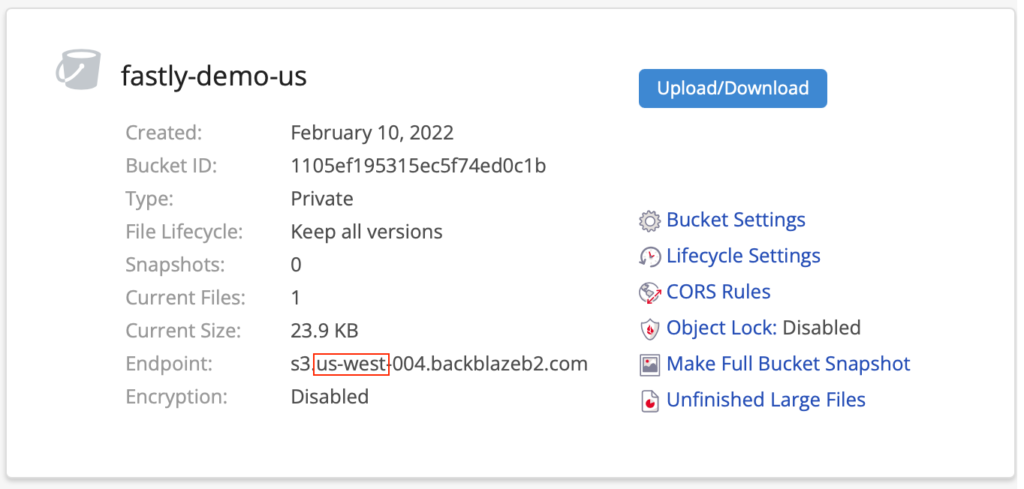
As Greg mentioned in the earlier post, Drive Stats data is published quarterly to Backblaze B2 as a single .zip file containing a CSV file for each day of the quarter. Each CSV file contains a record for each drive that was operational on that day (see this list of the fields in each record).
When Greg and I started working with the Parquet-formatted Drive Stats data, we took a simple, but somewhat inefficient, approach to converting the data from zipped CSV to Parquet:
- Download the existing zip files to local storage.
- Unzip them.
- Run a Python script to read the CSV files and write Parquet-formatted data back to local storage.
- Upload the Parquet files to Backblaze B2.
We were keen to automate this process, so we reworked the script to use the Python ZipFile module to read the zipped CSV data directly from its Backblaze B2 Bucket and write Parquet back to another bucket. We’ve shared the script in this GitHub gist.
After running the script, the drivestats table now contains data up until the end of Q3 2022:
trino:ds> SELECT DISTINCT year, month, day
FROM drivestats ORDER BY year DESC, month DESC, day DESC LIMIT 1;
year | month | day
------+-------+-----
 2022 |     9 |  30
(1 row)
In the last article, we were working with data running until the end of Q1 2022. On March 31, 2022, the Drive Stats dataset comprised 296 million records, and there were 211,732 drives in operation. Let’s see what the current situation is:
trino:ds> SELECT COUNT(*) FROM drivestats;
   _col0
-----------
 346006813
(1 row)

trino:ds> SELECT COUNT(*) FROM drivestats
    WHERE year = 2022 AND month = 9 AND day = 30;
   _col0
--------
 230897
(1 row)
So, since the end of March, we’ve added 50 million rows to the dataset, and Backblaze is now spinning nearly 231,000 drives—over 19,000 more than at the end of March 2022. Put another way, we’ve added more than 100 drives per day to the Backblaze Cloud Storage Platform in the past six months. Finally, how many exabytes of raw data storage does Backblaze now manage?
trino:ds> SELECT ROUND(SUM(CAST(capacity_bytes AS bigint))/1e+18, 2)
FROM drivestats WHERE year = 2022 AND month = 9 AND day = 30;
 _col0
-------
  2.62
(1 row)
Will we cross the three exabyte mark this year? Stay tuned to find out.
Ensuring the Integrity of Drive Stats Data
As Andy Klein, the Drive Stats supremo, collates each quarter’s data, he looks for instances of healthy drives being removed and then returned to service. This can happen for a variety of operational reasons, but it shows up in the data as the drive having failed, then later revived. This subset of data shows the phenomenon:
trino:ds> SELECT year, month, day, failure FROM drivestats WHERE
serial_number = 'ZHZ4VLNV' AND year >= 2021 ORDER BY year, month,
day;
 year | month | day | failure
------+-------+-----+---------
...
 2021 |    12 |  26 |       0
 2021 |    12 |  27 |       0
 2021 |    12 |  28 |       0
 2021 |    12 |  29 |       1
 2022 |     1 |   3 |       0
 2022 |     1 |   4 |       0
 2022 |     1 |   5 |       0
...
This drive appears to have failed on Dec 29, 2021, but was returned to service on Jan 3, 2022.
Since these spurious “failures” would skew the reliability statistics, Andy searches for and removes them from each quarter’s data. However, even Andy can’t see into the future, so, when a drive is taken offline at the end of one quarter and then returned to service in the next quarter, as in the above case, there is a bit of a manual process to find anomalies and clean up past data.
With the entire dataset in a single location, we can now write a SQL query to find drives that were removed, then returned to service, no matter when it occurred. Let’s build that query up in stages.
We start by finding the serial numbers and failure dates for each drive failure:
trino:ds> SELECT serial_number, DATE(FORMAT('%04d-%02d-%02d', year,
month, day)) AS date
FROM drivestats
WHERE failure = 1;
  serial_number  |    date
-----------------+------------
 ZHZ3KMX4        | 2021-04-01
 ZA12RBBM        | 2021-04-01
 S300Z52X        | 2017-03-01
 Z3051FWK        | 2017-03-01
 Z304JQAE        | 2017-03-02
...
(17092 rows)
Now we find the most recent record for each drive:
trino:ds> SELECT serial_number, MAX(DATE(FORMAT('%04d-%02d-%02d',
year, month, day))) AS date
    FROM drivestats
    GROUP BY serial_number;
  serial_number   |    date
------------------+------------
 ZHZ65F2W         | 2022-09-30
 ZLW0GQ82         | 2022-09-30
 ZLW0GQ86         | 2022-09-30
 Z8A0A057F97G     | 2022-09-30
 ZHZ62XAR         | 2022-09-30
...
(329908 rows)
We then join the two result sets to find spurious failures; that is, failures where the drive was later returned to service. Note the join condition—we select records whose serial numbers match and where the most recent record is later than the failure:
trino:ds> SELECT f.serial_number, f.failure_date
FROM (
    SELECT serial_number, DATE(FORMAT('%04d-%02d-%02d', year, month,
day)) AS failure_date
    FROM drivestats
    WHERE failure = 1
) AS f
INNER JOIN (
    SELECT serial_number, MAX(DATE(FORMAT('%04d-%02d-%02d', year,
month, day))) AS last_date
    FROM drivestats
    GROUP BY serial_number
) AS l
ON f.serial_number = l.serial_number AND l.last_date > f.failure_date;
  serial_number  | failure_date
-----------------+--------------
 2003261ED34D    | 2022-06-09
 W300STQ5        | 2022-06-11
 ZHZ61JMQ        | 2022-06-17
 ZHZ4VL2P        | 2022-06-21
 WD-WX31A2464044 | 2015-06-23
(864 rows)
As you can see, the current schema makes date comparisons a little awkward, pointing the way to optimizing the schema by adding a DATE-typed column to the existing year, month, and day. This kind of denormalization is common in analytical data.
Calculating the Quarterly Failure Rates
In calculating failure rates per drive model for each quarter, Andy loads the quarter’s data into MySQL and defines a set of views. We additionally define the current_quarter view to restrict the failure rate calculation to data in July, August, and September 2022:
CREATE VIEW current_quarter AS
    SELECT * FROM drivestats
    WHERE year = 2022 AND month in (7, 8, 9);

CREATE VIEW drive_days AS
    SELECT model, COUNT(*) AS drive_days
    FROM current_quarter
    GROUP BY model;

CREATE VIEW failures AS
    SELECT model, COUNT(*) AS failures
    FROM current_quarter
    WHERE failure = 1
    GROUP BY model
UNION
    SELECT DISTINCT(model), 0 AS failures
    FROM current_quarter
    WHERE model NOT IN
    (
        SELECT model
        FROM current_quarter
        WHERE failure = 1
        GROUP BY model
    );

CREATE VIEW failure_rates AS
    SELECT drive_days.model AS model,
           drive_days.drive_days AS drive_days,
           failures.failures AS failures,
           100.0 * (1.0 * failures) / (drive_days / 365.0) AS
annual_failure_rate
    FROM drive_days, failures
    WHERE drive_days.model = failures.model;
Running the above statements in Trino, then querying the failure_rates view, yields a superset of the data that we published in the Q3 2022 Drive Stats report. The difference is that this result set includes drives that Andy excludes from the Drive Stats report: SSD boot drives, drives that were used for testing purposes, and drive models which did not have at least 60 drives in service:
trino:ds> SELECT * FROM failure_rates ORDER BY model;
        model         | drive_days | failures | annual_failure_rate
----------------------+------------+----------+---------------------
 CT250MX500SSD1       |      32171 |        2 |                2.27
 DELLBOSS VD          |      33706 |        0 |                0.00
 HGST HDS5C4040ALE630 |       2389 |        0 |                0.00
 HGST HDS724040ALE640 |         92 |        0 |                0.00
 HGST HMS5C4040ALE640 |     341509 |        3 |                0.32
 ...
 WDC WD60EFRX         |        276 |        0 |                0.00
 WDC WDS250G2B0A      |       3867 |        0 |                0.00
 WDC WUH721414ALE6L4  |     765990 |        5 |                0.24
 WDC WUH721816ALE6L0  |     242954 |        0 |                0.00
 WDC WUH721816ALE6L4  |     308630 |        6 |                0.71
(74 rows)

Query 20221102_010612_00022_qscbi, FINISHED, 1 node
Splits: 139 total, 139 done (100.00%)
8.63 [82.4M rows, 5.29MB] [9.54M rows/s, 628KB/s]
Optimizing the Drive Stats Production Process
Now that we have shown that we can derive the required statistics by querying the Parquet-formatted data with Trino, we can streamline the Drive Stats process. Starting with the Q4 2022 report, rather than wrangling each quarter’s data with a mixture of tools on his laptop, Andy will use Trino to both clean up the raw data and produce the Drive Stats result set for publication.
Accessing the Drive Stats Parquet Dataset
When Greg and I started experimenting with Trino, our starting point was Brian Olsen’s Trino Getting Started GitHub repository, in particular, the Hive connector over MinIO file storage tutorial. Since MinIO and Backblaze B2 both have S3-compatible APIs, it was easy to adapt the tutorial’s configuration to target the Drive Stats data in Backblaze B2, and Brian was kind enough to accept my contribution of a new tutorial showing how to use the Hive connector over Backblaze B2 Cloud Storage. This tutorial will get you started using Trino with data stored in Backblaze B2 Buckets, and includes a section on accessing the Drive Stats dataset.
You might be interested to know that Backblaze is sponsoring this year’s Trino Summit, taking place virtually and in person in San Francisco, on November 10. Registration is free; if you do attend, come say hi to Greg and me at the Backblaze booth and see Trino in action, querying data stored in Backblaze B2.
The post Querying a Decade of Drive Stats Data appeared first on Backblaze Blog | Cloud Storage & Cloud Backup.