Welcome to part 1 of this narrative series about writing a complete video game from scratch, using the PICO-8. This is actually the second part, because in this house (unlike Lua) we index from 0, so if you’re new here you may want to consult the introductory stuff and table of contents in part zero.
If you’ve been following along, welcome back, and let’s dive right in!
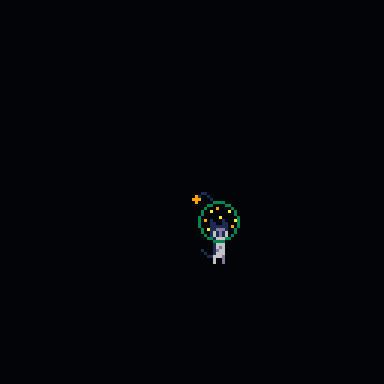
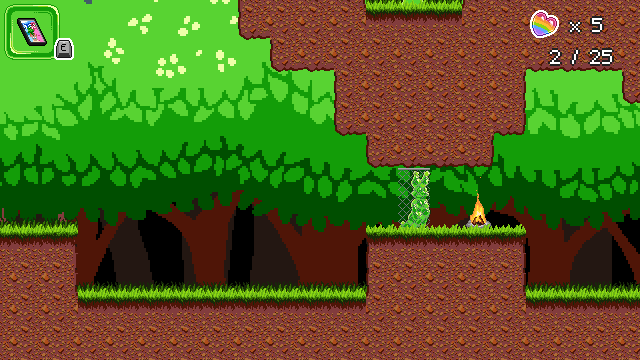
So far, I have… this. Which is something, and certainly much more than nothing, but all told not a lot.
Most conspicuously, this is going to be a platformer, so I need gravity. The problem with gravity is that it means things are always moving downwards, and if there’s nothing to stop them, they will continue off indefinitely into the void.
What I am trying to say here is that I feel the looming spectre of collision detection hanging over me. I’m going to need it, and I’m going to need it real soon.
And, hey, that sucks. Collision detection is a real big pain in the ass to write, so needing it this early is a hell of a big spike in the learning curve. Luckily for you, someone else has already written it: me!
Before I can get to that, though, I need to add some structure to the code I have so far. Everything I’ve written is designed to work for Star Anise and only Star Anise. That’s perfectly fine when he’s the only thing in the game, but I don’t expect he’ll stay alone for long! Collision detection in particular is a pretty major component of a platformer, so I definitely want to be able to reuse it for other things in the game. Also, collision detection is a big fucking hairy mess, so I definitely want to be able to shove it in a corner somewhere I’ll never have to look at it again.
A good start would be to build towards having a corner to shove it into.
As of where I left off last time, my special _update() and _draw() functions are mostly full of code for updating and drawing Star Anise. That doesn’t really sit right with me; as the main entry points, they should be about updating and drawing the game itself. Star Anise is part of the game, but he isn’t the whole game. All that code that’s specific to him should be put off in a little box somewhere. Cats love to be in little boxes, you see.
This raises the question of how I want to structure this project in general. And, I note: structuring a software project is hard, and you only really get a good sense of how to do it from experience. I’m still not sure I have a good sense of how to do it. Hell, I’m not convinced anyone has a good sense of how to do it.
Thankfully, this is a game, so it’s pretty obvious how to break it into pieces. (The tradeoff is that everything in a game ends up entangled with everything else no matter how you structure it, alas.) Star Anise is a separate thing in the game, so he might as well be a separate thing in the code. Later on I’ll need some more abstract structuring, but as an extremely rough guideline: if I can give it a name, it’s a good candidate to be made into a thing.
But what, exactly, is a thing in code? Most commonly (but not always), a thing is implemented with what’s called an object — a little bundle of data (what it is) with code (what it can do). I already have both of these parts for Star Anise: he has data like his position and which way he’s facing, and he has code for doing things like updating or drawing himself. A great first step would be to extract that stuff into an object, after which some other structure might reveal itself.
I do need to do one thing before I can turn get to that, though. You see, Lua is one of the few languages in common use today that doesn’t quite have built-in support for objects. Instead, it has all the building blocks you need to craft your own system for making objects. On the one hand, the way it does that is very slick and clever. On the other hand, it means you can’t write much Lua without cobbling together some arcane nonsense first, and also no one’s code quite works the same way.
Which brings me to the following magnificent monstrosity:
functionnop(...)return...end---------------------------------- simple object typelocalobj={init=nop}obj.__index=objfunctionobj:__call(...)localo=setmetatable({},self)returno,o:init(...)end-- subclassingfunctionobj:extend(proto)proto=protoor{}-- copy meta values, since lua doesn't walk the prototype chain to find themfork,vinpairs(self)doifsub(k,1,2)=="__"thenproto[k]=vendendproto.__index=protoproto.__super=selfreturnsetmetatable(proto,self)end
How does this work? What does this mean? What is a prototype chain, anyway? Dearest reader: it extremely does not matter. No one cares. I would have to stare at this for ten minutes to even begin to explain it. Every line is oozing with subtlety. To be honest, even though I describe this series as “from scratch”, this is one of the very few things that I copy/pasted wholesale from an earlier game. I know this does the bare minimum I need and I absolutely do not want to waste time reinventing it incorrectly. To drive that point home: I wrote collision detection from scratch, but I copy/pasted this. (But if you really want to know, I’ll explain it in an appendix.)
Feel free to copy/paste mine, if you like. You can also find a number of tiny Lua object systems floating around online, but with tokens at a premium, I wanted something microscopic. This basically does constructors, inheritance, and nothing else.
(Oh, I don’t think I mentioned, but the -- prefix indicates a Lua comment. Comments are ignored by the computer and tend to contain notes that are helpful for humans to follow. They don’t count against the PICO-8 token limit, but they do count against the total size limit, alas.)
The upshot is that I can now write stuff like this:
This creates a… well, terminology is tricky, but I’ll call it a type while doing air-quotes and glancing behind me to see if any Haskell programmers are listening. (It’s not much like the notion of a type in many other languages, but it’s the closest I’m going to get.) Now I can combine an x- and y-coordinate together as a single object, a single thing, without having to juggle them separately. I’m calling that kind of thing a vec, short for vector, the name mathematicians give to a set of coordinates. (More or less. That’s not quite right, but don’t worry about it yet.)
After the above incantation, I can create avec by calling it like a function. Note that the arguments ultimately arrive in vec:init, loosely called a constructor, which stores them in self.x and self.y — where self is the vec being created.
1
2
3
-- this is example code, not part of the gamelocala=vec(1,2)print("x = ",a.x," y = ",a.y)-- x = 1 y = 2
That iadd thing is a method, a special function that I can call on a vec. It’s like every vec carries around its own little bag of functions anywhere it appears — and since they’re specific to vec, I don’t have to worry about reusing names. (In fact, reusing names can be very helpful, as we’ll see later!)
The name iadd is (very!) short for “in-place add”, suggesting that the first vector adds the second vector to itself rather than creating a new third vector. That’s something I expect to be doing a lot, and making a method for it saves me some precious tokens.
1
2
3
4
5
-- example codelocalv=vec(1,2)localw=vec(3,4)v:iadd(w)print("x = ",v.x," y = ",v.y)-- x = 4 y = 6
Finally, those funny __add and __sub methods are special to Lua (if enchanted correctly, which is part of what the obj gobbledygook does) — they let me use + and - on my vecs just like they were numbers.
1
2
3
4
5
-- example codelocalq=vec(1,2)localr=vec(3,4)locals=q+rprint("x = ",s.x," y = ",s.y)-- x = 4 y = 6
This is the core idea of objects. A vec has some data — x and y — and some code — for adding another vec to itself. If I later discover some new thing I want a vec to be able to do, I can add another method here, and it’ll be available on every vec throughout my game. I can repeat myself a little bit less, and I can keep these related ideas together, separate from everything else.
Get the basic jist? I hope so, because I’ve really gotta get a move on here.
What a mouthful! But for the most part, this is the same code as before, just rearranged. For example, the new anise:draw() method has basically been cut and pasted from my old _draw() — all except the cls() call, since that has nothing to do with drawing Star Anise.
I’ve combined the px and py variables into a single vector, pos (short for “position”), which I now have to refer to as self.pos — that’s so PICO-8 knows whose pos I’m talking about. After all, it’s theoretically possible for me to create more than one Star Anise now. I won’t, but PICO-8 doesn’t know that!
A Star Anise object is created and assigned to player when the game starts, and then _update() calls player:update() and _draw() calls player:draw() to get the same effects as before.
I did make one moderately dramatic change in this code. The wordy code I had for reading buttons has become much more compact and inscrutable, and the moving variable is gone. A big part of the reason for this is that I consider Star Anise’s movement to be part of himself, but reading input to be part of the game, so I wanted to split them up. That means moving is a bit awkward, since I previously updated it as part of reading input. Instead, I’ve turned Star Anise’s movement into another vector, which I set in _update() using this mouthful:
1
2
3
4
5
6
7
8
9
-- top-levelfunctionb2n(b)returnband1or0end-- in _update()player.move=vec(b2n(btn(➡️))-b2n(btn(⬅️)),b2n(btn(⬇️))-b2n(btn(⬆️)))
The b2n() function turns a button into a number, and I only use it here. It turns true into 1 and false into 0. Think of it as measuring “how much” the button is held down, from 0 to 1, except of course there can’t be any answer in the middle.
Unpacking that a bit further, b2n(btn(➡️)) - b2n(btn(⬅️)) means “how much we’re holding right, minus how much we’re holding left”. If the player is only holding the right button, that’s 1 – 0 = 1. If they’re only holding the left button, that’s 0 – 1 = -1. If they’re holding both or neither, that’s 0. The results are the same as before, but the code is smaller.
Once Star Anise’s move is set, the rest works similarly to before: I update left based on horizontal movement (but leave it alone when there isn’t anyway), I alter his position (now using :iadd()), and I use the walk animation when he’s moving at all. And that’s it!
I like to use the term “actor” to refer to a distinct thing in the game world; it conjures a charming and concrete image of various characters performing on a stage. I think I picked it up from the Doom source code. “Entity” is more common and is used heavily in Unity, but can be confused with an “entity–component–system” setup, which Unity also supports. And then there are heretics who refer to game things as “objects” even though that’s also a programming term.
This code is a fine start, but it’s not quite what I want. There’s nothing here actually called an actor, for starters. My setup still only works for Star Anise!
I’d better fix that. The notion of an “actor” is pretty vague, so a generic actor won’t do much by itself, but it’s nice to define one as a template for how I expect real actors to work.
How does a blank actor update or draw itself? By doing nothing.
(I do assume that every actor has a position; this may not necessarily be the case in games with very broad ideas about what an “actor” is, but it’s reasonable enough for my purposes.)
Now, to link this with Star Anise, I’ll have aniseinherit from actor. That means he’ll become a specialized kind of actor, and in particular, all the methods on actor will also appear on anise. You may notice that anise was previously a specialized kind of obj (like actor and vec) — in fact, the only reason I can call vec(x, y) like a function is that it inherits some magic stuff from obj. Surprise!
1
localanise=actor:extend{
I can now delete anise:init(), since it’s identical to actor:init(). I still have anise:update() and anise:draw(), which override the methods on actor, so those don’t need changing.
Everything still only works for Star Anise, but I’m getting closer! I only need one more change. Instead of having only player, I will make a list of actors.
-- at the toplocalactors={}function_init()player=anise(vec(64,64))add(actors,player)endfunction_update()-- ...mostly same as before...foractorinall(actors)doactor:update()endendfunction_draw()cls()foractorinall(actors)doactor:draw()endend
This does pretty much what it reads like. The add() function, specific to PICO-8, adds an item to the end of a list. The all() function, also specific to PICO-8, helps go through a list. And the for blocks mean, for each thing in this list, run this code.
Now, at last, I have something that could work for actors other than Star Anise. All I need to do is define them and add them to the actors list, and they’ll automatically be updated and drawn, just like him!
Admittedly, this hasn’t gotten me anywhere concrete. The game still plays exactly the same as it did when I started. I’m betting that I’ll eventually have more than one actor, though, so I might as well lay the groundwork for that now while it’s easy. It doesn’t take much effort, and I find that if I give myself little early inroads like this, it feels like less of a slog to later come back and expand on the ideas. This is the sort of thing I meant by more structure revealing itself — once I have one actor, a natural next step is to allow for several actors.
I’ve put it off long enough. I can’t avoid it any longer. But it’s complicated enough to deserve its own post, so I don’t quite want to do it yet.
Instead, I’ll write as much code as possible except for the actual collision detection. There’s a bit more work to do to plug it in.
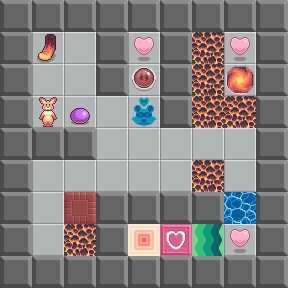
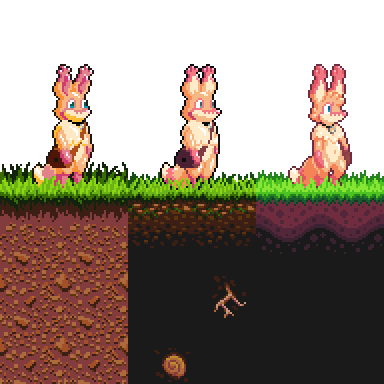
For example: what am I going to collide with? The only thing in the universe, currently, is Star Anise himself. It would be nice to have, say, some ground. And that’s a great excuse to toodle around a bit in the sprite editor.
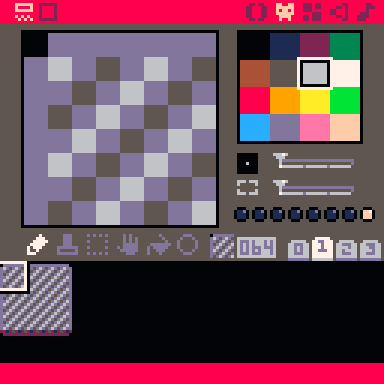
I went through several iterations before landing on this. Star Anise lives on a moon, so that was my guiding principle. The moon is gray and dusty and pitted, so at first I tried drawing a tile with tiny craters in it. Unfortunately, that was a busy mess to look at when tiled, and I didn’t think I’d have enough tile space for having different variants of tiles. I’m already using 9 tiles here just to have neat edges.
And so I landed on this simple pattern with just enough texture to be reminiscent of something, which is all you really need with low-res sprite art. It worked out well enough to survive, nearly unchanged, all the way to the final game. It was inspired by a vague memory of Starbound’s moondust tiles, which I was pretty sure had diagonal striping, though I didn’t actually look at them to be sure.
You may notice I drew these on the second tab of sprites. I want to be able to find tiles quickly when drawing maps, so I thought I’d put “terrain” on a dedicated tab and reserve the first one for Star Anise, other actors, special effects, and other less-common tiles. That turned out to be a good idea.
You may also notice that one of those dots on the middle right is lit up. How mysterious! We’ll get to that next time.
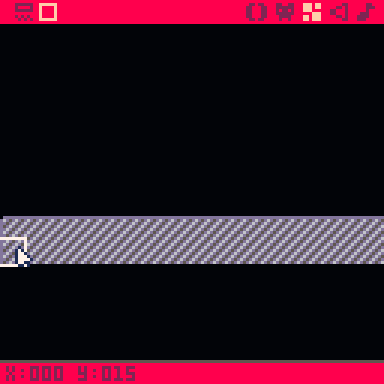
With a few simple tiles drawn, I can sprinkle a couple in the map tab. I know I want Metroid-style discrete screens, so I’m not worried about camera scrolling yet; the top-left corner (16×16 tiles) is enough to play with for now.
I draw two rows of tiles at the bottom of that screen. It’s a little hard to gauge since the toolbar and status bar get in the way, but the bottom row of the screen will be at y = 15. You can also hold Spacebar to get a grid, with squares indicating every half-screen.
Finally, to make this appear in the game, I need only ask PICO-8 to draw the map before I draw actors on top of it.
The PICO-8 map() function takes (at least) six arguments: the top-left corner of the map to start drawing from, measured in tiles; the top-left corner on the screen to draw to, measured in pixels; and the width/height of the rectangle to draw from the map, measured in tiles. This will draw a 32×32 block of tiles from the top-left corner of the map to the top-left corner of the screen.
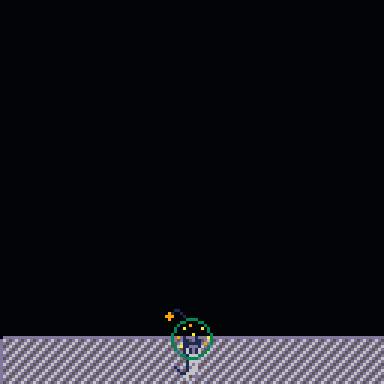
Of course, with no collision detection, those tiles are nothing more than background pixels, and the game treats them as such.
I’m not going into collision detection yet, but I can give you a taste, to give you an idea of the goals.
The core of it comes down to this line, from the end of anise:update().
1
self.pos:iadd(self.move)
That moves Star Anise by one pixel in each direction the player is holding. What I want to do is stop him when he hits something solid.
Hm, sounds hard. Let’s think for a moment about a simpler problem: how can I stop him falling through the ground, in the dumbest way possible?
The ground is flat, and it takes up the bottow two rows of tiles. That means its top edge is 14 tiles, or 112 pixels, below the top of the screen. Thus, Star Anise should not be able to move below that line.
But wait! Star Anise’s position is a single point at his top left, not even inside his helmet. What I really want is for his feet to not pass below that line, and the bottom of his feet is three tiles (24 pixels) below his position. Thus, his position should not pass below y = 112 – 24 = 88.
This isn’t going to get us very far, of course. He still walks through the air, he can still walk off the screen, and if I change the terrain then the code won’t be right any more. I’m also pretty sure I didn’t actually write this in practice. But hopefully it gives you the teeniest idea of the problem we’re going to solve next time.
Really, really, really quickly, here’s how that obj snippet works.
Lua’s primary data structure is the table. It can be used to make ordered lists of things, as I did above with actors, but it can also be used for arbitrary mappings. I can assign some value to a particular key, then quickly look that key up again later. Kind of like a Rolodex.
1
2
3
4
5
locallunekos={anise="star anise is the best",purrl="purrl is very lovely",}print(lunekos['anise'])
Note that the values (and keys!) don’t have to be strings; they can be anything you like, even other tables. But for string keys, you can do something special:
1
print(lunekos.anise)-- same as above
Everywhere you see a dot (or colon) used in Lua, that’s actually looking up a string in a table.
With me so far? Hope so.
Any Lua table can also be assigned a metatable, which is another table full of various magic stuff that affects the first table’s behavior. Most of the magic stuff takes the form of a special key, starting with two underscores, whose value is a function that will be called in particular circumstances. That function is then called a metamethod. (There’s a whole section on this in the Lua book, and a summary of metamethods on the Lua wiki.)
One common use for metamethods is to make normal Lua operators work on tables. For example, you can make a table that can be called like a function by providing the __call metamethod.
 1
 2
 3
 4
 5
 6
 7
 8
 9
10
11
12
13
localt={stuff=5678,}localmeta={-- this is just a regular table key with a function for its value__call=function(tbl)print("my stuff is",tbl['stuff'])end,}setmetatable(t,meta)t()-- my stuff is 5678t['stuff']="yoinky"t()-- my stuff is yoinky
One especially useful metamethod is __index, which is called when you try to read a key from the table, but the key doesn’t exist.
Instead of a function, __index can also be another (third!) table, in which case the key will be looked up in that table instead. And if that table has a metatable with an __index, Lua will follow that too, and keep on going until it gets an answer.
This is essentially what’s called prototypical inheritance, as seen in JavaScript (and more subtly in Python): an object consists of its own values plus a prototype, and if code tries to fetch something from the object that doesn’t exist, the prototype is checked instead. Since the prototype might have its own prototype, the whole sequence is called the prototype chain.
That’s all you need to know to follow the obj snippet, so here it is again.
functionnop(...)return...endlocalobj={init=nop}obj.__index=objfunctionobj:__call(...)localo=setmetatable({},self)returno,o:init(...)end-- subclassingfunctionobj:extend(proto)proto=protoor{}-- copy meta values, since lua doesn't walk the prototype chain to find themfork,vinpairs(self)doifsub(k,1,2)=="__"thenproto[k]=vendendproto.__index=protoproto.__super=selfreturnsetmetatable(proto,self)end
The idea is that types are used both as metatables and prototypes — they are always their own __index. At first, we have only obj, which looks like this:
Now we use obj:extend{} to create a new type. Follow along and see what happens. Lua only looks for metamethods like __call directly in the metatable and ignores __index, so I copy them into the new prototype. Then I make the prototype its own __index, as with obj, and also remember the “superclass” as __super (though I never end up using it). Finally I set the “superclass” as the prototype’s metatable.
(Oh, by the way: in Lua, if you call a function with only a single table or string literal as its argument, you can leave off the parentheses. So foo{} just means foo({}).)
That produces something like the following, noting that this is not quite real Lua syntax:
Now for the magic part. When I call vec(), Lua checks the metatable. (The __call in the main table does nothing!) The metatable is obj, which does have a __call, so Lua calls that function and inserts vec as the first argument. Then obj.__call creates an empty table, assigns self (which is the first argument, so vec) as the empty table’s metatable, and calls the new table’s init method.
Ah, but the new table is empty, so it doesn’t have an init method. No problem: it has a metatable with an __index, so Lua consults that instead. The metatable’s __index is vec, and vecdoes contain an init, so that’s what gets called. (If there were no vec.init, then Lua would see that vec also has a metatable with an __index, and continued along. That’s why I didn’t need an anise.init.)
That’s also why defining vec:__add works — it puts the __add metamethod into vec, which becomes the metatable for all vector objects, thus automatically making + work on them.
That’s all there is to it. It’s possible to get much more elaborate with this in a number of ways, but this is the bare minimum — and it could still be trimmed down further.
Note that you can’t actually call obj itself. Pop quiz: why not?
You may recall that I once had the ambitious idea to write a book on game development, walking the reader through making simple games from scratch in a variety of different environments, starting from simple level editors and culminating in some “real” engine.
That never quite materialized. As it turns out, writing a book is a huge slog, publishers want almost all of the proceeds, and LaTeX is an endless rabbit hole of distractions that probably consumed more time than actually writing. Also, a book about programming with no copy/paste or animations or hyperlinks kind of sucks.
I thus present to you Plan B: a series of blog posts. This is a narrative reconstruction of a small game I made recently, Star Anise Chronicles: Oh No Wheres Twig??. It took me less than two weeks and I kept quite a few snapshots of the game’s progress, so you’ll get to see a somewhat realistic jaunt through the process of creating a small game from very nearly nothing.
And unlike your typical programming tutorial, I can guarantee that this won’t get you as far as a half-assed Mario clone and then abruptly end. The game has original art and sound, a title screen, an ending, cutscenes, dialogue, UI, and more — so this series will necessarily cover how all of that came about. I will tell you why I made particular decisions, mention planned features I cut, show you the tradeoffs I made, and confess when I made life harder for myself. You know, all the stuff you actually go through when doing game development (or, frankly, any kind of software development).
The target audience is (ideally) anyone who knows what a computer is, so hopefully you can follow along no matter what your experience level. Enjoy!
This is part zero, and it’s mostly introductory stuff. Please don’t skip it! I promise there’s some meat in the latter half.
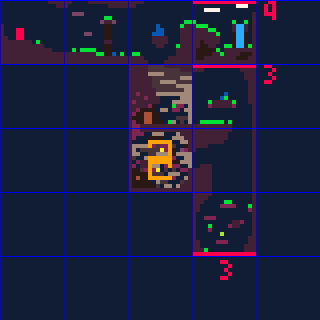
Here’s what you have to look forward to (though it is of course a WIP until the series is done). Occasionally there’ll be a snapshot of the game, but these were made on a whim during development and aren’t particularly meaningful as milestones.
For reference, I started working on the game the morning of April 29, and I released it the night of May 10, for a total of twelve days.
Part 0 (you are here): introduction, tour of PICO-8, putting something on the screen, moving around, measuring time, simple sprite animation
This is not a tutorial. Please set your expectations accordingly. Honestly, I don’t even like tutorials — too many of them are framed as something that will teach you a skill, but then only tell you what buttons to press to recreate what the author already made, with no insight as to why they made their decisions or even why they pressed those particular buttons. They often leave you hanging, with no clear next steps, no explanation of what to adjust to get different results.
I’ve never seen a platformer tutorial that actually produced a finished game. Most of them give you just enough to have a stock sprite (poorly) jump around on the screen, perhaps collect some coins, and that’s it. How do you fix the controls, add cutscenes, even make a damn title screen? That’s all left up to you.
This is something much better than a tutorial: a story. I made a video game — a real, complete video game — and I will tell you everything I can remember doing and thinking along the way. Every careful decision, every rushed tradeoff, every boneheaded mistake, every weird diversion. I don’t guarantee that anything I did is necessarily a good idea, but everything I did is an idea, and sometimes that’s all you need to get the gears turning.
If you’re interested in making a video games, I don’t promise that this series will teach you anything. But with a little effort, you can probably learn something. And to be frank, if you’re starting with zero knowledge but still manage to muddle through the whole series, you’ve got more than enough curiosity and determination to succeed at whatever you feel like doing.
The game in question is Star Anise Chronicles: Oh No Wheres Twig??, which I made with the PICO-8. (If you are from the future, I specifically used version 0.2.0i; later versions may have added conveniences I’m not using.) This is not a whizbang fully-featured game engine like Godot or Unity. If I want to draw something, I have to draw it myself. If I want physics, I have to write them myself. If I want shaders… well, that’s not going to happen, but a little ingenuity can still go a long way.
And that kind of ingenuity is what makes game development appealing to me in the first place. It’s one big puzzle: given the tools I have, what’s the most interesting thing I can make with the least amount of hapless flailing? That question will come up a number of times in this series.
If any of this sounds appealing to you, keep reading! Follow along if you can. You can get the PICO-8 (tragically not open source) for $15, and chances are you already own it — it was in the itch.io BLM bundle, so if you bought that, you’re free to download it whenever you want.
In order to replicate the experience of reading the book, I’m porting these little “admonition” boxes from what I’d started. I have a somewhat meandering writing style, and hopefully these will help get tangents out of the main text, while also better highlighting warnings and gotchas.
Here they are, in no particular order:
I reserve the right to invent more, if they’re needed and/or funny.
Game development is about a lot more than programming, but this will contain an awful lot of programming. The PICO-8 in particular tends to blur the lines between code and assets if you want to do anything fancy.
That puts me in a tricky position as an author. I want this to be accessible to people with little or no programming experience, but I can’t realistically explain every single line of code I write, or this series will never end (and will be more noise than signal for intermediate programmers).
Thus, I’m trusting you to look up basic concepts on your own if you need to. I’m writing this to fill a perceived gap, so I’ll try to focus on the gaps — finding resources on from-scratch collision detection is a crapshoot, but the web is awash in explanations of what a “variable” is. PICO-8 uses a programming language called Lua which is pretty simple and easy to pick up, so if you’re having trouble, maybe thumb through the Programming in Lua book a bit too.
Of course, if you’re just here for the ride and not too worried about writing your own game, you can skip ahead whenever you like. I’m not your mom.
(Oh, and if you’ve used Lua before, you should know that PICO-8’s Lua has been modified from stock Lua. The precise list of changes would be a big block of stuff in the middle of this already too long intro, so I’ve put it at the bottom. The upshot is: numbers are fixed-point instead of floating-point, you can use compound assignment, and the standard library is almost completely different.)
That’s probably enough words with no pictures. Time to get started.
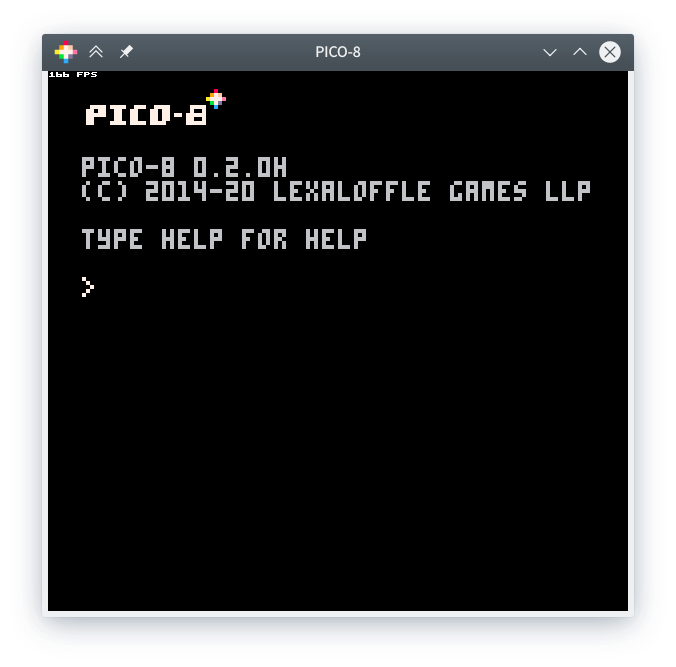
As mentioned, this is a game built with the PICO-8. I promised I’d tell you a story, but I can’t even explain why I chose PICO-8 if you don’t know what the thing is.
PICO-8 is a “fantasy console” — a genre that it pioneered. It has a fixed screen size, its own palette, its own font, a little chiptune synthesizer, its own idea of what buttons the player can press, and so on. It’s like an emulator for an 8-bit handheld that doesn’t actually exist, plus a bunch of relatively friendly tools for making cartridges for that handheld. It even has some arbitrary limitations to preserve that aesthetic. (I carefully avoid calling them artificial limitations, because there are some technical reasons for them, and a lot of programmers do a thing with their face if you say “artificial” to them. Like you’ve just spat in their lunch.)
If you’ve got PICO-8 open, you can type splore at this little command prompt to open the cartridge explorer, which lets you download and play cartridges that have been posted to the PICO-8 BBS (forum). You might want to try a few to get a sense of what the PICO-8 can do, though bear in mind that some of the best games are incredible feats of ingenuity and not representative. A good place to start is the “featured” tab, which lists games that… I believe have been hand-picked as high-quality? Some suggestions:
Star Anise Chronicles: Oh No Wheres Twig is in there, as is our older (and first!) game Under Construction.
The original PICO-8 version of Celeste, if you weren’t aware of its origins.
Dusk Child, one of the earliest games I played and a big inspiration — it’s pretty and expansive, but doesn’t do anything I couldn’t figure out.
Just One Boss, which is just so damn crisp.
Dank Tomb, a dungeon crawler with absolutely beautiful lighting effects.
PicoHot, which is absolute fucking nonsense how dare you.
Note that when playing most games, the PICO-8 functions as though it only had six buttons: a directional pad bound to the arrow keys, and “O” and “X” buttons bound to the Z and X keys. Most games refer to those buttons by name (the PICO-8 font has built-in symbols for them) rather than keyboard key, since you might be playing on a controller or with some other bindings. You can always press Esc for the built-in menu.
…
Had fun? Great! Pressing Esc takes you back to the prompt. From there, you can press Esc again to switch to the editor (and vice versa).
Now, this is not a PICO-8 tutorial. But the PICO-8’s design and constraints immensely impact how much I could do and how I planned to do it, so I can’t very well explain my thought process without that context. Luckily, all the code and assets for the last game you played stay loaded, so I might as well give you the whirlwind tour. Even if you’re not following along with an actual copy of PICO-8, you should keep reading so you understand what I’ve got to work with.
This is the code editor, a very tiny text editor. If you’ve loaded Under Construction, feel free to page through and see what I did. (Keyboard shortcuts help a lot; see the manual for a full list of them. There are also some cheat sheets floating around, though they focus more on programming capabilities.)
You may have noticed the ominous 7695/8192 in the bottom right. That’s hinting at one of the PICO-8’s limitations: the token count. A cartridge’s source code cannot exceed 8192 tokens, or it will not run at all. A “token” is, in general terms, a single “word” of code — a number like 133, a name like animframedelay, an operator like +, a keyword like function, and so on. The term “token” is borrowed from the field of parsing, which is an entire tangent you are free to look up yourself.
The PICO-8’s definition of “token” is slightly different from its typical usage and includes a few exceptions. The common Lua keywords local and end don’t count at all; nor do commas, periods, semicolons, or comments. A string of any length is one token. A pair of parentheses, brackets, or braces only counts as one token. Negative literal numbers (e.g., -25) are one token.
The token limit is the most oppressive of the limits on your code, but there are two others. The full size of your code cannot exceed 64KiB, though in practice I’ve never come anywhere near that size and I think you’d only approach it if you were committing some serious shenanigans. More of concern, the compressed size of your code cannot exceed 15,616 bytes. I do wind up battling that one near the end of this project (as I did with Under Construction), and it can be extra frustrating since it’s hard to gauge exactly what impact any particular change will have on compression. Thankfully, and unlike with the token limit, the PICO-8 will still run a game that’s over the compressed size; it just physically cannot export it to a cartridge.
Incidentally, you can use Alt and an arrow key to move between the editors.
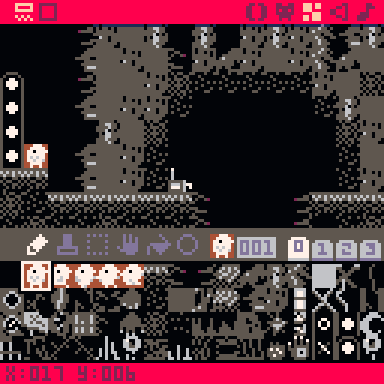
Here we have a tiny pixel art editor. As you might have guessed, the “native” size for a tile is 8 × 8 pixels, though you can use the bottom of the two sliders to edit bigger blocks of tiles at a time. (The screen is 128 × 128 pixels, or 16 × 16 tiles.) You have at your disposal a spritesheet of 256 such tiles, which are arranged at the bottom of the screen in four tabs of 64 tiles each. 001 here is the tile number. Each tile has its own set of 8 flags you can toggle on and off, which are represented by the eight circles just above the tabs; here, all the flags are off. The flags do nothing by themselves, but you can use them for whatever you like, and they turn out to be pretty handy.
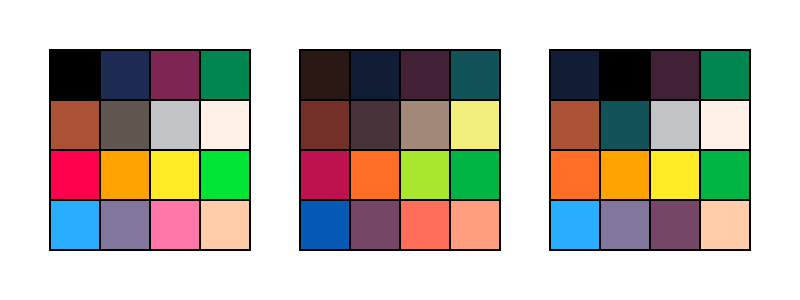
The palette is 16 colors, as shown. There are 16 more colors on the “secret palette” which I’ll be dipping into later, but you can only swap them in; you can never have more than 16 distinct colors on screen at the same time. This is reminiscent of how some early systems actually worked.
The map editor edits the map. You only get one; if you want to carve it up somehow, that’s up to you. It’s extremely simple: you have a grid of 128 × 64 tiles (that’s 8 × 4 screenfuls), and you can pick which tile goes in each cell. No layers, no stacking, no two things in the same cell. You can pan around with the middle mouse button and zoom with the mouse wheel (or check the manual for the keyboard equivalents).
The especially nice thing about the map is that you can draw entire blocks of it with the built-in map function, which saves a whole lot of tokens over drawing a bunch of tiles by hand. Even if you’re making a game that doesn’t have a literal map, it’s a convenient way to define and draw blocks of multiple tiles.
The catch is that the bottom half of the spritesheet and the bottom half of the map are shared, so you can’t actually have a full map and a full set of tiles in the same cartridge. You could have a full 8 × 4 map and 128 tiles, or you could have a full set of 256 tiles but only an 8 × 2 map, or you can split the space up somehow, but you can’t have the maximum of both. Drawing in the bottom half of one will immediately update the other with garbage. It’s beautiful, actually, if you’re into the aesthetic of arbitrary memory being drawn as tiles.
If you have a cartridge open, you can see this yourself: check out the bottom half of the map (it helps to use Tab or the buttons in the upper left to hide the tile palette) and tabs 2 and 3 of the sprite editor. If they’re not both completely empty, something will be full of garbage. Try drawing in one or the other, if you like, and you’ll see the other update with junk. That’s the memory layout of pixel data being interpreted as map data, or vice versa. Cool, right?
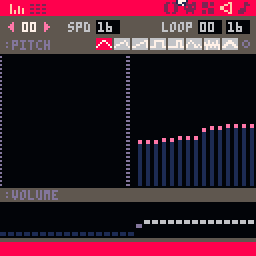
The sound editor (or SFX editor) does a lot, despite being very simple conceptually, and it can be a little intimidating if you’ve never worked with sound or music before. These screenshots are the two display modes, “pitch mode” and “tracker mode” — allegedly pitch mode is more suitable for sound effects and tracker mode is more suitable for music, but I honestly have no idea how anyone does anything in pitch mode, and I use tracker mode for both. Your mileage may vary. As with the map editor, use Tab or the buttons in the top-left to switch views.
There are 64 sound effects to work with, each consisting of 32 notes played by a little chiptune synth. Notes consist of a pitch (i.e., the actual note being played), an instrument, the volume, and an optional effect.
I could say an awful lot about sound and chiptunes and what any of this means, but this is not a chiptuning tutorial, so I’ll save that for when I actually made some sounds for the game. Do feel free to mess around here, though.
There’s also a music editor, but all it does is arrange several sound effects to play at the same time, so it’s not especially interesting.
And that’s everything at my disposal! I guess that means it’s time to get started, for real. Go back to the command prompt and use reboot to get a fresh blank cartridge, if you’re planning on following along.
The first step to making a game is having a game you want to make.
I started on this at the end of April, after a very rushed month spent preparing the Steam release of Cherry Kisses. I was pretty pumped about having just published something in a very visible place for the first time, and I wanted to keep that energy going, but I didn’t want to immediately jump into an even larger thing. I wanted to make something small, something self-contained, something I could do entirely on my own. (My spouse is the better artist by far, and they did all the art for Cherry Kisses.)
The PICO-8 came to mind as the obvious platform to use. For one, the limitations make it very difficult for a game’s scope to balloon very far; you will simply run out of space and have to cut some ideas. For two, the art and audio are fairly low-resolution, so I wouldn’t have much opportunity to endlessly fuss over trying to make them perfect. For three, it runs in a browser, even on phones, so the resulting game would be easy for anyone to play. (Having to download a thing will discourage a surprising amount of casual passersby, especially if the thing is fairly small and thus low-reward.)
I also just find the PICO-8 endlessly charming, and I hadn’t touched it in a couple years and was curious how it had improved in the interim. It’s great for a game started on a whim, too, since I can jump in and start slapping stuff on the screen without worrying that my ADHD brain will start fretting over how everything should be organized.
That only left the question of what to make.
Two and a half years prior — almost three, now — I’d started on a platformer where you played as Star Anise, my cat’s fursona. It was intended to be a goofy Metroidvania where you collected cat-themed powers, ran around defeating little monsters, collected useless garbage, and generally left a trail of minor mayhem in your wake. Sadly, it was interrupted by real-life events and we haven’t touched it since.
I loved how this game was shaping up! It was so goofy, but its goofiness really opened up the design. Star Anise is great to build a game around. I can give him all manner of strong yet absurd motivations, and as long as I tie them to something vaguely cat-themed, they’ll be memorable and feel sensible. I can load him up with goofy cat-themed powers without needing any kind of justification, because he’s a cat, and everyone knows cats are basically magic anyway. He has a group of friends already built in: other cats. And most importantly, he’s just fun to play as, because everything he does is ridiculous and overboard, but you never have to feel guilty about his mischief because he’s a cat.
It’s such a good hook. I’ve wanted to make a whole series of little Star Anise games, but the furthest I’d gotten so far was Star Anise Chronicles: Escape from the Chamber of Despair — which is good, but is also a text adventure, one of the most impenetrable genres imaginable.
So why not take another crack at it? I couldn’t fit the entire original vision into a PICO-8 game, but surely I’d have enough room for Star Anise, a few of the abilities we’d come up with, and some things to interact with. At long last, a Star Anise platformer.
You could say the stars aligned. The stars. Get it? Like Star Anise. Okay.
Before I could do anything, I needed some art. Okay, that’s not true; I could have boxes moving around on the screen, but I’ve done this enough that I am beyond tired of boxes. If I’m gonna make a Star Anise game then I want to have Star Anise on the damn screen right from the start.
And right away I had to make some decisions. I wanted this to be a little bit Metroidvania style, where Star Anise gained his handful of powers throughout the game and could then explore new areas.
That meant I wanted as much map space as humanly possible, so from the very beginning I knew the sprite/map split I wanted: all map. 32 screens, but only 128 sprites.
And that made several other decisions, automatically. I probably wouldn’t have enough sprite space to include a gun and enemies and whatnot, but a puzzler would let me skip all of that.
This is why I chose PICO-8! The game basically decided its own design with only minimal input from me. Puzzle platformer with some powerups.
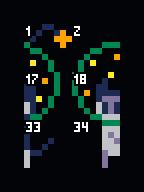
Now, to draw Star Anise, which meant deciding how big he should be. A very conspicuous part of his design is his huge helmet, which wouldn’t fit especially well in a single 8×8 tile, or even in two of them stacked. I decided to go one bigger and make a 2×3 block.
This wasn’t especially complicated to draw. At this size, it feels like a lot of the sprites draw themselves, too. It did help that I’d already seen my spouse’s interpretation of Star Anise from the prototype game above, but I think the general lesson there is to look at existing art that’s similar to what you want to draw and reverse-engineer the bits that make it work. Here, I made a big circle, squeezed in the narrowest possible face — a pixel each for the eyes, then three pixels for spacing — and gave him a rectangle for his body. Toss a couple stars into the inside of the helmet and, presto, that’s Star Anise.
You might be wondering about those weird extra tiles on the side! I’ll get to those in a moment.
With Star Anise drawn, the obvious first thing is to put him on the dang screen.
Some explanation may be in order. For starters, a “function” is a block of code that can be used repeatedly. (But then, this is not a programming tutorial.) These particular functions are special to the PICO-8: _init runs when the cartridge starts, _update runs every frame, and _draw also runs every frame.
What’s a frame, you ask? Well, you know how movies aren’t really showing movement, but are more like a very fast slideshow? Real life is “continuous” — that is, events occur smoothly over time, so when an object moves, it goes through every point between where it started and where it ends up. But we have no way to record that motion in full, becuase that would be an infinite amount of information! The best we can do is take a lot of snapshots very close together. And it turns out our eyes also work with snapshots (more or less), so it works well enough.
Likewise, simulating continuous behavior is extremely difficult, so video games tend to cheat the same way. We slice time into thin chunks — also called frames — and during each one, we move everything in the world ahead by that amount of time. If frames are short enough, you get the illusion that the world is behaving smoothly. Surprise! It’s all fake.
Modern games can (or should) deal with a varying frame rate, where each frame is a slightly (or greatly) different duration for any of myriad reasons. Since the PICO-8 is a faux-retro console, I’ll be using the retro term tic. It means the same thing, but it’s sometimes used for older systems where the framerate is reliably fixed, usually because it’s tied to (or even enforced by) hardware somewhere. Here it’s just emulated, but, you know, close enough.
Right, so, back to the PICO-8 itself. Every tic (of which there are 30 per second), the PICO-8 does two things: it calls _update to advance the game, then it calls _draw to draw the new state of the game to the screen. You might immediately wonder: why have these be separate if they happen one after the other anyway? Great question! The answer is that the PICO-8 does something clever — if it notices that the _update + _draw combination is taking longer than one tic (and the game is thus starting to lag), it will automatically drop down to 15 FPS. In this mode, it will call _updatetwice and then call _draw. Here is a terrible ASCII diagram.
As you can see, the game still updates twice in the same amount of time, so it still runs at the same speed, but it only draws half as often. With any luck, that saves enough effort that the game can keep running at the intended speed.
All of that is to say: the _draw function draws to the screen.
The first thing you (usually) want to do in _draw is clear the screen, which is accomplished by the charmingly terse cls(). If you don’t do this, your game will merrily draw right on top of whatever was on the screen previously: the prompt, a previous game, even the code editor.
After that, I called spr() to draw Star Anise. The usual arguments are spr(n, x, y), where n is the sprite number (visible near the middle of the screen in the sprite editor) and x, y say where to place him. He’s made up of six tiles, and you might think that drawing six tiles would thus require calling spr() six times, but it helpfully takes two more optional arguments: how many tiles to draw, as a single rectangle taken from the spritesheet. The above code thus draws a 2-by-3 block of tiles, starting from tile 1, at the coordinates (64, 64) — the center of the screen.
As is programming tradition, sprites are drawn from their top-left corner, so the initial tile is the top-left of the rectangle that gets drawn, and the coordinates are where the top-left of the drawn rectangle appears on screen. Thus, Star Anise appears with his top left “corner” in the middle of the screen.
There he is! How immensely satisfying. I always try to get something “real” drawing as early as humanly possible. It helps me feel like I’ve made some progress, like I’m working on a specific game and have made steps towards making it exist. This is already, quite clearly, a Star Anise game, but that wouldn’t be obvious if I’d started out with rectangles.
Now what? A good start would be to have him move around a bit. That’s easy enough if I introduce some state.
I do need to check what buttons the player is pressing, which I can do with btn(b), where b is the button… number. Left is button 0, right is button 1, up is button 2… but that makes for some unreadable garbage, so instead, let’s use a recently-introduced shortcut. If you hold Shift and press U, D, L, R, O, or X, the PICO-8 will insert a symbol representing that button. (I will be representing those symbols as ⬆️⬇️⬅️➡️🅾️❎, which is how the PICO-8 stores them on disk.)
Here I’ve put his position (still anchored at his top-left) into some variables, and during _update() I update them. (If you’re familiar with Lua, you may balk at += and -= — these are extensions added by PICO-8, and they save enough space that they’re definitely worth it.)
This is already halfway to being a game — it does something when I press buttons! Excellent. But also weird. This doesn’t look like Star Anise is walking around; it looks like he’s a static image being dragged by an invisible cursor or something. A very easy aesthetic improvement would be to make him not moonwalk when moving left.
That’s easy enough; the spr() function takes two more optional arguments, indicating whether to flip the sprite horizontally and/or vertically. I can just slap those in when he’s moving left. Or, well, not quite — I want to flip him when the last direction he moved was left. If he moves left and then stops, or moves left and then up and down, he should still be facing left.
Making progress, but obviously he’d look a lot better if he were animated, right?
Which, finally, brings us back to those extra tiles I drew. They’re copies of Star Anise’s legs and antenna, lightly edited to look like he’s in mid-step. The legs are sticking out all the way, and the antenna is adjusted to be… positioned slightly differently, since it’s bouncy. It’s a bit rough, but I can touch it up later.
Note that I’ve crammed as much movement into as little space as possible here. This is only a two-frame animation, so the leg movement is exaggerated to get the most bang for my buck. I don’t even duplicate the entirety of Star Anise for the other frame; instead, I only copied the tiles that change. That’ll make him more complicated to draw, but it does save me sprite space — remember, I only have 127 tiles available, and 9 of them is already 7% gone. (Writing more code to save on limited asset space is, in my experience, a pretty common PICO-8 tactic.)
Unfortunately, this makes flipping his sprite somewhat more complicated. I can’t just use that argument to spr(), because— well, I’ll get to that in a second. Here’s the updated code.
That sure got longer in a hurry! A quick overview:
I’ve introduced a global called t to act as a clock. I intend to use this for animation and other global cycles, so I don’t care about the actual time — that’s why I take it mod 120.
If you’re not familiar, the % (or “modulus”) operator gives you the remainder after division. It’s super duper useful and I wish we taught it as a primitive math operation! You can think of it like “clock arithmetic” — if it’s 9 o’clock and you wait 4 hours, it becomes 1 o’clock, which is the remainder when you divide 9 + 4 by 12. Or you can think of it as removing all chunks of something — to convert the 24-hour “13 o’clock” to 12-hour, you remove all the 12s, leaving just 1 behind. Or you can think of it as coiling the entire number line into a circle, so after 11 you wrap around to 0 and start over. (That’s not quite how clocks work, but using 0–11 turns out to be much simpler than using 1–12.)
The upshot here is that t will hit 119 and then wrap back around to zero, which is important because PICO-8 numbers can’t go any higher than 32767. If I left it to its own devices, it would still wrap around, but to the more cumbersome -32768. I don’t want a negative clock!
But why 120? Because I want to be able to divide the clock cycle into smaller animation cycles, and I can only do that evenly if the whole clock’s length is a multiple of the smaller cycle’s length. (On a more powerful system, I’d have a more elaborate animation setup, but that would cost more space and code than I’m willing to spend here.) Consider if I had a clock that wrapped around at 10, and I wanted an animation 3 tics long. I would use modulo 3 to shrink the clock, resulting in:
Whoops! Frame 0 will show twice in a row, intermittently, even seemingly at random. That’s not great. For the best chance of avoiding that problem without having to think too hard about it, I want a clock whose length is divisible by as much stuff as possible — a highly composite number. And, of course, 120 is one such number.
Next, I track whether Star Anise is moving at all, so I know whether to play the walk animation. Note that I always assume he isn’t moving, and then correct myself if it turns out he is; otherwise, the new value of moving would persist into future tics and he’d never stop.
That brings me to the new drawing code, which is a little tricky, so here it is a bit at a time:
1
2
3
4
5
6
7
8
9
-- top of the filelocalanise_stand={1,2,17,18,33,34}localanise_jump={3,2,17,18,19,35}-- in _draw()localpose=anise_standifmovingandt%8<4thenpose=anise_jumpend
This decides which tiles I’m going to draw. I can’t draw the walking part (which I’ve called “jump” because it does look like a jump in isolation, and I’ll be reusing them for that later) as a single block with spr() like before, and I’d like to share the code, so both frames are now assembled from individual tiles.
Note that tiles 1, 2, 17, 18, 33, and 34 are exactly the ones I was drawing in a single spr() call before. (The numbers increase by 16 when jumping to the next row, which makes sense, because each row has 16 tiles in it.) The other set is similar, but it has the alternate tiles substituted in.
I only want to use the jump tiles if Star Anise is moving, and if t % 8 < 4. That % turns my 120-tic clock into an 8-tic clock, then checks if we’re in the first half of it. Essentially: if it’s before noon, show the alternate frame; otherwise, show the normal standing frame.
The use of a global timer does have some subtle drawbacks here. If I tap an arrow key to move Star Anise only very briefly, then he may or may not animate, depending on whether the tap happens to be during the “stand” or “jump” intervals. A more powerful system, where every animation kept track of its own time, would always briefly show him moving. (On the other hand, this is an interesting aesthetic in its own right that kinda complements the very low-res and exaggerated animation.)
Next I need to draw the tiles, but we’ve come to the catch I mentioned before. When I draw Star Anise flipped, I’m now drawing him as a bunch of separate tiles. If I drew them in the same left-to-right order, then his left side would be flipped, and his right side would be flipped, but the whole image wouldn’t be. Er, just look at this picture.
See? The tiles are arranged the same way, but each one is individually flipped, and the result is… not what I want. I’ll need to also draw the columns in reverse order. And that’s exactly what I do:
Here I’m determining the start point and how far apart the tiles are. The variable names are fairly terse, for a couple of reasons: one, the PICO-8 screen is not very wide, so long variable names make code much harder to read; but also, math code tends to be easier to follow with shorter names anyway. I’ve even taken the naming conventions from math — the initial state of a variable is often written with a subscript zero (\(x_0\)) and a change is written with the Greek letter delta (\(\Delta x\)), so I’ve used the ASCII equivalents of those, x0 and dx.
I’m starting from Star Anise’s position, of course, and then each tile is 8 pixels right of the previous one… if he’s not flipped. If he is flipped, I want to move left, which will draw the tiles in reverse order. But that would change where he draws from, so to compensate, I also start drawing 8 pixels right of where I usually would. (Try to convince yourself that this is correct; on a flipped Star Anise, tile number 1 should draw 8 pixels left from his upper-left corner.)
All that’s left to do is the drawing itself. For each tile in the pose list, I draw that tile. Each row is two tiles wide, so after every second tile, I reset the horizontal “cursor” (x) back to where it started and move down by one row’s worth of pixels. For any other tile, I just move horizontally by dx.
The results are basically magic.
And that’s a good place to pause for now. Yes, I know, we didn’t get very far, but this is part zero! It’s mostly a test of this series and its tone for me, and a test of fortitude for you. I hope you could follow along with the minor mathematical hijinks above, because next time it gets much worse — before I can do anything else at all, I have to write collision detection. Oh boy! Stay tuned! And always feel free to ask questions, of me or anyone else!
Here are all the modifications PICO-8 has made to the language (based on Lua 5.2). If you’ve never used Lua, keep in mind that these won’t carry over if you try to write Lua anywhere else. Some of these are advanced features, so if you have no idea what something means, that’s probably fine.
Spoilers: it’s mostly that the standard library has changed.
Numbers are signed 15.16 fixed-point, rather than stock Lua’s 64-bit floating point. That means fractions can only be represented in increments of 0.0000152587890625 (= \(2^{-16}\), a cumbersome number I refer to as the “Planck size”), and numbers can’t exceed ±32768.
Compound assignment is supported: a += b works as in a = a + b in stock Lua, where + can be replaced with any binary operator.
!= is allowed as an alias for ~=.
if (foo) bar = 1 is shorthand for if foo then bar = 1 end. The parentheses are required, and the condition ends at the end of the line. (I strongly advise against using this unless you’re very desperate for space; it scans poorly and doesn’t even save tokens.)
The new @, %, and $ unary prefix operators read 1, 2, or 4 bytes from a memory address. (PICO-8’s memory, not system RAM!)
The ? unary prefix operator is equivalent to print. (I’ve never used it, and it’s not even directly documented.)
The built-in functions collectgarbage, dofile, error, pcall, require, select, and xpcall are not available (though the lack of select might be a bug).
The built-in variables _G and _VERSION are not available.
load has been replaced with a function that loads PICO-8 carts from files.
print has been replaced with a drawing function, which prints a single string at a position on screen.
tonumber and tostring have been replaced with tonum and tostr, which behave slightly differently (but tostr does still respect the __tostring metatable field).
(assert, getmetatable, ipairs, next, pairs, rawequal, rawget, rawlen, rawset, setmetatable, and type still exist and work as in stock Lua.)
The coroutine library is not available, but most of its contents are exposed directly as cocreate, coresume, costatus, and yield. There is no equivalent for coroutine.running or coroutine.wrap.
The require function and package library are not available, though the #include syntax can be used to textually substitute the contents of a Lua file.
The string library is not available. Replacement string functions are: chr, ord, split, and sub.
The table library is not available. Replacement table functions are: add, del, deli, count, all, foreach. There is no built-in way to concatenate or sort a list.
The math library is not available. Replacement math functions are: max, min, mid, flr, ceil, sin, cos, atan2, sqrt, abs, rnd, srand. There is also an integer division operator, \.
The bit32 library is not available, but bitwise operations are available as both functions — band, bor, bxor, bnot, shl, shr, lshr, rotl, rotr — and operators — &, |, ^^, ~, <<, >>, >>>, <<>, >><.
The io library is not available. Running PICO-8 cartridges have no notion of a filesystem.
The os library is not available. Running PICO-8 cartridges have no direct access to the underlying operating system. (Some facilities are exposed through the “syscall” function stat, such as accessing the current UTC or local time.)
The debug library is not available.
A number of other new functions were added, though I won’t list them all here; they’re generally for drawing, working with assets, or interacting with the PICO-8’s faux hardware.
Here is Lexy’s Labyrinth, a web-based Chip’s Challenge emulator.
It’s easy to get into and mostly speaks for itself, so here is a story.
Once upon a time, there was a puzzle game called Chip’s Challenge. It was created in 1989 for the Atari Lynx, an early handheld that is probably best known for… uh… Chip’s Challenge. It stood out as a curious blend of Sokoban head-scratching with real-time action, and it was one of the first computer puzzle games that had a whole pile of different mechanics and relied on exploiting the interesting interactions between them[citation needed].
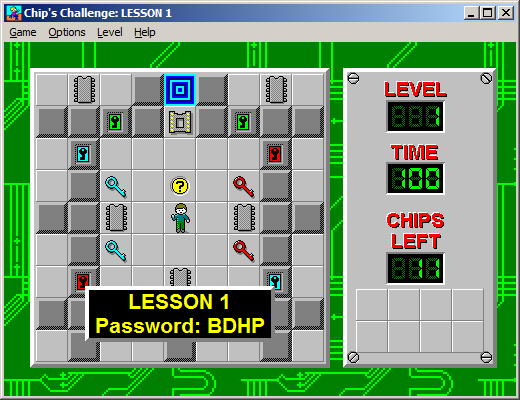
The game found wider recognition with its inclusion in Microsoft Entertainment Pack 4, and later the Best of Windows Entertainment Pack (charmingly abbreviated “BOWEP”).
That in itself is a curious story — numerous features of the Atari Lynx version were lost in translation, most notably that the Lynx version has the player and monsters slide smoothly between grid cells, whereas the Microsoft port has everything instantly snap from one cell to the next. Also conspicuous is the presence of several typos in level passwords, which are exactly consistent with a set of notes a player took about the Lynx game, but which would be impossible in a straight port — the Lynx level passwords weren’t manually set, but were generated on the fly by a PRNG.
The most obvious explanation is that the developer responsible for the Microsoft port didn’t have access to the Lynx source code, and in fact, had never played the original game at all. That would explain nearly every major gameplay difference between the Lynx and Microsoft versions, which are all things you’d never notice if you only had static screenshots and maps to work from. Given that restriction, hey, not a bad job.
I played the BOWEP edition of Chip’s Challenge as a kid and was completely enamoured. I suppose what got me the most was the same thing that I found so compelling about Doom: the ability to modify your environment, whether by using blocks to clear water or toggling green blocks or generating new monsters from a clone machine. Being able to affect my environment in (more or less) free-form ways felt curiously powerful.
…
Well, let’s not think about that too hard. I’ll save it for my therapist.
Some years later I discovered an incredible tool called The Internet, and with it I learned of the impending Chip’s Challenge 2, a sequel with way more tiles and possibilities! Fantastic!
Unfortunately, there was a complication. Epyx, the original publisher of Chip’s Challenge, had gone bankrupt (somehow!) and had sold most of its assets, including the Chip’s Challenge rights, to a company called Bridgestone Media (now Alpha Omega Productions), a Christian propaganda distributor.
You read that correctly.
Bridgestone, a company that generally dealt in movies, had some very peculiar ideas about the video game industry. Apparently they expected the assets they’d acquired to magically make them filthy rich — you know, just like Jesus would want — despite having acquired them from a company that had just evaporated. As such, they told the original developer, Chuck Somerville, that he could only release Chip’s Challenge 2 if he paid them one million dollars upfront.
He did not have one million dollars, and so Chip’s Challenge 2 languished forever.
(At this point, in hindsight, I wonder why Chuck didn’t simply change the story and tileset and release the game under a different name. Apparently he did start on something like this some years later, in the form of an open clone from scratch called Puzzle Studio, but it was eventually abandoned in favor of Chuck’s Challenge 3D. But I still wonder: why start a brand new thing, rather than rebrand and release the existing thing?)
We did have some descriptions of new Chip’s Challenge 2 mechanics, and so at the ripe old age of 15, with no idea what I was doing, I decided I would simply write my own version of Chip’s Challenge 2.
In QBasic.
Also I didn’t really understand how to handle the passage of time, so the game was turn-based and had no monsters.
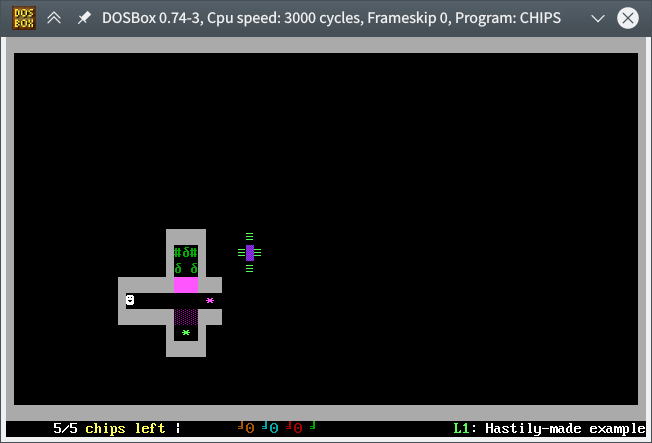
But, given all that, it wasn’t that bad. I found the source code a few years ago and put it on GitHub along with a sample level and a description of all the tiles you can use in the plaintext level format. I’ve got a prebuilt binary for DOS (usable in DosBox) too, if you like — just have a levels.txt in the same directory, and be sure it uses DOS line endings. I used to have one or two actual levels, but they have tragically been lost to the sands of time.
That would’ve been 2002.
Thirteen years later, in April 2015, a miracle occurred and defeated the Christians. Chip’s Challenge 2 was released on Steam.
It was fine. I don’t know. Over a decade of anticipation gets your hopes up, maybe. It’s a perfectly good puzzle game, and I don’t want to dunk on it, but sometimes I interact with it and I feel all life drain from my body.
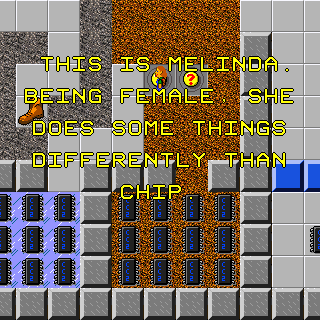
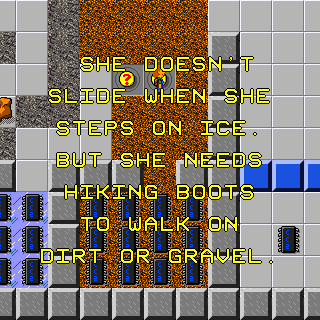
I don’t even know whether to talk about this completely unreadable way of showing hints or the utterly baffling justification of “being female” for these properties.
But it’s fine. The game was Windows-only, but it was old Windows-only, so Wine handled it perfectly well. I played through a few dozen levels. Passwords were gone, so you were free to skip over levels you just didn’t feel like playing.
And then they patched a level editor into the game, and it completely broke under Wine. Completely. Like, would not even run. It’s only in recent years that it even tries to run, and now it can’t draw the window and crashes if you attempt to do anything.
The funny thing is, apparently it doesn’t draw for some people on Windows, either. It doesn’t for me in a Windows VM. The official sanctioned solution is to… install… wined3d, a Windows port of the Wine implementation of Direct3D.
I don’t know. I don’t know! I don’t know what the hell anything. This situation is utterly baffling. What even are computers.
I gave up on the game until recently, when something reminded me of it and I tried it again in Wine. No luck, obviously. I spent half a day squabbling with bleeding-edge versions and Proton patches and all manner of other crap, then resorted to the Bit Busters ClubDiscord, but they couldn’t help me either.
And then something stirred, deep inside of me. This game wasn’t that complicated, right? I actually know how to make video games now. I even know how to make art, sort of. And sound. And music. And…
And here I am, a month later, having replicated Chip’s Challenge in a web browser, fueled entirely by some new emotion I’ve discovered that lies halfway between spite and exhaustion. My real goal was to clone Chip’s Challenge 2 so I can actually fucking play this game I bought, but it is of course a more complex game. Still, CC2 support is something like 60% done; most of what remains is wiring, tracks, and ghost/rover behavior.
CC1 support is more interesting, anyway — there are far more custom CC1 levels around, and Lexy’s Labyrinth exposes almost 600 of them a mere click away. Given that the original Microsoft port was 16-bit and is now difficult to run (and impossible to buy), and the official (free!) Steam release is fairly awkward and unmaintained (the dev mostly makes vague statements about “old code”), and even the favored emulator Tile World has the aesthetics and usability of a 1991 Unix application, I’m hoping this will make the Chip’s Challenge experience a little more accessible. It has a partially working level editor, too, which lets you share levels you make by simply passing around a URL, and I think that is fucking fantastic.
LL cannot currently load level packs from the Steam release, but it’s a high priority. In the meantime, if you really want to play the original levels (even though CCLP1 is far better in my experience), it’ll load CHIPS.DAT if you’ve got it lying around. Also, it works on phones!
Probably the most time-consuming parts of this project were the assets. I had to draw a whole tileset from scratch, including all of the CC2 tiles which you don’t even get to see yet (and a few of which aren’t actually done). That probably took a week, spread out over the course of the entire last month. Sound effects took several days, though they got much easier once I decided to give up on doing them by wiring LFOs together in SunVox and just use a bunch of BeepBox presets. I spent a couple days on my own music track, and half a dozen other kind souls chipped in their own music — thank you so much, everyone!
And thank you to the Bit Busters Club, whose incredibly detailed knowledge made it possible to match the behavior of a lot of obscure-but-important interactions. The Steam version of CC1 comes with solution replays, and LL can even play a significant number of them back without ever desyncing.
I’ve been ignoring pretty much everything else for a month to get this in a usable state, so I’d like to take a break from it for now, but I’d really like to get all of CC2 working when I can, and of course make the level editor fully functional. I love accessible modding tools, you don’t see many of them in games any more, and with any luck maybe it’ll inspire some other kid to get into game development later.
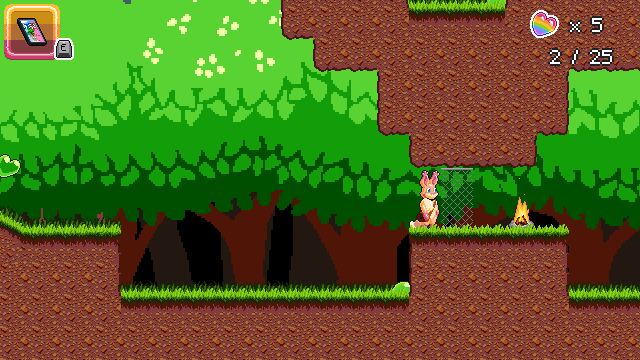
…okay, I haven’t been ignoring everything else. I also reused the tiles I drew for a fox flux minigame in a similar style, except that you place a limited set of tiles in empty spaces and then let the game run by itself. Kind of like… Chip’s Challenge meets The Incredible Machine.
(That arrow tile has since been updated to be more clear, but it means “when you hit something, turn around instead of stopping and ending the game.”)
I guess two little puzzle game engines isn’t too bad for not quite a month of work!
Here is Lexy’s Labyrinth, a web-based Chip’s Challenge emulator.
It’s easy to get into and mostly speaks for itself, so here is a story.
Once upon a time, there was a puzzle game called Chip’s Challenge. It was created in 1989 for the Atari Lynx, an early handheld that is probably best known for… uh… Chip’s Challenge. It stood out as a curious blend of Sokoban head-scratching with real-time action, and it was one of the first computer puzzle games that had a whole pile of different mechanics and relied on exploiting the interesting interactions between them[citation needed].
The game found wider recognition with its inclusion in Microsoft Entertainment Pack 4, and later the Best of Windows Entertainment Pack (charmingly abbreviated “BOWEP”).
That in itself is a curious story — numerous features of the Atari Lynx version were lost in translation, most notably that the Lynx version has the player and monsters slide smoothly between grid cells, whereas the Microsoft port has everything instantly snap from one cell to the next. Also conspicuous is the presence of several typos in level passwords, which are exactly consistent with a set of notes a player took about the Lynx game, but which would be impossible in a straight port — the Lynx level passwords weren’t manually set, but were generated on the fly by a PRNG.
The most obvious explanation is that the developer responsible for the Microsoft port didn’t have access to the Lynx source code, and in fact, had never played the original game at all. That would explain nearly every major gameplay difference between the Lynx and Microsoft versions, which are all things you’d never notice if you only had static screenshots and maps to work from. Given that restriction, hey, not a bad job.
I played the BOWEP edition of Chip’s Challenge as a kid and was completely enamoured. I suppose what got me the most was the same thing that I found so compelling about Doom: the ability to modify your environment, whether by using blocks to clear water or toggling green blocks or generating new monsters from a clone machine. Being able to affect my environment in (more or less) free-form ways felt curiously powerful.
…
Well, let’s not think about that too hard. I’ll save it for my therapist.
Some years later I discovered an incredible tool called The Internet, and with it I learned of the impending Chip’s Challenge 2, a sequel with way more tiles and possibilities! Fantastic!
Unfortunately, there was a complication. Epyx, the original publisher of Chip’s Challenge, had gone bankrupt (somehow!) and had sold most of its assets, including the Chip’s Challenge rights, to a company called Bridgestone Media (now Alpha Omega Productions), a Christian propaganda distributor.
You read that correctly.
Bridgestone, a company that generally dealt in movies, had some very peculiar ideas about the video game industry. Apparently they expected the assets they’d acquired to magically make them filthy rich — you know, just like Jesus would want — despite having acquired them from a company that had just evaporated. As such, they told the original developer, Chuck Somerville, that he could only release Chip’s Challenge 2 if he paid them one million dollars upfront.
He did not have one million dollars, and so Chip’s Challenge 2 languished forever.
(At this point, in hindsight, I wonder why Chuck didn’t simply change the story and tileset and release the game under a different name. Apparently he did start on something like this some years later, in the form of an open clone from scratch called Puzzle Studio, but it was eventually abandoned in favor of Chuck’s Challenge 3D. But I still wonder: why start a brand new thing, rather than rebrand and release the existing thing?)
We did have some descriptions of new Chip’s Challenge 2 mechanics, and so at the ripe old age of 15, with no idea what I was doing, I decided I would simply write my own version of Chip’s Challenge 2.
In QBasic.
Also I didn’t really understand how to handle the passage of time, so the game was turn-based and had no monsters.
But, given all that, it wasn’t that bad. I found the source code a few years ago and put it on GitHub along with a sample level and a description of all the tiles you can use in the plaintext level format. I’ve got a prebuilt binary for DOS (usable in DosBox) too, if you like — just have a levels.txt in the same directory, and be sure it uses DOS line endings. I used to have one or two actual levels, but they have tragically been lost to the sands of time.
That would’ve been 2002.
Thirteen years later, in April 2015, a miracle occurred and defeated the Christians. Chip’s Challenge 2 was released on Steam.
It was fine. I don’t know. Over a decade of anticipation gets your hopes up, maybe. It’s a perfectly good puzzle game, and I don’t want to dunk on it, but sometimes I interact with it and I feel all life drain from my body.
I don’t even know whether to talk about this completely unreadable way of showing hints or the utterly baffling justification of “being female” for these properties.
But it’s fine. The game was Windows-only, but it was old Windows-only, so Wine handled it perfectly well. I played through a few dozen levels. Passwords were gone, so you were free to skip over levels you just didn’t feel like playing.
And then they patched a level editor into the game, and it completely broke under Wine. Completely. Like, would not even run. It’s only in recent years that it even tries to run, and now it can’t draw the window and crashes if you attempt to do anything.
The funny thing is, apparently it doesn’t draw for some people on Windows, either. It doesn’t for me in a Windows VM. The official sanctioned solution is to… install… wined3d, a Windows port of the Wine implementation of Direct3D.
I don’t know. I don’t know! I don’t know what the hell anything. This situation is utterly baffling. What even are computers.
I gave up on the game until recently, when something reminded me of it and I tried it again in Wine. No luck, obviously. I spent half a day squabbling with bleeding-edge versions and Proton patches and all manner of other crap, then resorted to the Bit Busters ClubDiscord, but they couldn’t help me either.
And then something stirred, deep inside of me. This game wasn’t that complicated, right? I actually know how to make video games now. I even know how to make art, sort of. And sound. And music. And…
And here I am, a month later, having replicated Chip’s Challenge in a web browser, fueled entirely by some new emotion I’ve discovered that lies halfway between spite and exhaustion. My real goal was to clone Chip’s Challenge 2 so I can actually fucking play this game I bought, but it is of course a more complex game. Still, CC2 support is something like 60% done; most of what remains is wiring, tracks, and ghost/rover behavior.
CC1 support is more interesting, anyway — there are far more custom CC1 levels around, and Lexy’s Labyrinth exposes almost 600 of them a mere click away. Given that the original Microsoft port was 16-bit and is now difficult to run (and impossible to buy), and the official (free!) Steam release is fairly awkward and unmaintained (the dev mostly makes vague statements about “old code”), and even the favored emulator Tile World has the aesthetics and usability of a 1991 Unix application, I’m hoping this will make the Chip’s Challenge experience a little more accessible. It has a partially working level editor, too, which lets you share levels you make by simply passing around a URL, and I think that is fucking fantastic.
LL cannot currently load level packs from the Steam release, but it’s a high priority. In the meantime, if you really want to play the original levels (even though CCLP1 is far better in my experience), it’ll load CHIPS.DAT if you’ve got it lying around. Also, it works on phones!
Probably the most time-consuming parts of this project were the assets. I had to draw a whole tileset from scratch, including all of the CC2 tiles which you don’t even get to see yet (and a few of which aren’t actually done). That probably took a week, spread out over the course of the entire last month. Sound effects took several days, though they got much easier once I decided to give up on doing them by wiring LFOs together in SunVox and just use a bunch of BeepBox presets. I spent a couple days on my own music track, and half a dozen other kind souls chipped in their own music — thank you so much, everyone!
And thank you to the Bit Busters Club, whose incredibly detailed knowledge made it possible to match the behavior of a lot of obscure-but-important interactions. The Steam version of CC1 comes with solution replays, and LL can even play a significant number of them back without ever desyncing.
I’ve been ignoring pretty much everything else for a month to get this in a usable state, so I’d like to take a break from it for now, but I’d really like to get all of CC2 working when I can, and of course make the level editor fully functional. I love accessible modding tools, you don’t see many of them in games any more, and with any luck maybe it’ll inspire some other kid to get into game development later.
…okay, I haven’t been ignoring everything else. I also reused the tiles I drew for a fox flux minigame in a similar style, except that you place a limited set of tiles in empty spaces and then let the game run by itself. Kind of like… Chip’s Challenge meets The Incredible Machine.
(That arrow tile has since been updated to be more clear, but it means “when you hit something, turn around instead of stopping and ending the game.”)
I guess two little puzzle game engines isn’t too bad for not quite a month of work!
I wrote the original game (very slightly NSFW) for my own “horny” game jam, Strawberry Jam (more likely to be NSFW), way back in February 2017.
You play as Lexy, my shameless Floraverse self-insert, who owns an enchanted collar that (among other things) makes her basically indestructible and allows her to easy to transform into… whatever, given some kind of sensible trigger. And then you do some puzzle-platforming to collect “strawberry hearts” and gain access to new areas, much of which (surprise!) involves getting turned into things.
For example, this chain-link fence blocks you:
But if you let that green blob in the grass turn you into slime, you can walk right through it.
There are also spikes, which you get stuck on if you land on them… but slime can walk right through them, glass can stand on top of them, and stone outright destroys them. And so on. As a jam game, it’s not very expansive, but many of the puzzle elements interact differently with many of the handful of Lexy variants, which provided enough potential to make eight levels.
The jam game was rough, but I really liked the concept and wanted to expand on it. I spent a good chunk of the summer of 2017 on it, but it was a struggle. I was still fairly new to pretty much every aspect of actually creating a game — I’d only been drawing for two years, I’d sometimes hit big gaps in the design with no idea how to fill them, and I wasn’t yet entirely comfortable with complex physics or shaders. The art in particular was a huge problem; it took me a long time to produce sprites that I was only passably happy with. My spouse Ash is an artist, and we’ve made several games together where they produced all the art, but this was my idea and I was determined to draw it myself.
Then 2018 hit, which was a whole entire mess, and I didn’t really touch fox flux at all for over a year. I made a couple of other games with Ash, some finished, some not, and kept drawing intermittently.
I returned to fox flux for the middle of 2019, and decided… I’m not sure what I decided, exactly. I guess I’d gotten better at all the things that had been difficult for me before, so I set about trying to improve every aspect of the game at once.
I realized the (many, many) improved sprites I’d drawn in 2017 were not actually very good, and drew a new Lexy design from scratch that absolutely blew me away… which meant throwing away all the existing art.
I’d come up with a few new things for Lexy to turn into, each of which altered her behavior pretty significantly, and her code was becoming a spaghetti disaster. So I spent some time completely refactoring actors into bags of components, which I was unsure about until very recently and which ended up breaking pretty much every single object in the game, sometimes in subtle ways.
I decided to add water, which unraveled into a whole pile of decisions and problems.
I tried to make consistent or interesting physics for pushing things (e.g. wooden crates), and that became a nightmare. I easily spent weeks on this, trapped in a cycle of finding some edge case that couldn’t be fixed without considerably expanding what I was simulating, struggling to do that expansion while keeping all the basic stuff working, and then finding a new and different edge case.
Did I mention that I tried to do all of these things at the same time, while also trying to nail down the design of a game that’s naturally prone to a combinatoric explosion of interactions?
At a certain point it just felt hopeless. I’d poured easily over a year into this game, and all I had to show for it was a jumbled pile of stuff that didn’t work, strewn about a couple test maps that didn’t even contain any puzzles.
I don’t know what happened, exactly. I’d given up on the heavily-simulated push physics last year, at least, so that wasn’t so much of a concern any more. But I still had a mess. I’d long since written git status off as unusable.
Until this past month, when I sat down and just started powering through the mess. One by one, I fixed the serious breakages that the component refactor had caused. I dedicated a day or two just to figuring out water physics, put a little more thought into it, and ended up with something that looks and plays quite nicely. I finished redrawing basic Lexy, and even added frames I hadn’t had before.
I think the difference was… fear. I’d previously hesitated so much, both in the art and the gnarlier code. It was such a struggle to get something working at all that changing it in any way was terrifying — what if I broke it and couldn’t even get it back to how it’d been?
I don’t know how to describe exactly how this felt, and I also don’t know how to explain what changed. It was like a switch flipped. I think it started when I drew new dirt tiles, and it didn’t even take that long, and I loved them. I’ve always had a hard time drawing terrain, and for once I just sat down and did it and it came out well and it looked like mine, like my style, which was a thing I hadn’t even really grasped I have before. After that I just cranked out a mountain of new sprite art, faster and better than anything I’d done before. Like I’d been accumulating XP over the past few years and just now decided to spend it all on levelling up.
Over the past six weeks, I have:
Redesigned the terrain
Vastly improved the palette
Completely finished redrawing Lexy
Redesigned the HUD
Mocked up a new dialogue layout
Drawn a new font
Drawn and implemented new consistent level entrances
Animated a treasure chest opening cutscene
Animated getting a key
Added a completely new tally at the end of a level
Added transitions for entering and leaving levels
Added swimming behavior
Redrawn the old gecko as a much more visible bananalizard
Animated the hearts and several other pickups
Ported the original forest levels to use all the new stuff
I don’t even know there has been just so much
Just look at the style evolution! God damn.
Here’s that same level from above:
A lot of the last few weeks went towards level transitions, which previously… kind of worked. They were always a hasty jam hack that I never liked; there was a quick screen fade when going through a door, there was barely any notion of being “in a level” vs not, and the game even counted the fucking hearts in a level on the fly the first time you entered it. It was all very silly.
But now (please pardon the occasional frame drops from my screen recorder):
I finally feel like I’m making some real progress. I finally feel like this could be something I take seriously, that it could be a real game, something more than half an hour long. At some point it just became an absolute joy to look at and run around in.
The basic concept is the same, but I want to add some structure to it. The jam game was four single-room levels you could tackle in any order without much guidance, then another set of the same. Which is fine, but doesn’t give me much wiggle room in the design.
In the full game, levels will contain not just hearts, but also a treasure (a la Wario Land 3), some amount of candy (usable at the shop to buy things of some description), and an explicit exit. The overworld will function a bit more like a world map, and though you’ll still need to collect N hearts to get to the next zone, there may sometimes be obstacles that can only be overcome by finding the right treasure in a level.
I also intend to give Lexy some active abilities, for example this blown kiss (recorded with older art) that can toggle pink objects between two states:
I even have a plot in mind! The jam game had only a teeny tiny one.
Ash is currently busy with their own game, so I think this is gonna be The Thing I Do for a while. To that end, I’m in the middle of setting up some infrastructure:
Also, I recently created a secret Discord channel on the same server, where I intend to do planning and design work that I’m not ready to make public yet! Spoilers will abound, but if you’re interested and okay with that, you can get in by pledging at least $4 on Patreon and letting me know to give you the role. (I don’t use Patreon’s native Discord integration because it does rude things like forcibly rejoin you to the server even if you manually leave.)
I’d like to finish porting the old levels over to new artwork, the new level infrastructure, etc. It’d make for a nice little Patreon demo or something, it gives me a milestone with pretty clear goals, and it’ll leave me with at least a small palette of puzzle elements that I know work correctly.
I’d like to write about what I’m doing sometimes on this dang blog. I’ve found that structured writing is really, really, really hard when my head is a mess, and it has been extremely a mess for the last two and a half years (sorry), but jotting down what I’m already doing should be much easier than the more elaborate posts I’ve written, which need research and tooling and whatnot.
I have a good handful of puzzle elements — some of which even work — and a bunch of ideas for more, but I haven’t actually tried building levels since I made the original game! That’s kind of the important part, so I’d love to do some of it now that the dust is finally settling.
I still have some design decisions to make, though they’re getting trickier since I’ve already decided all the easy stuff. But I’ll save that for the generous folks who give me four dollars, I guess.
So. As I mentioned at the beginning, this game was originally made for a “horny” game jam. Given that it’s mostly platforming, you might be wondering why that is. I already feel like I’m crossing the streams somehow by even mentioning this on this blog, so I’ll try very hard not to get TMI here.
I have a foot in “TF” (transformation) kink circles, and one thing that’s always struck me about that subculture is how much of it is completely non-sexual. You can find no end of artwork of, say, someone being turned into one of those inflatable pooltoys — where both the artist and the audience are obviously having a good time with it — yet with no hint of sexual elements whatsoever. It’s a form of sexuality that doesn’t need to be sexual at all.
I started Strawberry Jam because I wanted to see some adult games that were more creative with their gameplay. Much of the genre consists of otherwise regular games that occasionally show you some explicit artwork, and while that’s a perfectly fine way to design a game, I felt that the medium surely had more potential. It turns out that a non-sexual fantasy kink works wonders as a gameplay element; rather than just giving you a picture, the game takes a concept and has you experience it yourself, even figure out by experimentation how it’s altered the way you interact with the world.
This puts me in a slightly awkward position. I do, genuinely and platonically, love these kinds of gameplay themes! I adore changes in how you perceive or interact with a world — the dark world in Metroid Prime 2, the time reversal in Braid, the “dimension” swapping in Quantum Conundrum, etc. I think this is a great concept that anyone can have a good time with, and I feel like this game is a love letter to the Wario Land series.
At the same time, I do also appreciate the kink inspiration. Even Lexy’s collar was originally conceived as a gimmick I could use for drawing adult artwork. The jam game contains a lot of suggestive dialogue, since Lexy herself also appreciates the kink aspect. And that was a lot of fun to write, and I’m sure it enhanced the experience for other folks with similar leanings.
But this is such a good concept that I want it to be playable as just a regular puzzle-platformer as well. I think it would have fairly broad appeal, and I don’t want to hamstring myself by totally fucking weirding people out when it dawns on them that “oh the dev is kinda Into This huh”. And yet I don’t want to completely sterilize the game, either, because… well, ultimately, it’s my game and I like the suggestive parts.
This is a tough line to draw, and I’m not yet sure how to do it. I’ve considered just making alternative dialogue that you can opt into when you start the game, but given that Lexy already speaks differently depending on what form she’s in, I have no idea how feasible that is.
I don’t know how to gauge this. I’ve always been up to my armpits in the side of the internet that just posts porn and talks about sexuality casually, whereas I’m dimly aware that most people see sexuality as this completely distinct part of life that you hide in a small box, far away from the eyes of polite society. But maybe I’m overestimating that? Does anyone actually care if the protagonist of a game comments “hey this is hot” about something weird but innocuous?
Or maybe that’s exactly where the line is. I remember Nier: Automata, a game that is all too happy to show off the protagonist’s immaculately-rendered ass, which is clearly meant for the enjoyment of both the creator and the players. But nobody comments on it within the game, which makes it seem incidental, somehow. I can’t explain why that is, and it feels slightly dishonest to me.
Am I overthinking this? If you’re not involved in any kind of kink circles and played the original jam game, I’m curious to hear how it read to you. Was it at all uncomfortable, like perhaps the game was expecting you to heavily empathize with a feeling you don’t share at all? Or does putting that feeling on a character, rather than aiming it at the human player, make it something you can easily shrug off? The full game will have more stuff going on, so there should be lots more dialogue that isn’t solely about Lexy’s feelings, if that helps.
Hm, I thought I would have more to say here! I have a lot of ideas, but only a handful of them are implemented yet, and I guess it’s hard to show what a game will be like before most of it works.
I hope this is enough to whet some appetites, at least! I haven’t been excited like this about anything in far too long.
(I originally drafted this just after publishing the game, but then decided to start a whole series about its development and wasn’t sure what to do with this! But it’s solid and serves a different purpose, so here it is.)
It’s been a while, but I made another PICO-8 game! It’s a little platformer with light puzzling, where you help Star Anise find his best friend Branch Commander Twig. It’s only half an hour long at worst, and it’s even playable on a phone!
This is the one-and-a-halfth entry in the Star Anise Chronicles series, which after several false starts, finally kicked off over Christmas with a… uh… interactive fiction game. Expect the series to continue with even more whiplash-inducing theme shifts.
More technical considerations will go in the “gamedev from scratch” series, but read on for some overall thoughts on the design. Both contain spoilers, of course, so I do urge you to play the game first.
The first attempt at a Star Anise game was two years ago, in early 2018. The idea was to make a Metroidvania where Star Anise had a bunch of guns that shot cat-themed projectiles, obtained a couple other cat-themed powers, and made a total mess of a serious plot happening in the background while he ran around collecting garbage.
After finishing up the Steam release of Cherry Kisses last month, we decided that our next game should be that one, which would now be Star Anise 2 (since i’d already released a Star Anise 1 some months ago). We have, uh, already altered these plans, but that’s the background.
I don’t really know why I started on this game. I guess there’s some element of stress to working on a project with someone, even if that someone is Ash (my spouse), and especially if I’m supposed to be driving it forward. I have to tell someone what to do, and then if I don’t like the result I have to ask them to fix it, and a lot of tiny design questions are out of my control anyway, and all of this is happening on someone else’s schedule, and I have to convey all the project state that’s in my head in a complicated non-verbal form, and… all of those things are a constant low-level source of stress.
So I guess we’d just finished a game that I’d designed, and it was looking like we were about to start a sizable project where I was the design lead again, and I wanted to make something I could finish by myself as an interlude.
And so I sat down with a teeny tiny tool to make a teeny tiny version of what I expected would be our next game.
The basics were obvious: run, jump, land. I gave Star Anise little landing particles early on — they’re in the bigger prototype, I love landing puffs in general, and having them be stars adds so much silly personality.
I knew I wanted to have multiple abilities you collect, since that’s the heart of Metroidventures. I briefly considered giving Star Anise a gun, as in the prototype, but gave up on that pretty early. I would’ve had to sprite a gun, a projectile, a projectile explosion, enemies, enemy attacks, enemy death frames…
Don’t get me wrong; I have no problem with drawing all of that. The concern was that PICO-8 has a very limited amount of space for sprites — in the configuration I was using, 128 sprites of 8×8 pixels each. Star Anise himself takes up 9, even with some clever reuse for his walking animation. The star puff takes 4. The common world tile, plus versions for edges and corners, takes up 9. That’s 22 sprites already, more than 17% of the space I have, for absolutely nothing besides jumping around on solid ground. I would have to keep it simple.
That led me to the first two powers, both borrowed from the prototype:
AOWR starts conversation with NPCs and opens doors. I can’t really take any creative credit here, since these are both things Anise attempts to do with aowrs in real life.
Papping activates levers and knocks over glasses of liquid. Anise only does one of those in real life. (In the prototype, this is a gun — which shoots pawprint-shaped projectiles — but I’d already been thinking about making it a “melee” ability first.)
I adore both of these abilities. I think they both turn some common UI tropes on their heads. NPCs, doors, and levers are all things you usually interact with by pressing some generic “interact” button, but hitting a lever (and meowing at a door) adds some physicality to the action — you’re actually doing something, not just making it go.
And pressing A to talk to an NPC doesn’t really make any sense at all! Consider: almost universally, even in games where the player character speaks, pressing A to start a conversation leads off with the NPC talking. So what the hell did you actually do? What does pressing A represent actually doing that results in someone else casually starting a conversation with you, seemingly unprompted? I have no idea! It’s nonsense! But Anise meows at me all the time and I always respond to him, which is perfectly sensible.
The third power, telepawt, is a little newer. We’d conceived a cat teleporting power pretty recently, but it was more involved and required some big environmental props. I realized pretty quickly that I couldn’t possibly do much of interest on the tiny PICO-8 screen (16 × 16 tiles), but I do like teleporting abilities! I briefly considered ripping off Axiom Verge, but I’ve already done that in fox flux, and the physics are a little involved… and then, lo, inspiration! Combine the two ideas: teleport great distances, but in a controlled and predictable way, by teleporting to the point on the opposite side of the screen. It felt like a very 8-bit kind of power, and I could already imagine a few ways to hide stuff with it, so off I went.
And that seemed like a reasonable progression. A way to talk (and progress through doors), a way to interact with objects, and a way to move around. I decided about halfway through development to make jumping a faux powerup as well; it stretches out the progression a bit more by making you walk past potential jumps and then come back to them later, which is important when I don’t have much map space to work with.
I’d originally planned for items to be separate from abilities, but ran into a couple problems, the worst of which was that I really didn’t have much screen space for sprinkling more items around. I ended up turning items into abilities in their own right, which I think was an improvement overall; now you can crinkle the plastic bag wherever you want, for example.
The game deliberately doesn’t try to explain itself; PICO-8 only has six buttons, and four of them are a d-pad, so I figured button-mashing (as in ye olde NES days) would get everyone through. Still, several players were confused about how to jump (and possibly gave up before even acquiring jump?), and one didn’t realize you could switch abilities, despite the up/down arrowheads on the ability box. Not sure what to learn from this.
I struggled a bit with the map. PICO-8 has a built-in map editor with enough space for 32 screen-sized rooms (arranged in an 8 × 4 grid), which it turns out is not very many. I also very much did not want the game space to be confined to exactly that size of rectangle, so I knew I’d have to do some funky stuff with room connections. (Armed with that power, I ended up making loops and other kinds of non-Euclidean geometry, but hey that’s plenty appropriate for an imaginary moon.)
The bigger problem was designing the rooms outside of the PICO-8 map editor. I tried sketching in Krita, and then on paper, but kept running into the same two problems: it was tedious to rearrange rooms, and I didn’t have a good sense of how much space was available per room.
I found a novel solution: I wrote a Python script to export the map to a PNG, opened it in Aseprite, and edited it there — with each pixel representing a tile and the grid size set to 16. Now I knew exactly how much space I had, and rearranging rooms was easy: double-clicking a cell selects it, and holding Alt while dragging a selection snaps it to the grid. Here’s the beginning part of the game, screenshotted directly from Aseprite at 400% zoom:
When it came time to pack it all back into a rectangle, I copied the whole map, rearranged the rooms, and numbered them all so I could keep track of connections. Surprisingly, it wasn’t that bad a workflow.
The non-Euclidean map connections came in handy for packing secrets in more efficiently; most of the secret stars are off-screen, making them harder to find, but I couldn’t really afford to have a dedicated treasure room for every single one. So I crammed two treasures into the same room a few times, even though the two routes you’d take to get there are generally nowhere near each other.
Doors helped stretch the map out, too. It’s probably obvious if you think about it in the slightest, but doors don’t lead to different rooms; they reuse the same room. But some tiles only appear in the overworld, some tiles only appear in cave world, and actors (besides doors) don’t spawn in caves. That seemingly small difference was enough to make rooms vastly different in the two worlds; the most extreme case is a “crossroads” room, which you traverse vertically in the overworld but horizontally in cave world. (Honestly, I wish I’d done a bit more of this, but it works best in rooms that only have two overworld exits, and there ended up not being too many of those. Also, caves are restricted to basically just platforming, so there’s only so much variety I can squeeze out of them.)
Designing caves was a little trickier than you might think, since the PICO-8 map has no layers! If something needed to occupy a tile in the overworld, then I could not put something in the same place in cave world. Along with the design nightmare that is telepawt, this gave me a couple headaches.
I do like the cave concept a lot, though. I love parallel versions of places in games, and I have an unfinished PICO-8 game that’s centered around that idea taken to extremes. It’s also kind of a nod to my LÖVE games, all the way back to Neon Phase, where going indoors didn’t load another map — rooms were just another layer.
Originally, PICO-8 had a fixed palette of 16 colors. You could do palette swaps of various sorts, but you can’t actually change any of the colors.
But since I last used it, PICO-8 gained a “secret palette” — an extra 16 colors that you can request. You can’t have more than 16 colors on the screen at a time, but you can replace one of the existing colors with a “secret” color. There’s also an obscure way to tell PICO-8 to preserve the screen palette when the game finishes, which means I could effectively change the palette in the sprite editor. Hooray!
I didn’t want to completely change the palette, so I tried to keep the alterations minor. For the most part, I gave up reds and pinks for a better spread of greens, purples, and yellows. Here’s the core PICO-8 palette, the secret PICO-8 palette, and the game’s palette, respectively:
I think I did a decent job of preserving the overall color aesthetic while softening the harsh contrasts of the original palette, and the cool colors really helped the mood.
Note that I changed the background color (color 0 isn’t drawn when it appears in a sprite) to navy and promoted black to a foreground color, which helped black stand out more when used as an outline or whatever. Probably the best example of this is in the logo, traced from the vector logo I made for the first Star Anise game.
Hmm, what else. The tiles themselves felt almost forced, if that makes sense? Like I could only draw them one way. PICO-8 tiles are a rinky-dink 8 pixels, and boy that is not much to work with. If I had a lot of sprite space, I could make bigger metatiles, but… I don’t, so I couldn’t. I tried a lot of variations of tiles, and what I ended up with were pretty much the only things that worked.
I love how the emoting came out. I knew I didn’t have nearly enough room for facial expressions for everyone, but I wanted to give them some kind of visual way to express mood, and the tiny overlays kinda fell naturally out of that. I think they add a ton of personality, especially in how everyone uses them differently.
I’m pretty happy with the sound design, as well. I’m an extremely amateur composer, and I wrote 90% of the music in a few hours on the start of the last day, but I actually like how it came out and I like going back to listen to it. The sound effects are, with some mild exceptions, pretty much excellent — the aowr is incredible, it has fooled other folks in the house more than once, and I knew I had it right when I had a blast just running around mashing the meow button.
I’m also happy with the dialogue, and hope it conveys the lunekos’ personalities in just these few interactions.
While writing the ending, I had to stop in mid-draft to go cry. Then I cried again when I finished it a few days later. I’ll miss you forever, Branch Commander Twig.
If you did, thanks for playing.
The collective thoughts of the interwebz
Manage Consent
To provide the best experiences, we use technologies like cookies to store and/or access device information. Consenting to these technologies will allow us to process data such as browsing behavior or unique IDs on this site. Not consenting or withdrawing consent, may adversely affect certain features and functions.
Functional
Always active
The technical storage or access is strictly necessary for the legitimate purpose of enabling the use of a specific service explicitly requested by the subscriber or user, or for the sole purpose of carrying out the transmission of a communication over an electronic communications network.
Preferences
The technical storage or access is necessary for the legitimate purpose of storing preferences that are not requested by the subscriber or user.
Statistics
The technical storage or access that is used exclusively for statistical purposes.The technical storage or access that is used exclusively for anonymous statistical purposes. Without a subpoena, voluntary compliance on the part of your Internet Service Provider, or additional records from a third party, information stored or retrieved for this purpose alone cannot usually be used to identify you.
Marketing
The technical storage or access is required to create user profiles to send advertising, or to track the user on a website or across several websites for similar marketing purposes.