Post Syndicated from Alasdair Allan original https://www.raspberrypi.org/blog/how-to-get-started-with-fuzix-on-raspberry-pi-pico/
FUZIX is an old-school Unix clone that was initially written for the 8-bit Zilog Z80 processor and released by Alan Cox in 2014. At one time one of the most active Linux developers, Cox stepped back from kernel development in 2013. While the initial announcement has been lost in the mists because he made it on the now defunct Google+, Cox jokingly recommended the system for those longing for the good old days when all the source code still fitted on a single floppy disk.
Since then FUZIX has been ported to other architectures such as 6502, 68000, and the MSP430. Earlier in the week David Given — who wrote both the MSP430 and ESP8266 ports — went ahead and ported it to Raspberry Pi Pico and RP2040.
So you can now run Unix on a $4 microcontroller.
Building FUZIX from source
FUZIX is a “proper” Unix with a serial console on Pico’s UART0 and SD card support, using the card both for the filesystem and for swap space. While there is a binary image available, it’s easy enough to build from source.
If you don’t already have the Raspberry Pi Pico toolchain set up and working you should go ahead and set up the C/C++ SDK.
Afterwards you need grab the the Pico port from GitHub.
$ git clone https://github.com/davidgiven/FUZIX.git
$ cd FUZIX
$ git checkout rpipico
Then change directory to the platform port
$ cd Kernel/platform-rpipico/and edit the first line of the Makefile to set the path to your pico-sdk.
So for instance if you’re building things on a Raspberry Pi and you’ve run the pico_setup.sh script, or followed the instructions in our Getting Started guide, you’d point the PICO_SDK_PATH to
export PICO_SDK_PATH = /home/pi/pico/pico-sdkAfter that you can go ahead and build both the FUZIX UF2 file and the root filesystem.
$ make world -j
$ ./update-flash.sh
If everything goes well you should have a UF2 file in build/fuzix.uf2 and a filesystem.img image file in your current working directory.
You can now load the UF2 file onto your Pico in the normal way.
Go grab your Raspberry Pi Pico board and a micro USB cable. Plug the cable into your Raspberry Pi or laptop, then press and hold the BOOTSEL button on your Pico while you plug the other end of the micro USB cable into the board. Then release the button after the board is plugged in.
A disk volume called RPI-RP2 should pop up on your desktop. Double-click to open it, and then drag and drop the UF2 file into it.
The volume will automatically unmount, and your Pico is now running Unix. Unfortunately it won’t be much use without a filesystem.
Building a bootable SD card
The filesystem.img image file we built earlier isn’t a bootable image. Unlike the Raspberry Pi OS images you might be used to, you can’t just use something like Raspberry Pi Imager to write it to an SD card. We’re going to have to get our hands a bit dirtier than that.
The following instructions are for building your file system on a Raspberry Pi, or another similar Linux platform. Comparable tools are available on both MS Windows and Apple macOS, but the exact details will differ.
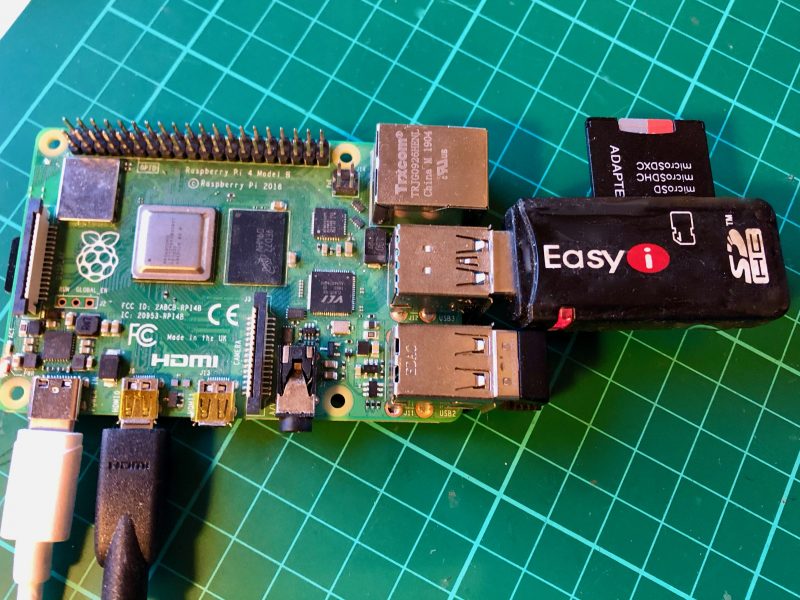
Go grab a microSD card. As the partitions we’re going to put onto it are only going to take up 34MB it doesn’t really matter what size you’ve got to hand. I was using a 4GB card, as that was the smallest I could find, but it’s not that important.
Now plug the card into a USB card reader and then into your Raspberry Pi or laptop computer. We’re going to have to build the partition table that FUZIX is expecting, which consists of two partitions: the first a 2MB swap partition, and the second a 32MB root partition into which we can copy the root filesystem, our filesystem.img file.
After plugging your card into the reader you can find it from the command line using the lsblk command. If you’ve have a blank unformatted card it will be visible as /dev/sda.
$ lsblk
NAME        MAJ:MIN RM  SIZE RO TYPE MOUNTPOINT
sda           8:0    1  3.7G  0 disk
mmcblk0     179:0    0 14.9G  0 disk
├─mmcblk0p1 179:1    0  256M  0 part /boot
└─mmcblk0p2 179:2    0 14.6G  0 part /
$
But if the card is already formatted you might instead see something like this
$ lsblk
NAME        MAJ:MIN RM  SIZE RO TYPE MOUNTPOINT
sda           8:0    1  3.7G  0 disk
└─sda1        8:1    1  3.7G  0 part /media/pi/USB
mmcblk0     179:0    0 14.9G  0 disk
├─mmcblk0p1 179:1    0  256M  0 part /boot
└─mmcblk0p2 179:2    0 14.6G  0 part /
$
which is a FAT-formatted card with a MBR named “USB”, which your Raspberry Pi has automatically mounted under /media/pi/USB.
If your card has mounted, just go ahead and unmount it as follows:
$ umount /dev/sda1Then looking using lsblk you should see
$ lsblk
NAME        MAJ:MIN RM  SIZE RO TYPE MOUNTPOINT
sda           8:0    1  3.7G  0 disk
└─sda1        8:1    1  3.7G  0 part
mmcblk0     179:0    0 14.9G  0 disk
├─mmcblk0p1 179:1    0  256M  0 part /boot
└─mmcblk0p2 179:2    0 14.6G  0 part /
$
at which point we can delete the current partition table by zeroing out the first part of the card and deleting the “start of disk” structures.
$ sudo dd if=/dev/zero of=/dev/sda bs=512 count=1If you run lsblk again afterwards you’ll see that the sda1 partition has been deleted.
Next we’ll use fdisk to create a new partition table. Type the following
$ sudo fdisk /dev/sdato put you at the fdisk prompt. Then type “o” to create a new DOS disklabel
Command (m for help): o
Created a new DOS disklabel with disk identifier 0x6e8481a2.
followed by “n” to create a new partition:
Command (m for help): n
Partition type
   p   primary (0 primary, 0 extended, 4 free)
   e   extended (container for logical partitions)
Select (default p): p
Partition number (1-4, default 1): 1
First sector (2048-7744511, default 2048): 2048
Last sector, +/-sectors or +/-size{K,M,G,T,P} (2048-7744511, default 7744511): +2M
Created a new partition 1 of type 'Linux' and of size 2 MiB.
Depending on the initial state of your disk you may be prompted that the partition “contains a vfat signature” and asked whether you want to remove the signature. If asked, just type “Y” to confirm.
Next, we’ll set the type for this partition to “7F“
Command (m for help): t
Selected partition 1
Hex code (type L to list all codes): 7F
Changed type of partition 'Linux' to 'unknown'.
to create the 2MB swap partition that FUZIX is expecting. From here we need to create a second 32MB partition to hold our root file system:
Command (m for help): n
Partition type
   p   primary (1 primary, 0 extended, 3 free)
   e   extended (container for logical partitions)
Select (default p): p
Partition number (2-4, default 2): 2
First sector (6144-7744511, default 6144): 6144
Last sector, +/-sectors or +/-size{K,M,G,T,P} (6144-7744511, default 7744511): +32M

Created a new partition 2 of type 'Linux' and of size 32 MiB.
Afterwards if you type “p” at the fdisk prompt you should see something like this:
Command (m for help): p
Disk /dev/sda: 3.7 GiB, 3965190144 bytes, 7744512 sectors
Disk model: STORAGE DEVICE
Units: sectors of 1 * 512 = 512 bytes
Sector size (logical/physical): 512 bytes / 512 bytes
I/O size (minimum/optimal): 512 bytes / 512 bytes
Disklabel type: dos
Disk identifier: 0xe121b9a3

Device     Boot Start   End Sectors Size Id Type
/dev/sda1        2048  6143    4096   2M 7f unknown
/dev/sda2        6144 71679   65536  32M 83 Linux
If you do, you can type “w” to write and save the partition table.
Finally, we can copy our root file system into our second 32MB partition:
$ sudo dd if=filesystem.img of=/dev/sda2
65535+0 records in
65535+0 records out
33553920 bytes (34 MB, 32 MiB) copied, 14.1064 s, 2.4 MB/s
$
You can now eject the SD card from the USB card reader, because it’s time to wire up our breadboard.
Wiring things up on the breadboard
If you’re developing on a Raspberry Pi, and you haven’t previously used UART serial — which is different from the “normal” USB serial — you should go read Section 4.5 of our Getting Started guide.
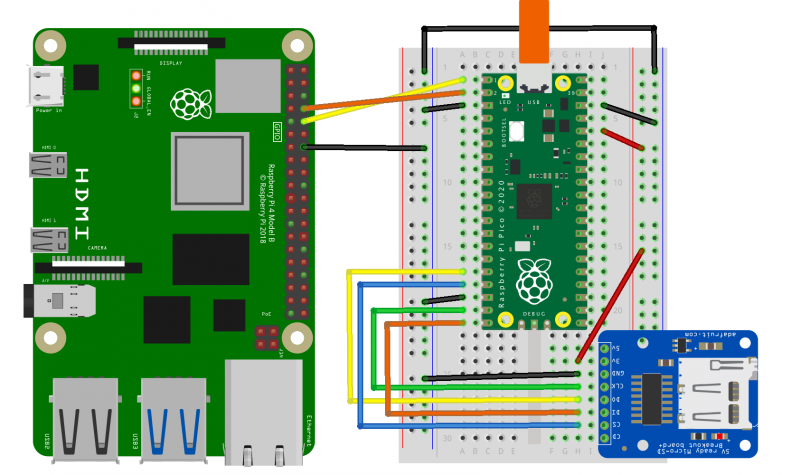
Here I’m using Adafruit’s MicroSD Card Breakout, and wiring the UART serial connection directly to to the Raspberry Pi’s serial port using the GPIO headers.
However, if you’re developing on a laptop you can use something like the SparkFun FTDI Basic Breakout to connect the serial UART to your computer. Again, see our Getting Started guide for details: Section 9.1.4 if you’re on Apple macOS, or Section 9.2.5 if you’re on MS Windows.
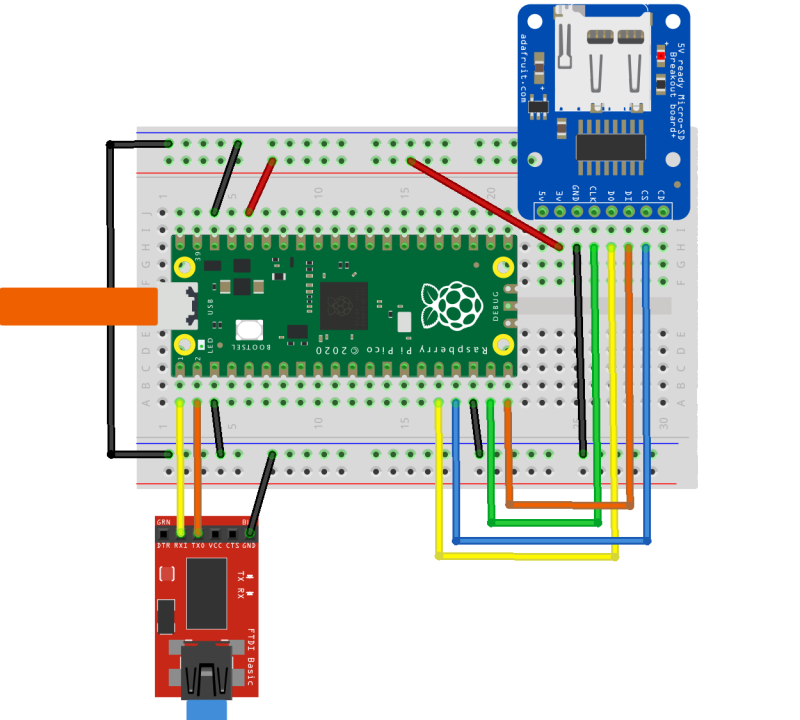
Either way, the mapping between the pins on your Raspberry Pi Pico and the SD card breakout is the same, and should be as follows:
| Pico | RP2040 | SD Card |
| 3V3 (OUT) | — | +3.3V |
| Pin 16 | GP12 (SPI1 RX) | DO (MISO) |
| Pin 17 | GP13 (SPI1 CSn) | CS |
| Pin 18 | GND | GND |
| Pin 19 | GP14 (SPI1 SCK) | SCK |
| Pin 20 | GP15 (SPI1 TX) | DI (MOSI) |
Once you’ve wired things up, pop your formatted microSD card into the breadboarded SD card breakout, and plug your Raspberry Pi Pico into USB power. FUZIX will boot automatically.
Connecting to FUZIX
If you’re connecting using a Raspberry Pi, the first thing you’ll need to do is enable UART serial communications using raspi-config.
$ sudo raspi-configGo to Interfacing Options → Serial. Select “No” when asked “Would you like a login shell to be accessible over serial?” and “Yes” when asked “Would you like the serial port hardware to be enabled?”
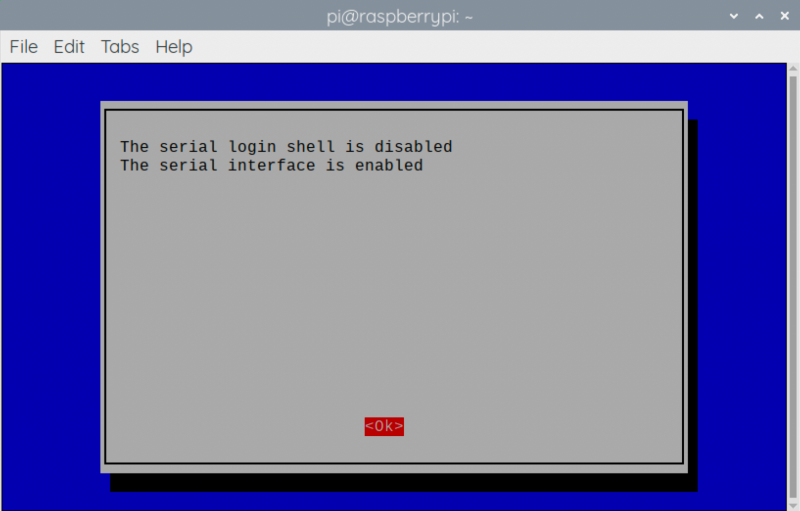
raspi-config on Raspberry Pi.Leaving raspi-config you should choose “Yes” and reboot your Raspberry Pi to enable the serial port. More information about connecting via UART can be found in Section 4.5 of our Getting Started guide.
You can then connect to FUZIX using minicom:
$ sudo apt install minicom
$ minicom -b 115200 -o -D /dev/serial0
Alternatively, if you are working on a laptop from macOS or MS Windows you can use minicom, screen, or your usual Terminal program. If you’re unsure what to use, there are a number of options: for instance, a good option is CoolTerm, which is cross-platform and works on Linux, macOS, and Windows.
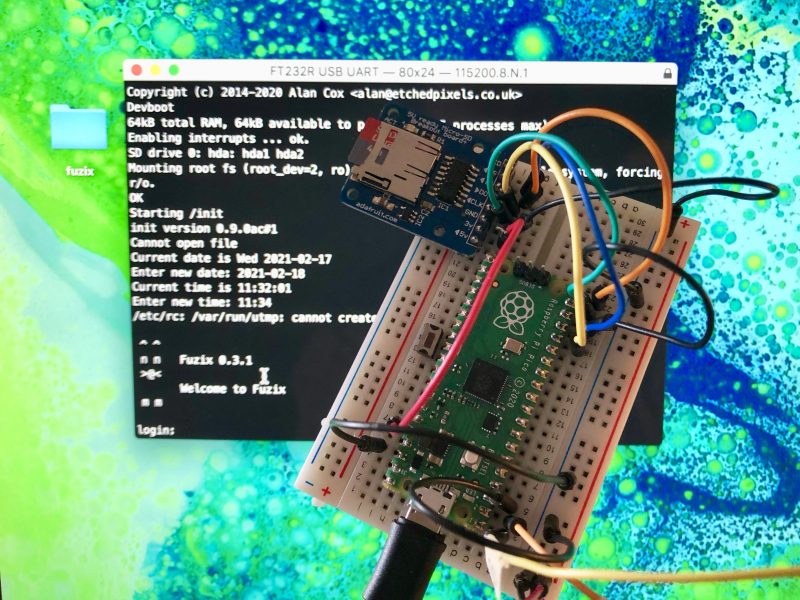
After connecting to the serial port you should see something like this:
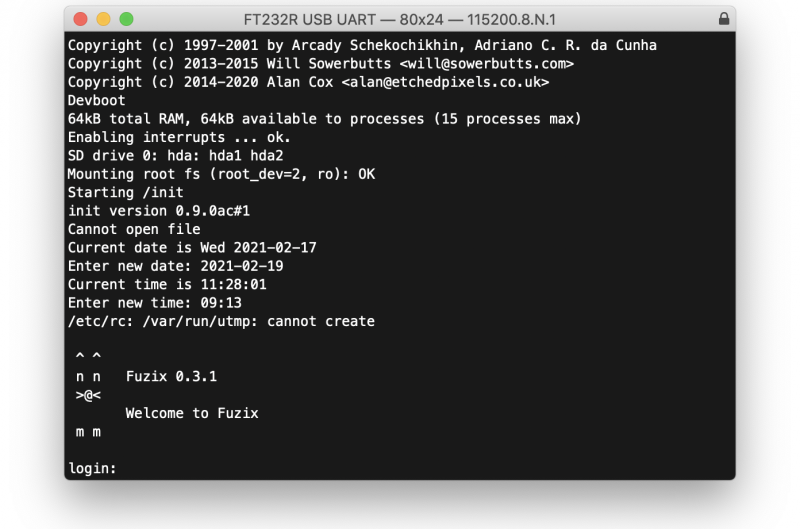
If you don’t see anything, just unplug and replug your Pico to reset it and start FUZIX running again.
Finally, go ahead and enter the correct date and time, and when you get to the login prompt you can login as “root” with no password.
Welcome to FUZIX!
Wrapping up
While there are still a few problems, the port of FUZIX to Pico has been merged to the upstream repository, which means it’s now an official part of the operating system.
Support for developing for Pico can be found on the Raspberry Pi forums. There is also an (unofficial) Discord server where a lot of people active in the new community seem to be hanging out. Feedback on the documentation should be posted as an Issue to the pico-feedback repository on GitHub, or directly to the relevant repository it concerns.
All of the documentation, along with lots of other help and links, can be found on the Getting Started page. If you lose track of where that is in the future, you can always find it from your Pico: to access the page, just press and hold the BOOTSEL button on your Pico, plug it into your laptop or Raspberry Pi, then release the button. Go ahead and open the RPI-RP2 volume, and then click on the INDEX.HTM file.
That will always take you to the Getting Started page.
The post How to get started with FUZIX on Raspberry Pi Pico appeared first on Raspberry Pi.