Post Syndicated from Skip Levens original https://www.backblaze.com/blog/nas-101-setting-up-and-configuring-your-nas/
Upgrading to a network attached storage (NAS) system is a great decision for a growing business. They offer bigger storage capacity, a central place to organize your critical files and backups, easier multi-site collaboration, and better data protection than individual hard drives or workstations. But, configuring your NAS correctly can mean the difference between enjoying a functional storage system that will serve you well for years and spending what might feel like years on the phone with support.
After provisioning the right NAS for your needs (We have a guide for that, too.), you’ll want to get the most out of your investment. Let’s talk about the right way to configure your NAS using storage deployment best practices.
In this post, we’ll cover:
- Where to locate your NAS and how to optimize networking.
- How to set up your file structure and assign administrator and user access.
- How to configure NAS software and backup services.
Disclaimer: This advice will work for almost all NAS systems aside from the very large and complex systems typically installed in data center racks with custom network and power connections. For that, you’ve probably already advanced well beyond NAS 101.
Setup Logistics: Where and How
Choosing a good location for your NAS and optimizing your network are critical first steps in ensuring the long-term health of your system and providing proper service to your users.
Where to Keep Your NAS
Consider the following criteria when choosing where in your physical space to put your NAS. A good home for your NAS should be:
- Temperature Controlled: If you can’t locate your NAS in a specific, temperature-controlled room meant for servers and IT equipment, choose a place with good airflow that stays cool to protect your NAS from higher temperatures that can shorten component life.
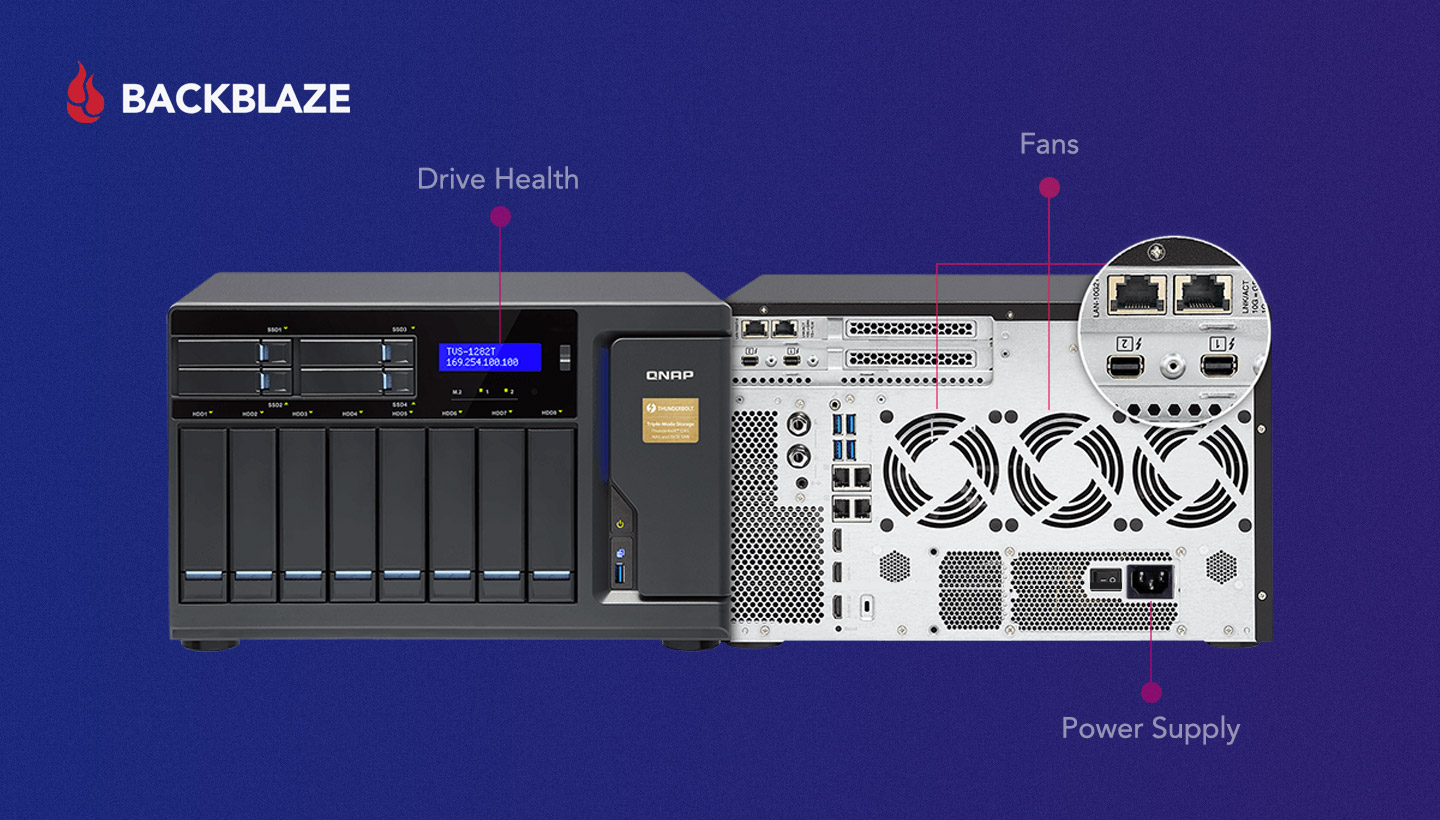
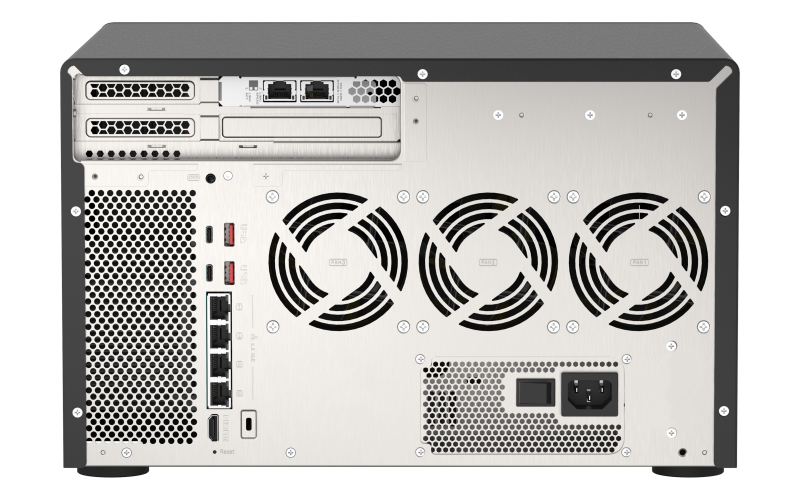
- Clean: Dust gathering around the fans of your NAS is a sign that dust could be entering the device’s internal systems. Dust is a leading cause of failure for both system cooling fans and power supply fans, which are typically found under grills at the back of the device. Make sure your NAS’s environment is as dust-free as possible, and inspect the area around the fans and the fans themselves periodically. If you notice dust buildup, wipe the surface dust with a static-free cloth and investigate air handling in the room. Air filters can help to minimize dust.
- Stable: You’ll want to place your system on a flat, stable surface. Try to avoid placing your NAS in rooms that get a lot of traffic. Vibration tends to be rough on the hard drives within the NAS—they value their quiet time.
- Secure: A locked room would be best for a physical asset like a NAS system, but if that’s not possible, try to find an area where visitors won’t have easy access.
Finally, your NAS needs a reliable, stable power supply to protect the storage volumes and data stored therein. Unexpected power loss can lead to loss or corruption of files being copied. A quality surge protector is a must. Better yet, invest in an uninterruptible power supply (UPS) device. If the power goes out, a UPS device will give you enough time to safely power down your NAS or find another power source. Check with your vendor for guidance on recommended UPS systems, and configure your NAS to take advantage of that feature.
How to Network Your NAS
Your NAS delivers all of its file and backup services to your users via your network, so optimizing that network is key to enhancing the system’s resilience and reliability. Here are a few considerations when setting up your network:
- Cabling: Use good Ethernet cabling and network router connections. Often, intermittent connectivity or slow file serving issues can be traced back to faulty Ethernet cables or ports on aging switches.
- IP Addresses: If your NAS has multiple network ports (e.g. two 1GigE Ethernet ports), you have a few options to get the most out of them. You can connect your NAS to different local networks without needing a router. For example, you could connect one port to the main internal network that your users share and a second port to your internet connected cameras or IoT devices—a simple way to make both networks accessible to your NAS. Another option is to set one port with a static or specific IP address and configure the second port to dynamically retrieve an IP address via DHCP to give you an additional way to access the system in case one link goes down. A third option, if it’s available on your NAS, is to link multiple network connections into a single connection. This feature (called 802.3AD Link Aggregation, or port bonding) gets more network performance than a single port can provide.
- DNS: Your NAS relies on domain name servers—DNS—that the NAS system can query to help translate users’ web server requests to IP addresses, to provide its services. Most NAS systems will allow you to set two DNS entries for each port. You might already be running a DNS service locally (e.g. so that staging.yourcompany.local goes to the correct internal-only server), but it’s a good practice to provide a primary and secondary DNS server for the system to query. That way, if the first DNS server is unreachable, the second can still look up internet locations that applications running on your NAS will need. If one DNS entry is assigned by your local DHCP server or internet provider, set the second DNS entry to something like Cloudflare DNS (1.1.1.1 or 1.0.0.1) or Google DNS (8.8.8.8 or 8.8.4.4).
DHCP = Dynamic host configuration protocol. It automatically assigns an IP address from a pool of addresses, minimizing the human error in manual configuration and requires less network administration.

Access Management: Who and What
Deciding who has access to what is entirely unique to each organization, but there are some best practices that can make management easier. Here, we share some methods to help you plan for system longevity regardless of personnel changes.
Configuring Administrator Access
Who has the keys to the kingdom? What happens when that person moves departments or leaves the company? Planning ahead for these contingencies should be part of your NAS setup. We recommend two practices to help you prepare:
- Designate multiple trusted people as administrators. Your NAS system probably comes with a default admin name and password which you should, of course, change, but it’s beneficial to have at least one more administrator account. If one admin isn’t available, a backup admin can still log in. Additionally, using an organization-wide password manager like Bitwarden for your business is highly recommended.
- Use role-based emails for alerts. You’ll find many places in your NAS system configuration to enter an email address in case the system needs to send an alert—when power goes out or a disk has failed, for example. Instead of entering a single person’s email, use a role-based email instead. People change, but [email protected] will never leave you. Role-based emails are often implemented as a group email, allowing you to assign multiple people to the account and increasing the likelihood that someone will be available to respond to warnings.
Configuring User Access
With a NAS, you have the ability to easily manage how your users and groups access the shared storage needed for your teams to work effectively. Easy collaboration was probably one of the reasons you purchased a NAS in the first place. Building your folder system appropriately and configuring access by role or group helps you achieve that goal. Follow these steps when you first set up your NAS to streamline storage workflows:
- Define your folders. Your NAS might come pre-formatted with folders like “Photo,” “Video,” “Web,” etc. This structure makes sense when only one person is using the NAS. In a multi-user scenario, you’ll want to define the folders you’ll need, for example, by role or group membership, instead.
- Local Backups: A folder for local backups, accessible only by backup software. This keeps your backup data separate from your shared storage.
- Shared Storage: A folder for company-wide shared storage accessible to everyone.
- Group Folders: Accounting, training, marketing, manufacturing, support, etc.
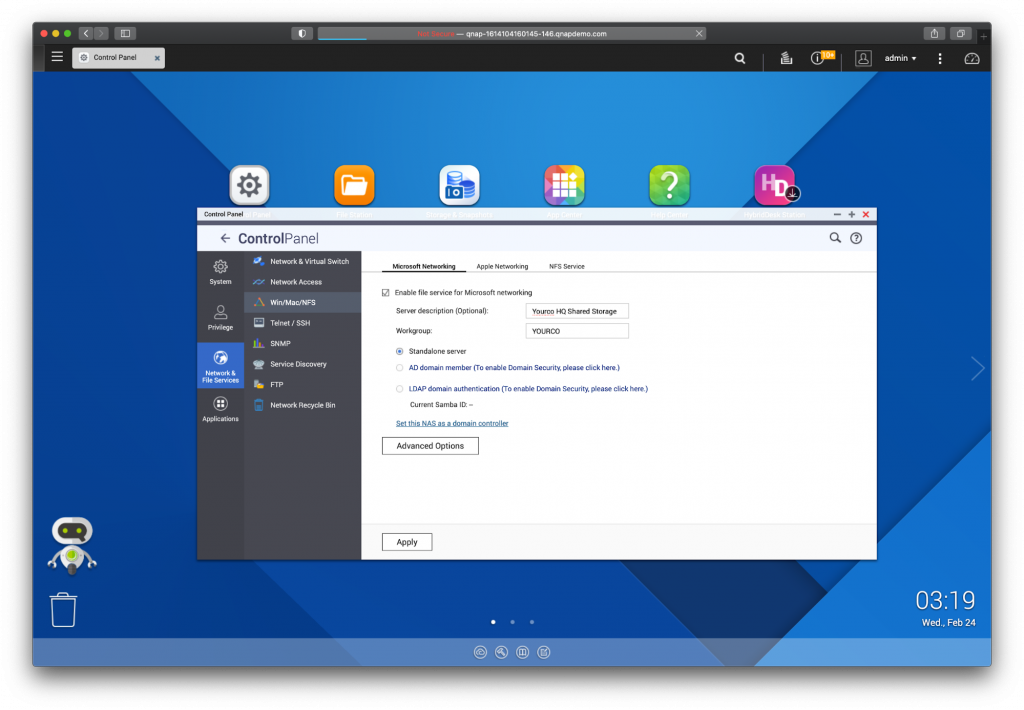
- Integrate with directory services. If you use a directory service like Active Directory or other LDAP services to manage users and privileges, you can integrate it with your NAS to assign access permissions. Integrating with directory services will let you use those tools to assign storage access instead of assigning permissions individually. Check your NAS user guide for instructions on how to integrate those services.
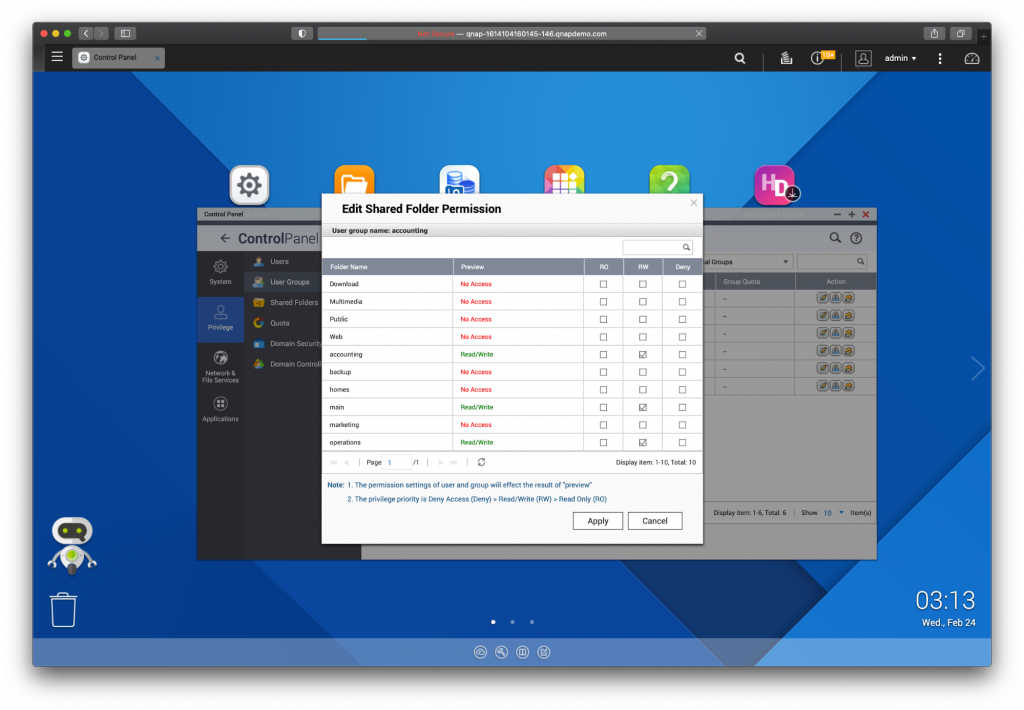
- Use a group- or role-based approach. If you don’t use an external user management service, we recommend setting up permissions based on groups or roles. A senior-level person might need access to every department’s folders, whereas a person in one department might only need access to a few folders. For example, for the accounting team’s access, you can create a folder for their files called “Accounting,” assign every user in accounting to the “Accounting” group, then grant folder access for that group rather than for each and every user. As people come and go, you can just add them to the appropriate group instead of configuring user access permissions for every new hire.
Here is an example folder structure you could start with:

The Last Step: NAS Software and Backup Management
Once you’ve found a suitable place for your NAS, connected it to your network, structured your folders, and configured access permissions, the final step is choosing what software will run on your NAS, including software to ensure your systems and your NAS itself are backed up. As you do so, keep the following in mind:
- Prioritize the services you need. When prioritizing your services, adopt the principle of least privilege. For example, if a system has many services enabled by default, it makes sense to turn some of them off to minimize the system load and avoid exposing any services that are unnecessary. Then, when you are ready to enable a service, you can thoughtfully implement it for your users with good data and security practices, including applying the latest patches and updates. This keeps your NAS focused on its most important services—for example, file system service—first so that it runs efficiently and optimizes resources. Depending on your business, this might look like turning off video-serving applications or photo servers and turning on things like SMB for file service for Mac, Windows, and Linux; SSH if you’re accessing the system via command line; and services for backup and sync.
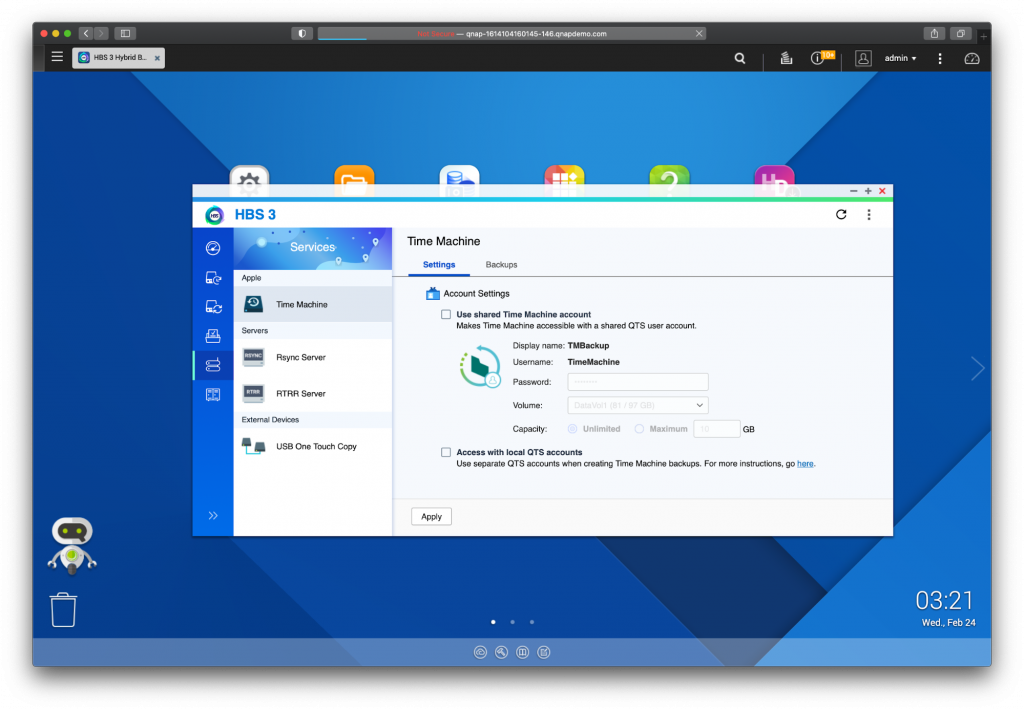
- Back up local systems to your NAS. Your NAS is an ideal local storage target to back up all systems in your network—your servers, desktops, and laptops. For example, QNAP and Synology systems allow you to use the NAS as a Time Machine backup for your Mac users. Windows users can use QNAP NetBak Replicator, or Active Backup Suite on Synology devices.
- Back up your NAS to cloud storage. Once local systems are backed up to your NAS, backing your NAS up to off-site cloud storage will complete a 3-2-1 backup strategy. To protect your NAS data in Backblaze, you can use Hybrid Backup Sync on QNAP and Hyper Backup on Synology systems, or explore these integrations for backing up to Backblaze B2 Cloud Storage.
- SMB: The most common storage access and browsing protocol to “talk” to modern OS clients. It allows these systems to browse available systems, authenticate to them, and send and retrieve files.
- AFP: An older protocol that serves files for older Mac clients that do not work well with SMB.
- NFS: A distributed file system protocol used primarily for UNIX and Linux systems.
- FTP and SFTP: File serving protocols for multiple, simultaneous users, common for large directories of files that users will need occasional access to, like training or support documents. SFTP is more secure and highly preferred over FTP. You will likely find that it’s easier to create and manage a folder on your NAS with read-only access instead.
- rsync: A file protocol for backups, allowing systems to easily connect to and backup their systems using the rsync file transfer and sync utility. If your local servers or systems back up to your NAS via rsync, this service will need to be enabled on the NAS.
The Final, Final Step: Enjoy All the Benefits Your NAS Offers
If you’ve followed our NAS 101 series, you now have a system sized for your important data and growing business that’s configured to run at its best. To summarize, here are the major takeaways to remember when setting up your NAS:
- Keep your NAS in a cool, safe, clean location.
- Optimize your network to ensure reliability and maximize performance.
- Plan for ease of use and longevity when it comes to folder structure and access management.
- Prioritize the software and services you need when first configuring your NAS.
- Make sure your systems are backed up to your NAS, and your NAS is backed up to an off-site location.
Have you recently set up a NAS in your office or home office? Let us know about your experience in the comments.
The post NAS 101: Setting Up and Configuring Your NAS appeared first on Backblaze Blog | Cloud Storage & Cloud Backup.