Post Syndicated from Sajeev Attiyil Bhaskaran original https://aws.amazon.com/blogs/security/configure-saml-single-sign-on-for-kibana-with-ad-fs-on-amazon-elasticsearch-service/
It’s a common use case for customers to integrate identity providers (IdPs) with Amazon Elasticsearch Service (Amazon ES) to achieve single sign-on (SSO) with Kibana. This integration makes it possible for users to leverage their existing identity credentials and offers administrators a single source of truth for user and permissions management. In this blog post, we’ll discuss how you can configure Security Assertion Markup Language (SAML) authentication for Kibana by using Amazon ES and Microsoft Active Directory Federation Services (AD FS).
Amazon ES now natively supports SSO authentication that uses the SAML protocol. With SAML authentication for Kibana, users can integrate directly with their existing third-party IdPs, such as Okta, Ping Identity, OneLogin, Auth0, AD FS, AWS Single Sign-on, and Azure Active Directory. SAML authentication for Kibana is powered by Open Distro for Elasticsearch, an Apache 2.0-licensed distribution of Elasticsearch, and is available to all Amazon ES customers who have enabled fine-grained access controls.
When you set up SAML authentication with Kibana, you can configure authentication that uses either service provider (SP)-initiated SSO or IdP-initiated SSO. The SP-initiated SSO flow occurs when a user directly accesses any SAML-configured Kibana endpoint, at which time Amazon ES redirects the user to their IdP for authentication, followed by a redirect back to Amazon ES after successful authentication. An IdP-initiated SSO flow typically occurs when a user chooses a link that first initiates the sign-in flow at the IdP, skipping the redirect between Amazon ES and the IdP. This blog post will focus on the SAML SP-initiated SSO flow.
Prerequisites
To complete this walkthrough, you must have the following:
- A virtual private cloud (VPC)-based Amazon ES version 6.7 or later with fine-grained access control enabled.
- AD FS installed and configured with at least one user and one group.
- A browser with network connectivity to AD FS, Amazon ES, and Kibana.
Solution overview
For the solution presented in this post, you use your existing AD FS as an IdP for the user’s authentication. The SAML federation uses a claim-based authentication model in which user attributes (in this case stored in Active Directory) are passed from the IdP (AD FS) to the SP (Kibana).
Let’s walk through how a user would use the SAML protocol to access Amazon ES Kibana (the SP) while using AD FS as the IdP. In Figure 1, the user authentication request comes from an on-premises network, which is connected to Amazon VPC through a VPN connection—in this case, this could also be over AWS Direct Connect. The Amazon ES domain and AD FS are created in the same VPC.
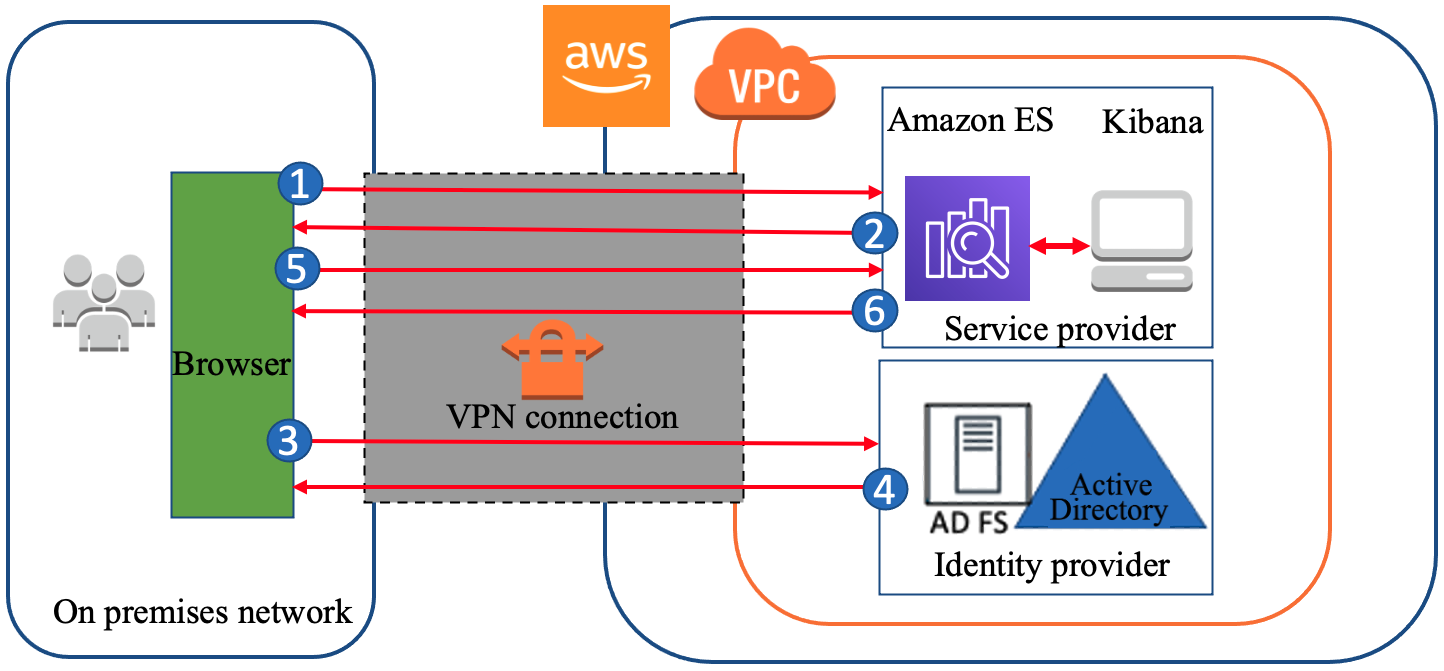
Figure 1: A high-level view of a SAML transaction between Amazon ES and AD FS
The initial sign-in flow is as follows:
- Open a browser on the on-premises computer and navigate to the Kibana endpoint for your Amazon ES domain in the VPC.
- Amazon ES generates a SAML authentication request for the user and redirects it back to the browser.
- The browser redirects the SAML authentication request to AD FS.
- AD FS parses the SAML request and prompts user to enter credentials.
- User enters credentials and AD FS authenticates the user with Active Directory.
- After successful authentication, AD FS generates a SAML response and returns the encoded SAML response to the browser. The SAML response contains the destination (the Assertion Consumer Service (ACS) URL), the authentication response issuer (the AD FS entity ID URL), the digital signature, and the claim (which user is authenticated with AD FS, the user’s NameID, the group, the attribute used in SAML assertions, and so on).
- The browser sends the SAML response to the Kibana ACS URL, and then Kibana redirects to Amazon ES.
- Amazon ES validates the SAML response. If all the validations pass, you are redirected to the Kibana front page. Authorization is performed by Kibana based on the role mapped to the user. The role mapping is performed based on attributes of the SAML assertion being consumed by Kibana and Amazon ES.
Deploy the solution
Now let’s walk through the steps to set up SAML authentication for Kibana single sign-on by using Amazon ES and Microsoft AD FS.
Enable SAML for Amazon Elasticsearch Service
The first step in the configuration setup process is to enable SAML authentication in the Amazon ES domain.
To enable SAML for Amazon ES
- Sign in to the Amazon ES console and choose any existing Amazon ES domain that meets the criteria described in the Prerequisites section of this post.
- Under Actions, select Modify Authentication.
- Select the Enable SAML authentication check box.

Figure 2: Enable SAML authentication
When you enable SAML, it automatically creates and displays the different URLs that are required to configure SAML support in your IdP.

Figure 3: URLs for configuring the IdP
- Look under Configure your Identity Provider (IdP), and note down the URL values for Service provider entity ID and SP-initiated SSO URL.


Set up and configure AD FS
During the SAML authentication process, the browser receives the SAML assertion token from AD FS and forwards it to the SP. In order to pass the claims to the Amazon ES domain, AD FS (the claims provider) and the Amazon ES domain (the relying party) have to establish a trust between them. Then you define the rules for what type of claims AD FS needs to send to the Amazon ES domain. The Amazon ES domain authorizes the user with internal security roles or backend roles, according to the claims in the token.
To configure Amazon ES as a relying party in AD FS
- Sign in to the AD FS server. In Server Manager, choose Tools, and then choose AD FS Management.
- In the AD FS management console, open the context (right-click) menu for Relying Party Trust, and then choose Add Relying Party Trust.

Figure 4: Set up a relying party trust
- In the Add Relying Party Trust Wizard, select Claims aware, and then choose Start.

Figure 5: Create a claims aware application
- On the Select Data Source page, choose Enter data about the relying party manually, and then choose Next.

Figure 6: Enter data about the relying party manually
- On the Specify Display Name page, type in the display name of your choice for the relying party, and then choose Next. Choose Next again to move past the Configure Certificate screen. (Configuring a token encryption certificate is optional and at the time of writing, Amazon ES doesn’t support SAML token encryption.)

Figure 7: Provide a display name for the relying party
- On the Configure URL page, do the following steps.
- Choose the Enable support for the SAML 2.0 WebSSO protocol check box.
- In the URL field, add the SP-initiated SSO URL that you noted when you enabled SAML authentication in Amazon ES earlier.
- Choose Next.

Figure 8: Enable SAML support and provide the SP-initiated SSO URL
- On the Configure Identifiers page, do the following:
-
- For Relying party trust identifier, provide the service provider entity ID that you noted when you enabled SAML authentication in Amazon ES.
- Choose Add, and then choose Next.

Figure 9: Provide the service provider entity ID
-
- On the Choose Access Control Policy page, choose the appropriate access for your domain. Depending on your requirements, choose one of these options:
- Choose Permit Specific Group to restrict access to one or more groups in your Active Directory domain based on the Active Directory group.
- Choose Permit Everyone to allow all Active Directory domain users to access Kibana.
Note: This step only provides access for the users to authenticate into Kibana. You have not yet set up Open Distro security roles and permissions.

Figure 10: Choose an access control policy
- On the Ready to Add Trust page, choose Next, and then choose Close.


Now you’ve finished adding Amazon ES as a relying party trust.
To configure claim issuance rules for the relying party during the authentication process, AD FS sends user attributes—claims—to the relying party. With claim rules, you define what claims AD FS can send to the Amazon ES domain. In the following procedure, you create two claim rules: one is to send the incoming Windows account name as the Name ID and the other is to send Active Directory groups as roles.
To configure claim issuance rules
- On the Relying Party Trusts page, right-click the relying party trust (in this case, AWS_ES_Kibana) and choose Edit Claim Issuance Policy.

Figure 11: Edit the claim issuance policy
- Configure the claim rule to send the Windows account name as the Name ID, using these steps.
- In the Edit Claim Issuance Policy dialog box, choose Add Rule. The Add Transform Claim Rule Wizard opens.
- For Rule Type, choose Transform an Incoming Claim, and then choose Next.
- On the Configure Rule page, enter the following information:
- Claim rule name: NameId
- Incoming claim type: Windows account name
- Outgoing claim type: Name ID
- Outgoing name ID format: Unspecified
- Pass through all claim values: Select this option
- Choose Finish.

Figure 12: Set the claim rule for Name ID
- Configure Active Directory groups to send as roles, using the following steps.
- In the Edit Claim Issuance Policy dialog box, choose Add Rule. The Add Transform Claim Rule Wizard opens.
- For Rule Type, choose Send LDAP Attributes as Claims, and then choose Next.
- On the Configure Rule page, enter or choose the following settings:
- Claim rule name: Send-Groups-as-Roles
- Attribute store: Active Directory
- LDAP attribute: Token-Groups – Unqualified Names (to select the group name)
- Outgoing claim type: Roles (the value for Roles should match the Roles Key that you will set in the Configure SAML in the Amazon ES domain step later in this process)
- Choose Finish

Figure 13: Set claim rule for Active Directory groups as Roles


The configuration of AD FS is now complete and you can download the SAML metadata file from AD FS. The SAML metadata is in XML format and is needed to configure SAML in the Amazon ES domain. The AD FS metadata file (the IdP metadata) can be accessed from the following link (replace <AD FS FQDN> with the domain name of your AD FS server). Copy the XML and note down the value of entityID from the XML, as shown in Figure 14. You will need this information in the next steps.

Figure 14: The value of entityID in the XML file
Configure SAML in the Amazon ES domain
Next, you configure SAML settings in the Amazon Elasticsearch Service console. You need to import the IdP metadata, configure the IdP entity ID, configure the backend role, and set up the Roles key.
To configure SAML setting in the Amazon ES domain
-
- Sign in to the Amazon Elasticsearch Service console. On the Actions menu, choose Modify authentication.
- Import the IdP metadata, using the following steps.
- Choose Import IdP metadata, and then choose Metadata from IdP.
- Paste the contents of the FederationMetadata XML file (the IdP metadata) that you copied earlier in the Add or edit metadata field. You can also choose the Import from XML file button if you have the metadata file on the local disk.

Figure 15: The imported identity provider metadata
- Copy and paste the value of entityID from the XML file to the IdP entity ID field, if that field isn’t autofilled.
- For SAML manager backend role (the console may refer to this as master backend role), enter the name of the group you created in AD FS as part of the prerequisites for this post. In this walkthrough, we set the name of the group as admins, and therefore the backend role is admins.

Optionally, you can also provide the user name instead of the backend role.
- Set up the Roles key, using the following steps.
- Under Optional SAML settings, for Roles key, enter Roles. This value must match the value for Outgoing claim type, which you set when you configured claims rules earlier.

Figure 16: Set the Roles key
- Leave the Subject key field empty to use the NameID element of the SAML assertion for the user name. Keep the defaults for everything else, and then choose Submit.
- Under Optional SAML settings, for Roles key, enter Roles. This value must match the value for Outgoing claim type, which you set when you configured claims rules earlier.

It can take few minutes to update the SAML settings and for the domain to come back to the active state.
Congratulations! You’ve completed all the SP and IdP configurations.
Sign in to Kibana
When the domain comes back to the active state, choose the Kibana URL in the Amazon ES console. You will be redirected to the AD FS sign-in page for authentication. Provide the user name and password for any of the users in the admins group. The example in Figure 17 uses the credentials for the user [email protected], who is a member of the admins group.
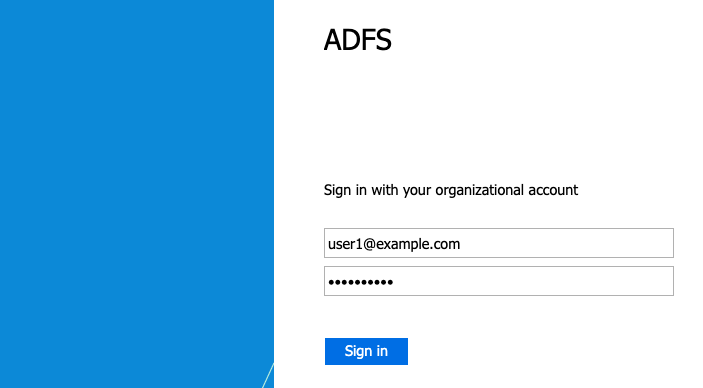
Figure 17: The AD FS sign-in screen with user credentials
AD FS authenticates the user and redirect the page to Kibana. If the user has at least one role mapped, you go to the Kibana home page, as shown in Figure 18. In this walkthrough, you mapped the AD FS group admins as a backend role to the manager user. Internally, the Open Distro security plugin maps the backend role admins to the security roles all_access and security_manager. Therefore, the Active Directory user in the admins group is authorized with the privileges of the manager user in the domain. For more granular access, you can create different AD FS groups and map the group names (backend roles) to internal security roles by using Role Mappings in Kibana.
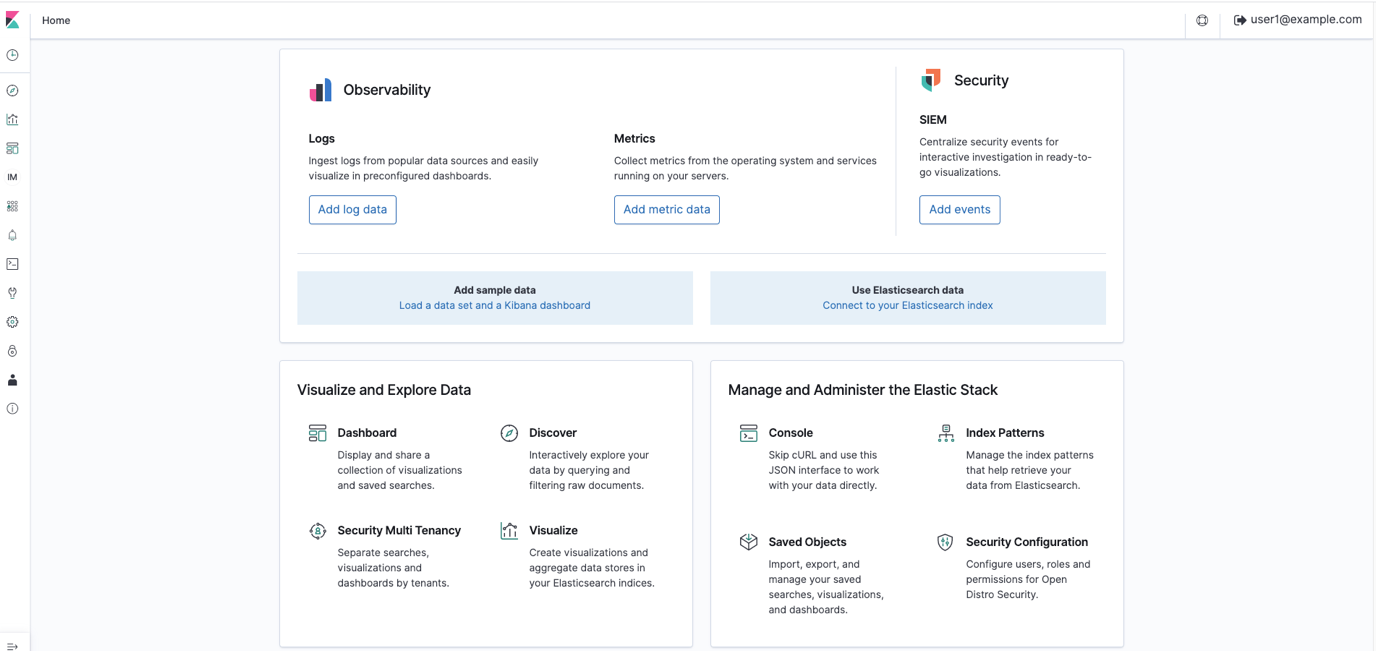
Figure 18: The AD FS user [email protected] is successfully logged in to Kibana
Note: At the time of writing for this blog post, if you specify the <SingleLogoutService /> details in the AD FS metadata XML, when you sign out from Kibana, Kibana will call AD FS directly and try to sign the user out. This doesn’t work currently, because AD FS expects the sign-out request to be signed with a certificate that Amazon ES doesn’t currently support. If you remove <SingleLogoutService /> from the metadata XML file, Amazon ES will use its own internal sign-out mechanism and sign the user out on the Amazon ES side. No calls will be made to AD FS for signing out.
Conclusion
In this post, we covered setting up SAML authentication for Kibana single sign-on by using Amazon ES and Microsoft AD FS. The integration of IdPs with your Amazon ES domain provides a powerful way to control fine-grained access to your Kibana endpoint and integrate with existing identity lifecycle processes for create/update/delete operations, which reduces the operational overhead required to manage users.
If you have feedback about this post, submit comments in the Comments section below. If you have questions about this post, start a new thread on the Amazon Elasticsearch Service forum or contact AWS Support.
Want more AWS Security how-to content, news, and feature announcements? Follow us on Twitter.