Post Syndicated from Nathan Liefting original https://blog.zabbix.com/setting-up-manual-ticket-creation-using-zabbix-frontend-scripts/15550/
In this blog post, you will learn how to set up manual ticket creation through the use of Zabbix frontend scripts. We will use Jira Service Desk as an example, but this guide should work for any type of service desk or help desk system, as we can apply this technique for other systems in a similar fashion.
Introduction
Zabbix already has the ability to automatically create tickets through the use of Media Types and Actions. This way we can filter out certain issues based on host groups, severity, tags and a lot more. But what if your action misses a problem because of your filters? Or what if you simply want to limit the number of tickets that are created by actions? That’s when we can use Zabbix Frontend Scripts to manually create a ticket from the Zabbix Frontend, while automatically filling in the ticket info with a click of a button.
Let’s check take a look at how we can achieve this.
How to
Setting up Jira
As mentioned, in this example we’ll use Jira. Why? Simply because personally I am a big fan of the Atlassian product suite and it’s what I had available on hand. Feel free to apply this technique to any service desk system out there though, as we are definitely not limited to Jira Service Desk.
To make the frontend script work we are going to need a working integration (Media Type in Zabbix terminology). You can check out https://zabbix.com/integrations to see if the service desk system of your choosing is already available out of the box. If not, you can always use a community solution or build your own integration. Jira Service Desk is already available though, meaning we can use the settings pre-defined in Zabbix. For Jira Service Desk we’ll need:
- jira_url – The actual URL of your Jira instance. For example: https://company.atlassian.net/
- jira_user– Jira user login, in our instance this is my email.
- jira_project_key– Numeric key of the Jira project. We can find this in the URL once we go to our Jira Service Desk project settings. For example: pid=10054
- jira_issue_type– Number of the issue type to be used when creating new issues from Zabbix. Check out the Project Settings -> Request types and use the number in the URL for the request type you’d like to use.
- jira_password– Password or API token. We can create this at: https://id.atlassian.com/manage/api-tokens
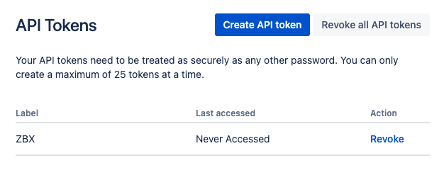
Make sure to save the API token somewhere, as you can only copy it over once.
Setting up the frontend script
Now once you have set up everything on the Jira (or which ever other service desk you use) side, we can continue with the next step which is setting up the Frontend script. If we look at the particular Zabbix Media Type, we can see something interesting.
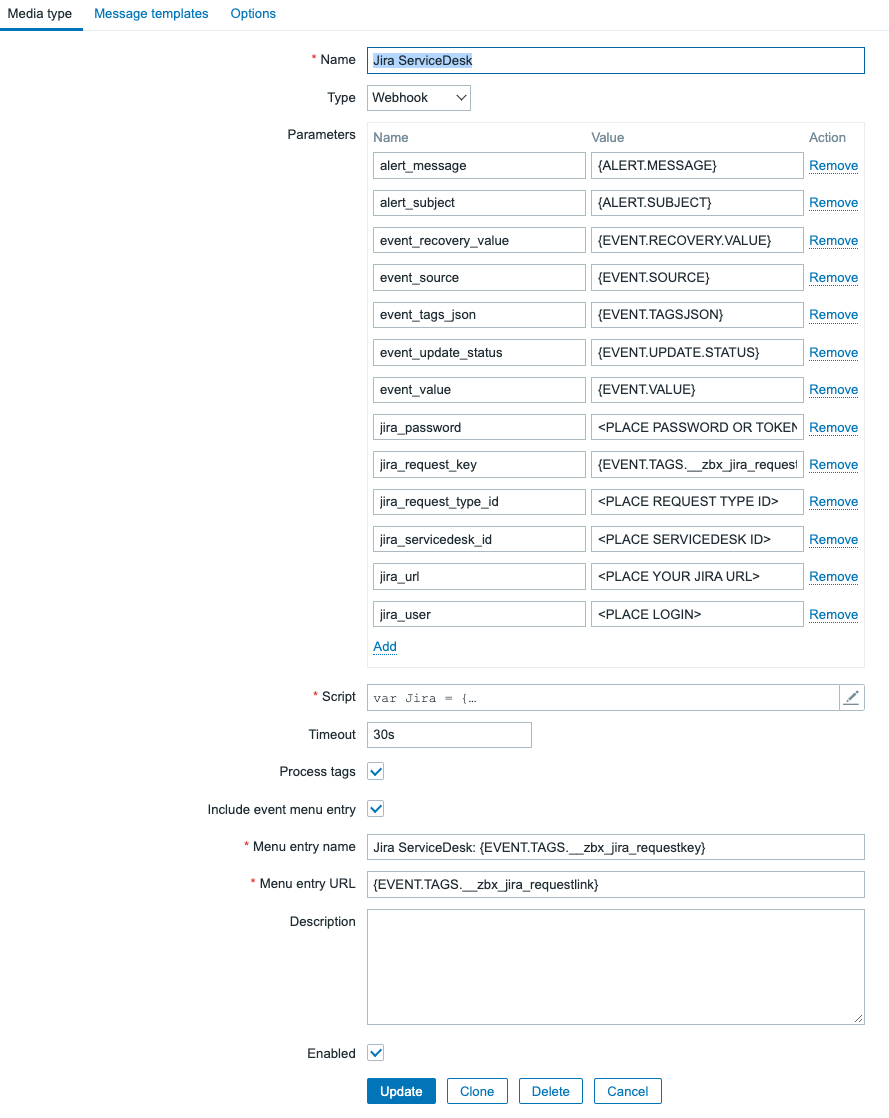
The Jira ServiceDesk default Media Type is of course already set up, but that’s not the most interesting part – although super useful nevertheless. Looking at the Media Type we have our Parameters and the Javascript script. If we take a look at the Frontend Script configuration and compare it with our Media Type, that’s when it gets interesting:

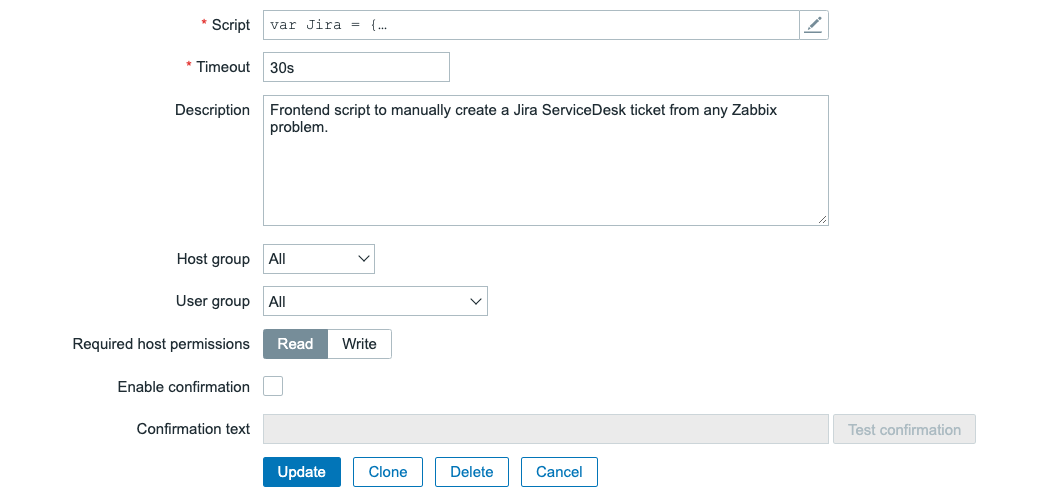
With release of Zabbix 5.4 it is now possible possible for us to execute webhooks directly with a Frontend script, as we can see we have the same Parameter and Script options available in this section. Meaning that most of what we have to do is navigate to Administration -> Scripts and copy over the Media Type Parameters and script. So, let’s do that and fill in the parameters with default values:

Do not forget to do the same thing for the script part:
Once you’ve set this up, we aren’t completely done yet. We have copied the default parameter values as defined by Zabbix in the default Jira ServiceDesk Media Type. Now that we’ve copied those from the Media Type to the Frontend script, we still need to edit them to reflect our Jira ServiceDesk parameters. We need to edit the following fields:
alert_message: We can add our own alert message here, which will be filling out the body of our Jira Service Desk ticket. Use the Zabbix built-in macro’s wisely here. Something like:
There is a problem on {HOST.HOST} - {EVENT.NAME} with severity: {EVENT.SEVERITY} since {EVENT.DATE}
alert_subject: This will be the subject of our Jira ticket, again heavily reliant on Built-in Macro’s. It can be something like:
Severity:{EVENT.SEVERITY} Problem on:{HOST.HOST} - {EVENT.NAME}
event_source: We set this to 0, meaning it is a problem. Normally this is dynamic, but we can make it static for the script.
0
Then, as discussed in the earlier part of this post we need to edit the following parameters:
jira_password
jira_request_type_id
jira_servicedesk_id
jira_url
jira_user
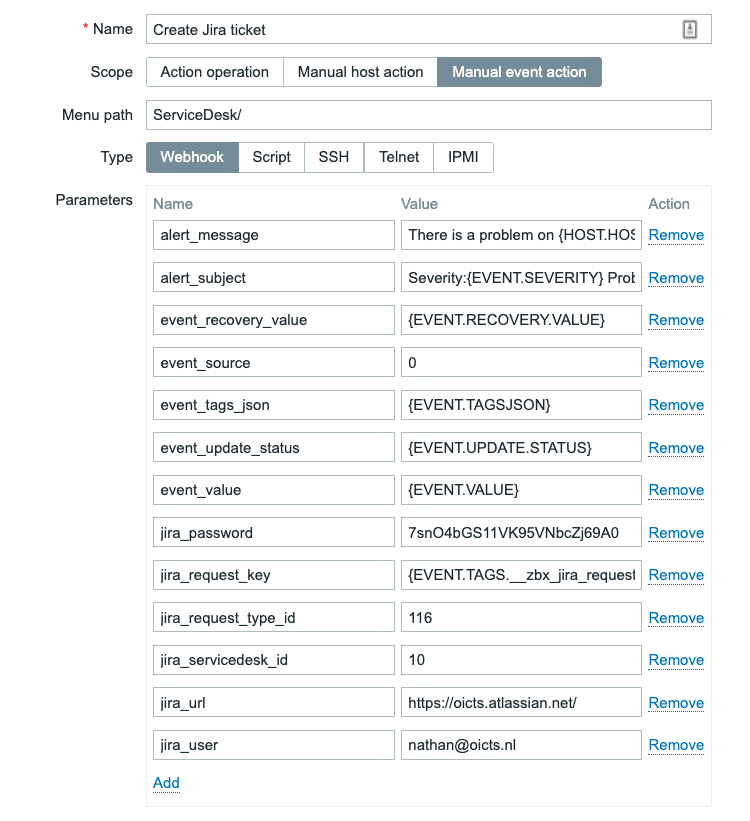
Once you have set up all of those parameters, it should now look like this:
The result
Now, if all of the information from the previous steps is filled in, we can test the integration. Navigate to Monitoring -> Problems and click on any of the problem names:
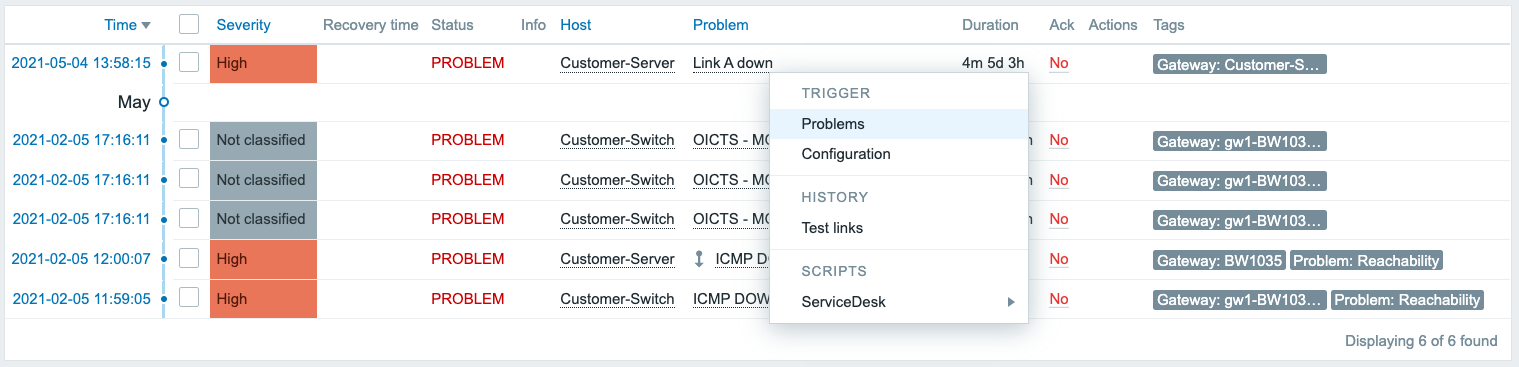
Which will open a dropdown menu. Go to ServiceDesk and click the Create Jira ticket button.
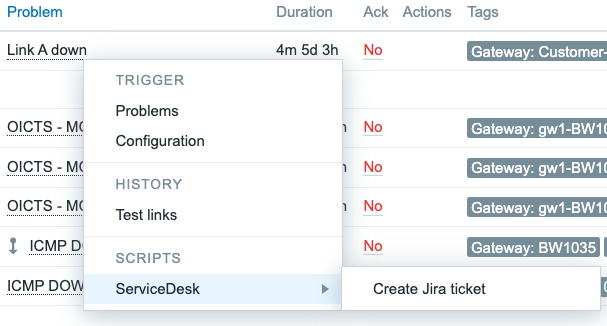
This will then kick of our new Zabbix frontend script. The webhook script will be using the Jira API to create a ticket and voila:

A ticket is created, right from the frontend. It’s just that easy.
Conclusion
Using Media Types is great and I would definitely recommend using them. If you have set up the correct filtering using host groups, severities, tags and perhaps more than that, you can already keep the ticket count to a minimum. But there’s always a downside to using a lot of filters, you might miss something. That’s where our Frontend Script implementation kicks in. Maybe your filter missed a ticket, maybe you don’t want automated tickets at all. We can use the script to manually create tickets, quickly from the frontend and solve that issue.
You’ve now got a powerful way to do so, fully compatible with Zabbix most of the times out of the box! As Zabbix adds more and more of this functionality it becomes easier and easier to do so, if you just know where to look.
I hope you enjoyed reading this blog post and if you have any questions or need help configuring anything on your Zabbix setup feel free to contact me and the team at Opensource ICT Solutions. We build a ton of cool integrations like this and much more!
Nathan Liefting
![]()