Post Syndicated from Arielle Olache original http://blog.cloudflare.com/multihost-waiting-room/


Cloudflare Waiting Room protects sites from overwhelming traffic surges by placing excess visitors in a fully customizable virtual waiting room, admitting them dynamically as spots become available. Instead of throwing error pages or delivering poorly-performing site pages, Waiting Room empowers customers to take control of their end-user experience during unmanageable traffic surges.

A key decision customers make when setting up a waiting room is what pages it will protect. Before now, customers could select one hostname and path combination to determine what pages would be covered by a waiting room. Today, we are thrilled to announce that Waiting Room now supports coverage of multiple hostname and path combinations with a single waiting room, giving customers more flexibility and offering broader site coverage without interruptions to end-user flows. This new capability is available to all Enterprise customers with an Advanced Purchase of Waiting Room.
Waiting Room site placement
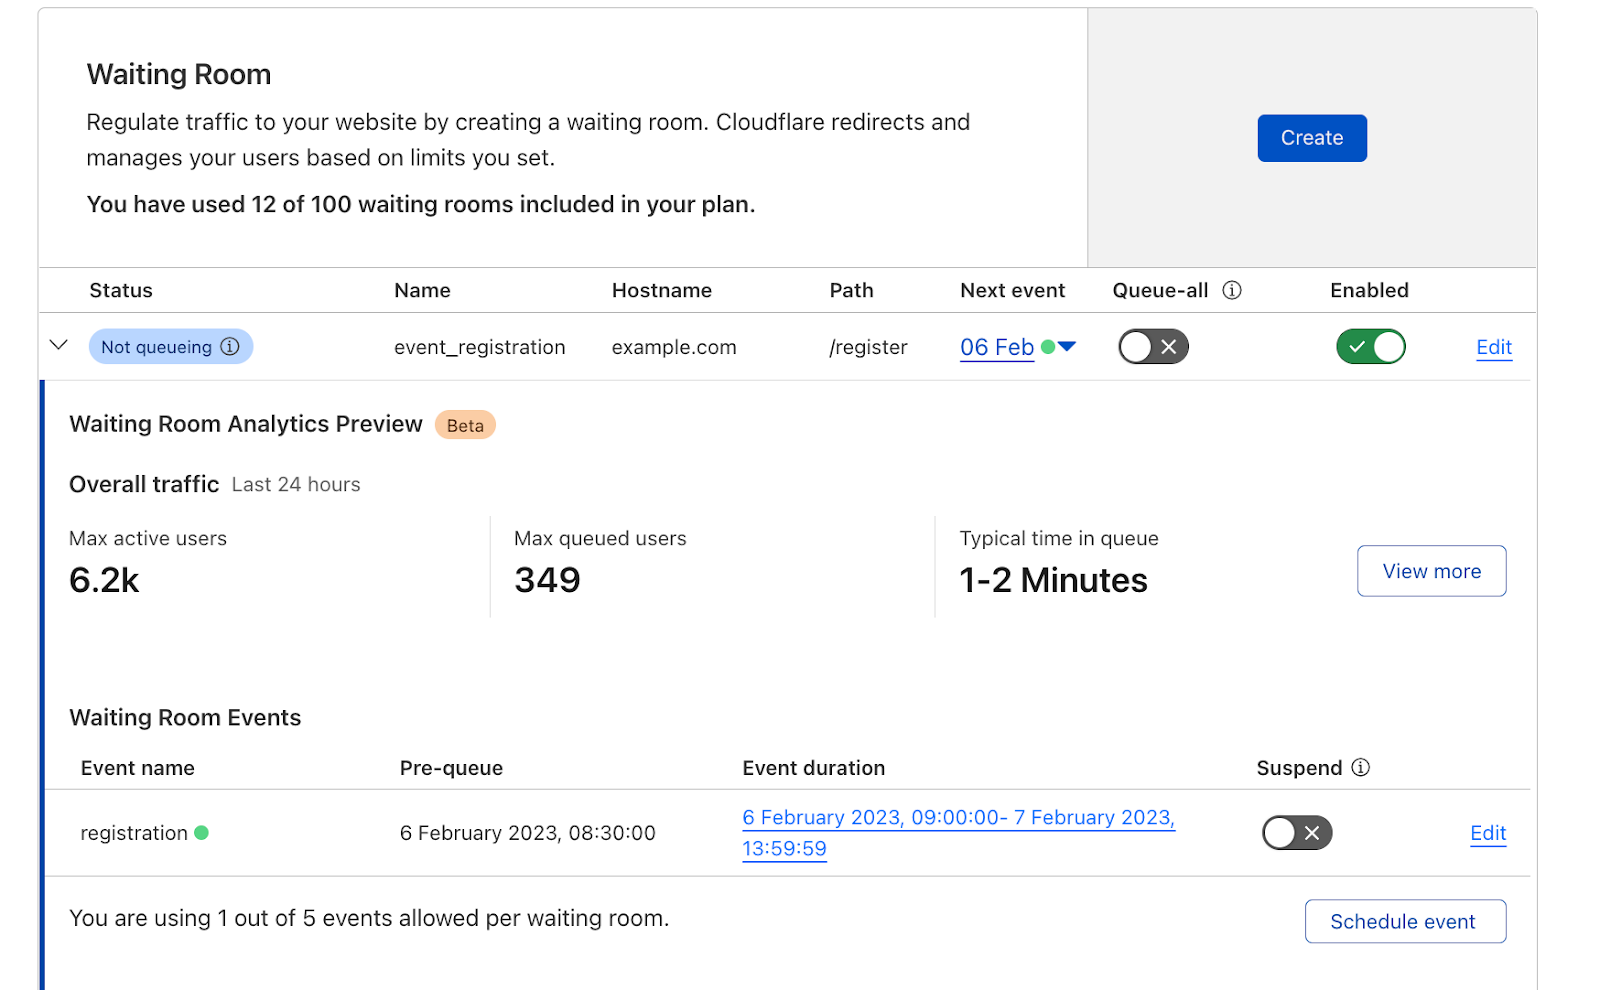
As part of the simple, no-coding-necessary process for deploying a waiting room, customers specify a hostname and path combination to indicate which pages are covered by a particular waiting room. When a site visitor makes a preliminary request to that hostname and path or any of its subpaths, they will be issued a waiting room cookie and either be admitted to the site or placed in a waiting room if the site is at capacity.
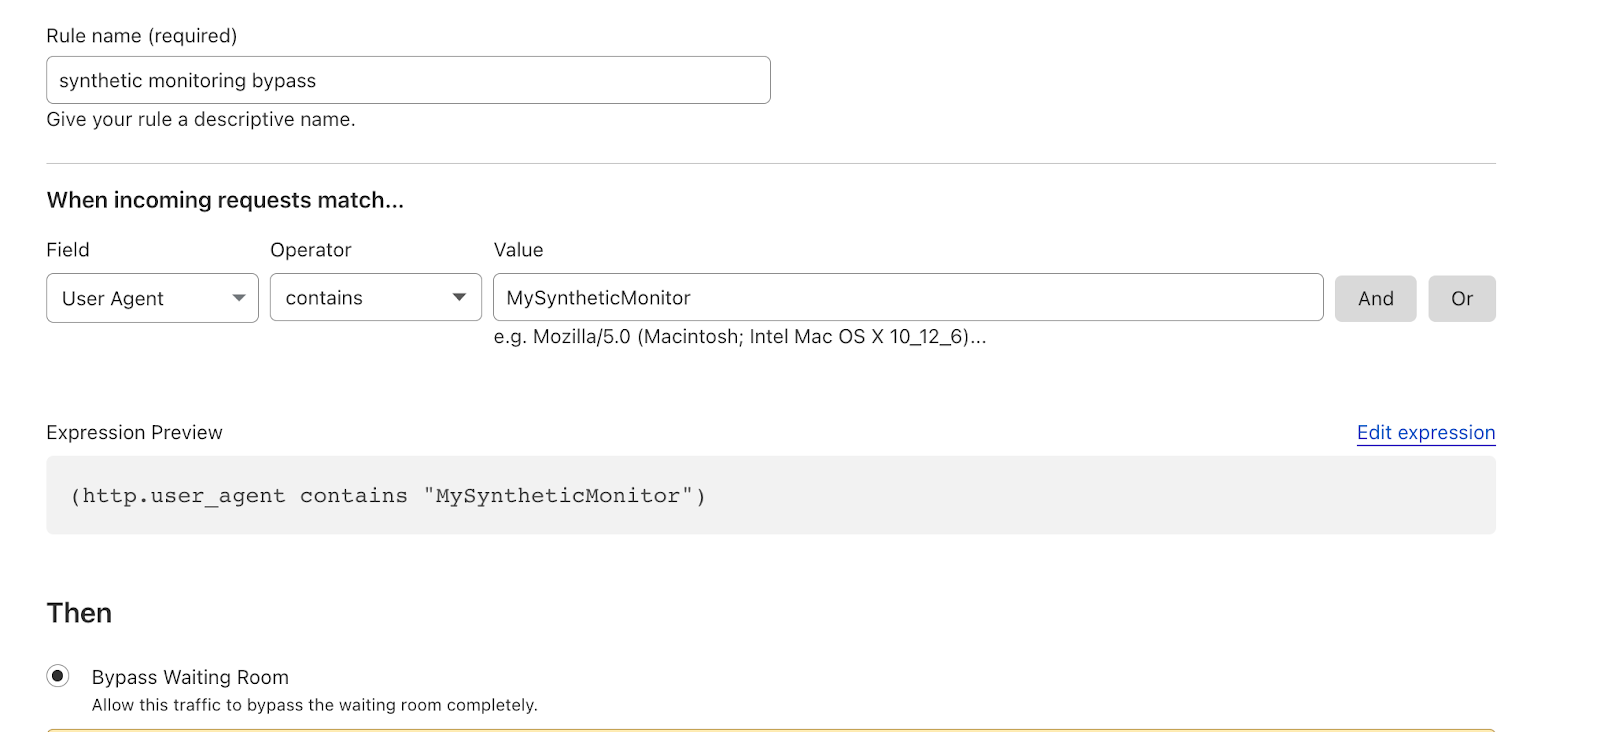
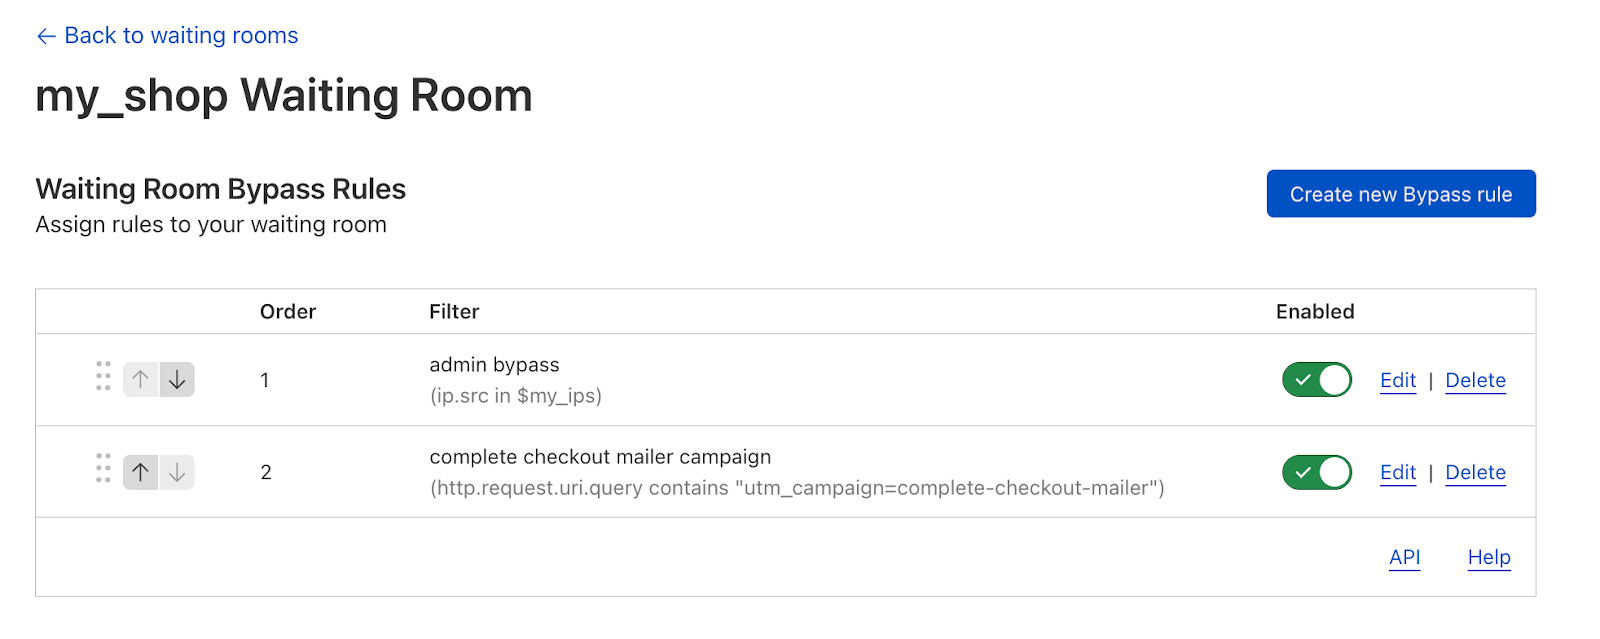
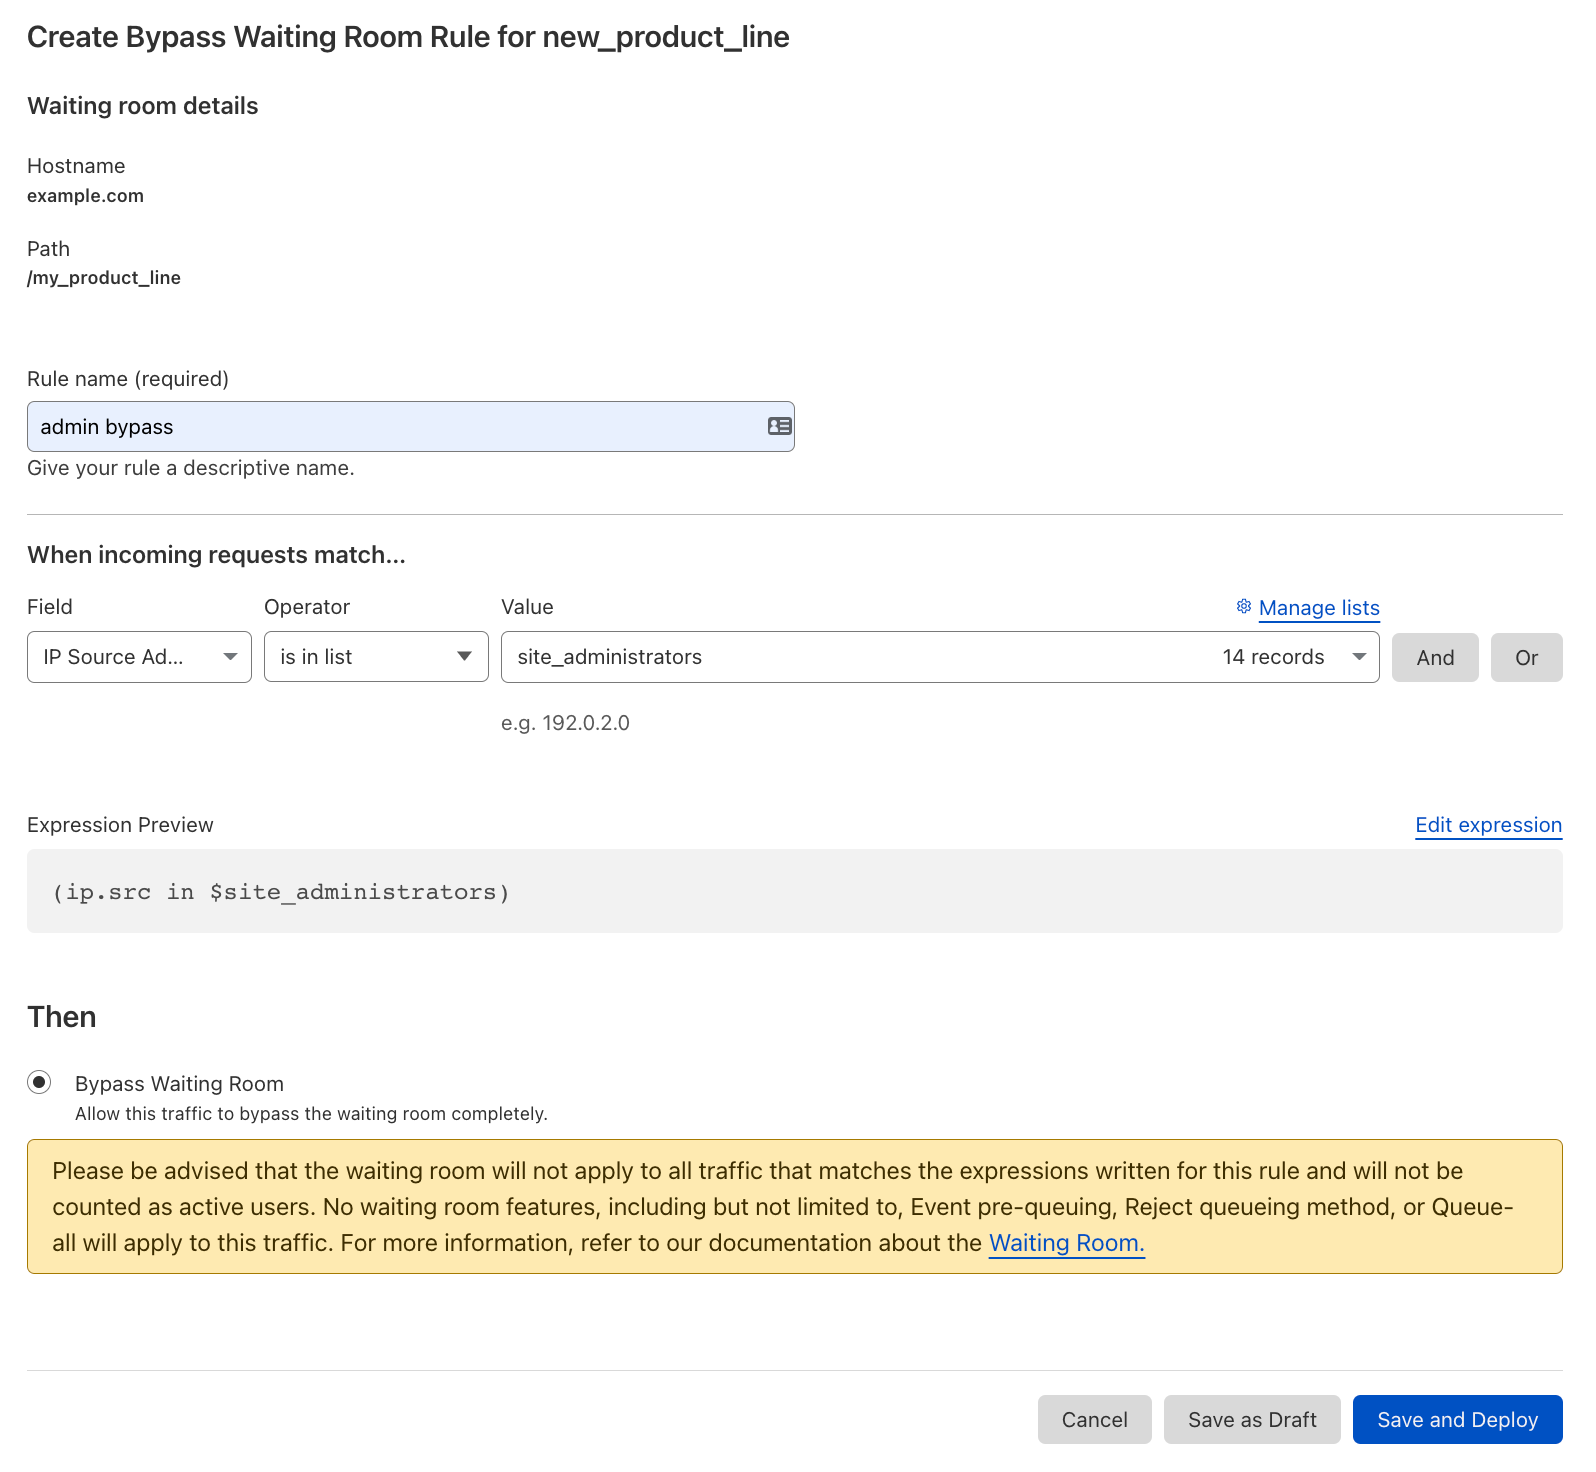
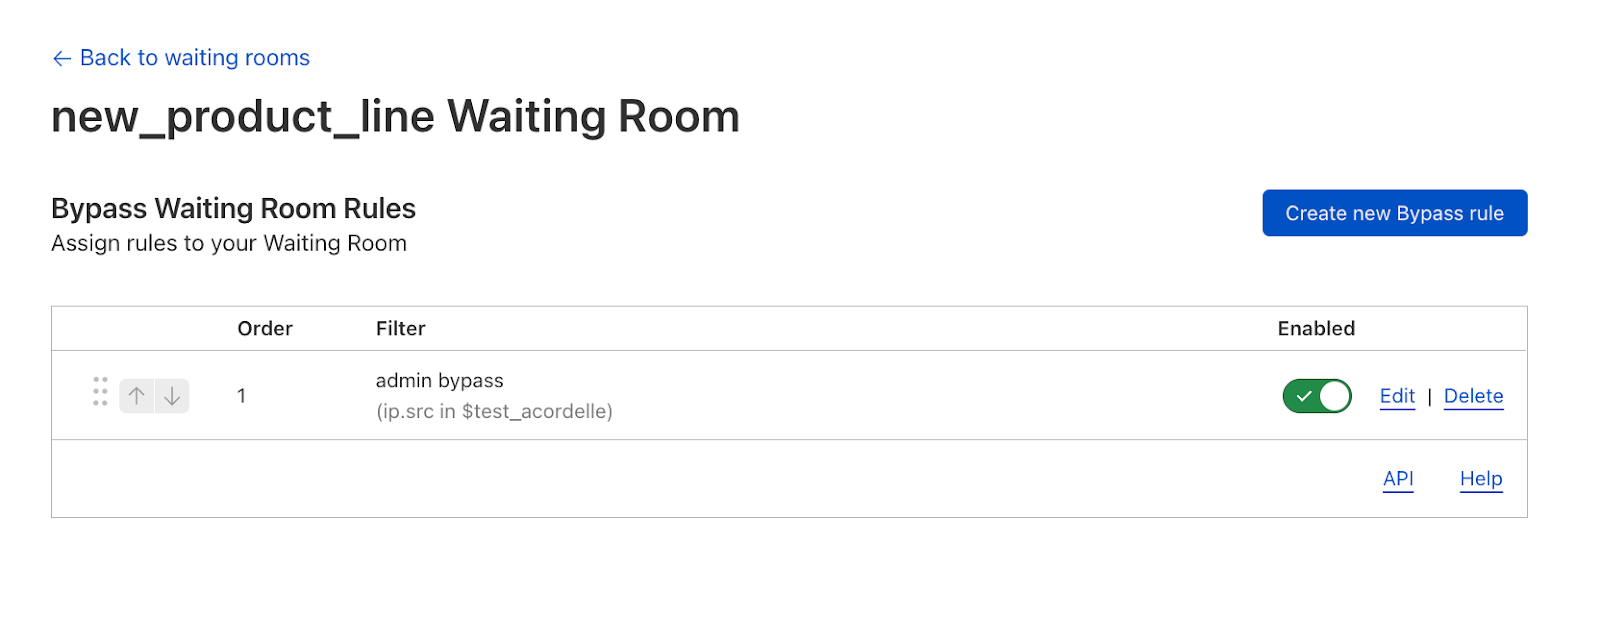
Last year, we added Waiting Room Bypass Rules, giving customers many options for creating exceptions to this hostname and path coverage. This unlocked capabilities such as User Agent Bypassing, geo-targeting, URL exclusions, and administrative IP bypassing. It also allowed for some added flexibility regarding which pages a waiting room would apply to on a customer’s site by adding the ability to exclude URLs, paths, and query strings. While this update allowed for greater specificity regarding which traffic should be gated by Waiting Room, it didn’t offer the broader coverage that many customers still needed to protect greater portions of their sites with a single waiting room.
Why customers needed broader Waiting Room coverage
Let’s review some simple yet impactful examples of why this broader coverage option was important for our customers. Imagine you have an online store, example.com, and you want to ensure that a single waiting room covers the entire customer journey — from the homepage, to product browsing, to checkout. Many sites would delineate these steps in the flow using paths: example.com/, example.com/shop/product1, example.com/checkout. Because Waiting Room assumes an implied wildcard at the end of a waiting room’s configured path, this use case was already satisfied for these sites. Thus, placing a waiting room at example.com/ would cover all the URLs associated with every step of this customer journey. In this setup, once a site visitor has passed the waiting room, they would not be re-queued at any step in their user flow because they are still using the same waiting room’s cookie, which indicates to Waiting Room that they are the same user between URLs.
However, many sites delineate different steps of this type of shopping flow using subdomains instead of or as well as paths. For example, many sites will have their checkout page on a different subdomain, such as checkout.example.com. Before now, if a customer had this site structure and wanted to protect their entire site with a single waiting room, they would have needed to deploy a waiting room at example.com/ and another at checkout.example.com/. This option was not ideal for many customers because a site visitor could be queued at two different parts of the same customer journey. This is because the waiting room at checkout.example.com/ would count the same visitor as a different user than the waiting room covering example.com/.
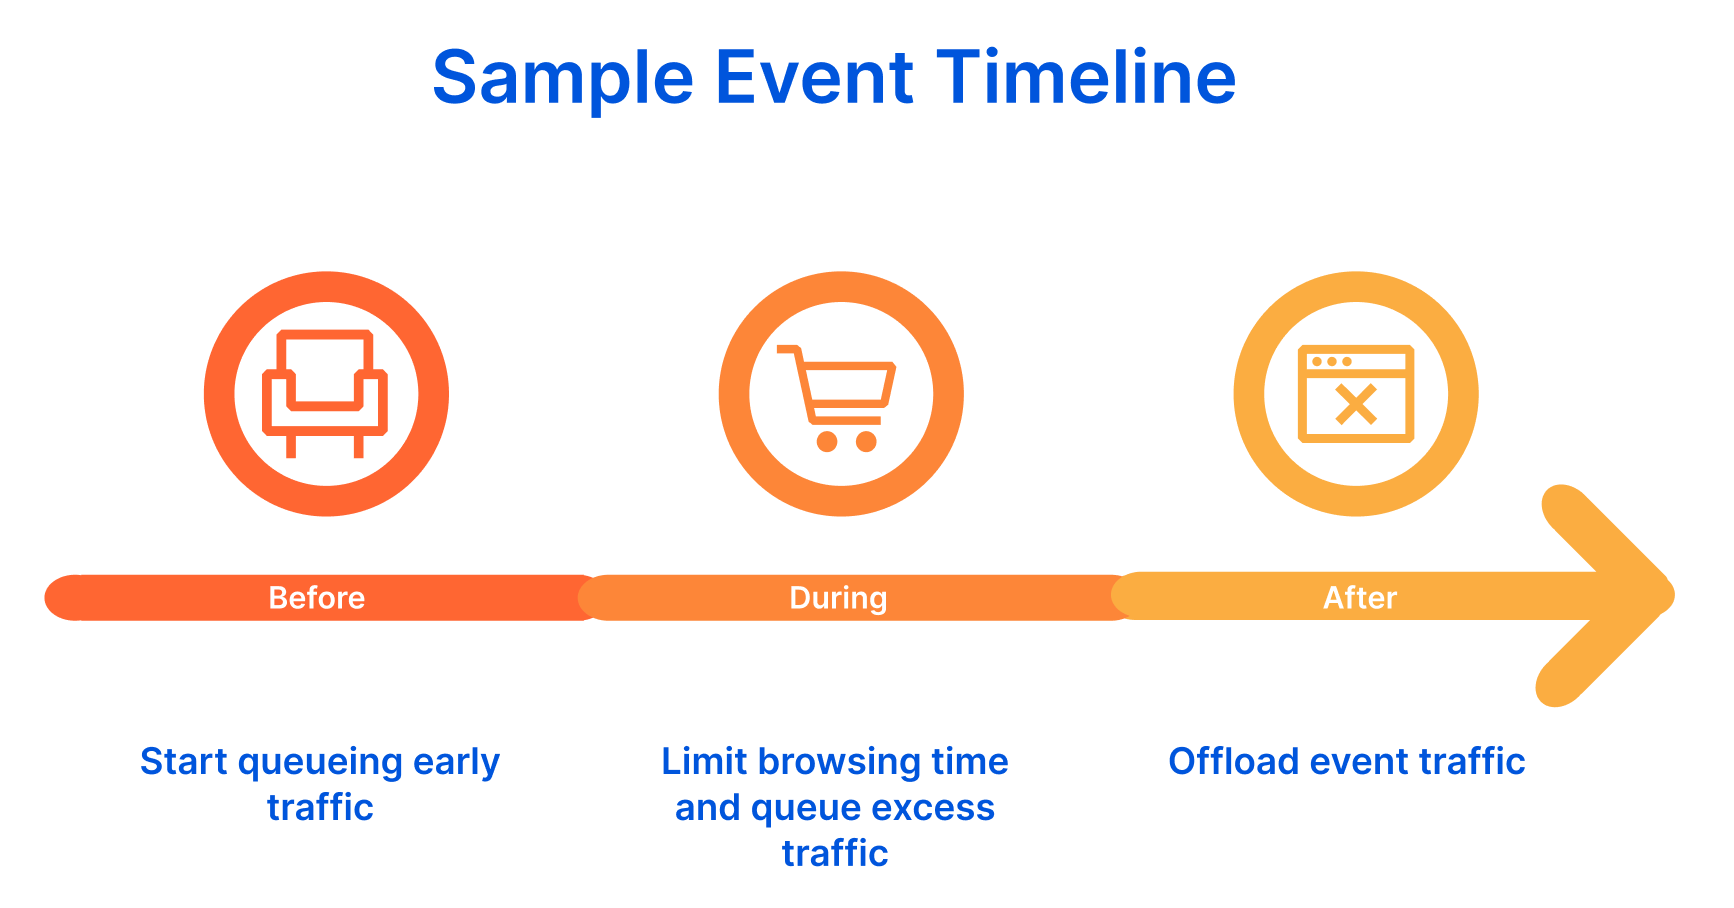
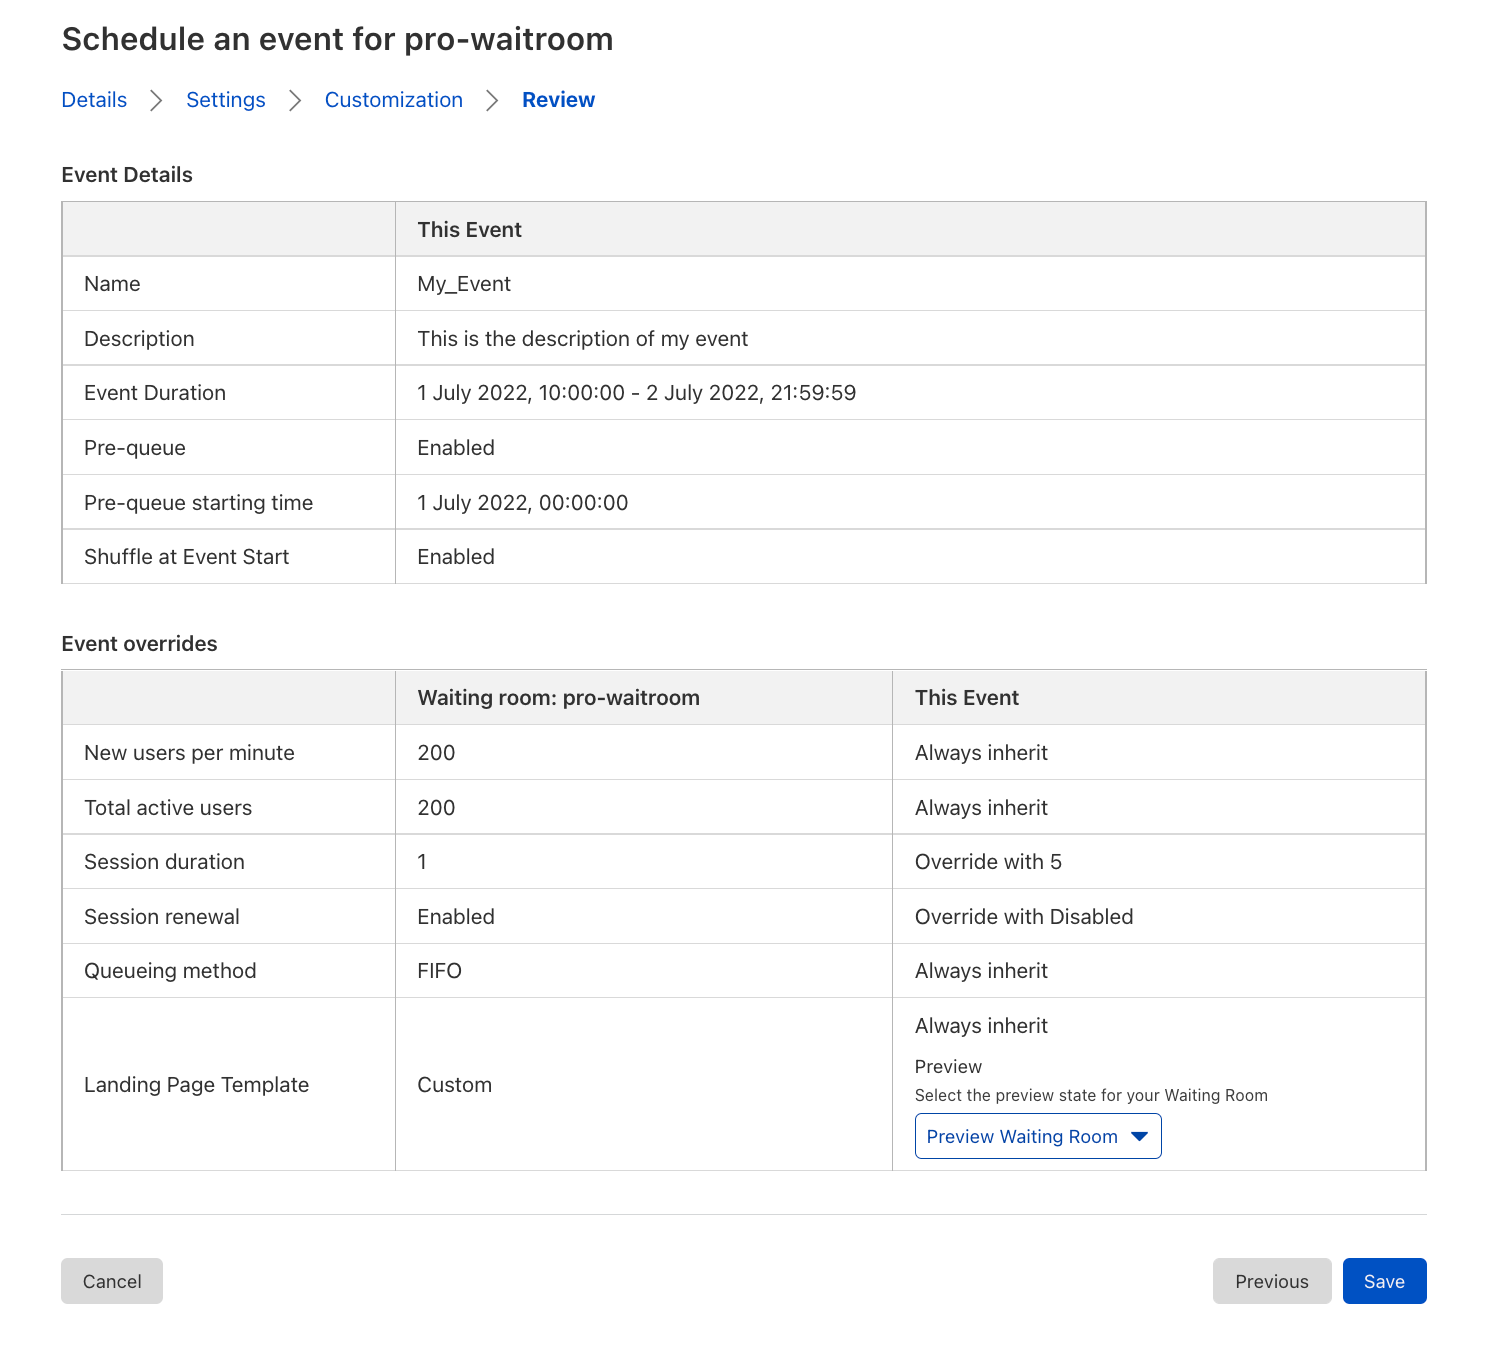
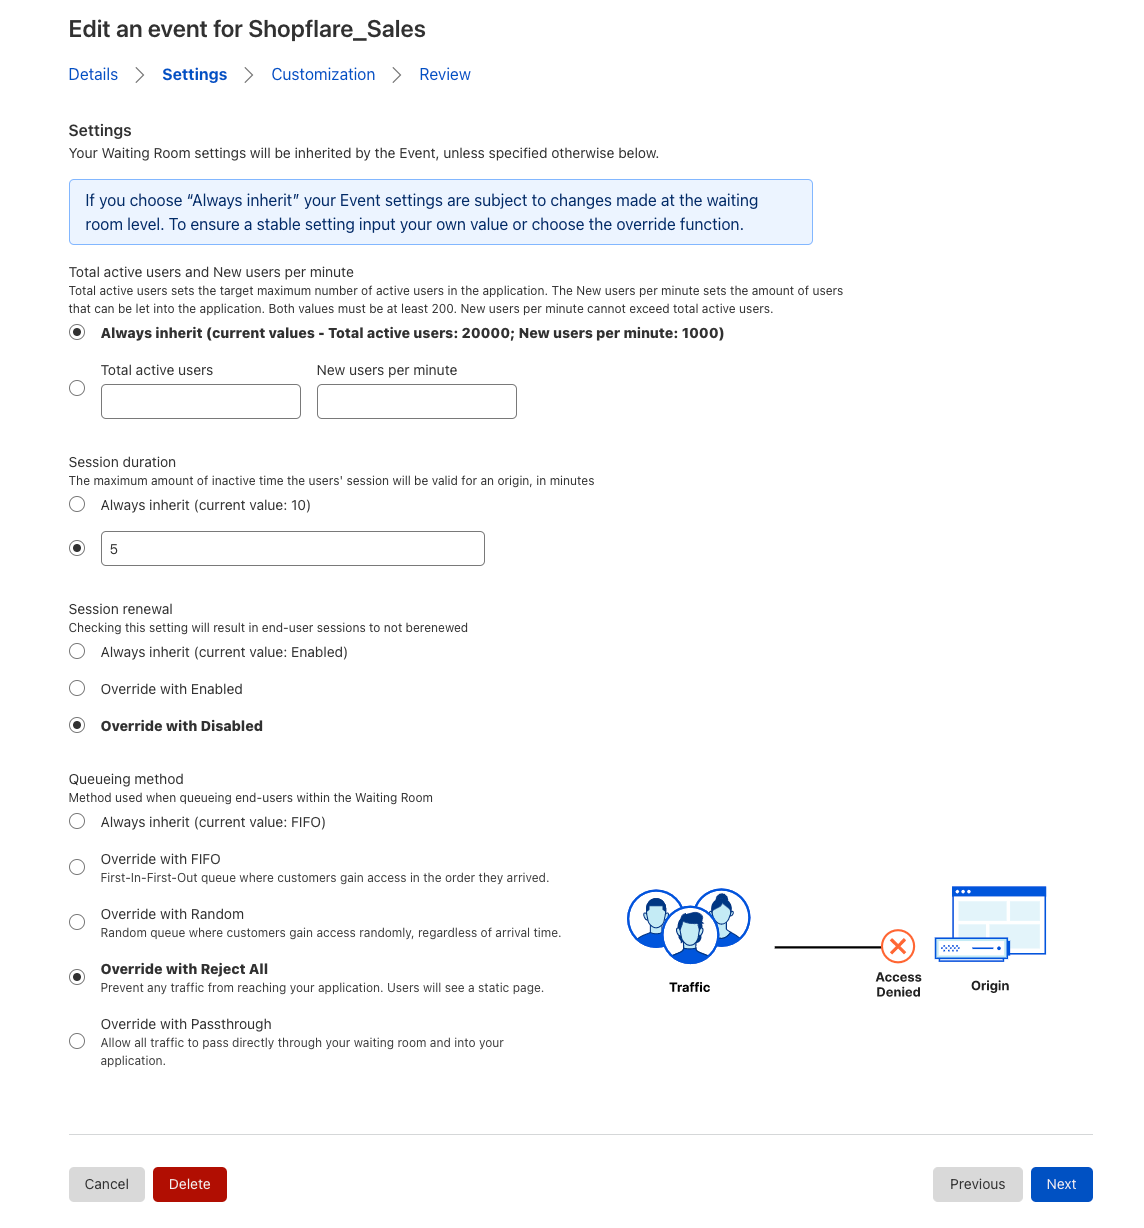
That said, there are cases where it is wise to separate waiting rooms on a single site. For example, a ticketing website could place a waiting room at its apex domain (example.com) and distinct waiting rooms with pre-queues on pages for specific events (example.com/popular_artist_tour). The waiting room set at example.com/ ensures that the main point of entry to the site does not get overwhelmed and crash when ticket sales for any one event open. The waiting room placed on the specific event page ensures that traffic for a single event can start queuing ahead of the event without impacting traffic going to other parts of the site.
Ultimately, whether a customer wants one or multiple waiting rooms to protect their site, we wanted to give our customers the flexibility to deploy Waiting Room however was best for their use cases and site structure. We’re thrilled to announce that Waiting Room now supports multi-hostname and path coverage with a single waiting room!
Getting started with multi-host and path coverage
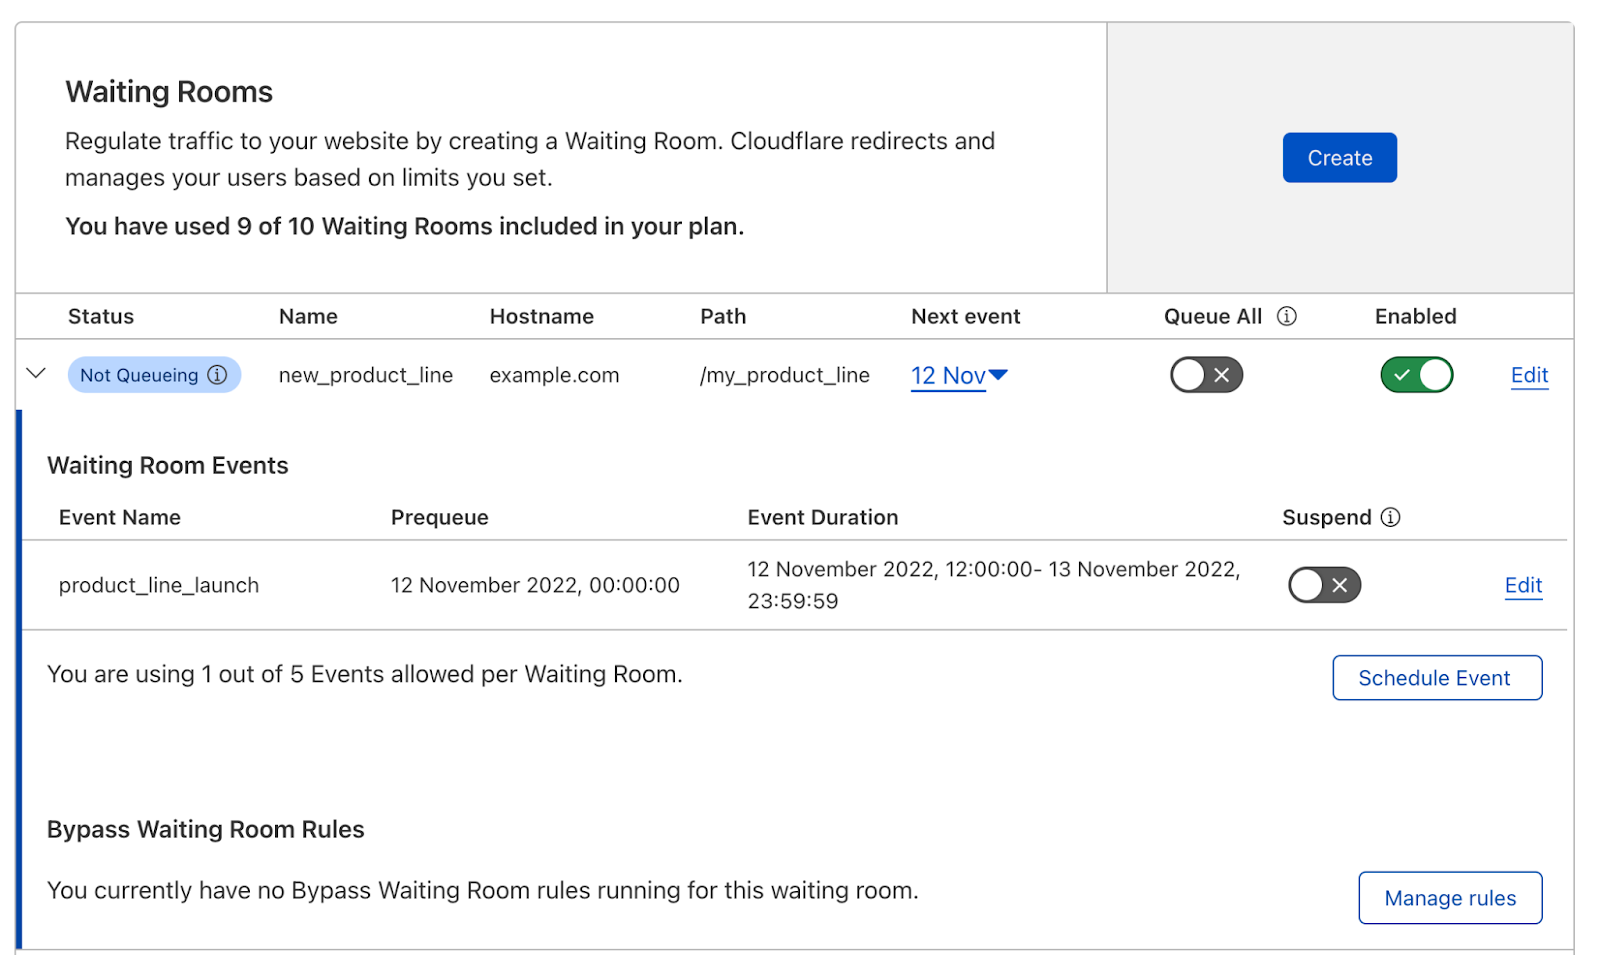
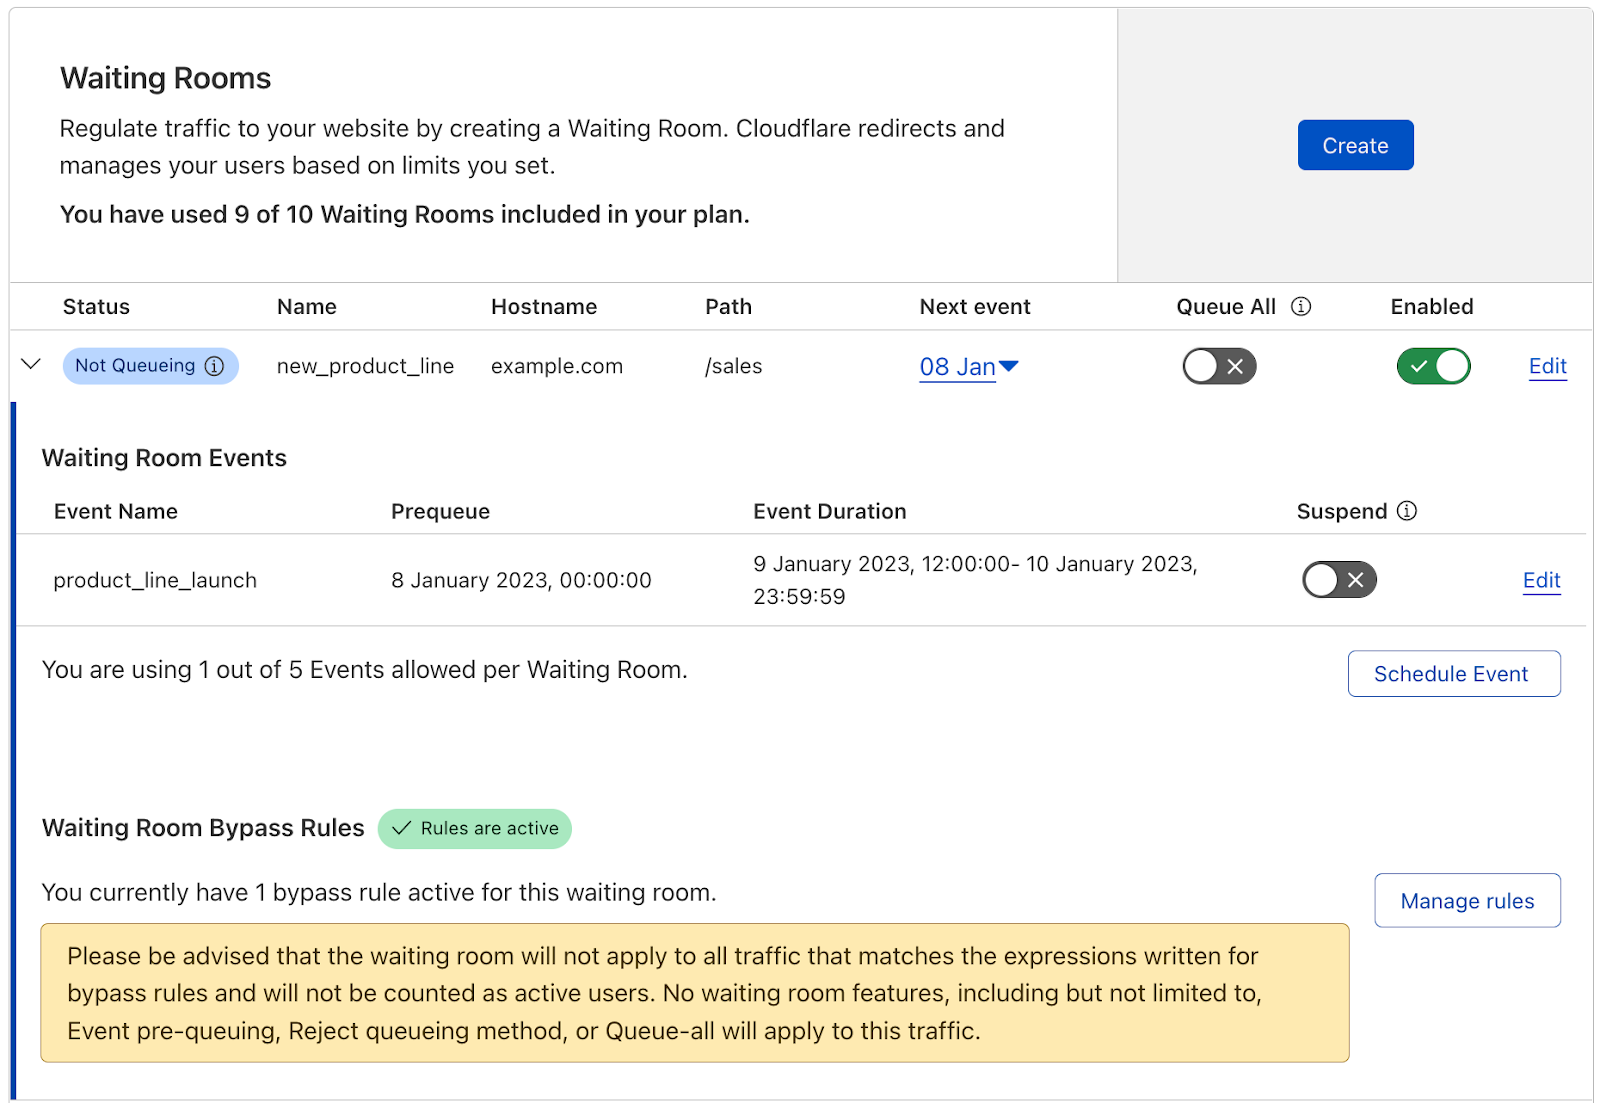
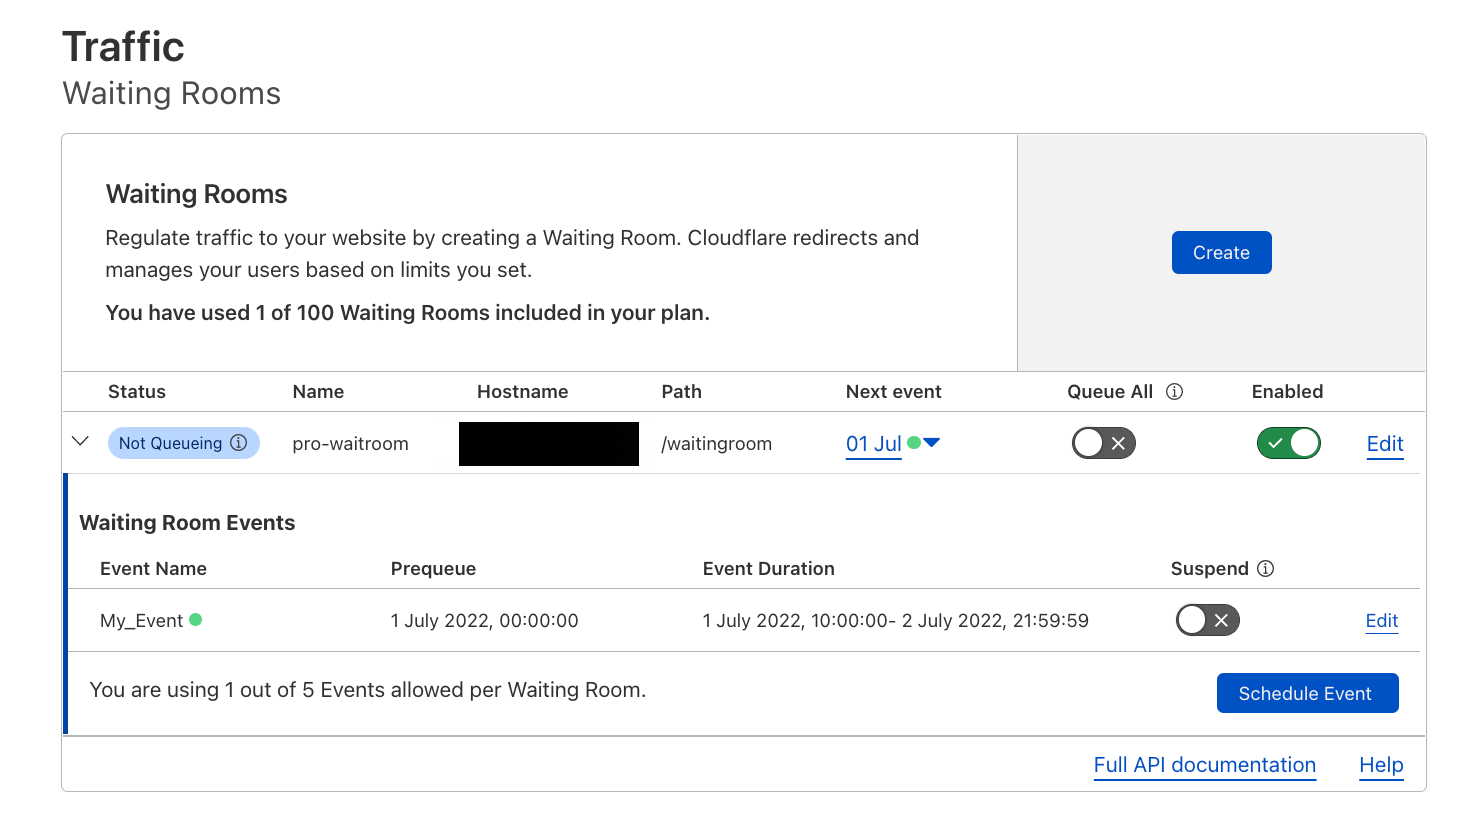
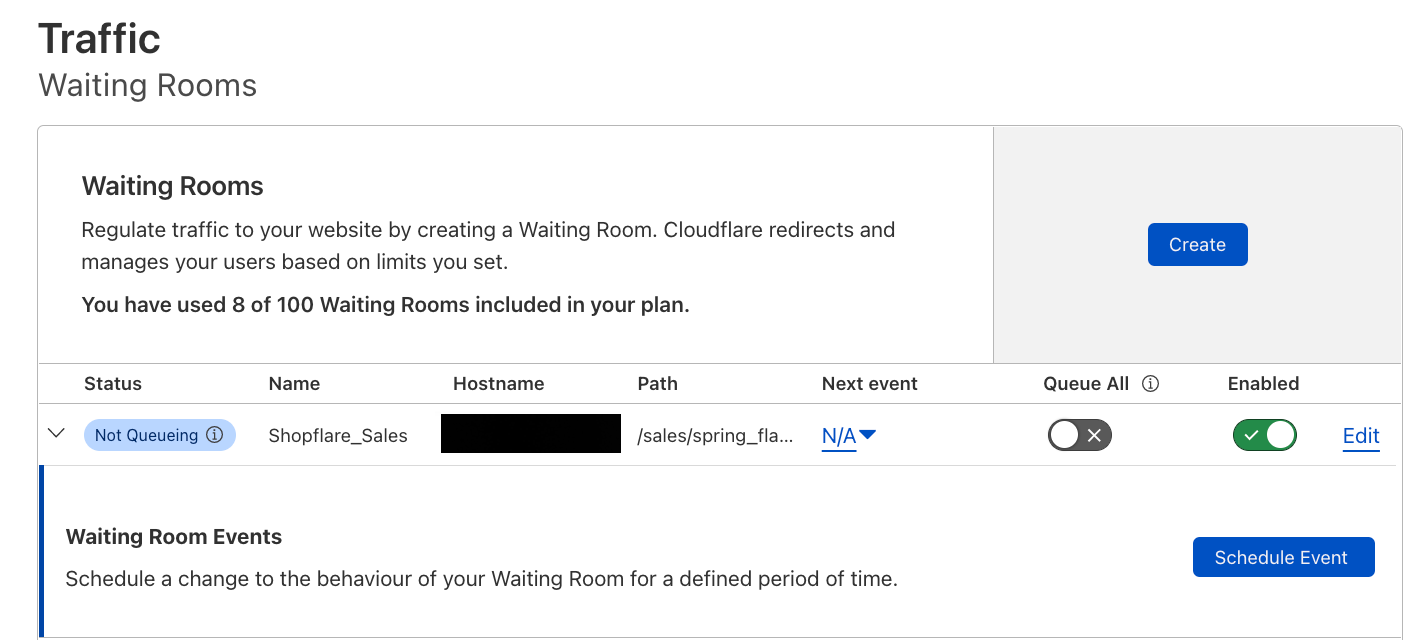
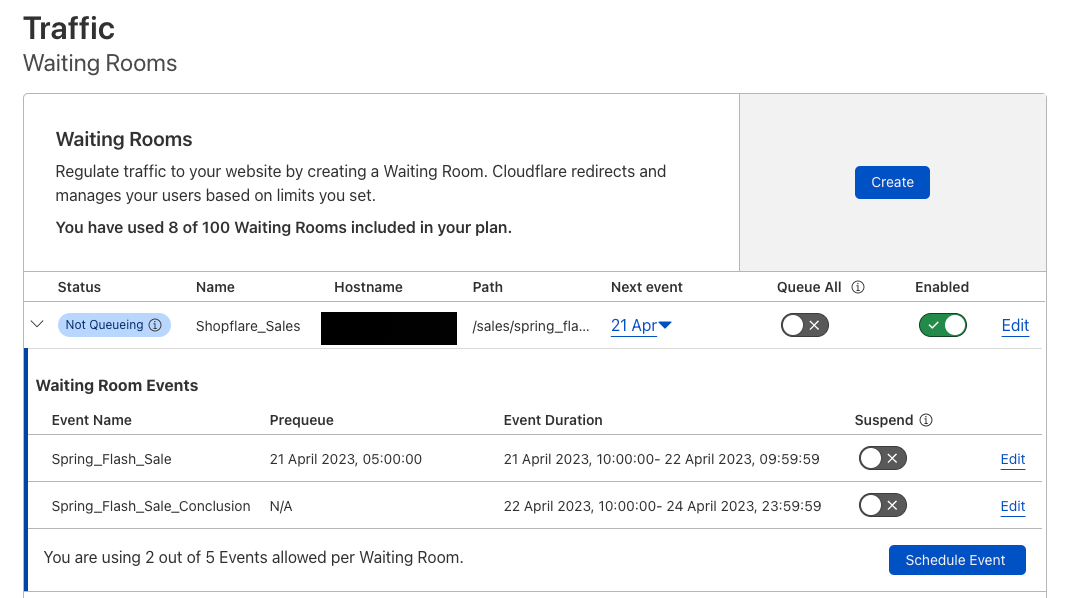
Customers can now configure a waiting room on multiple hostname and path combinations — or routes — belonging to the same zone. To do so, navigate to Traffic > Waiting Room and select Create. The name of your domain will already be populated. To add additional routes to your waiting room configuration, select Add Hostname and Path. You can then enter another hostname and path to be covered by the same waiting room. Remember, there is an implied wildcard after each path. Therefore, creating a waiting room for each URL you want your waiting room to cover is unnecessary. Only create additional routes for URLs that wouldn’t be covered by the other hostname and path combinations you have already entered.
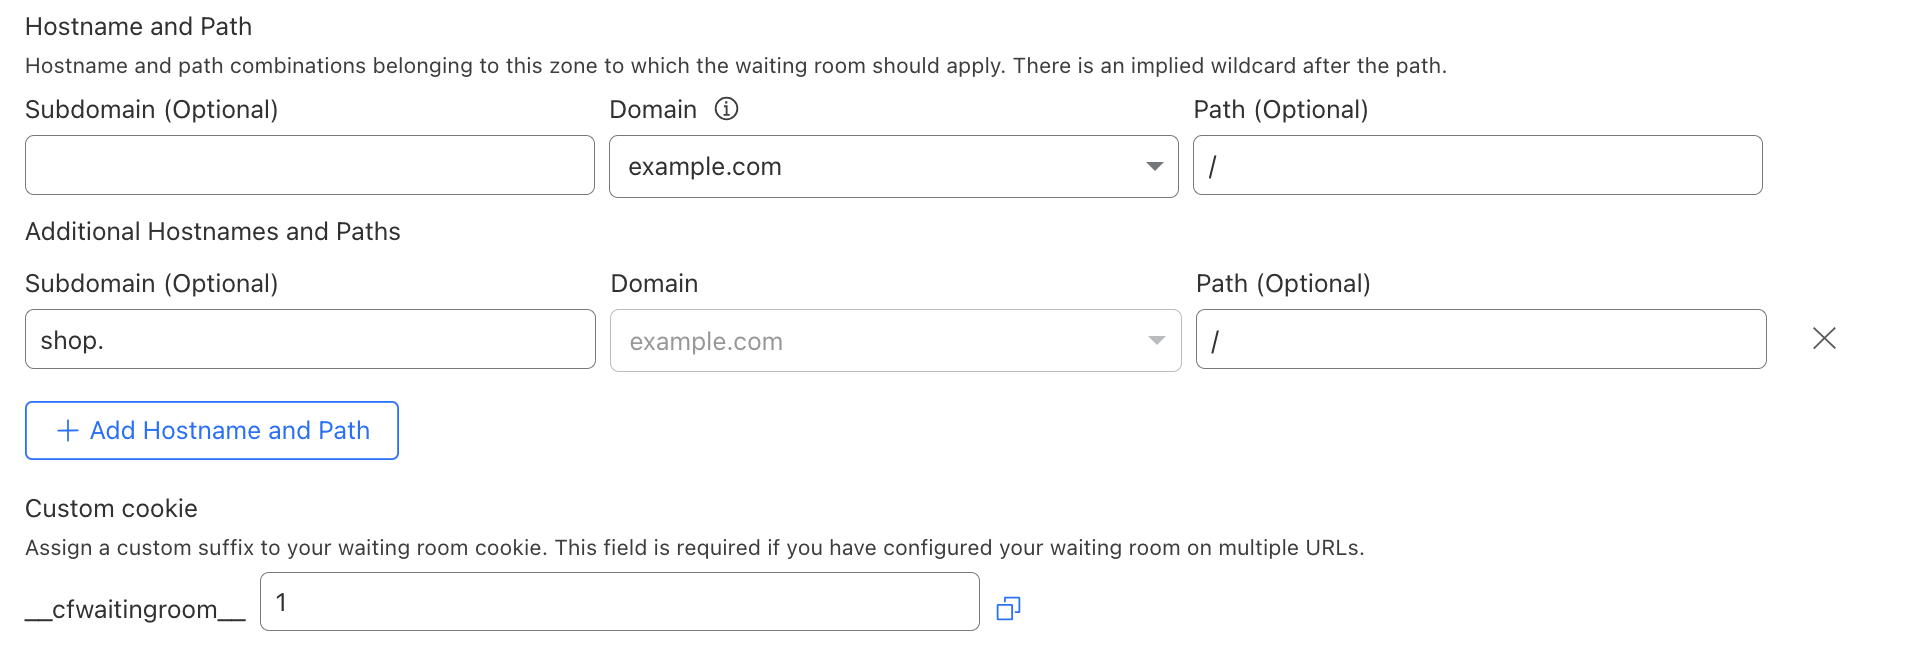
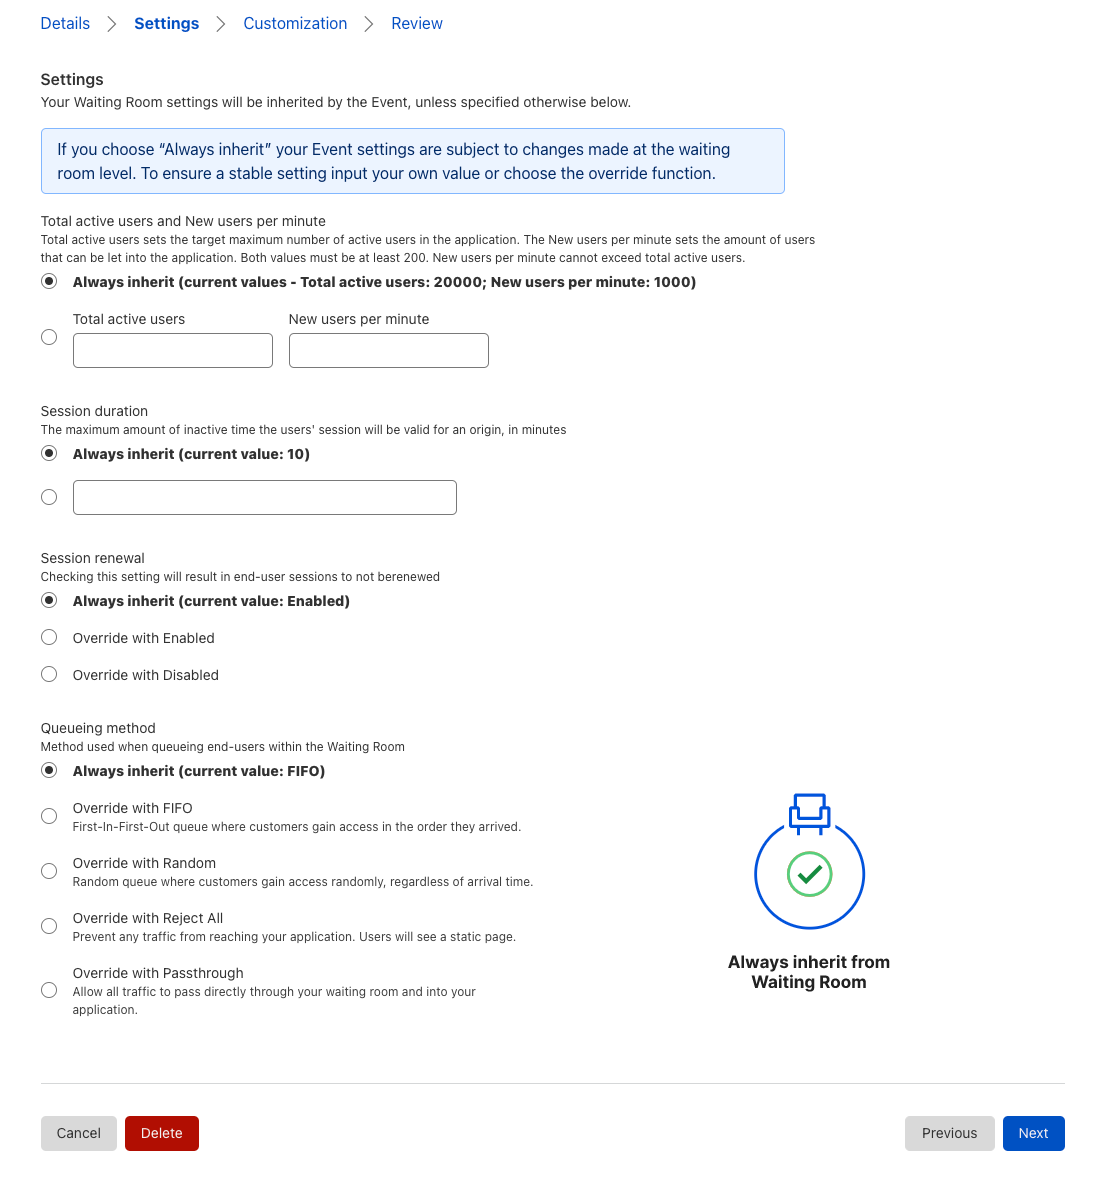
When deploying a waiting room that covers multiple hostname and path combinations, you must create a unique cookie name for this waiting room (more on that later!). Then, proceed with the same workflow as usual to deploy your waiting room.
Deploying a multi-language waiting room
A frequent customer request was the ability to cover a multi-language site with a single waiting room — offering different text per language while counting all site traffic toward the same waiting room limits. There are various ways a site can be structured to delineate between different language options, but the two most common are either by subdomain or path. For a site that uses path delineation, this could look like example.com/en and example.com/es for English and Spanish, respectively. For a site using subdomain delineation, this could look like en.example.com/ and es.example.com/. Before multihost Waiting Room coverage, the subdomain variation would not have been able to be covered by a single waiting room.
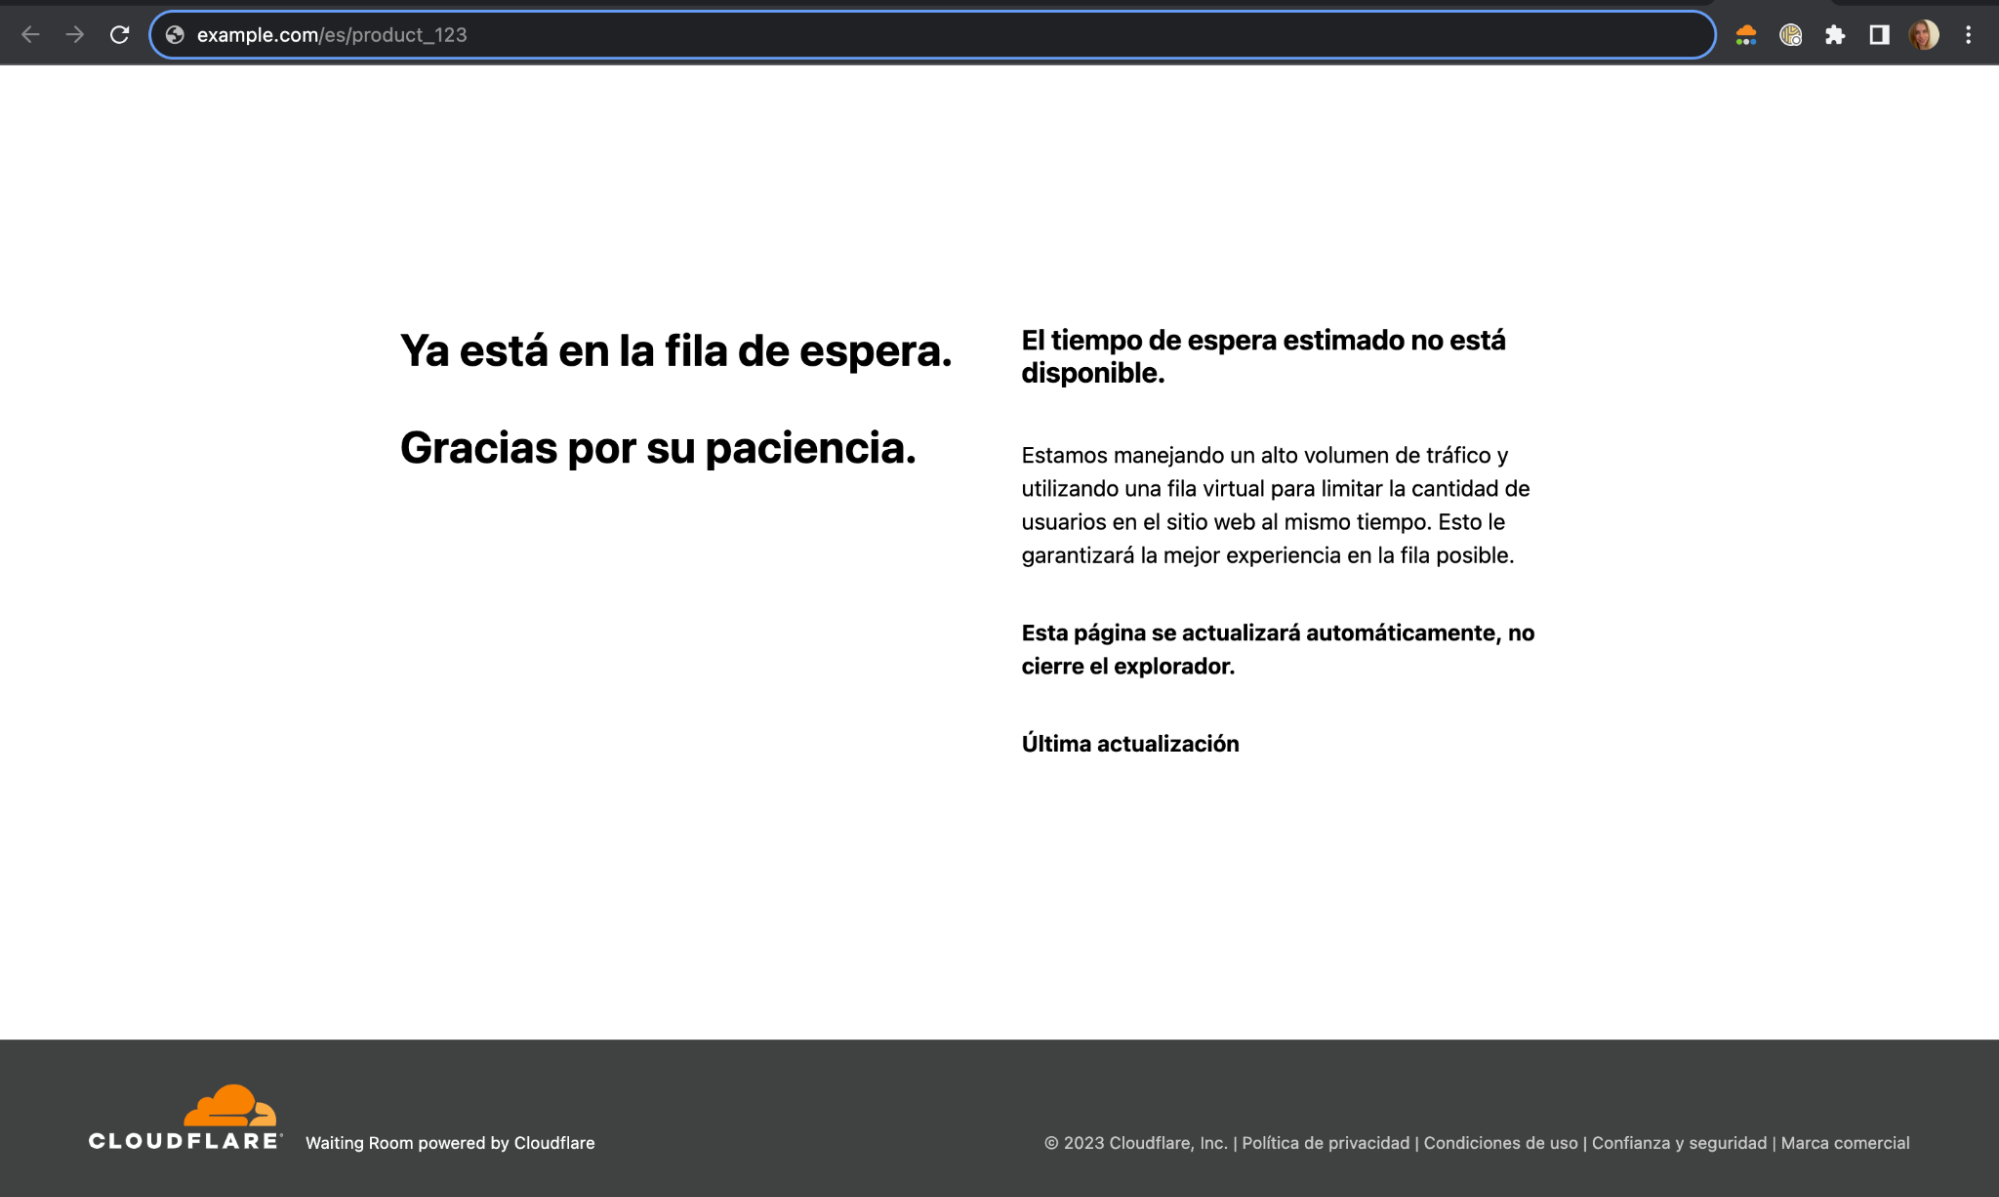
Waiting Room’s existing configuration options already supported the path variation. However, this was only true if the customer wanted to gate the entire site, which they could do by placing the waiting room at example.com/. Many e-commerce customers asked for the ability to gate different high-demand product pages selling the same product but with different language options. For instance, consider example.com/en/product_123 and example.com/es/product_123, where the customer wants the same waiting room and traffic limits to cover both URLs. Before now, this would not have been possible without some complex bypass rule logic.
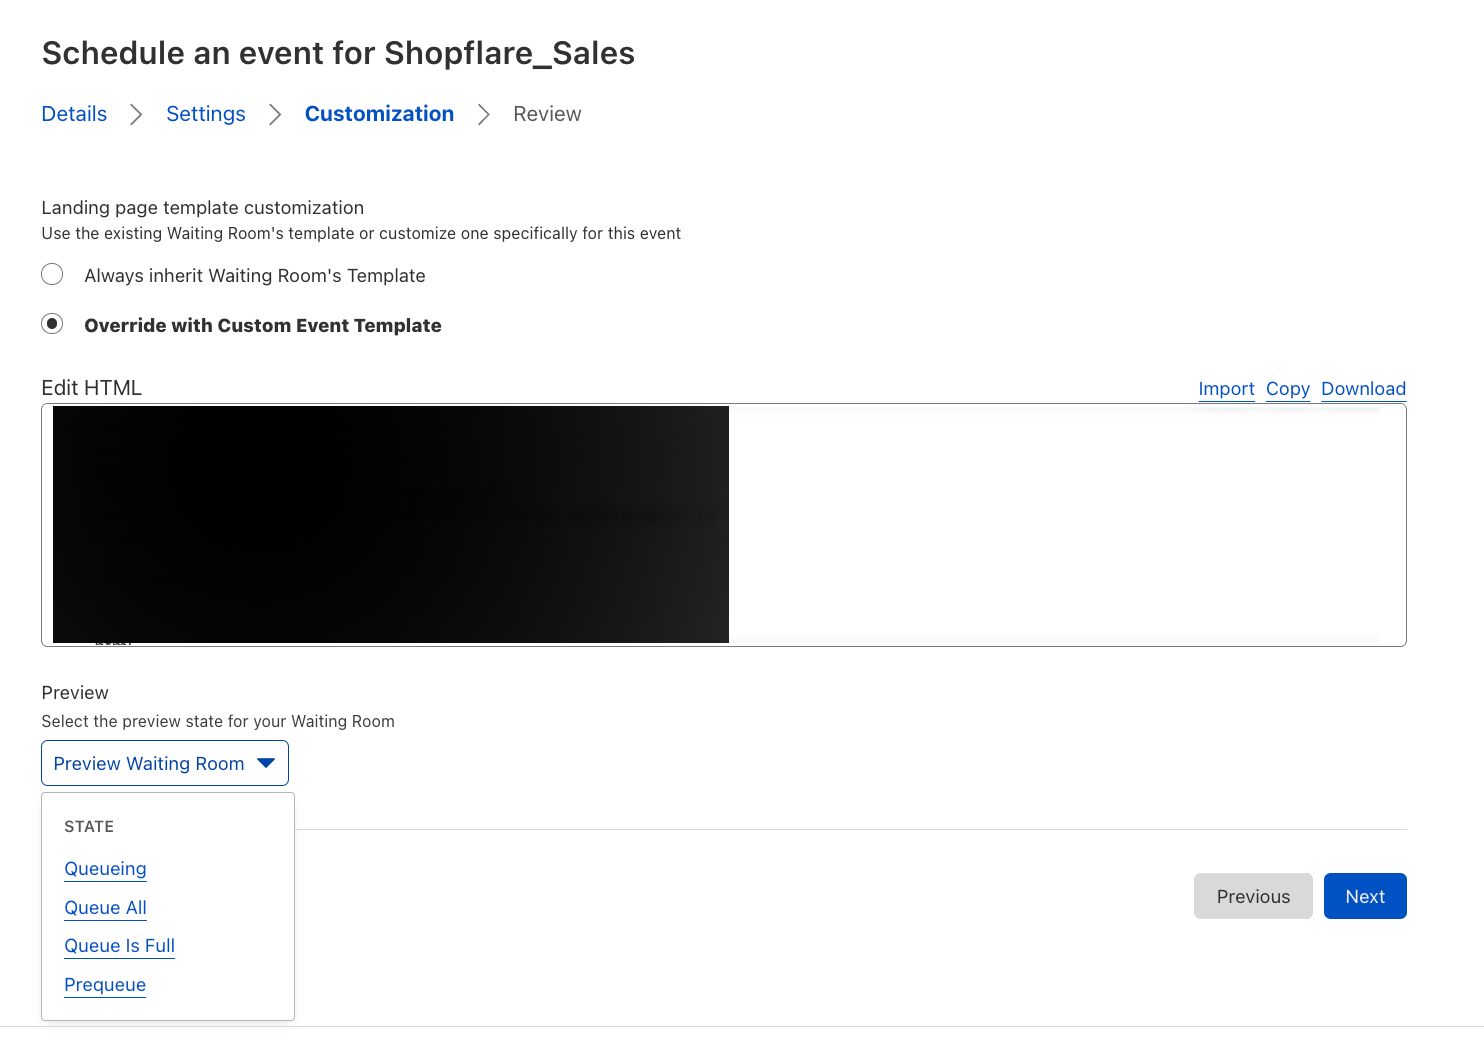
Now, customers can deploy a waiting room that accommodates either the subdomain or path approach to structuring a multi-language site. The only remaining step is setting up your waiting room to serve different languages when a user is queued in a waiting room. This can be achieved by constructing a template that reads the URL to determine the locale and define the appropriate translations for each of the locales within the template.
Here is an example of a template that determines the locale from the URL path, and renders the translated text:
<!DOCTYPE html>
<html>
  <head>
    <title>Waiting Room powered by Cloudflare</title>
  </head>
  <body>
    <section>
      <h1 id="inline-msg">
        You are now in line.
      </h1>
      <h1 id="patience-msg">
        Thank you for your patience.
      </h1>
    </section>
    <h2 id="waitTime"></h2>

    <script>
      var locale = location.pathname.split("/")[1] || "en";
      var translations = {
        "en": {
          "waittime_60_less": "Your estimated wait time is {{waitTime}} minute.",
          "waittime_60_greater": "Your estimated wait time is {{waitTimeHours}} hours and {{waitTimeHourMinutes}} minutes.",
          "inline-msg": "You are now in line.",
          "patience-msg": "Thank you for your patience.",
        },
        "es": {
          "waittime_60_less": "El tiempo de espera estimado es {{waitTime}} minuto.",
          "waittime_60_greater": "El tiempo de espera estimado es {{waitTimeHours}} de horas y {{waitTimeHourMinutes}} minutos.",
          "inline-msg": "Ahora se encuentra en la fila de espera previa.",
          "patience-msg": "Gracias por su paciencia.",
        }
      };

      {{#waitTimeKnown}}
      var minutes = parseInt( {{waitTime}} , 10);
      var time = document.getElementById('waitTime');

      if ( minutes < 61) {
        time.innerText = translations[locale]["waittime_60_less"]
      } else {
        time.innerText = translations[locale]["waittime_60_greater"]
      }
      {{/waitTimeKnown}}

      // translate template text for each of the elements with “id” suffixed with “msg”
      for (const msg of ["inline-msg", "patience-msg"]) {
        const el = document.getElementById(msg);
        if (el == null) continue;
        el.innerText = translations[locale][msg];
      }
    </script>
  </body>
</html>
Here’s how the template works: given a site distinguishes different locales with various paths such as /en/product_123 or /es/product_123 in the <script /> body after the rendering the page, the locale is extracted from the location.pathname via locale = location.pathname.split(“/”)[1]. If there isn’t a locale specified within the translations object we default it to “en”. For example, if a user visits example.com/product_123, then by default render the English text template.
Similarly, in order to support a multi-language waiting room for sites that delineate site structure via subdomain, it would only require you to update how you extract the locale from the URL. Instead of looking at the pathname we look at the hostname property of the window.location object like locale = location.hostname.split(“.”)[0], given, we have site structure as following: en.example.com, es.example.com.
The above code is a pared down example of starter templates we have added to our developer documentation, which we have included to make it easier for you to get started with a multi-language waiting room. You can download these templates and edit them to have the look and feel aligned with your site and with the language options your site offers.
These templates can further be expanded to include other languages by adding translations to the `translations` object for each of the locales. Thus, a single template is able to serve multiple languages depending on whatever the locale the site is being served as either via subdomain or path.
How we handle cookies with a multihostname and path waiting room
The waiting room assigns a __cfwaitingroom cookie to each user to manage the state of the user that determines the position of the user in line among other properties needed to make the queueing decisions for the user. Traditionally, for a single hostname and path configuration it was trivial to just set the cookie as __cfwaitingroom=[cookie-value]; Domain=example.com; Path=/es/product_123. This ensured that when the page refreshed it would send us the same Waiting Room cookie for us to examine and update. However, this became non-trivial when we wanted to share the same cookie across different subdomain or path combinations, for example, on example.com/en/product_123.
Approaches to setting multiple cookies
There were two approaches that we brainstormed and evaluated to allow the sharing of the cookie for the same waiting room.
The first approach we considered was to issue multiple Set-Cookie headers in the HTTP response. For example, in the multi-language example above, we could issue the following in the response header:
Set-Cookie: __cfwaitingroom=[cookie-value]…Domain=example.com; Path=/en/product_123 …
Set-Cookie: __cfwaitingroom=[cookie-value]...Domain=example.com; Path=/es/product_123 …
This approach would allow us to handle the multiple hostnames and paths for the same waiting room. However, it does not present itself as a very scalable solution. Per RFC6265, there isn’t a strict limit defined in the specification, browsers have their own implementation-specific limits. For example, Chrome allows the response header to grow up to 256K bytes before throwing the transaction with ERR_RESPONSE_HEADERS_TOO_BIG. Additionally, in this case, the response header would grow proportionally to the number of unique hostname and path combinations, and we would be redundantly repeating the same cookie value N (where N is the number of additional routes) number of times. While this approach would have allowed us to effectively handle a bounded list of hostname and path combinations that need to be set, it was not ideal for cases where we can expect more than a handful routes for a particular site.
The second approach that we considered and chose to move forward with was to set the cookie on the apex domain (or the most common subdomain). In other words, we would figure out the most common subdomain from the list of routes and use that as the domain. Similarly, for the paths, this would entail determining the least common prefix from the list of paths and use that as the value to be set on the path attribute. For example, consider a waiting room with the following two routes configured, a.example.com/shoes/product_123 and b.example.com/shoes/product_456.
To determine the domain that would be set for the cookie, we can see that example.com is the most common subdomain among the list of domains. Applying the most common subdomain algorithm, we would get example.com as the domain. Applying the least common prefix algorithm on the set of paths, /shoes/product_123 and /shoes/product_456, we would get /shoes as the path. Thus, the set-cookie header would be the following:
Set-Cookie: … __cfwaitingroom=[cookie-value]; Domain=example.com; Path=/shoes …
Now, when a visitor accesses any of the pages covered by this waiting room, we can guarantee Waiting Room receives the right cookie and there will only be Set-Cookie included in the response header.
However, we are still not there yet. Although we are able to identify the common subdomain (or apex domain) and common path prefix, there would still be a problem if routes from one waiting room would overlap with another waiting room. For example, say we configure two waiting rooms for the same site where we are selling our special shoes:
Waiting Room A
a.example.com/shoes/product_123
b.example.com/shoes/product_456
Waiting Room B
c.example.com/shoes/product_789
d.example.com/shoes/product_012
If we apply the same algorithm as described above, we would get the same domain and path properties set for the two cookies. For Waiting Room A, the domain would be example.com and the path would be /shoes. Similarly, for Waiting Room B, the most common subdomain would also be example.com and least common path prefix would be /shoes. This would effectively prevent us from distinguishing the two cookies and route the visitor to the right waiting room. In order to solve the issue of overlapping cookie names, we introduced the requirement of setting a custom suffix that is unique to the customer’s zone. This is why it is required to provide a custom cookie suffix when configuring a waiting room that covers multiple hostnames or paths. Therefore, if Waiting Room A was assigned cookie suffix “a” and Waiting Room B was assigned cookie suffix “b”, the two Set-Cookie definitions would look like the following:
Waiting Room A
Set-Cookie: __cfwaitingroom_a=[cookie-value]; Domain=example.com; Path=/shoes
Waiting Room B
Set-Cookie: __cfwaitingroom_b=[cookie-value]; Domain=example.com; Path=/shoes
When a visitor makes a request to any pages where the two different waiting rooms are configured, Waiting Room can distinguish and select which cookie corresponds to the given request and use this to determine which waiting room’s settings apply to that user depending on where they are on the site.
With the addition of multihost and multipath Waiting Room coverage, we’re thrilled to offer more flexible options for incorporating Waiting Room into your site, giving your visitors the best experience possible while protecting your site during times of high traffic. Make sure your site is always protected from traffic surges. Try out Waiting Room today or reach out to us to learn more about the Advanced Waiting Room!