Post Syndicated from Nipun Chagari original https://aws.amazon.com/blogs/big-data/trigger-an-aws-glue-databrew-job-based-on-an-event-generated-from-another-databrew-job/
Organizations today have continuous incoming data, and analyzing this data in a timely fashion is becoming a common requirement for data analytics and machine learning (ML) use cases. As part of this, you need clean data in order to gain insights that can enable enterprises to get the most out of their data for business growth and profitability. You can now use AWS Glue DataBrew, a visual data preparation tool that makes it easy to transform and prepare datasets for analytics and ML workloads.
As we build these data analytics pipelines, we can decouple the jobs by building event-driven analytics and ML workflow pipelines. In this post, we walk through how to trigger a DataBrew job automatically on an event generated from another DataBrew job using Amazon EventBridge and AWS Step Functions.
Overview of solution
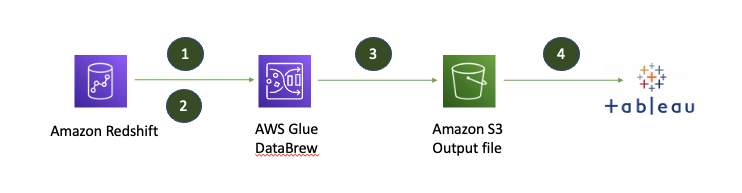
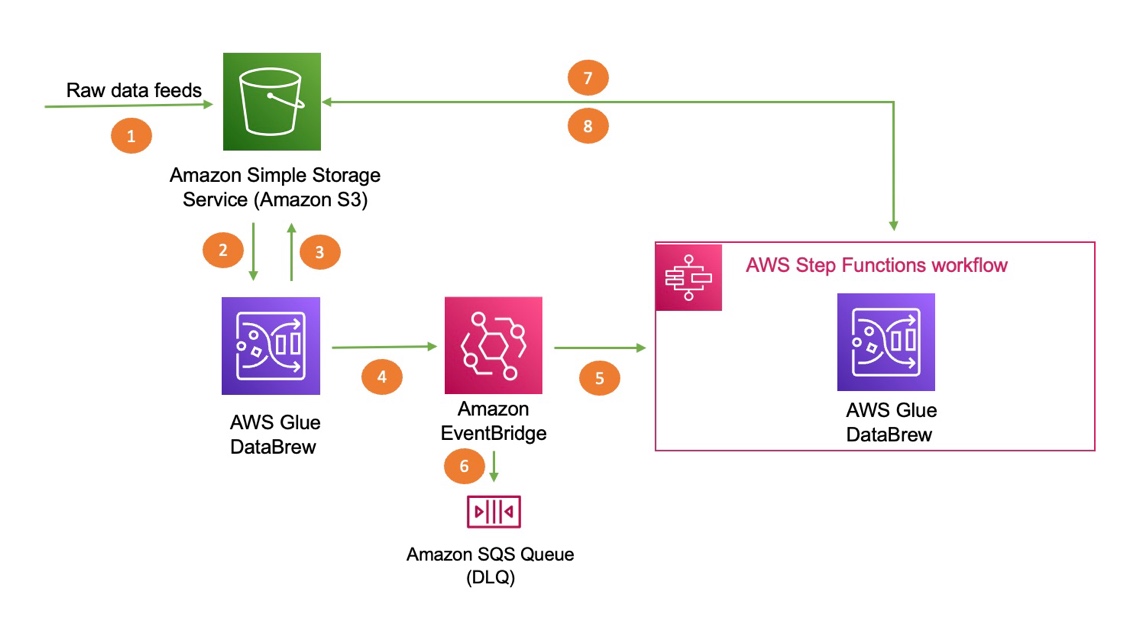
The following diagram illustrates the architecture of the solution. We use AWS CloudFormation to deploy an EventBridge rule, an Amazon Simple Queue Service (Amazon SQS) queue, and Step Functions resources to trigger the second DataBrew job.
The steps in this solution are as follows:
- Import your dataset to Amazon Simple Storage Service (Amazon S3).
- DataBrew queries the data from Amazon S3 by creating a recipe and performing transformations.
- The first DataBrew recipe job writes the output to an S3 bucket.
- When the first recipe job is complete, it triggers an EventBridge event.
- A Step Functions state machine is invoked based on the event, which in turn invokes the second DataBrew recipe job for further processing.
- The event is delivered to the dead-letter queue if the rule in EventBridge can’t invoke the state machine successfully.
- DataBrew queries data from an S3 bucket by creating a recipe and performing transformations.
- The second DataBrew recipe job writes the output to the same S3 bucket.
Prerequisites
To use this solution, you need the following prerequisites:
- An AWS account
- AWS Identity and Access Management (IAM) permissions for DataBrew (for more information, see Setting up IAM policies for DataBrew)
- An S3 bucket (to store data)
Load the dataset into Amazon S3
For this post, we use the Credit Card customers sample dataset from Kaggle. This data consists of 10,000 customers, including their age, salary, marital status, credit card limit, credit card category, and more. Download the sample dataset and follow the instructions. We recommend creating all your resources in the same account and Region.
Create a DataBrew project
To create a DataBrew project, complete the following steps:
- On the DataBrew console, choose Projects and choose Create project.
- For Project name, enter
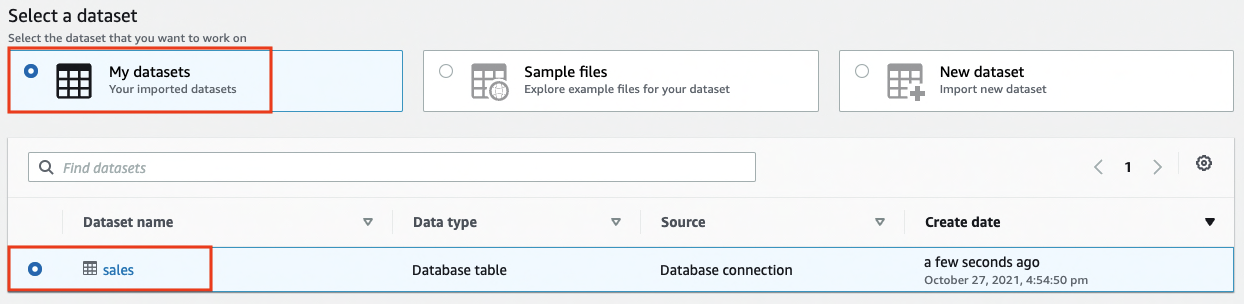
marketing-campaign-project-1. - For Select a dataset, select New dataset.

- Under Data lake/data store, choose Amazon S3.
- For Enter your source from S3, enter the S3 path of the sample dataset.
- Select the dataset CSV file.

- Under Permissions, for Role name, choose an existing IAM role created during the prerequisites or create a new role.
- For New IAM role suffix, enter a suffix.

- Choose Create project.


After the project is opened, a DataBrew interactive session is created. DataBrew retrieves sample data based on your sampling configuration selection.
Create the DataBrew jobs
Now we can create the recipe jobs.
- On the DataBrew console, in the navigation pane, choose Projects.
- On the Projects page, select the project
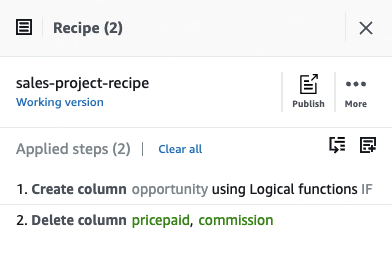
marketing-campaign-project-1. - Choose Open project and choose Add step.

- In this step, we choose Delete to drop the unnecessary columns from our dataset that aren’t required for this exercise.

You can choose from over 250 built-in functions to merge, pivot, and transpose the data without writing code.

- Select the columns to delete and choose Apply.

- Choose Create job.

- For Job name, enter
marketing-campaign-job1.

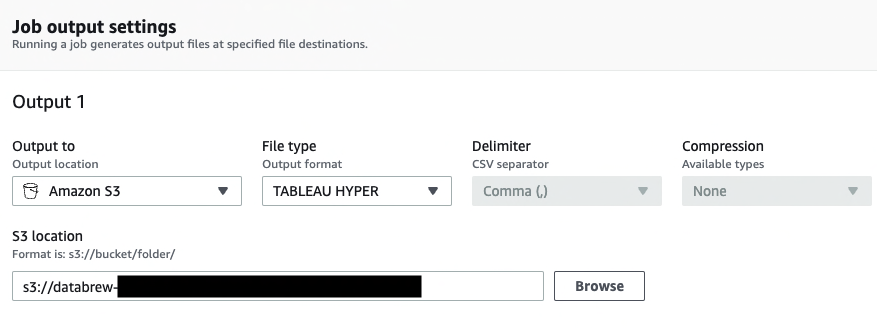
- Under Job output settings¸ for File type, choose your final storage format (for this post, we choose CSV).
- For S3 location, enter your final S3 output bucket path.

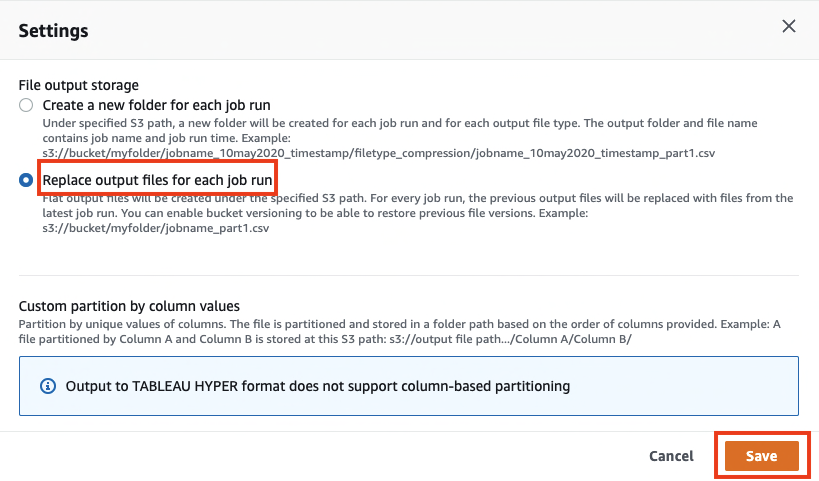
- Under Settings, for File output storage, select Replace output files for each job run.
- Choose Save.

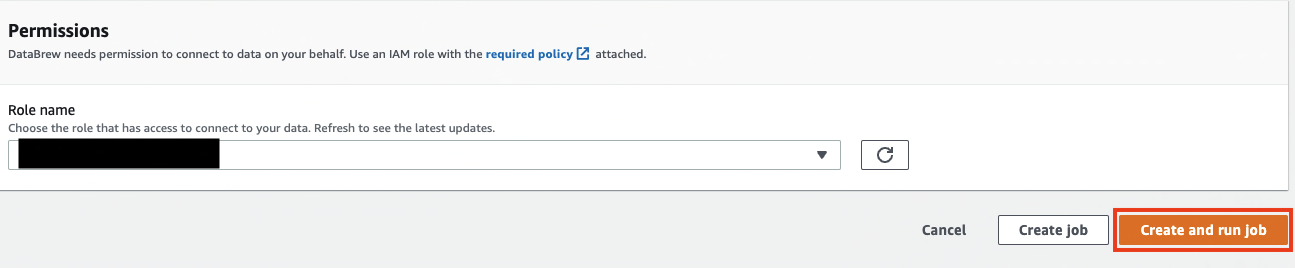
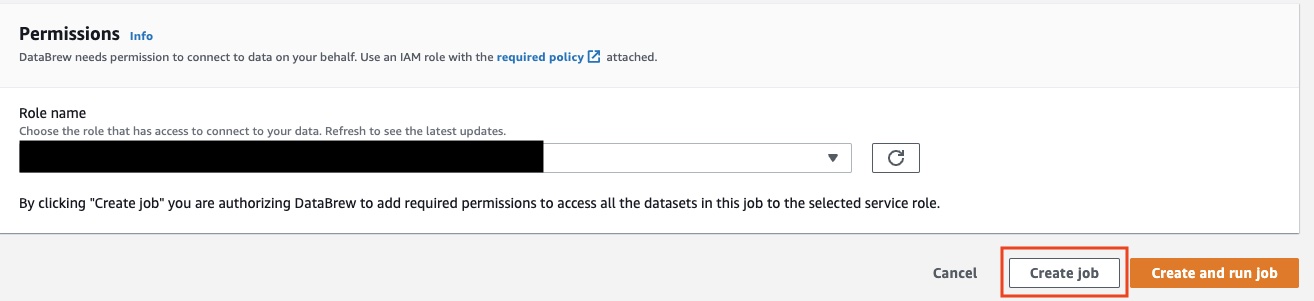
- Under Permissions, for Role name¸ choose an existing role created during the prerequisites or create a new role.
- Choose Create job.


Now we repeat the same steps to create another DataBrew project and DataBrew job.
- For this post, I named the second project
marketing-campaign-project2and named the jobmarketing-campaign-job2. - When you create the new project, this time use the job1 output file location as the new dataset.
- For this job, we deselect Unknown and Uneducated in the Education_Level column.


Deploy your resources using CloudFormation
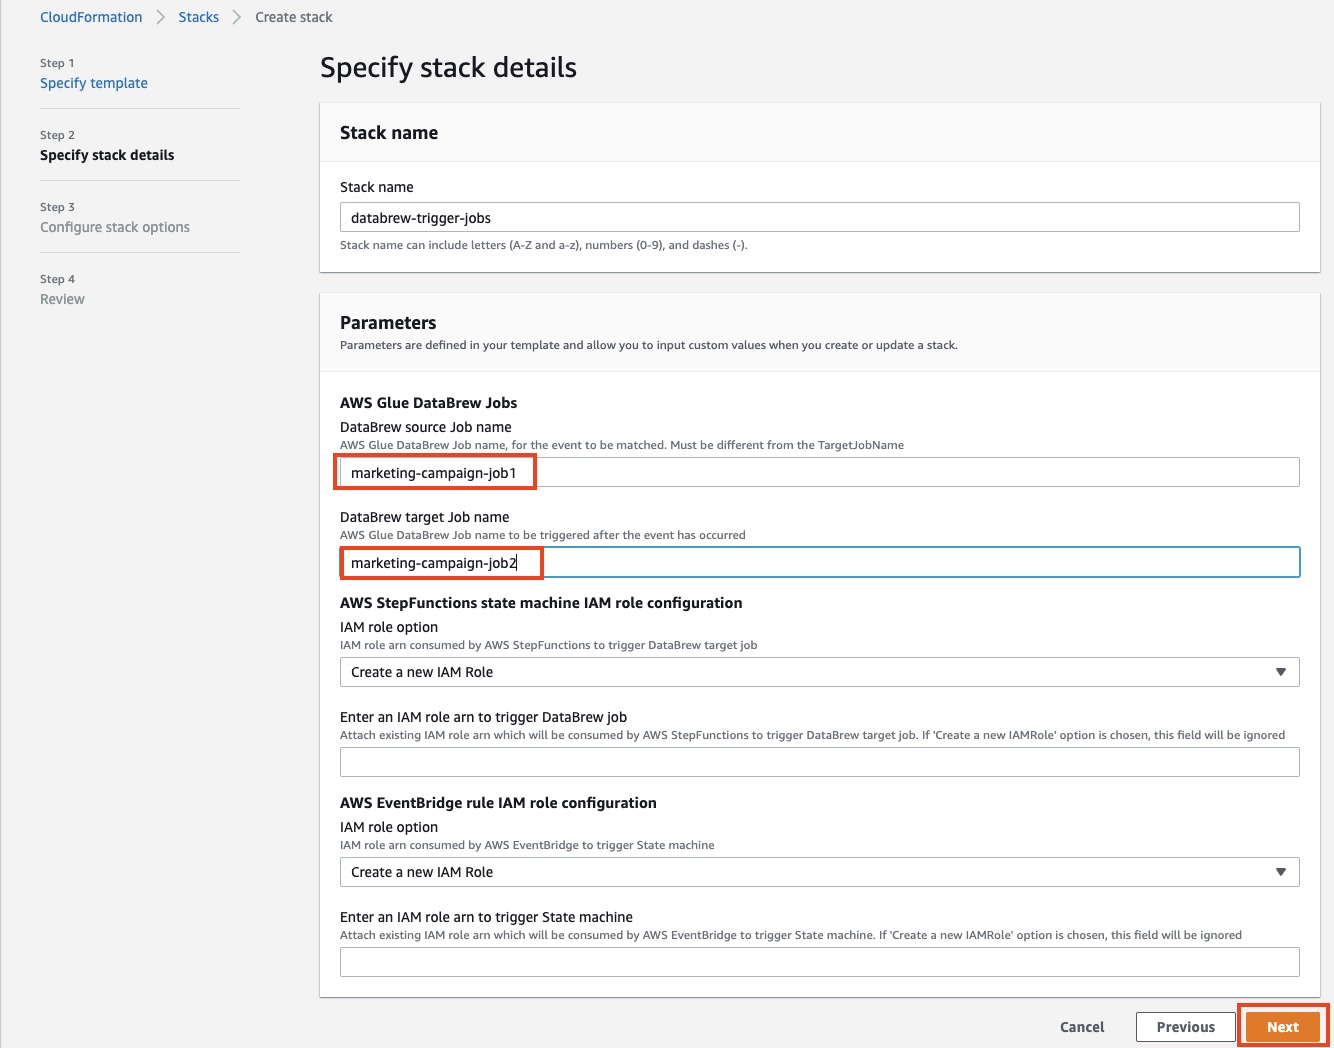
For a quick start of this solution, we deploy the resources with a CloudFormation stack. The stack creates the EventBridge rule, SQS queue, and Step Functions state machine in your account to trigger the second DataBrew job when the first job runs successfully.
- Choose Launch Stack:

- For DataBrew source job name, enter
marketing-campaign-job1. - For DataBrew target job name, enter
marketing-campaign-job2. - For both IAM role configurations, make the following choice:
- If you choose Create a new Role, the stack automatically creates a role for you.
- If you choose Attach an existing IAM role, you must populate the IAM role ARN manually in the following field or else the stack creation fails.
- Choose Next.

- Select the two acknowledgement check boxes.
- Choose Create stack.


Test the solution
To test the solution, complete the following steps:
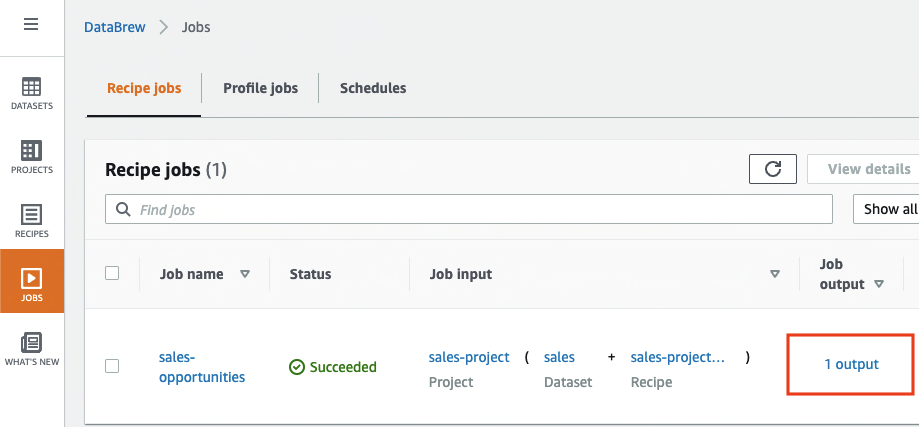
- On the DataBrew console, choose Jobs.
- Select the job
marketing-campaign-job1and choose Run job.
This action automatically triggers the second job, marketing-campaign-job2, via EventBridge and Step Functions.

- When both jobs are complete, open the output link for
marketing-campaign-job2.


You’re redirected to the Amazon S3 console to access the output file.

In this solution, we created a workflow that required minimal code. The first job triggers the second job, and both jobs deliver the transformed data files to Amazon S3.
Clean up
To avoid incurring future charges, delete all the resources created during this walkthrough:
- IAM roles
- DataBrew projects and their associated recipe jobs
- S3 bucket
- CloudFormation stack
Conclusion
In this post, we walked through how to use DataBrew along with EventBridge and Step Functions to run a DataBrew job that automatically triggers another DataBrew job. We encourage you to use this pattern for event-driven pipelines where you can build sequence jobs to run multiple jobs in conjunction with other jobs.
About the Authors
 Nipun Chagari is a Senior Solutions Architect at AWS, where he helps customers build highly available, scalable, and resilient applications on the AWS Cloud. He is passionate about helping customers adopt serverless technology to meet their business objectives.
 Prarthana Angadi is a Software Development Engineer II at AWS, where she has been expanding what is possible with code in order to make life more efficient for AWS customers.