Post Syndicated from Sam Dengler original https://aws.amazon.com/blogs/compute/using-certificate-based-authentication-for-ios-applications-with-amazon-sns/
This blog post is written by Yashlin Naidoo, Arnav Thakur, Kim Read, Guilherme Silva.
Amazon SNS enables you to send notifications to a mobile push endpoint using a platform application endpoint by dispatching the notification on your application’s behalf. Push notifications for iOS apps are sent using Apple Push Notification Service (APNs).
To send push notifications using SNS for APNS certificate-based authentication, you must provide a set of credentials for connecting to the Apple Push Notification Service (see prerequisites for push). SNS supports using certificate-based authentication (.p12), in addition to the new token-based authentication (.p8).
Certificate-based authentication uses a provider certificate to establish a secure connection between your provider and APNs. These certificates are tied to a single application and are used to send notifications to this application. This approach can be useful when you haven’t migrated to the new token-based authentication.
For new applications, we recommend using token-based authentication as it provides improved security. It removes the need for yearly renewal of the certificates and can also be shared amongst multiple applications. To learn about how to use token-based authentication, visit Token-Based authentication for iOS applications with Amazon SNS in the AWS Compute Blog.
This blog shows step-by-step instructions on how to build an iOS application. You learn how to create a new certificate from your Apple developer account, and set up a platform application and endpoint in the SNS console. Next, you will learn how to test your application by sending a push notification via SNS to your device. Finally, you view the push notification delivered to your device.
Setting up your iOS application
This section will go over:
- Creating an iOS application.
- Creating a .p12 certificate to upload to SNS.
Prerequisites:
- XCode IDE for application development.
- An Apple Developer Account for certificate creation.
Creating an iOS application
- Create a new XCode project. Select iOS as the platform.

New XCode project
- Select your Apple Developer Account team and organization identifier.

Select your Apple Developer Account team
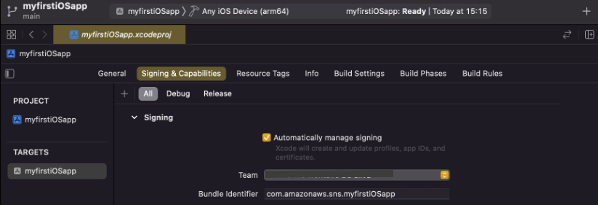
- In your project, go to Signing & Capabilities. Under signing, ensure that “Automatically manage signing” is checked and your team is selected.

Signing & Capabilities
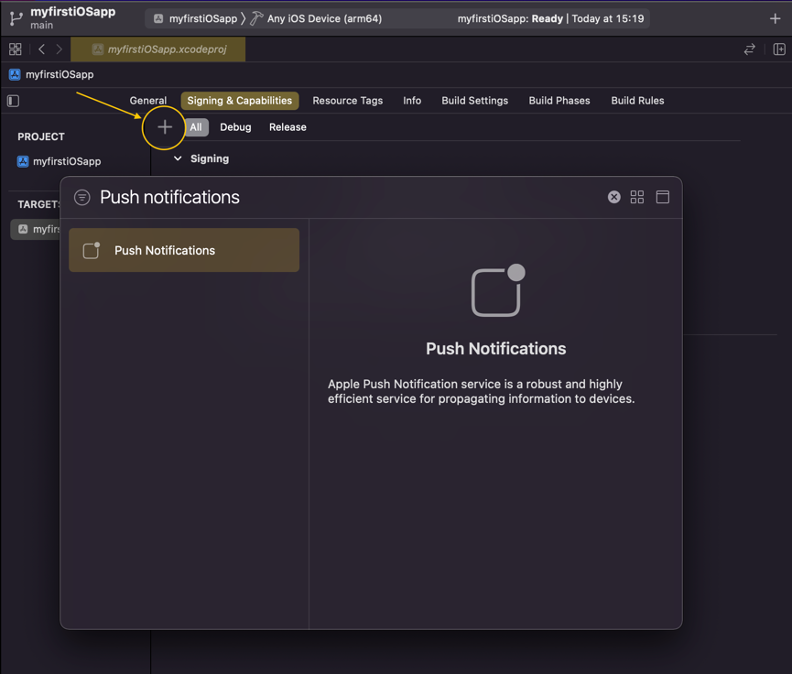
- To add the push notification capability to your application, select “+” and select Push Notifications.

Add push notification capability
This step creates resources on your Apple Developer Account (the App ID and adds Push notification capability to it). You can also verify this in your Apple Developer Account.
- Add the following code to AppDelegate.swift:
import UIKit import UserNotifications @main class AppDelegate: UIResponder, UIApplicationDelegate { func application(_ application: UIApplication, didFinishLaunchingWithOptions launchOptions: [UIApplication.LaunchOptionsKey: Any]?) -> Bool { // Override point for customization after application launch //Call to register for push notifications when launched registerForPushNotifications() return true } // MARK: UISceneSession Lifecycle func application(_ application: UIApplication, configurationForConnecting connectingSceneSession: UISceneSession, options: UIScene.ConnectionOptions) -> UISceneConfiguration { // Called when a new scene session is being created. // Use this method to select a configuration to create the new scene with. return UISceneConfiguration(name: "Default Configuration", sessionRole: connectingSceneSession.role) } func application(_ application: UIApplication, didDiscardSceneSessions sceneSessions: Set<UISceneSession>) { // Called when the user discards a scene session. // If any sessions were discarded while the application was not running, this will be called shortly after application:didFinishLaunchingWithOptions. // Use this method to release any resources that were specific to the discarded scenes, as they will not return. } func getNotificationSettings() { UNUserNotificationCenter.current().getNotificationSettings { settings in print("Notification settings: \(settings)") guard settings.authorizationStatus == .authorized else { return } DispatchQueue.main.async { UIApplication.shared.registerForRemoteNotifications() } } } func registerForPushNotifications() { //1 this handles all notification-related activities in the app including push notifications UNUserNotificationCenter.current() //2 this requests authorization to send the types of notifications specifies in the options .requestAuthorization( options: [.alert, .sound, .badge]) { [weak self] granted, _ in print("Permission granted: \(granted)") guard granted else { return } self?.getNotificationSettings() } } func application( _ application: UIApplication, didRegisterForRemoteNotificationsWithDeviceToken deviceToken: Data ) { let tokenParts = deviceToken.map { data in String(format: "%02.2hhx", data) } let token = tokenParts.joined() print("Device Token: \(token)") } func application( _ application: UIApplication, didFailToRegisterForRemoteNotificationsWithError error: Error ) { print("Failed to register: \(error)") } } - Build and run the application on an iPhone. Note that the push notification feature does not work with a simulator.
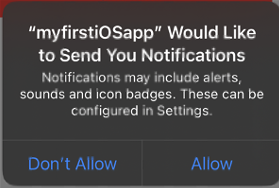
- On your phone, select “Allow” when prompted to allow push notifications.

Allow push notifications
- The debugger prints “Permission granted: true” if successful and returns the Device Token.

Device token


You have now configured an iOS application that can receive push notifications. Next, use the application to test sending push notifications with SNS using certificate-based authentication.
Creating a .p12 certificate to upload to SNS
After completing the previous step, you need:
- An app identifier
- A certificate signing request (CSR)
- An SSL certificate
Create an identifier
- Log in to your Apple Developer Account.
- Choose Certificates, Identifiers & Profiles.
- In the Identifiers section, choose the Add button (+).
- In the Register a new identifier section, choose App IDs and select Continue.
- In the Select a type section, choose App, and select Continue.
- For Description, type the application description.
- For Bundle ID, use the Bundle ID assigned to your application. You can find this ID under Signing & Capabilities of your application in XCode (see step 3 under “Creating an application”).
- Under Capabilities, choose Push Notifications.
- Select Continue. In the Confirm your App ID panel, check that all values were entered correctly. The identifier should match your app ID and bundle ID.
- Select Register to register the new app ID.
Create a certificate signing request (CSR)
- Open Keychain Access located in /Applications/Utilities or search for it on Finder.
- Once opened, choose the tab Keychain Access Tab (next to the Apple icon). Navigate to Certificate Assistant and choose Request a Certificate from a Certificate Authority.
- Enter the Username, Email Address, Common Name and leave CA Email Address empty.
- Choose Saved to disk and choose Continue.
Create a certificate
- Log in to your Apple Developer Account.
- Choose Certificates, Identifiers & Profiles.
- In the Certificate section, select Create new certificate.
- Under services, choose your certificate: Apple Push Notification service SSL (Sandbox)/Apple Push Notification service SSL (Sandbox & Production).
- Keep Platform as iOS and choose App ID (Identifier) created previously.
- Upload the Certificate Signing Request created in the previous step and Download your certificate.
Create .p12 certificate to upload to SNS
- Once your certificate.cer file is downloaded (for example, “aps_development.cer”), open it to show in keychain access. Find Apple Development iOS Push Services: (Your Identifier Name/App ID Name) and ensure that the file is placed in the “Login” folder.
- Right-click and choose Export as file format .p12 and choose Save. Optionally, set a password.
Creating a new platform application using APNs certificate-based authentication
Prerequisites
To implement APNs certificate-based authentication from SNS, you must have:
- An Apple Developer Account
- An iOS mobile application
For creating a new SNS Platform Application that is used to store Push Notification Platform credentials, configurations and related configurations:
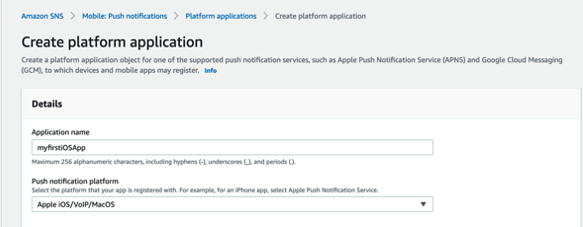
- Navigate to the SNS Console. Expand the Mobile menu and choose Create platform application.
- For the Application name field, enter an application name such as “myfirstiOSapp”. For Push Notification Platform, select Apple iOS/ VoIP/ macOS.

Create platform application
- Under the Apple Credentials section:
- If your application is in development, select the radio button for Used for development in sandbox. If your application is in production, uncheck Used for development in sandbox.
- For Push service, choose iOS and for Authentication method, choose Certificate.
- Under Certificate, select Choose file to upload the .p12 certificate file.
- If you configured a password while creating the certificate, enter this in the Certificate Password field.
- Choose Load Credentials from File to extract the Certificate and private key components.
- Event Notifications, Delivery Status Logging – Optional: Refer to the guide for enabling Delivery Status logs and the guide to set up Mobile Event related Notifications. More on this step can also be found in the best practices guide.

Enter Apple credentials
- Choose Create Platform Application. This creates a certificate-based authentication APNs Platform Application for iOS.

Create platform application


Creating a new platform endpoint using APNs token-based authentication
To send Push Notifications using SNS, a platform endpoint resource is created to store the destination address of the corresponding iOS application that is associated with the SNS platform application.
A destination address of a user’s device with the iOS application installed is identified by an unique device token. It is obtained once the app has registered successfully with APNs to receive push notifications. The details of the device token captured in the Platform Endpoint resource along with the configurations in the SNS Platform application are used in conjunction by the service to deliver a push notification message.
In the following steps, you create a new platform endpoint for a destination device that has the iOS application installed and is capable of receiving push notifications.
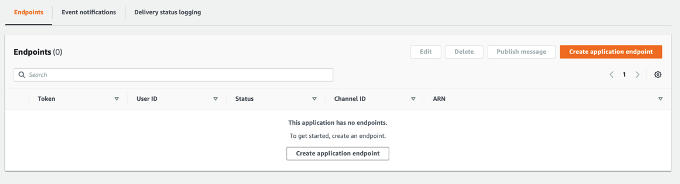
- Open your Platform Application. Choose Create Application Endpoint.

Application endpoints list
- Locate the Device token in the application logs of the iOS app provisioned earlier. Enter it in the Device Token Field.
- To store any additional arbitrary data for the endpoint, you can include in the User data field and choose Create application endpoint.

Create application endpoint
- Choose Create application endpoint and the details are shown on the console.

Application endpoint detail


Testing a push notification from your device
In this section, you test sending a push notification to your device.
- From the SNS console, navigate to your platform endpoint and choose Publish message.
- Enter a message to send. This example uses a custom payload that allows you to provide additional APNs headers.

Publish message
- Choose Publish message.
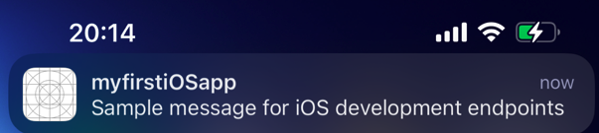
- The push notification is delivered to your device.

Notification

Conclusion
Developers send mobile push notifications for APNs certificate-based authentication by using a .p12 certificate to authenticate an Apple device endpoint. Certificate-based authentication ensures a secure connection through TLS (Transport Layer Security). The provider (SNS) initiates the request to APNs and validation from the provider and APNS is required to complete the secure connection.
Certificates expire annually and must be renewed to ensure that SNS can continue to deliver to the endpoint. In this post, you learn how to create an iOS application for APNs certificate-based authentication and integrate it with SNS to send push notifications to your device using a .p12 certificate to authenticate your application with the mobile endpoint.
To learn more about APNs certificate-based authentication with Amazon SNS, visit the Amazon SNS Developer Guide.
For more serverless learning resources, visit Serverless Land.