Post Syndicated from Veliswa Boya original https://aws.amazon.com/blogs/aws/aws-and-vmware-announce-vmware-cloud-on-aws-integration-with-amazon-fsx-for-netapp-ontap/
Our customers are looking for cost-effective ways to continue to migrate their applications to the cloud. VMware Cloud on AWS is a fully managed, jointly engineered service that brings VMware’s enterprise-class, software-defined data center architecture to the cloud. VMware Cloud on AWS offers our customers the ability to run applications across operationally consistent VMware vSphere-based public, private, and hybrid cloud environments by bringing VMware’s Software-Defined Data Center (SDDC) to AWS.
In 2021, we announced the fully managed shared storage service Amazon FSx for NetApp ONTAP. This service provides our customers with access to the popular features, performance, and APIs of ONTAP file systems with the agility, scalability, security, and resiliency of AWS, making it easier to migrate on-premises applications that rely on network-attached storage (NAS) appliances to AWS.
Today I’m excited to announce the general availability of VMware Cloud on AWS integration with Amazon FSx for NetApp ONTAP. Prior to this announcement, customers could only use VMware VSAN where they could scale datastore capacity with compute. Now, they can scale storage independently and SDDCs can be scaled with the additional storage capacity that is made possible by FSx for NetApp ONTAP.
Customers can already add storage to their SDDCs by purchasing additional hosts or by adding AWS native storage services such as Amazon S3, Amazon EFS, and Amazon FSx for providing storage to virtual machines (VMs) on existing hosts. You may be thinking that nothing about this announcement is new.
Well, with this amazing integration, our customers now have the flexibility to add an external datastore option to support their growing workload needs. If you are running into storage constraints or are continually met with unplanned storage demands, this integration provides a cost-effective way to incrementally add capacity without the need to purchase more hosts. By taking advantage of external datastores through FSx for NetApp ONTAP, you have the flexibility to add more storage capacity when your workloads require it.
An Overview of VMware Cloud on AWS Integration with Amazon FSx for NetApp ONTAP
There are two account connectivity options for enabling storage provisioned by FSx for NetApp ONTAP to be made available for mounting as a datastore to a VMware Cloud on AWS SDDC. Both options use a dedicated Amazon Virtual Private Cloud (Amazon VPC) for the FSx file system to prevent routing conflicts.
The first option is to create a new Amazon VPC under the same connected AWS account and have it connected with the VMware-owned Shadow VPC using VMware Transit Connect. The diagram below shows the architecture of this option:
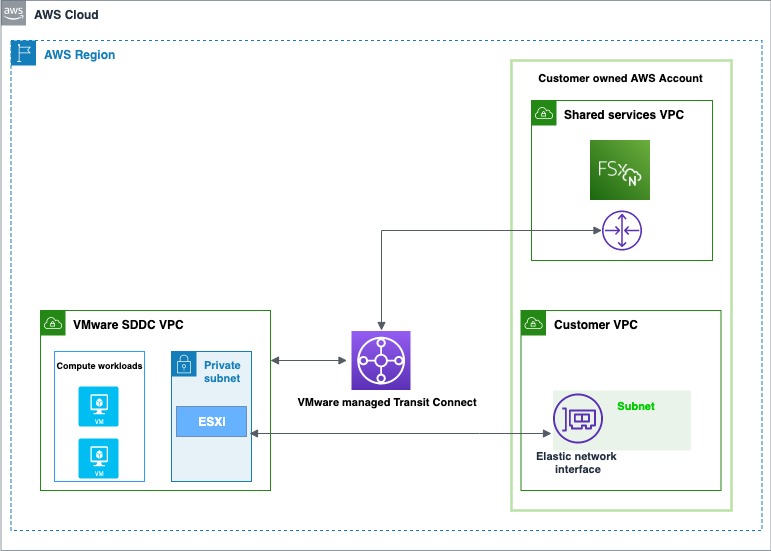
The first option is to enable storage under the same AWS connected account
The second option is to create a new AWS account, which by default comes with an Amazon VPC for the Region. Similar to the first option, VMware Transit Connect is used to attach this new VPC with the VMware-owned Shadow VPC. Here is a diagram showing the architecture of this option:
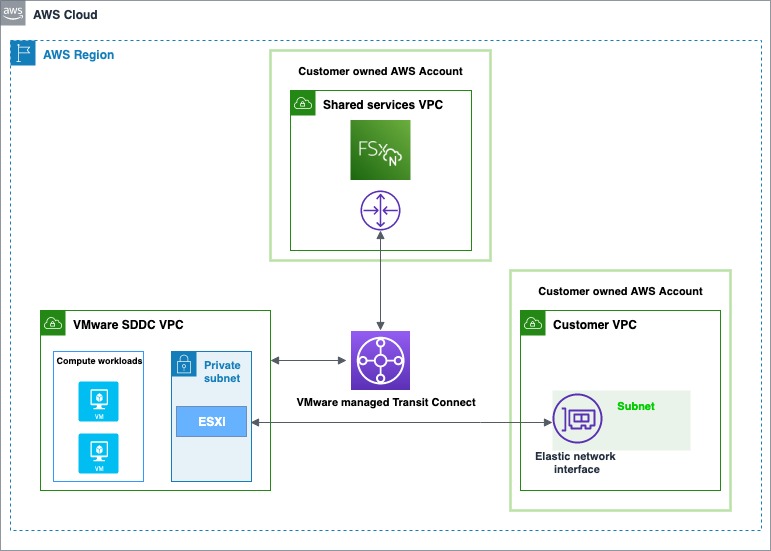
The second option is to enable storage by creating a new AWS account
Getting Started with VMware Cloud on AWS Integration with Amazon FSx for NetApp ONTAP
The first step is to create an FSx for NetApp ONTAP file system in your AWS account. The steps that you will follow to do this are the same, whether you’re using the first or second path to provision and mount your NFS datastore.
- Open the Amazon FSx service page.
- On the dashboard, choose Create file system to start the file system creation wizard.
- On the Select file system type page, select Amazon FSx for NetApp ONTAP, and then click Next which takes you to the Create ONTAP file system page. Here select the Standard create method.
The following video shows a complete guide on how to create an FSx for NetApp ONTAP:
The same process can be found in this FSx for ONTAP User Guide.
After the file system is created, locate the NFS IP address under the Storage virtual machines tab. The NFS IP address is the floating IP that is used to manage access between file system nodes, and it is required for configuring VMware Transit Connect.

Location of the NFS IP address under the Storage virtual machines tab – AWS console

Location of the NFS IP address under the Storage virtual machines tab – AWS console
You are done with creating the FSx for NetApp ONTAP file system, and now you need to create an SDDC group and configure VMware Transit Connect. In order to do this, you need to navigate between the VMware Cloud Console and the AWS console.
Sign in to the VMware Cloud Console, then go to the SDDC page. Here locate the Actions button and select Create SDDC Group. Once you’ve done this, provide the required data for Name (in the following example I used “FSx SDDC Group” for the name) and Description. For Membership, only include the SDDC in question.
After the SDDC Group is created, it shows up in your list of SDDC Groups. Select the SDDC Group, and then go to the External VPC tab.

External VPC tab Add Account – VMC Console
Once you are in the External VPC tab, click the ADD ACCOUNT button, then provide the AWS account that was used to provision the FSx file system, and then click Add.
Now it’s time for you to go back to the AWS console and sign in to the same AWS account where you created your Amazon FSx file system. Here navigate to the Resource Access Manager service page and click the Accept resource share button.

Resource Access Manager service page to access the Accept resource share button – AWS console
Return to the VMC Console. By now, the External VPC is in an ASSOCIATED state. This can take several minutes to update.
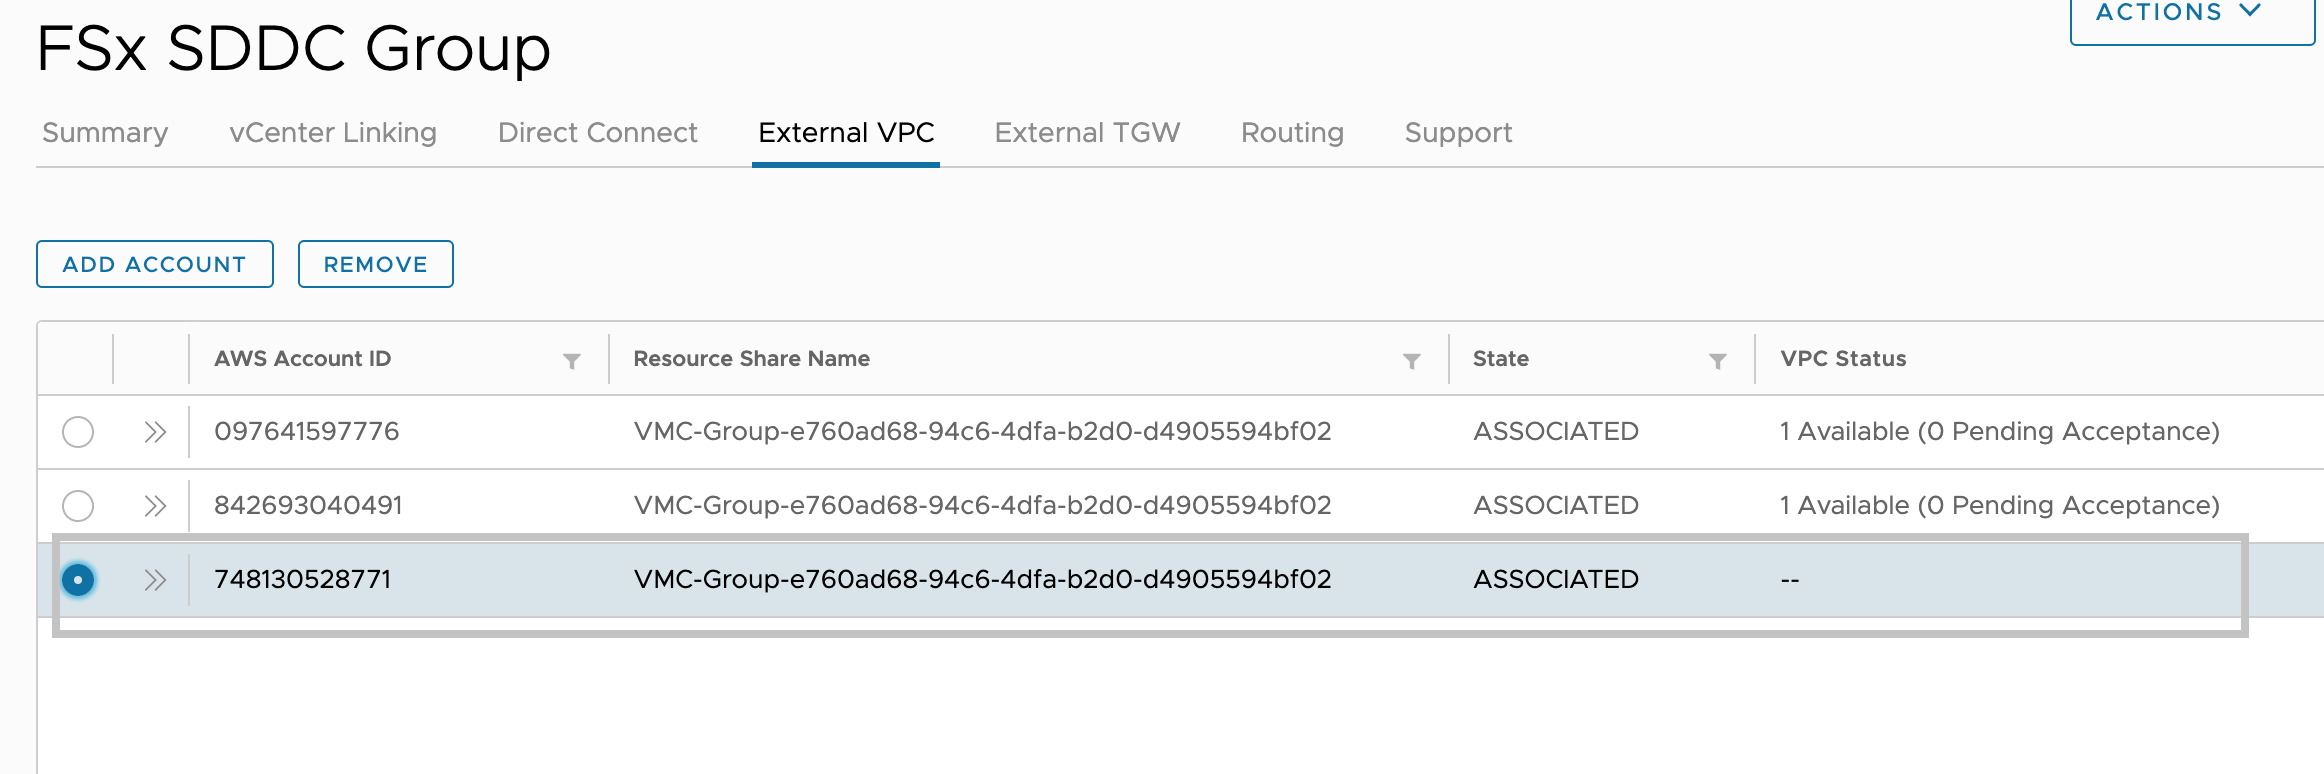
External VPC tab – VMC Console
Next, you need to attach a Transit Gateway to the VPC. For this, navigate back to the AWS console. A step-by-step guide can be found in the AWS Transit Gateway documentation.
The following is an example that represents a typical architecture of a VPC attached to a Transit Gateway:
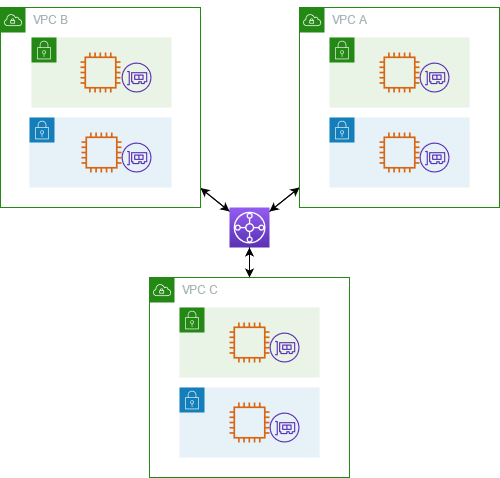
A typical architecture of a VPC attached to a Transit Gateway
You are almost at the end of the process. You now need to accept the transit gateway attachment and for this you will navigate back to the VMware Cloud Console.
Accept the Transit Gateway attachment as follows:
- Navigating back to the SDDC Group, External VPC tab, select the AWS account ID used for creating your FSx NetApp ONTAP, and click Accept. This process may take a few minutes.
- Next, you need to add the routes so that the SDDC can see the FSx file system. This is done on the same External VPC tab, where you will find a table with the VPC. In that table, there is a button called Add Routes. In the Add Route section, add two routes:
- The CIDR of the VPC where the FSx file system was deployed.
- The floating IP address of the file system.
- Click Done to complete the route task.
In the AWS console, create the route back to the SDDC by locating VPC on the VPC service page and navigating to the Route Table as seen below.

VPC service page Route Table navigation – AWS console
Ensure that you have the correct inbound rules for the SDDC Group CIDR by locating Security Groups under VPC and finding the Security Group that is being used (it should be the default one) to allow the inbound rules for SDDC Group CIDR.

Security Groups under VPC that are being used to allow the inbound rules for SDDC Group CIDR
Lastly, mount the NFS Datastore in the VMware Cloud Console as follows:
- Locate your SDDC.
- After selecting the SDDC, Navigate to the Storage Tab.
- Click Attach Datastore to mount the NFS volume(s).
- The next step is to select which hosts in the SDDC to mount the datastore to and click Mount to complete the task.
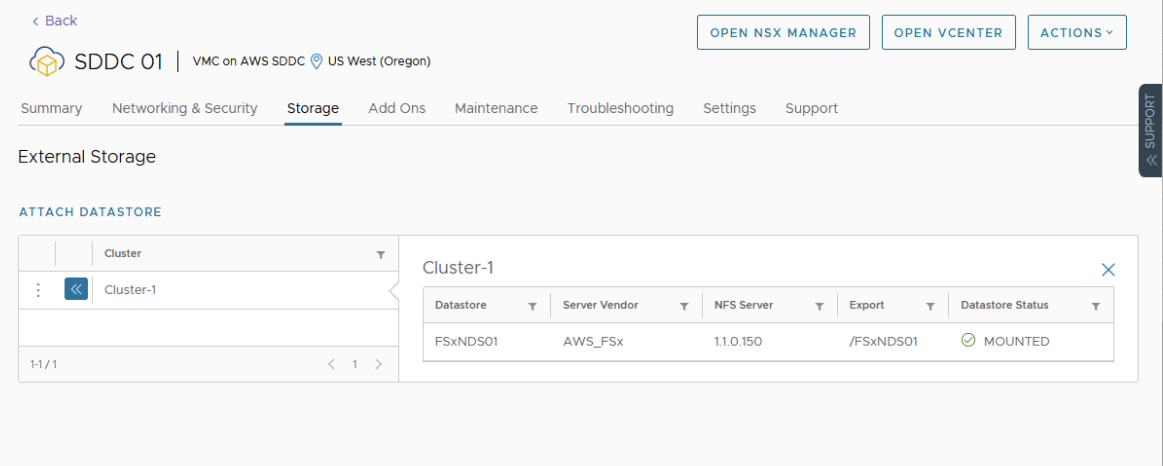
Attach A New Datastore
Available Today
Amazon FSx for NetApp ONTAP is available today for VMware Cloud on AWS customers in US East (Ohio), US East (N. Virginia), US West (Oregon), Asia Pacific (Mumbai), Asia Pacific (Seoul), Asia Pacific (Singapore), Asia Pacific (Sydney), Asia Pacific (Tokyo), Canada (Central), Europe (Frankfurt), Europe (Ireland), Europe (London), Europe (Milan), Europe (Paris), Europe (Stockholm), South America (São Paulo), AWS GovCloud (US-East), and AWS GovCloud (US-West).
– Veliswa x