Post Syndicated from Danilo Poccia original https://aws.amazon.com/blogs/aws/introducing-aws-resource-explorer-quickly-find-resources-in-your-aws-account/
Looking for a specific Amazon Elastic Compute Cloud (Amazon EC2) instance, Amazon Elastic Container Service (Amazon ECS) task, or Amazon CloudWatch log group can take some time, especially if you have many resources and use multiple AWS Regions.
Today, we’re making that easier. Using the new AWS Resource Explorer, you can search through the AWS resources in your account across Regions using metadata such as names, tags, and IDs. When you find a resource in the AWS Management Console, you can quickly go from the search results to the corresponding service console and Region to start working on that resource. In a similar way, you can use the AWS Command Line Interface (CLI) or any of the AWS SDKs to find resources in your automation tools.
Let’s see how this works in practice.
Using AWS Resource Explorer
To start using Resource Explorer, I need to turn it on so that it creates and maintains the indexes that will provide fast responses to my search queries. Usually, the administrator of the account is the one taking these steps so that authorized users in that account can start searching.
To run a query, I need a view that gives access to an index. If the view is using an aggregator index, then the query can search across all indexed Regions.

If the view is using a local index, then the query has access only to the resources in that Region.

I can control the visibility of resources in my account by creating views that define what resource information is available for search and discovery. These controls are not based only on resources but also on the information that resources bring. For example, I can give access to the Amazon Resource Names (ARNs) of all resources but not to their tags which might contain information that I want to keep confidential.
In the Resource Explorer console, I choose Enable Resource Explorer. Then, I select the Quick setup option to have visibility for all supported resources within my account. This option creates local indexes in all Regions and an aggregator index in the selected Region. A default view with a filter that includes all supported resources in the account is also created in the same Region as the aggregator index.

With the Advanced setup option, I have access to more granular controls that are useful when there are specific governance requirements. For example, I can select in which Regions to create indexes. I can choose not to replicate resource information to any other Region so that resources from each AWS Region are searchable only from within the same Region. I can also control what information is available in the default view or avoid the creation of the default view.
With the Quick setup option selected, I choose Go to Resource Explorer. A quick overview shows the progress of enabling Resource Explorer across Regions. After the indexes have been created, it can take up to 36 hours to index all supported resources, and search results might be incomplete until then. When resources are created or deleted, your indexes are automatically updated. These updates are asynchronous, so it can take some time (usually a few minutes) to see the changes.
Searching With AWS Resource Explorer
After resources have been indexed, I choose Proceed to resource search. In the Search criteria, I choose which View to use. Currently, I have the default view selected. Then, I start typing in the Query field to search through the resources in my AWS account across all Regions. For example, I have an application where I used the convention to start resource names with my-app. For the resources I created manually, I also added the Project tag with value MyApp.
To find the resource of this application, I start by searching for my-app.

The results include resources from multiple services and Regions and global resources from AWS Identity and Access Management (IAM). I have a service, tasks, and a task definition from Amazon ECS, roles and policies from AWS IAM, log groups from CloudWatch. Optionally, I can filter results by Region or resource type. If I choose any of the listed resources, the link will bring me to the corresponding service console and Region with the resource selected.

To look for something in a specific Region, such as Europe (Ireland), I can restrict the results by adding region:eu-west-1 to the query.

I can further restrict results to Amazon ECS resources by adding service:ecs to the query. Now I only see the ECS cluster, service, tasks, and task definition in Europe (Ireland). That’s the task definition I was looking for!

I can also search using tags. For example, I can see the resources where I added the MyApp tag by including tag.value:MyApp in a query. To specify the actual key-value pair of the tag, I can use tag:Project=MyApp.

Creating a Custom View
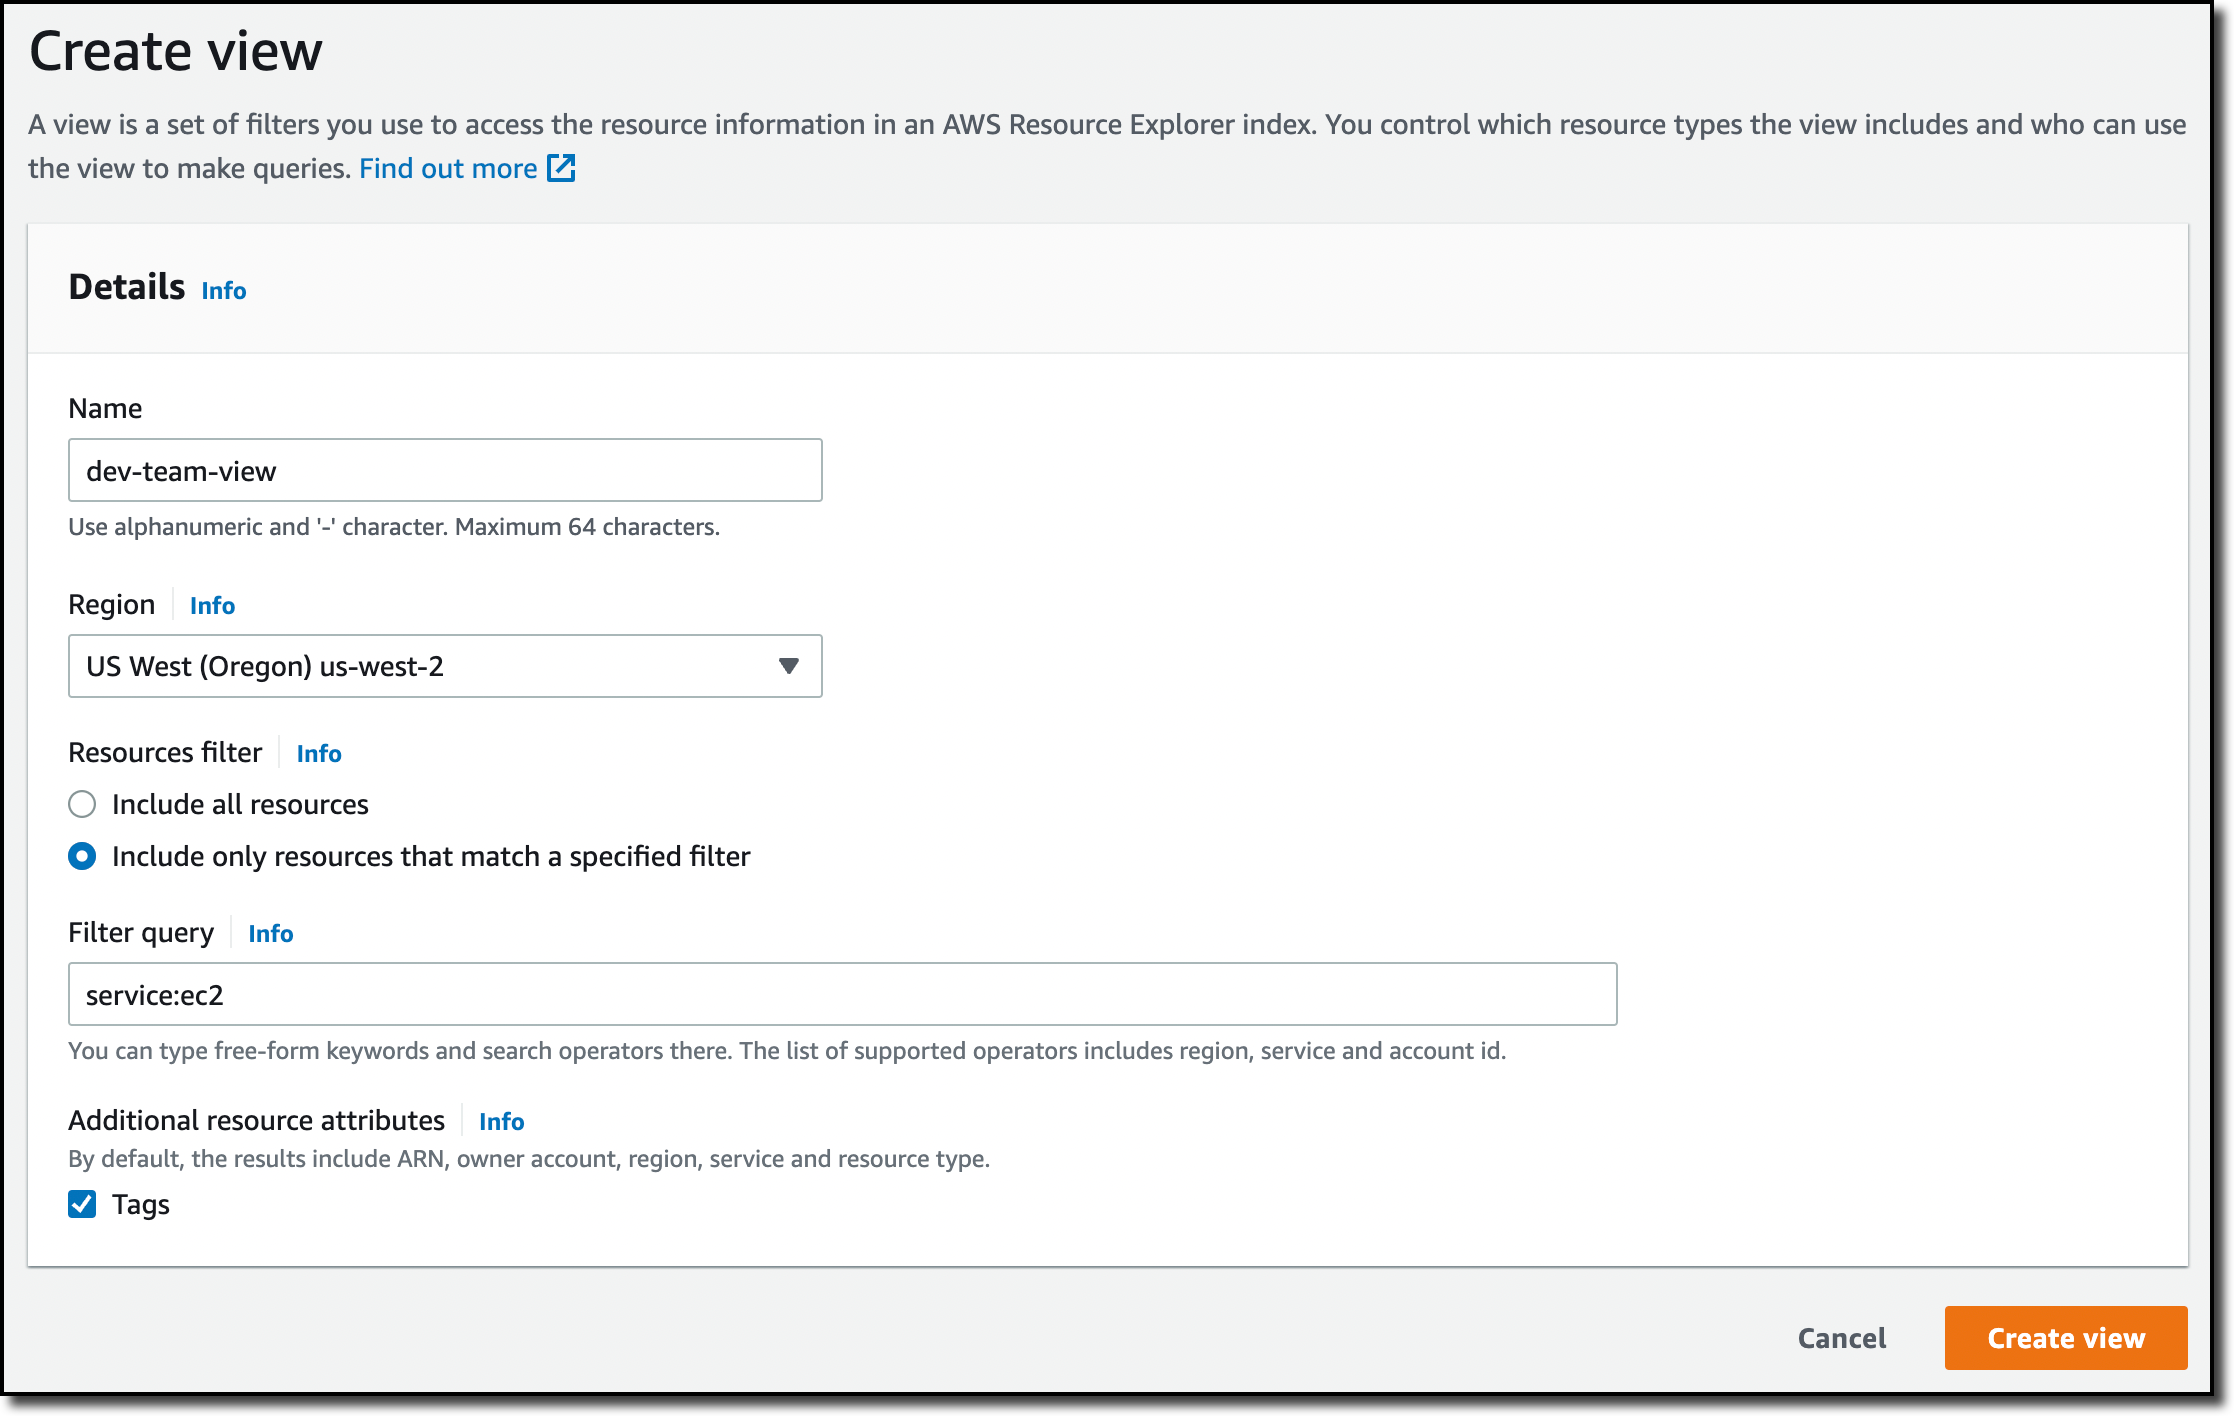
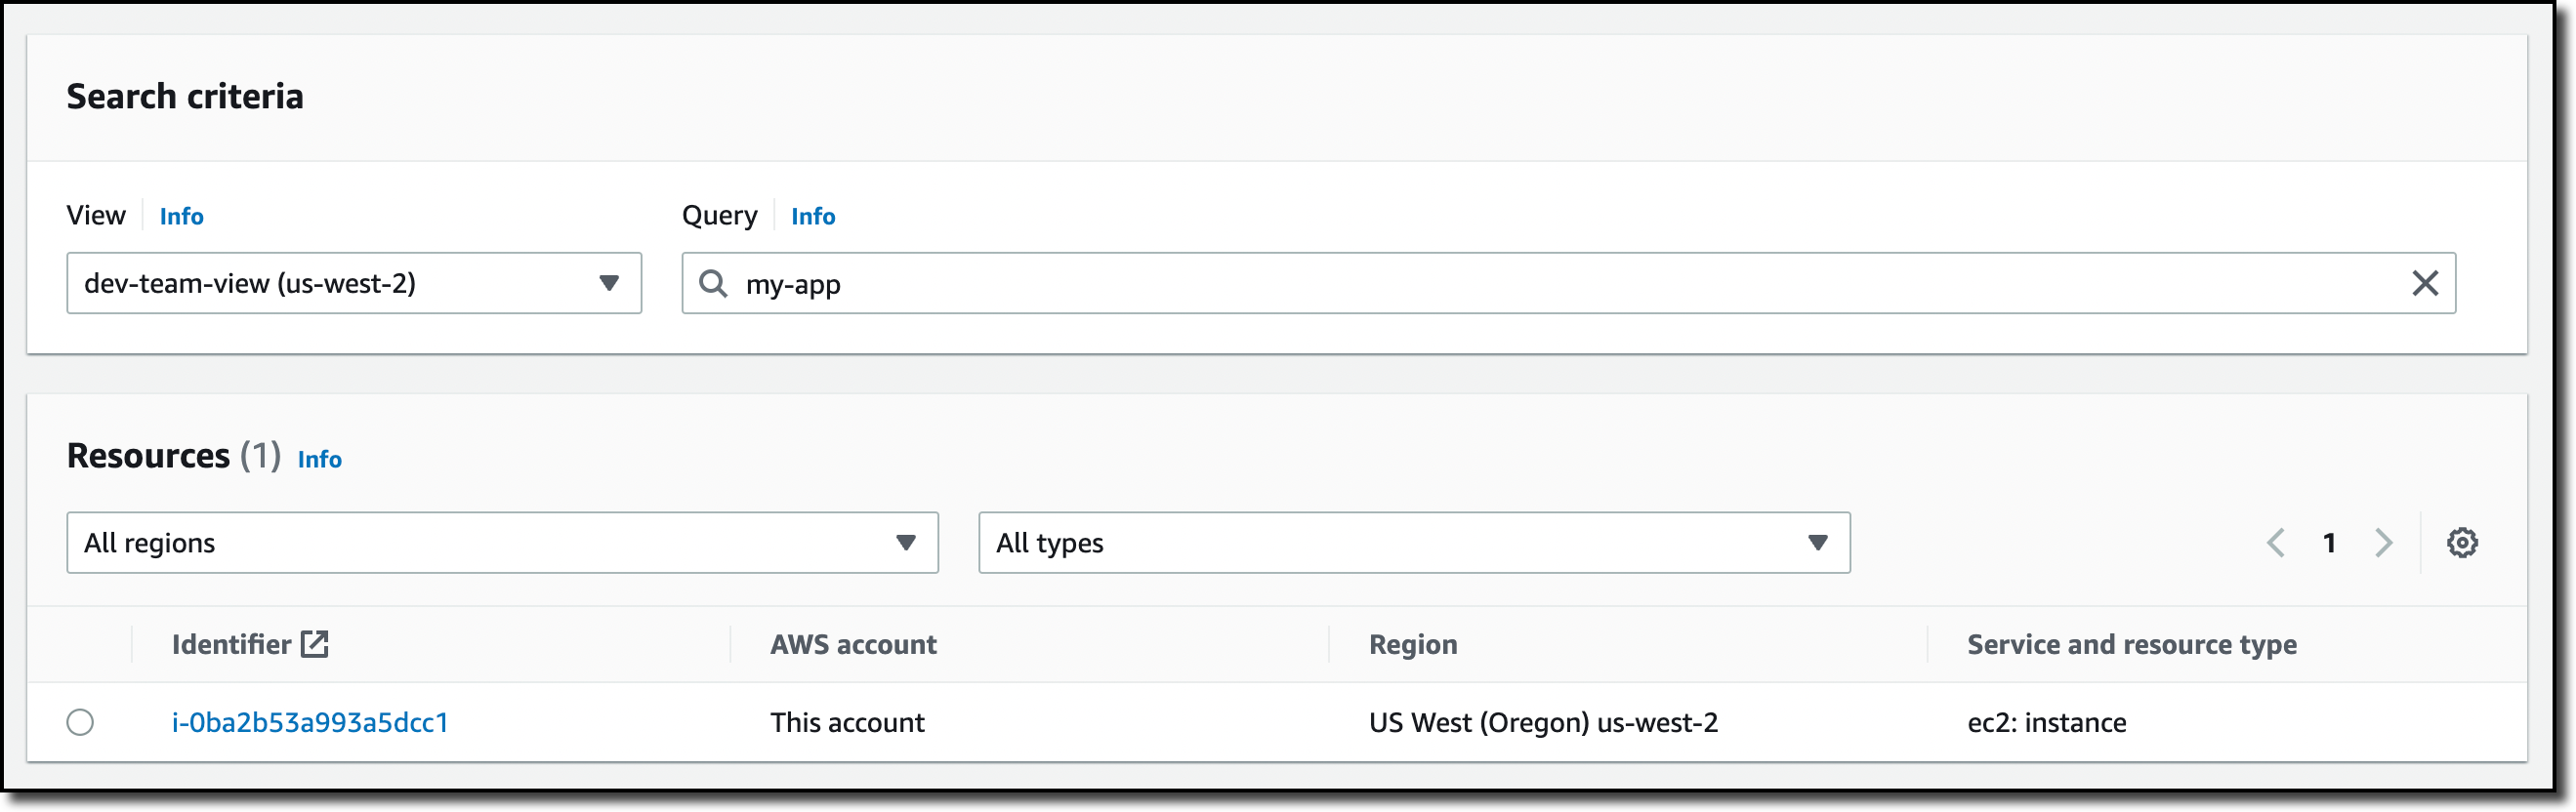
Sometimes you need to control the visibility of the resources in your account. For example, all the EC2 instances used for development in my account are in US West (Oregon). I create a view for the development team by choosing a specific Region (us-west-2) and filtering the results with service:ec2 in the query. Optionally, I could further filter results based on resource names or tags. For example, I could add tag:Environment=Dev to only see resources that have been tagged to be in a development environment.
Now I allow access to this view to users and roles used by the development team. To do so, I can attach an identity-based policy to the users and roles of the development team. In this way, they can only explore and search resources using this view.
Unified Search in the AWS Management Console
After I turn Resource Explorer on, I can also search through my AWS resources in the search bar at the top of the Management Console. We call this capability unified search as it gives results that include AWS services, features, blogs, documentation, tutorial, events, and more.
To focus my search on AWS resources, I add /Resources at the beginning of my search.

Note that unified search automatically inserts a wildcard character (*) at the end of the first keyword in the string. This means that unified search results include resources that match any string that starts with the specified keyword.

The search performed by the Query text box on the Resource search page in the Resource Explorer console does not automatically append a wildcard character but I can do it manually after any term in the search string to have similar results.
Unified search works when I have the default view in the same Region that contains the aggregator index. To check if unified search works for me, I look at the top of the Settings page.

Availability and Pricing
You can start using AWS Resource Explorer today with a global console and via the AWS Command Line Interface (CLI) and the AWS SDKs. AWS Resource Explorer is available at no additional charge. Using Resource Explorer makes it much faster to find the resources you need and use them in your automation processes and in their service console.
Discover and access your AWS resources across all the Regions you use with AWS Resource Explorer.
— Danilo