Post Syndicated from Vesselin Tzvetkov original https://aws.amazon.com/blogs/security/apply-the-principle-of-separation-of-duties-to-shell-access-to-your-ec2-instances/
In this blog post, we will show you how you can use AWS Systems Manager Change Manager to control access to Amazon Elastic Compute Cloud (Amazon EC2) instance interactive shell sessions, to enforce separation of duties. Separation of duties is a design principle where more than one person’s approval is required to conclude a critical task, and it is an important part of the AWS Well-Architected Framework. You will be using AWS Systems Manager Session Manager in this post to start a shell session in managed EC2 instances.
To get approval, the operator requests permissions by creating a change request for a shell session to an EC2 instance. An approver reviews and approves the change request. The approver and requestor cannot be the same Identity and Access Management (IAM) principal. Upon approval, an AWS Systems Manager Automation runbook is started. The Automation runbook adds a tag to the operator’s IAM principal that allows it to start a shell in the specified targets. By default, the operator needs to start the session within 10 minutes of approval (although the validity period is configurable). After the 10 minutes elapse, the Automation runbook removes the tag from the principal, which means that the permissions to start new sessions are revoked.
To implement the solution described in this post, you use attribute-based access control (ABAC) based policy. In order to start a Systems Manager session, the operator’s IAM principal must have the tag key SecurityAllowSessionInstance, and the tag value set to the target EC2 instance ID. All operator principals have attached the same managed policy, which allows the session to start only if the tag is present and the value is equal to the instance ID. Figure 1 shows an example in which the IAM principal tag SecurityAllowSessionInstance has the value i-1234567890abcdefg, which is the same as the instance ID.
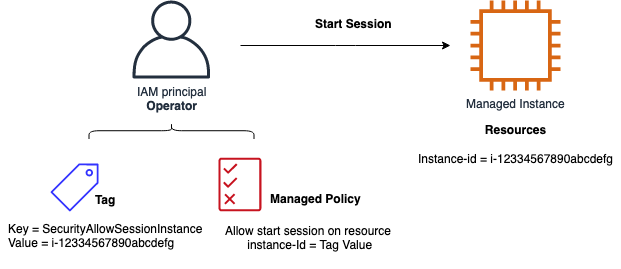
Figure 1: Tag and managed policy pattern
In this post, we will take you through the following steps:
- Review the architecture of the solution. (See the Architecture section.)
- Set up Systems Manager and Change Manager in the console.
- Deploy an AWS CloudFormation template that will provision the following:
- A change management template AllowSsmSessionStartTemplate to request permission for a Session Manager shell session on a specified EC2 instance.
- The Systems Manager Automation runbook with three steps that: adds a tag to the principal; waits 10 minutes (configurable); and removes the tag. The tag key is SecurityAllowSessionInstance.
- An IAM managed policy to be added to an IAM principal, which allows starting a Systems Manager session only if the tag AllowStartSsmSessionBasedOnIamTags is present.
- An Amazon SNS topic change-manager-ssm-approval where approvers can get notification about requests.
- An IAM role named SsmSessionControlChangeMangerRole, to be used for the Systems Manager Automation runbook.
Note: Before you use the change template, you will approve the change management template in the AWS Management Console (one time).
- Perform simple test cases to demonstrate how an operator can obtain permission and start a session in a managed instance.
- Perform status monitoring.
You can use this solution across your AWS Organizations to give you the benefit of centrally managing change-related tasks in one member account, which you specify to be the delegated administrator account. For more information about how to set this up, see Setting up Change Manager for an organization.
Note: The operator can have multiple sessions in different EC2 instances simultaneously, but the sessions must be approved and started one after another because of tag overwrite on approval.
For more information about change management actions, including approvals and starting the runbook, see Auditing and logging Change Manager activity in the AWS Systems Manager User Guide.
Architecture
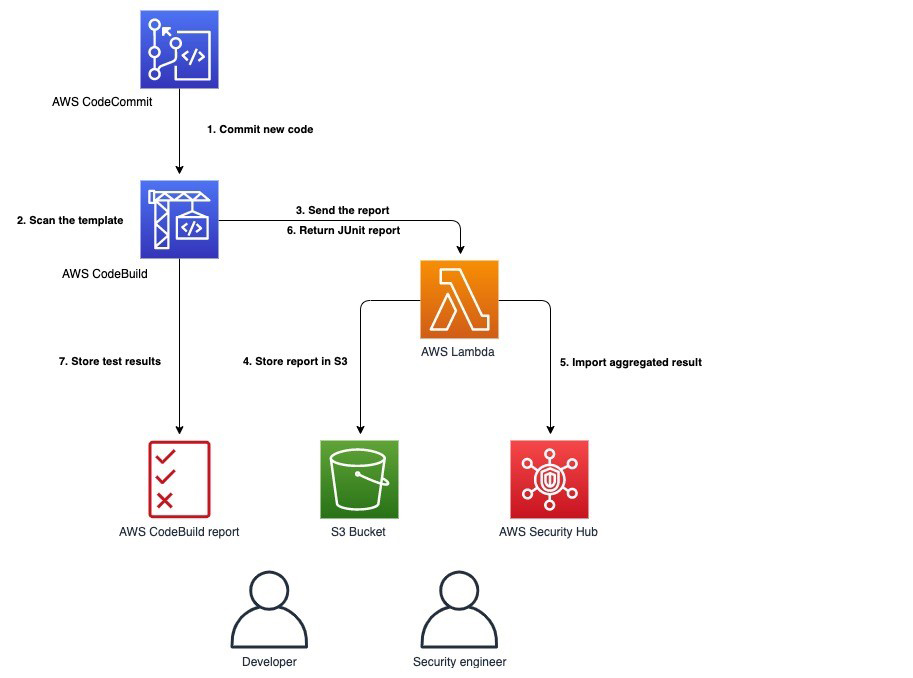
The architecture of this solution is shown in Figure 2.
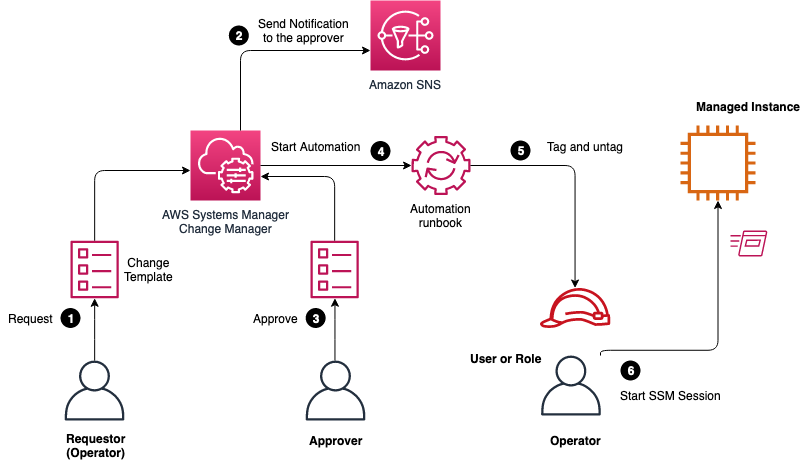
Figure 2: Solution architecture
The main steps shown in Figure 2 are the following:
- Request: The requestor (which can be the operator) creates a change request in Systems Manager Change Manager and selects the template AllowSsmSessionStartTemplate. You need to provide the following mandatory parameters: name of change, approvals (users, group, or roles), IAM role for the execution of change, target account, EC2 instance ID, operator’s principal type (user or role), and operator’s principal name.
- Send notification: The notification is sent to the Amazon SNS topic change-manager-ssm-approval for the new change request.
- Approve: The approver reviews and approves the request.
- Start automation: The Automation runbook AllowStartSsmSession is started at the time specified in the change request.
- Tag: The operator’s IAM principal is tagged with the key SecurityAllowSessionInstance. After 10 minutes, the runbook completes by removing the tag from the IAM principal.
- Start session: The operator can start a session to the instance by using Systems Manager Session Manager within 10 minutes of approval. A notification is sent to the SNS topic change-manager-ssm-approval, where the operator can also subscribe to be notified.
Roles and permissions
The provided managed policy AllowStartSsmSessionBasedOnIamTags gives permission to start the Systems Manager session when the instance ID is equal to principal tag, and additionally to terminate the session. The managed policy allows the operator to keep an already active session beyond the approval interval and terminate it as preferred. Resumption of the session is not supported, and the operator will need to start a new session instead.
WARNING: You should validate that the operator principal (which is an IAM user or role) does not have permissions on the actions ssm:StartSession, ssm:TerminateSession, ssm:ResumeSession outside the managed policy used in this solution.
WARNING: It is very important that the operator must not have permission to change the relevant IAM roles, users, policies, or principal tags, so that the operator cannot bypass the approval process.
Set up Systems Manager and Change Manager
You need to initially activate Systems Manager and Systems Manager Change Manager in your account. If you have already activated them, you can skip this section.
Note: You should enable Systems Manager as described in Setting up AWS Systems Manager, according to your company needs. The minimal requirement is to set up the service-linked role AWSServiceRoleForAmazonSSM that will be used by Systems Manager.
To create the service-linked IAM role
- Open the IAM console. In the navigation pane, choose Roles, then choose Create role.
- For the AWS Service role type, choose Systems Manager.
- Choose the use case Systems Manager – Inventory and Maintenance Windows, then choose Next: Permissions.
- Keep all default values, choose Next: Tags, and then choose Next: Review.
- Review the role and then choose Create role.
For more information, see Creating a service-linked role for Systems Manager.
Next, you set up Systems Manager Change Manager as described in Setting up Change Manager. Your specifics will vary depending on whether you use AWS Organizations or a single account.
Define the IAM users or groups that are allowed to approve change templates
Every change template should be approved before use (optional). The approval can be done by users and groups. If you use IAM roles in your organization, you will need a temporary user, which you can set up as described in Creating IAM users (console). Alternatively, you can use the change templates without explicit approval, as described later in this section.
To add reviewers for change templates
- In the AWS Systems Manager console, choose Change Manager, choose Settings, then choose Template reviewers.
- On the Select IAM approvers page, review the Users tab and Groups tab, as shown in Figure 3, and add approvers if necessary.
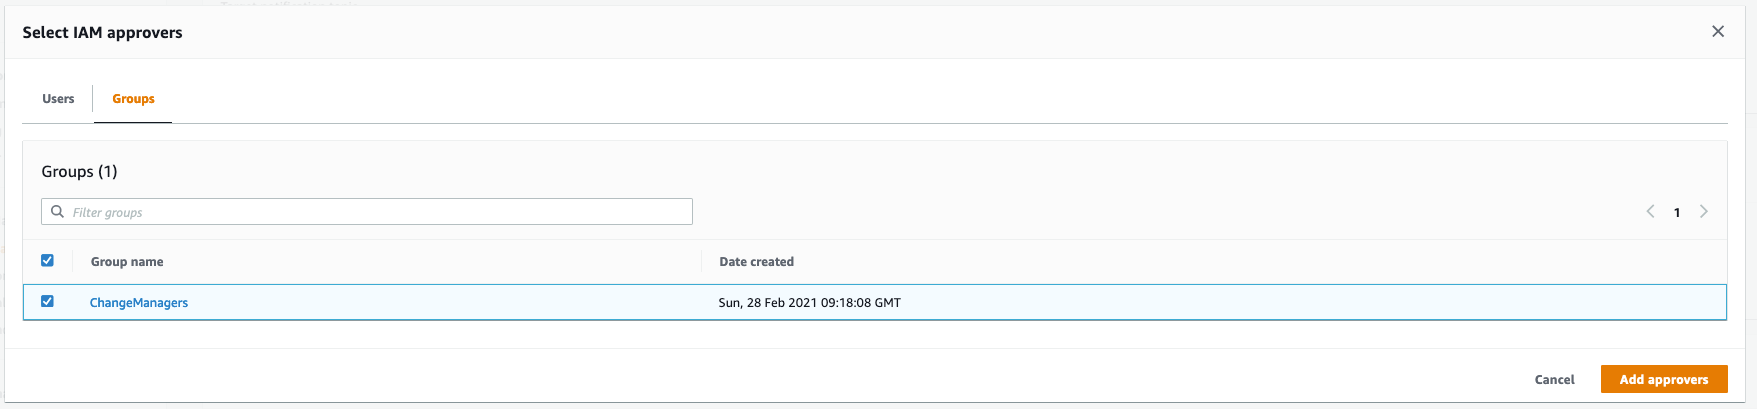
Figure 3: Change Manger settings
If you prefer not to explicitly review and approve the change template before use, you must turn off approval as follows.
To turn off approval of change templates before use
- In the Systems Manager console, choose Change Manager, then choose Settings.
- Under Best practices, set the option Require template review and approval before use to disabled.
Deploy the solution
After you complete the setup, you will perform the following steps one time in your selected account and AWS Region. The solution manages the permissions in all Regions you select, because IAM roles and policies are global entities.
To launch the stack
- Choose the following Launch Stack button to open the AWS CloudFormation console pre-loaded with the template. You must sign in to your AWS account in order to launch the stack in the required Region.

- On the CloudFormation launch panel, specify the parameter Approval validity in minutes to correspond to your company policy, or keep the default value of 10 minutes.

(Optional) To approve the template
- To request approval of the Change Manager template, in the Systems Manager console, choose Change Manager, and then choose Change templates. Select AllowSsmSessionStartTemplate and submit for approval.
- To approve the Change Manager template, sign in to the Systems Manager console as the required approver user or group. Choose Change Manager, and then choose Change templates. Select AllowSsmSessionStartTemplate and choose Actions, Approve template. For more information, see Reviewing and approving or rejecting change templates.
- (Optional) The Systems Manager session approvers should subscribe to the SNS topic change-manager-ssm-approval, to get notification on new requests.
Now you’re ready to use the solution.
Test the solution
Next, we’ll demonstrate how you can test the solution end-to-end by doing the following: creating two IAM roles (Operator and Approver), launching an EC2 instance, requesting access by Operator to the instance, approving the request by Approver, and finally starting a Systems Manager session on the EC2 instance by Operator. You will run the test in the single account where you deployed the solution. We assume that you have set up Systems Manager as described in the Set up Systems Manager and Change Manager section.
Note: If you’re not using IAM roles in your organization, you can use IAM users instead, as described in Creating IAM users (console).
To prepare to test the solution
- Open the IAM console and create an IAM role named Operator in your account, and attach the following managed policies: ReadOnlyAccess (AWS managed) and AllowStartSsmSessionBasedOnIamTags (which you created in this post). For more information, see Creating IAM roles
- Create a second IAM role named Approver in your account, and attach the following AWS managed policies: ReadOnlyAccess and AmazonSSMFullAccess.
- Create an IAM role named EC2Role with a trust policy to the EC2 service (ec2.amazonaws.com) and attach the AWS managed policy AmazonEC2RoleforSSM. Alternatively, you can confirm that your existing EC2 instances have the AmazonEC2RoleforSSM policy attached to their role. For more information, see Creating a role for an AWS service (console).
- Open the Amazon EC2 console and start a test EC2 instance of type Amazon Linux 2 with the IAM role EC2Role that you created in step 3. You can keep the default values for all the other parameters. You don’t need to set up VPC Security Group rules to allow inbound SSH to the EC2 instance. Take note of the instance-id, because you will need it later. For more information, see Launch an Amazon EC2 Instance.
- Open the Amazon SNS console. Under Simple Notification Service, for Topics, subscribe to the SNS topic change-manager-ssm-approval. For more information, see Subscribing to an Amazon SNS topic.
To do a positive test of the solution
- Open the Systems Manager console, sign in as Operator, choose Change Manager, and create a change request.
- Select the template AllowSsmSessionStartTemplate.
- On the Specify change details page, enter a name and description, and select the IAM role Approver as approver.
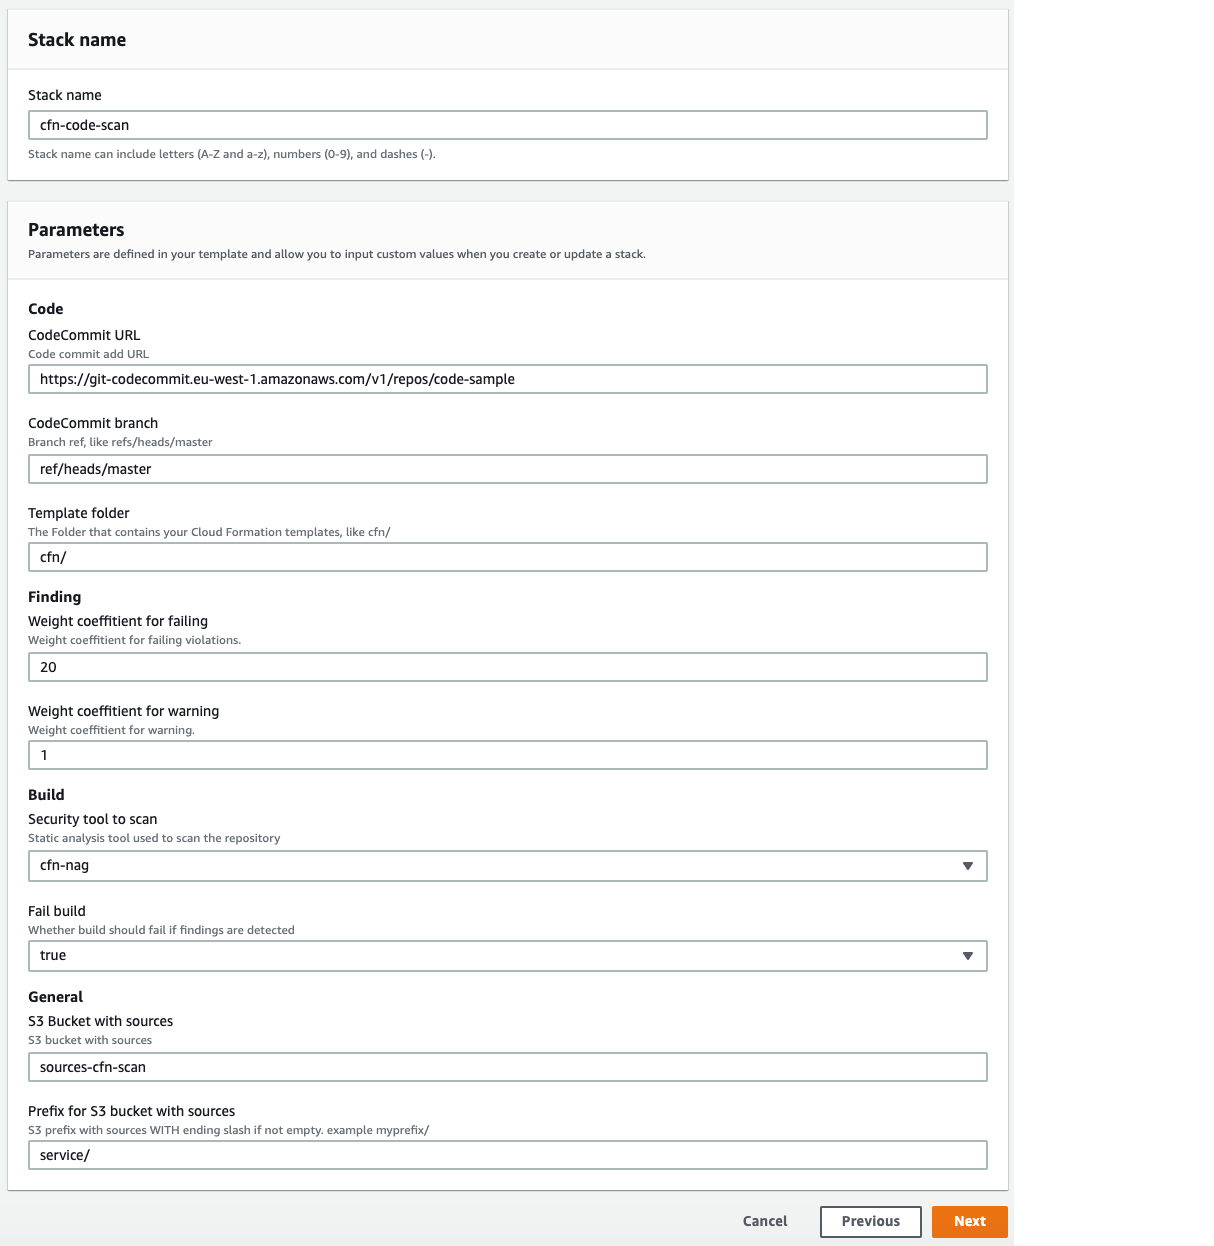
- For Target notification topic, select the SNS topic change-manager-ssm-approval, as shown in Figure 4. Choose Next.

Figure 4: Creating a change request
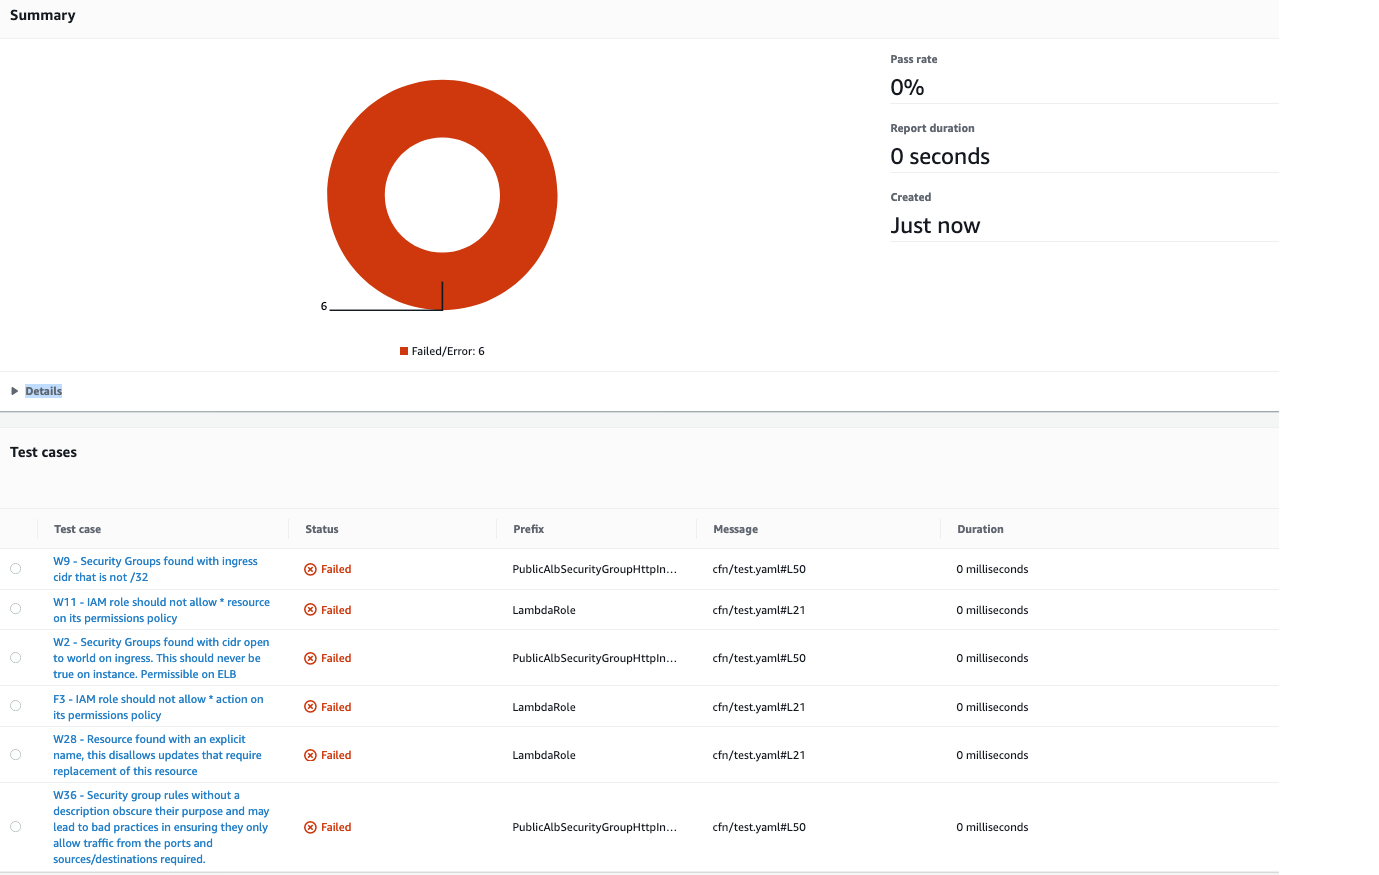
- On the Specify parameters page, provide the automation IAM role SsmSessionControlChangeMangerRole, the instance-id you noted earlier, the principal name Operator, and the principal type role, as shown in Figure 5.

Figure 5: Specify parameters for the change request
- Next, sign in as Approver. In the Systems Manager console, choose Change Manager.
- On the Requests tab, as shown in Figure 6, select the request and choose Approve. (For more information, see Reviewing and approving or rejecting change requests (console).) The Automation runbook will be started.

Figure 6: Change Manager overview
- Sign in as Operator. Within the approval validity time that you provided in the template (10 minutes is the default), connect to the instance by using Systems Manager as described in Start a session.When the session has started and you see Unix shell at the instance, the positive test is done.


Next, you can do a negative test, to demonstrate that access isn’t possible after the approval validity period (10 minutes) has elapsed.
To do a negative test of the solution
- Do steps 1 through 7 of the previous procedure, if you haven’t already done so.
- Sign in as IAM role Operator. Wait several minutes longer than the approval validity time (10-minute default) and connect to the instance by using Systems Manager as described in Start a session.You will see that the IAM role Operator doesn’t have permission to start a session.
Clean up the resources
After the tests are finished, terminate the EC2 instance to avoid incurring future costs and remove the roles if these are no longer needed.
Status monitoring
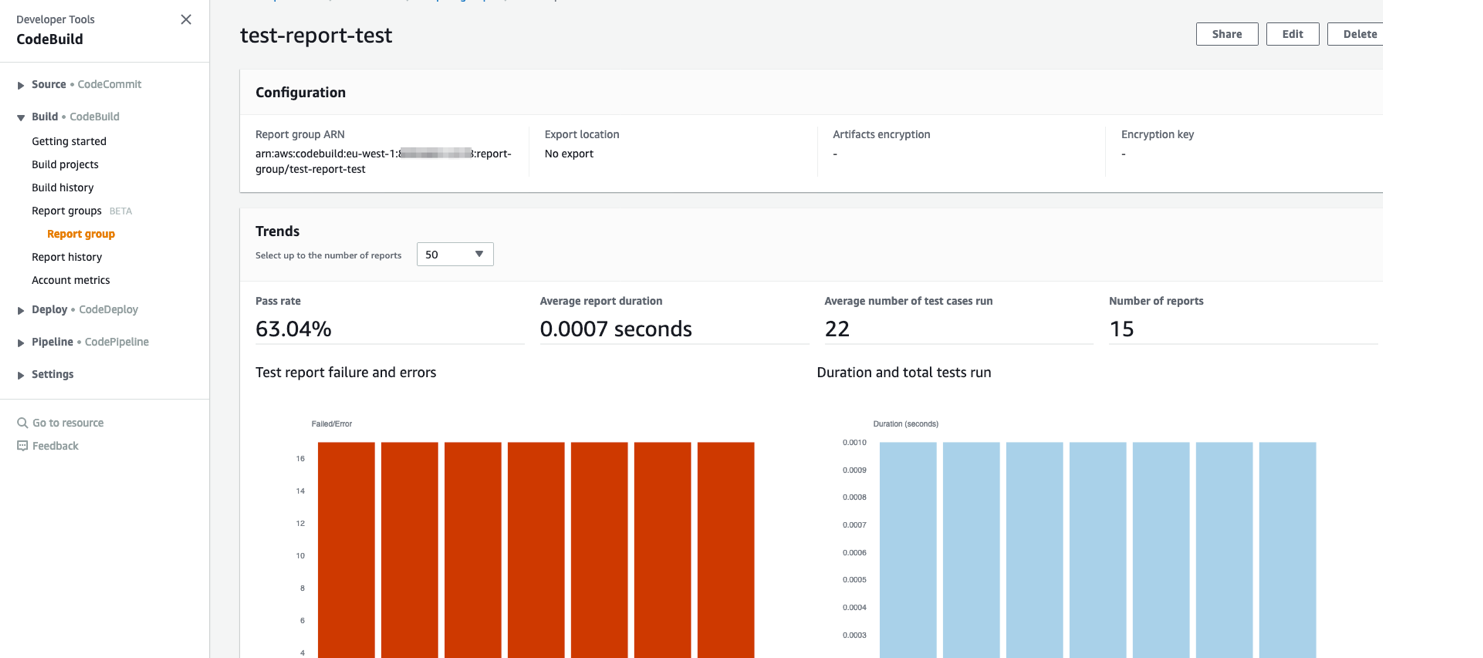
In the Systems Manager console, on the Change Manager page, on the Requests tab, you can find all service requests and their status, and a link to the log of the runbook, as shown in Figure 7.
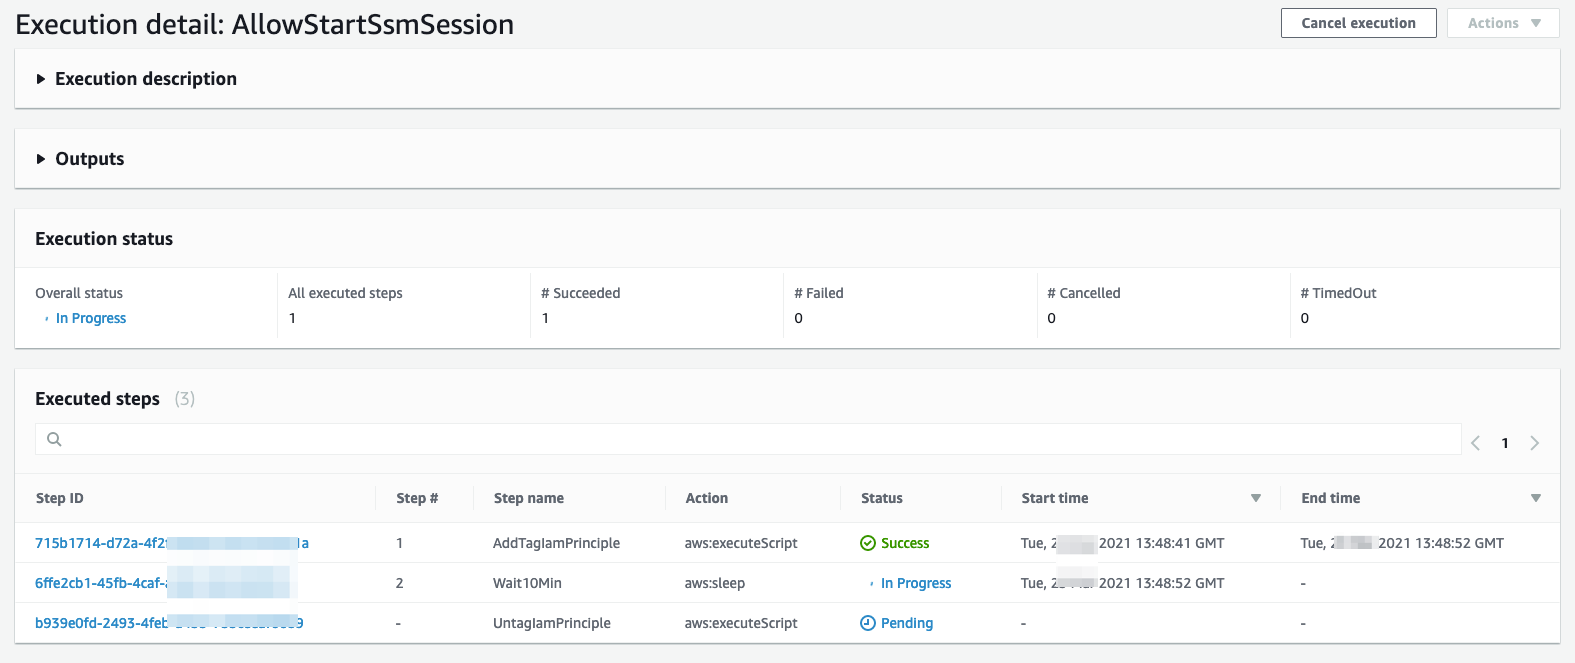
Figure 7: Change Manger runbook log
In the example shown in Figure 7, you can see the status of the following steps in the Automation runbook: tagging the principal, waiting, and removing the principal tag. For more information about audit and login, see Auditing and logging Change Manager activity.
Conclusion
In this post, you‘ve learned how you can enforce separation of duties by using an approval workflow in AWS Systems Manager Change Manager. You can also extend this pattern to use it with AWS Organizations, as described in Setting up Change Manager for an organization. For more information, see Configuring Change Manager options and best practices.
If you have feedback about this post, submit comments in the Comments section below. If you have questions about this post, start a new thread on the AWS Systems Manager forum.
Want more AWS Security how-to content, news, and feature announcements? Follow us on Twitter.