Create your own reusable visual transforms for AWS Glue Studio

Post Syndicated from Gonzalo Herreros original https://aws.amazon.com/blogs/big-data/create-your-own-reusable-visual-transforms-for-aws-glue-studio/

AWS Glue Studio has recently added the possibility of adding custom transforms that you can use to build visual jobs to use them in combination with the AWS Glue Studio components provided out of the box. You can now define custom visual transform by simply dropping a JSON file and a Python script onto Amazon S3, which defines the component and the processing logic, respectively.

Custom visual transform lets you define, reuse, and share business-specific ETL logic among your teams. With this new feature, data engineers can write reusable transforms for the AWS Glue visual job editor. Reusable transforms increase consistency between teams and help keep jobs up-to-date by minimizing duplicate effort and code.

In this blog post, I will show you a fictional use case that requires the creation of two custom transforms to illustrate what you can accomplish with this new feature. One component will generate synthetic data on the fly for testing purposes, and the other will prepare the data to store it partitioned.

Use case: Generate synthetic data on the fly

There are multiple reasons why you would want to have a component that generates synthetic data. Maybe the real data is heavily restricted or not yet available, or there is not enough quantity or variety at the moment to test performance. Or maybe using the real data imposes some cost or load to the real system, and we want to reduce its usage during development.

Using the new custom visual transforms framework, let’s create a component that builds synthetic data for fictional sales during a natural year.

Define the generator component

First, define the component by giving it a name, description, and parameters. In this case, use salesdata_generator for both the name and the function, with two parameters: how many rows to generate and for which year.

For the parameters, we define them both as int, and you can add a regex validation to make sure the parameters provided by the user are in the correct format.

There are further configuration options available; to learn more, refer to the AWS Glue User Guide.

This is how the component definition would look like. Save it as salesdata_generator.json. For convenience, we’ll match the name of the Python file, so it’s important to choose a name that doesn’t conflict with an existing Python module.
If the year is not specified, the script will default to last year.

{
  "name": "salesdata_generator",
  "displayName": "Synthetic Sales Data Generator",
  "description": "Generate synthetic order datasets for testing purposes.",
  "functionName": "salesdata_generator",
  "parameters": [
    {
      "name": "numSamples",
      "displayName": "Number of samples",
      "type": "int",
      "description": "Number of samples to generate"
    },
    {
      "name": "year",
      "displayName": "Year",
      "isOptional": true,
      "type": "int",
      "description": "Year for which generate data distributed randomly, by default last year",
      "validationRule": "^\\d{4}$",
      "validationMessage": "Please enter a valid year number"
    }
  ]
}

Implement the generator logic

Now, you need to create a Python script file with the implementation logic.
Save the following script as salesdata_generator.py. Notice the name is the same as the JSON, just with a different extension.

from awsglue import DynamicFrame
import pyspark.sql.functions as F
import datetime
import time

def salesdata_generator(self, numSamples, year=None):
    if not year:
        # Use last year
        year = datetime.datetime.now().year - 1
    
    year_start_ts = int(time.mktime((year,1,1,0,0,0,0,0,0)))
    year_end_ts = int(time.mktime((year + 1,1,1,0,0,0,0,0,0)))
    ts_range = year_end_ts - year_start_ts
    
    departments = ["bargain", "checkout", "food hall", "sports", "menswear", "womenwear", "health and beauty", "home"]
    dep_array = F.array(*[F.lit(x) for x in departments])
    dep_randomizer = (F.round(F.rand() * (len(departments) -1))).cast("int")

    df = self.glue_ctx.sparkSession.range(numSamples) \
      .withColumn("sale_date", F.from_unixtime(F.lit(year_start_ts) + F.rand() * ts_range)) \
      .withColumn("amount_dollars", F.round(F.rand() * 1000, 2)) \
      .withColumn("department", dep_array.getItem(dep_randomizer))  
    return DynamicFrame.fromDF(df, self.glue_ctx, "sales_synthetic_data")

DynamicFrame.salesdata_generator = salesdata_generator

The function salesdata_generator in the script receives the source DynamicFrame as “self”, and the parameters must match the definition in the JSON file. Notice the “year” is an optional parameter, so it has assigned a default function on call, which the function detects and replaces with the previous year. The function returns the transformed DynamicFrame. In this case, it’s not derived from the source one, which is the common case, but replaced by a new one.

The transform leverages Spark functions as well as Python libraries in order to implement this generator.
To keep things simple, this example only generates four columns, but we could do the same for many more by either hardcoding values, assigning them from a list, looking for some other input, or doing whatever makes sense to make the data realistic.

Deploy and using the generator transform

Now that we have both files ready, all we have to do is upload them on Amazon S3 under the following path.

s3://aws-glue-assets-<account id>-<region name>/transforms/

If AWS Glue has never been used in the account and Region, then that bucket might not exist and needs to be created. AWS Glue will automatically create this bucket when you create your first job.

You will need to manually create a folder called “transforms” in that bucket to upload the files into.

Once you have uploaded both files, the next time we open (or refresh) the page on AWS Glue Studio visual editor, the transform should be listed among the other transforms. You can search for it by name or description.

Because this is a transform and not a source, when we try to use the component, the UI will demand a parent node. You can use as a parent the real data source (so you can easily remove the generator and use the real data) or just use a placeholder. I’ll show you how:

  1. Go to the AWS Glue, and in the left menu, select Jobs under AWS Glue Studio.
  2. Leave the default options (Visual with a source and target and S3 source and destination), and choose Create.
  3. Give the job a name by editing Untitled job at the top left; for example, CustomTransformsDemo
  4. Go to the Job details tab and select a role with AWS Glue permissions as the IAM role. If no role is listed on the dropdown, then follow these instructions to create one.
    For this demo, you can also reduce Requested number of workers to 2 and Number of retries to 0 to minimize costs.
  5. Delete the Data target node S3 bucket at the bottom of the graph by selecting it and choosing Remove. We will restore it later when we need it.
  6. Edit the S3 source node by selecting it in the Data source properties tab and selecting source type S3 location.
    In the S3 URL box, enter a path that doesn’t exist on a bucket the role selected can access, for instance: s3://aws-glue-assets-<account id>-<region name>/file_that_doesnt_exist. Notice there is no trailing slash.
    Choose JSON as the data format with default settings; it doesn’t matter.
    You might get a warning that it cannot infer schema because the file doesn’t exist; that’s OK, we don’t need it.
  7. Now search for the transform by typing “synthetic” in the search box of transforms. Once the result appears (or you scroll and search it on the list), choose it so it is added to the job.
  8. Set the parent of the transform just added to be S3 bucket source in the Node properties tab. Then for the ApplyMapping node, replace the parent S3 bucket with transforms Synthetic Sales Data Generator. Notice this long name is coming from the displayName defined in the JSON file uploaded before.
  9. After these changes, your job diagram should look as follows (if you tried to save, there might be some warnings; that’s OK, we’ll complete the configuration next).
  10. Select the Synthetic Sales node and go to the Transform tab. Enter 10000 as the number of samples and leave the year by default, so it uses last year.
  11. Now we need the generated schema to be applied. This would be needed if we had a source that matches the generator schema.
    In the same node, select the tab Data preview and start a session. Once it is running, you should see sample synthetic data. Notice the sale dates are randomly distributed across the year.
  12. Now select the tab Output schema and choose Use datapreview schema That way, the four fields generated by the node will be propagated, and we can do the mapping based on this schema.
  13. Now we want to convert the generated sale_date timestamp into a date column, so we can use it to partition the output by day. Select the node ApplyMapping in the Transform tab. For the sale_date field, select date as the target type. This will truncate the timestamp to just the date.
  14. Now it’s a good time to save the job. It should let you save successfully.

Finally, we need to configure the sink. Follow these steps:

  1. With the ApplyMapping node selected, go to the Target dropdown and choose Amazon S3. The sink will be added to the ApplyMapping node. If you didn’t select the parent node before adding the sink, you can still set it in the Node details tab of the sink.
  2. Create an S3 bucket in the same Region as where the job will run. We’ll use it to store the output data, so we can clean up easily at the end. If you create it via the console, the default bucket config is OK.
    You can read more information about bucket creation on the Amazon S3 documentation 
  3. In the Data target properties tab, enter in S3 Target Location the URL of the bucket and some path and a trailing slash, for instance: s3://<your output bucket here>/output/
    Leave the rest with the default values provided.
  4. Choose Add partition key at the bottom and select the field sale_date.

We could create a partitioned table at the same time just by selecting the corresponding catalog update option. For simplicity, generate the partitioned files at this time without updating the catalog, which is the default option.

You can now save and then run the job.

Once the job has completed, after a couple of minutes (you can verify this in the Runs tab), explore the S3 target location entered above. You can use the Amazon S3 console or the AWS CLI. You will see files named like this: s3://<your output bucket here>/output/sale_date=<some date yyyy-mm-dd>/<filename>.

If you count the files, there should be close to but not more than 1,460 (depending on the year used and assuming you are using 2 G.1X workers and AWS Glue version 3.0)

Use case: Improve the data partitioning

In the previous section, you created a job using a custom visual component that produced synthetic data, did a small transformation on the date, and saved it partitioned on S3 by day.

You might be wondering why this job generated so many files for the synthetic data. This is not ideal, especially when they are as small as in this case. If this data was saved as a table with years of history, generating small files has a detrimental impact on tools that consume it, like Amazon Athena.

The reason for this is that when the generator calls the “range” function in Apache Spark without specifying a number of memory partitions (notice they are a different kind from the output partitions saved to S3), it defaults to the number of cores in the cluster, which in this example is just 4.

Because the dates are random, each memory partition is likely to contain rows representing all days of the year, so when the sink needs to split the dates into output directories to group the files, each memory partition needs to create one file for each day present, so you can have 4 * 365 (not in a leap year) is 1,460.

This example is a bit extreme, and normally data read from the source is not so spread over time. The issue can often be found when you add other dimensions, such as output partition columns.

Now you are going to build a component that optimizes this, trying to reduce the number of output files as much as possible: one per output directory.
Also, let’s imagine that on your team, you have the policy of generating S3 date partition separated by year, month, and day as strings, so the files can be selected efficiently whether using a table on top or not.

We don’t want individual users to have to deal with these optimizations and conventions individually but instead have a component they can just add to their jobs.

Define the repartitioner transform

For this new transform, create a separate JSON file, let’s call it repartition_date.json, where we define the new transform and the parameters it needs.

{
  "name": "repartition_date",
  "displayName": "Repartition by date",
  "description": "Split a date into partition columns and reorganize the data to save them as partitions.",
  "functionName": "repartition_date",
  "parameters": [
    {
      "name": "dateCol",
      "displayName": "Date column",
      "type": "str",
      "description": "Column with the date to split into year, month and day partitions. The column won't be removed"
    },
    {
      "name": "partitionCols",
      "displayName": "Partition columns",
      "type": "str",
      "isOptional": true,
      "description": "In addition to the year, month and day, you can specify additional columns to partition by, separated by commas"
    },
    {
      "name": "numPartitionsExpected",
      "displayName": "Number partitions expected",
      "isOptional": true,
      "type": "int",
      "description": "The number of partition column value combinations expected, if not specified the system will calculate it."
    }
  ]
}

Implement the transform logic

The script splits the date into multiple columns with leading zeros and then reorganizes the data in memory according to the output partitions. Save the code in a file named repartition_date.py:

from awsglue import DynamicFrame
import pyspark.sql.functions as F

def repartition_date(self, dateCol, partitionCols="", numPartitionsExpected=None):
    partition_list = partitionCols.split(",") if partitionCols else []
    partition_list += ["year", "month", "day"]
    
    date_col = F.col(dateCol)
    df = self.toDF()\
      .withColumn("year", F.year(date_col).cast("string"))\
      .withColumn("month", F.format_string("%02d", F.month(date_col)))\
      .withColumn("day", F.format_string("%02d", F.dayofmonth(date_col)))
    
    if not numPartitionsExpected:
        numPartitionsExpected = df.selectExpr(f"COUNT(DISTINCT {','.join(partition_list)})").collect()[0][0]
    
    # Reorganize the data so the partitions in memory are aligned when the file partitioning on s3
    # So each partition has the data for a combination of partition column values
    df = df.repartition(numPartitionsExpected, partition_list)    
    return DynamicFrame.fromDF(df, self.glue_ctx, self.name)

DynamicFrame.repartition_date = repartition_date

Upload the two new files onto the S3 transforms folder like you did for the previous transform.

Deploy and use the generator transform

Now edit the job to make use of the new component to generate a different output.
Refresh the page in the browser if the new transform is not listed.

  1. Select the generator transform and from the transforms dropdown, find Repartition by date and choose it; it should be added as a child of the generator.
    Now change the parent of the Data target node to the new node added and remove the ApplyMapping; we no longer need it.
  2. Repartition by date needs you to enter the column that contains the timestamp.
    Enter sale_date (the framework doesn’t yet allow field selection using a dropdown) and leave the other two as defaults.
  3. Now we need to update the output schema with the new date split fields. To do so, use the Data preview tab to check it’s working correctly (or start a session if the previous one has expired). Then in the Output schema, choose Use datapreview schema so the new fields get added. Notice the transform doesn’t remove the original column, but it could if you change it to do so.
  4. Finally, edit the S3 target to enter a different location so the folders don’t mix with the previous run, and it’s easier to compare and use. Change the path to /output2/.
    Remove the existing partition column and instead add year, month, and day.

Save and run the job. After one or two minutes, once it completes, examine the output files. They should be much closer to the optimal number of one per day, maybe two. Consider that in this example, we only have four partitions. In a real dataset, the number of files without this repartitioning would explode very easily.
Also, now the path follows the traditional date partition structure, for instance: output2/year=2021/month=09/day=01/run-AmazonS3_node1669816624410-4-part-r-00292

Notice that at the end of the file name is the partition number. While we now have more partitions, we have fewer output files because the data is organized in memory more aligned with the desired output.

The repartition transform has additional configuration options that we have left empty. You can now go ahead and try different values and see how they affect the output.
For instance, you can specify “department ” as “Partition columns” in the transform and then add it in the sink partition column list. Or you can enter a “Number of partitions expected” and see how it affects the runtime (it no longer needs to determine this at runtime) and the number of files produced as you enter a higher number, for instance, 3,000.

How this feature works under the hood

  1. Upon loading the AWS Glue Studio visual job authoring page, all your transforms stored in the aforementioned S3 bucket will be loaded in the UI. AWS Glue Studio will parse the JSON definition file to display transform metadata such as name, description, and list of parameters.
  2. Once the user is done creating and saving his job using custom visual transforms, AWS Glue Studio will generate the job script and update the Python library path (also referred as —extra-py-files job parameters) with the list of transform Python file S3 paths, separated by comma.
  3. Before running your script, AWS Glue will add all file paths stored in the —extra-py-files job parameters to the Python path, allowing your script to run all custom visual transform functions you defined.

Cleanup

In order to avoid running costs, if you don’t want to keep the generated files, you can empty and delete the output bucket created for this demo. You might also want to delete the AWS Glue job created.

Conclusion

In this post, you have seen how you can create your own reusable visual transforms and then use them in AWS Glue Studio to enhance your jobs and your team’s productivity.

You first created a component to use synthetically generated data on demand and then another transform to optimize the data for partitioning on Amazon S3.


About the authors

Gonzalo Herreros is a Senior Big Data Architect on the AWS Glue team.

Michael Benattar is a Senior Software Engineer on the AWS Glue Studio team. He has led the design and implementation of the custom visual transform feature.

Refreshing Rapid7’s Coordinated Vulnerability Disclosure Policy

Post Syndicated from Tod Beardsley original https://blog.rapid7.com/2022/12/28/refreshing-rapid7s-coordinated-vulnerability-disclosure-policy/

Refreshing Rapid7's Coordinated Vulnerability Disclosure Policy

As 2023 comes hurtling towards us like some kind of maniacal arctic train full of disturbingly realistic AI-generated people, I wanted to take a moment on the blog here to announce that we here at Rapid7, Inc. have refreshed our coordinated vulnerability disclosure (CVD) policy and philosophy. If you just want the precise details, you can head on over to the refreshed CVD page. Otherwise, read on if you want some more explanation of why we’re updating our CVD policy.

A Cohesive Philosophy

Rapid7, as you might expect, is chock full of security researchers—part time, full time, hobbyists, and professionals alike—and so, we frequently come across software vulnerabilities that we’d like to see fixed. These bugs might exist in specialized environments, in the cloud, in the hands of end-users, or in enterprise data centers. The vulnerabilities themselves might be widely exploited in the wild or they might be hard to trigger. Sometimes, the vulnerability itself might be technically a violation of security principles, but the practical effect of its exploitation will be kind of “meh.”

And on and on. It turns out, our old “one size fits all” style of CVD just wasn’t cutting it, as we ran into more and more edge cases when it came to the kinds of vulnerabilities we learn about. Recognizing that, we thought it would be helpful to come up with some broad strokes of what we intend to accomplish and offer up what we expect to do in most cases. From there, we could enumerate all the edge cases we could think of (and have experienced) and document how those cases are different from the usual flow of vulnerability disclosure.

So, far starters, we put together this (fairly pithy) reasoning of why we participate in coordinated vulnerability disclosure in the first place:

  1. We believe in strengthening defense by democratizing access to attacker tooling and knowledge. One of Rapid7’s unique strengths is our deep knowledge of how attackers work. Our vulnerability research and Metasploit teams strive to make attacker capabilities, that would otherwise be used primarily by criminals, accessible to all.  This enables defenders to understand and prioritize critical vulnerabilities, develop detections and mitigations, and test security controls. Releasing public exploit code and novel research is core to our mission to close the security achievement gap.
  2. Public disclosure of vulnerabilities is a critical component of a healthy cybersecurity ecosystem. Rapid7 advocates for, and practices, timely public disclosure of vulnerabilities across both third-party products and our own systems and solutions. This includes vulnerabilities we independently discover in our customers’ tech stacks. Through transparent, open, and timely vulnerability disclosures, Rapid7 is able to assist  the entire internet in protecting and defending those assets and services critical to modern civilization.
  3. Organizations need timely information about risk in order to make educated choices about protecting their networks—especially during active attacks. Our vulnerability disclosure policy includes specific provisions for expediting public disclosure in cases where exploitation has been observed in the wild. Vendors often (understandably) act to protect their own businesses and reputations when there are security issues in their products that introduce risk into their downstream customers’ environments. When we know about exploitation in the wild, or when we believe that threat actors may be covertly weaponizing non-public vulnerabilities, our priority is to alert customers and the community so they may take action to protect their organizations.

The Basic CVD

Building from that, we’ve updated and articulated what is “normal” in vulnerability disclosure, in the form of a five-point guide to what everyone should expect from Rapid7. You can read the exact wording at https://www.rapid7.com/security/disclosure (it may change slightly over time), but to summarize, our basic, standard approach will be to:

  • Keep things confidential at first;
  • Reserve a CVE ID;
  • Tell CERT/CC after 15 days;
  • Publish about it after 60 days; and
  • Encourage the release of a fix

Rapid7 will also:

  • Offer extensions on disclosure timelines (within reason)
  • Publish if the software maintainer publishes, and
  • Not hold things up if there are duplicate reports

That all seems pretty normal in cybersecurity, and reflects industry standards as promulgated by the likes of ISO 29147 and ISO 30111. Internally, we’ve been calling this the “potato case,” since it’s the basis of all sorts of variations and permutations. And, like a potato—which you might dice, slice, pan-fry, bake, mash, pressure cook, season, gravy, butter, and on and on—we can take this base policy and tweak it just a little to get where we need to be for all the edge cases in CVD.

Edge Cases (edginess not guaranteed)

Okay, enough potato talk. Getting hungry.

Vulnerabilities cause unintended conditions and undefined behaviors, and so our CVD should anticipate curve-balls and weird circumstances. We break out six classes of vulnerabilities (and a meta-classification of “more than one”) and slightly alter the standard case per circumstance:

  • Exploited in the Wild: When vulnerabilities are being actively exploited, time is of the essence so that defenders can ramp up and start defending, right now. It would be pretty irresponsible to sit on our hands for 60 days in this case, so expect a bulletin inside a couple of days instead of two months.
  • Patch Bypasses: If a patch doesn’t do the job and a bypass is discovered, we will want to move a little faster, and also, make sure there’s a new CVE ID to describe it. Recycling CVE IDs causes vulnerability management systems all kinds of headaches.
  • Cloud/Hosted Vulnerabilities: The cloud remains special, in that a fix to a SaaS product tends to mean that’s the end of it, and there’s sometimes little value in disclosure after the fact. However, it remains a possibility that there are some cases in which the learnings from a particular cloud vuln are worth talking about and raising awareness of (namely, for IOCs and logging artifacts to check to see if you’ve already been compromised).
  • Kinetic Vulnerabilities: These vulnerabilities are special since they have direct effect on life and limb; think of specialized medtech, vehicle safety systems, and the like. In these cases, we want to allow plenty of time for patches to get out there before we openly discuss all of the technical details.
  • Low-Impact Vulnerabilities: While every bug is sacred and special, some are, well, less special than others. In these cases, we wouldn’t bother with coordinating with CERT/CC (they have plenty of work to do), and we may not even publicly disclose them at all (beyond the private disclosure to the responsible organization).
  • Vulnerabilities with No Responsible Organizations: Sometimes, there are bugs in systems that nobody maintains anymore—abandonware and the like. In these cases, we will move a little faster on disclosure, in coordination with CERT/CC, mainly because we’re not waiting for a fix to be developed.
  • Multi-Faceted Vulnerabilities: If a bug checks more than one of the above boxes, a shorter timeline will apply. So, for example, if there’s some abandoned software that’s also being exploited right now, we’ll publish in just a couple days, rather than a month and a half.

Right now, those are all the cases we can think of, and they hit every vulnerability disclosure I’ve been a part of at Rapid7 over the last decade. Every time we’ve strayed from our (old) policy, it was due to one or more of these conditions. I expect that going forward, the way we approach CVD will be much more predictable and comfortable for everyone involved. Well, except for the criminals and spies that are using these vulns for evil, sorry, not sorry.

Patches Accepted

If you have any thoughts or feedback on this policy, hit us up at [email protected] and we’d be happy to hear it. Or, toot at me and/or Caitlin directly on Mastodon. Do note that we’ll be sticking to the much more precise language on our CVD page, since this blog post is *not* the greatest CVD in the world, it’s just a tribute.

As always, If you have a vulnerability to report on something that Rapid7 is responsible for, check our security.txt for contact details.
Incidentally, do you have a security.txt file? Should you? They’re easy and fun to write and publish—see RFC 9116 for the details there; publishing a note of where to contact you sure makes the job of hearing about vulnerabilities in your products and services a whole lot easier.

The 2022 Naughty and Nice List

Post Syndicated from Tom Caiazza original https://blog.rapid7.com/2022/12/27/the-2022-naughty-and-nice-list/

The 2022 Naughty and Nice List

It’s the holiday season when children all over the world cross their fingers in the hope that they don’t end up on a certain red-clad big man’s naughty list. Turns out, we at Rapid7 have a similar tradition, only we’re the ones making the list and there’s a whole lotta naughty going on (not like that, get your heads out of the gutter).

We’ve asked a few of our experts to share what in cybersecurity deserves to be on the naughty list, and what needs to be on the nice list. Some of these represent personal gripes, others are industry-wide, and still others are specific to certain aspects of what we do all day.

Obviously, we all lived through the many levels of Shell this year so we are taking that as the quintessential 2022 naughty entry. These are a few others that you may or may not have been tracking, but are worth thinking about as we put this year to bed.

Here, without further fan fare, is our non-exhaustive, thoroughly delightful, slightly deranged, 2022 Cybersecurity Naughty and Nice List. Enjoy.

The Naughty List

Virtual Private Nopes: I try, really hard, to take a charitable read on people’s motivations. So, normally, it takes a lot to get on my bad side. That said: I nominate the entire consumer VPN industry for this year’s Naughty List. This is based on a paper published by the University of Maryland titled, Investigating Influencer VPN Ads on YouTube, by Omer Akgul, Richard Roberts, Moses Namara, Dave Levin, and Michelle L. Mazurek.

Not to spoil the surprise, but the study shows that many consumer VPN influencer ads contain potentially misleading claims, including overpromises and exaggerations that could negatively influence viewers’ understanding of Internet safety. It also found that the ads’ presentation of information on complicated subjects of cryptography, networking, and cybersecurity in general is likely counterproductive and may make viewers resistant to learning true facts about these topics.

Naughty, naughty indeed. You can hear more about this on Security Nation, or if you’re feeling particularly ironic, on YouTube. – Tod Beardsley, Director of Research

When IoT Products Attack: There is a never ending flood of cheap white labeled IoT goods available for consumers to purchase online. Many of these devices have little or no security. Worse, most of these products don’t even have vendors backing them when vulnerabilities are found. As a result, many of the issues will never be fixed.

As this pile of garbage continues to grow, it seems we are just forced to wait and anticipate another Mirai-style botnet (or worse) to emerge and create havoc. – Deral Heiland, Principal Security Researcher, IoT

Ambulance Chasing in the Wake of the Uber breach: It is critical for cybersecurity vendors to react to cybersecurity events as quickly as possible and often in as close to real-time as we can get. From a marketing standpoint, this can be an opportunity to impart a timely, relevant message that showcases a security product in a positive light.

There’s nothing inherently wrong with that, but when vendors use it as an opportunity to tsk-tsk those who didn’t use their product they come off as unhelpful at best, and dangerously boastful at worst.

The Uber breach that hit headlines earlier this year is a good example of this where some of the most vocal vendors were also shown to be unable to stop the breach. Everyone should be proud of their products and their capabilities, but let’s stick to being helpful to the community rather than resorting to ambulance chasing and Monday morning quarterbacking. – Ryan Blanchard, Product Marketing Manager, InsightCloudSec

The Nice List

U.S. Government Agencies Pass New Cybersecurity Legislation: During 2022, the U.S. took some significant steps—in the form of regulation and legislation—to ensure proper disclosure of major cybersecurity incidents.

In March, President Biden signed new cybersecurity legislation mandating critical infrastructure operators report hacks to the Department of Homeland Security within 72 hours and within 24 hours of ransomware payments.

Additionally, the SEC voted to propose two new cybersecurity rules for publicly-traded companies. The first mandates reporting of material cybersecurity incidents in an 8-K form within four business days of the incident. The second requires companies disclose their policies for managing cybersecurity risks, including updates on previously reported material cybersecurity incidents.

In July, the House of Representatives passed two cybersecurity bills. The first requires the Federal Trade Commission to report cross-border complaints involving ransomware and other cybersecurity incidents. The second directs the Department of Energy to establish an energy cybersecurity university leadership program. – Ryan Blanchard, Product Marketing Manager, InsightCloudSec

Consumer Protections for IoT Devices: In October, the White House hosted a meeting with IoT industry leaders to start the process of developing an IoT Labeling system for consumers to help them identify products that meet a standard level of security.

Although this project will take time to complete, and the use of the labels will be voluntary for vendors, I do expect many vendors will embrace this labeling solution to help promote their products above their competitors. This project will be a major step forward for consumers, which will help them to make sound security decisions on what products to deploy in their homes. – Deral Heiland, Principal Security Researcher, IoT

Adventures in TOTP Token Extraction: I let backups for my phone lapse … for the entire pandemic. Oops. So, when my phone gave up the ghost, I lost the primary authentication device for 2FA (in addition to countless photos of my wife and I playing board games during lockdown). Oh no!

I was using a cloud-based TOTP token manager and was still authenticated and logged in on my desktop. So, “no problem,” says I, “I can just use the web UI to export these tokens to the new phone!” Well, not so fast—it turns out that it is super hard to grab these tokens and port them around. Which is infuriating.

Thankfully, Guillaume Boudreau published a completely hacky method to extract those TOTP tokens, which is totally nuts and also totally works. Yay! – Tod Beardsley, Director of Research, Rapid7

In Conclusion, We’ve Concluded

So, there you have it. A bit of naughty, a touch of nice, something about TOTP tokens, this blog post has it all. Thank you from the entire Rapid7 team for being with us throughout this wild year!

Top Ten Blog Posts of 2022

Post Syndicated from original https://www.backblaze.com/blog/top-ten-blog-posts-of-2022/

Every year we round up the best of the blog, and this year is no different. We like to look back on our posts that you, our readers, liked best and reflect on the content that resonated with the most folks.

How do we do that? Data! We gathered the analytics and sorted out the posts that got the most unique views over the course of the year. There are some mainstays that show up here year after year—our Drive Stats reports are a perennial hit. But there are always some surprises in there, too. Do you read all of our posts? Did your favorite one make the list? Read on to find out.

A Countdown of Top Blog Posts from 2022

10. How to Wipe a Windows SSD or Hard Drive

Coming in at the #10 spot is a companion piece to our ever-popular “How to Wipe a Mac” lest we neglect our PC-loving brethren. Check out this post if you need to securely erase your PC.

9. Don’t Get Trapped in iCloud

This post covers some of the pitfalls you might run into if you rely solely on iCloud to store your data as well as the method I, personally, use to back up my mobile devices.

8. The SSD Edition: 2022 Drive Stats Mid-Year Review

This year, we introduced a new report as part of our Drive Stats franchise focusing on SSDs, and it earned the #8 spot in our top 10. Read this one to find out how the SSDs in our data centers performed.

7. SSD 101: How to Upgrade Your Computer With an SSD

Lots of you searched for ways to take that old computer you have lying around and upgrade it with an SSD instead of donating or recycling it. This post explains the practicalities you should consider before doing so.

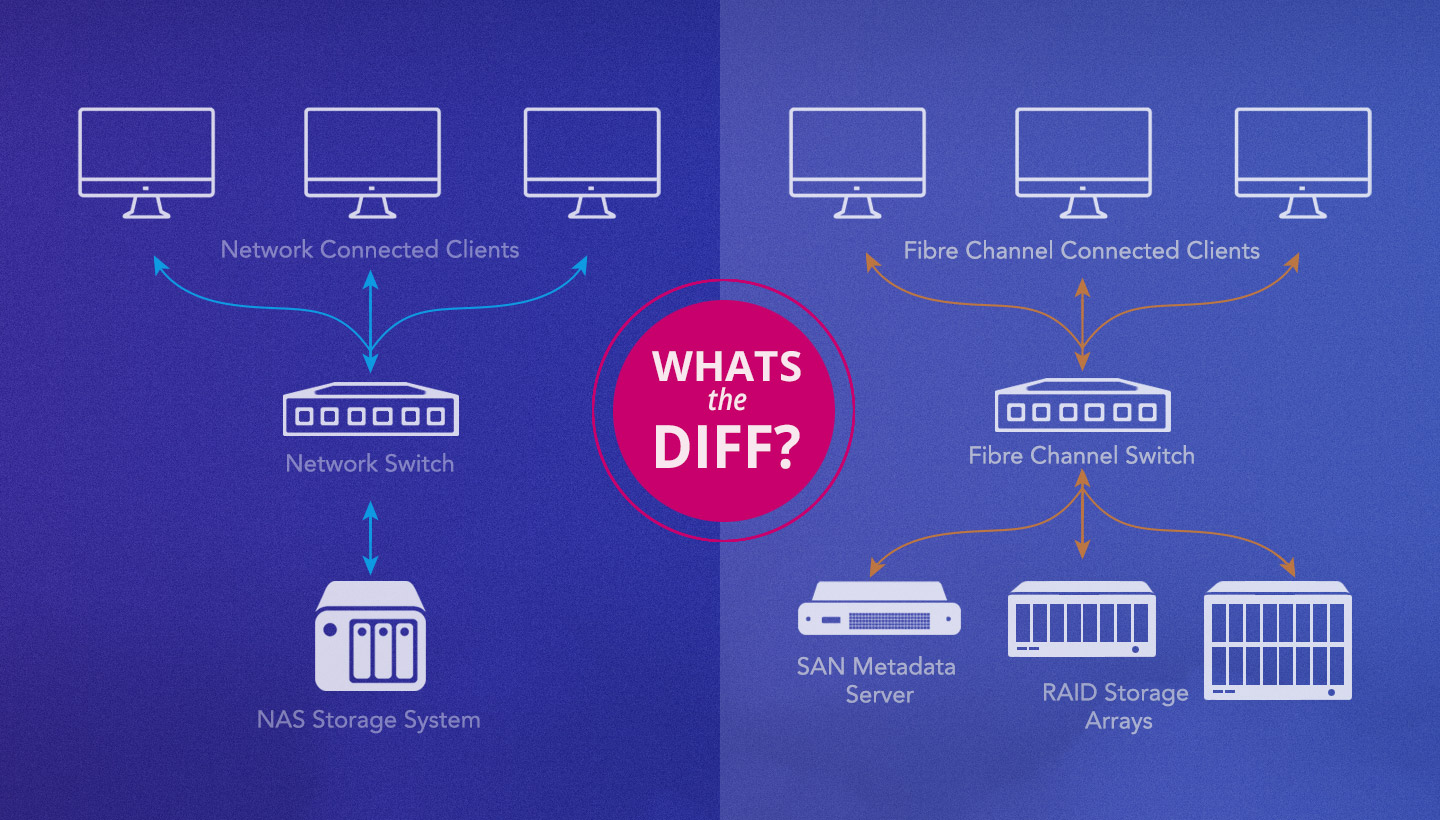
6. What’s the Diff: NAS vs. SAN

Network attached storage (NAS). Storage area network (SAN). If the acronyms weren’t confusing enough, the actual names of these two technologies certainly do the job. We explain the difference in this popular post.

5. How to Wipe a Mac Hard Drive

Still more of you are interested in how to safely and securely wipe your Macs. Especially as we come out of the gift giving season, many of you might be ready to dispose of or donate that old computer. Use this guide to make sure your data doesn’t make its way into the wrong hands.

4. Backblaze Drive Stats for Q1 2022

Our Q1 Drive Stats post, released on May the Fourth (be with you), is always a fun one. This year, Andy took inspiration from the “Star Wars” cinematic universe, organizing the post around notable quotes and delighting us all.

3. What’s the Diff: SSD vs. NVMe vs. M.2 Drives

Many of you were curious about the different kinds of SSD drives out there, putting this comparison post in the #3 spot. We spelled out the differences between SSDs, NVMe, and M.2 drives so you can figure out which is best for your use case.

2. Backblaze Drive Stats for Q2 2022

Our marquee franchise was unseated as the top post this year. Andy Klein, our resident Drive Stats storyteller, took it in stride. While Drive Stats may not be our top post this year, the reports hold three of the top ten slots, which is nothing to scoff at. Consistency is key!

1. The Python GIL: Past, Present, and Future

This little experimental post on a somewhat arcane feature of the Python programming language found a huge audience when we published it back in May. We reached out to Barry Warsaw, a Python core developer and contributor, and Pawel Polewicz, a backend software developer, to write a quick history of the Python global interpreter lock (GIL). Barry and Pawel blew us away with this deep dive on the GIL’s evolution that ended up becoming our top blog post of the year.

Thanks for Reading the Backblaze Blog in 2022

We’re glad you like reading about things like cloud storage, hard drives, and esoteric coding features like the Python GIL as much as we like writing about them. We want to thank you for tuning in here on the blog and sharing your thoughts with us in the comments and on social media. Did your favorite post make it into the list? Is there anything you wish we’d write about more? Let us know in the comments. We always love to hear from you.

The post Top Ten Blog Posts of 2022 appeared first on Backblaze Blog | Cloud Storage & Cloud Backup.

[$] The rest of the 6.2 merge window

Post Syndicated from original https://lwn.net/Articles/918146/

The world got a special Christmas present from Linus Torvalds this year in
the form of the 6.2-rc1
kernel prepatch. By the time the merge window closed, 13,687 non-merge
changesets had been pulled into the mainline for the 6.2 release. This was
the busiest merge window since 5.13 (which brought in 14.231 changesets) in
mid-2021, and quite a bit busier than 6.1 was — but comparable to the late
5.x releases. Just under 4,000 of those changesets were pulled after the first-half summary was written; there were
quite a few significant changes to be found in those late-arriving patches.

Arresting IT Administrators

Post Syndicated from Bruce Schneier original https://www.schneier.com/blog/archives/2022/12/arresting-it-administrators.html

This is one way of ensuring that IT keeps up with patches:

Albanian prosecutors on Wednesday asked for the house arrest of five public employees they blame for not protecting the country from a cyberattack by alleged Iranian hackers.

Prosecutors said the five IT officials of the public administration department had failed to check the security of the system and update it with the most recent antivirus software.

The next step would be to arrest managers at software companies for not releasing patches fast enough. And maybe programmers for writing buggy code. I don’t know where this line of thinking ends.

The collective thoughts of the interwebz