Post Syndicated from Sheila Busser original https://aws.amazon.com/blogs/compute/running-aws-lambda-functions-on-aws-outposts-using-aws-iot-greengrass/
This blog post is written by Adam Imeson, Sr. Hybrid Edge Specialist Solution Architect.
Today, AWS customers can deploy serverless applications in AWS Regions using a variety of AWS services. Customers can also use AWS Outposts to deploy fully managed AWS infrastructure at virtually any datacenter, colocation space, or on-premises facility.
AWS Outposts extends the cloud by bringing AWS services to customers’ premises to support their hybrid and edge workloads. This post will describe how to deploy Lambda functions on an Outpost using AWS IoT Greengrass.
Consider a customer who has built an application that runs in an AWS Region and depends on AWS Lambda. This customer has a business need to enter a new geographic market, but the nearest AWS Region is not close enough to meet application latency or data residency requirements. AWS Outposts can help this customer extend AWS infrastructure and services to their desired geographic region. This blog post will explain how a customer can move their Lambda-dependent application to an Outpost.
Overview
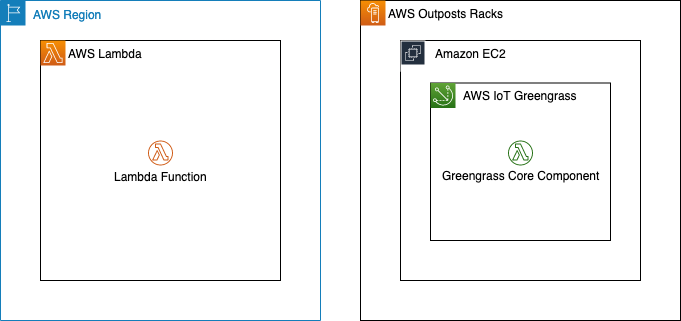
In this walkthrough you will create a Lambda function that can run on AWS IoT Greengrass and deploy it on an Outpost. This architecture results in an AWS-native Lambda function running on the Outpost.
Deploying Lambda functions on Outposts rack
Prerequisites: Building a VPC
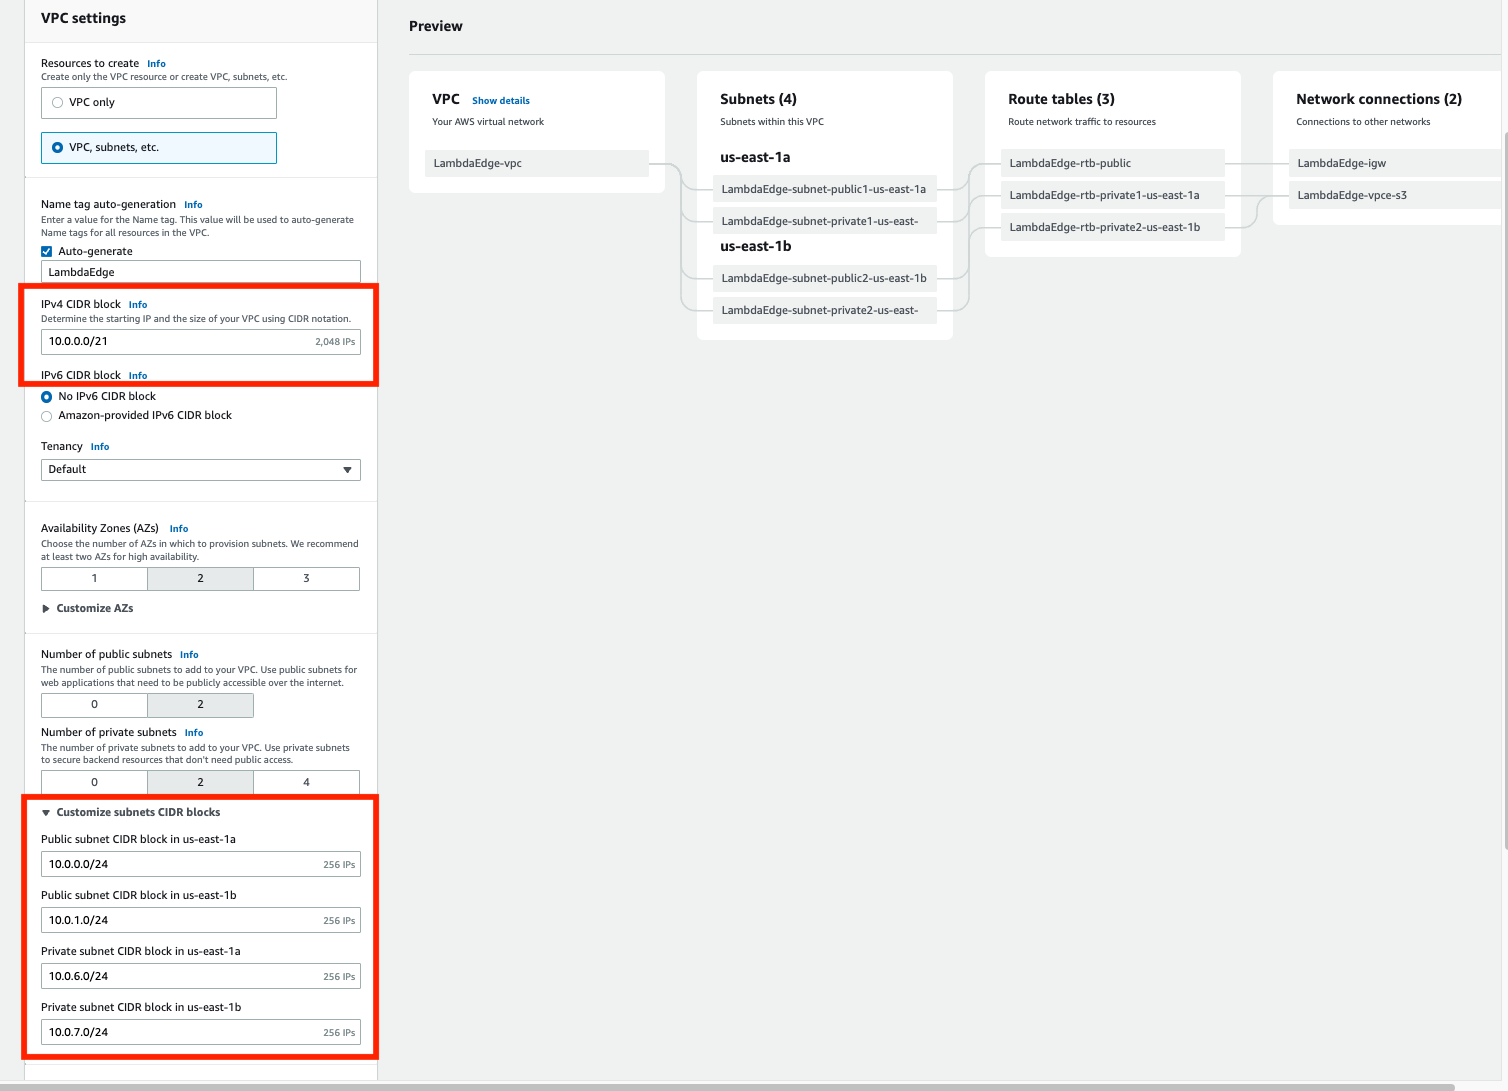
To get started, build a VPC in the same Region as your Outpost. You can do this with the create VPC option in the AWS console. The workflow allows you to set up a VPC with public and private subnets, an internet gateway, and NAT gateways as necessary. Do not consume all of the available IP space in the VPC with your subnets in this step, because you will still need to create Outposts subnets after this.
Now, build a subnet on your Outpost. You can do this by selecting your Outpost in the Outposts console and choosing Create Subnet in the drop-down Actions menu in the top right.

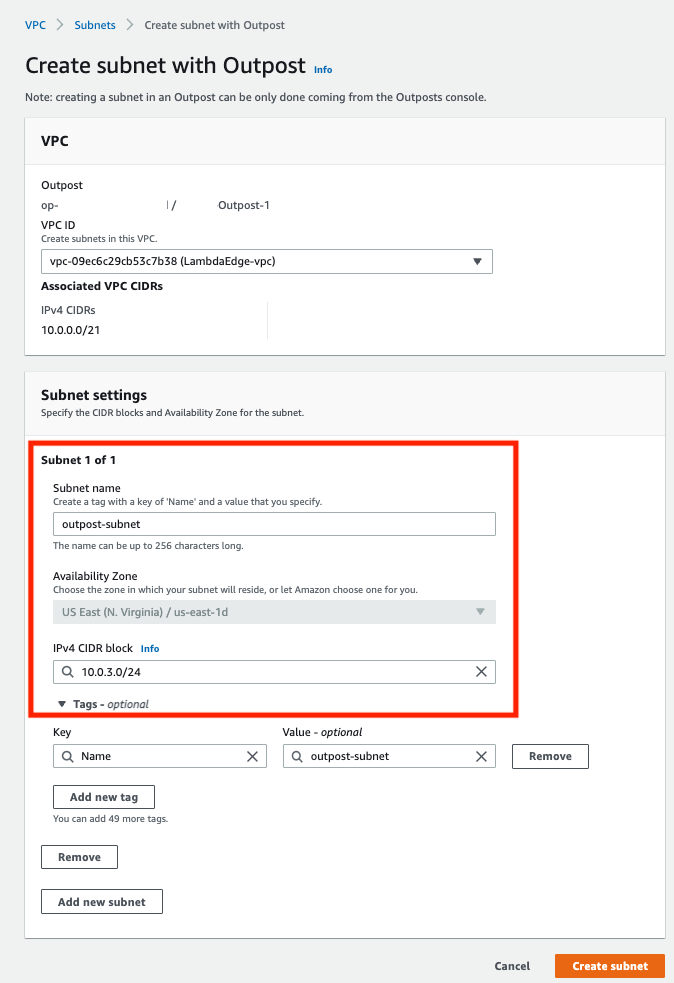
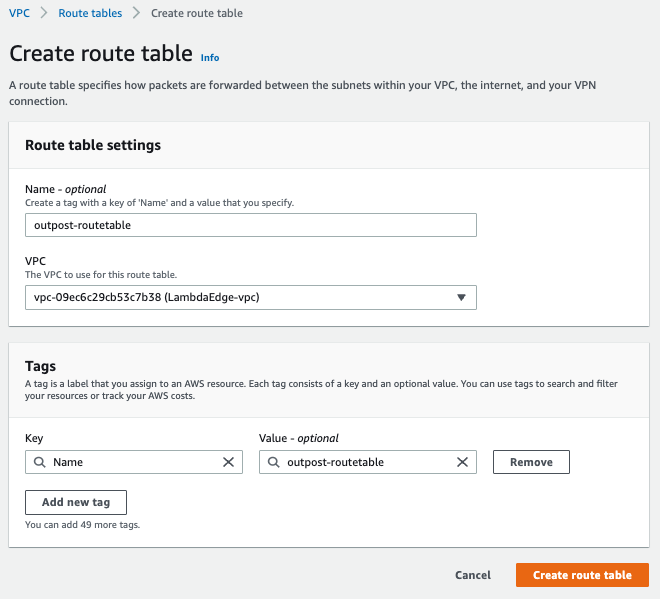
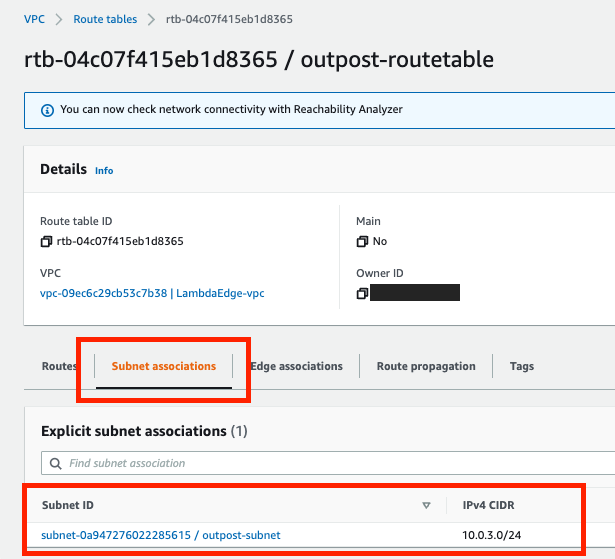
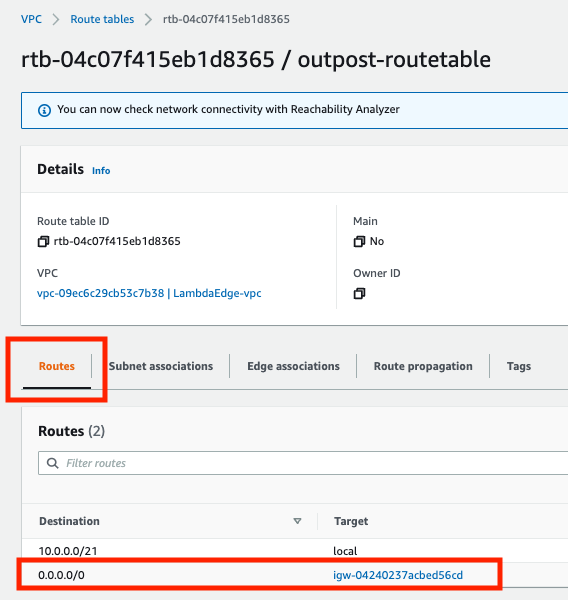
Choose the VPC you just created and select a CIDR range for your new subnet that doesn’t overlap with the other subnets that are already in the VPC. Once you’ve created the subnet, you need to create a new subnet route table and associate it with your new subnet. Go into the subnet route tables section of the VPC console and create a new route table. Associate the route table with your new subnet. Add a 0.0.0.0/0 route pointing at your VPC’s internet gateway. This sets the subnet up as a public subnet, which for the purposes of this post will make it easier to access the instance you are about to build for Greengrass Core. Depending on your requirements, it may make more sense to set up a private subnet on your Outpost instead. You can also add a route pointing at your Outpost’s local gateway here. Although you won’t be using the local gateway during this walkthrough, adding a route to the local gateway makes it possible to trigger your Outpost-hosted Lambda function with on-premises traffic.
Setup: Launching an instance to run Greengrass Core
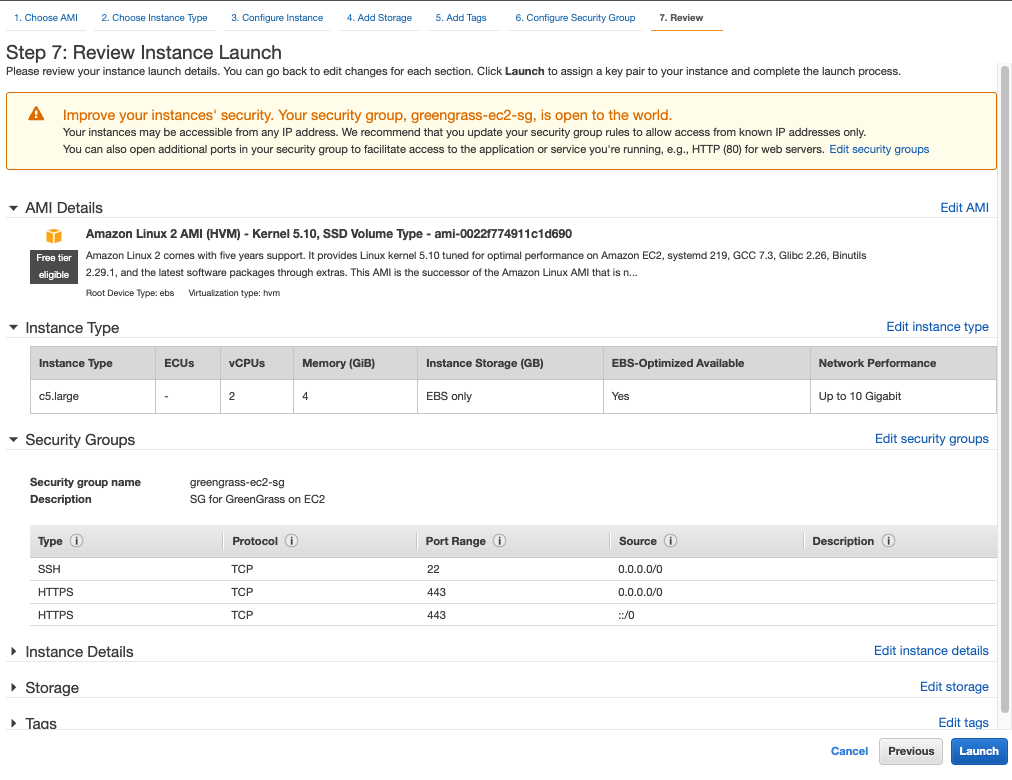
Create a new EC2 instance in your Outpost subnet. As long as your Outpost has capacity for your desired instance type, this operation will proceed the same way as any other EC2 instance launch. You can check your Outpost’s capacity in the Outposts console or in Amazon CloudWatch:

I used a c5.large instance running Amazon Linux 2 with 20 GiB of Amazon EBS storage for this walkthough. You can pick a different instance size or a different operating system in accordance with your application’s needs and the AWS IoT Greengrass documentation. For the purposes of this tutorial, we assign a public IP address to the EC2 instance on creation.
Step 1: Installing the AWS IoT Greengrass Core software
Once your EC2 instance is up and running, you will need to install the AWS IoT Greengrass Core software on the instance. Follow the AWS IoT Greengrass documentation to do this. You will need to do the following:
- Ensure that your EC2 instance has appropriate AWS permissions to make AWS API calls. You can do this by attaching an instance profile to the instance, or by providing AWS credentials directly to the instance as environment variables, as in the Greengrass documentation.
- Log in to your instance.
- Install OpenJDK 11. For Amazon Linux 2, you can use
sudo amazon-linux-extras install java-openjdk11to do this. - Create the default system user and group that runs components on the device, with
sudo useradd —system —create-home ggc_user
sudo groupadd —system ggc_group - Edit the /etc/sudoers file with
sudo visudosuch that the entry for the root user looks likeroot ALL=(ALL:ALL) ALL - Enable cgroups and enable and mount the memory and devices cgroups. In Amazon Linux 2, you can do this with the grubby utility as follows:
sudo grubby --args="cgroup_enable=memory cgroup_memory=1 systemd.unified_cgroup_hierarchy=0" --update-kernel /boot/vmlinuz-$(uname -r) - Type
sudo rebootto reboot your instance with the cgroup boot parameters enabled. - Log back in to your instance once it has rebooted.
- Use this command to download the AWS IoT Greengrass Core software to the instance:
curl -s https://d2s8p88vqu9w66.cloudfront.net/releases/greengrass-nucleus-latest.zip > greengrass-nucleus-latest.zip - Unzip the AWS IoT Greengrass Core software:
unzip greengrass-nucleus-latest.zip -d GreengrassInstaller && rm greengrass-nucleus-latest.zip - Run the following command to launch the installer. Replace each argument with appropriate values for your particular deployment, particularly the aws-region and thing-name arguments.
sudo -E java -Droot="/greengrass/v2" -Dlog.store=FILE \
-jar ./GreengrassInstaller/lib/Greengrass.jar \
--aws-region region \
--thing-name MyGreengrassCore \
--thing-group-name MyGreengrassCoreGroup \
--thing-policy-name GreengrassV2IoTThingPolicy \
--tes-role-name GreengrassV2TokenExchangeRole \
--tes-role-alias-name GreengrassCoreTokenExchangeRoleAlias \
--component-default-user ggc_user:ggc_group \
--provision true \
--setup-system-service true \
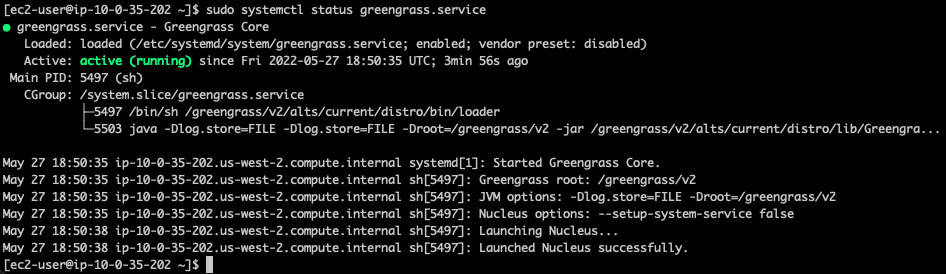
--deploy-dev-tools true - You have now installed the AWS IoT Greengrass Core software on your EC2 instance. If you type
sudo systemctl status greengrass.servicethen you should see output similar to this:
Step 2: Building and deploying a Lambda function
Now build a Lambda function and deploy it to the new Greengrass Core instance. You can find example local Lambda functions in the aws-greengrass-lambda-functions GitHub repository. This example will use the Hello World Python 3 function from that repo.
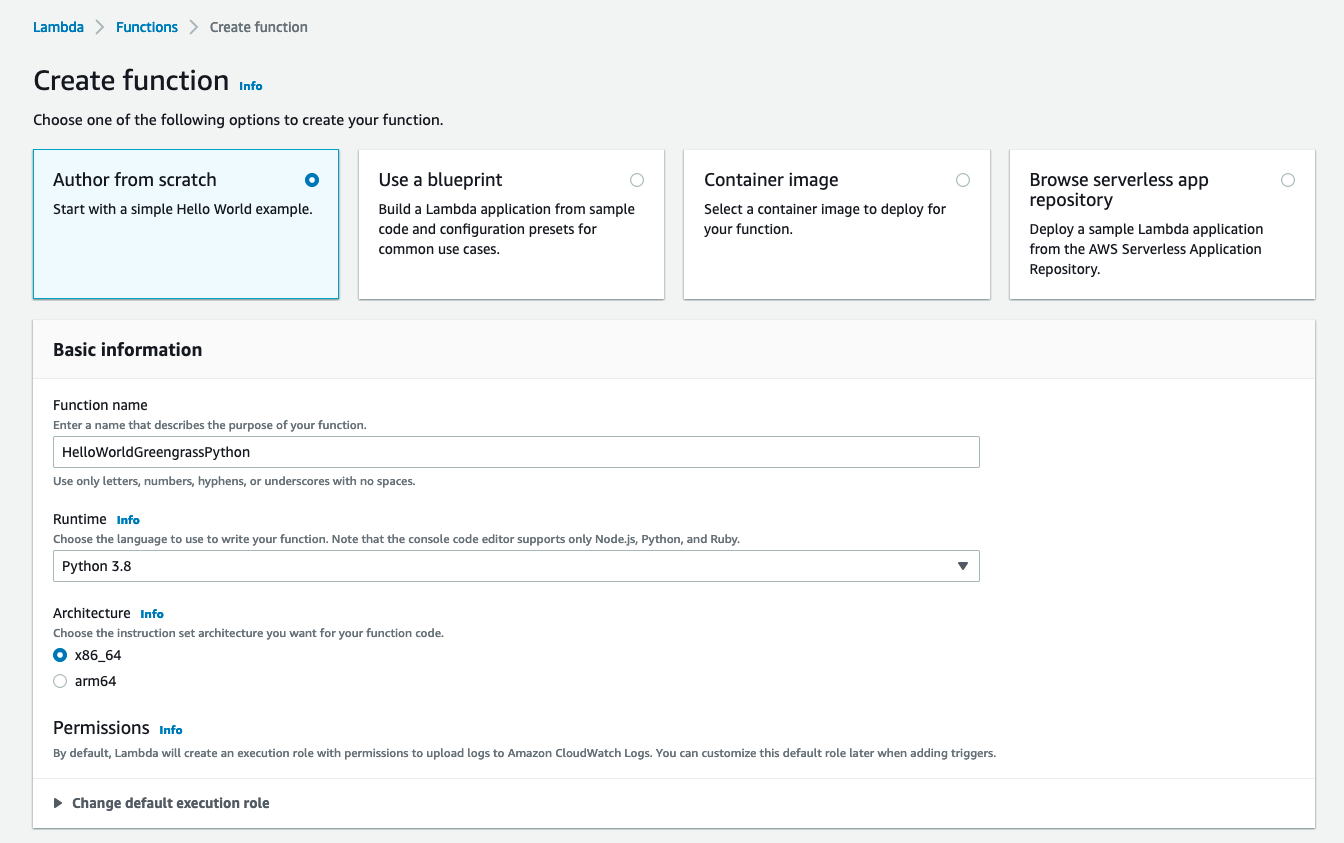
- Create the Lambda function. Go to the Lambda console, choose Create function, and select the Python 3.8 runtime:
- Choose Create function at the bottom of the page. Once your new function has been created, copy the code from the Hello World Python 3 example into your function:
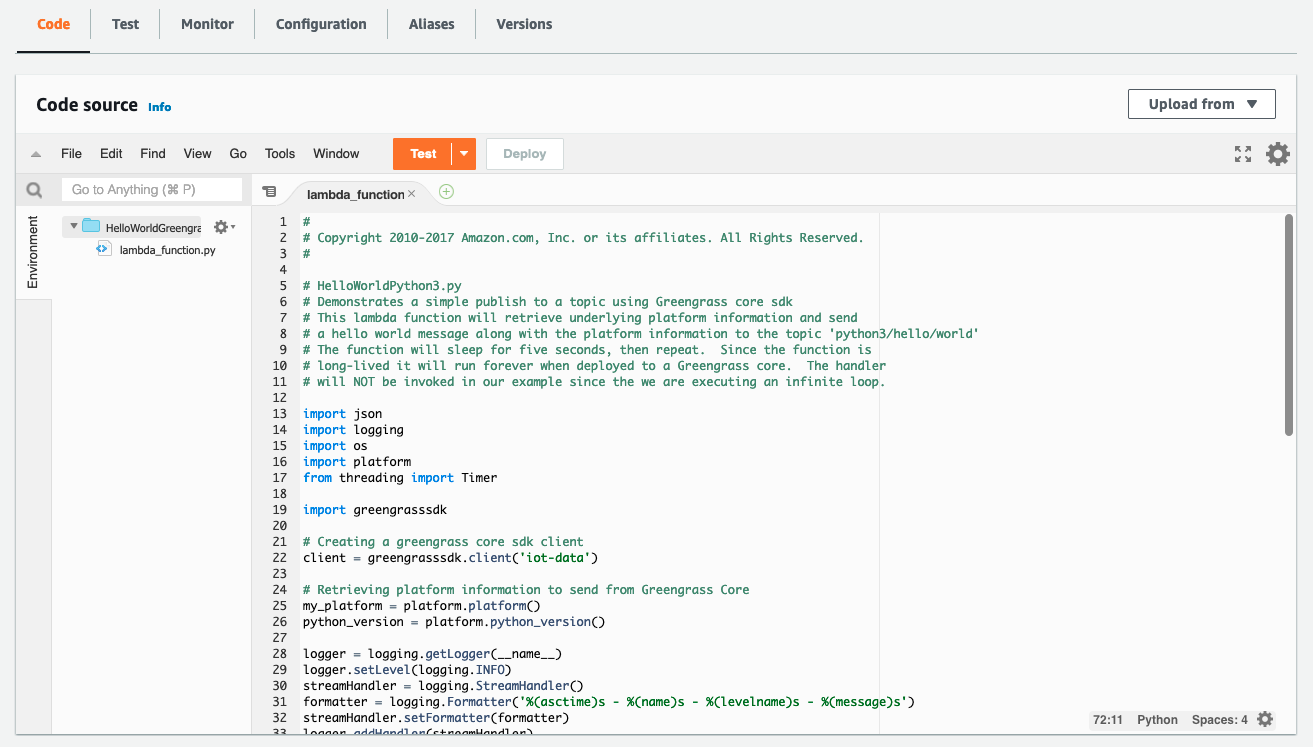
- Choose Deploy to deploy your new function’s code.
- In the top right, choose Actions and select Publish new version. For this particular function, you would need to create a deployment package with the AWS IoT Greengrass SDK for the function to work on the device. I’ve omitted this step for brevity as it is not a main focus of this post. Please reference the Lambda documentation on deployment packages and the Python-specific deployment package docs if you want to pursue this option.

- Go to the AWS IoT Greengrass console and choose Components in the left-side pop-in menu.
- On the Components page, choose Create component, and then Import Lambda function. If you prefer to do this programmatically, see the relevant AWS IoT Greengrass documentation or AWS CloudFormation documentation.
- Choose your new Lambda function from the drop-down.

- Scroll to the bottom and choose Create component.
- Go to the Core devices menu in the left-side nav bar and select your Greengrass Core device. This is the Greengrass Core EC2 instance you set up earlier. Make a note of the core device’s name.

- Use the left-side nav bar to go to the Deployments menu. Choose Create to create a new deployment, which will place your Lambda function on your Outpost-hosted core device.
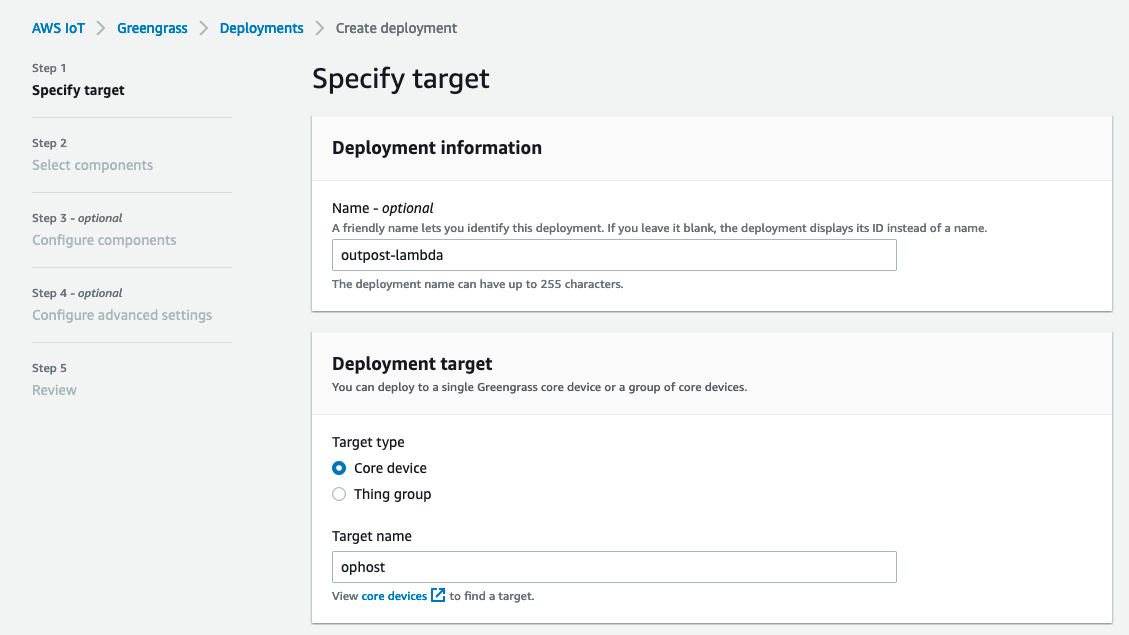
- Give the deployment a name and select Core device, providing the name of your core device. Choose Next.
- Select your Lambda function and choose Next.

- Choose Next again, on both the Configure components and Configure advanced settings On the last page, choose Deploy.

You should see a green message at the top of the screen indicating that your configuration is now being deployed.
Clean up
- Delete the Lambda function you created.
- Terminate the Greengrass Core EC2 instance.
- Delete the VPC.
Conclusion
Many customers use AWS Outposts to expand applications into new geographies. Some customers want to run Lambda-based applications on Outposts. This blog post shows how to use AWS IoT Greengrass to build Lambda functions which run locally on Outposts.
To learn more about Outposts, please contact your AWS representative and visit the Outposts homepage and documentation.