Tag Archives: 3D printing

3D print you own replica Astro Pi flight case

Post Syndicated from Richard Hayler original https://www.raspberrypi.org/blog/3d-print-astro-pi-flight-case-mark-ii/

We’ve put together a new how-to guide for 3D printing and assembling your own Astro Pi unit replica, based on the upgraded units we sent to the International Space Station in December.

Astro Pi MK II hardware.
The new, upgraded Astro Pi units.

The Astro Pi case connects young people to the Astro Pi Challenge

It wasn’t long after the first Raspberry Pi computer was launched that people started creating the first cases for it. Over the years, they’ve designed really useful ones, along with some very stylish ones. Without a doubt, the most useful and stylish one has to be the Astro Pi flight case.

Animation of how the components of the Mark 2 Astro Pi hardware unit fit together.
What’s inside the new units.

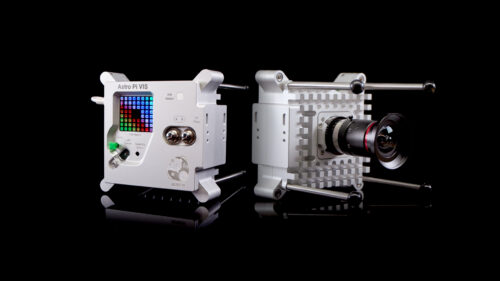
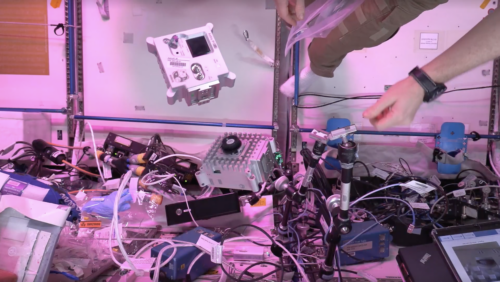
This case houses the Astro Pi units, the hardware young people use when they take part in the European Astro Pi Challenge. Designed by the amazing Jon Wells for the very first Astro Pi Challenge, which was part of Tim Peake’s Principia mission to the ISS in 2015, the case has become an iconic part of the Astro Pi journey for young people.

Logo of the European Astro Pi Challenge.

As Jon says: “The design of the original flight case, although functional, formed an emotional connection with the young people who took part in the programme and is an engaging and integral part of the experience of the Astro Pi.”

People love to 3D print Astro Pi cases

Although printing an Astro Pi case is absolutely not essential for participating in the European Astro Pi Challenge, many of the teams of young people who participate in Astro Pi Mission Space Lab, and create experiments to run on the Astro Pi units aboard the ISS, do print Astro Pi cases to house the hardware that we send them for testing their experiments.

An aluminium-encased Astro Pi unit next to a 3D-printed Astro Pi unit replica.
An aluminium Astro Pi case, and a 3D printed case.

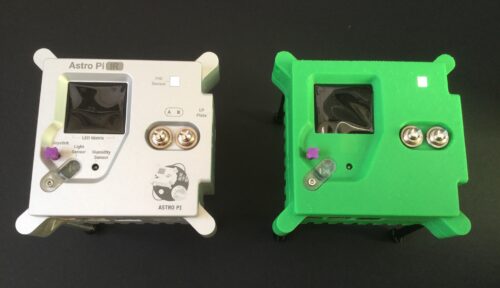
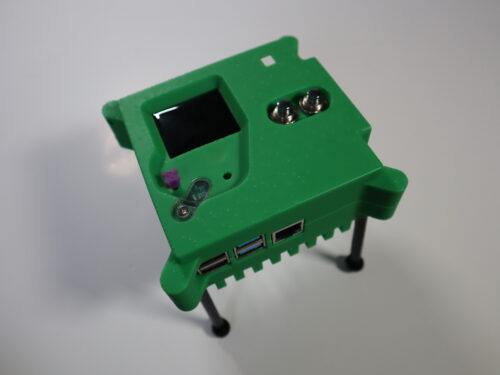
When we published the first how-to guide for 3D printing an Astro Pi case and making a working replica of the unit, it was immediately popular. We saw an exciting range of cases being produced. Some people (such as me) tried to make theirs look as similar as possible to the original aluminium Astro Pi flight unit, even using metallic spray paint to complete the effect. Others chose to go for a multicolour model, or even used glow-in-the-dark filament.

So it wasn’t a huge surprise that when we announced that we were sending upgraded Astro Pi units to the ISS — with cases again designed by Jon Wells — we received a flurry of requests for the files needed to 3D print these new cases.

The mark 2 Astro Pi units spin in microgravity on the International Space Station.
The new Astro Pi units are on board the ISS now.

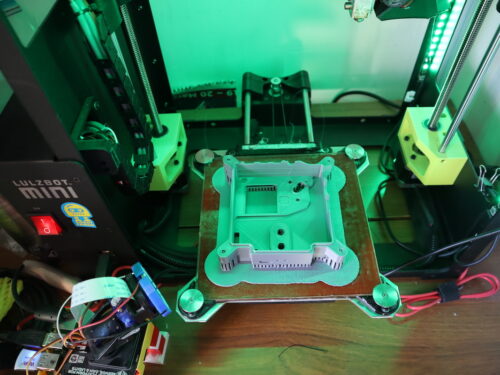
Now that the commissioning of the new Astro Pi units, which arrived on board the International Space Station in December, is complete, we’ve been able to put together an all-new how-to guide to 3D printing your own Mark II Astro Pi case and assembling your own Astro Pi unit replica at home or in the classroom.

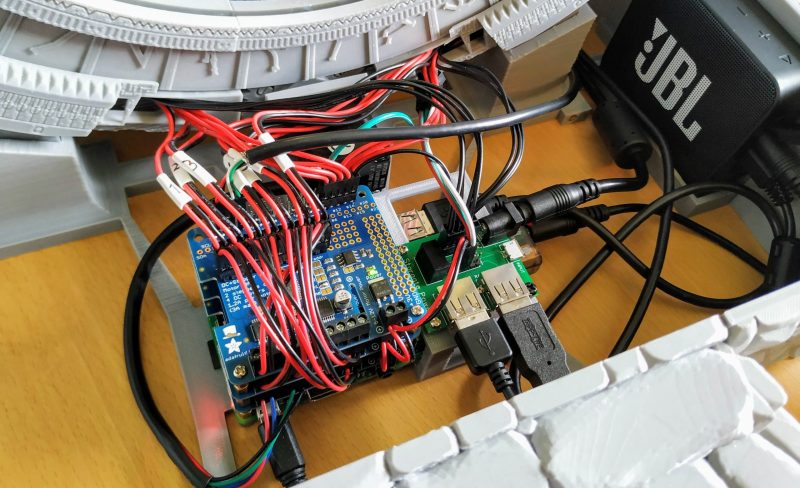
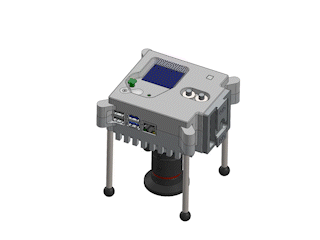
The guide also includes step-by-step instructions to completing the internal wiring so you can construct a working Astro Pi unit. We’re provided a custom version of the self-test software that is used on the official Astro Pis, so you can check that everything is operational.

If you’re new to 3D printing, you might like to try one of our BlocksCAD projects and practice printing a simpler design before you move on the the Astro Pi case.

Changes and improvements to the guide

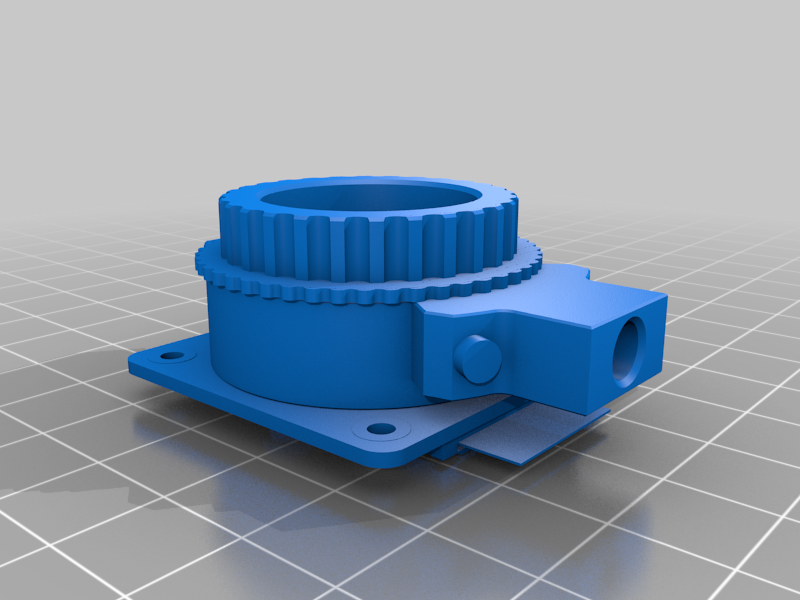
We’ve made some changes to the original CAD designs to make printing the Mark II case parts and assembling a working Astro Pi replica unit as easy as possible. Unlike the STL files for the Mark I case, we’ve kept the upper and lower body components as single parts, rather than splitting each into two thinner halves. 3D printers have continued to improve since we wrote the first how-to guide. Most now have heated beds, which prevent warping, and we’ve successfully printed the Mark II parts on a range of affordable machines.

An Astro Pi case front is being printed on a 3D printer.
Printing an Astro Pi case.

The guide contains lots of hints and tips for getting the best results. As usual with 3D printing, be prepared to make some tweaks for the particular printer that you use.

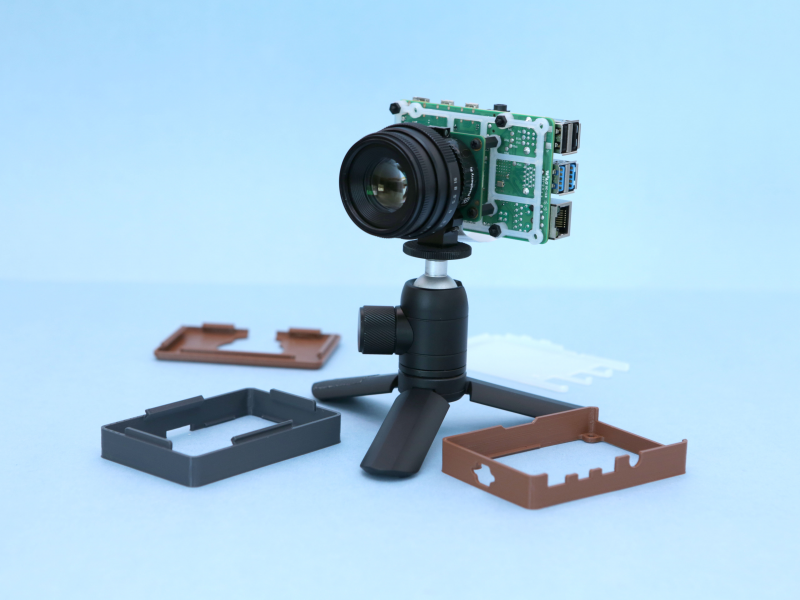
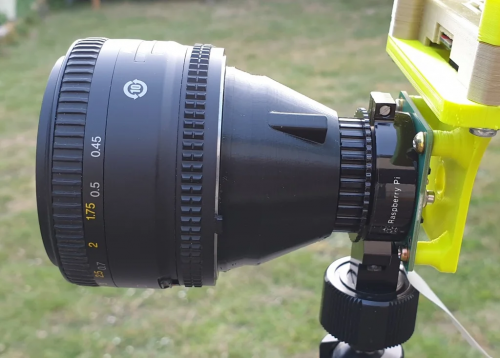
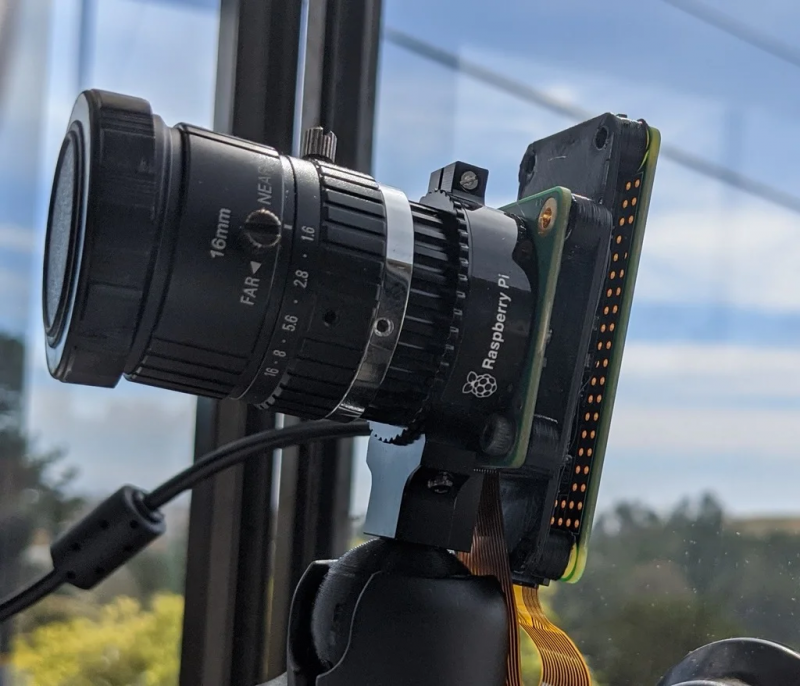
In addition to the upper and lower case parts, there are also some extra components to print this time: the colour sensor window, the joystick cap, the Raspberry Pi High Quality Camera housing, and the legs that protect the lenses and allow the Astro Pi units on the ISS to be safely placed up against the nadir window.

Four 3D-printed Astro Pi case fronts.
You can choose between four variants of the upper case part.

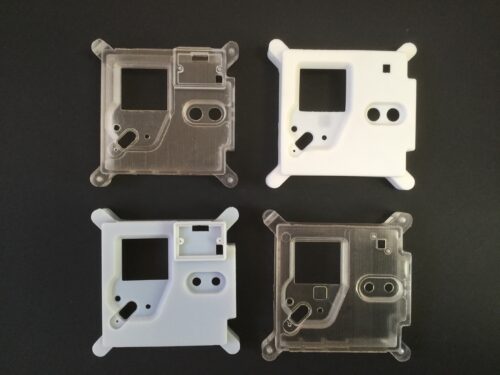
We’ve included files for four variants of the upper case part (see above). In order to keep costs down, the kits that we send to Astro Pi Mission Space Lab teams have a different PIR sensor to the ones of the proper Astro Pi units. So we’ve produced files for upper case parts that allow that sensor to be fitted. If you’re not taking part in the European Astro Pi Challenge, this also offers a cheaper alternative to creating an Astro Pi replica which still includes the motion detection capability:

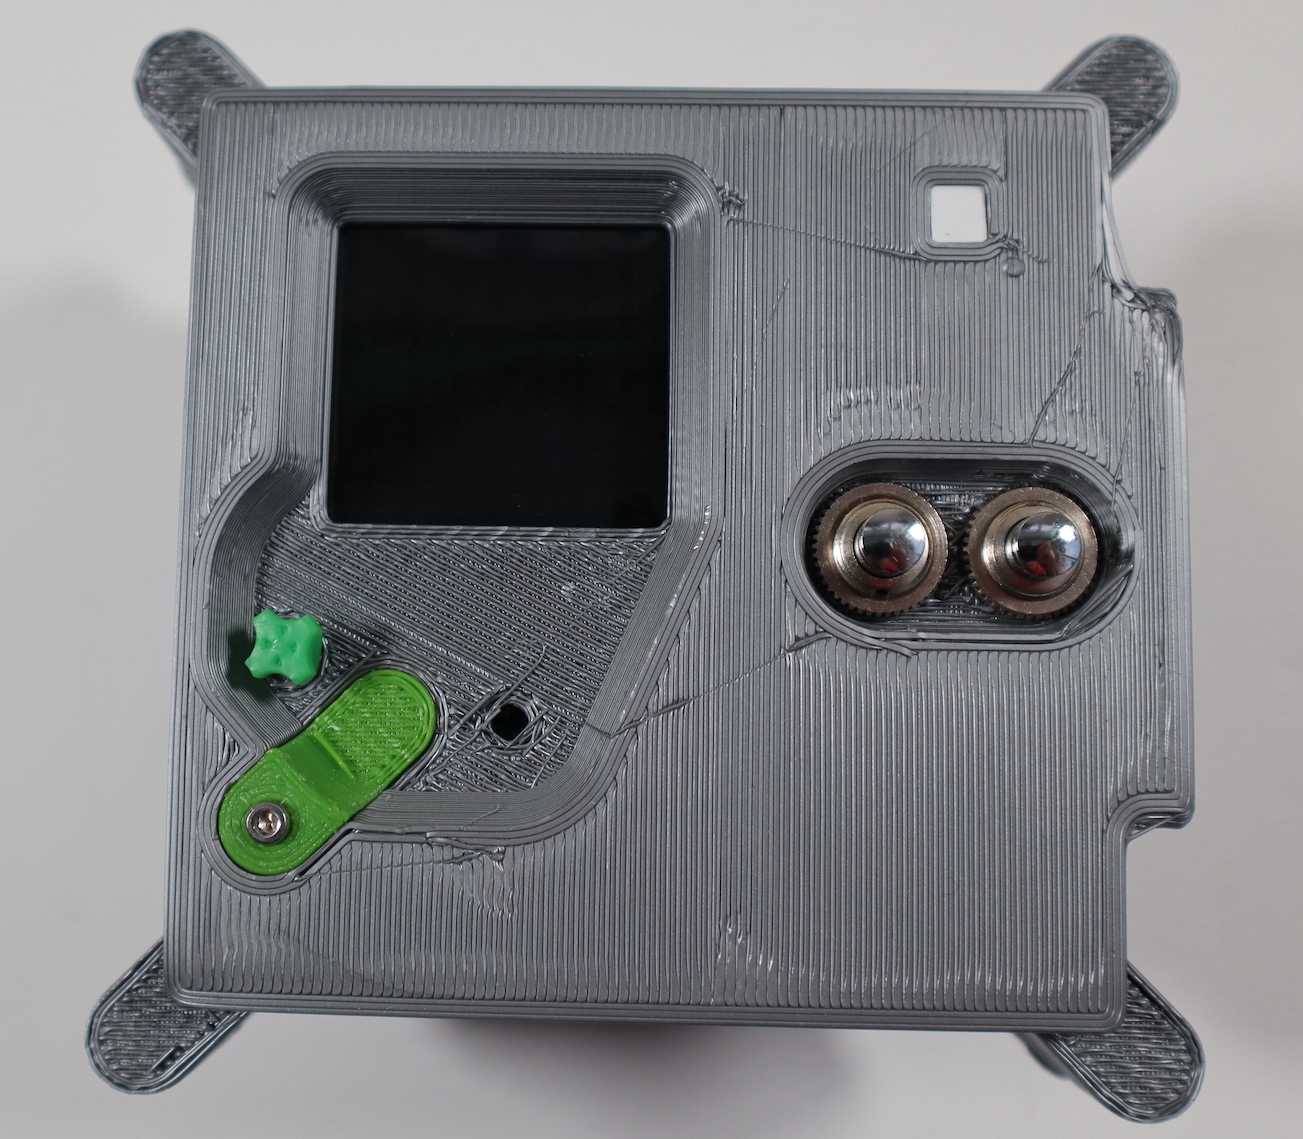
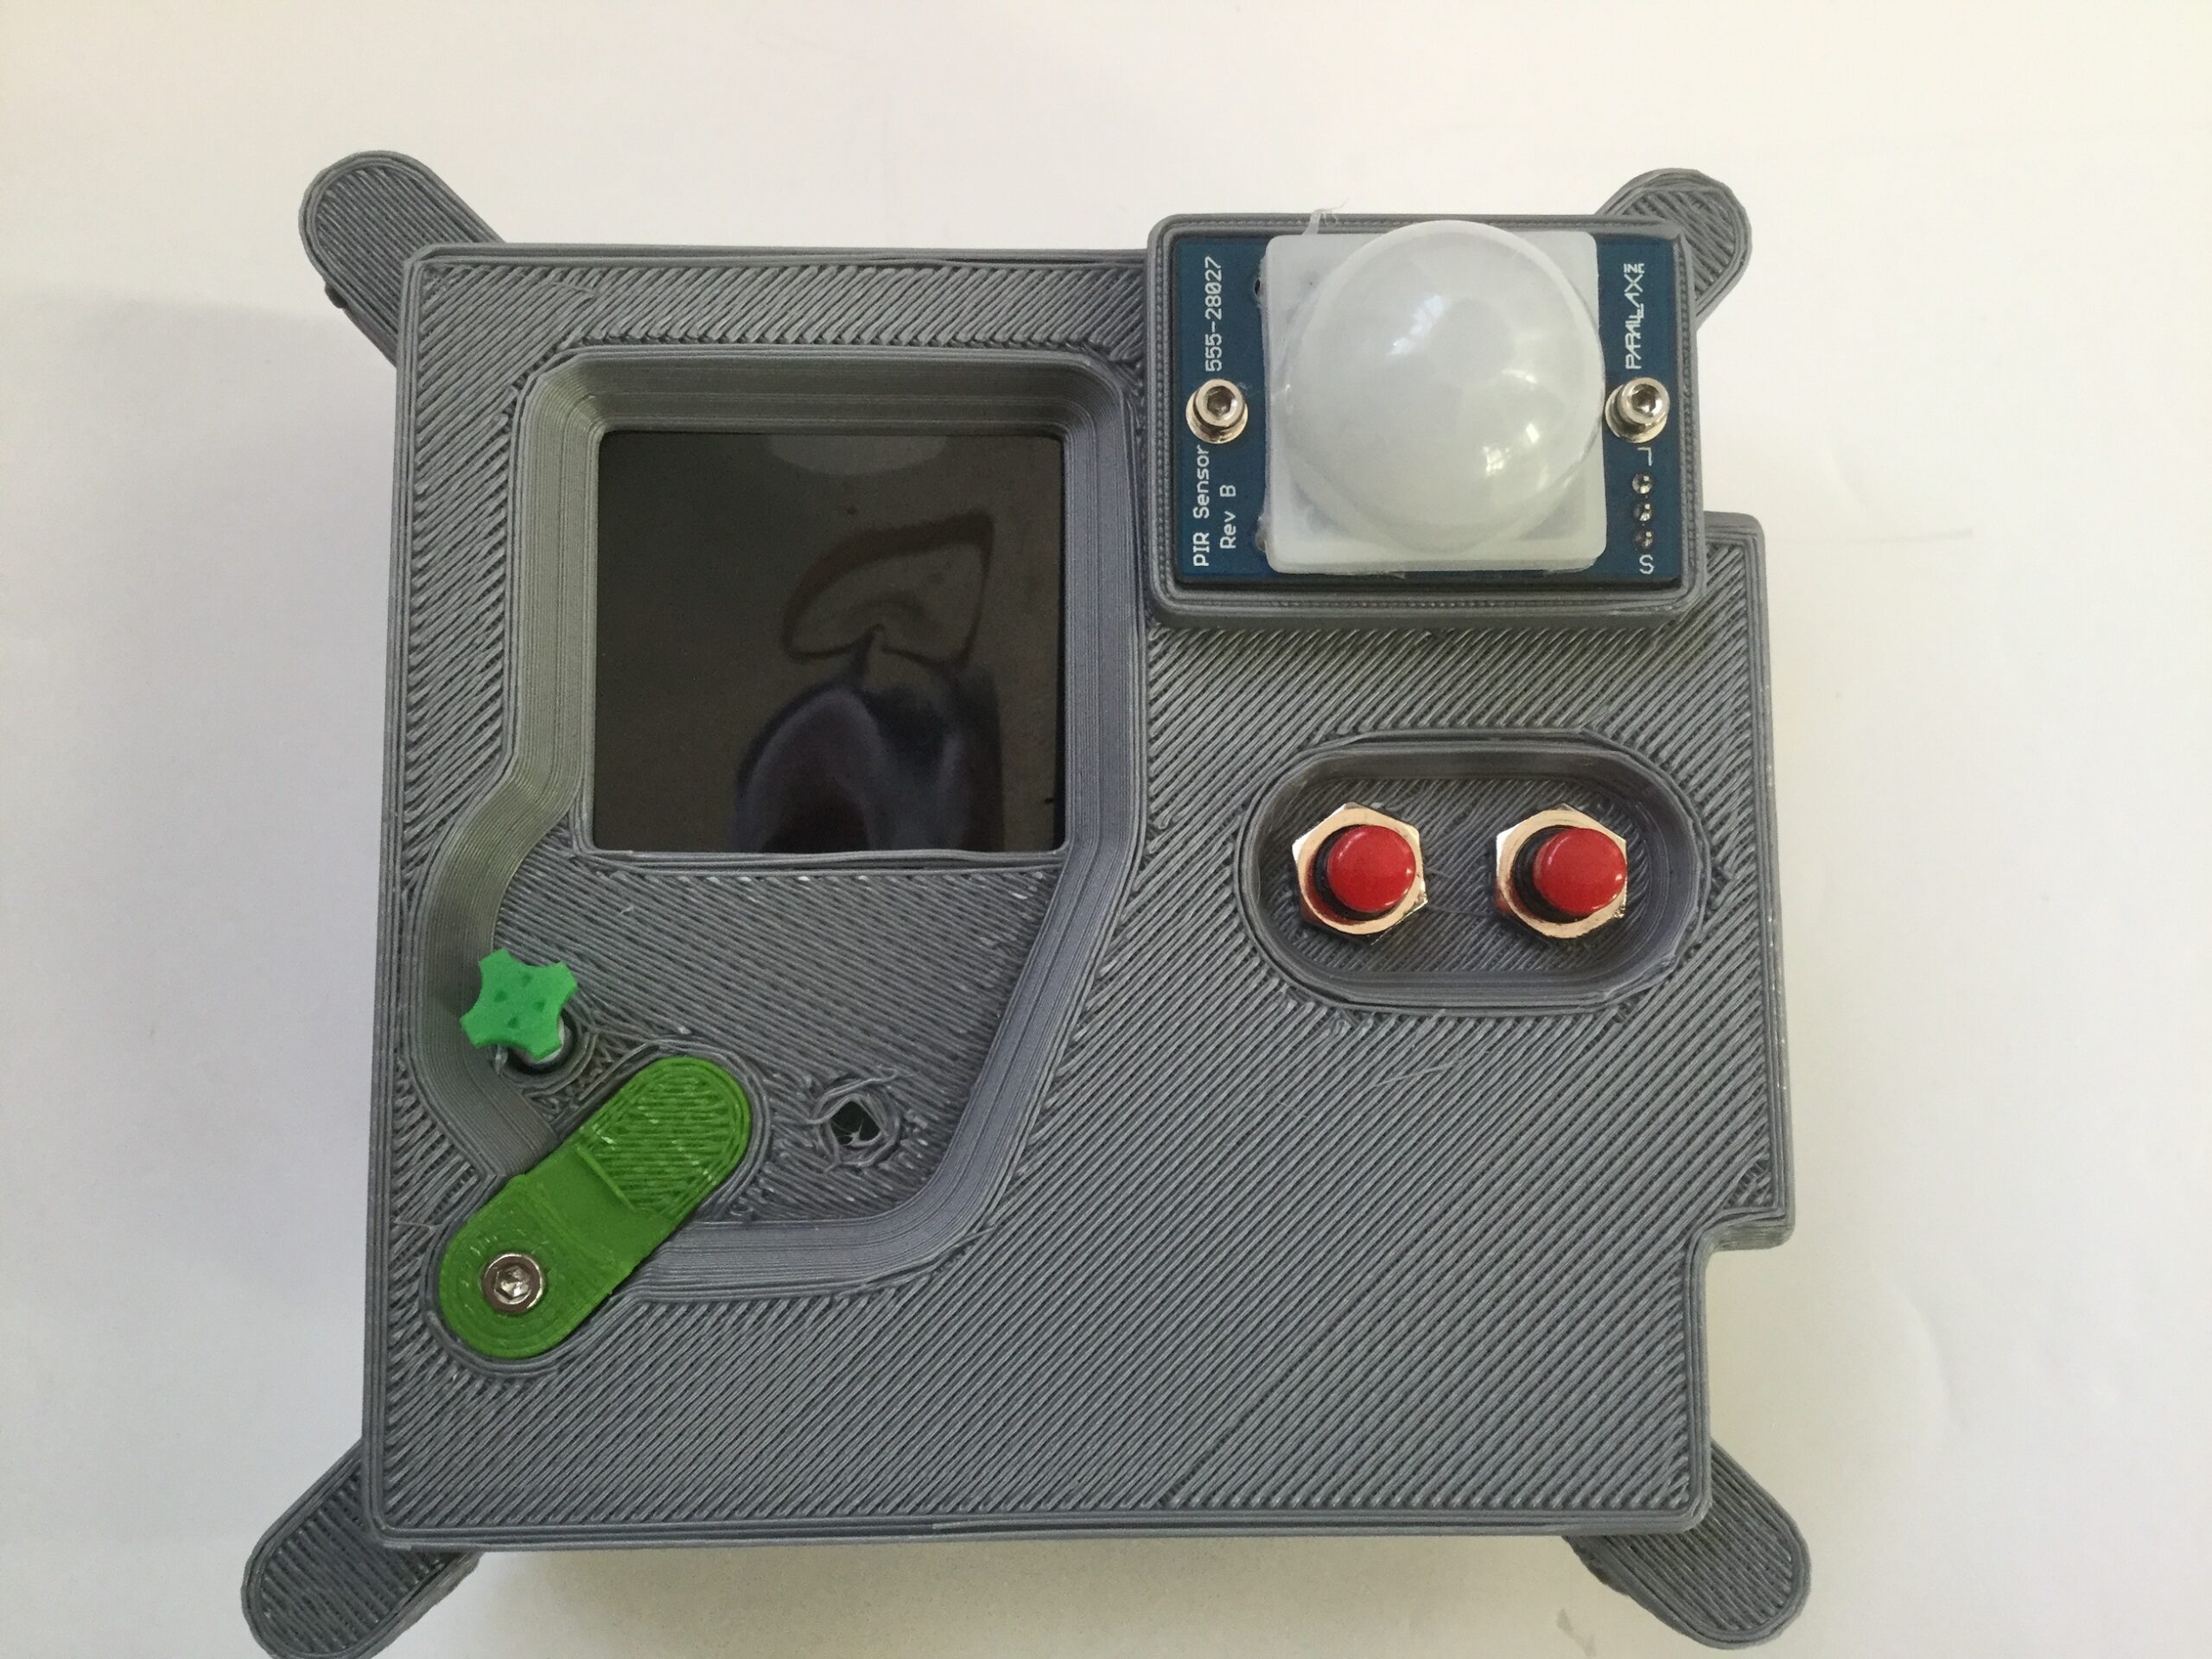
We’ve also provided versions for the upper case part that have smaller holes for the push buttons. So, if you don’t fancy splashing out on the supremely pressable authentic buttons, you can use other colourful alternatives, which typically have a smaller diameter.

A 3D-printed Astro Pi unit replica with legs attached.
The guide includes files for printing the Astro Pi’s protective legs.

Do share photos of your 3D-printed Astro Pi cases with us by tweeting pictures of them to @astro_pi and @RaspberryPi_org.

One week left to help young people make space history with Astro Pi Mission Zero

It’s still not too late for young people to take part in this year’s Astro Pi beginners’ coding activity, Mission Zero, and suggest their ideas for the names for the two new Astro Pi units! Astro Pi Mission Zero is still open until next Friday, 18 March.

Logo of Mission Zero, part of the European Astro Pi Challenge.

The post 3D print you own replica Astro Pi flight case appeared first on Raspberry Pi.

The Stargate | The MagPi 101

Post Syndicated from Rob Zwetsloot original https://www.raspberrypi.org/blog/the-stargate-the-magpi-101/

Fans of the Stargate SG-1 series, prepare to be inspired: a fellow aficionado has fashioned his own model of the show’s iconic portal. Nicola King takes an interstellar trip in the latest issue of The MagPi Magazine.

A mini version of the Stargate from TV sat on a table. Blue glowing light emits from the fake tunnel

When Kristian Tysse began making some projects on his new 3D printer, he soon became aware that the possibility of printing his own ‘working’ Stargate SG-1 model was within his grasp at last. “I suddenly realised I might now have enough knowledge about 3D printing, Raspberry Pi, motors, and programming to actually make a Stargate model of my own,” he tells us. “I wanted people who are familiar with the show to immediately know what it was, and tried to make it work as best I could, while staying as true as possible to the feeling and essence of the TV show.”

Raspberry Pi buried in the wires powering the mini stargate

Kristian also wanted to use a Raspberry Pi within this fully interactive, light-up, moving-parts project as “it is a powerful device with lots of flexibility. I do like that it functions as a full computer with an operating system with all the possibility that brings.”

Model minutiae

The back of the stargate controller with no lights on

You only have to look at the model to see just how much 3D printing was needed to get all of the parts ready to piece together, and Kristian created it in segments. But one of the key parts of his model is the DHD or Dial Home Device which viewers of the series will be familiar with. “The DHD functions as a USB keyboard and, when the keys are used, it sends signals to the (Python) program on Raspberry Pi that engages the different motors and lights in a proper Stargate way,” he enthuses. “If a correct set of keys/symbols are pressed on the DHD, the wormhole is established – illustrated on my Stargate with an infinity mirror effect.” 

“I wanted people who are familiar with the show to immediately know what it was”

Kristian Tysse

However, the DHD was a challenge, and Kristian is still tweaking it to improve how it works. He admits that writing the software for the project was also tricky, “but when I think back, the most challenging part was actually making it ‘functional’, and fitting all the wires and motors on it without destroying the look and shape of the Stargate itself.”

Dazzling detail

A close up of the stargate control panel with glowing orange touch buttons

Kristian admits to using a little artistic licence along the way, but he is keen to ensure the model replicates the original as far as possible. “I have taken a few liberties here and there. People on the social media channels are quick to point out differences between my Stargate and the one in the series. I have listened to most of those and done some changes. I will implement some more of those changes as the project continues,” he says. He also had to redesign the project several times, and had a number of challenges to overcome, especially in creating the seven lit, moving chevrons: “I tried many different approaches before I landed on the right one.”

The results of Kristian’s time-intensive labours are truly impressive, and show what you can achieve when you are willing to put in the hours and the attention to detail. Take a look at Kristian’s extremely detailed project page to see more on this super-stellar make.

Issue #101 of The MagPi Magazine out NOW

The front cover of the magazine featuring Raspberry Pi 400

Never want to miss an issue? Subscribe to The MagPi and we’ll deliver every issue straight to your door. Also, if you’re a new subscriber and get the 12-month subscription, you’ll get a completely free Raspberry Pi Zero bundle with a Raspberry Pi Zero W and accessories.

The post The Stargate | The MagPi 101 appeared first on Raspberry Pi.

3D-printable cases for the Raspberry Pi High Quality Camera

Post Syndicated from Alex Bate original https://www.raspberrypi.org/blog/3d-printable-cases-for-the-raspberry-pi-high-quality-camera/

Earlier this year, we released the Raspberry Pi High Quality Camera, a brand-new 12.3 megapixel camera that allows you to use C- and CS-mount lenses with Raspberry Pi boards.

We love it. You love it.

How do we know you love it? Because the internet is now full of really awesome 3D-printable cases and add-ons our community has created in order to use their High Quality Camera out and about…or for Octoprint…or home security…or SPACE PHOTOGRAPHY, WHAT?!

The moon, captured by a Raspberry Pi High Quality Camera. Credit: Greg Annandale

We thought it would be fun to show you some of 3D designs we’ve seen pop up on sites like Thingiverse and MyMiniFactory, so that anyone with access to a 3D printer can build their own camera too!

Adafruit did a thing, obvs

Shout out to our friends at Adafruit for this really neat, retro-looking camera case designed by the Ruiz Brothers. The brown filament used for the casing is so reminiscent of the leather bodies of SLRs from my beloved 1980s childhood that I can’t help but be drawn to it. And, with snap-fit parts throughout, you can modify this case model as you see fit. Not bad. Not bad at all.

Nikon to Raspberry Pi

While the Raspberry Pi High Quality Camera is suitable for C- and CS-mount lenses out of the box, this doesn’t mean you’re limited to only these sizes! There’s a plethora of C- and CS-mount adapters available on the market, and you can also 3D print your own adapter.

Thingiverse user UltiArjan has done exactly that and designed this adapter for using Nikon lenses with the High Quality Camera. Precision is key here to get a snug thread, so you may have to fiddle with your printer settings to get the right fit.

And, for the Canon users out there, here’s Zimbo1’s adapter for Canon EF lenses!

Raspberry Pi Zero minimal adapter

If you’re not interested in a full-body camera case and just need something to attach A to B, this minimal adapter for the Raspberry Pi Zero will be right up your street.

Designer ed7coyne put this model together in order to use Raspberry Pi Zero as a webcam, and according to Cura on my laptop, should only take about 2 hours to print at 0.1 with supports. In fact, since I’ve got Cura open already…

3D print a Raspberry Pi High Quality Camera?!

Not a working one, of course, but if you’re building something around the High Quality Camera and want to make sure everything fits without putting the device in jeopardy, you could always print a replica for prototyping!

Thingiverse user tmomas produced this scale replica of the Raspberry Pi High Quality Camera with the help of reference photos and technical drawings, and a quick search online will uncover similar designs for replicas of other Raspberry Pi products you might want to use while building a prototype

Bonus content alert

We made this video for HackSpace magazine earlier this year, and it’s a really hand resource if you’re new to the 3D printing game.

Also…

…I wasn’t lying when I said I was going to print ed7coyne’s minimal adapter.

The post 3D-printable cases for the Raspberry Pi High Quality Camera appeared first on Raspberry Pi.