Post Syndicated from Ashley Whittaker original https://www.raspberrypi.org/blog/raspberry-pi-displays-album-art-on-led-matrix/
We’ve seen a few innovative album art displays using Raspberry Pi, from LEGO minifigures playing their own music to this NFC-powered record player.
Redditor u/gonnabuysomewindows was looking for a fun project combining Raspberry Pi and Adafruit’s LED matrix, and has created the latest cool album art display to grace our blog.
Hardware
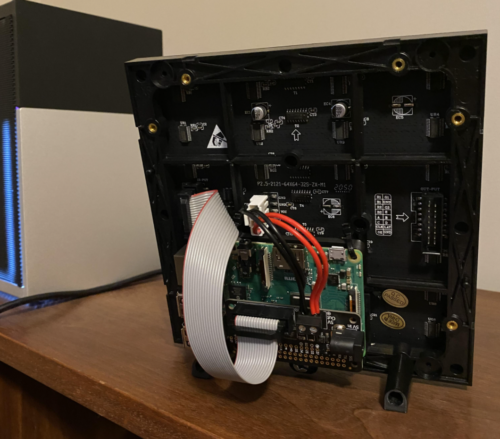
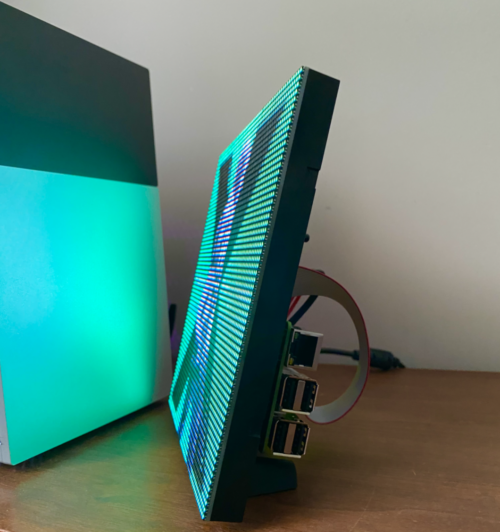
- Raspberry Pi 3 Model B+
- Adafruit 64×64 RGB LED Matrix
- Adafruit RGB Matrix Bonnet for Raspberry Pi (this also powers the Raspberry Pi)
- 5v 10a switching PSU
- 3D-printed Matrix feet to stand it upright and Raspberry Pi mount to secure the Raspberry Pi to the back
How does it work?
The maker turned to PowerShell – a cross-platform task automation solution – to create a script (available on GitHub) that tells the Raspberry Pi which album is playing, and sends it the album artwork for display on the LED matrix.
Raspberry Pi runs a flaschen-taschen server to display the album artwork. The PowerShell script runs a ‘send image’ command every time the album art updates. Then the Raspberry Pi switches the display to reflect what is now playing. In the demo video, the maker runs this from iTunes, but says that any PowerShell-compatible music player (ie: Spotify) will work too.
Setting up your own LED album art display
The maker’s original reddit post shares a step-by-step guide to follow on the software side of things. And they detail the terminal code you’ll need to run on the Raspberry Pi to get your LED Matrix displaying the correct image.
They also suggest checking out Adafruit’s setup guides for the RGB Matrix Bonnet for Raspberry Pi and for the LED Matrix itself.
The post Raspberry Pi displays album art on LED matrix appeared first on Raspberry Pi.