Post Syndicated from Jacob Bednarz original https://blog.cloudflare.com/automatically-generating-cloudflares-terraform-provider
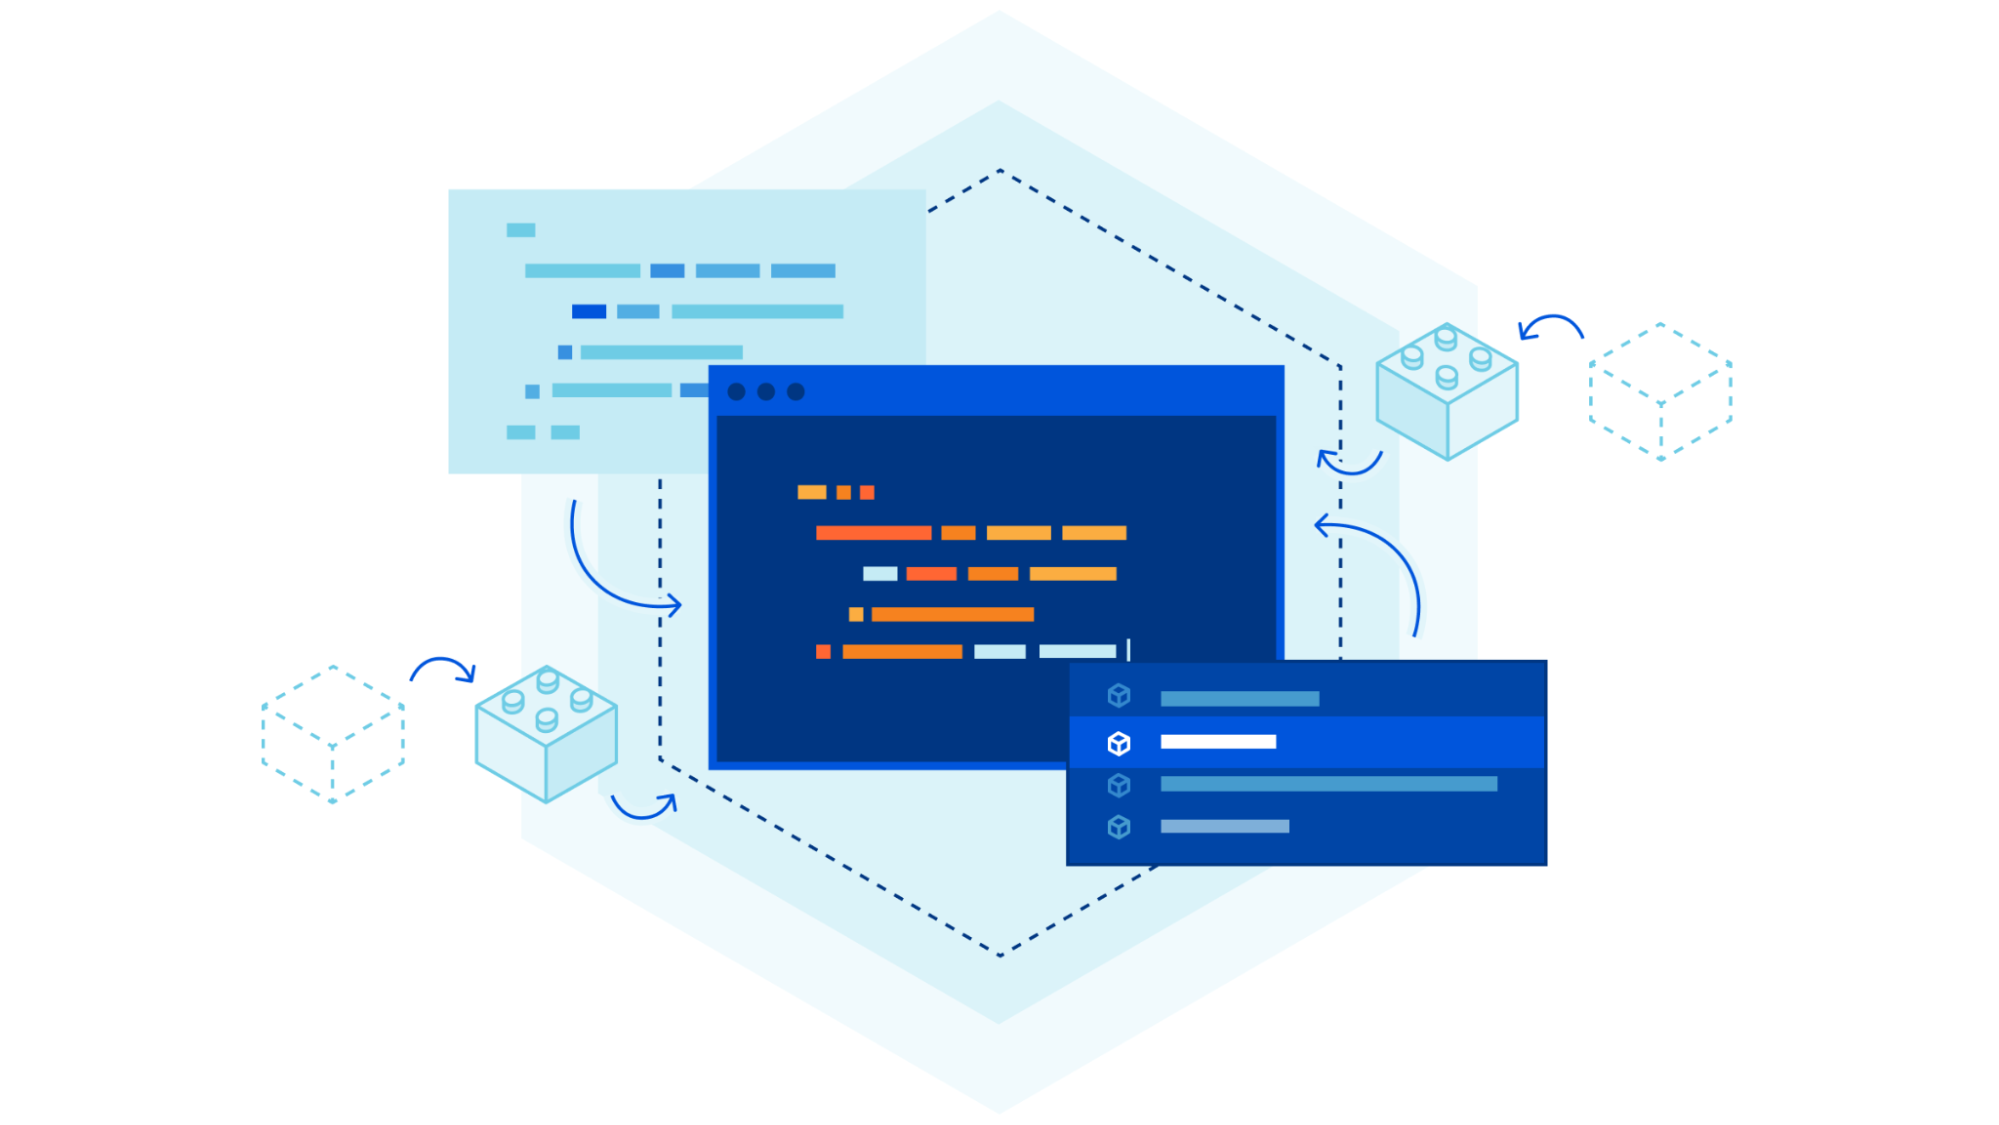
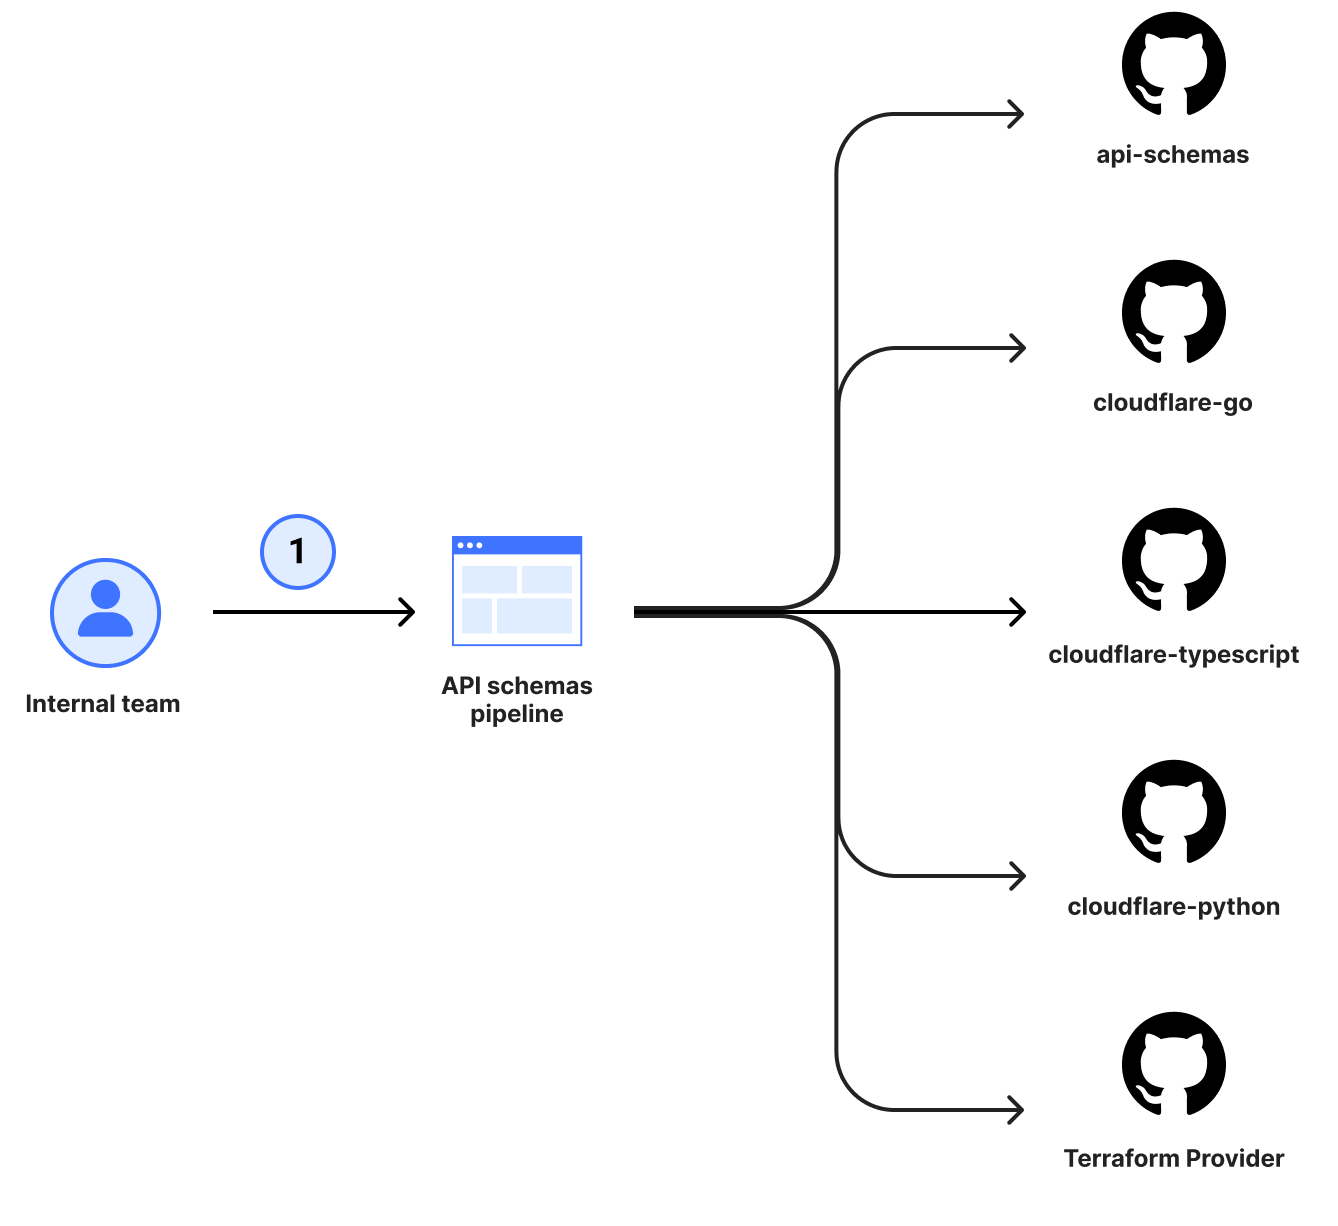
In November 2022, we announced the transition to OpenAPI Schemas for the Cloudflare API. Back then, we had an audacious goal to make the OpenAPI schemas the source of truth for our SDK ecosystem and reference documentation. During 2024’s Developer Week, we backed this up by announcing that our SDK libraries are now automatically generated from these OpenAPI schemas. Today, we’re excited to announce the latest pieces of the ecosystem to now be automatically generated — the Terraform provider and API reference documentation.
This means that the moment a new feature or attribute is added to our products and the team documents it, you’ll be able to see how it’s meant to be used across our SDK ecosystem and make use of it immediately. No more delays. No more lacking coverage of API endpoints.
You can find the new documentation site at https://developers.cloudflare.com/api-next/, and you can try the preview release candidate of the Terraform provider by installing 5.0.0-alpha1.
Why Terraform?
For anyone who is unfamiliar with Terraform, it is a tool for managing your infrastructure as code, much like you would with your application code. Many of our customers (big and small) rely on Terraform to orchestrate their infrastructure in a technology-agnostic way. Under the hood, it is essentially an HTTP client with lifecycle management built in, which means it makes use of our publicly documented APIs in a way that understands how to create, read, update and delete for the life of the resource.
Keeping Terraform updated — the old way
Historically, Cloudflare has manually maintained a Terraform provider, but since the provider internals require their own unique way of doing things, responsibility for maintenance and support has landed on the shoulders of a handful of individuals. The service teams always had difficulties keeping up with the number of changes, due to the amount of cognitive overhead required to ship a single change in the provider. In order for a team to get a change to the provider, it took a minimum of 3 pull requests (4 if you were adding support to cf-terraforming).
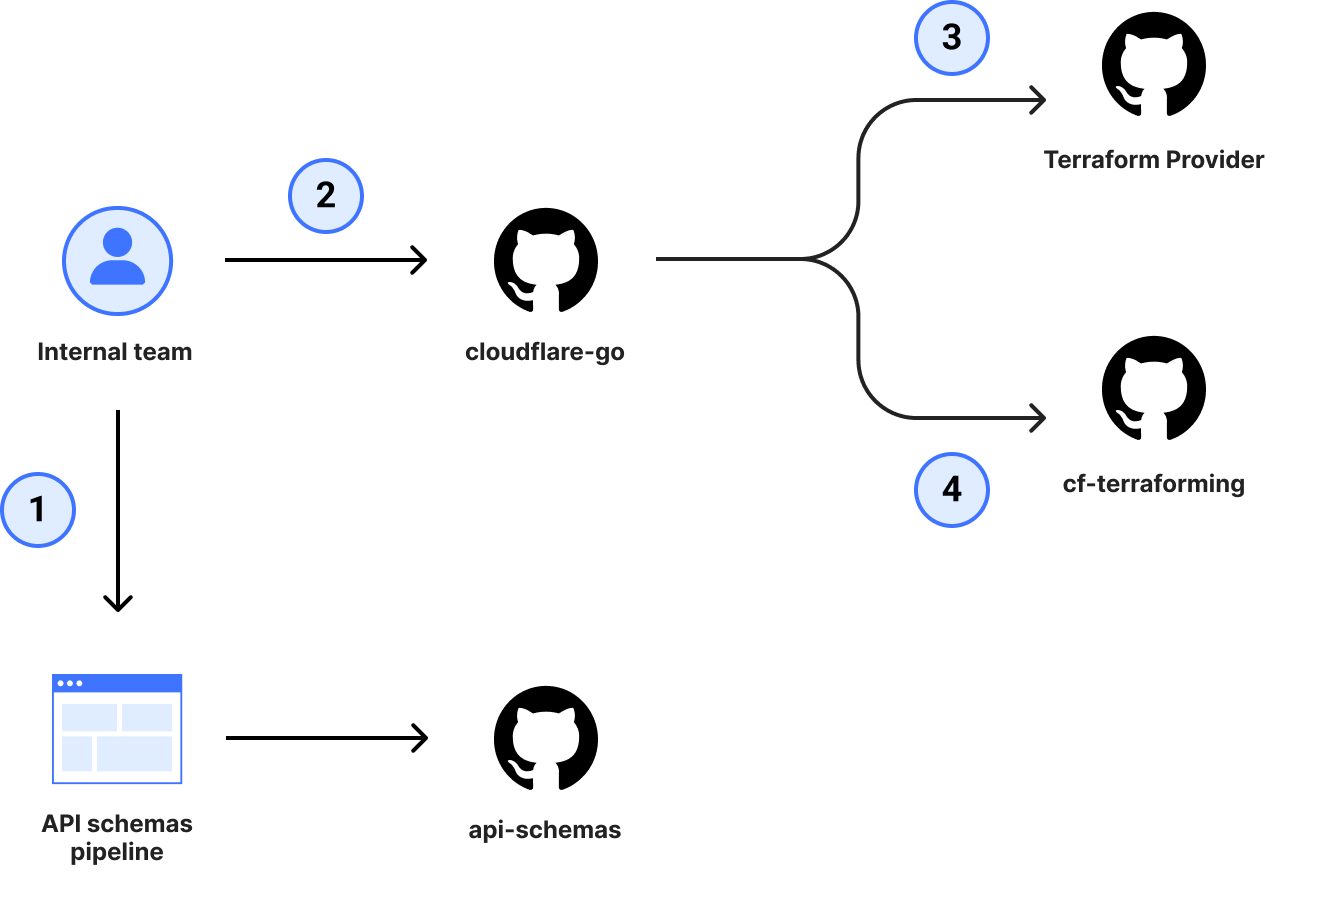
Even with the 4 pull requests completed, it didn’t offer guarantees on coverage of all available attributes, which meant small yet important details could be forgotten and not exposed to customers, causing frustration when trying to configure a resource.
To address this, our Terraform provider needed to be relying on the same OpenAPI schemas that the rest of our SDK ecosystem was already benefiting from.
Updating Terraform automatically
The thing that differentiates Terraform from our SDKs is that it manages the lifecycle of resources. With that comes a new range of problems related to known values and managing differences in the request and response payloads. Let’s compare the two different approaches of creating a new DNS record and fetching it back.
With our Go SDK:
// Create the new record
record, _ := client.DNS.Records.New(context.TODO(), dns.RecordNewParams{
	ZoneID: cloudflare.F("023e105f4ecef8ad9ca31a8372d0c353"),
	Record: dns.RecordParam{
		Name:    cloudflare.String("@"),
		Type:    cloudflare.String("CNAME"),
        Content: cloudflare.String("example.com"),
	},
})


// Wasteful fetch, but shows the point
client.DNS.Records.Get(
	context.Background(),
	record.ID,
	dns.RecordGetParams{
		ZoneID: cloudflare.String("023e105f4ecef8ad9ca31a8372d0c353"),
	},
)
And with Terraform:
resource "cloudflare_dns_record" "example" {
  zone_id = "023e105f4ecef8ad9ca31a8372d0c353"
  name    = "@"
  content = "example.com"
  type    = "CNAME"
}
On the surface, it looks like the Terraform approach is simpler, and you would be correct. The complexity of knowing how to create a new resource and maintain changes are handled for you. However, the problem is that for Terraform to offer this abstraction and data guarantee, all values must be known at apply time. That means that even if you’re not using the proxied value, Terraform needs to know what the value needs to be in order to save it in the state file and manage that attribute going forward. The error below is what Terraform operators commonly see from providers when the value isn’t known at apply time.
Error: Provider produced inconsistent result after apply

When applying changes to example_thing.foo, provider "provider[\"registry.terraform.io/example/example\"]"
produced an unexpected new value: .foo: was null, but now cty.StringVal("").
Whereas when using the SDKs, if you don’t need a field, you just omit it and never need to worry about maintaining known values.
Tackling this for our OpenAPI schemas was no small feat. Since introducing Terraform generation support, the quality of our schemas has improved by an order of magnitude. Now we are explicitly calling out all default values that are present, variable response properties based on the request payload, and any server-side computed attributes. All of this means a better experience for anyone that interacts with our APIs.
Making the jump from terraform-plugin-sdk to terraform-plugin-framework
To build a Terraform provider and expose resources or data sources to operators, you need two main things: a provider server and a provider.
The provider server takes care of exposing a gRPC server that Terraform core (via the CLI) uses to communicate when managing resources or reading data sources from the operator provided configuration.
The provider is responsible for wrapping the resources and data sources, communicating with the remote services, and managing the state file. To do this, you either rely on the terraform-plugin-sdk (commonly referred to as SDKv2) or terraform-plugin-framework, which includes all the interfaces and methods provided by Terraform in order to manage the internals correctly. The decision as to which plugin you use depends on the age of your provider. SDKv2 has been around longer and is what most Terraform providers use, but due to the age and complexity, it has many core unresolved issues that must remain in order to facilitate backwards compatibility for those who rely on it. terraform-plugin-framework is the new version that, while lacking the breadth of features SDKv2 has, provides a more Go-like approach to building providers and addresses many of the underlying bugs in SDKv2.
(For a deeper comparison between SDKv2 and the framework, you can check out a conversation between myself and John Bristowe from Octopus Deploy.)
The majority of the Cloudflare Terraform provider is built using SDKv2, but at the beginning of 2023, we took the plunge to multiplex and offer both in our provider. To understand why this was needed, we have to understand a little about SDKv2. The way SDKv2 is structured isn’t really conducive to representing null or “unset” values consistently and reliably. You can use the experimental ResourceData.GetRawConfig to check whether the value is set, null, or unknown in the config, but writing it back as null isn’t really supported.
This caveat first popped up for us when the Edge Rules Engine (Rulesets) started onboarding new services and those services needed to support API responses that contained booleans in an unset (or missing), true, or false state each with their own reasoning and purpose. While this isn’t a conventional API design at Cloudflare, it is a valid way to do things that we should be able to work with. However, as mentioned above, the SDKv2 provider couldn’t. This is because when a value isn’t present in the response or read into state, it gets a Go-compatible zero value for the default. This showed up as the inability to unset values after they had been written to state as false values (and vice versa).
The only solution we have here to reliably use the three states of those boolean values is to migrate to the terraform-plugin-framework, which has the correct implementation of writing back unset values.
Once we started adding more functionality using terraform-plugin-framework in the old provider, it was clear that it was a better developer experience, so we added a ratchet to prevent SDKv2 usage going forward to get ahead of anyone unknowingly setting themselves up to hit this issue.
When we decided that we would be automatically generating the Terraform provider, it was only fitting that we also brought all the resources over to be based on the terraform-plugin-framework and leave the issues from SDKv2 behind for good. This did complicate the migration as with the improved internals came changes to major components like the schema and CRUD operations that we needed to familiarize ourselves with. However, it has been a worthwhile investment because by doing so, we’ve future-proofed the foundations of the provider and are now making fewer compromises on a great Terraform experience due to buggy, legacy internals.
Iteratively finding bugs
One of the common struggles with code generation pipelines is that unless you have existing tools that implement your new thing, it’s hard to know if it works or is reasonable to use. Sure, you can also generate your tests to exercise the new thing, but if there is a bug in the pipeline, you are very likely to not see it as a bug as you will be generating test assertions that show the bug is expected behavior.
One of the essential feedback loops we have had is the existing acceptance test suite. All resources within the existing provider had a mix of regression and functionality tests. Best of all, as the test suite is creating and managing real resources, it was very easy to know whether the outcome was a working implementation or not by looking at the HTTP traffic to see whether the API calls were accepted by the remote endpoints. Getting the test suite ported over was only a matter of copying over all the existing tests and checking for any type assertion differences (such as list to single nested list) before kicking off a test run to determine whether the resource was working correctly.
While the centralized schema pipeline was a huge quality of life improvement for having schema fixes propagate to the whole ecosystem almost instantly, it couldn’t help us solve the largest hurdle, which was surfacing bugs that hide other bugs. This was time-consuming because when fixing a problem in Terraform, you have three places where you can hit an error:
-
Before any API calls are made, Terraform implements logical schema validation and when it encounters validation errors, it will immediately halt.
-
If any API call fails, it will stop at the CRUD operation and return the diagnostics, immediately halting.
-
After the CRUD operation has run, Terraform then has checks in place to ensure all values are known.
That means that if we hit the bug at step 1 and then fixed the bug, there was no guarantee or way to tell that we didn’t have two more waiting for us. Not to mention that if we found a bug in step 2 and shipped a fix, that it wouldn’t then identify a bug in the first step on the next round of testing.
There is no silver bullet here and our workaround was instead to notice patterns of problems in the schema behaviors and apply CI lint rules within the OpenAPI schemas before it got into the code generation pipeline. Taking this approach incrementally cut down the number of bugs in step 1 and 2 until we were largely only dealing with the type in step 3.
A more reusable approach to model and struct conversion
Within Terraform provider CRUD operations, it is fairly common to see boilerplate like the following:
var plan ThingModel
diags := req.Plan.Get(ctx, &plan)
resp.Diagnostics.Append(diags...)
if resp.Diagnostics.HasError() {
	return
}

out, err := r.client.UpdateThingModel(ctx, client.ThingModelRequest{
	AttrA: plan.AttrA.ValueString(),
	AttrB: plan.AttrB.ValueString(),
	AttrC: plan.AttrC.ValueString(),
})
if err != nil {
	resp.Diagnostics.AddError(
		"Error updating project Thing",
		"Could not update Thing, unexpected error: "+err.Error(),
	)
	return
}

result := convertResponseToThingModel(out)
tflog.Info(ctx, "created thing", map[string]interface{}{
	"attr_a": result.AttrA.ValueString(),
	"attr_b": result.AttrB.ValueString(),
	"attr_c": result.AttrC.ValueString(),
})

diags = resp.State.Set(ctx, result)
resp.Diagnostics.Append(diags...)
if resp.Diagnostics.HasError() {
	return
}
At a high level:
-
We fetch the proposed updates (known as a plan) using
req.Plan.Get() -
Perform the update API call with the new values
-
Manipulate the data from a Go type into a Terraform model (
convertResponseToThingModel) -
Set the state by calling
resp.State.Set()
Initially, this doesn’t seem too problematic. However, the third step where we manipulate the Go type into the Terraform model quickly becomes cumbersome, error-prone, and complex because all of your resources need to do this in order to swap between the type and associated Terraform models.
To avoid generating more complex code than needed, one of the improvements featured in our provider is that all CRUD methods use unified apijson.Marshal, apijson.Unmarshal, and apijson.UnmarshalComputed methods that solve this problem by centralizing the conversion and handling logic based on the struct tags.
var data *ThingModel

resp.Diagnostics.Append(req.Plan.Get(ctx, &data)...)
if resp.Diagnostics.HasError() {
	return
}

dataBytes, err := apijson.Marshal(data)
if err != nil {
	resp.Diagnostics.AddError("failed to serialize http request", err.Error())
	return
}
res := new(http.Response)
env := ThingResultEnvelope{*data}
_, err = r.client.Thing.Update(
	// ...
)
if err != nil {
	resp.Diagnostics.AddError("failed to make http request", err.Error())
	return
}

bytes, _ := io.ReadAll(res.Body)
err = apijson.UnmarshalComputed(bytes, &env)
if err != nil {
	resp.Diagnostics.AddError("failed to deserialize http request", err.Error())
	return
}
data = &env.Result

resp.Diagnostics.Append(resp.State.Set(ctx, &data)...)
Instead of needing to generate hundreds of instances of type-to-model converter methods, we can instead decorate the Terraform model with the correct tags and handle marshaling and unmarshaling of the data consistently. It’s a minor change to the code that in the long run makes the generation more reusable and readable. As an added benefit, this approach is great for bug fixing as once you identify a bug with a particular type of field, fixing that in the unified interface fixes it for other occurrences you may not yet have found.
But wait, there’s more (docs)!
To top off our OpenAPI schema usage, we’re tightening the SDK integration with our new API documentation site. It’s using the same pipeline we’ve invested in for the last two years while addressing some of the common usage issues.
SDK aware
If you’ve used our API documentation site, you know we give you examples of interacting with the API using command line tools like curl. This is a great starting point, but if you’re using one of the SDK libraries, you need to do the mental gymnastics to convert it to the method or type definition you want to use. Now that we’re using the same pipeline to generate the SDKs and the documentation, we’re solving that by providing examples in all the libraries you could use — not just curl.
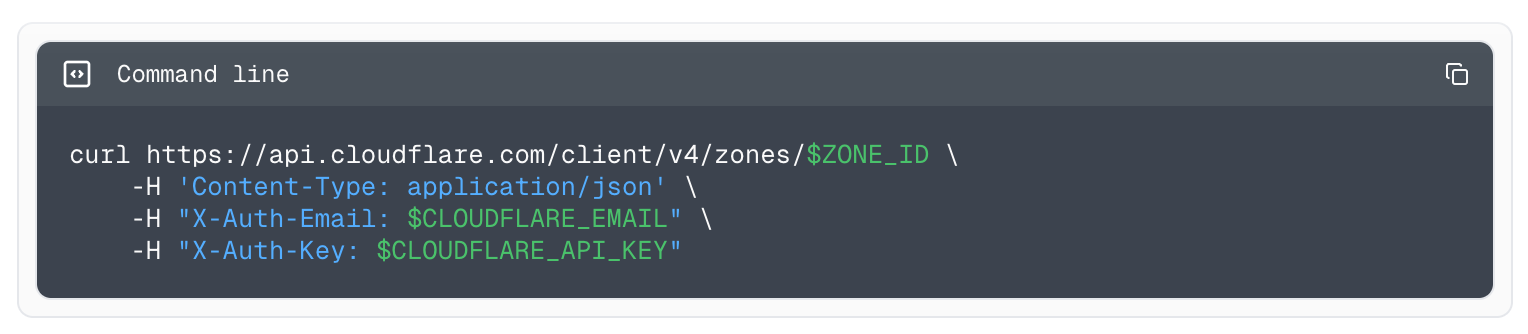
Example using cURL to fetch all zones.
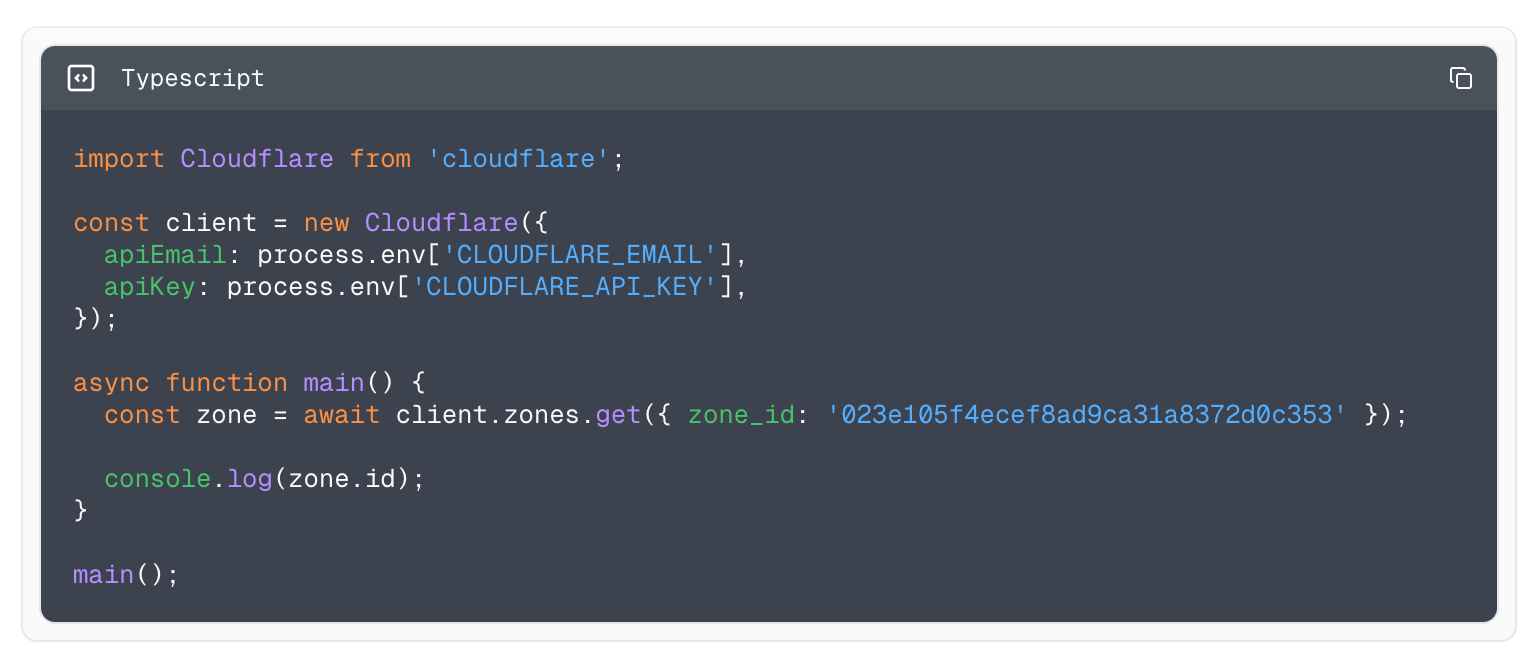
Example using the Typescript library to fetch all zones.
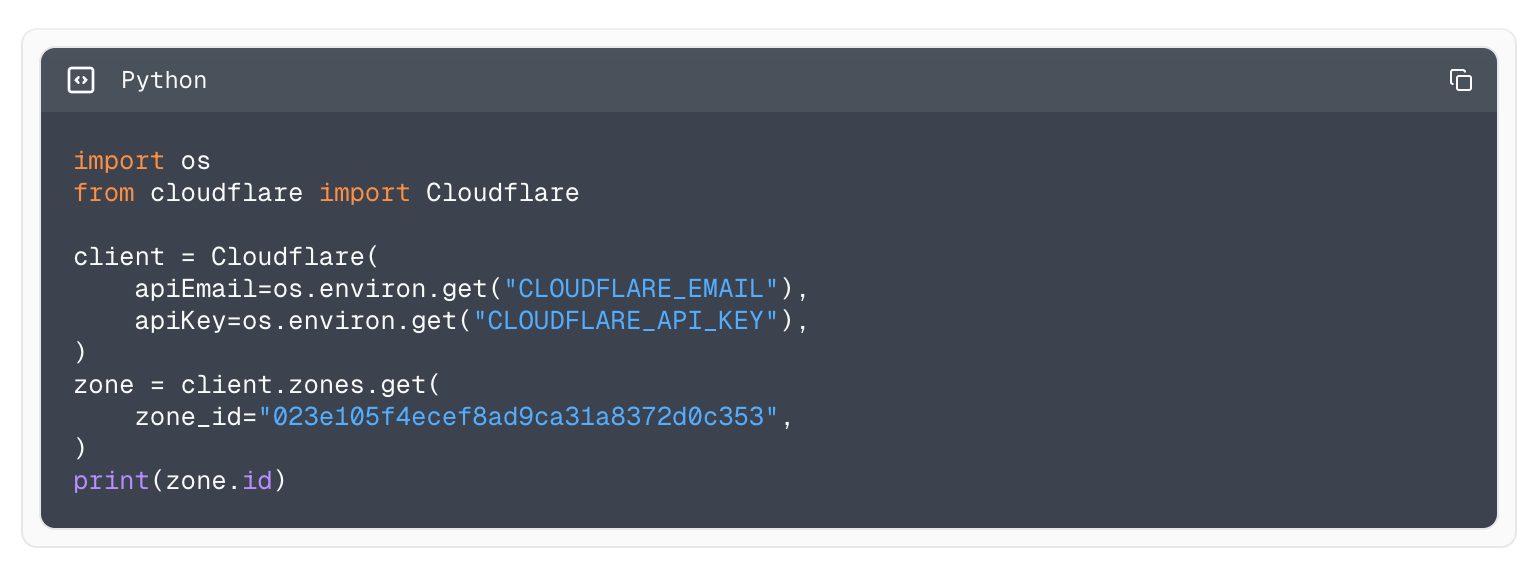
Example using the Python library to fetch all zones.
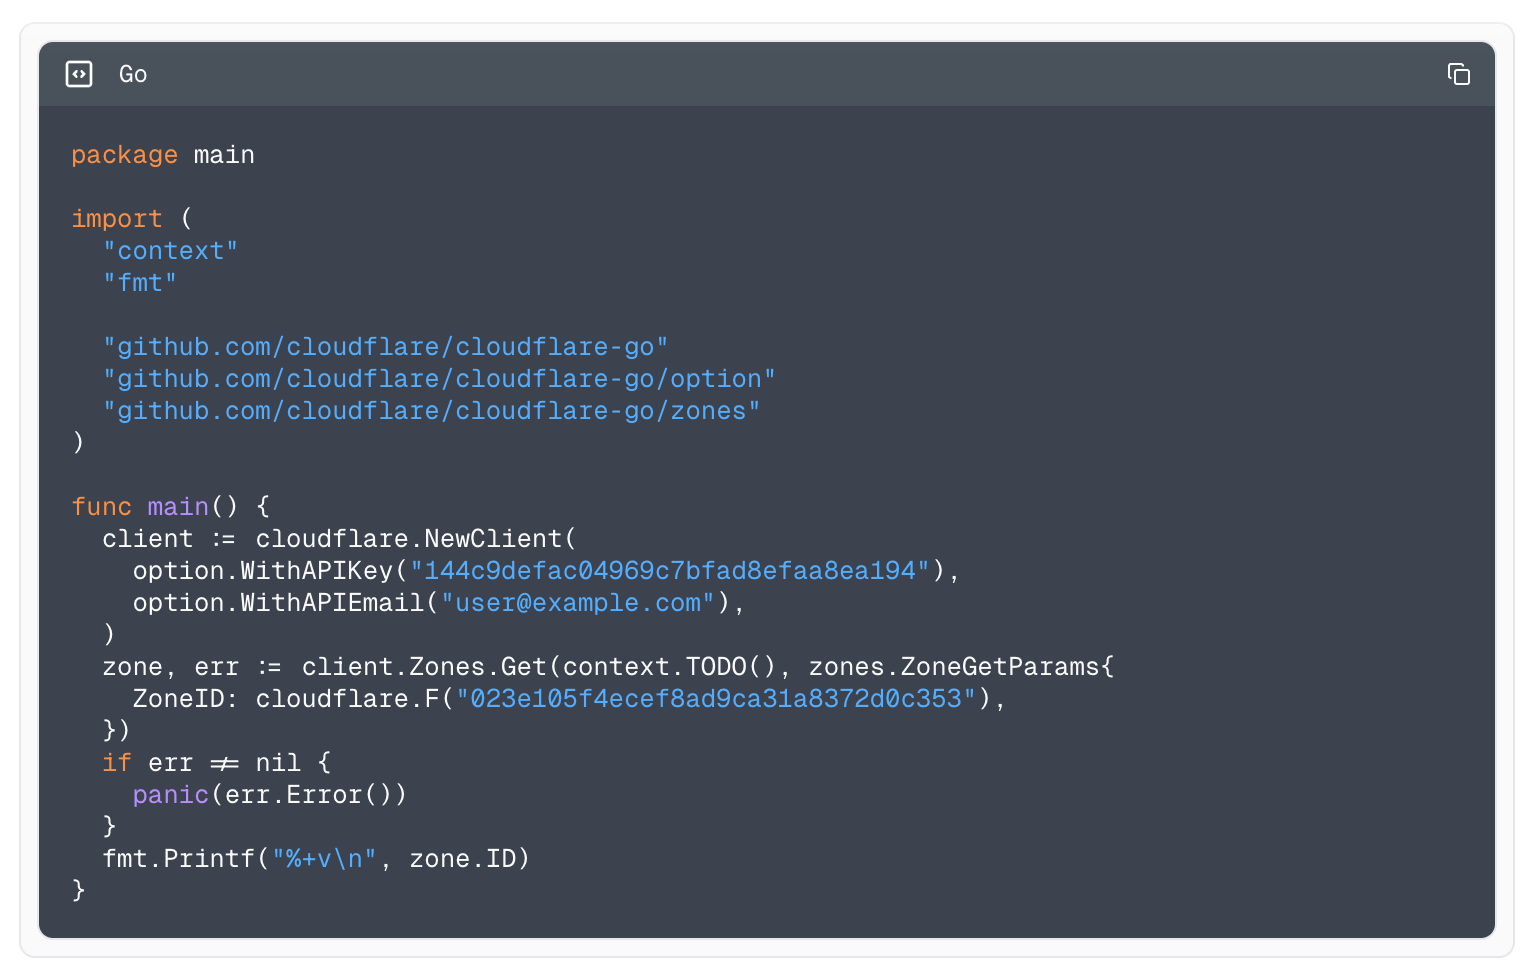
Example using the Go library to fetch all zones.
With this improvement, we also remember the language selection so if you’ve selected to view the documentation using our Typescript library and keep clicking around, we keep showing you examples using Typescript until it is swapped out.
Best of all, when we introduce new attributes to existing endpoints or add SDK languages, this documentation site is automatically kept in sync with the pipeline. It is no longer a huge effort to keep it all up to date.
Faster and more efficient rendering
A problem we’ve always struggled with is the sheer number of API endpoints and how to represent them. As of this post, we have 1,330 endpoints, and for each of those endpoints, we have a request payload, a response payload, and multiple types associated with it. When it comes to rendering this much information, the solutions we’ve used in the past have had to make tradeoffs in order to make parts of the representation work.
This next iteration of the API documentation site addresses this is a couple of ways:
-
It’s implemented as a modern React application that pairs an interactive client-side experience with static pre-rendered content, resulting in a quick initial load and fast navigation. (Yes, it even works without JavaScript enabled!).
-
It fetches the underlying data incrementally as you navigate.
By solving this foundational issue, we’ve unlocked other planned improvements to the documentation site and SDK ecosystem to improve the user experience without making tradeoffs like we’ve needed to in the past.
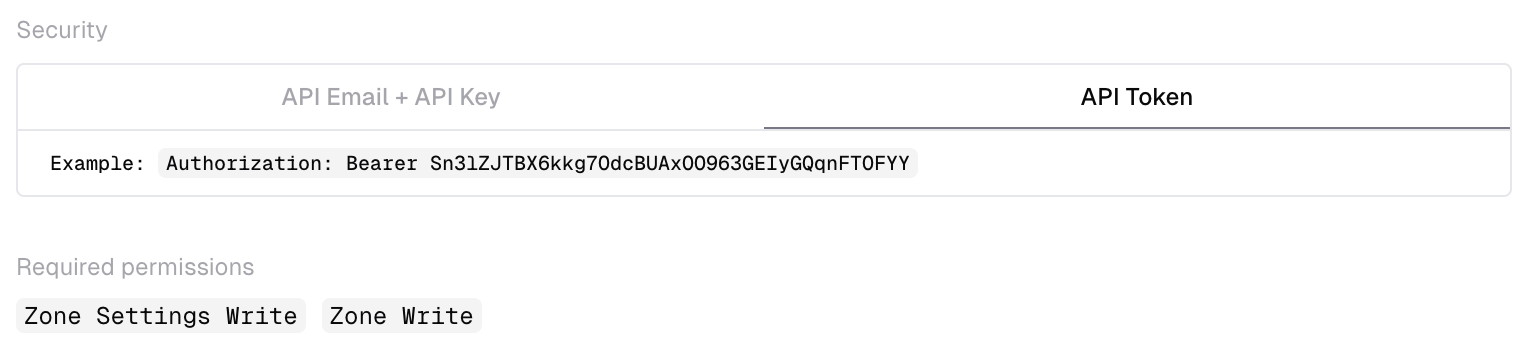
Permissions
One of the most requested features to be re-implemented into the documentation site has been minimum required permissions for API endpoints. One of the previous iterations of the documentation site had this available. However, unknown to most who used it, the values were manually maintained and were regularly incorrect, causing support tickets to be raised and frustration for users.
Inside Cloudflare’s identity and access management system, answering the question “what do I need to access this endpoint” isn’t a simple one. The reason for this is that in the normal flow of a request to the control plane, we need two different systems to provide parts of the question, which can then be combined to give you the full answer. As we couldn’t initially automate this as part of the OpenAPI pipeline, we opted to leave it out instead of having it be incorrect with no way of verifying it.
Fast-forward to today, and we’re excited to say endpoint permissions are back! We built some new tooling that abstracts answering this question in a way that we can integrate into our code generation pipeline and have all endpoints automatically get this information. Much like the rest of the code generation platform, it is focused on having service teams own and maintain high quality schemas that can be reused with value adds introduced without any work on their behalf.
Stop waiting for updates
With these announcements, we’re putting an end to waiting for updates to land in the SDK ecosystem. These new improvements allow us to streamline the ability of new attributes and endpoints the moment teams document them. So what are you waiting for? Check out the Terraform provider and API documentation site today.