Post Syndicated from Zach Elliott original https://aws.amazon.com/blogs/messaging-and-targeting/send-geofenced-marketing-messages-using-amazon-pinpoint/
Introduction
Geofencing, which creates a virtual geographical boundary that triggers a marketing action to a mobile device when a user enters or exits that boundary, can be used in marketing messages to drive more traffic and increase conversions. Amazon Pinpoint, AWS’ multichannel communication tool, can be used to create mobile notifications using geofencing technology, so customers receive notifications about a business when they’re close by that physical location.
Ways retailers can use geofencing:
There are a number of different use cases that retail or location-based businesses can use geofencing to drive customer conversions:
- Target the customer with real-time offers and promotions when the customer is near the store: Detecting and establishing an interaction with the customer while in the store improves the customer experience. Using geofencing, retailers will be able to detect the presence and will be able to send coupon or promotional notifications.
- Improve product search in the store: As the consumer enters the geofenced store, activate the product search for the store to help the consumer to search and navigate easily within the store.
- Get more information about the customer in the store: Retailers will be able to collect more accurate consumer behavior inside the store by recording the interaction between the consumers and product search, and using geofencing and position to calculate the dwell time inside the store or how long the consumer is waiting in the queue.
In this blog we will talk about how you can use Amazon Location Service to trigger a notification using Amazon Pinpoint when a consumer enters a geofenced store.
Architecture Overview
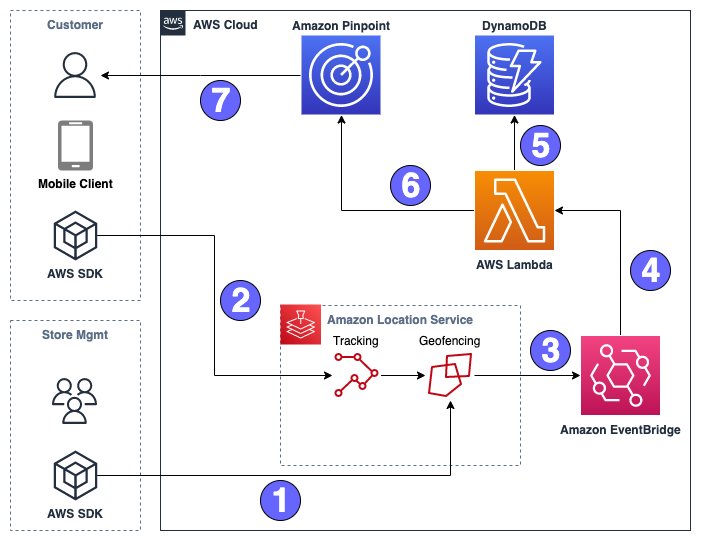
Fig. 1: Geofencing and Pinpoint – Sample Architecture
Figure 1 depicts the solution architecture and resources deployed by the AWS CloudFormation Template, described in more detail in later sections. In the solution workflow:
- Store Management defines a Geofence around store locations they wish to enroll using Amazon Location Service Geofencing and circular geofences.
- A customer who has opted into location tracking using the app will update an Amazon Location Service Tracker Resource. This tracker will be evaluated against the store geofences.
- If a geofence ENTER event is triggered, a message is sent to Amazon EventBridge.
- EventBridge will trigger an AWS Lambda function.
- The Lambda function looks up the Store Information in an Amazon DynamoDB table that matches the geofence ID in order to enrich the email.
- Event is sent to a Pinpoint Journey with information from the Geofence event as well as store info.
- Personalized email is sent to customer via Pinpoint
Configuring AWS Cloudformation
To deploy the Amazon Location Service resources as well as EventBridge, DynamoDB, and Lambda, we have created an AWS Cloudformation Template.
Use this link to launch the CloudFormation stack in the US-West-2 region. Selecting the button next to “I acknowledge that AWS CloudFormation might create IAM resources.” click Create stack
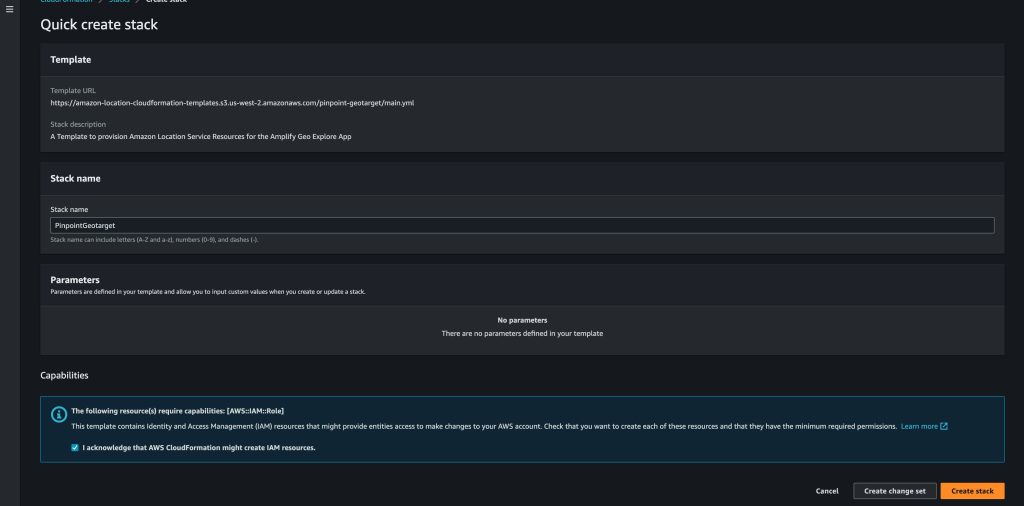
Fig. 2: AWS CloudFormation Console showing stack options.
Once the stack is complete. We can begin configuring Pinpoint.
Configuring Pinpoint
Our project was created for us via the CloudFormation template, but we still need to configure some items in Pinpoint. First, we’ll set up our email identity to send and receive messages from; for the purposes of this blog, you’ll use the same email address for sending and receiving the email, but in a production environment, your sending identity could either be a specific email address you’ve verified for messaging, or an entire email domain you’ve verified via DNS.
Configuring email channel
Adding an email
- On the left-side Pinpoint menu, expand the Email option and choose Email identities
- Select Verify email identity
- Enter an email address you have access to for the confirmation step
- Select Verify email address
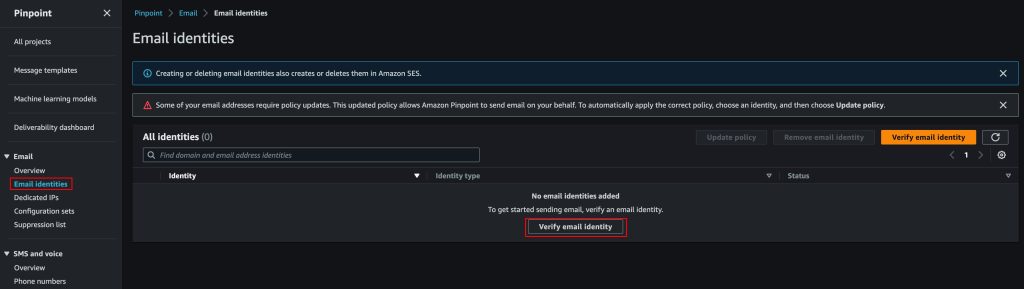
Fig. 3: AWS Console showing email verification
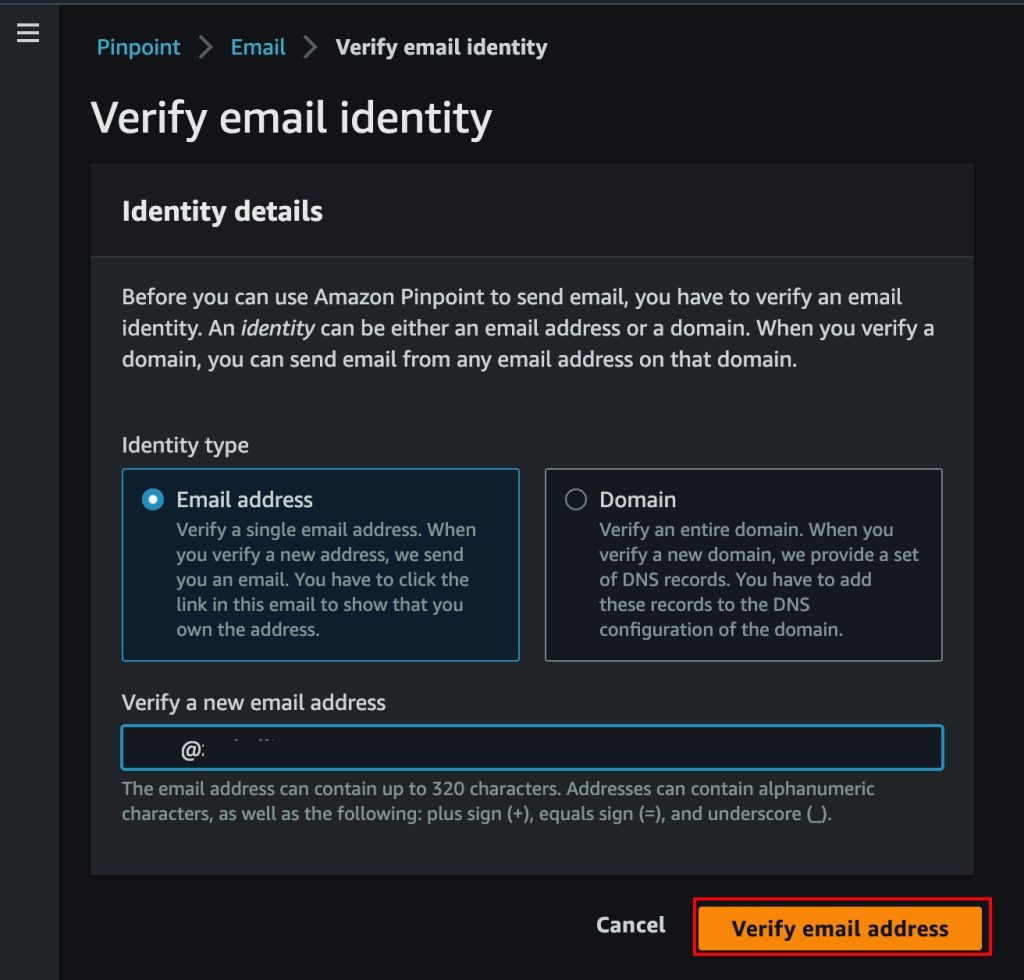
Fig. 4: Email verification options
Now, check your inbox for a verification email. It should look something like this:
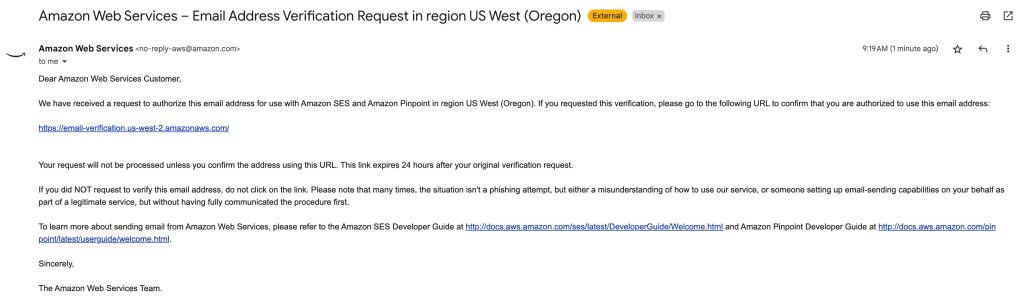
Fig. 5: Email Verification message from Amazon Pinpoint
Click the link to verify your email address. Now we can begin sending and receiving messages at this address.
Now that we have a verified email, we can configure the email channel.
Configuring the email channel
- On the left-side Pinpoint menu, navigate to All projects and select CoffeeShop
- Navigate to Settings and select Email
- Select Edit next to Identity details
- Select the checkbox for Enable the email channel for this project
- Select Use an existing email address and select the address you verified in the previous step.
- Select Save
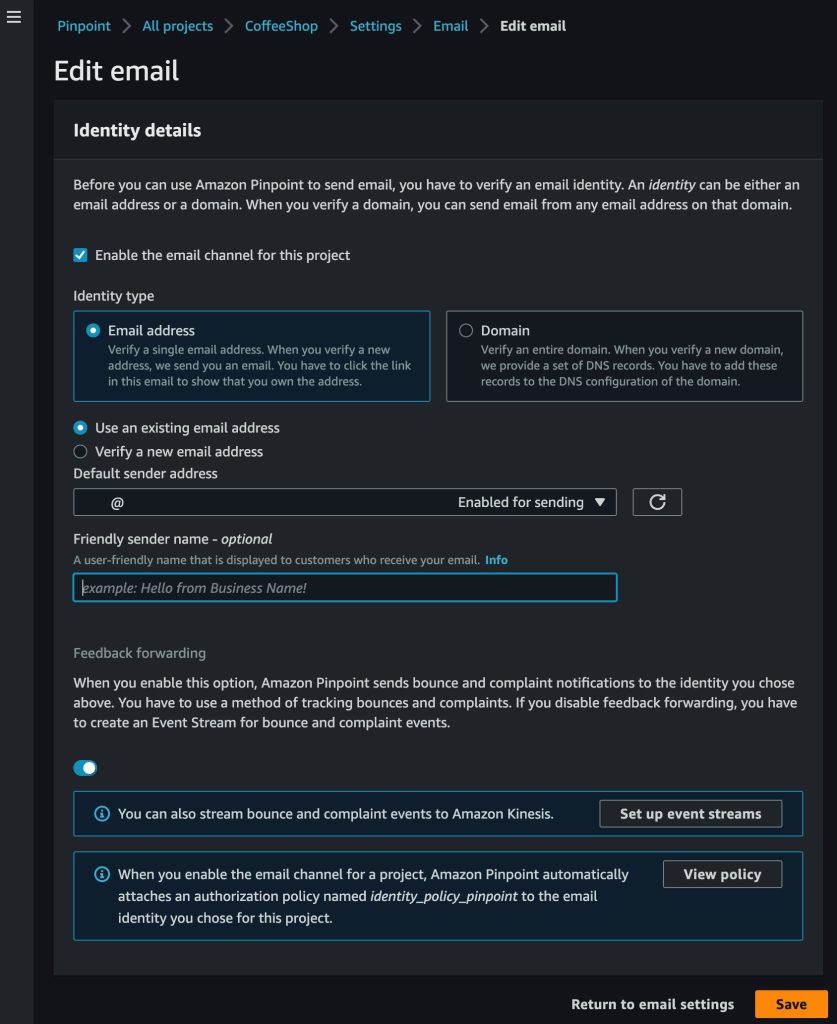
Fig. 6: Configuring the email channel
Configuring email template
Next, we need to define what our email looks like that is sent to our customers when they enter a geofence. We’ve provided HTML code for a basic Coffee Shop template here
Configure email template
- On the left-side Pinpoint menu, navigate to Message templates, select Create template
- Name the template CoffeeShopGeoTarget and set the subject to “We haven’t seen you in a while”
- Paste the contents of the HTML template into the Message field.
- Select Create
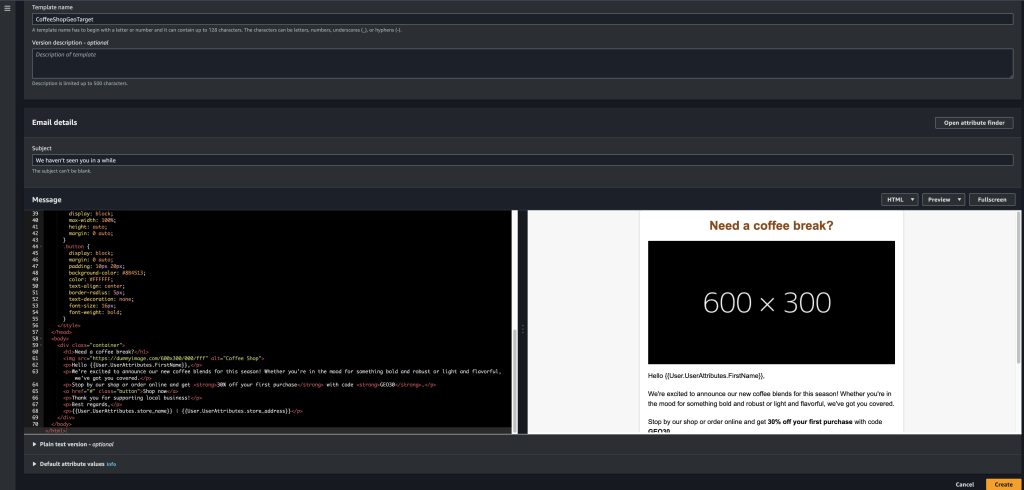
Fig. 7: Configuring the email template
You can see multiple attributes are used in the template. These attributes come from our segment in the case of FirstName, and DynamoDB in the case of the store name and address.
Configuring email segment
Now we need to define who we are going to send an email to. For this, we need to set up our segment within Pinpoint. We’ve provided a sample segment file here. Download this file and open it in a text editor.

Fig. 8: Configuring the email segment
Replace all the values with your own information . The email needs to be the same email we verified in an earlier step. Create a UserID for the user that can be used to uniquely identify them. Leave ChannelType as “EMAIL” to indicate we are using the email channel in Pinpoint, and leave OptOut as “NONE” which indicates the user would like to receive all communications and has not opted-out of receiving notifications. Once the information is edited, save the file.
Importing the segment
- On the left-side Pinpoint menu, navigate to All projects, and select your CoffeeShop Project
- Navigate to Segments and select Import a segment
- Drag the downloaded csv file into the Drop files here box.
- Select Create Segment
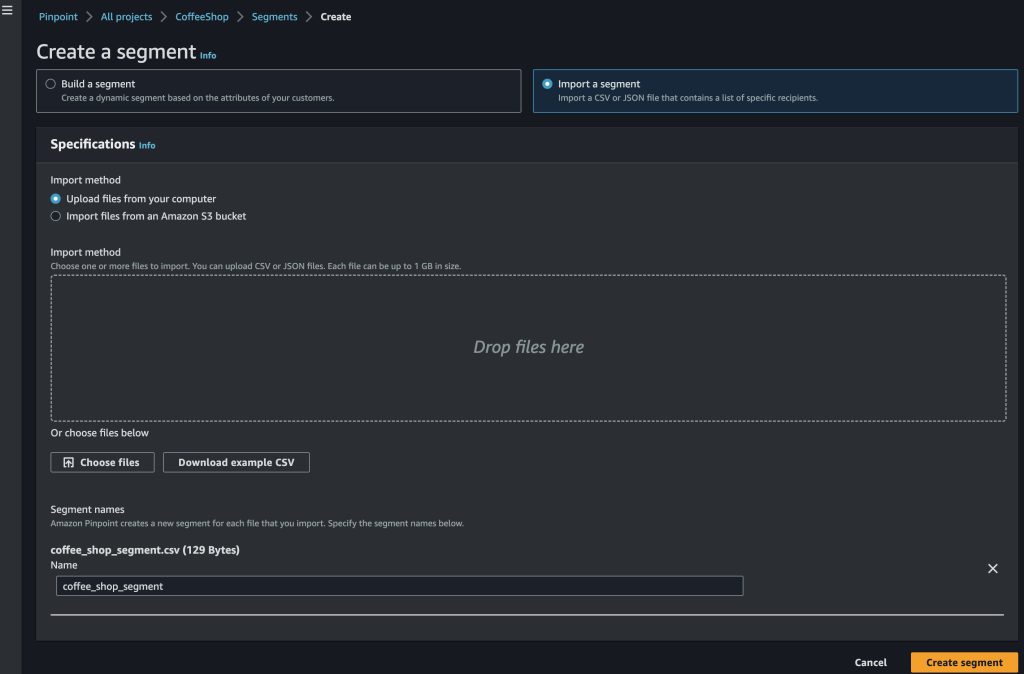
Fig. 9: Importing a segment
Configuring Journey
In this post, we will be setting up a very simple Journey that sends an email anytime a user enters a geofence. If we wanted to go a step farther, we could add additional activities later in the Journey such as determining if the customer purchased something based on receiving the email, and sending them targeted emails based on the drink they ordered.
Now that we’ve added the email channel, we can set up our journey.
Configuring journey entry
- On the left-side Pinpoint menu, navigate to the CoffeeShop Project and select Journeys
- Select Create journey
- Name the journey “CoffeeShopGeoTarget”
- Set the entry condition to “geofence enter”
- Select Save

Fig. 10: Journey event configuration
Configuring journey activity
- Select the Add activity icon
- Select Send an email from the dropdown
- Choose the email template we created earlier
- Enter the verified email we configured earlier
- Select Save
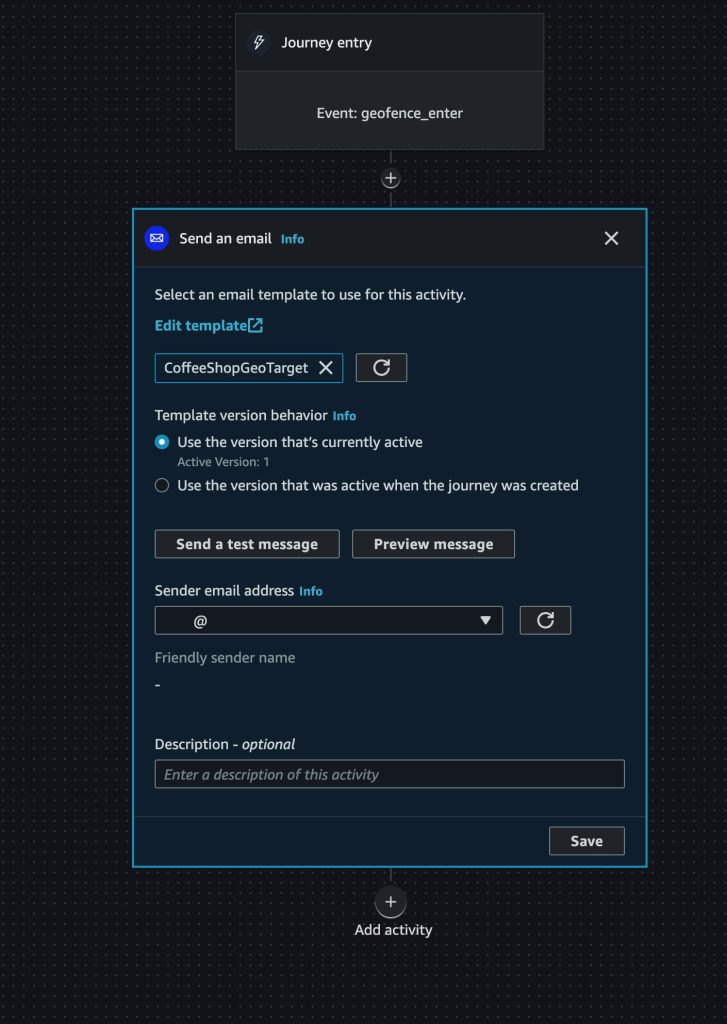
Fig. 11: Journey email destination configuration
Reviewing Journey
- Select Review
- Select Mark as reviewed
- Select Publish
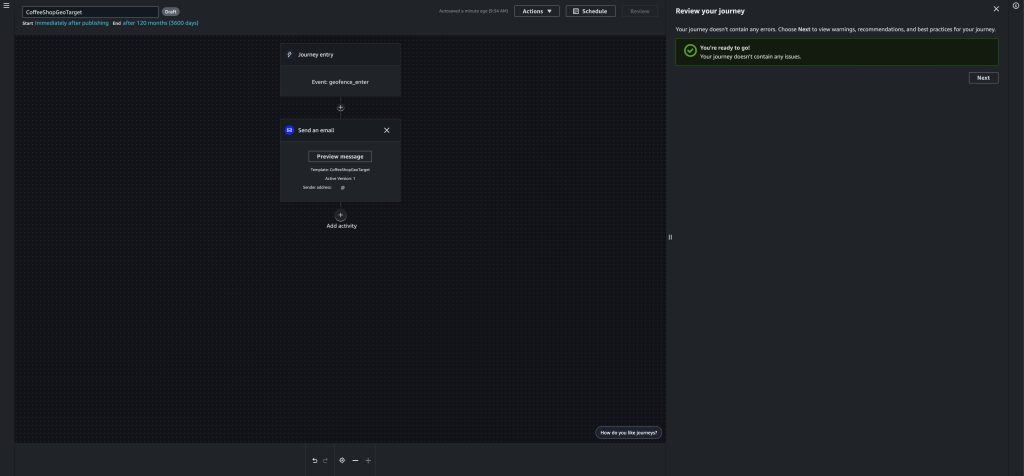
Fig. 12: Reviewing the Journey
Once we publish our journey, a 5 minute timer will start, which will give us time to set up our tracking environment.
Configuring Amazon Location Resources
Now that we’ve configured Pinpoint to send geotargeted emails, we need to set up our Geofences as well as emulate a person passing nearby our coffee shops. To do that, we will use the AWS CLI and AWS Cloudshell .
To open AWS CloudShell, select it in the upper right near the region selection.
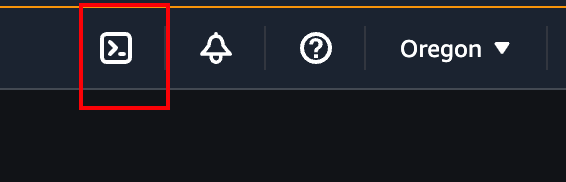
Fig. 13: Location of AWS Cloudshell in the AWS Console
AWS CloudShell will now open in the bottom half of the AWS Console , note it may take up to a minute on first launch. First, we’ll create our geofences. For this, we will use Circular geofences around a point location. In this case, we will create two geofences, one for a Coffee shop at Amazon’s Doppler office, and one for a shop at Amazon’s Nitro North office. These correlate with the DynamoDB store information table.
aws location put-geofence --collection-name StoreCollection --geofence-id store_1508 --geometry 'Circle={Center=[-122.33826293063228, 47.61530011310656], Radius=100}'Successful Geofence creation will create output similar to the below:
{
"CreateTime": "2023-04-21T19:31:57.807000+00:00",
"GeofenceId": "store_1508",
"UpdateTime": "2023-04-21T19:31:57.807000+00:00"
}
Next we create our second geofence:
aws location put-geofence --collection-name StoreCollection --geofence-id store_1509 --geometry 'Circle={Center=[-122.34051934099395, 47.61751544952795], Radius=100}'Successful Geofence creation will create output similar to the below:
{
"CreateTime": "2023-04-21T19:32:41.980000+00:00",
"GeofenceId": "store_1509",
"UpdateTime": "2023-04-21T19:32:41.980000+00:00"
}
Now that our geofences are created, we can emulate a person walking by and triggering a geofence. We will do this using Amazon Location Service Trackers. In CloudShell, enter the following command:
aws location batch-update-device-position --tracker-name CustomerDevices --updates Accuracy={Horizontal=0},DeviceId=111,Position=-122.33811005706218,47.61541094771129,SampleTime=$(date +%s)When this command is issued, a geofence is then evaluated which will trigger an event sent to Amazon EventBridge. This event then triggers a Lambda, which creates an event with Pinpoint. This triggers the Journey, which sends an email.
Now check your email, you should see a customized email with the store you were close to and your name . Note because we are not using domain verification, you may receive a warning on the email message. See our documentation on how to use domain verification.
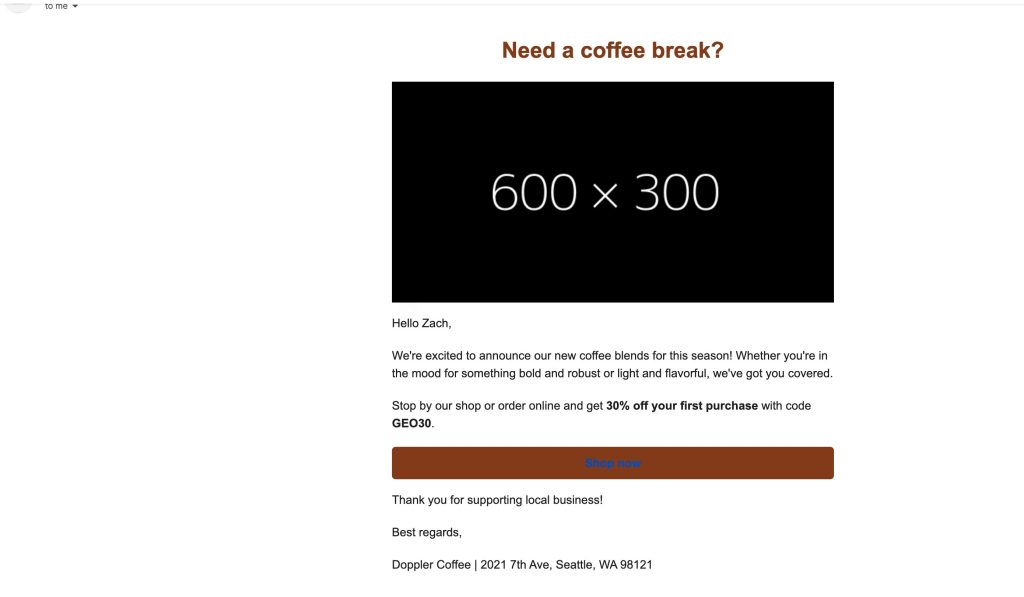
Fig. 14: Email received from Amazon Pinpoint
Next Steps
For this blog, we used the default Journey configuration. However, we can further optimize our Journey by following Tips and best practices for journeys. You can also set up push notifications or in-app notifications to further optimize the customer experience to catch them in the moment they walk by, instead of when they may check their email next. You can read more about push notifications here.
Clean up
Deleting CloudFormation template
- In the AWS Console, navigate to the AWS CloudFormation console. Select the PinpointGeotarget stack
- Select Delete Stack
Deleting Pinpoint resources
- In the AWS Console, navigate to the Pinpoint Console
- Select Message templates
- Select the CoffeeShop template
- Select Delete then confirm you wish to delete it
Removing email identity
- In the AWS Console, navigate to the Pinpoint Console
- Navigate to Email, and select Email identities
- Select the radio button next to the verified email you configured
- Select Remove email identity
- Type Delete to confirm the removal
Conclusion
In this post, we explored how you can detect the presence of the customer whenever they cross near the geofenced physical store, using Amazon Location Service in which Amazon EventBridge receives the event, triggers an AWS Lambda function, and then triggers a Journey in Amazon Pinpoint to send a notification to the customer with a coupon.
Further more, integrating this solution with your customer data platform and with Amazon Personalize will help you to personalize the promotions and vouchers to fit the tastes and tendencies of customers

Zach Elliott works as a Solutions Architect focusing on Amazon Location Service at AWS. He is passionate about helping customers build geospatial solutions on AWS. He is also part of the IoT Subject Matter Expert community at AWS and loves helping customers develop unique IoT-based solutions.

With an illustrious track record as a technology thought-leader, Anshul joined AWS in 2016 and is the EMEA technology leader for retail. He is responsible for defining and executing the company’s retail technology strategy, which includes building retail-focused solutions with services like Amazon Forecast and Amazon Personalize, as well as experiences like Frictionless Shopping with AI/ML and IoT services from AWS. Anshul also works very closely with AWS global retail customers to help transform their businesses with cutting-edge AWS technologies.