Post Syndicated from The Atlantic original https://www.youtube.com/watch?v=5SRmXvxe3Ow
Secure your Express application APIs in minutes with Amazon Verified Permissions
Post Syndicated from Trevor Schiavone original https://aws.amazon.com/blogs/security/secure-your-express-application-apis-in-minutes-with-amazon-verified-permissions/
Today, Amazon Verified Permissions announced the release of @verifiedpermissions/authorization-clients-js, an open source package that developers can use to implement external fine-grained authorization for Express.js web application APIs in minutes when using Verified Permissions.
Express is a minimal and flexible Node.js web application framework that provides a robust set of features for web and mobile applications. By using this standardized integration with Verified Permissions, developers can externalize authorization using up to 90 percent less code compared to writing their own custom integrations, saving them time and effort and improving application security posture by reducing the amount of custom integration code.
Why externalize authorization?
Traditionally, developers implemented authorization within their application by embedding authorization logic directly into application code. This embedded authorization logic is designed to support a few permissions, but as applications evolve, there is often a need to incrementally update the embedded authorization logic to support more complex use cases, resulting in code that is complex and difficult to maintain. As code complexity increases, further evolving the security model and performing audits of permissions becomes more challenging, resulting in an application that becomes more difficult to maintain over its lifecycle.
By externalizing authorization, you can decouple authorization logic from your application. This yields multiple benefits including freeing up development teams to focus on application logic and simplifying software audits.
One approach to externalize authorization from your application code is to use Cedar. Cedar is an open source language and software development kit (SDK) for writing and enforcing authorization policies for your applications. You specify fine-grained permissions as Cedar policies, and your application authorizes access requests by calling the Cedar SDK. For example, if you’re building a pet store application, you can use the following Cedar policy to control that only a user with a jobLevel of employee can access the POST /pets API.
One option for using Cedar is to self-manage the implementation; you can find an example for this pattern in another post: Secure your application APIs in 5 minutes with Cedar.
Self-managed Cedar provides the benefits of externalizing authorization but requires ongoing operational management. Organizations are responsible for Cedar version upgrades, applying security patches, managing policies, and auditing authorizations. Another option for using Cedar is to use Verified Permissions. Verified Permissions removes these operational requirements by providing a managed service for Cedar. Verified Permissions manages scaling, simplifies policy governance by supporting centralized policy management, and logs policy changes and authorization requests to simplify auditing.
This post describes how web application developers can use the new Express package to simplify the integration of Express web applications with Verified Permissions. The step-by-step guide uses a sample Pet Store application to show how access to APIs can be restricted based on user groups. You can find the sample Pet Store application in the verifiedpermissions repository on GitHub.
Pet Store application API overview
The Pet Store application is used to manage a pet store. The pet store is built using Express with Node.js and exposes the APIs in the following table.
| API | Description |
| GET /api/pets | Returns the list of available pets |
| GET /api/pets/{petId} | Returns the specified pet found |
| POST /api/pets | Adds a pet to the pet store |
| PUT /api/pets/{petId} | Updates an existing pet |
| DELETE /api/pets/{petId} | Removes a pet from the pet store |
This application doesn’t allow all users to access all APIs. Instead, it enforces the following rules:
- Administrators: Full access to pets and management functions
- Employees: Can view, create, and update pets
- Customers: Can view pets and create new pets
Implementing authorization for the Pet Store APIs
Let’s walk through how to secure your application APIs using Verified Permissions and the new package for Express. The initial application, with no authorization, can be found in the start folder; use this to follow along with the post. You can find a completed version of the application in the finish folder.
When completed, you’ll have implemented the application architecture shown in Figure 1. A React frontend application that uses Amazon Cognito for authentication. The application then includes the identity token returned from Cognito as an authorization header to the Express backend APIs. The Express backend, using the new Verified Permissions authorization middleware package, calls Verified Permissions to authorize the user request.

Figure 1: Architecture of the Pet Store application
Prerequisites
Before you get started, make sure you have the following prerequisites in place.
Step 1: Set up the AWS CLI
Some of the commands require the AWS Command Line Interface (AWS CLI). See Installing or updating to the latest version of the AWS CLI and Configuring settings for the AWS CLI.
Step 2: Set up an OpenID Connect identity provider and a database
The Pet Store application uses an OpenID Connect (OIDC) identity provider to manage users. For this example, you use an Amazon Cognito user pool called PetStoreUserPool with three users, one Admin, one Employee, and one Customer.
The application also uses a Amazon DynamoDB database to store the pets.
You can set up Amazon Cognito and DynamoDB in your AWS account by running the following command in the /start directory.
The setup script will prompt you to set passwords for the three users (passwords must be at least 8 characters and require at least one number, one uppercase letter, and one lowercase letter).
Note the outputs of running this script because you’ll use them in step 5 of Integrate Verified Permissions.
Note: In your own applications, you can set up Amazon Cognito by following the instructions in Create a new application in the Amazon Cognito console, or you can bring your own OIDC identity provider.
Step 3 (optional): Run the application
Now that the infrastructure is set up, you can run the application. In two separate terminals, run the following commands in the /start directory:
Test the application by creating some pets.
Integrate Verified Permissions
With the prerequisites in place, the next step is to integrate Verified Permissions. Verified Permissions can be integrated into an Express application in six steps:
- Create a Verified Permissions policy store
- Add the Cedar and Verified Permissions authorization middleware packages
- Create and deploy a Cedar schema
- Create and deploy Cedar policies
- Connect the Verified Permissions policy store to your OIDC identity provider
- Update the application code to call Verified Permissions to authorize API access
The Verified Permissions integration happens with the Express web application backend. All commands in the section should be run in the /start/backend directory.
Step 1: Create a Verified Permissions policy store
- Create a policy store in Verified Permissions using the AWS CLI by running the following command
Example successful command output:
- Save the
policyStoreIdvalue from the command output to use in step 3.
Step 2: Add the Cedar and Verified Permissions authorization middleware packages
- Run the following command to add two new dependencies on
@verifiedpermissions/authorization-clientsand@cedar-policy/authorization-for-expressjs
Step 3: Create and deploy the Cedar schema
A Cedar schema defines the authorization model for an application, including the entity types in the application and the actions users are allowed to take. You attach your schema to your Verified Permissions policy stores, and when policies are added or modified, the service automatically validates the policies against the schema.
The @cedar-policy/authorization-for-expressjs package can analyze the OpenAPI specification of your application and generate a Cedar schema. Specifically, the paths object in the OpenAPI schema is required in your specification.
If you don’t have an OpenAPI spec, you can generate one using the tool of your choice. There are several open source libraries that you can use to do this for Express; you might need to add some code to your application, generate the OpenAPI spec, and then remove the code. Alternatively, some generative AI based tools such as the Amazon Q Developer CLI are effective at generating OpenAPI spec documents. Regardless of how you generate the spec, be sure to validate the correct output from the tool.
For the sample application an OpenAPI spec document has been included and is named openapi.json.
- Run the following command to generate the Cedar schema.
Example successful command output:
- Next, format the Cedar schema for use with the AWS CLI. The specific format required is described in the documentation Amazon Verified Permissions policy store schema. To format the Cedar schema run the following command.
Example successful command output:
- After the schema is formatted, run the following command to upload the schema to Verified Permissions. Note that you need to replace
<policy store id>with the actual policy store ID, which is provided as an output from the command in step 1.Example successful command output:
Step 4: Create and deploy Cedar policies
If no policies are configured, Cedar denies authorization requests. The next step is to create policies that will allow specific user groups access to specific resources. The Express framework integration helps bootstrap this process by generating example policies based on the previously generated schema. You can then then customize these policies based on your use cases.
- Run the following command to generate sample Cedar policies.
Example successful command output:
Two sample policies are generated in the
/policiesdirectory:policy_1.cedarandpolicy_2.cedar.policy_1.cedarprovides permissions for users in theadminuser group to perform any action on any resource.policy_2.cedarprovides more access to the individual actions defined in the Cedar schema with a place holder for a specific group.Note that if you specified an
operationIdin the OpenAPI specification, the action names defined in the Cedar Schema will use thatoperationIdinstead of the default<HTTP Method> /<PATH>format. In this case, make sure that the naming of your actions in your Cedar policies matches the naming of your actions in your Cedar schema.For example, if you want to call your action
AddPetinstead ofPOST /pets, you could set theoperationIdin your OpenAPI specification toAddPet. The resulting action in the Cedar policy would bePetStoreApp::Action::"AddPet"Create a third policy file called
policy_3.cedarand then replace the contents of each file with the following policies. Replace<userpoolId>in each policy with the Cognito User Pool Id copied earlier.Note: In a real use case, consider renaming your Cedar policy files based on their contents, for example,
allow_customer_group.cedar. - The policies need to be formatted so that they work with the AWS CLI for Verified Permissions. The specific format is described in the AWS CLI Verified Permissions documentation. Run the following command to format the policies.
Example successful command output:
The formatted policies will be output to the
backend/policies/json/directory. - After formatting the policies, run the following three commands, one for each policy, to upload them to Verified Permissions. The policy store ID is returned after completing step 2. Replace
<policy store id>with the actual policy store ID.Example successful command output:
Alternatively, you can also copy and paste Cedar policies into Verified Permissions in the AWS Management Console.
Step 5: Connect the Verified Permissions policy store to your OIDC identity provider
By default, the Verified Permissions authorizer middleware reads a JSON Web Token (JWT) provided within the authorizationheader of the API request to get user information. Verified Permissions can validate the token in addition to performing authorization policy evaluation.
- To do this, create an identity source in Verified Permissions policy store. To simplify formatting in the AWS CLI command, we’ve defined the identity source configuration in
identity-source-configuration.txtReplace the<userPoolArn>and<clientId>parameters in the following code block based on the outputs of running thesetup-infrastructure.sh scriptin Step 2 of the prerequisites. - After you update the file, run the following command to update the Verified Permissions policy store. Replace
<policy store id>with the actual policy store ID.
Example successful command output:
Step 6: Update the application code to call Verified Permissions to authorize API access
You now need to update the application to use the @verifiedpermissions/authorization-clients and @cedar-policy/authorization-for-expressjs dependencies. This will allow the application to call Verified Permissions to authorize the API requests.
- Add the dependencies and define the
CedarAuthorizerMiddlewareandAVPAuthorizerin the application by adding the following block of code to line 13 (directly after the import statements) ofbackend/app.ts. Replace<policystoreId>in the following code block with your actual Verified Permissions policy store ID. - Configure the Express application to use the authorization middleware that you just defined. To do this, add the following line of code to the end of the block of
app.use(..)statements that begin after the comment// Configure security and performance middleware(approximately line 48 depending on how you pasted the previous block of code).
You’ve now successfully set up authorization in your application by creating a Verified Permissions policy store, writing Cedar policies to define your authorization, and integrating your application with Verified Permissions.
Validating API security
You can use the frontend web application to verify that authorization has been applied to the APIs. In two separate terminals run the following commands in the /start directory
In a browser navigate to http://localhost:3001 and sign in with one of the Amazon Cognito users you created earlier. Validate that the permissions policies are working as expected:
- Administrators: Can view, create, update, and delete pets.
- Employees: Can view, create, and update pets.
- Customers: Can view pets and create new pets.
In the terminal for the Express application, you can see log output that provides additional details about the authorization decisions. For example, following an unauthorized action the terminal outputs the following:
Conclusion
The new @verifiedpermissions/authorization-clients-js package allows Express developers to integrate their application with Verified Permissions to decouple authorization logic from code. By decoupling your authorization logic and integrating your application with the Verified Permissions, you can improve developer productivity and simplify permissions and access audits.
To support analyzing and auditing permissions when writing cedar policies the open source Cedar project also recently open sourced the Cedar Analysis CLI to help developers perform policy analysis on their policies. You can learn more about this new tool in Introducing Cedar Analysis: Open Source Tools for Verifying Authorization Policies.
The framework packages are open source and available on GitHub under the Apache 2.0 license, with distribution through NPM. To learn more, see Amazon Verified Permissions and Cedar.
If you have feedback about this post, submit comments in the Comments section below.
Improve your security posture using Amazon threat intelligence on AWS Network Firewall
Post Syndicated from Amit Gaur original https://aws.amazon.com/blogs/security/improve-your-security-posture-using-amazon-threat-intelligence-on-aws-network-firewall/
Today, customers use AWS Network Firewall to safeguard their workloads against common security threats. However, they often have to rely on third-party threat feeds and scanners that have limited visibility in AWS workloads to protect against active threats. A self-managed approach to cloud security through traditional threat intelligence feeds and custom rules can result in delayed responses, leaving customers exposed to active threats that are relevant to AWS workloads. Customers are looking for an automated approach to analyzing threats and deploying mitigations across multiple enforcement points to establish consistent defenses and want a unified, AWS-native solution that can rapidly protect against active threats across their entire cloud infrastructure.
This post introduces active threat defense, a new Network Firewall managed rule group that offers protection against active threats relevant to workloads in AWS. Active threat defense uses the AWS global infrastructure visibility and extensive threat intelligence to deliver automated, intelligence-driven security measures. The feature uses the Amazon threat intelligence system MadPot, which continuously tracks attack infrastructure, including malware hosting URLs, botnet command and control servers, and crypto mining pools, identifying indicators of compromise (IOCs) for active threats.
Active threat defense comes as a rule group AttackInfrastructure, which protects against malicious network traffic by blocking communications with detected attack infrastructure. After the managed rule group is configured in your firewall policy, Network Firewall now automatically blocks suspicious traffic to malicious IPs, domains, and URLs for indicator categories such as command-and-control (C2s), malware staging hosts, sinkholes, out-of-band testing (OAST), and mining-pools. It implements comprehensive filtering of both inbound and outbound traffic for various protocols, including TCP, UDP, DNS, HTTPS, and HTTP, and uses specific, verified threat indicators to facilitate high accuracy and minimize false positives.
Network Firewall with active threat defense protects AWS workloads using the following mechanisms:
- Threat prevention: Automatically blocks malicious traffic using Amazon threat intelligence to identify and prevent active threats targeting workloads in AWS
- Rapid protection: Continuously updates Network Firewall rules based on newly discovered threats, enabling immediate protection against them
- Streamlined operations: Findings in GuardDuty marked with the threat list name “Amazon Active Threat Defense” can now be automatically blocked when active threat defense is enabled on Network Firewall
- Collective defense: Deep threat inspection (DTI) enables shared threat intelligence, improving protection for active threat defense managed rule group users
Figure 1 illustrates the use of the active threat defense managed rule group with Network Firewall. It shows the automatic creation of stateful rules in the AWS managed rule group using threat data collected from MadPot.

Figure 1: Network Firewall with active threat defense
Getting started
The active threat defense managed rule group can be enabled directly within Network Firewall using the AWS Management Console, AWS Command Line Interface (AWS CLI), or AWS SDK. You can then associate the managed rule group with the Network Firewall policy. The rule group receives regular updates with new threat indicators and signatures, while automatically removing inactive or aged-out signatures.
Prerequisites
To get started with Network Firewall with active threat defense, visit the Network Firewall console or see the AWS Network Firewall Developers Guide. Active threat defense is supported in all AWS Regions where Network Firewall is available today, including the AWS GovCloud (US) Regions and China Regions.
If this is your first time using Network Firewall, make sure to complete the following prerequisites. If you already have a firewall policy and a firewall, you can skip this section.
Set up the active threat defense managed rule group
With the prerequisites in place, you can set up and use the active threat defence managed rule group.
To set up the managed rule group:
- In the AWS Network Firewall console, choose Firewall policies in the navigation pane.
- Select an existing firewall policy or the policy that you created as part of the prerequisites.

Figure 2: Select the Network Firewall policy
- Scroll down to Stateful rule groups. On the right-hand side, choose Actions and select Add managed stateful rule groups.

Figure 3: Add a rule group
- On the Add managed stateful rule groups page, scroll down to active threat defense. Select the rule group AttackInfrastructure. Based on your requirements for Deep threat inspection, you can opt out if you don’t want Network Firewall to process service logs. Choose Add to policy.

Figure 4: Add the rule group to the policy
- You can verify on the next page the managed rule group was added to the policy.

Figure 5: Verify that the managed rule group was added to the policy


Pricing
For active threat defense pricing, see AWS Network Firewall pricing.
Considerations
The first consideration is to understand how Network Firewall is more effective in detecting and mitigating threats associated with HTTPS traffic when the TLS inspection feature is used alongside the active threat defense managed rule group. TLS inspection enables active threat defense to analyze the actual content of encrypted connections, allowing it to identify and block malicious URLs that might otherwise pass undetected. This process involves decrypting traffic, inspecting the contents for known malicious URL patterns or behaviors, and then re-encrypting the traffic if it’s deemed safe. For more information on the considerations on TLS inspection, see Considerations for TLS inspection. Organizations must balance the security benefits with potential latency introduction and make sure that they have proper controls in place to handle sensitive decrypted data.
Another consideration is the mitigation of false positives. When you use this managed rule group in your firewall policy, you can edit rule group alert settings to help identify false-positives as part of a mitigation strategy. For more information, see mitigating false-positives.
The final consideration is how the use of managed rule groups count against the limit of stateful rules for each policy. For more information, see AWS Network Firewall quotas and Setting rule group capacity in AWS Network Firewall.
Conclusion
In this post, you learned how to use the AWS Network Firewall active threat defense managed rule group to safeguard workloads against active threats.
If you have feedback about this post, submit comments in the Comments section below.
Nonprofit Network Design for under $1000 bucks!
Post Syndicated from Crosstalk Solutions original https://www.youtube.com/watch?v=qnNHFZfLLkY
How AWS is simplifying security at scale: Four keys to faster innovation from AWS re:Inforce 2025
Post Syndicated from Amy Herzog original https://aws.amazon.com/blogs/security/how-aws-is-simplifying-security-at-scale-four-keys-to-faster-innovation-from-aws-reinforce-2025/
When I began my career in security, most people accepted as fact that protecting systems came at the expense of productivity. That didn’t have to be true then, and it’s definitely not true now. The cloud, and specifically the AWS Cloud, is a big reason why. But as technology evolves and systems become more complex, operating at scale demands a fresh approach to security. We take our customers’ security seriously, and that means building guardrails that give organizations the confidence to innovate boldly and scale rapidly.
In my new role as AWS CISO, I see this playing out daily. As I meet with customers, their excitement about technologies like generative AI comes hand in hand with questions about securing complex environments and managing new types of risk. They’re excited about innovation, but they need confidence that their security foundations can keep pace with their ambitions. They want to move fast without compromising security.
Today at re:Inforce, I shared how AWS is working backward from these needs to fundamentally transform how security scales in the cloud. It all starts with a security foundation built on four key pillars: identity and access management, data and network security, monitoring and incident response, and the continuous work of migration, modernization, and patching. Organizations with mature security models across these pillars are the ones moving fastest. Across each of these areas, we’re focused on delivering security capabilities that help customers adopt new technologies and experiment with confidence.
Scaling identity for the cloud
As our customers rapidly scale their cloud operations, they’ve told us that managing identity and access across complex environments becomes increasingly challenging. They need solutions that can grow with their business while maintaining strong security. Identity and access management underpins every aspect of cloud security, and success in this area requires both rigorous authentication controls and comprehensive visibility into access permissions.
I was excited to announce new internal access findings for AWS IAM Access Analyzer today. This capability transforms how organizations manage access to sensitive data at scale, addressing the complexities our customers face as they grow. Using automated reasoning technology, it analyzes complex permission layers across diverse policy types, giving security teams comprehensive visibility into who within their organizations has access to what resources. With daily monitoring and notifications of new access granted, we’re helping teams implement least-privilege access with confidence in even the most complex environments. This provides our customers visibility to strengthen access controls on their critical resources while maintaining the agility their business demands as they scale in the cloud.
Empowering transformation through data and network security
Our customers are eager to transform their businesses, but they need confidence that their security can keep pace with rapid innovation. This is especially true when it comes to protecting their networks and data at scale. During the keynote, Noopur Davis, CISO of Comcast, shared how her organization protects their vast network and customer data while enabling rapid innovation. With millions of customers relying on their services, Comcast’s approach resonated with me: security shouldn’t just defend, it should enable transformation.
We’re delivering on this vision with new capabilities that simplify security at scale. Today, I announced that AWS Certificate Manager now allows you to export ACM-issued public certificates and their private keys for use inside or outside of AWS, giving you automated certificate management with the flexibility to help secure your workloads. We’re also expanding AWS Shield with enhanced network and application protection that performs a network security analysis to identify configuration issues and provides remediation recommendations. You can even use AWS generative AI powered assistant Amazon Q Developer to gain actionable insights using simple natural language. These innovations help teams protect their data and stay ahead of evolving threats even as their environments grow more complex.
Elevating threat detection and response
Our customers have shared their challenges in keeping pace with the evolving threat landscape, especially as they scale their cloud operations. While traditional automation helps manage growing complexity, AI represents an even more powerful opportunity to transform security operations. When implemented thoughtfully, AI dramatically improves our ability to spot complex attack patterns, reduce false positives, and automate responses at massive scale.
Today at re:Inforce, I announced two key security innovations: expanded capabilities in Amazon GuardDuty Extended Threat Detection and enhanced AWS Security Hub that directly address these needs. Together, these services help simplify security at scale. GuardDuty uses AWS-trained AI and machine learning (AI/ML) models to detect sophisticated multi-stage threats and provide actionable insights, while Security Hub prioritizes critical security issues by automatically analyzing and correlating security signals into clear, prioritized actions. This approach gives teams the confidence to scale their operations, knowing they can detect and respond to security risks efficiently across their entire AWS environment.
Accelerating the journey to better security
While advanced capabilities like AI and automation help strengthen security operations, the foundation matters most. Moving to the cloud represents a transformative opportunity to build on a fundamentally stronger security foundation than most organizations can ever hope to achieve with on-premises environments. When migrating to AWS, you reduce the need to manage physical infrastructure security while gaining access to built-in protections that are continuously updated and maintained.
Successful cloud adoption means going beyond simple lift-and-shift. Modernization is key to realizing these benefits. By moving solutions further up the stack to use managed services like AWS Lambda, Amazon Simple Storage Service (Amazon S3), or AWS Key Management Service (AWS KMS), you benefit from security controls that are built in rather than bolted on. These services are continuously patched and maintained by AWS, freeing your teams to focus on innovating for your customers. After all, the fastest path to better security is the one where core protections are already built in.
Partnering for security success
Security transformation isn’t a journey organizations need to take alone. Throughout my career, I’ve seen how the right partnerships can accelerate success, bringing fresh perspectives and deep expertise to complex challenges. Our security partners help customers across the four pillars we discussed today, from implementing identity solutions to modernizing security operations. They understand both the technical complexities and the business realities of scaling security in the cloud, often bringing valuable industry-specific experience that helps organizations move faster with confidence.
Looking ahead
As you scale your operations in the cloud, our goal is to give you the confidence to move quickly while maintaining strong security controls. When security scales naturally with your business, teams can focus on building what’s next instead of managing infrastructure.
To dive deeper into how AWS designs, builds, and operates security at unprecedented scale, I encourage you to join our Innovation Talks at re:Inforce. These hour-long sessions explore the key pillars of modern cloud security: secure foundations, resilient architectures, AI-powered innovations, and large-scale threat intelligence.
As I step into my role as AWS CISO, I’m energized by the opportunity ahead. For nearly 20 years, AWS has maintained a unique culture of security that enables us to innovate rapidly while shipping securely. As we navigate the landscape of generative AI and rapid technological change, earning your trust means not just keeping pace with innovation, but helping to make it even more successful. I couldn’t be more excited to carry this mission forward.
If you have feedback about this post, submit comments in the Comments section below.
Unify your security with the new AWS Security Hub for risk prioritization and response at scale (Preview)
Post Syndicated from Donnie Prakoso original https://aws.amazon.com/blogs/aws/unify-your-security-with-the-new-aws-security-hub-for-risk-prioritization-and-response-at-scale-preview/
AWS Security Hub has been a central place for you to view and aggregate security alerts and compliance status across Amazon Web Services (AWS) accounts. Today, we are announcing the preview release of the new AWS Security Hub which offers additional correlation, contextualization, and visualization capabilities. This helps you prioritize critical security issues, respond at scale to reduce risks, improve team productivity, and better protect your cloud environment.
Here’s a quick look at the new AWS Security Hub.

With this new enhancement, AWS Security Hub integrates security capabilities like Amazon GuardDuty, Amazon Inspector, AWS Security Hub Cloud Security Posture Management (CSPM), Amazon Macie, and other AWS security capabilities to help you gain visibility across your cloud environment through centralized management in a unified cloud security solution.
Getting started with the new AWS Security Hub
Let me walk you through how to get started with AWS Security Hub.
If you’re a new customer to AWS Security Hub, you need to navigate to the AWS Security Hub console to enable AWS security capabilities and capabilities and start assessing risk across your organization. You can learn more on the Documentation page.
After you have AWS Security Hub enabled, it will automatically consume data from supporting security capabilities you’ve enabled, such as Amazon GuardDuty, Amazon Inspector, Amazon Macie, and AWS Security Hub CSPM. You can navigate to the AWS Security Hub console to view these findings and benefit from insights created through correlation of findings across these capabilities.
As security risks are uncovered, they’re presented in a redesigned Security Hub summary dashboard. The new Security Hub summary dashboard provides a comprehensive, unified view of your AWS security posture. The dashboard organizes security findings into distinct categories, making it easier to identify and prioritize risks.
The new Exposure summary widget helps you identify and prioritize security exposures by analyzing resource relationships and signals from Amazon Inspector, AWS Security Hub CSPM, and Amazon Macie. These exposure findings are automatically generated and are a key part of the new solution, highlighting where your critical security exposures are located. You can learn more about exposure on the Documentation page.

AWS Security Hub now provides a Security coverage widget designed to help you identify potential coverage gaps. You can use this widget to identify where you’re missing coverage by the security capabilities that power Security Hub. This visibility helps you identify which capabilities, accounts, and features you need to address to improve your security coverage.

As you can see on the navigation menu, AWS Security Hub is organized into five key areas to streamline security management:
- Exposure: Provides visibility into all exposure findings, a security vulnerability or misconfiguration that could potentially expose an AWS resource or system to unauthorized access or compromise, generated by Security Hub, helping you identify resources that might be accessible from outside your environment
- Threats: Consolidates all threat findings generated by Amazon GuardDuty, showing potential malicious activities and intrusion attempts
- Vulnerabilities: Displays all vulnerabilities detected by Amazon Inspector, highlighting software flaws and configuration issues
- Posture management: Shows all posture management findings from AWS Security Hub Cloud Security Posture Management (CSPM), helping provide compliance with security best practices
- Sensitive data: Presents all sensitive data findings identified by Amazon Macie, helping you track and protect your sensitive information

When you navigate to the Exposure page, you’ll see findings grouped by title, with severity levels clearly indicated to help you focus on critical issues first.

To explore specific exposures, you can select any finding to see affected resources. The panel includes key information about the implicated resource, account, Region, and when the issue was detected.

In this panel, you’ll also find an attack path visualization that is particularly useful for understanding complex security relationships. For network exposure paths, you can see all components involved in the path—including virtual private clouds (VPCs), subnets, security groups, network access control lists (ACLs), and load balancers—helping you identify exactly where to implement security controls. The visualization also highlights Identity and Access Management (IAM) relationships, showing how permission configurations might allow privilege escalation or data access. Resources with multiple contributing traits are clearly marked so you can quickly identify which components represent the greatest risk.

The Threats dashboard provides actionable insights into potential malicious activities detected by Amazon GuardDuty, organizing findings by severity so you can quickly identify critical issues like unusual API calls, suspicious network traffic, or potential credential compromises. The dashboard includes GuardDuty Extended Threat Detection findings, with all “Critical” severity threats representing these Extended Threat Detections that require immediate attention.
Similarly, the Vulnerabilities dashboard from Amazon Inspector provides a comprehensive view of software vulnerabilities and network exposure risks. The dashboard highlights vulnerabilities with known exploits, packages requiring urgent updates, and resources with the highest numbers of vulnerabilities.

Another valuable new feature is the Resources view, which provides an inventory of all resources deployed in your organization covered by AWS Security Hub. You can use this view to quickly identify which resources have findings against them and filter by resource type or finding severity. Selecting any resource provides detailed configuration information without needing to pivot to other consoles, streamlining your investigation workflow.

The new Security Hub also offers integration capabilities to help you comprehensively monitor your cloud environments and connect with third-party security solutions. This gives you the flexibility to create a unified security solution tailored to your organization’s specific needs.

For example, with integration capability, when viewing a security finding, you can select the Create ticket option and choose your preferred ticketing integration.

Additional things to know
Here are a couple of things to note:
- Availability – During this preview period, the new AWS Security Hub is available in following AWS Regions: US East (N. Virginia, Ohio), US West (N. California, Oregon), Africa (Cape Town), Asia Pacific (Hong Kong, Jakarta, Mumbai, Osaka, Seoul, Singapore, Sydney, Tokyo), Canada (Central), Europe (Frankfurt, Ireland, London, Milan, Paris, Stockholm), Middle East (Bahrain), and South America (São Paulo).
- Pricing – The new AWS Security Hub is available at no additional charge during the preview period. However, you will still incur costs for the integrated capabilities including Amazon GuardDuty, Amazon Inspector, Amazon Macie, and AWS Security Hub CSPM.
- Integration with existing AWS security capabilities – Security Hub integrates with Amazon GuardDuty, Amazon Inspector, AWS Security Hub CSPM, and Amazon Macie, providing a comprehensive security posture without additional operational overhead.
- Enhanced data interoperability – The new Security Hub uses the Open Cybersecurity Schema Framework (OCSF), enabling seamless data exchange across your security capabilities with normalized data formats.
To learn more about the enhanced AWS Security Hub and join the preview, visit the AWS Security Hub product page.
Happy building!
— Donnie
Beyond compute: Shifting vulnerability detection left with Amazon Inspector code security capabilities
Post Syndicated from Nirali Desai original https://aws.amazon.com/blogs/security/shifting-vulnerability-detection-left-with-amazon-inspector-code-security-capabilities/
Since launch, Amazon Inspector has helped customers automate vulnerability management for their running workloads on Amazon Elastic Compute Cloud (Amazon EC2), container workloads, and AWS Lambda functions. Today, we’re taking a step forward into more proactive security with the latest addition to Amazon Inspector: code security capabilities. By using this powerful new feature you can get a proactive view of the security health of your code. With native integration to source code managers (SCM) such as GitHub and GitLab, Amazon Inspector helps you identify and prioritize security vulnerabilities and misconfigurations across your application source-code, dependencies, and infrastructure as code (IaC).
Even if you make no changes to your code, there can be vulnerabilities in libraries that it depends on, creating risks for you and your users. By scanning repositories, you can continually monitor the security of your code and its dependencies. With Amazon Inspector, you can define consistent security controls throughout your software development lifecycle, so your security and development teams can collaborate effectively while reducing risk and remediation costs.
Overview of Amazon Inspector code security capabilities
Amazon Inspector now provides three additional security analysis capabilities: static application security testing (SAST), software composition analysis (SCA), and infrastructure as code (IaC) scanning. To use these features, you must establish a connection with your SCM tool (as shown in Figure 1). If you use GitHub, you can get started by installing and configuring the Amazon Inspector App from the GitHub Marketplace, which enables automated code analysis and delivers security findings directly within pull requests. If you use a self-managed GitLab, implementation is straightforward using a personal access token with the necessary permissions.
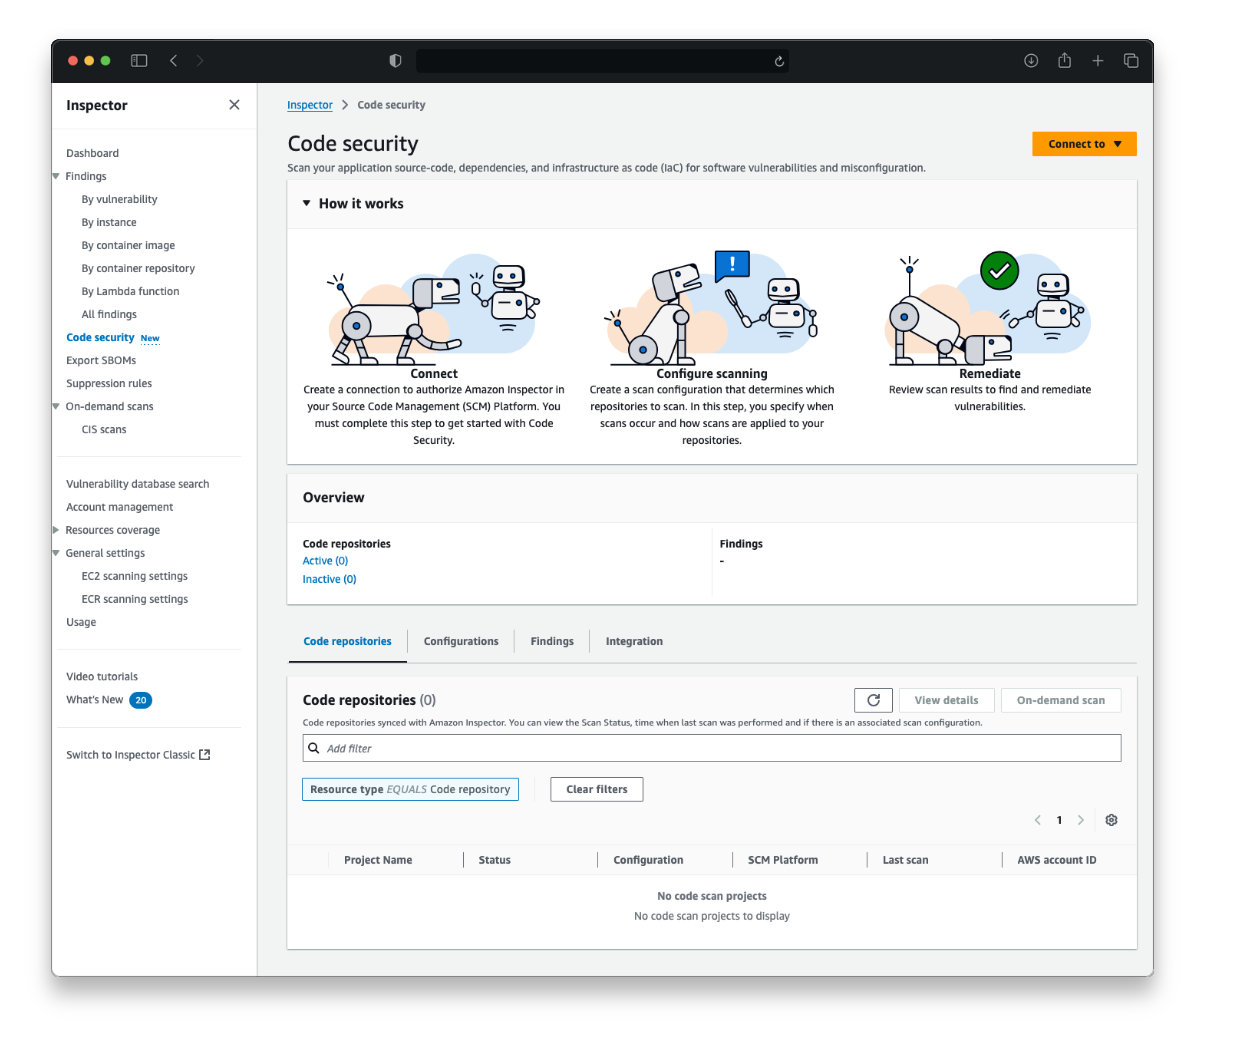
Figure 1: Code security landing page for Amazon Inspector
Static application security testing
Static application security testing (SAST) is the process of analyzing source code to identify insecure patterns or methods without needing to compile or execute the code. Amazon Inspector SAST scans analyze your source code to identify potential security vulnerabilities such as hardcoded secrets, cross-site scripting, or injection attacks across a wide range of programming languages including, JavaScript, Python, C#. The service also analyzes Bash shell scripts, extending security coverage beyond application code to include deployment and configuration scripts.
Software composition analysis
Software composition analysis (SCA) helps you understand and manage risks related to software dependencies. Every programming language has its own method of finding, importing, and updating contributed libraries. For example, PyPI for Python, NPM for NodeJS, and Cargo for Rust. Sometimes vulnerabilities are discovered in libraries distributed through the language-specific package distributions, or sometimes a library that you’re using depends on another library, and that dependency has the vulnerability. Amazon Inspector supports the major environments for Python, .Net, PHP, JavaScript, Java, Ruby, Rust, and Go. It automatically analyzes dependencies to identify known vulnerabilities and show you which code is affected. When vulnerabilities are detected, Amazon Inspector provides detailed information about the impact, available fixes, and upgrade paths to help you quickly remediate issues.
Infrastructure as code security
Just as applications are constructed from code, cloud infrastructure can be deployed and managed through code-based methods. Amazon Inspector now also analyzes IaC templates (as shown in Figure 2) to identify potential security misconfigurations, for example, the use of AWS Identity and Access Management (IAM) wildcards in action statements or disabled Glue Data Catalog encryption. This way identified risks can be fixed before the code is executed and the incorrect infrastructure is deployed. The new feature analyzes AWS CloudFormation, Terraform, and AWS CDK, helping you maintain secure infrastructure definitions throughout their development process. This capability helps make sure that security best practices are followed, and potential issues are caught before the infrastructure is deployed.
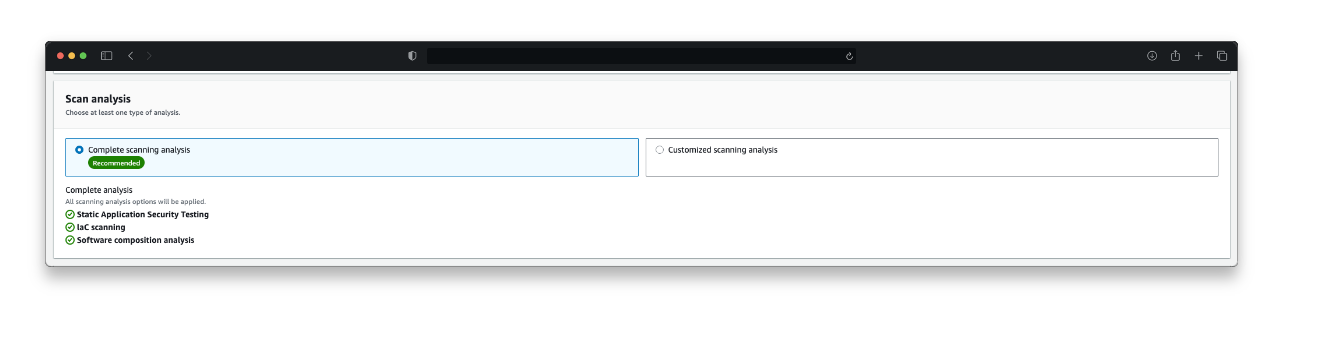
Figure 2: Amazon Inspector scan analysis configuration showing SAST, IaC, and SCA scan types
For the most up-to-date list of programming languages supported across Amazon Inspector code security capabilities, see the online documentation.
Improved security governance and visibility
Amazon Inspector lets you choose which scan types to run across which repositories (as shown in Figure 3). You can initiate a scan based on any of the following:
- On-demand: Initiates an immediate scan of the selected repository
- Change based: Initiates a scan on push to main branch, or on a pull request or merge request
- Scheduled: Initiates a scan weekly or monthly
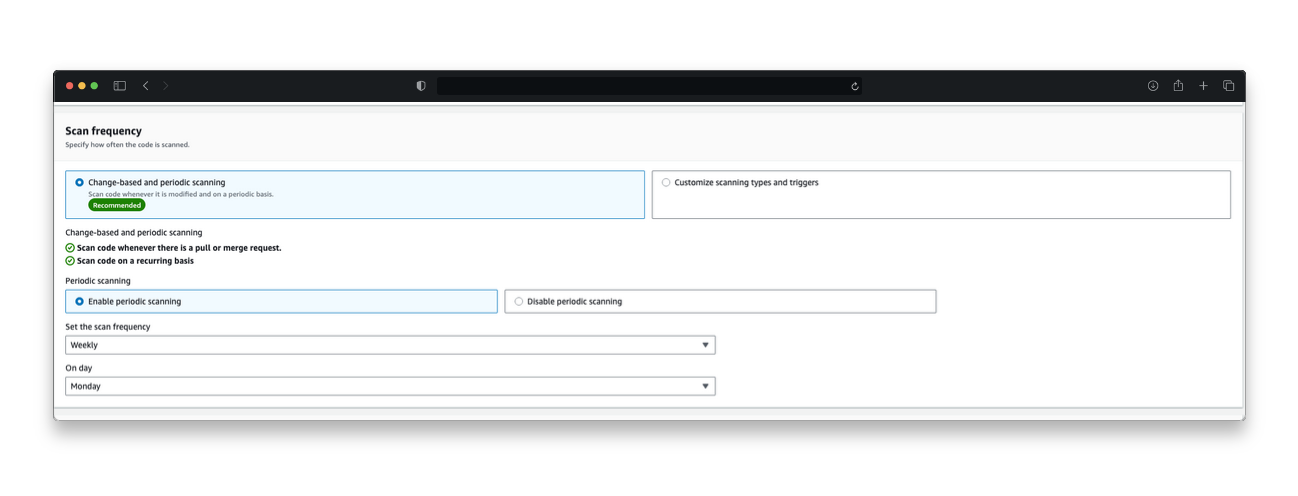
Figure 3: Overview of scan configurations
Amazon Inspector integrates code security findings into a unified dashboard that you can use to manage and enforce scanning policies across repositories using customizable scan configurations. As part of the integration workflow with the SCM platform, you can set up a default scan configuration that can be applied to existing or new repositories. Alternatively, you also have an option to create custom scan configurations that match specific existing repositories through inclusions tags.
Upon successful scheduled or event-based scans, Amazon Inspector generates detailed findings that pinpoint specific lines of code within repositories, including commit IDs and file locations where vulnerabilities are detected. Amazon Inspector empowers your security teams with customizable filtering through intelligent suppression rules. By using these options, you can tailor your security view to match your organization’s unique priorities, showing exactly what matters most to your team while preserving findings data for reporting and auditing. Through native Amazon EventBridge integration, these detailed security findings can be automatically routed into existing security workflows, enabling alerting and response capabilities.
Code fix recommendations
Amazon Inspector streamlines security remediation by providing specific code fix recommendations directly where developers work. The two-way integration with your SCM automatically suggests fixes as comments within pull requests (PRs) and merge requests (MRs) for Critical and High findings, alerting developers to the most important vulnerabilities to address without disrupting their workflow. Simultaneously, security teams benefit from a consolidated dashboard in the Amazon Inspector console that aggregates findings from scheduled or event-based scans across in-scope repositories. Each finding comes with tailored remediation guidance based on scan type (as shown in Figure 4): specific code suggestions for IAC and SAST findings, or recommended version upgrades and dependency update paths for SCA findings.
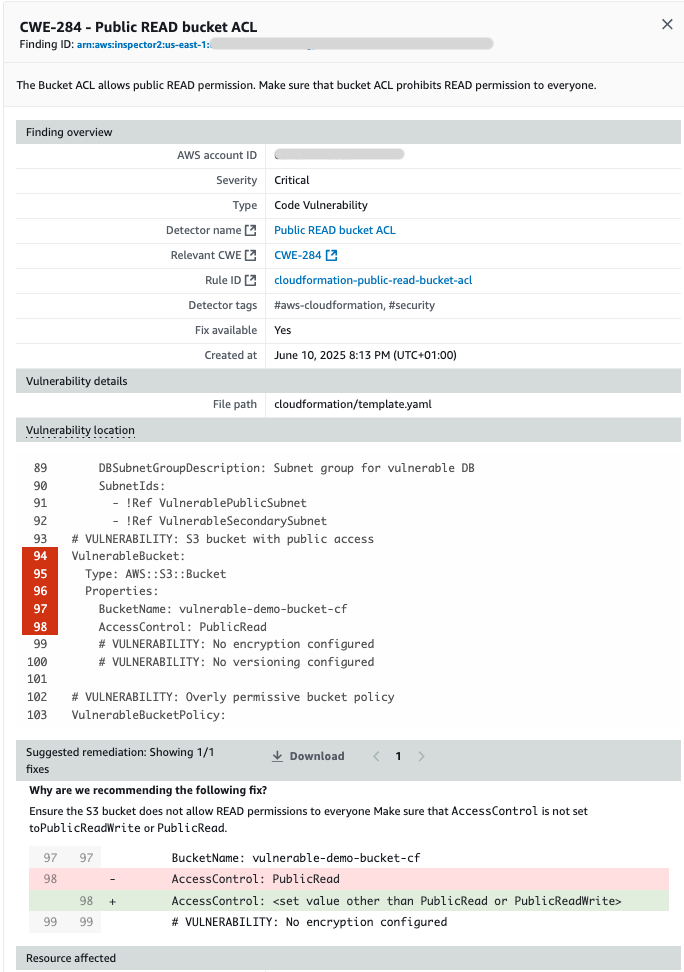
Figure 4: Code fix recommendation on a finding in the Amazon Inspector dashboard
Conclusion
These expanded security capabilities now deliver end-to-end visibility of the security health of your cloud applications, from initial code development through to production deployment. Security teams can use the unified dashboard in Amazon Inspector to track and manage vulnerabilities across repositories and application components, facilitating consistent security controls throughout the software lifecycle. Meanwhile, development teams receive immediate, actionable feedback within their source code repositories, creating a seamless security experience that bridges both security and development workflows. This approach is designed to help you maintain robust security practices while keeping development velocity high.
To get started with the new capabilities of Amazon Inspector, visit the Amazon Inspector console. For pricing details and implementation guidance, see documentation. These new features are now available in 10 AWS commercial Regions.
AWS Backup adds new Multi-party approval for logically air-gapped vaults
Post Syndicated from Veliswa Boya original https://aws.amazon.com/blogs/aws/aws-backup-adds-new-multi-party-approval-for-logically-air-gapped-vaults/
Today, we’re announcing the general availability of a new capability that integrates AWS Backup logically air-gapped vaults with Multi-party approval to provide access to your backups even when your AWS account is inaccessible due to inadvertent or malicious events. AWS Backup is a fully managed service that centralizes and automates data protection across AWS services and hybrid workloads. It provides core data protection features, ransomware recovery capabilities, and compliance insights and analytics for data protection policies and operations.
As a backup administrator, you use AWS Backup logically air-gapped vaults to securely share backups across accounts and organizations, logically isolate your backup storage, and support direct restore to help reduce recovery time following an inadvertent or malicious event. However, if a bad or unintended actor gains root access to your backup account or the management account of your organization, your backups suddenly become inaccessible, even though they’re still safely stored in the logically air-gapped vault. While traditional account recovery involved working through support channels, AWS Backup with Multi-party approval delivers immediate access to recovery tools, empowering you with faster resolution times and greater control over your recovery timeline.
Multi-party approval for AWS Backup logically air-gapped vaults adds an additional layer of protection for you to recover your application data even when your AWS account becomes completely inaccessible. Using Multi-party approval, you can create approval teams which consist of highly trusted individuals in your organization, then associate them with your logically air-gapped vault. If you get locked out of your AWS accounts due to inadvertent or malicious actions, you can request your own approval team to authorize sharing of your vault from any account, even those outside your AWS Organizations account. Once approved, you gain authorized access to your backups and can begin your recovery process.
How it works
Multi-party approval for AWS Backup logically air-gapped vaults combines the security of logically air-gapped vaults with the governance of Multi-party approval to create a recovery mechanism that works even when your AWS account is compromised. Here’s how it works:
1. Approval team creation
First, you create an approval team in your AWS Organizations management account. If the management account is new, first create an AWS Identity and Access Management (IAM) Identity Center instance before creating the approval team. The approval team consists of trusted individuals (IAM Identity Center users) who will be authorized to approve vault sharing requests. Each approver receives an invitation to join the approval team through a new Approval portal.

2. Vault association
When your approval team is active, you share it with accounts that own logically air-gapped vaults using AWS Resource Access Manager (AWS RAM) to safeguard against requests for approval from arbitrary accounts. Backup administrators can then associate this approval team with new or existing logically air-gapped vaults.
3. Protection against compromise
If your AWS account becomes compromised or inaccessible, you can request access to your backups from a different account (a clean recovery account). This request includes the Amazon Resource Name (ARN) of the logically air-gapped vault in the format arn:aws:backup:<region>:<account>:backup-vault:<name> and an optional vault name and comment.
4. Multi-party approval
The request is sent to the approval team, who review it through the approval portal. When the minimum required number of approvers authorize the request, the vault is automatically shared with the requesting account. All requests and approvals are comprehensively logged in AWS CloudTrail.
5. Recovery process
With access granted, you can immediately start restoring or copying your data in the new recovery account without waiting for your compromised account to be remediated.
This approach provides an entirely separate authentication path to access and recover your backups, completely independent of your AWS account credentials. Even if the bad actor has root access to your account, they can’t prevent the approval team-based recovery process.
1. Create a new logically air-gapped vault
To create a new logically air-gapped vault, provide a name, tags (optional), and vault lock properties.

2. Assign an approval team
When the vault has been created, choose Assign approval team to assign it with an existing approval team.

Choose an existing approval team from the drop-down menu then select Submit to finalize the assignment.

Now your approval team is assigned to your logically air-gapped vault.

Good to know
It’s essential to test your recovery process before an actual emergency:
- From a different AWS account, use the AWS Backup console or API to request sharing of your logically air-gapped vault by providing the vault ID and ARN.
- Request approval of your request from the approval team.
- Once approved, verify that you can access and restore backups from the vault in your testing account.
As a best practice, monitor the health of your approval team regularly using AWS Backup Audit Manager to ensure they have sufficient active participants to meet your approval threshold.
Multi-party approval for enhanced cloud governance
Today, we’re also announcing the general availability of a new capability that AWS account administrators can use to add Multi-party approval to their product offerings. As highlighted in this post, AWS Backup is the first service to integrate this capability. With Multi-party approval, administrators can enable application owners to guard sensitive service operations with a distributed review process.
Good to know
Multi-party approval provides several significant security advantages:
- Distributed decision-making, eliminating single points of failure
- Full auditability through AWS CloudTrail integration
- Protection against compromised credentials
- Formal governance for compliance-sensitive operations
- Consistent approval experience across integrated services
Now available
Multi-party approval is available today in all AWS Regions where AWS Organizations is available. Multi-party approval for AWS Backup logically air-gapped vaults is available in all AWS Regions where AWS Backup is available.
– Veliswa.
Home Assistant Automation Inspector: Find Errors & Fix Fast!
Post Syndicated from BeardedTinker original https://www.youtube.com/shorts/u43x0QGLZjk
New AWS Shield feature discovers network security issues before they can be exploited (Preview)
Post Syndicated from Esra Kayabali original https://aws.amazon.com/blogs/aws/new-aws-shield-feature-discovers-network-security-issues-before-they-can-be-exploited-preview/
Today, I’m happy to announce AWS Shield network security director (preview), a capability that simplifies identification of configuration issues related to threats such as SQL injections and distributed denial of service (DDoS) events, and proposes remediations. This feature identifies and analyzes network resources, connections, and configurations. It compares them against AWS best practices to create a network topology that highlights resources requiring protection.
Organizations today face significant challenges in maintaining a robust network security posture. Security teams often struggle to efficiently discover all resources in their environments, understand how these resources are interconnected, and identify which security services are currently configured. Additionally, they find determining how well resources are configured relative to AWS best practices requires considerable expertise and effort. Many teams find it difficult to identify which network security services and rule sets would best protect their applications from common and emerging threats.
AWS Shield network security director addresses these challenges through three key capabilities. First, it performs comprehensive analysis to discover resources across your AWS accounts, identify connectivity between resources, and determine which network security services and configurations are currently in place. Second, it prioritizes resources by severity level based on AWS network security best practices and threat intelligence. Finally, it provides specific remediation recommendations such as step-by-step instructions for implementing the right AWS security services, including AWS WAF, Amazon Virtual Private Cloud (Amazon VPC) security groups, and Amazon VPC network access control lists (ACLs) to protect your resources.
The service supports critical network security use cases, including protecting applications against internet-born threats and controlling human access to resources based on port, protocol, or IP address range. It provides network analysis to discover assets and delivers analysis that eliminates time-consuming manual processes for identifying resources that need protection. The service offers resource prioritization by assigning security findings a severity level based on network context and adherence to AWS best practices, helping you focus on what matters most. Additionally, it supplies actionable recommendations with specific guidance on which services and configurations will address each security gap. You can also get answers, in natural language, from AWS Shield network security director from within Amazon Q Developer in the AWS Management Console and chat applications.
Getting started with AWS Shield network security director
To use AWS Shield network security director, I need to initiate a network analysis of my AWS resources. I go to the AWS WAF & Shield console and choose Getting started under AWS Shield network security director in the navigation pane. I choose Get started, which takes me to the configuration page. On this page, I can choose how to perform my first network analysis: I can assess findings from across all supported Regions or from my current Region only. I select Start network analysis.

After the analysis is completed, the dashboard page shows a breakdown of resource types by severity level and the most common categories of network security findings associated with their resources. Resources are categorized by type and severity level (critical, high, medium, low, informational), making it easy to identify which areas need immediate attention.

Next, I explore the Resources section to understand the distribution of my assets and filter by severity level in my environment. I can use Resource overview to review a specific severity level, which will redirect me to the Resources under Network security director with the associated severity level filter. I choose the resources that have Medium severity level.

I choose a specific resource to view its network topology map showing how it connects to other resources and associated findings. This visualization helps me understand the potential impact of security configurations and identify exposed paths. I review detailed findings such as “Allows unrestricted inbound access (0.0.0.0/0) on all ports” with severity ratings.

Next, I go to Findings under Network security director, which shows common configuration issues. For each finding, I receive detailed information and recommended remediation steps. The service rates the severity of findings (high, medium, low) to help me prioritize my response. Critical-severity findings such as “CloudFront origin is also internet accessible without CloudFront protections” or high-severity findings such as “Allows unrestricted inbound access (0.0.0.0/0) on all ports” are presented first, followed by medium- and low-severity issues.

You can analyze your network security configurations, in natural language, with AWS Shield network security director within Amazon Q Developer in the AWS Management Console and chat applications. For example, you can say “Do I have any network security issues on my CloudFront distributions?” or “Are any of my resources vulnerable to bots and scrapers?” This integration helps security teams quickly understand their security posture and receive guidance on implementing best practices without having to navigate through extensive documentation.
To explore this capability, I ask “What are my most critical network security issues?” in the Explore with Amazon Q section. Amazon Q analyzes my network security configuration and generates a response based on the security assessment of my AWS environment.

With this comprehensive view of your network security, you can now make data-driven decisions to strengthen your defenses against emerging threats.
Join the preview
AWS Shield network security director is available in the US East (N. Virginia) and Europe (Stockholm) Regions. The Amazon Q Developer capability to analyze network security configurations is available in preview in US East (N. Virginia). To begin strengthening your network security, visit the AWS Shield network security director console and initiate your first network security analysis.
For more information, visit the AWS Shield product page.
Amazon CloudFront simplifies web application delivery and security with new user-friendly interface
Post Syndicated from Micah Walter original https://aws.amazon.com/blogs/aws/amazon-cloudfront-simplifies-web-application-delivery-and-security-with-new-user-friendly-interface/
Today, we’re announcing a new simplified onboarding experience for Amazon CloudFront that developers can use to accelerate and secure their web applications in seconds. This new experience, along with improvements to the AWS WAF console experience, makes it easier than ever for developers to configure content delivery and security services without requiring deep technical expertise.
Setting up content delivery and security for web applications traditionally required navigating multiple Amazon Web Services (AWS) services and making numerous configuration decisions. With this new CloudFront onboarding experience, developers can now create a fully configured distribution with DNS and a TLS certificate in just a few clicks.
Amazon CloudFront offers compelling benefits for organizations of all sizes looking to deliver content and applications globally. As a content delivery network (CDN), CloudFront significantly improves application performance by serving content from edge locations closest to your users, reducing latency and improving user experience. Beyond performance, CloudFront provides built-in security features that protect your applications from distributed denial of service (DDoS) attacks and other threats at the edge, preventing malicious traffic from reaching your origin infrastructure. The service automatically scales with your traffic demands without requiring any manual intervention, handling both planned and unexpected traffic spikes with ease. Whether you’re running a small website or a large-scale application, the CloudFront integration with other AWS services and the new simplified console experience makes it easier than ever to implement these essential capabilities for your web applications.
Streamlined CloudFront configuration
The new CloudFront console experience guides developers through a simplified workflow that starts with the domain name they want to use for their distribution. When using Amazon Route 53, the experience automatically handles TLS certificate provisioning and DNS record configuration, while incorporating security best practices by default. This unified approach eliminates the need to switch between multiple services like AWS Certificate Manager, Route 53, and AWS WAF, and offers developers a faster time to production without the need to dive deep on the nuanced configuration options of each service.
For example, a developer can now create a secure CloudFront distribution for their applications fronted by a load balancer by entering their domain name and selecting their load balancer as the origin. The console automatically recommends optimal CDN and security configurations based on the application type and requirements, and developers can deploy with confidence knowing they’re following AWS best practices.
For developers who wish to host a static website on Amazon Simple Storage Service (Amazon S3), CloudFront provides several important benefits. First, it improves your website’s performance by caching content at edge locations closer to your users, reducing latency and improving page load times. Second, it helps protect your S3 bucket by acting as a security layer—CloudFront can be configured to be the only way to access your content, preventing direct access to your S3 bucket. The new experience automatically configures these security best practices for you.
Enhanced security integration with AWS WAF
Complementing the new CloudFront experience, we’re also introducing an improved AWS WAF console that features intelligent Rule Packs—curated sets of security rules based on application type and security requirements. These Rule Packs enable developers to implement comprehensive security controls without needing to be security experts.
When creating a CloudFront distribution, developers can now enable AWS WAF protection through an integrated experience that uses these new Rule Packs. The console provides clear recommendations for security configurations that developers can use to preview and validate their settings before deployment.
Web applications face numerous security threats today, including SQL injection attacks, cross-site scripting (XSS), and other OWASP Top 10 vulnerabilities. With the new AWS WAF integration, you automatically get protection against these common attack vectors. The recommended Rule Packs provide immediate protection against malicious bot traffic, common web exploits, and known bad actors while preventing direct-to-origin attacks that could overwhelm your infrastructure.
Let’s take a look
If you’ve ever created an Amazon CloudFront distribution, you’ll immediately notice that things have changed. The new experience is straightforward to follow and understand. For my example, I chose to create a distribution for a static website using Amazon S3 as my origin.

In Step 1, I give my distribution a name and select from Single website or app or the new Multi-tenant architecture option, which I can use to configure distributions that use multiple domains but share a common configuration. I choose Single website or app and enter an optional domain name. With the new experience, I can use the Check domain button to verify I have my domain as a Route 53 zone file.

Next, I select the origin for the distribution, which is where CloudFront will fetch the content to serve and cache. For my Origin type, I select Amazon S3. As the preceding screenshot shows, there are several additional options to choose from. Each of the options is designed to make configuration as straightforward as possible for the most popular use cases. Next, I select my S3 bucket, either by typing in the bucket name or using the Browse S3 button.

Next, I have several settings related to using Amazon S3 as my origin. The Grant CloudFront access to origin option is an important one. This option (selected by default) will update my S3 bucket policy to allow CloudFront to access my bucket and will configure my bucket for origin access control. This way, I can use a completely private bucket and know that assets in my bucket can only be accessed through CloudFront. This is a critical step to keeping my bucket and assets secure.
In the next step, I’m presented with the option to configure AWS WAF. With AWS WAF enabled, my web servers are better protected because it inspects each incoming request for potential threats before allowing them to make their way to my web servers. There is a cost to enabling AWS WAF, and as you can see in the following screenshot, there is a calculator to help estimate additional charges.

Now available
The new CloudFront onboarding experience and enhanced AWS WAF console are available today in all AWS Regions where these services are offered. You can start using these new features through the AWS Management Console. There are no additional charges for using these new experiences—you pay only for the CloudFront and AWS WAF resources you use, based on their respective pricing models.
To learn more about the new CloudFront onboarding experience and AWS WAF improvements, visit the Amazon CloudFront Documentation and AWS WAF Documentation. Start building faster, more secure web applications today with these simplified experiences.
AWS Certificate Manager introduces exportable public SSL/TLS certificates to use anywhere
Post Syndicated from Channy Yun (윤석찬) original https://aws.amazon.com/blogs/aws/aws-certificate-manager-introduces-exportable-public-ssl-tls-certificates-to-use-anywhere/
Today, we’re announcing exportable public SSL/TLS certificates from AWS Certificate Manager (ACM). Prior to this launch, you can issue your public certificates or import certificates issued by third-party certificate authorities (CAs) at no additional cost, and deploy them with integrated AWS services such as Elastic Load Balancing (ELB), Amazon CloudFront distribution, and Amazon API Gateway.
Now you can export public certificates from ACM, get access to the private keys, and use them on any workloads running on Amazon Elastic Compute Cloud (Amazon EC2) instances, containers, or on-premises hosts. The exportable public certificate are valid for 395 days. There is a charge at time of issuance, and again at time of renewal. Public certificates exported from ACM are issued by Amazon Trust Services and are widely trusted by commonly used platforms such as Apple and Microsoft and popular web browsers such as Google Chrome and Mozilla Firefox.
ACM exportable public certificates in action
To export a public certificate, you first request a new exportable public certificate. You cannot export previously created public certificates.
To get started, choose Request certificate in the ACM console and choose Enable export in the Allow export section. If you select Disable export, the private key for this certificate will be disallowed for exporting from ACM and this cannot be changed after certificate issuance.

You can also use the request-certificate command to request a public exportable certificate with Export=ENABLED option on the AWS Command Line Interface (AWS CLI).
aws acm request-certificate \
--domain-name mydomain.com \
--key-algorithm EC_Prime256v1 \
--validation-method DNS \
--idempotency-token <token> \
--options \
CertificateTransparencyLoggingPreference=DISABLED \
Export=ENABLED
After you request the public certificate, you must validate your domain name to prove that you own or control the domain for which you are requesting the certificate. The certificate is typically issued within seconds after successful domain validation.
When the certificate enters status Issued, you can export your issued public certificate by choosing Export.

Enter a passphrase for encrypting the private key. You will need the passphrase later to decrypt the private key. To get the public key, Choose Generate PEM Encoding.

You can copy the PEM encoded certificate, certificate chain, and private key or download each to a separate file.

You can use the export-certificate command to export a public certificate and private key. For added security, use a file editor to store your passphrase and output keys to a file to prevent being stored in the command history.
aws acm export-certificate \
     --certificate-arn arn:aws:acm:us-east-1:<accountID>:certificate/<certificateID> \
     --passphrase fileb://path-to-passphrase-file \
     | jq -r '"\(.Certificate)\(.CertificateChain)\(.PrivateKey)"' \
     > /tmp/export.txt
You can now use the exported public certificates for any workload that requires SSL/TLS communication such as Amazon EC2 instances. To learn more, visit Configure SSL/TLS on Amazon Linux in your EC2 instances.
Things to know
Here are a couple of things to know about exportable public certificates:
- Key security – An administrator of your organization can set AWS IAM policies to authorize roles and users who can request exportable public certificates. ACM users who have current rights to issue a certificate will automatically get rights to issue an exportable certificate. ACM admins can also manage the certificates and take actions such as revoking or deleting the certificates. You should protect exported private keys using secure storage and access controls.
- Revocation – You may need to revoke exportable public certificates to comply with your organization’s policies or mitigate key compromise. You can only revoke the certificates that were previously exported. The certificate revocation process is global and permanent. Once revoked, you can’t retrieve revoked certificates to reuse. To learn more, visit Revoke a public certificate in the AWS documentation.
- Renewal – You can configure automatic renewal events for exportable public certificates by Amazon EventBridge to monitor certificate renewals and create automation to handle certificate deployment when renewals occur. To learn more, visit Using Amazon EventBridge in the AWS documentation. You can also renew these certificates on-demand. When you renew the certificates, you’re charged for a new certificate issuance. To learn more, visit Force certificate renewal in the AWS documentation.
Now available
You can now issue exportable public certificates from ACM and export the certificate with the private keys to use other compute workloads as well as ELB, Amazon CloudFront, and Amazon API Gateway.
You are subject to additional charges for an exportable public certificate when you create it with ACM. It costs $15 per fully qualified domain name and $149 per wildcard domain name. You only pay once during the lifetime of the certificate and will be charged again only when the certificate renews. To learn more, visit the AWS Certificate Manager Service Pricing page.
Give ACM exportable public certificates a try in the ACM console. To learn more, visit the ACM Documentation page and send feedback to AWS re:Post for ACM or through your usual AWS Support contacts.
— Channy
Verify internal access to critical AWS resources with new IAM Access Analyzer capabilities
Post Syndicated from Micah Walter original https://aws.amazon.com/blogs/aws/verify-internal-access-to-critical-aws-resources-with-new-iam-access-analyzer-capabilities/
Today, we’re announcing a new capability in AWS IAM Access Analyzer that helps security teams verify which AWS Identity and Access Management (IAM) roles and users have access to their critical AWS resources. This new feature provides comprehensive visibility into access granted from within your Amazon Web Services (AWS) organization, complementing the existing external access analysis.
Security teams in regulated industries, such as financial services and healthcare, need to verify access to sensitive data stores like Amazon Simple Storage Service (Amazon S3) buckets containing credit card information or healthcare records. Previously, teams had to invest considerable time and resources conducting manual reviews of AWS Identity and Access Management (IAM) policies or rely on pattern-matching tools to understand internal access patterns.
The new IAM Access Analyzer internal access findings identify who within your AWS organization has access to your critical AWS resources. It uses automated reasoning to collectively evaluate multiple policies, including service control policies (SCPs), resource control policies (RCPs), and identity-based policies, and generates findings when a user or role has access to your S3 buckets, Amazon DynamoDB tables, or Amazon Relational Database Service (Amazon RDS) snapshots. The findings are aggregated in a unified dashboard, simplifying access review and management. You can use Amazon EventBridge to automatically notify development teams of new findings to remove unintended access. Internal access findings provide security teams with the visibility to strengthen access controls on their critical resources and help compliance teams demonstrate access control audit requirements.
Let’s try it out
To begin using this new capability, you can enable IAM Access Analyzer to monitor specific resources using the AWS Management Console. Navigate to IAM and select Analyzer settings under the Access reports section of the left-hand navigation menu. From here, select Create analyzer.

From the Create analyzer page, select the option of Resource analysis – Internal access. Under Analyzer details, you can customize your analyzer’s name to whatever you prefer or use the automatically generated name. Next, you need to select your Zone of trust. If your account is the management account for an AWS organization, you can choose to monitor resources across all accounts within your organization or the current account you’re logged in to. If your account is a member account of an AWS organization or a standalone account, then you can monitor resources within your account.
The zone of trust also determines which IAM roles and users are considered in scope for analysis. An organization zone of trust analyzer evaluates all IAM roles and users in the organization for potential access to a resource, whereas an account zone of trust only evaluates the IAM roles and users in that account.
For this first example, we assume our account is the management account and create an analyzer with the organization as the zone of trust.

Next, we need to select the resources we wish to analyze. Selecting Add resources gives us three options. Let’s first examine how we can select resources by identifying the account and resource type for analysis.

You can use Add resources by account dialog to choose resource types through a new interface. Here, we select All supported resource types and select the accounts we wish to monitor. This will create an analyzer that monitors all supported resource types. You can either select accounts through the organization structure (shown in the following screenshot) or paste in account IDs using the Enter AWS account ID option.

You can also choose to use the Define specific resource types dialog, which you can use to pick from a list of supported resource types (as shown in the following screenshot). By creating an analyzer with this configuration, IAM Access Analyzer will continually monitor both existing and new resources of the selected type within the account, checking for internal access.

After you’ve completed your selections, choose Add resources.

Alternatively, you can use the Add resources by resource ARN option.

Or you can use the Add resources by uploading a CSV file option to configure monitoring a list of specific resources at scale.

After you’ve completed the creation of your analyzer, IAM Access Analyzer will analyze policies daily and generate findings that show access granted to IAM roles and users within your organization. The updated IAM Access Analyzer dashboard now provides a resource-centric view. The Active findings section summarizes access into three distinct categories: public access, external access outside of the organization (requires creation of a separate external access analyzer), and access within the organization. The Key resources section highlights the top resources with active findings across the three categories. You can see a list of all analyzed resources by selecting View all active findings or Resource analysis on the left-hand navigation menu.

On the Resource analysis page, you can filter the list of all analyzed resources for further analysis.

When you select a specific resource, any available external access and internal access findings are listed on the Resource details page. Use this feature to evaluate all possible access to your selected resource. For each finding, IAM Access Analyzer provides you with detailed information about allowed IAM actions and their conditions, including the impact of any applicable SCPs and RCPs. This means you can verify that access is appropriately restricted and meets least-privilege requirements.

Pricing and availability
This new IAM Access Analyzer capability is available today in all commercial Regions. Pricing is based on the number of critical AWS resources monitored per month. External access analysis remains available at no additional charge. Pricing for EventBridge applies separately.
To learn more about IAM Access Analyzer and get started with analyzing internal access to your critical resources, visit the IAM Access Analyzer documentation.
Security updates for Tuesday
Post Syndicated from jake original https://lwn.net/Articles/1025734/
Security updates have been issued by AlmaLinux (.NET 8.0, .NET 9.0, buildah, containernetworking-plugins, firefox, gstreamer1-plugins-bad-free, libsoup3, podman, skopeo, sqlite, thunderbird, unbound, valkey, varnish, and xz), Debian (webkit2gtk), Fedora (fido-device-onboard, python-django4.2, rust-git-interactive-rebase-tool, and thunderbird), Red Hat (libsoup), Slackware (libxml2), SUSE (java-11-openjdk, kernel, and wireshark), and Ubuntu (c3p0, dojo, python-django, python3.13, python3.12, python3.11, python3.10, python3.9, python3.8, python3.7, python3.6, and requests).
Introducing the new console experience for AWS WAF
Post Syndicated from Harith Gaddamanugu original https://aws.amazon.com/blogs/security/introducing-the-new-console-experience-for-aws-waf/
Protecting publicly facing web applications can be challenging due to the constantly evolving threat landscape. You must defend against sophisticated threats, including zero-day vulnerabilities, automated events, and changing compliance requirements. Navigating through consoles and selecting the protections best suited to your use case can be complicated, requiring not only security expertise but also a deep understanding of the applications you want to protect.
Today, we’re excited to share that AWS WAF has launched a new console experience designed to simplify security configuration. This enhanced interface provides an integrated security solution that provides comprehensive protection across your application landscape, featuring a streamlined single-page workflow that can reduce deployment time from hours to minutes. AWS WAF now provides pre-configured rule packs for specific workloads, automated security recommendations, and a unified dashboard for clear visibility into security status. The new console also offers flexible protection levels and integrated partner solutions to help you scale security operations effectively.
In this post, we walk you through the features of the enhanced console experience for AWS WAF. You can now select your workload type to automatically apply expert-curated protection packs, helping to maintain comprehensive protection across your workloads.
Reduce web application security implementation steps by 80 percent
The simplified interface consolidates the configuration steps into a single page, reducing the need to navigate through multiple pages. This consolidation creates an intuitive workflow that significantly reduces setup complexity. You can complete configurations that previously took hours within minutes, representing an 80 percent reduction in implementation time.
The new experience offers pre-configured security defaults and documentation, helping users of all technical abilities to effectively secure applications. When starting the setup process, you select the application category and feature focus to protect an API or web application, and AWS WAF automatically customizes the protection parameters accordingly.
AWS WAF now also integrates with AWS Marketplace through a dedicated page for direct deployment of partner solutions.
This streamlined approach, shown in Figure 1, transforms what was previously a complex, time-consuming process into a straightforward, efficient workflow that maintains robust security standards while dramatically reducing implementation time and potential configuration errors.
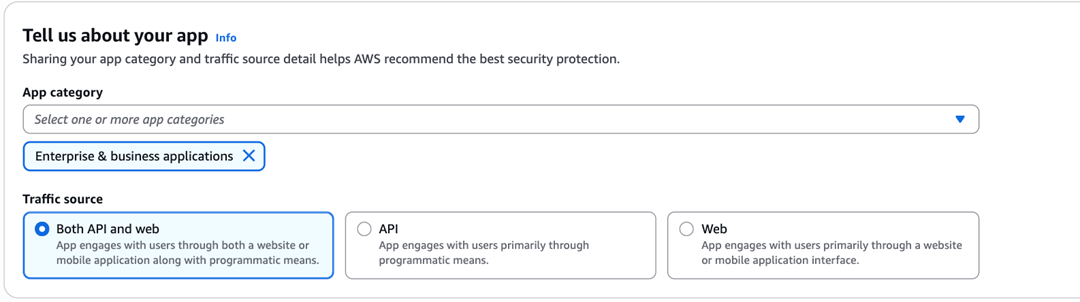
Figure 1: Workload specific protection
Simplified AWS WAF rule deployment through protection packs
AWS WAF simplifies security deployment through three configuration options, each based on AWS security expertise and ready for immediate implementation. These protection packs provide comprehensive configuration optimized for various application types.
- Recommended: Enables recommended protections for the selected application categories and traffic sources
- Essentials: Enables essential protections for the selected application categories and traffic sources
- You build it: Select and customize protections from the available options to fit your needs
Implementation requires a single step: selecting the appropriate protection pack based on your security needs, as shown in Figure 2. This approach minimizes complex configurations while maintaining security standards.
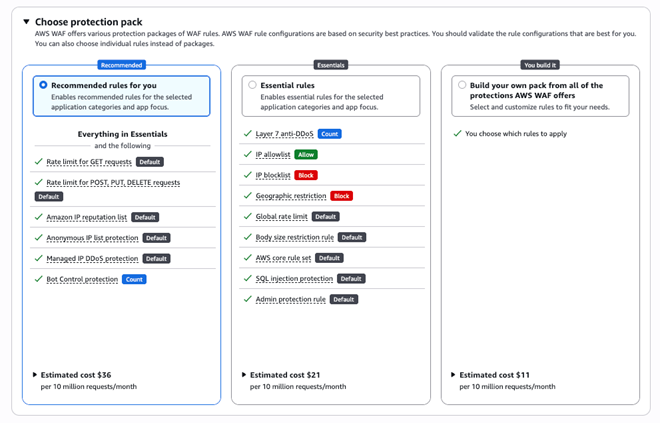
Figure 2: Choosing a rule package during AWS WAF onboarding
Real-time monitoring, automated recommendations, and protection activity visualization
The new console features an outcome-driven dashboard, shown in Figure 3, that simplifies security monitoring by consolidating threat detection metrics, rule performance analytics, and actionable insights into a single view. Security teams can now respond to threats faster without having to navigate through multiple screens.
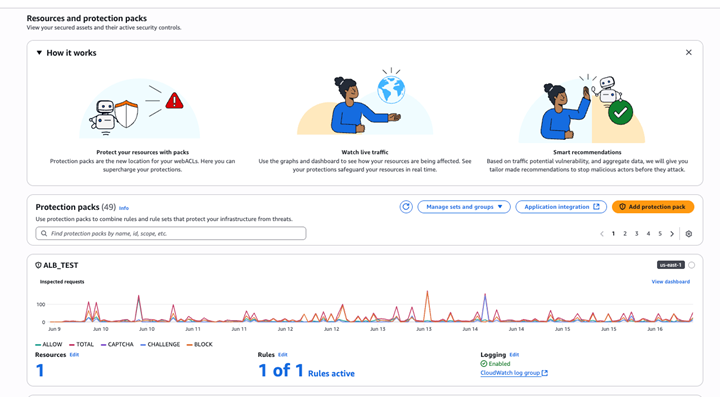
Figure 3: Resources and protections dashboard
AWS Threat Intelligence enhances monitoring capabilities by analyzing two weeks of allowed traffic patterns to proactively identify potential vulnerabilities. The service examines critical traffic dimensions including IP reputation, distributed denial of service (DDoS) attacks, bot activities, anonymous IP sources, and vulnerable application traffic. When AWS WAF detects vulnerabilities, it recommends specific AWS Managed Rules to strengthen your security posture, as shown in Figure 4.
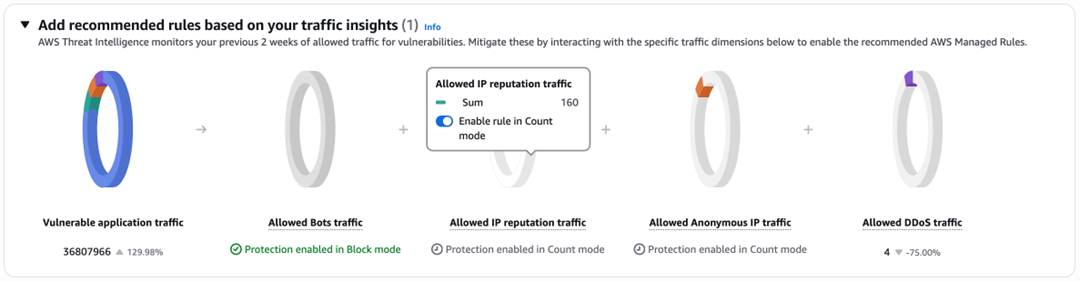
Figure 4: Automated recommendations dashboard
The new real-time monitoring dashboard, as shown in Figure 5, offers comprehensive security insights at a glance. It displays request counts for traffic within your specified time range and summarizes protection rules with their corresponding termination actions. A standout feature is the Sankey visualization, which maps protection activity to AWS WAF actions, helping security teams track traffic flow, identify rule interaction patterns, and optimize configurations.
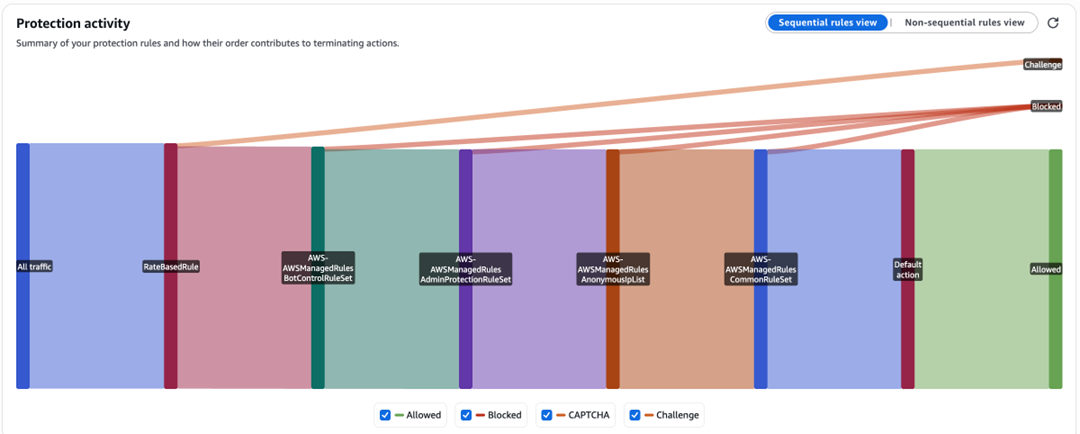
Figure 5: Summary and protection activity visualization dashboard
Outcome driven dashboards for actionable insights
The new dashboard, shown in Figure 6, displays security metrics based on business impact. The left panel contains four main categories: traffic, bot, rule, and CAPTCHA characteristics. The right panel shows metrics within each category. Under Traffic characteristics, you can view metrics by countries, attack types, and device types.
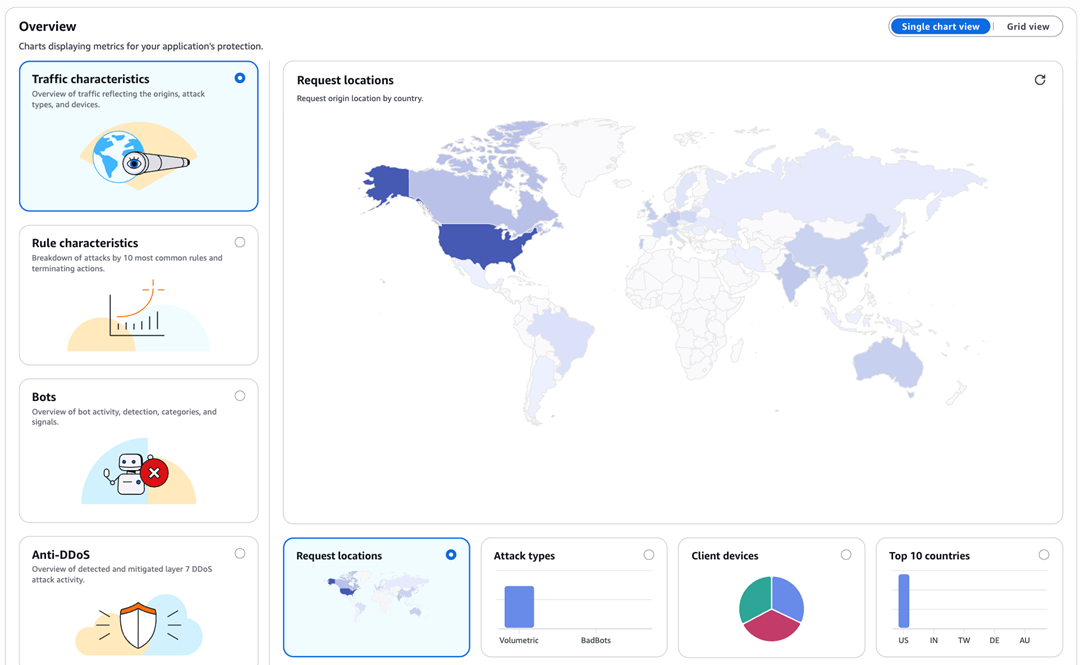
Figure 6: New, outcome-driven dashboard
Bot characteristics include detection ratio, categories, token information, signals, session thresholds, IP token reuse thresholds, and coordinated activity. Rule characteristics highlight the top 10 managed rules, while CAPTCHA characteristics show solved, abandoned, and unsolved puzzle metrics. This organized structure helps you analyze data effectively, starting with category selection and progressing to rule evaluation. You can combine categories and metrics to visualize patterns, investigate incidents, and make informed decisions. Interactive features, such as IP blocking on hover, enable immediate action. The new console experience allows you to quickly identify threats, optimize WAF rules, and maintain effective security controls based on specific needs.
Query logs from the console
The new AWS WAF console features an integrated log explorer. You can access two analysis options from the bottom of the new console page: sampled requests for immediate review or log explorer for detailed analysis. The log explorer, shown in Figure 7, requires Amazon CloudWatch logging and provides pre-built filters for rule actions and time frames, enabling quick pattern identification and trend analysis. If CloudWatch logging isn’t enabled, you can still analyze security events through sampled requests.
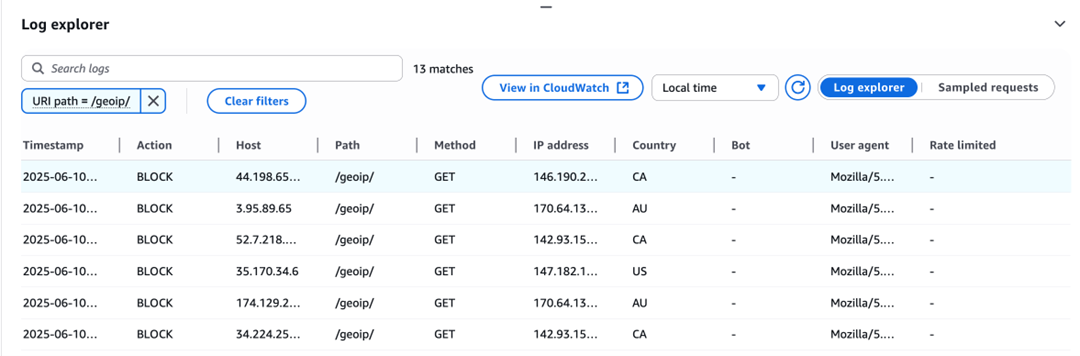
Figure 7: New log explorer view for traffic analysis
Availability and pricing
Starting today, these dashboards are available by default in the AWS WAF console at no additional cost to you and require no additional setup to be completed.
Customer success
Early adopters are already seeing significant benefits. Sarah Chen, Security Engineer at National Retail Corporation, reports: “With the new console, we configured protection for our PHP applications in under 10 minutes. The rule recommendations helped us identify and block sophisticated attacks targeting our applications, reducing our security incidents by 60 percent in the first month.”
Conclusion
By combining intelligent monitoring, guided configuration, and straightforward access to specialized solutions, our enhanced console helps organizations to maintain robust security postures without the complexity traditionally associated with advanced security management.
If you have feedback about this post, submit comments in the Comments section below. If you have questions about this post, contact AWS Support.
Igniting innovation: How Experience AI is empowering teachers and students across Kenya
Post Syndicated from Victor Murithi original https://www.raspberrypi.org/blog/experience-ai-is-empowering-teachers-and-students-across-kenya/
This blog post is written by Victor Murithi, Communications and Media Consultant at Young Scientists Kenya, one of our global partners for Experience AI in Kenya.
When over 100 teachers from across Kenya gathered at Kangaru High School in Embu County for the Kenya Science and Engineering Fair Nationals in April, few anticipated just how transformative a two-day workshop could be. Delivered by the Experience AI Young Scientists Kenya (YSK) team, with support from the Raspberry Pi Foundation, the training sparked more than curiosity — it sparked a shift in mindset.
This wasn’t just about introducing new tools: it was about empowering teachers to confidently lead their students into an artificial intelligence (AI)-driven future.

National reach and local impact
What began as a plan to train just 40 teachers quickly grew into something much bigger. By the time the workshop kicked off, 104 teachers from over 80 schools across 37 counties in Kenya, had registered and participated — nearly tripling the initial target.
This overwhelming interest confirmed a powerful insight: teachers are eager to understand AI, not only to better prepare their students for the future, but also for their own professional growth.
The workshop’s curriculum didn’t just focus on technical skills, it aimed to create confidence, clarity, and community among the attendees — key ingredients for successfully integrating AI into teaching and learning.
“Helping teachers move past their fear of AI and understand its potential is incredibly powerful. Because AI is the future, and through this training, we’re reaching the minds that will shape it,” explained Lucy Mwaniki, AI Community Trainer at YSK.
Practical skills, real outcomes
As part of the training, the attendees completed interactive worksheets, tested basic machine learning models, and sat a final comprehension test, something they found both validating and motivational.
“We were able to do the summative test… which turned out to be a very effective way of us understanding how in-depth and how well they grasped the knowledge,” says Lucy Mwaniki.
In one standout session, teachers collaboratively brainstormed ways AI could address national educational challenges. Ideas included models to assist students in selecting academic pathways within Kenya’s Competency Based Curriculum (CBC). Several teachers also successfully built working models, demonstrating the potential of applied learning.
“It was a very eye-opening session… some of the teachers were able to create a very basic model, which was a wonderful experience for them,” Lucy Mwaniki explains.
What made this training exceptional was its immediate applicability and long-term vision. By the end of two days, teachers weren’t just AI-aware — they were AI-ready, with many already starting to explore how AI tools could support entrepreneurship, lesson planning, and personalised learning pathways.

Celebrating our achievements and impact
At the close of the training, each teacher received a Certificate of Participation, recognising their commitment to professional development and their new capacity to bring AI into the classroom. The awarding of certificates added a sense of accomplishment and pride, reinforcing that teachers are key drivers of technological transformation in education.
And the impact of the training was measurable:
- 95% of teachers agreed that the training increased their knowledge and confidence to teach AI concepts
- 88% of teachers agreed that the training was high quality and useful for preparing them to teach the Experience AI lessons
But it doesn’t end there, as Vanessa Inziani, Head of Programs at YSK, explains, “Our commitment doesn’t end with the training — we continue to support educators with resources, mentorship, and follow-up to ensure success in delivering the program in the classroom.”
Looking ahead towards a promising AI journey
With the rapidly evolving digital landscape, AI is no longer a distant concept — it’s a present-day classroom necessity. Yet, introducing AI into schools isn’t just about technical literacy; it’s about confidence, clarity, and community and the approach the Young Scientist Kenya team and Experience AI delivered during the two-day training is anchored in this belief.
As AI continues to shape the global education landscape, programs like Experience AI provide the bridge needed to equip teachers, inspire students, and future-proof education systems. The Kangaru High School session was not a one-off — it was a catalyst for systemic change.
Experience AI is scaling. As it expands across Kenya and beyond, the benefits are clear:
- Empowered educators who gain confidence and skills to integrate AI in their teaching
- Future-ready students who grasp foundational AI concepts and their real-world applications
- Sustainable impact as trained teachers go on to influence thousands of learners in their communities
The journey from fear to fluency starts with a single step, a willingness for us all to explore what’s possible. Together, we can equip educators, inspire students, and shape Kenya’s future, one AI-literate classroom at a time.
About Experience AI
Experience AI is an AI literacy programme, co-developed by the Raspberry Pi Foundation and Google DeepMind, that teaches students aged 11 to 14 about AI and machine learning. Thanks to funding from Google.org, Young Scientists Kenya has partnered with the Raspberry Pi Foundation to provide free training to Kenyan educators, equipping them with the skills they need to effectively deliver the programme in their settings. They are one of two global partners working with the Raspberry Pi Foundation in Kenya.
You can find out more about the programme on our website: rpf.io/expai-ysk-blogpost
The post Igniting innovation: How Experience AI is empowering teachers and students across Kenya appeared first on Raspberry Pi Foundation.
Where AI Provides Value
Post Syndicated from Bruce Schneier original https://www.schneier.com/blog/archives/2025/06/where-ai-provides-value.html
If you’ve worried that AI might take your job, deprive you of your livelihood, or maybe even replace your role in society, it probably feels good to see the latest AI tools fail spectacularly. If AI recommends glue as a pizza topping, then you’re safe for another day.
But the fact remains that AI already has definite advantages over even the most skilled humans, and knowing where these advantages arise—and where they don’t—will be key to adapting to the AI-infused workforce.
AI will often not be as effective as a human doing the same job. It won’t always know more or be more accurate. And it definitely won’t always be fairer or more reliable. But it may still be used whenever it has an advantage over humans in one of four dimensions: speed, scale, scope and sophistication. Understanding these dimensions is the key to understanding AI-human replacement.
Speed
First, speed. There are tasks that humans are perfectly good at but are not nearly as fast as AI. One example is restoring or upscaling images: taking pixelated, noisy or blurry images and making a crisper and higher-resolution version. Humans are good at this; given the right digital tools and enough time, they can fill in fine details. But they are too slow to efficiently process large images or videos.
AI models can do the job blazingly fast, a capability with important industrial applications. AI-based software is used to enhance satellite and remote sensing data, to compress video files, to make video games run better with cheaper hardware and less energy, to help robots make the right movements, and to model turbulence to help build better internal combustion engines.
Real-time performance matters in these cases, and the speed of AI is necessary to enable them.
Scale
The second dimension of AI’s advantage over humans is scale. AI will increasingly be used in tasks that humans can do well in one place at a time, but that AI can do in millions of places simultaneously. A familiar example is ad targeting and personalization. Human marketers can collect data and predict what types of people will respond to certain advertisements. This capability is important commercially; advertising is a trillion-dollar market globally.
AI models can do this for every single product, TV show, website and internet user. This is how the modern ad-tech industry works. Real-time bidding markets price the display ads that appear alongside the websites you visit, and advertisers use AI models to decide when they want to pay that price—thousands of times per second.
Scope
Next, scope. AI can be advantageous when it does more things than any one person could, even when a human might do better at any one of those tasks. Generative AI systems such as ChatGPT can engage in conversation on any topic, write an essay espousing any position, create poetry in any style and language, write computer code in any programming language, and more. These models may not be superior to skilled humans at any one of these things, but no single human could outperform top-tier generative models across them all.
It’s the combination of these competencies that generates value. Employers often struggle to find people with talents in disciplines such as software development and data science who also have strong prior knowledge of the employer’s domain. Organizations are likely to continue to rely on human specialists to write the best code and the best persuasive text, but they will increasingly be satisfied with AI when they just need a passable version of either.
Sophistication
Finally, sophistication. AIs can consider more factors in their decisions than humans can, and this can endow them with superhuman performance on specialized tasks. Computers have long been used to keep track of a multiplicity of factors that compound and interact in ways more complex than a human could trace. The 1990s chess-playing computer systems such as Deep Blue succeeded by thinking a dozen or more moves ahead.
Modern AI systems use a radically different approach: Deep learning systems built from many-layered neural networks take account of complex interactions—often many billions—among many factors. Neural networks now power the best chess-playing models and most other AI systems.
Chess is not the only domain where eschewing conventional rules and formal logic in favor of highly sophisticated and inscrutable systems has generated progress. The stunning advance of AlphaFold2, the AI model of structural biology whose creators Demis Hassabis and John Jumper were recognized with the Nobel Prize in chemistry in 2024, is another example.
This breakthrough replaced traditional physics-based systems for predicting how sequences of amino acids would fold into three-dimensional shapes with a 93 million-parameter model, even though it doesn’t account for physical laws. That lack of real-world grounding is not desirable: No one likes the enigmatic nature of these AI systems, and scientists are eager to understand better how they work.
But the sophistication of AI is providing value to scientists, and its use across scientific fields has grown exponentially in recent years.
Context matters
Those are the four dimensions where AI can excel over humans. Accuracy still matters. You wouldn’t want to use an AI that makes graphics look glitchy or targets ads randomly—yet accuracy isn’t the differentiator. The AI doesn’t need superhuman accuracy. It’s enough for AI to be merely good and fast, or adequate and scalable. Increasing scope often comes with an accuracy penalty, because AI can generalize poorly to truly novel tasks. The 4 S’s are sometimes at odds. With a given amount of computing power, you generally have to trade off scale for sophistication.
Even more interestingly, when an AI takes over a human task, the task can change. Sometimes the AI is just doing things differently. Other times, AI starts doing different things. These changes bring new opportunities and new risks.
For example, high-frequency trading isn’t just computers trading stocks faster; it’s a fundamentally different kind of trading that enables entirely new strategies, tactics and associated risks. Likewise, AI has developed more sophisticated strategies for the games of chess and Go. And the scale of AI chatbots has changed the nature of propaganda by allowing artificial voices to overwhelm human speech.
It is this “phase shift,” when changes in degree may transform into changes in kind, where AI’s impacts to society are likely to be most keenly felt. All of this points to the places that AI can have a positive impact. When a system has a bottleneck related to speed, scale, scope or sophistication, or when one of these factors poses a real barrier to being able to accomplish a goal, it makes sense to think about how AI could help.
Equally, when speed, scale, scope and sophistication are not primary barriers, it makes less sense to use AI. This is why AI auto-suggest features for short communications such as text messages can feel so annoying. They offer little speed advantage and no benefit from sophistication, while sacrificing the sincerity of human communication.
Many deployments of customer service chatbots also fail this test, which may explain their unpopularity. Companies invest in them because of their scalability, and yet the bots often become a barrier to support rather than a speedy or sophisticated problem solver.
Where the advantage lies
Keep this in mind when you encounter a new application for AI or consider AI as a replacement for or an augmentation to a human process. Looking for bottlenecks in speed, scale, scope and sophistication provides a framework for understanding where AI provides value, and equally where the unique capabilities of the human species give us an enduring advantage.
This essay was written with Nathan E. Sanders, and originally appeared in The Conversation.
Дългите традиции на добре поддържаната брада в мюсюлманския свят (продължение)
Post Syndicated from Атанас Шиников original https://www.toest.bg/dulgite-traditsii-na-dobre-poddurzhanata-brada-v-myusyulmanskiya-svyat-produlzhenie/
<< Към първа част

Да се върнем към историческия фундамент на брадата. Към нейния корен (асл, откъдето и идва нашенското аслъ!), там, където се крият доктринално-езиковите ѝ фоликули.
Старите арабски речници, да вземем, примерно, най-известния – „Езикът на арабите“ (Лисан ал-‘араб) на Ибн Манзур от XIII век, отделят доволно внимание на терминологията на брадата. На арабски е лихйа, споделя един корен с други думи, обозначаващи също и „кора“ (включително мозъчна), „обвивка“. И много ясно обозначава какво е брадата – събирателното за растящите косми по двете бузи и брадичката. Това си е стандартното определение, което устойчиво възпроизвеждат древните авторитети, понякога добавят и ограничителната линия откъм ухото (‘изар), което условно може да преведем като „бакенбард“.
По този повод интересно наблюдение прави един от авторите на съвременни трактати – някой си шейх Абу Абд Аллах Мухаммад във вече споменатото съчинение „Брадата в Писанието, Сунната и преданията на праведните предци на общността“¹. Ценно книжле от около сто и трийсет страници, доколкото обобщава много стари и известни авторитети. Естествено, не попадайте в плоския херменевтичен капан да си мислите, че такива съчинения са лишени от тълкувателен елемент само защото ви изглеждат като компилация от средновековни извори. Тълкувателният елемент начева още с подбора на кои точно извори ще се цитират.
Но констатацията по повод термина за „бакенбард“ (‘изар) си струва. За него, твърди авторът, можело да се каже, че богословите прависти са по-конкретни, дават по-ясни дефиниции, отколкото филолозите. Имаме храна за размисъл тук, доколкото филологията в един класически мюсюлюмански светоглед не съществува самоцелно, а обслужва стремежите на правистите и богословите да разберат свещените текстове като основа на нормотворчеството и регулацията на живота на общността. И така, богословието, правото и езикознанието вървят ръка за ръка. Та ако имаме общо понятие за „бакенбард“, ще е логично да имаме разсъждение къде точно започва и свършва той. Ето ви едно софистицирано описание от египетския богослов и юрист Ал-Калюби от XVII век:
Ако се пусне конец по права линия от най-горната част на ухото до най-високата част на челото, то онова, що е долепено до ухото и върви успоредно на страната на лицето, е ‘изар.²
Пробвах тази телесна картография вкъщи пред огледалото. Може да е заради формата на черепа ми, но ми се струва, че доста високо се отсича горната граница на тоя арабски бакенбард.
Има и обозначения за други части около брадата, например пространството под долната устна, където също растат косми. Тази част или вид брада се нарича ‘анфака, на английски познато като „душевна кръпка“ (soul patch), подобно на българската „козя брадичка“. Пак Ибн Манзур говори и за определения като „мъж, чиято брада е заела цялото му лице, освен малка част“. На арабски се наричал агарр, а пък аз веднага се сещам за футболиста Трифон Иванов, лека му пръст. Ибн Манзур изрично уточнява, че има и женски вариант на прилагателното „брадат“ (лихйан) – лихйана. Не знам защо го прави, но можете ли да избегнете асоциацията с брадатите женски джуджета от „Властелина на пръстените“ на Толкин?
От особена значимост е арабското определение касс, приложено към брада, и то не коя да е, а тази на самия Пророк. Защото е важно не само какво е казал в Сунната, а и как е изглеждал. Нали помните, че той е „прекрасен образец за вас“ (Коран 33:21)? Аз, ако съм мюсюлманин, ще се опитвам да му подражавам във всичко. И ето, разказва се за него, че брадата му можела да бъде описана с това прилагателно. А то, четем в речника на Ибн Манзур от тринайсетото столетие, си означава „гъст“ за телесна растителност, особено за брадата на Пророка. Но не просто гъста. Към това качество вървят и гъсти корени, плътни, не тънки косми, не твърде дълга, в същото време начупена. Добавете към това боядисана, редовно сресвана и поддържана – и получавате архетипните измерения на един истински пророчески груминг от пясъците на Арабия през VII век. Заслужава да бъде измежду достойните за възхищение характеристики на Мохамед.
Ненапразно „Кълна се в брадата на Пророка!“ е стандартно възклицание сред мюсюлманите,
забелязано още от самия Ричард Бъртън по време на поклонничеството му до Мека и Медина през XIX век. И с тази съвършена брада Пророкът съвършено се вписва в мюсюлманската профетология.
Ето, твърдят преданията, преди него пратениците на Аллах сред човечеството също са имали бради. Ибрахим (библ. Авраам) бил с бяла брада, а Иса (библ. Иисус) пък имал много черна лицева растителност. И в примера на самия Пророк с неговата гъста, но не прекомерно дълга брада, се крие ключът към язвителността на „неволниците“ от приказките от „Хиляда и една нощ“ към мъжете с твърде дълги бради. Същата подигравка откриваме и във възпитателната „Книга за глупците и невежите“ на друг мой любимец – историка, богослова и литератора Ибн ал-Джаузи от XII век. Подобно на „Скъперниците“ на по-ранния Ал-Джахиз, тук може да се заровим в истории за всякакви неразумни поведенчески модели. И сред тях значително място е отделено на невъздържано дългите бради.
Измежду знаците за глупостта, които не могат да бъдат сбъркани, пише той, е дължината на брадата.
Според самата Тора, Петокнижието Мойсеево (Таурат), твърди Ибн ал-Джаузи, брадата имала своите корени в мозъка, затова и който позволи на брадата му да порасте прекомерно, мозъкът му намалявал. Нещо като скачени съдове. Оттук и оглупяването. Мъдрите хора били казали, че „глупостта е тор за брадата“, а дългобрадият си е чисто кьосе откъм интелект.
Добре, а след като не върви нито с твърде дълга брада, нито съвсем без, колко е оптималното, се пита човек. Ибн ал-Джаузи е класик и по този въпрос. Златната среда е колкото една шепа или стиска. Представете си един юмрук дължина. Всичко над тази дължина си е чист минус за интелекта. Ако аз като един съвестен коментатор трябва да добавя допълнителен тълкувателен пласт, не е ли казал самият Аллах в Корана, че мюсюлманската общност е „общност по средата“ (Коран 2:143)? И тази среда може да се отнесе за всичко, като винаги ще се пита: средата между кои две крайности?
Най-голямото прегрешение на набедените глупци от разказа на Ибн ал-Джаузи, изглежда, се състои в тяхното отклонение от пророческия идеал. Затова и глупостта им се изразява не само и единствено в интелектуален дефицит, а в невъзможността да разпознаят и да изпълнят божествената повеля. А както знаем от пророческото предание, в човешката „природа“ (фитра) се включва подрязването на ноктите, подрязването на мустака и пускането на брадата. С други думи, ако трябва да препратим към началото на Аристотелевата „Метафизика“ и да го перифразираме, в природата на човека е не само стремежът към знание, но и подрязването на ноктите и пускането на брадата. Оттук следва и че колкото повече занемаряваш тези заповеди, толкова повече се отдалечаваш от истинската си същност и от целта на своето съществуване според Твореца. Ако трябва да зазвуча като съвременен корпоративен лайфкоуч, „спираш да бъдеш себе си“. Затова и в тази теологична парадигма бръсненето е напълно недопустимо.
Сега разбирате ли малко по-добре външността на талибаните и основанията на тяхната забрана върху бръснарските салони? Категорично се възбранява брадата да се премахва. Че и богословът от школата на маликитите Абу Умар ибн Абд ал-Барр от XI век не просто го обявява за греховно, ами и пояснява, че само женствените мъже със съмнителна сексуална идентичност (муханнасун) го правят. Брадата се възправя като неоспорим знак за разграничение между двата пола, като е греховно всяко уподобяване между тях. По силата на същата импликация се постановява и бръсненето на косми при жените, ако растат като брада или мустак. Защото универсалното богословско разбиране е, че при нежния пол това представлява недостатък, ущърбност (накс) или срам (‘иб). И там насоките са предимно по посока препоръчително бръснене (мустахабб). Защото така човек не извършва греховно вмешателство в творението на Всевишния Аллах, а напротив – утвърждава същностната направа на жената без брада, мустак или косми под долната устна. Даже някои богослови от школата на маликитите допълнително подсилват този принцип и постановяват, че ако на жената израсте брада, мустак или косми под долната устна, е направо задължително (уаджиб) да се обръсне.
За да не останем в заблуда, че консервативният поглед към брадата е потънал някъде в дебрите на въобразеното от нас мюсюлманско Средновековие, да надзърнем към електронния свят на порталите за фетви. Любознателен читател задава въпрос относно значението на пророческото предание за пускането на брадата и подрязването на мустака. Въпросът е интересен, защото се позовава на тълкувание от друг религиозен авторитет, според който „отпускането“ (и‘фа’) на брадата не означавало толкова да се остави да расте, колкото да не се сплита.
На това екипът на шейх Мухаммад Салих ал-Мунаджжид от неговата дигитализирана машина за религиозни консултации отговаря по няколко линии. „Пускането“ на брадата категорично означава да се остави да расте безпрепятствено. Позовава се на авторитета на известния историк Ибн ал-Асир от XII век, който противопоставя растежа на брадата на подрязването на мустака. Хадисите в тази връзка също са цитирани последователно, особено в заръката на мюсюлманите да се отграничат от останалите религиозни общности – „хората на Писанието“, тоест от юдеите и християните, както и от зороастрийците (маджус) – чрез пускането на брадата. Защото останалите общности или подрязвали твърде много брадите си, или направо се бръснели. Споменава се и друг авторитет – имам Ан-Науауи от XIII век. От него на български са преведени класиките „Четиридесет хадиса“ и „Градината на праведниците“. Тук авторът прави важно уточнение: и петте глагола в арабския език, употребени в преданието за отпускането на брадата, имат много сходно значение. Позволява се отнемането от брадата до дължина една стиска. И отпускането на брадата се смята за една от добродетелите, свързани с човешката същност.
В друг сайт – на шейх Ибн Баз, имаме друг нюанс на питането. Дали заръката да се отпуска брадата е със статус на задължение (уджуб), или просто на препоръка (истихбаб)? Защото ако е задължение, следва нещо много важно. Не го ли спазваш, може би извършваш грях (харам) и евентуално ще те обявят за неверник (кафир). Нещата са сериозни. И отговорът е доста рязък. Всичките тези предписания – да се подрязва мустакът и да се отпуска брадата като жест на категорично разграничение от неверниците – са религиозно задължение, твърди шейхът. А забраната за бръснене и прекомерно подрязване е категорична.
С други думи, по терминологията на мюсюлманското право (фикх) казусът се разглежда по оста на двете крайности на спектъра на категориите позволеност. От единия край стои тази на религиозната повеля и задължение. Ако не го правиш, гориш. От другия край стои категорията на пълна възбрана и грях. Пускаш брадата. Задължително. Не бръснеш. Напълно забранено. Така ставаш истински мюсюлманин. Разбира се, фетвата е много по-детайлна от моето опростенческо обобщение.
Но донякъде самодоволно мога да заключа, че съм успял да изградя един брадат разказ от времето на Пророка, разгръщащ се според своята консистентна свещена логика. Още преди да прочета фетвите, които съм открил, съм се досетил какво ще кажат днешните религиозни авторитети. Може би защото и аз съм се подхлъзнал да подбера само онези, с чиято логика съм съгласен.
Например преднамерено съм решил да заскобя Турция. Тамошните символни употреби на брадите и мустаците между религиозното и лаическото, между лявото и дясното, марксизма и турския национализъм през XX век оставяме за някой друг път. И на някой друг колега. Отделно може да разсъждаваме и защо бръснарниците в центъра на София не са точното място за оформяне на брада по свещения закон на исляма.
Важното е друго. Да усетите как въпросите на хигиената и естетиката, културата и религията, ритуалните изисквания, догматиката и идентичността, отношенията между половете, литературата, поезията и анекдотиката от София до Мека, Медина и Кайро се вплитат в една и съща брадата тъкан на историята.
А дотук, както казват фризьорите, сме обрали само връхчетата.
1 Хасуна, Абу Абд Аллах Мухаммад ибн Абд ал-Хамид. Ал-Лихйа фи-л-китаб уа-с-Сунна уа-акуал салафи л-умма. Кайро: Дар ал-китаб уа-с-Сунна, 2007.
2 Пак там, с. 13.
В рубриката „Ориент кафе“ Атанас Шиников поднася любопитни теми, свързани не толкова с горещата политика, колкото с историята и културата на Близкия изток. А той, древен и днешен, е по-близко до нас и съвремието ни, отколкото си представяме.
Zabbix at the Netherlands Ministry of Infrastructure and Water Management
Post Syndicated from Michael Kammer original https://blog.zabbix.com/zabbix-at-the-netherlands-ministry-of-infrastructure-and-water-management/30681/
The Ministry of Infrastructure and Water Management is the Dutch ministry responsible for transport, aviation, housing policy, public works, spatial planning, land management, and water resource management. Created in 2010 following the merger of the Ministry of Transport and Water Management and the Ministry of Housing, Spatial Planning, and Environment, the ministry works to create an efficient network of roads, railways, waterways, and airways, effective water management to protect against flooding, and improved air and water quality.
The challenge:
The ministry needed a monitoring solution that could handle not only infrastructure monitoring, but also IoT devices responsible for monitoring water levels, water quality, temperature, and other data. The infrastructure components that needed to be monitored included Red Hat Satellite and Capsule servers, Red Hat Virtual Data Centers, Red Hat Identity management, Ansible automation platforms, and a wide range of custom IoT devices.
The solution:
The Red Hat Satellite and Capsule monitoring consists of one satellite, 6 server, and 15 satellite capsules for different environments, with approximately 2000 Linux machines connected to the satellite capsules. The machines retrieve their packages from the capsules and the capsules act as proxies that fetch data from the satellite servers. The capsules also manage the content packages and subscriptions for the machines.
For Red Hat satellite and Capsule monitoring, Zabbix performs capsule discovery via Low Level Discovery, which uses Http requests, which in turn collect data via the REST API. Each capsule’s content sync status is monitored and if the content sync fails, new packages are not installed. Connectivity between capsules and the satellite is also monitored by performing port checks, because capsules need to be able to connect to the satellite in order for the content to be synced.
Zabbix also discovers and monitors satellite repositories, checking both when the last sync was performed and the current sync status. Software subscriptions are also discovered and monitored and alerts are sent, with the severity of the alerts raised at the point when a subscription has only 30 days remaining.
Red Hat Virtual Data Center licences and identity management also benefit from the added flexibility that Zabbix brings to the table. Virtual DC licences must be present on ESX hosts, so situations where an ESX host with an active license has no VMS on it (or has VMS migrated to it) must be avoided, because that would mean that a license is being essentially wasted. Whenever a Zabbix trigger detects a problem, Ansible automatically attaches or detaches a licence to or from the ESX host, depending on the type of problem detected.
When it comes to Red Hat identity management, Zabbix discovers and monitors processes on the identity management platform (including identity management service status) thanks to the ability to extend Zabbix agent with user parameters.
Meanwhile, Ansible Automation Platform monitoring consists of monitoring for controllers. The Ansible Automation Platform API is used to discover the controllers, and each controller is checked to see if any jobs are running, their last seen time, their capacity, and their status. Sometimes controllers are disabled for maintenance and then re-enabled, so alerts are sent out for controllers that have been disabled for a longer time.
Ansible Automation Platform monitoring also includes monitoring decommission machines, which are assigned to a group instead of being immediately deleted. Zabbix monitors the grace period for the decommission machines and alerts users if the grace period is over, generating a warning if an Ansible host is disabled for seven days and then escalating it if the machine has been disabled for more than 14 days.
Zabbix also discovers and monitors configuration management jobs, and if a job fails it will attempt to restart it. If the issue is still not resolved, it gets escalated to the appropriate individual. These Ansible checks are primarily done via Http agents, from Zabbix servers or proxies.
Finally, in addition to infrastructure monitoring, Zabbix also monitors the health of IoT devices responsible for water levels, water quality, temperature, and other data. These devices are running Raspberry Pi modules and Zabbix Agent 2 is used to monitor the device status. Zabbix Agent 2 with a local agent database is used in cases where the agent is unable to send the metrics on these devices. Should a network outage happen, Zabbix stores the backlog data in the local agent database.
The results:
Trusting their monitoring to Zabbix has greatly improved processes at the ministry, saving time and money by making it easy to notice and fix issues before affected departments themselves were aware of them. In addition, having the latest historical data at their fingertips has been invaluable to the ministry’s technical teams during troubleshooting or when dealing with performance issues, saving everyone involved a great deal of time.
In conclusion
Zabbix’s flexible nature and its ability to integrate with popular platforms as well as custom devices made it the perfect “one-stop shop” for the ministry’s needs, consolidating all of their monitoring in a single pane of glass and giving them complete visibility into every layer of their infrastructure – while also integrating smoothly with their existing systems.
To learn more about what Zabbix can do for customers in the public sector, contact us.
The post Zabbix at the Netherlands Ministry of Infrastructure and Water Management appeared first on Zabbix Blog.
Locally hosting an internet-connected server
Post Syndicated from Matthew Garrett original https://mjg59.dreamwidth.org/72095.html
I’m lucky enough to have a weird niche ISP available to me, so I’m paying $35 a month for around 600MBit symmetric data. Unfortunately they don’t offer static IP addresses to residential customers, and nor do they allow multiple IP addresses per connection, and I’m the sort of person who’d like to run a bunch of stuff myself, so I’ve been looking for ways to manage this.
What I’ve ended up doing is renting a cheap VPS from a vendor that lets me add multiple IP addresses for minimal extra cost. The precise nature of the VPS isn’t relevant – you just want a machine (it doesn’t need much CPU, RAM, or storage) that has multiple world routeable IPv4 addresses associated with it and has no port blocks on incoming traffic. Ideally it’s geographically local and peers with your ISP in order to reduce additional latency, but that’s a nice to have rather than a requirement.
By setting that up you now have multiple real-world IP addresses that people can get to. How do we get them to the machine in your house you want to be accessible? First we need a connection between that machine and your VPS, and the easiest approach here is Wireguard. We only need a point-to-point link, nothing routable, and none of the IP addresses involved need to have anything to do with any of the rest of your network. So, on your local machine you want something like:
[Interface]
PrivateKey = privkeyhere
ListenPort = 51820
Address = localaddr/32
[Peer]
Endpoint = VPS:51820
PublicKey = pubkeyhere
AllowedIPs = VPS/0
And on your VPS, something like:
[Interface]
Address = vpswgaddr/32
SaveConfig = true
ListenPort = 51820
PrivateKey = privkeyhere
[Peer]
PublicKey = pubkeyhere
AllowedIPs = localaddr/32
The addresses here are (other than the VPS address) arbitrary – but they do need to be consistent, otherwise Wireguard is going to be unhappy and your packets will not have a fun time. Bring that interface up with wg-quick and make sure the devices can ping each other. Hurrah! That’s the easy bit.
Now you want packets from the outside world to get to your internal machine. Let’s say the external IP address you’re going to use for that machine is 321.985.520.309 and the wireguard address of your local system is 867.420.696.005. On the VPS, you’re going to want to do:
iptables -t nat -A PREROUTING -p tcp -d 321.985.520.309 -j DNAT --to-destination 867.420.696.005
Now, all incoming packets for 321.985.520.309 will be rewritten to head towards 867.420.696.005 instead (make sure you’ve set net.ipv4.ip_forward to 1 via sysctl!). Victory! Or is it? Well, no.
What we’re doing here is rewriting the destination address of the packets so instead of heading to an address associated with the VPS, they’re now going to head to your internal system over the Wireguard link. Which is then going to ignore them, because the AllowedIPs statement in the config only allows packets coming from your VPS, and these packets still have their original source IP. We could rewrite the source IP to match the VPS IP, but then you’d have no idea where any of these packets were coming from, and that sucks. Let’s do something better. On the local machine, in the peer, let’s update AllowedIps to 0.0.0.0/0 to permit packets form any source to appear over our Wireguard link. But if we bring the interface up now, it’ll try to route all traffic over the Wireguard link, which isn’t what we want. So we’ll add table = off to the interface stanza of the config to disable that, and now we can bring the interface up without breaking everything but still allowing packets to reach us. However, we do still need to tell the kernel how to reach the remote VPN endpoint, which we can do with ip route add vpswgaddr dev wg0. Add this to the interface stanza as:
PostUp = ip route add vpswgaddr dev wg0
PreDown = ip route del vpswgaddr dev wg0
That’s half the battle. The problem is that they’re going to show up there with the source address still set to the original source IP, and your internal system is (because Linux) going to notice it has the ability to just send replies to the outside world via your ISP rather than via Wireguard and nothing is going to work. Thanks, Linux. Thinux.
But there’s a way to solve this – policy routing. Linux allows you to have multiple separate routing tables, and define policy that controls which routing table will be used for a given packet. First, let’s define a new table reference. On the local machine, edit /etc/iproute2/rt_tables and add a new entry that’s something like:
1 wireguard
where “1” is just a standin for a number not otherwise used there. Now edit your wireguard config and replace table=off with table=wireguard – Wireguard will now update the wireguard routing table rather than the global one. Now all we need to do is to tell the kernel to push packets into the appropriate routing table – we can do that with ip rule add from localaddr lookup wireguard, which tells the kernel to take any packet coming from our Wireguard address and push it via the Wireguard routing table. Add that to your Wireguard interface config as:
PostUp = ip rule add from localaddr lookup wireguard
PreDown = ip rule del from localaddr lookup wireguard
and now your local system is effectively on the internet.
You can do this for multiple systems – just configure additional Wireguard interfaces on the VPS and make sure they’re all listening on different ports. If your local IP changes then your local machines will end up reconnecting to the VPS, but to the outside world their accessible IP address will remain the same. It’s like having a real IP without the pain of convincing your ISP to give it to you.
 comments