Tag Archives: ConsumerBackup

Backblaze Holiday Gift Guide 2021

Post Syndicated from original https://www.backblaze.com/blog/backblaze-holiday-gift-guide-2021/

The holiday season is upon us, and here at Backblaze, we always love to see what cool, new things are out there for us to give to our friends and family. Every year, we ask our team members what gifts they’ll be giving (or treating themselves to) and share their ideas on our blog.

This year, our team’s gift ideas range from the latest in fitness trackers for the person who’s always on the go, to weighted blankets that keep you cozy, and helpful plant-rearing guides for blossoming green thumbs. Read on for some gift ideas that are sure to bring some holiday joy!

For Those Who Love Spending Time Outdoors

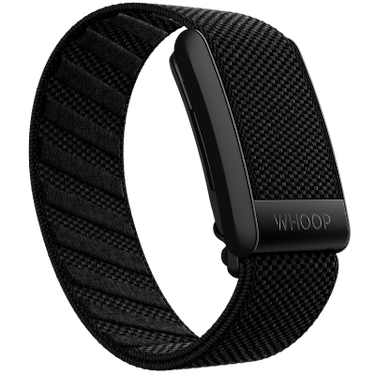
WHOOP

WHOOP is a fitness and health membership that offers a fitness tracker and an app that analyzes fitness, health, and sleep data as well as a way to connect with other WHOOP members. Their adjustable device can be worn with a range of garments or on their handy wristbands. And they’re stylish!

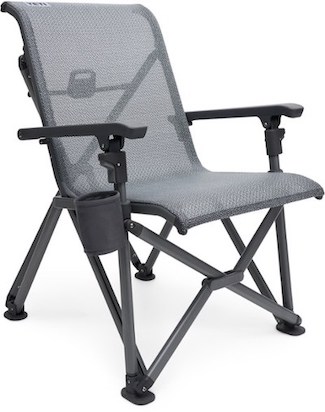
YETI Trailhead Camp Chair

Save yourself a seat wherever you are—the beach, the backyard, or the backcountry—with this lightweight camp chair.

ENO DoubleNest Printed Hammock

Don’t want to sit down after your hike? Lay down in this packable hammock instead!

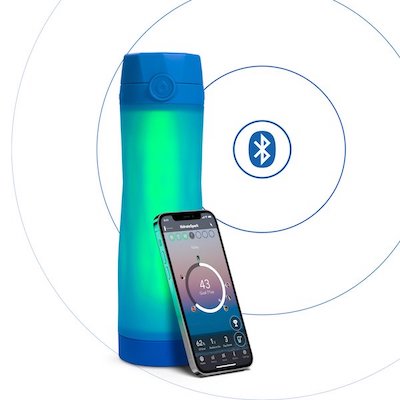
Hidrate Spark 3 Smart Water Bottle

If you’re the type of person who needs to be reminded to drink water (me), this water bottle will glow when it’s time to hydrate. Luckily, it will not play obnoxious music.

And Those Who’d Rather Stay Home

Gravity Weighted Flannel Sherpa Blanket

Holiday season is also cozy season, and weighted blankets are arguably one of the best ways to enjoy it.

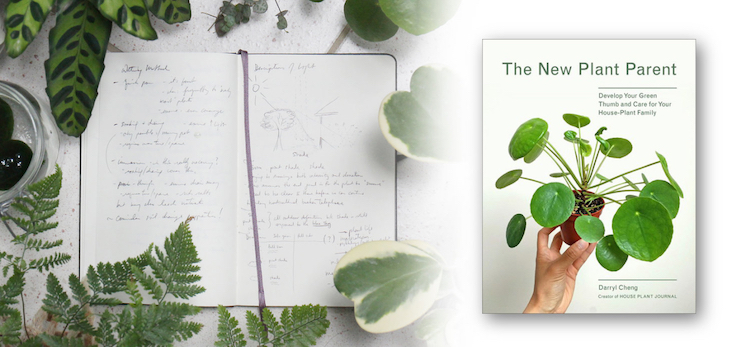
The New Plant Parent

If you or someone you know spent the early months of the pandemic transforming their home into a greenhouse (that also smelled of sourdough), this book provides all the houseplant tips and tricks they might need to keep their indoor garden thriving.

RENPHO Eye Massager

As many of us spend our days staring at screens that can strain our eyes over time, this eye massager is a great way to reduce tension and headaches. It even connects to your phone via Bluetooth so you can choose music to play as it works. Not to be confused with an
Oculus Quest 2.

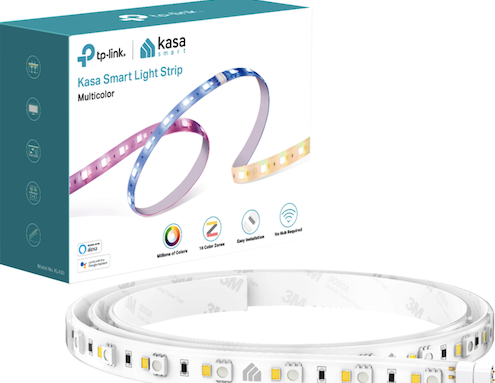
TP-Link Kasa Smart Light Strip

Every kid will want one of these to decorate their room. You can light up your house with this multicolor light strip, which you can control from your phone.

For Your Foodie Friend

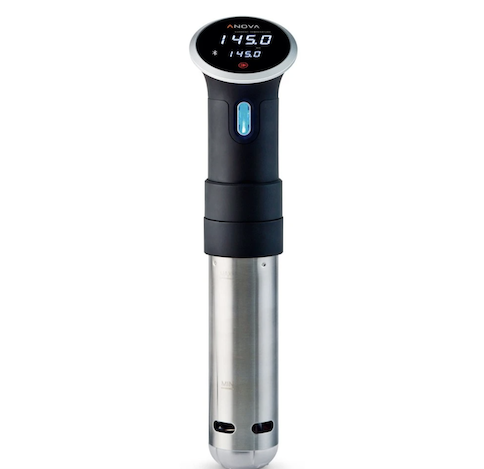
Anova Precision Cooker Pro

Treat the home chef in your life to this super precise and powerful sous vide tool that’s a fan favorite with over 100 million cooks.

Hot Ones 10 Pack Sauce Kit

Everything tastes better with hot sauce, and this kit includes the full lineup from season 16 of “Hot Ones.”

Koffie Inja

This small batch coffee roaster uses sustainable and ethically-sourced coffee beans and donates 20% of their proceeds to Muttville, a San Francisco-based senior dog rescue shelter.

Games and Game-related Accessories

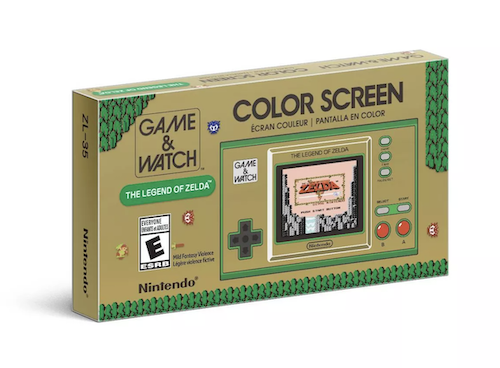
Nintendo Game and Watch: The Legend of Zelda

Retro game fans will enjoy this collectible game and watch that includes three Legend of Zelda games.

Legendary Edition of Curse of Strahd

Strahd is a TTRPG favorite and this edition comes with bonus encounters, finger puppets, and lots more!

Glorious Modular Mechanical Keyboard

This is the world’s first RGB, modular mechanical keyboard. It’s easily customizable and needs no setup. For when you need your clanky keys to light up!

For the Practical Person

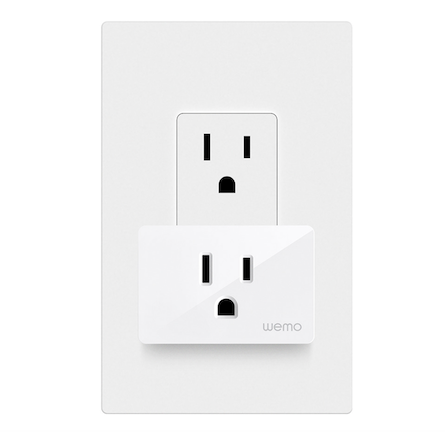
Wemo WiFi Smart Plug

This smart plug uses your home Wi-Fi connection to let you control plugged-in devices from your phone or tablet. Neat!

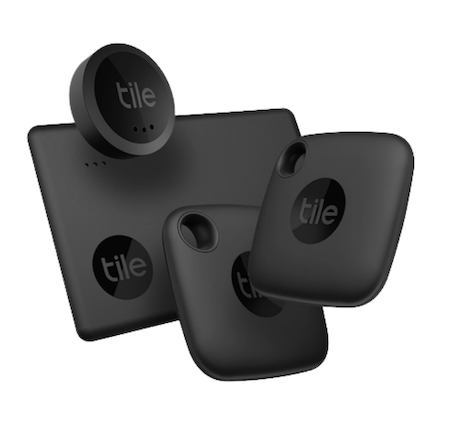
Tile Combo Pack

Have a friend or family member who’s constantly losing their keys or phone (or themselves)? Help them keep track of their items with this combo pack that works with Android or Apple devices.

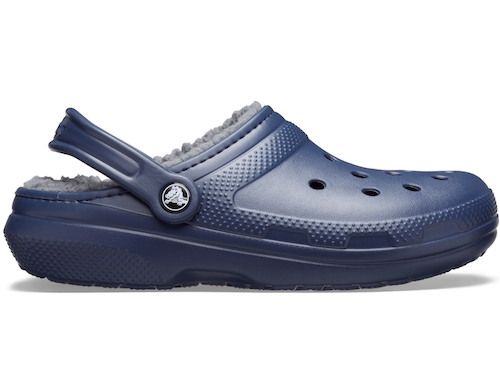
Fuzzy Lined Crocs

Are they the most fashionable? Maybe not. But they might be the most comfortable, especially with the warm and fuzzy liner!

Give the Gift of Backblaze

Help your friends and family back up their data with Backblaze Computer Backup. They’ll thank you for helping make sure they never lose a file again.

Happy Gift-giving From Backblaze

We hope this gift guide has helped spark some ideas for your own holiday gift-giving! Comment below to tell us what gifts you’ll be giving your friends and family this year.

The post Backblaze Holiday Gift Guide 2021 appeared first on Backblaze Blog | Cloud Storage & Cloud Backup.

Who Ya Gonna Call? Backblaze

Post Syndicated from original https://www.backblaze.com/blog/who-ya-gonna-call-backblaze/

Halloween and its surrounding spooky season is my favorite time of the year. As the Computer Backup Steward at Backblaze, I often read people’s notes to us, which detail how we’ve helped them recover their files. As I was thinking about their experiences and our past Halloween blog posts detailing spooky data loss stories (Truly, what’s scarier than data loss?), I recalled a personal story that happened to my sister a few years ago when she was interning here at Backblaze. It reminded me that Backblaze Computer Backup doesn’t just recover people’s data, but we also help access it in times of need—which can be equally important. Like the Ghostbusters, when there’s something strange in your (data’s) neighborhood, who ya gonna call? …Backblaze, it’s Backblaze. So, on this, the Friday before Halloween, let me recount that tiny spooky tale for you today…


A long time ago, my sister Lisa was an intern with us here at Backblaze. It was just for a month, but she helped us build desks, digitized business cards (The horror!), and generally helped out around the office while getting a feel for working at a Silicon Valley tech startup. Like any good startup techie, after joining us for the summer, she started using Backblaze to back up her computer files, which makes sense because as a 19-year-old—a lot can happen to your computer.

My sister and I are really close, and we try to go on little trips together whenever possible. One of these opportunities arose in the form of a road trip from the San Francisco Bay to Los Angeles to see a comedy show. (For those curious, it was Kevin Smith and Ralph Garman recording their “Hollywood Babble-On” podcast.)

Driving down from the Bay Area to Los Angeles takes about five to six hours, sometimes longer depending on the traffic and where you’re headed. As we passed hour four, my sister turned to me and said, ”Hey, do I need my ID for this?” Cue: creepy forewarning music.

Now, this comedy show was held, oddly enough, in a comedy club (this sometimes happens when comedy is involved). An important thing to know about comedy clubs in general is that often they require people to be over 18, and are very serious about asking for ID so that underage people don’t imbibe, which makes sense—safety first.

So, yes. An ID was required, and yes she would need it, but no, she did not have it—nor her purse in general. Being an older brother is like that sometimes. I wasn’t about to turn around and drive back to San Francisco—partly because we had the show to go to that night, but also because I would get a bit of enjoyment from her having to sit outside while I enjoyed some comedy as a “lesson.” A sinister brotherly thought.

Luckily, I remembered that a few months back, my sister had to scan her passport as a PDF so that we could have a digital copy on another trip. I called up the comedy club and asked if they’d take a digital ID if we didn’t have a physical one, and while they were confused, they did say yes, so long as it was official. Good news! Once we arrived at the hotel, she logged on to Backblaze, found her backed up passport PDF, and we printed it out in the lobby. And we made it to the show on time. Happily ever after!

OK, so maybe it wasn’t really a horror story and the prospect of not making it to a comedy show may not seem scary to some people, but our family dynamic would mean that if she wasn’t able to attend and had to sit outside, she’d never have lived it down—low stakes slightly spooky (the best kind).

The post Who Ya Gonna Call? Backblaze appeared first on Backblaze Blog | Cloud Storage & Cloud Backup.

How to Back Up Old Email Accounts

Post Syndicated from Nicole Perry original https://www.backblaze.com/blog/how-to-back-up-old-email-accounts/

Growing up, a common conversation I overheard between my mom and grandma went like this: “Do you have that recipe from our great aunt?”

“Sure, I do. Let me email it to you. Also, I have some funny jokes to forward along.”

My mom, and I’m guessing many others too, have kept every email they’ve ever received from their parents, family, and friends because they don’t want to lose the funny jokes, family recipes, announcements, and more that they’ve sent back and forth over the years. In the moment, our email accounts can feel like a day-to-day concern, or worse, a repository of spam. But for most of us, every email account holds some amount of treasured memories.

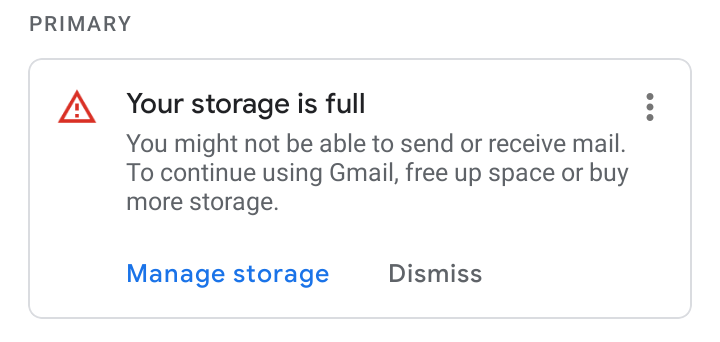
Nowadays, my mom has many different email accounts. But, she wanted to find a way to keep all of those emails she loved without having to keep the accounts themselves. She also found that she had so many emails in her inbox that she was running out of storage space.

Buying more storage can become expensive and doesn’t guarantee that those emails are safely backed up and remain accessible. One option is to download the emails, delete them in the client, and back them up somewhere reliable and accessible for the long term.

If you’re looking for a way to keep old emails or just want to clean up your inbox storage because you’re running out of space, this post walks you through the steps of how to download your data from various email platforms.

We’ve gathered a handful of guides to help you protect content across many different platforms—including social media, sync services, and more. We’re working on developing this list—please comment below if you’d like to see another platform covered.

Getting Started: How to Download One Email

If you know the exact email you want to make sure you have a copy of, it’s very easy to download it from any client.

For this example, we are going to use Gmail, but this should work for most email clients. If you run into an email client that it does not work with, feel free to note it in the comments below and we’ll update the guidance.

  1. Log in to the email address you would like to download a copy of the email from. (I’m using Gmail.)
  2. Find the email you would like to download. For this example, I will be downloading a family recipe sent by my mom.
  3. Select “Print” in the top right corner.
  4. When the print screen appears, save the email as a PDF on to your computer.
  5. And presto, you have a copy of that email you would like to save forever.

This process can be a bit tedious as you would have to download each email one at a time. It also can be tough if you don’t remember how to find the email you would like to save. If this is true, there are also ways that you can download all of your email data.

While there are other file formats you can download individual emails in, we strongly recommend that—if you want to be able to manage or search your old emails—you download all of your emails (which we explain how to do below). This provides the data in easily manageable formats and is far more time efficient.

Getting Serious: How to Download All of Your Emails

Below, I explain how to download your email data from two top free email websites. Don’t see the email platform you use? Leave a comment below and we’ll work to add material to help you!

How to Download Outlook Emails

A lot of people use Outlook for various reasons, often for work or school. If you downloaded Microsoft 365, then you also have access to Outlook email. To export your email from Outlook and save it as a PST file (don’t worry about what a PST file is quite yet, we’ll explain below), do the following:

  1. Sign in to your Outlook account.
  2. Click the gear button in the upper right corner.
  3. Scroll down on the settings panel to “View all Outlook settings.”
  4. Click on the button with a gear symbol labeled “General.”
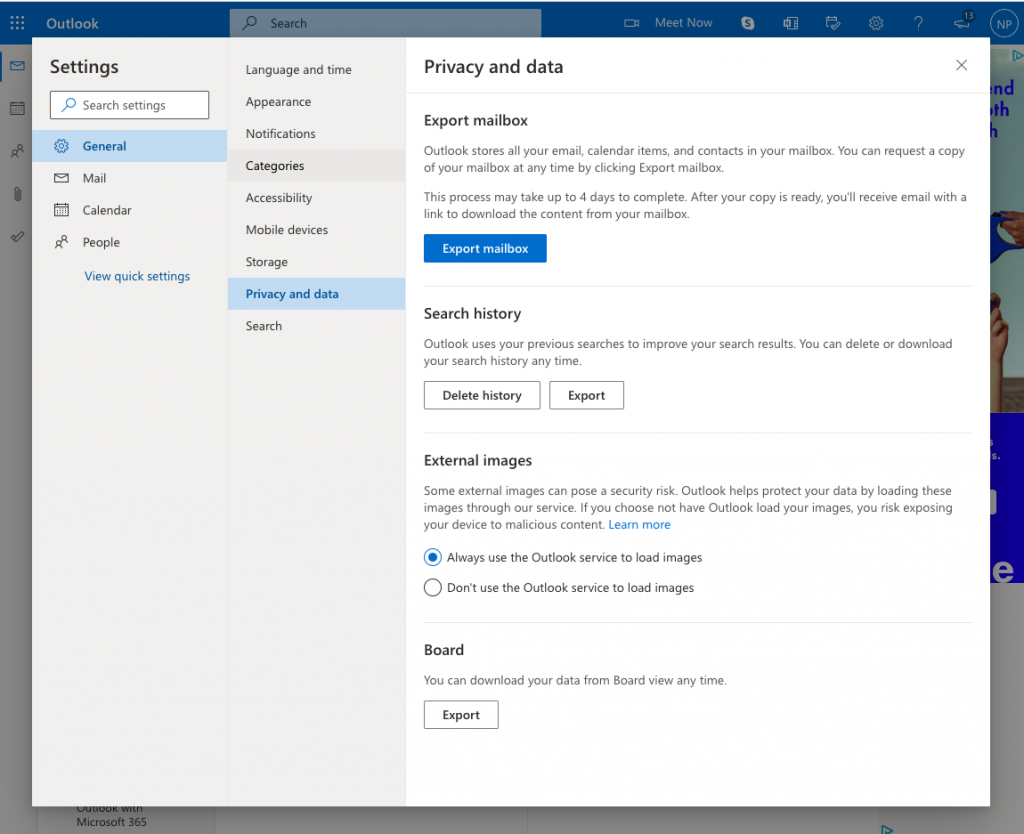
  5. Select “Privacy and data” on the second panel that appears.
  6. On the right side, there will be a button labeled “Export mailbox.” Select this button.
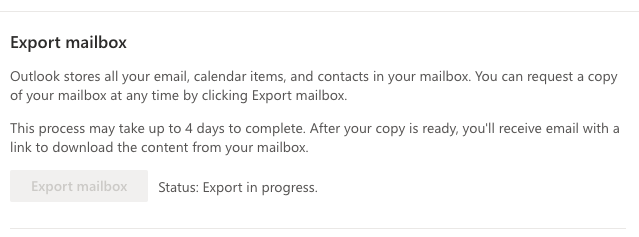
  7. The button will grey out and a status update will appear to let you know the download is in progress.
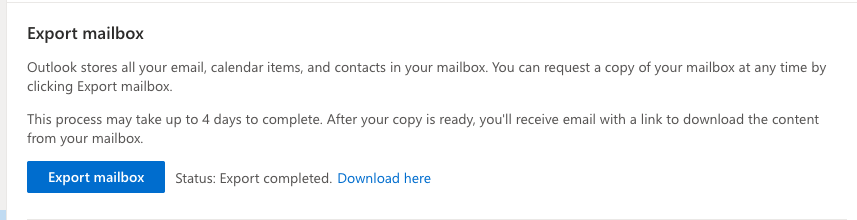
  8. When the export is complete, we’ve found that Outlook may not notify your inbox. If this is the case, you will need to repeat steps one through five and navigate to the “Download here” button. This button will only appear once your emails are ready to download.
  9. Click “Download here” to download your PST file with all of your email data. (Scroll past the section on downloading Gmail data to learn what to do with this file type.)

How to Download Gmail Emails

In a previous post, we explained how to download all of your data from Google Drive. But, if you are just looking to download your Gmail data, here is a more detailed way to just do that.

  1. Log in to the Google Account you’d like to download your emails from.
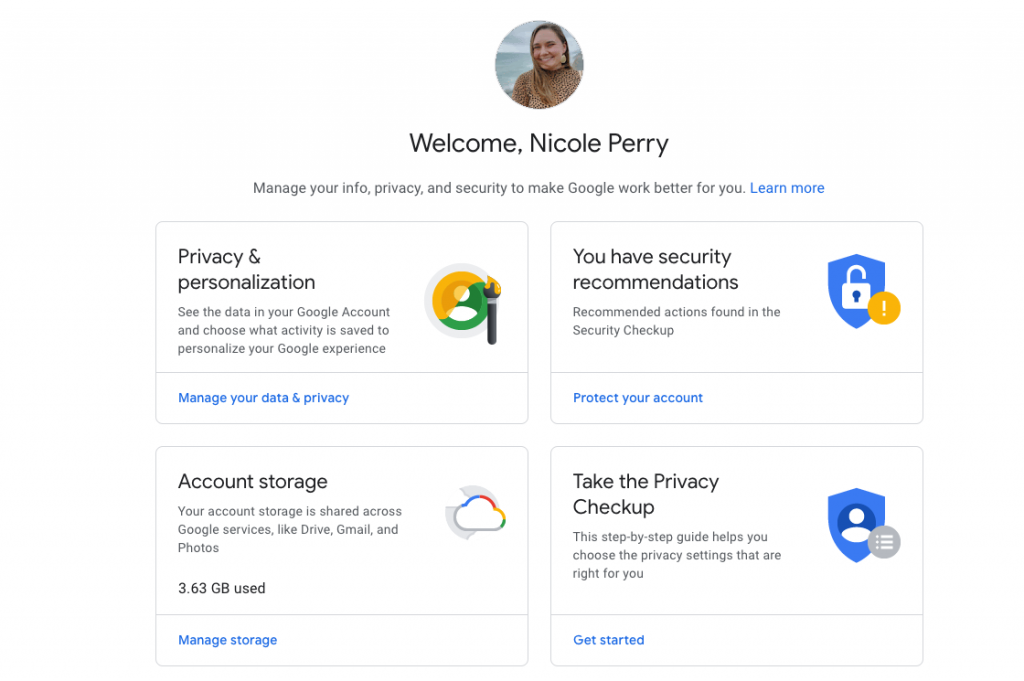
  2. Once signed in, you will want to go to: myaccount.google.com.
  3. Go to the “Privacy & personalization” section and select “Manage your data & privacy.”
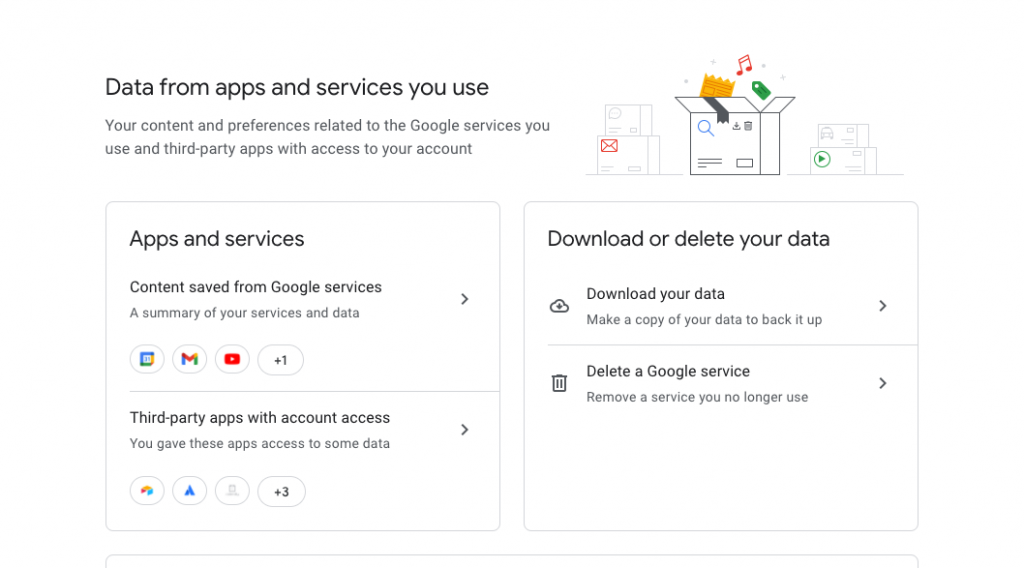
  4. On the next screen it takes you to, you’ll want to scroll down to a section labeled “Data from apps and services you use.” Here, you’ll select “Download your data” in the “Download or delete your data” section.
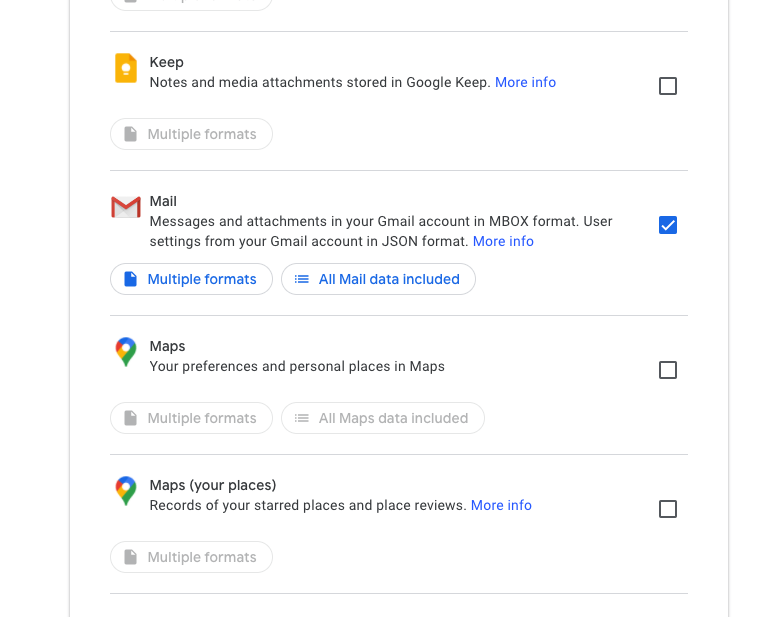
  5. From here, it’ll take you to the Google Takeout page. On this page, you’ll be given the option to select to download all of your Gmail emails and also your Google Chrome bookmarks, transactions from various Google services, locations stored in Google Maps, Google Drive contents, and other Google-related products you may use.
  6. If you want to download all your Google data, keep everything selected. If you just want a copy of your emails, deselect all and only select Google Mail to be downloaded.
  7. Click the next step on the bottom of the page.
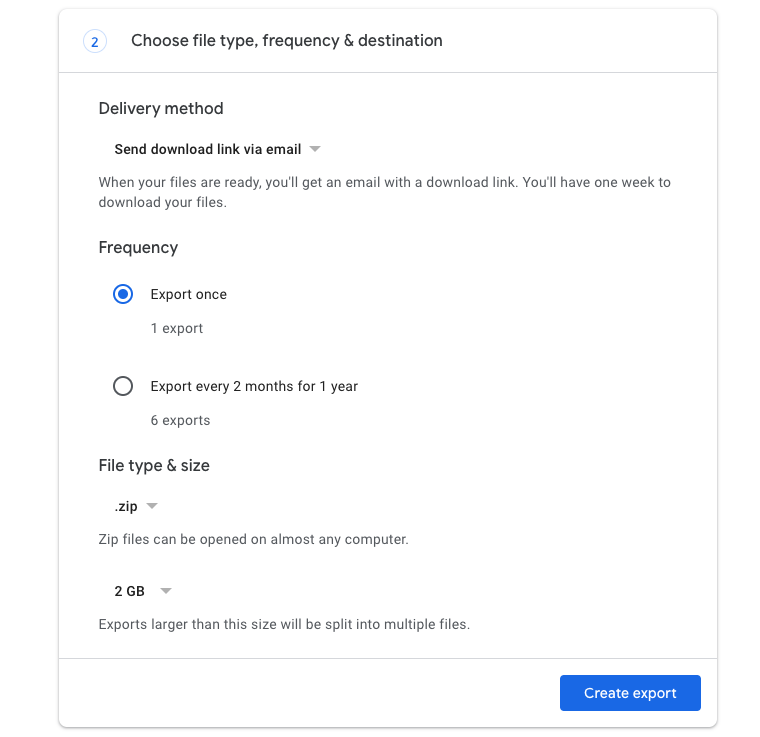
  8. On the next page, you’ll decide what file type you would like it sent as, the frequency you would like this action to happen (Example: If you would like your data to be downloaded every six months, this is where you can set that to happen.), and the destination you would like your data to be sent to. For this example, I picked a one time download.
  9. Select “Create export” and you’ll see an export in progress page.
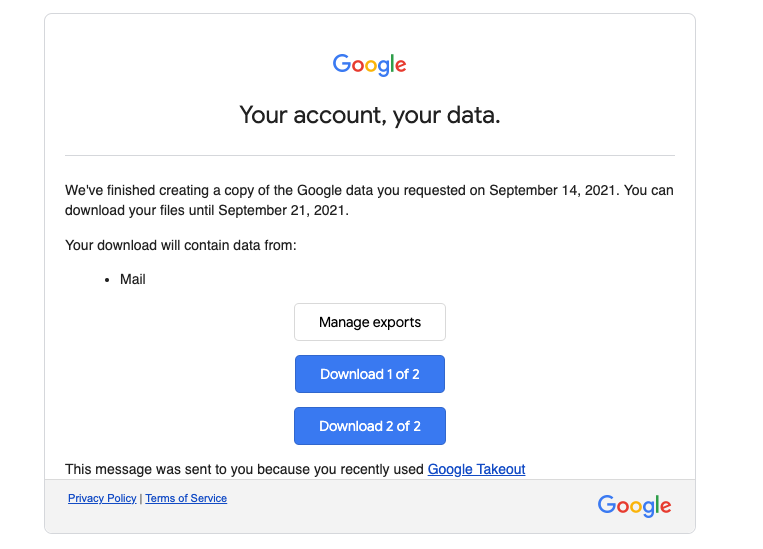
  10. An email will appear in a few minutes, hours, or a couple of days (depending on the size of data you are downloading), informing you that your Google data is ready to download. Once you have this email in your inbox, you have a week to download the data. Click the “Download your files” button in the email and you will have a ZIP file or a TGZ file (depending on what type of file you picked) on your computer with your Google data.
  11. When you open the ZIP, you will have all of your emails (including spam and trash) in an MBOX file.

What Is a PST File? What Is a MBOX File? How Do I Open Them?

A PST file is used by Microsoft programs to store data and items such as email messages, calendar events, and contacts. By moving items to an Outlook Data File (also known as a PST file) saved to your computer, you can free up storage space in the mailbox on your mail server. If you would like to make this file usable by other email clients, here’s a guide on how to convert your newly downloaded PST file to a MBOX file type.

An MBOX file is an email mailbox saved in a mail storage format used for organizing email messages in a single text file. It saves messages in a connected order where each message is stored after another, starting with the “From” header.

To open a MBOX file, you will need a third-party email program, such as Apple Mail or Mozilla Thunderbird. We recommend Mozilla Thunderbird, as it’s a free email client and it’s supported by both Macs and PCs.

This step is helpful if you would like to view the emails you downloaded. It also helps if you were looking to take the emails you downloaded and move them to a new inbox. For example, if you are afraid the email account you’ve used to sign up for everything over the past 10 years is vulnerable, you can download the emails from that inbox and move them to a new inbox using Apple Mail or Mozilla Thunderbird.

Great, now you’ve downloaded your emails. You’re not done yet! Read on to learn how to safely back up your emails so that you can hold on to them forever.

Use Backblaze B2 Cloud Storage Buckets to Keep an Organized Archive of Your Emails

Once you have your email data downloaded to your computer, it’s best practice to make sure that you have at least one copy of your data stored off-site in the cloud. Storing it in the cloud alongside two local copies ensures you never lose all those important emails.

A simple way to do this is with Backblaze B2, where you can upload and organize your files in buckets. To upload your files to a bucket, follow the steps below.

  1. Sign in to your Backblaze account.
  2. In the left hand column, select “Buckets” under the section “B2 Cloud Storage.”
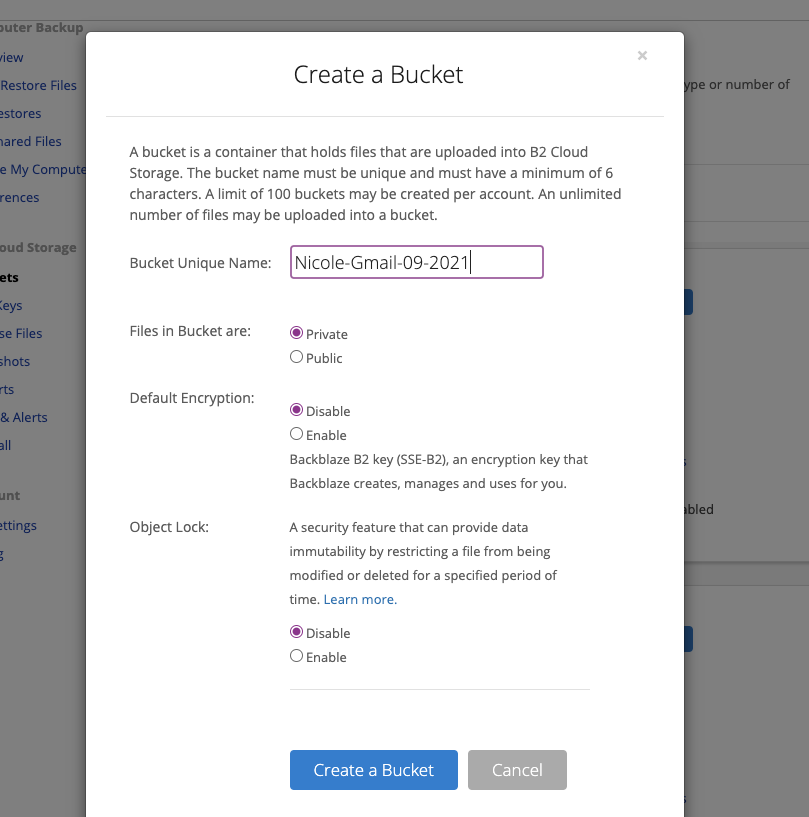
  3. Click on the button “Create a bucket.”
  4. In the next step, you will need to create a unique name for your bucket and select some settings for it, like if it will be public or private or if you would like to enable encryption.
  5. Once the bucket is created, it will take you to a page where you can upload your files. You will want to drag and drop the email files you want to upload to it. If the MBOX file is too large to drag and drop into the bucket, you can use a third-party integration like Cyberduck to facilitate the upload. You can read the guide to using Cyberduck for Backblaze B2 bucket uploads here.

Alternatively, if you’re not worried about organizing or working with your email archives and just want to know they’re stored away safely, you can keep your downloaded files on your computer. If you follow this route, remember to sign up for a backup service that makes a copy of all of your computer’s files in the cloud. In the case of any data loss, a service like Backblaze Computer Backup would have a copy of all of your data ready for you to restore. If your email applications are locally stored on your computer, Backblaze will automatically back up your emails. You can learn more about how this works here. This approach will take up more room on your computer, but it’s a simple path to peace of mind.

From here, your MBOX file with all your emails from your family, friends, and reminders to yourself (We all have those!) will be safe in the cloud. If you ever want to pull out the archive and read the emails you saved, remember to use the third-party tools mentioned above. What’s important is that you have all your memories stored, safely with a provider who will ensure their redundancy and reliability.

Have questions or want to see a guide for an email client we didn’t mention above? Feel free to let us know in the comments!

The post How to Back Up Old Email Accounts appeared first on Backblaze Blog | Cloud Storage & Cloud Backup.

Back to School, Backup for School

Post Syndicated from original https://www.backblaze.com/blog/back-to-school-backup-for-school/

Students are starting to head back to the classroom all over the world and, while the timing might be the same, the way we’re thinking about school has changed a lot recently. Schoolwork and projects that previously would have been printed out and handed in have moved online along with classrooms and collaboration. The amount of flexibility this has allowed teachers, parents, students, and childcare professionals is great, but it also means that more schoolwork than ever is at risk of data loss.

As young folks are heading back to classrooms, especially those heading off to college farther afield, now is a great time to help teach the value of backing up their data.

Whether they are in person, online, or on a hybrid system, students will still be creating, collaborating, and consuming files on their computers. Setting them up with a backup service, or helping them install one can prevent them from calling you late at night in a panic after spilling Redbull or coffee on the machine they’re diligently (we’re sure) doing schoolwork on.

Backup Basics: The 3-2-1 Approach

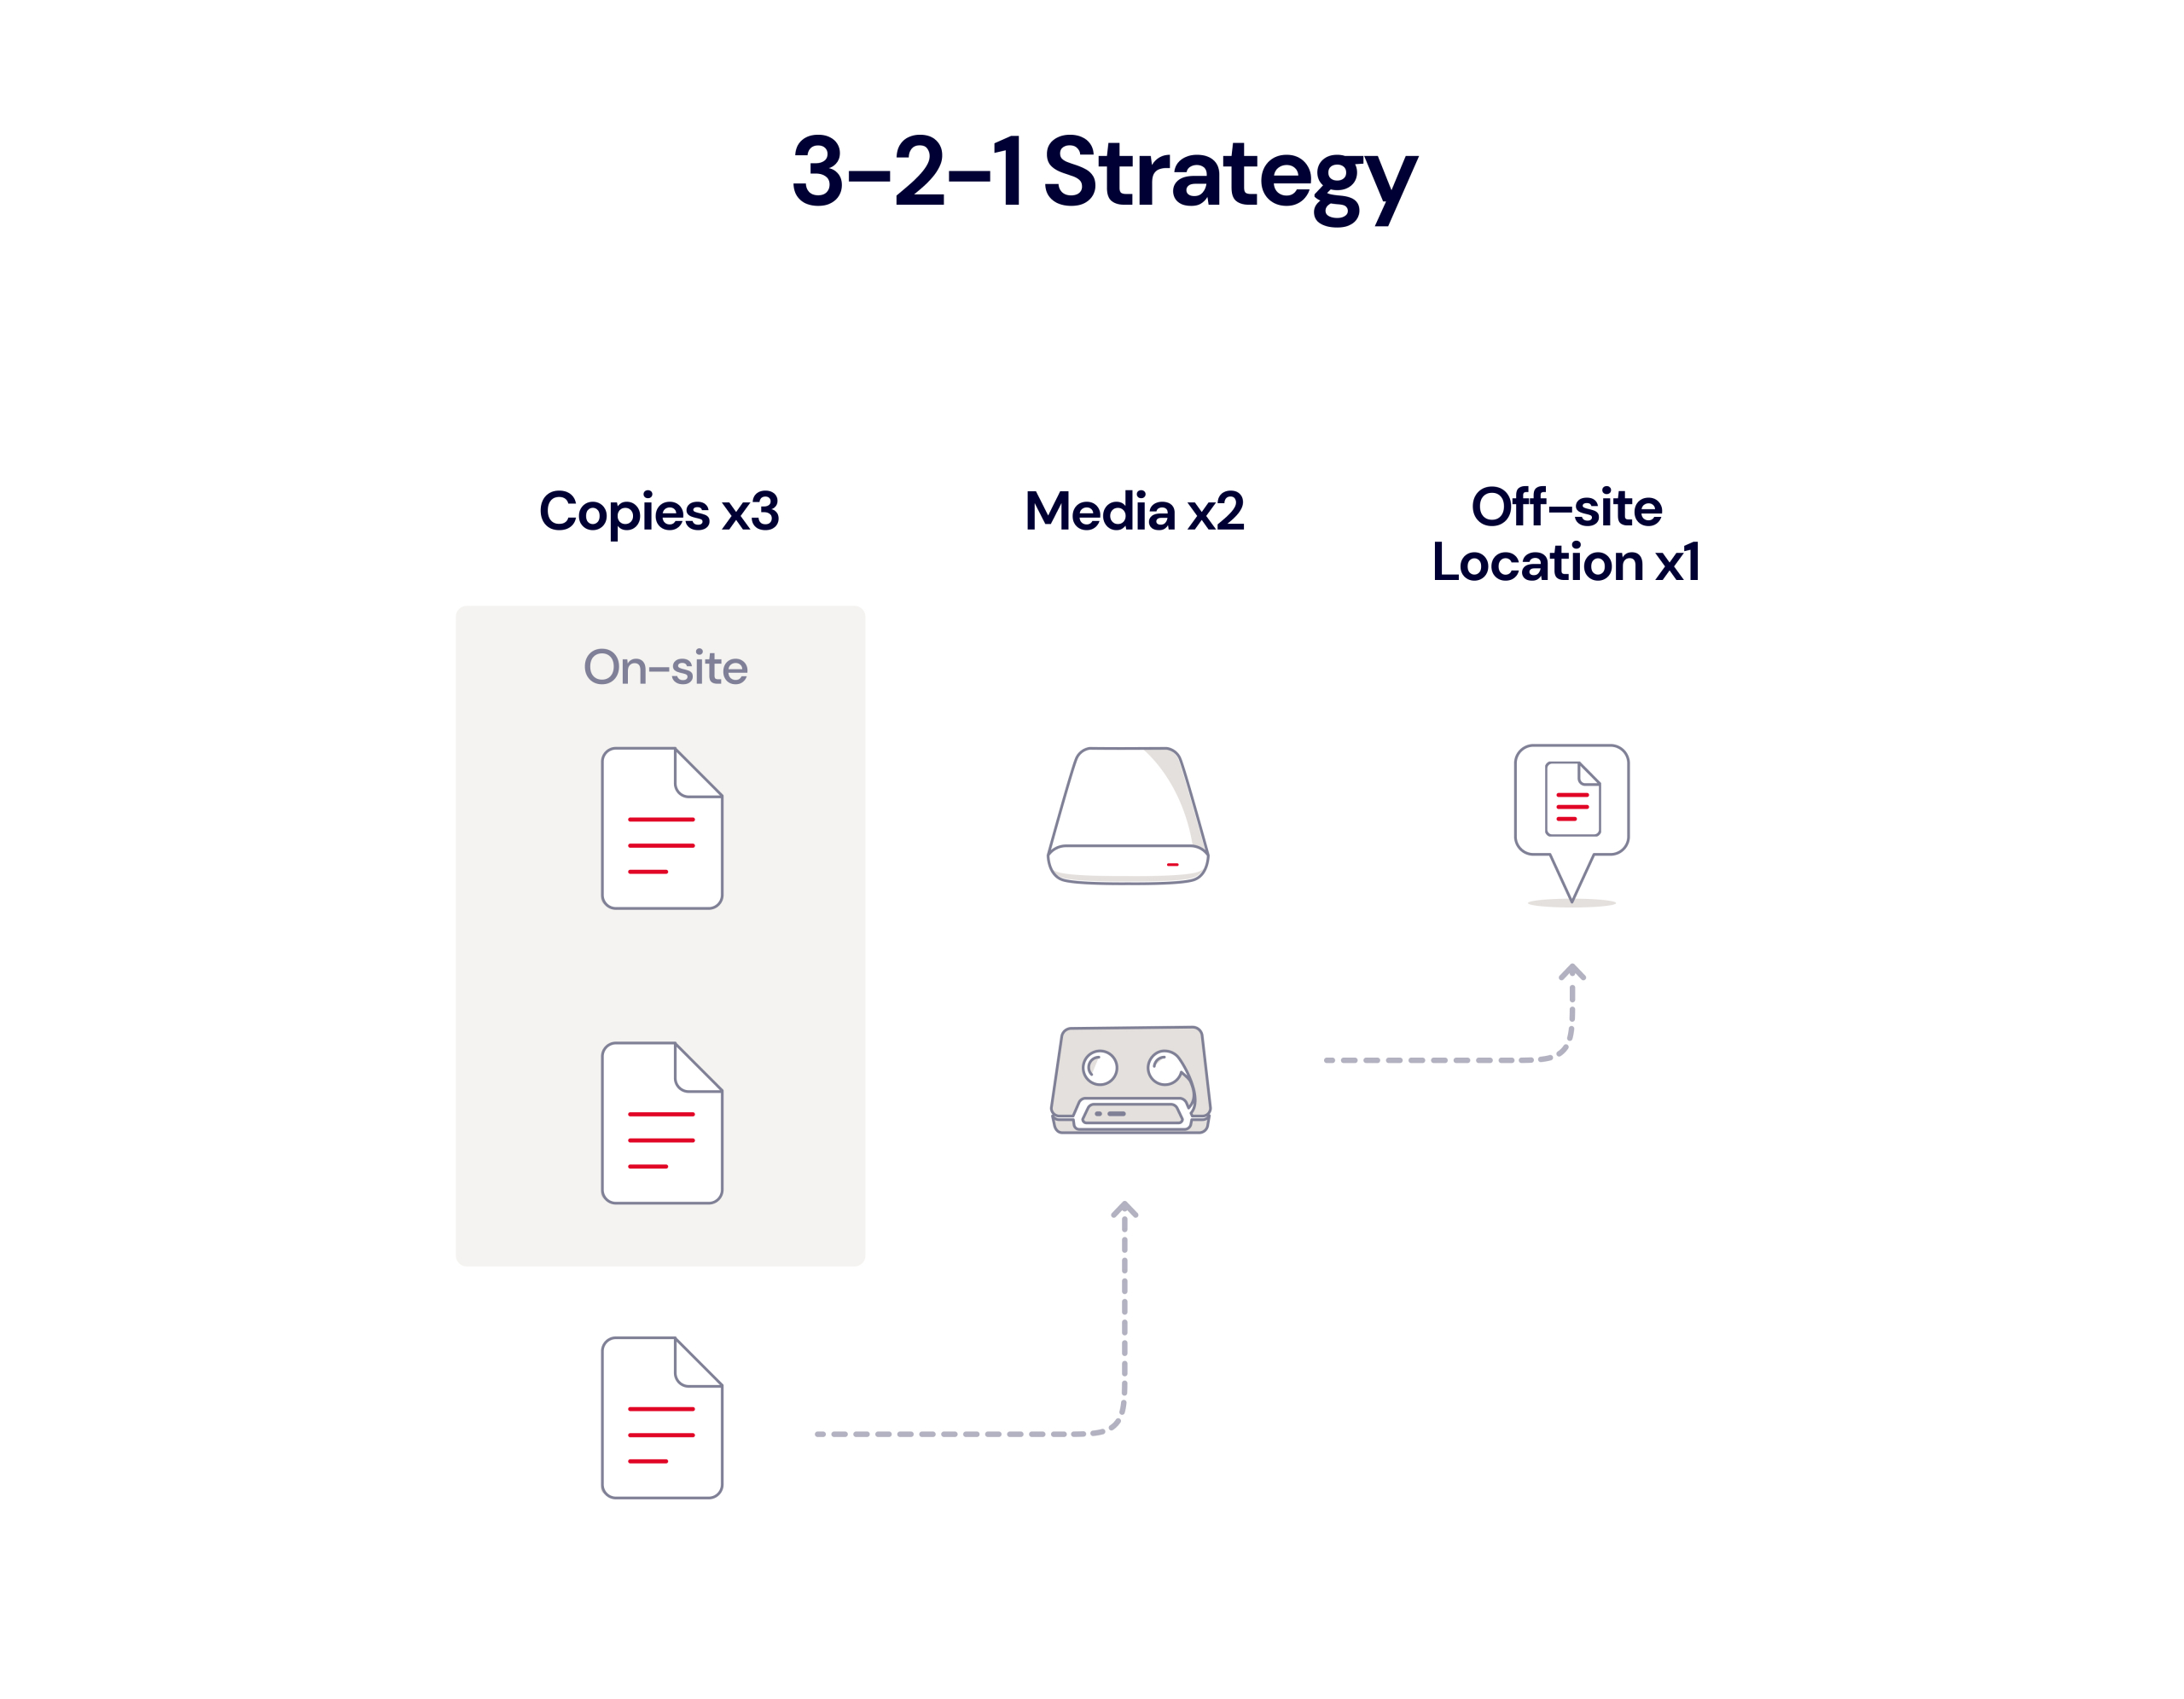
Spilling something and frying the electronics inside of a computer is not the only way to lose data, so having an all-encompassing view to data care is important. At Backblaze, we recommend the 3-2-1 backup approach. That means keeping:

  • Three copies of your data.
  • Two copies of your data on-site but on different devices. (For example, on your computer and an external hard drive.)
  • One copy of your data off-site. (For example, in the cloud.)

Best Practices for Students

In addition to your basic 3-2-1 approach, there are a few best practices students can follow (and parents can encourage) to help them avoid scrambling to find their term paper the night before the final, including:

  • Instituting naming conventions.
  • Keeping data in a central repository.
  • Automating backups.
  • Creating archives.

Institute Naming Conventions

One common way of losing data is simply forgetting where it was created or saved, similar to misplacing a pair of keys. The easiest way to combat that is to have clear naming conventions for your folders and files and to use them consistently. Having a folder for every year of study, then semester, or quarter inside of it, then class inside of that, helps categorize data and is a great way to start building up good data hygiene.

Keep Data in a Central Repository

A typical student’s data is scattered across a variety of devices, apps, clouds, and computers—we call this “data scatter.” Even if they are using good data hygiene when naming and organizing these various locations, having a central repository—even if just for final documents—is important.

When they have their data in one centralized location, students can back it up frequently, so that even if work is lost from a collaborative place (like someone deleting a file or presentation from a shared folder), they’ll still have a copy locally and in an accessible location.

Automate Backups

Once the data is saved to the new location, the next best thing to do is make sure that there are automated backups running, so that—should anything happen to that machine or device—the data will still be accessible somewhere else (all part of the 3-2-1 strategy).

When selecting a backup tool, you want to look for something simple, affordable, and most importantly, accessible. That’s where apps like Backblaze really shine when it comes to computer backup, since they are designed to be unobtrusive, and the backed up data can be accessed anywhere in the world via web or mobile apps.

Create Archives

Creating archives is another tool in the fight to combat data loss and maintain good data hygiene. Archives differ from backups in that they tend to be permanent. Backups tend to be on a rolling basis (similar to an alarm system keeping a certain amount of video before it gets recycled—the thought being, if something happens you can recover the video for a certain period of time, but if nothing occurs it’s better to get that space back).

Archives, on the other hand, are more immutable in nature. Once you have an archive, it’s rare to remove it, unless you want to get rid of everything associated with it. There are many methods that people employ to archive their data, including having hard drives for every month or year that they create an archive for, but there are online tools as well. Backblaze B2 Cloud Storage has an Object Lock feature which allows users to upload data and have it stay there until expressly deleted by the user.

Backing Up Your Student’s Social Life

It’s probably not your top priority, but your student is likely just as concerned with backing up their social profiles and photos as they are with backing up their Econ 101 homework. Fortunately, we’ve got both covered. To help your student back up their digital social life, we put together a few handy guides:

How to Get Started

The best time to start backing up is now. If Backblaze is a good choice for your family and school-aged kiddos, there’s a few ways to get started:

  • Here’s how to set up Backblaze on your kid’s computer before they head off to college:
    • Sign up for an account, and install Backblaze on your student’s computer. You can find our guides to installing on Mac here, and on Windows here.
    • Once you have installed the software, you can select what hard drives should be backed up, set your backup schedule, or change your performance settings. For more on how to do that, you can check out our Mac Settings Overview and Windows Settings Overview.
    • You can set up payment in the Billing section under My Account when you sign in to Backblaze.
    • If your student needs to restore a file, they can follow the steps here.
  • If your kid is more of a self-starter, send them a gift code—that way you’ll cover their first year, and after that it’s on them to handle the payment and maintenance (good for those who value their independence but maybe just need a jump-start): https://backblaze.com/gift.htm.
  • Consider using a Backblaze Group! A few years ago we wrote about how our Groups feature can help families maintain their digital lives, and you can read it here. This option is great if you have many family members, or if you just want one central place to manage billing for multiple accounts.
    • If you are a Backblaze customer, simply log in to Backblaze.com, go to the Settings page, and enable Business Groups. Once done, you can navigate to the Groups Management page and get started. More information on creating a Group can be found here.
    • If you are not yet a Backblaze customer and like the Groups approach, you can create a new Backblaze account with Groups enabled here.

Just like developing good habits for anything else, a strong understanding of data, where it lives, how it can be lost, and how to save it can be an incredibly important skill to develop. As the amount of data in the world increases and it increasingly becomes the digital world’s most precious resource, maintaining it will become one of the more important habits we can instill in our younger generations!

The post Back to School, Backup for School appeared first on Backblaze Blog | Cloud Storage & Cloud Backup.
Getting Rid of Your PC? Here’s How to Wipe a Windows SSD or Hard Drive

Post Syndicated from Molly Clancy original https://www.backblaze.com/blog/how-to-wipe-pc-ssd-or-hard-drive/

A decorative image showing a PC and a hard drive over a cloud.

Do you have an old PC lying around that you’d love to throw away or donate? Before you take it to the recycling center, you definitely want to scrub it of all your data. And there’s a bit more to it than just deleting your files and emptying the recycle bin. 

This guide will help you make sure all of your personal data is wiped from the machine so you can be confident it’s all gone before you give it away or recycle it. 

First things first: Back up your computer

Before you do anything, make sure your data is backed up. You want to be able to load it all on to a new computer, or at least keep it in an archive, so you can access it after you dispose of your old machine. The best plan for backing anything up is the 3-2-1 backup strategy where you keep three copies of your data on two types of media with one copy off-site. Your first copy is the one on your computer. Your second copy can be kept on an external hard drive or other external media. And, your third copy should be kept in an off-site location like the cloud. If you’re not backing up an off-site copy, now is a great time to get started.

You can easily create a backup using Windows Backup on Windows 7, 8, 8.1, 10, and 11. If you save that to an external hard drive, you can then move your files to a new computer or just keep it as a local backup. Once you’re backed up, you’re ready to wipe your PC’s internal hard drive.
How to completely wipe a PC

In most cases, wiping a PC involves simply reformatting the disk and reinstalling Windows using the Reset function. If you are recycling, donating, or selling your PC, the Reset function makes data recovery sufficiently difficult, especially if your data is encrypted (more on that later). This process is straightforward in Windows versions 8, 8.1, 10, and 11, and works for both hard disk drives (HDDs) and solid state drives (SSDs).

How to reset Windows 10 and 11

Follow these instructions for different versions of Windows to reset your PC:

  1. Go to SettingsSystem (In Windows 10: Update & Security) → Recovery.
  2. Under Reset this PC, click Reset PC. (In Windows 10: Click Get Started.)
  3. Choose Remove everything. If you’re not getting rid of your PC, you can use Keep my files to give your computer a good cleaning to improve performance.
  4. You will be prompted to choose to reinstall Windows via Cloud download or Local reinstall. If you’re feeling generous and want to give your PC’s next owner a fresh version of Windows, choose Cloud download. This will use internet data. If you’re planning to recycle your PC, Local reinstall works just fine.
  5. In Additional settings, click Change settings and toggle Clean data to on. This takes longer, but it’s the most secure option.
  6. Click Reset to start the process.

How to reset Windows 8 and 8.1

  1. Go to SettingsChange PC SettingsUpdate and RecoveryRecovery.
  2. Under Remove everything and reinstall Windows, click Get started, then click Next.
  3. Select Fully clean the drive. This takes longer, but it’s the most secure option.
  4. Click Reset to start the process.

Secure erase using third-party tools

If the reset option doesn’t totally put your mind at ease, or if you have a PC running Windows 7 or older, you have another option—third-party tools. There are a number of good third-party tools you can use to securely erase your disk, which we’ll get into below. These are different depending on whether you have an internal HDD or an SSD.

How do I find out I have an HDD or SSD in my Windows laptop?

Most desktops and laptops sold in the last few years will have an SSD, but you can easily check to be sure:

  1. Open Settings.
  2. Type “Defragment” in the search bar.
  3. Click on Defragment and Optimize Your Drives.
  4. Check the media type of your drive.

How to securely erase your Windows drive using third-party tools

Now that you know what kind of drive you have, here are your options for wiping your Windows drive:

Securely erase an HDD

The process for erasing an HDD involves overwriting the data, and there are many utilities out there to do it yourself:

  1. DBAN: Short for Darik’s Boot and Nuke, DBAN has been around for years and is a well-known and trusted drive wipe utility for HDDs. It does multiple pass rewrites (binary ones and zeros) on the disk. You’ll need to download it to a USB drive and run it from there.
  2. Disk Wipe: Disk Wipe is another free utility that does multiple rewrites of binary data. You can choose from a number of different methods for overwriting your disk. Disk Wipe is also portable, so you don’t need to install it to use it.
  3. Eraser: Eraser is also free to use. It gives you the most control over how you erase your disk. Like Disk Wipe, you can choose from different methods that include varying numbers of rewrites, or you can define your own.

Keep in mind, any disk erase utility that does multiple rewrites is going to take quite a while to complete.

If you’re using Windows 7 or older and you’re just looking to recycle your PC, you can stop here. If you intend to sell or donate your PC, you’ll need the original installation discs (yes, that’s discs with a “c”…remember? Those round shiny things?) to reinstall a fresh version of Windows.

Don’t worry. You can still make use of those discs.

Securely erase an SSD

You have a few options for securely erasing an SSD. These third-party tools will do the trick:

  1. Parted Magic: Parted Magic is the most regularly recommended third-party erase tool for SSDs, but it does cost $11. It’s a bootable tool like some of the HDD erase tools—you have to download it to a USB drive and run it from there.
  2. ATA Secure Erase: ATA Secure Erase is a command that basically shocks your SSD. It uses a voltage spike to flush stored electrons. While this sounds damaging (and it does cause some wear), it’s perfectly safe. It doesn’t overwrite the data like other secure erase tools, so there’s actually less damage done to the SSD.

Encrypting data on a Windows PC

Even if you’re not getting rid of your computer, encrypting your data is a good idea. If your laptop falls into the wrong hands, encryption makes it that much harder for criminals to access your personal information. But, if you have an SSD, encrypting your data is even more important, both before you get rid of it and just in general. Why? The way SSDs store and retrieve data is different from HDDs.

HDDs store data at specific physical locations on the drive platter. In contrast, SSDs use electronic circuits and memory cells, which are organized into pages and blocks, to store data. Constant writing and rewriting to the same blocks can wear out an SSD over time. To mitigate this, SSDs employ a technique called “wear leveling,” which distributes data across the entire drive, preventing it from being stored in just one physical location.

When you tell an SSD to erase data, it doesn’t overwrite the existing data. Instead, it writes new data to a different block. Consequently, some of your old data may remain on the SSD until the wear leveling process eventually overwrites those cells. So, it’s smart to encrypt your data before erasing it from an SSD. This ensures that any residual data is protected. If any data is left lurking, at least no one will be able to read it without an encryption key.

Encrypting your data first isn’t necessarily a requirement, but if Windows Reset is not enough for you and you’ve come this far, we figure it’s a step you’d want to take. The process isn’t complicated, but not every Windows machine is the same. First, check to see if your device is encrypted by default:

  1. Open the Start menu.
  2. Scroll to the Windows Administrative Tools dropdown menu.
  3. Select System Information. You can also search for “system information” in the taskbar.
  4. If the Device Encryption Support value is “Meets prerequisites,” you’re good to go—encryption is enabled on your device.

If not, your next step is to check if your device has BitLocker built in:

  1. Open Settings.
  2. Type “BitLocker” in the search bar.
  3. Click Manage BitLocker.
  4. Click Turn on BitLocker and follow the prompts.

If neither of those options are available, you can use third-party software to encrypt your internal SSD. VeraCrypt and AxCrypt are both good options. Just remember to record the encryption passcode somewhere and also the operating system (OS), OS version, and the encryption tool you used so you can recover the files later on if desired.

The nuclear option

Encrypting, resetting, and/or wiping your drive with a third-party tool should be more than enough to make sure your data is protected and your laptop or desktop is clean before you donate or recycle it. But maybe you’re still feeling wary about it. In that case, you always have the option to destroy the drive yourself.

When nothing less than total destruction will do, just make sure you do it safely. The safest and most secure way to destroy an HDD, and the only way we’d recommend physically destroying an SSD, is to shred it. Check with your local electronics recycling center to see if they have a shredder you can use. (And, you absolutely want to ask if you can watch as giant metal gears chomp down on your drive. Metal.) Shredding it should be a last resort though. Drives typically last five to 10 years, and millions get shredded every year before the end of their useful life. 

If you have a megabot ready to go, you should first crush, then shred your drives.

Still have questions about how to securely erase or destroy your hard drives? Let us know in the comments. And if you’re curious about how to erase a Mac HDD or SSD, read our guide here.

FAQs

How do I wipe a PC?

In most cases, wiping a PC involves simply reformatting the disk and reinstalling Windows using the Reset function. If you are recycling, donating, or selling your PC, the Reset function makes data recovery sufficiently difficult, especially if your data is encrypted. You can also use third-party tools to securely wipe a PC drive.

How do I encrypt data on a PC drive?

First, check to see if your device is encrypted by default. You can search “system information” in the search bar. If the Device Encryption Support value is “Meets prerequisites,” you’re good to go—encryption is enabled on your device. If not, your next step is to check if your device has BitLocker built in. Type “BitLocker” in the search bar, click Manage BitLocker, then click Turn on BitLocker and follow the prompts. If neither of those options are available, you can use third-party software to encrypt your internal SSD. VeraCrypt and AxCrypt are both good options.

How do I safely dispose of an SSD or HDD myself?

The safest and most secure way to destroy an HDD, and the only way we’d recommend physically destroying an SSD, is to shred it. Check with your local electronics recycling center to see if they have a shredder you can use (or if they’ll at least let you watch as giant metal gears chomp down on your drive). Shredding it should be a last resort though. Drives typically last five to 10 years, and millions get shredded every year before the end of their useful life. 

The post Getting Rid of Your PC? Here’s How to Wipe a Windows SSD or Hard Drive appeared first on Backblaze Blog | Cloud Storage & Cloud Backup