A yottabyte (technically pronounced “yadda-a-bite,” not “yoda-bite,” but it’s the eve of May the Fourth and we couldn’t pass up a “Star Wars” reference) is a phenomenally huge number of bytes. As a refresher, a byte is a unit of digital storage made up of eight bits (short for binary digit which are either a one or a zero).
The prefix “yotta” is the largest unit recognized by the International System of Units (SI). It denotes a factor of 1024 or 1,000,000,000,000,000,000,000,000 (that’s 24 zeroes in case your eyes are crossing) or one septillion (not reptilian).
To compare, the last time we defined a big number, we looked at an exabyte, which is only a measly 1018.
Put it in other units of measure, one yottabyte =
one million (1,000,000) zettabytes
one billion (1,000,000,000) exabytes
one trillion (1,000,000,000,000) petabytes
one quadrillion (1,000,000,000,000,000) terabytes
one quintillion (1,000,000,000,000,000,000) gigabytes
one sextillion (1,000,000,000,000,000,000,000) megabytes
one septillion (1,000,000,000,000,000,000,000,000) bytes
Feel the force of the zeroes, you will!
To give you some examples of what these fantastic figures actually look like, we put together this infographic with some approximations to bring a yottabyte into perspective. Keep in mind, right now, nothing is actually measured in yottabyte scale—it’s a theoretical number that’s just sitting around waiting for the future of supercomputing to be put to good use.
If you want to share this infographic on your site, copy the code below and paste into a Custom HTML block.
<div><div><strong>What is a Yottabyte</strong></div><a href="https://www.backblaze.com/blog/what-is-a-yottabyte/"><img src="https://www.backblaze.com/blog/wp-content/uploads/2022/05/compressed-v2_Backblaze_How-Big-is-a-Yottabyte_IG-copy-1-scaled.jpg" border="0" alt="how big is a yottabyte infographic" title="how big is a yottabyte infographic" /></a></div>
”Judge Me by My Size, Do You?”
“And, well, you should not,” in the words of Yoda. Now that you know what a yottabyte looks like, let’s look at how much data storage Backblaze has under management.
Way back in 2010, we passed 10 petabytes of cloud backup data under management. It was a big deal at the time and we celebrated it on our blog. We made an infographic about it and thus began our infographic journey into the world of big numbers.
In 2012, we passed 75 petabytes and visualized the data as an iTunes gift card, as one does in 2012…
Just five months after that, we passed 100 petabytes and compared it to Mt. Shasta…
We were really on a roll—150 petabytes in early 2015, 200 before the end of that year. The storage was accelerating, and we couldn’t mark every milestone with a cool visual. That was, until we hit one exabyte in 2020.
And it hasn’t slowed down since then. Today, we have over two exabytes of data storage under management. We’re nowhere near a yottabyte yet, but like Yoda says, “Patience, you must have.”
Two exabytes today. A yottabyte tomorrow. Maybe? Someday? Either way, you know we’ll be there with a handy infographic whenever the day comes.
March was Women’s History Month, and throughout the month, Backblaze’s employee-led, internal Diversity, Equity, and Inclusion (DEI) committee educated our team on the contributions of women throughout history. In a company-wide Slack channel, DEI committee leaders shared facts and resources about women who were pioneers in a range of fields.
Many of our team members found these facts useful to inform and expand their own worldviews. Team members shared articles they found themselves, and some even used the content as part of their homeschooling curriculum. (As a bonus, the DEI Committee also surveyed employees to generate a word cloud that describes the women of Backblaze, which you can see in the image above.)
The initiative was so popular with our team, we thought we would share some of the content with you even though we are well on our way into April, because any day is a good day to recognize the diverse range of women who have made contributions to our everyday lives, whether it’s still Women’s History Month or not.
Keep reading to learn about important figures and events in the history of technology, Hollywood, politics, and more!
Women in History
In 1756, long before the women’s suffrage movement gained any traction, Lydia Chapin Taft was legally allowed to vote.
Lydia Chapin Taft’s husband, Josiah Taft, was a prominent member of their community in Uxbridge, Massachusetts; he served several terms as a legislator and presided over town hall meetings. When he died, the townspeople agreed to permit Lydia Chapin Taft to vote in her husband’s place. The decision was made in keeping with the slogan of “no taxation without representation,” since Josiah Taft was the town’s largest taxpayer. Lydia Chapin Taft went on to cast several more votes, contributing to the town’s stance on important matters like financial contribution to the French and Indian War.
Read more about Lydia Chapin Taft here.
The 1900s brought significant milestones for women and money in the United States.
In 1938, the federal minimum wage was established as a result of the passage of the Fair Labor Standards Act, eliminating many pay differences between men and women for hourly jobs. In the 1960s, women gained the right to open a bank account. Shortly after, in 1974, the Equal Credit Opportunity Act passed, which aimed to prohibit credit discrimination on the basis of gender. Before it passed, many banks granted credit cards to women only with their husbands’ signatures and outright refused to issue them to unmarried women.
Read more about economic rights for women in the U.S. here.
Wyoming refused to join the United States without a guarantee that women would be allowed to vote.
In 1869, the territory of Wyoming made history when it passed a law granting women aged 21 and older the right to vote. That law was threatened two decades later when Wyoming applied for statehood. Congress stated that it wouldn’t allow the territory to join the Union unless women were disenfranchised. Wyoming called Congress out on its bluff, replying via telegram, “We will remain out of the Union one hundred years rather than come in without the women.” Congress relented and Wyoming became a state in 1890, with women’s right to vote intact. True to its past, Wyoming’s state motto today is simply, “Equal Rights.”
Read more about Wyoming and women’s right to vote here.
Source: Jet City Comics/Joao Vieira.
The British suffragettes learned jiujitsu to defend themselves and evade arrest.
Campaigning for women’s enfranchisement was a dangerous act back in the early 20th century. Many suffragettes in the UK were incarcerated, and some were even force fed in jail as punishment for their self-imposed hunger strikes. To protect women from going to jail and facing this abuse, which could have disastrous health consequences, one suffragette had the bright idea to teach her fellow protesters jiujitsu. Edith Margaret Garrud used her martial arts background to secretly train a unit of 30 members of the Women’s Social and Political Union in self defense. The group was alternately known as “The Bodyguard” and “The Amazons,” and was highly effective at resisting arrest.
Read more about how suffragettes in the UK used martial arts to defend themselves here.
Arabella Mansfield became the first female lawyer in the United States in 1869.
Admitted to the Iowa bar, Mansfield made her career as a college educator and administrator. Despite an Iowa state law restricting the bar exam to males, Mansfield had taken it and earned high scores. Shortly after her court challenge, Iowa amended its licensing statute and became the first state to accept women and minorities into its bar.
Read more about Arabella Mansfield here.
In 1964, Patsy Mink became the first woman of color elected to the U.S. House of Representatives.
Mink’s Congressional career spanned decades (1964–1977; 1990–2002). She was a key author for Title IX, a law that advanced gender equity within federal funding policies for education. This law was later renamed the Patsy T. Mink Equal Opportunity in Education Act in her honor.
Read more about Patsy Mink here.
No list of formidable Irish women would be complete without tomboy icon Gráinne Ní Mháille, aka Grace O’Malley, the notorious “Pirate Queen” of western Ireland.
Born on Clare Island in 1530, O’Malley famously cut off her hair after her father refused to take her on a voyage in case her locks got caught in the ropes. In her prime, O’Malley commanded three galleys, 20 ships, and over 200 men against her perpetual nemesis—the English—and even met with Elizabeth I before living to the ripe old age of 73.
Find out more about Grace O’Malley here.
Cork, Ireland native Annie Moore became the first immigrant to be processed through the newly-opened Ellis Island in New York on January 1, 1892.
Just 17 years old at the time, Moore looked after her two brothers on the ship voyage from Ireland to America, before going on to have 11 children of her own with German Catholic salesman Joseph Augustus Schayer. Moore died in 1924. Her previously unmarked grave was identified over eight decades later in 2006, and a Celtic Cross made from Irish Blue Limestone was later unveiled at her final resting place.
You can read more about Annie Moore here.
Tammy Duckworth, the Illinois senator and retired National Guard lieutenant colonel, is responsible for an impressive list of firsts.
Duckworth is the first Congress member to be born in Thailand, the first to give birth while in office, the first Asian-American woman to represent Illinois in Congress, and the first woman with a disability to be elected to Congress. She lost both of her legs following a helicopter attack in the Iraq War. “People always want me to hide it in pictures,” she told Vogue in 2018. “I say no! I earned this wheelchair. It’s no different from a medal I wear on my chest. Why would I hide it?”
Find out more about her here.
In 1985, Wilma Mankiller became the first woman to be Principal Chief of the Cherokee Nation, leading the largest tribe in the United States.
During Mankiller’s decade-long chiefdom from 1985 to 1995, “tribal enrollment grew, infant mortality dropped, and employment rates doubled,” according to Time. In 1998, she was awarded the Presidential Medal of Freedom by Bill Clinton.
Learn more about Wilma Mankiller here.
Women in Art
Toshiko Takaezu was a trailblazer in ceramic art making during the 1970s.
Takaezu is best known for creating large, closed-vessel sculptures. At the time, fellow artists expressed shock that a woman could make such large pieces, some taller than the artist herself. Takaezu merged aspects of Japanese tea ceremony, calligraphy, and American Abstract Expressionism to create a new style from these diverse art traditions. She had a long career as an artist and teacher at the Cleveland Institute of Art and Princeton University.
Learn more about Toshiko Takaezu here.
Emily Kauʻiomakaweliokauaionalaniokamanookalanipo Kukahiwa Zuttermeister, also known as Aunty Kauʻi, is a revered Kumu Hula (master hula teacher) from Hawaiʻi.
Zuttermeister trained in the hula pahu tradition of Samuel Pua Haʻaheo before becoming a teacher in 1935. Zuttermeister helped revitalize ʻŌlelo Hawaiʻi (the Hawaiian language) and culture by teaching hula. She was part of a community of leaders who raised awareness about hula as a storytelling art form created by the Hawaiian people to recall and share their knowledge.
Learn more about her here.
No one did sultry better than Anna May Wong.
The Los Angeles-born screen siren landed her breakthrough role at age 17 in 1922’s “The Toll of the Sea.” Wong was also quite the trend setter—in 1934, the Mayfair Mannequin Society of New York voted her the “world’s best-dressed woman,” a massive fashion world honor at the time. Success in Hollywood came, but certainly not equal to her talent. As her Turner Classic Movie biography sums it up, stateside audiences considered Wong either “too Chinese” or “too American.” In Europe, the actress received a wider range of roles and due critical acclaim.
Learn more about Anna May Wong here.
Best known as the frontwoman of 4 Non Blondes, Linda Perry’s prolific behind-the-scenes work—as both a songwriter and producer—helped define modern pop music.
Perry worked on hit songs with P!nk, Christina Aguilera, and Alicia Keys. While a woman has never won a Grammy for Producer of the Year (Non-classical), in 2019, Perry received a nomination for the award from the Recording Academy. The singer-songwriter is one of a handful of women to achieve success in production and with her own music.
Learn more about Linda Perry here.
Delia Derbyshire was an innovator in electronic music who pushed the boundaries of technology and composition.
Derbyshire is most well-known for her electronic arrangement of the theme for “Doctor Who,” an important example of Musique Concrète. Each note was individually crafted by cutting, splicing, and stretching, or compressing, segments of analogue tape which contained recordings of a plucked string, oscillators, and white noise.
Learn more about Delia Derbyshire here.
During a two-decade career that began in the mid-1960s, Sonia Pottinger held the distinction of being Jamaica’s first female record producer.
Cutting tracks with the likes of Joe White & Chuck and Culture, her production spanned a variety of Jamaican genres, from rock-steady to ska to reggae.
Read more about Sonia Pottinger here.
Geena Davis starred in two movies about female empowerment: “Thelma & Louise” and “A League of Their Own.”
As Davis got older, she realized how unempowered women were in Hollywood. In 2004, she founded the Geena Davis Institute on Gender in Media to collect data comparing the number and types of male and female roles and to use that data to convince the industry of the need for change.
Listen to her speak about her career here.
Rita Moreno has influenced the entertainment industry for over 70 years as an actress, singer, and dancer.
Moreno became the first Latine woman to earn the vaunted EGOT: an Emmy, Grammy, Oscar, and Tony. In 2004, she was honored with the Presidential Medal of Freedom for her many contributions to the arts.
Learn more about Rita Moreno here.
Women in Technology
Hedy Lamarr was much more than “the most beautiful woman in the world” during Hollywood’s Golden Age.
The Austrian-American actress was also a mathematically-minded inventor who learned about military technology from dinner party conversations between her arms-manufacturer husband and Nazi German generals, before escaping to America where she eventually invented a new torpedo guidance system for the U.S. Navy.
Read more about Hedy Lamarr’s inventions here.
Rear Admiral Grace Brewster Murray Hopper was a STEM pioneer.
Grace Brewster Murray Hopper brought the research and career interests of women in computing to the forefront. The history of computer hardware invention is mostly a male-oriented affair. This isn’t unexpected given that early computers had more to do with heavy engineering than logic. However, when it comes to software, the picture is a little different. Hopper was responsible not only for the development of the Cobol language, but also for continuous advocacy within the industry to make computers and computing more accessible.
Find out more about Grace Hopper here.
Ada, Countess of Lovelace was born 200 years ago, but her name lives on.
There is often an unfairness in the reporting of the history of computing. The software people are nearly always passed over in preference for the hardware people. Ada, Countess of Lovelace worked with Charles Babbage on his Analytical Engine and is generally accepted as the first programmer. Later, in the 1970s, the Ada language was named in recognition of her status as the first computer programmer. In 2009, Ada Lovelace Day was inaugurated to celebrate the achievements of women in science, technology, engineering, and math.
Read more about her here.
In 1996, after being named a mission specialist on the Space Shuttle Columbia by NASA, Kalpana Chawla became the first woman of Indian descent to fly in space.
The shuttle orbited around earth 252 times in a little over two weeks. Chawla’s second—and last—trip to space came in 2003 when she and six other astronauts completed more than 80 experiments over the course of 16 days. She and the entire crew died when the ship disintegrated upon reentering the Earth’s atmosphere. In 2020, Northrop Grumman named a spacecraft after Chawla in her memory.
Read more about her here.
Share More Information on Women in History
Did you learn something new that you didn’t know before? Or, do you have a fact to share about a woman in history? Comment below and help us expand this list!
Who doesn’t like birthdays? We definitely do. And we usually celebrate ours on the Backblaze Blog because they’re fun, and we like reminiscing about the time we passed 10 petabytes of data under management and how cute exciting that was (we now have over two exabytes of data storage under management, for context).
But this past year, well, things have been busy! And the last few months have been busier still. Honestly, our 15th anniversary almost slipped right by us. But, we couldn’t let such a milestone go by without marking it somehow.
Today, we thought we’d take a brief look back on our beginnings and where we are now as a public company—a little “how it started/how it’s going” retrospective to celebrate our coming of age—not to pat ourselves on the back, but to celebrate the ways our team and business have grown, especially over the past year.
How It Started
One of the things we’re most proud of is the incredible team we’ve built. Before we founded Backblaze, the five founders and two demi-founders had worked together for 20 years. So, we knew the kind of company we wanted to create when we sat down to hash out what Backblaze would be—a company that’s equally fair and good for its customers, partners, employees, investors, and the greater community.
Five co-founders; two demi-founders; 1,200 square feet; one white board; innumerable Post-Its.
The team today is a lot bigger than it once was (270+ and counting!), but when we started Backblaze, we wanted to create a culture, both internally and externally, of people who cared about each other, cared about their work, and cared about our product. We knew building that kind of culture would lead us authentically to where we are today, and we fiercely protected it. According to afewsources, we’re still doing well on that count.
How It’s Going
So, what have we been up to recently? Thus far in 2022:
We launched Universal Data Migration, a new service that covers all data transfer costs, including legacy provider egress fees, and manages data migration from any legacy on-premises or cloud source.
We enhanced our partner program with two new offerings (in addition to Universal Data Migration, which partners can also take advantage of):
Backblaze B2 Reserve: A predictable, capacity pricing model to empower our Channel Partners.
Backblaze Partner API: A new API that empowers our Alliance Partners to easily integrate and manage B2 Cloud Storage within their products and platforms.
We announced new partnerships with:
CTERA: An enterprise file services platform that extends the capabilities of traditional NAS and file servers to the cloud.
Catalogic: An enterprise and Kubernetes data protection solution.
Kasten by Veeam: A Kubernetes backup and application mobility solution.
We opened our Bug Bounty Program to any security researcher who wants to help us find any vulnerabilities and strengthen the security of our services.
And just a few weeks before 2021 came to a close: We went public on Nasdaq under BLZE.
Blazing it in Times Square.
As much as we’d like to reflect* on more of the great things that happened in our past, we’re more interested in keeping our heads down, working away at what’s next. Stay tuned for the next 15 years.
*If you ARE interested in celebrating some past milestones with us, we put together this nifty chart of some other key milestones that happened between our founding date, 4/20/2007 (yes yes, we were founded on 4/20 with a CEO whose name is Budman, we’ve heard it all before) and when we went public. We thought we’d share it here (obviously we can’t help ourselves, we really do love reminiscing).
Have you ever noticed something for the first time and then couldn’t stop noticing it? For example, you buy a brand new Kia Soul and then every car that catches your eye on the road for the foreseeable future is a Kia Soul, and you think to yourself, “Oh hey, it’s my car buddy!” Well, that’s called the Baader–Meinhof phenomenon, or frequency bias. It’s not just when you notice something for the first time either. Working at Backblaze over the last 11 years, there’s one thing I cannot escape in my daily life: backups.
Seriously, whenever I am watching a TV show or movie, any time there’s a subplot (or main plot) of backing up, I often think, “Well now, there’s a great example of why you should back up!” This manifests in me trying to get screen captures and create gifs to highlight the importance of backups.
In today’s post, in lieu of an April Fool’s prank, we’re opting to have some good, clean fun and take a stroll down pop culture lane with some highlights of backups in Hollywood. Some of them we found ourselves, and some we found through a service I learned about from TikTok (Yay, learning through social media!), yarn.co. Read on to check out our top 10 list of backups in pop culture (and one backup fail).
11. Are there any “Supernatural” fans in the house?
10. “Parks and Recreation:” Donna saves the day.
9. Maybe not computer related, but I can’t help but include “Austin Powers.”
8. Not backing up, but having a backup plan helps recover from hacking and ransomware…
7. Live-action “The Lion King:” Sometimes I think of myself and Backblaze as a digital Pumbaa.
6. “Altered Carbon:” We couldn’t agree more—you cannot be without backup at this crucial time, or any time!
5. Anyone who’s seen “Tiger King” surely remembers this scene.
4. “MacGyver:” Having backups helps you get back up and running quickly!
And there’s nothing better than the 3-2-1 backup strategy!
3. “My Little Pony” also knows what’s up when it comes to a thorough backup strategy.
2. One of the greatest shows of all time, “The Wire,” breaking it all down.
1. This one’s my all-time favorite. Chief O’Brien talks backups on “Star Trek:”
And One Backup Fail
This is a very bad idea…
Have a favorite of your own? Post it in the comments below!
Talking to your family can be hard. Especially when it comes to topics that are as uncomfortable as backups. Today, March 31st, is World Backup Day, and we want to reduce the number of April Fools this year by making sure everyone is backed up. Do your family and friends have a good backup strategy in place? If not, we have a few different approaches you can take when broaching the conversation and some key concepts that will arm you with the knowledge to fight backup negligence, one friend and family member at a time.
The Subtle Nudge
Sometimes a simple reminder is the easiest way to go. Here are a couple of simple prompts that you might want to utilize if you think a simple reminder might do the trick:
Fun fact: Did you know that today is World Backup Day? You have a backup right? I use Backblaze, and it’s pretty great.
Don’t be an April Fool, back up your data! Today is World Backup Day, and Backblaze is a great service if you aren’t using one.
Backblaze is a great service for backing up your computer, and it’s World Backup Day today, so you know what to do.
I lost my data once. It was horrible. Don’t be like me—use Backblaze. (Oh, you’ve never lost data? Eh. A little white lie never hurt anyone when it comes to backing up.)
Sometimes a simple nudge just won’t suffice and you need to really sit someone down and explain things to them. If that happens, we have a few different talking points that you may want to utilize about the benefits of backing up online:
Think of backing up as insurance for your data. In case something happens to the computer you are using, your data can still be protected.
If you have an online backup, all the data that’s backed up from your computer is available online, so you can access it even if your computer is offline, lost, or stolen.
Online backup services like Backblaze have mobile apps that allow you to access your backed up data on the go, from anywhere you have an internet connection.
Ransomware is on the rise, and having an off-site backup like Backblaze can help you recover from a malicious attack because your data will still be intact elsewhere, even if your computer is infected with ransomware or malware.
Full-on Family IT Management
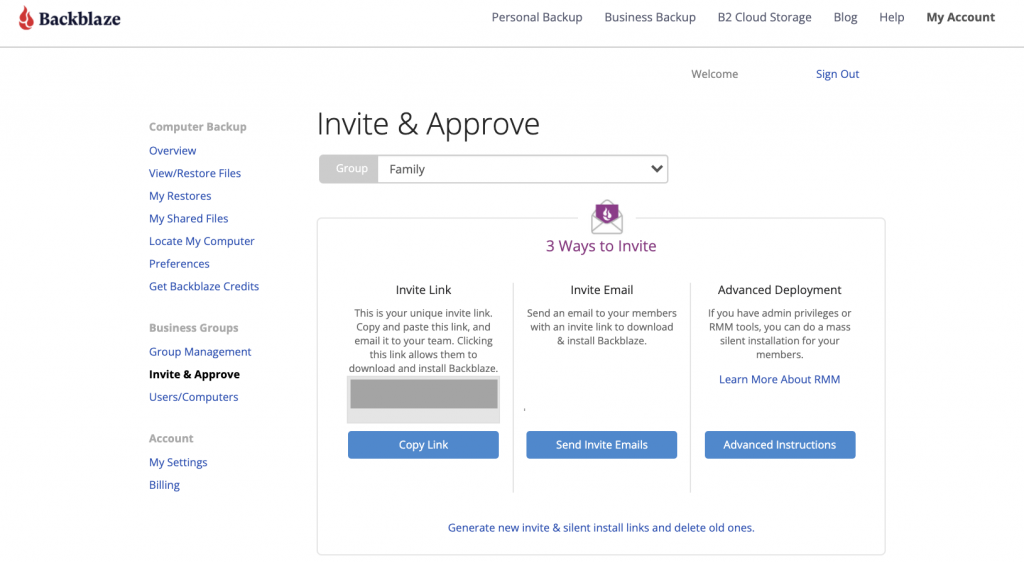
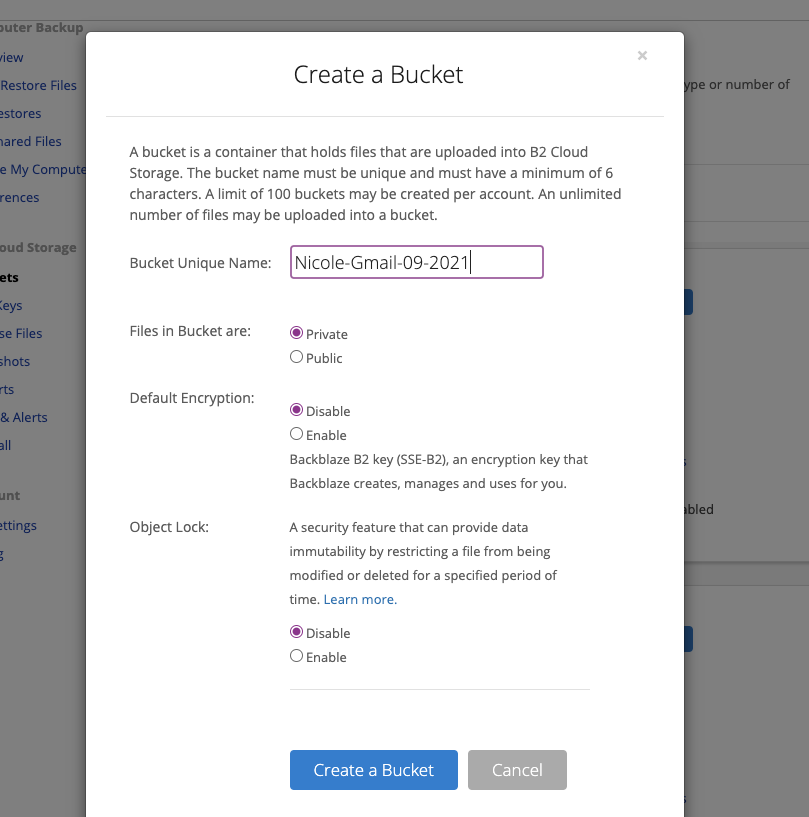
Taking matters into your own hands is also an option. With Backblaze, our Groups feature allows you to take control and get your family backed up. Creating a Group that you manage is a piece of cake:
Make sure they install the Backblaze service on their computer (That’s the only manual step on their machine.) and we’ll handle the rest!
One thing to note is that your Group can be managed or unmanaged. In an unmanaged Group, people will individually create Backblaze accounts and will be able to recover data on their own without the Group manager being able to access it. In a managed Group, both the individual and the Group manager would be able to access and recover data from the backed up accounts!
Knowledge Is Power
Before going into these conversations, it’s also important to be prepared with the cold hard facts about backing up and best practices in general. Below, we’ve listed a few things that are important to know and could be helpful in the discussions above:
Refer-a-friend
Backblaze has a refer-a-friend program that gives you a free month of backup for every person you refer who signs up for an account and purchases a license. Plus, they also get a month for free—this is a great way to get your friends and family started!
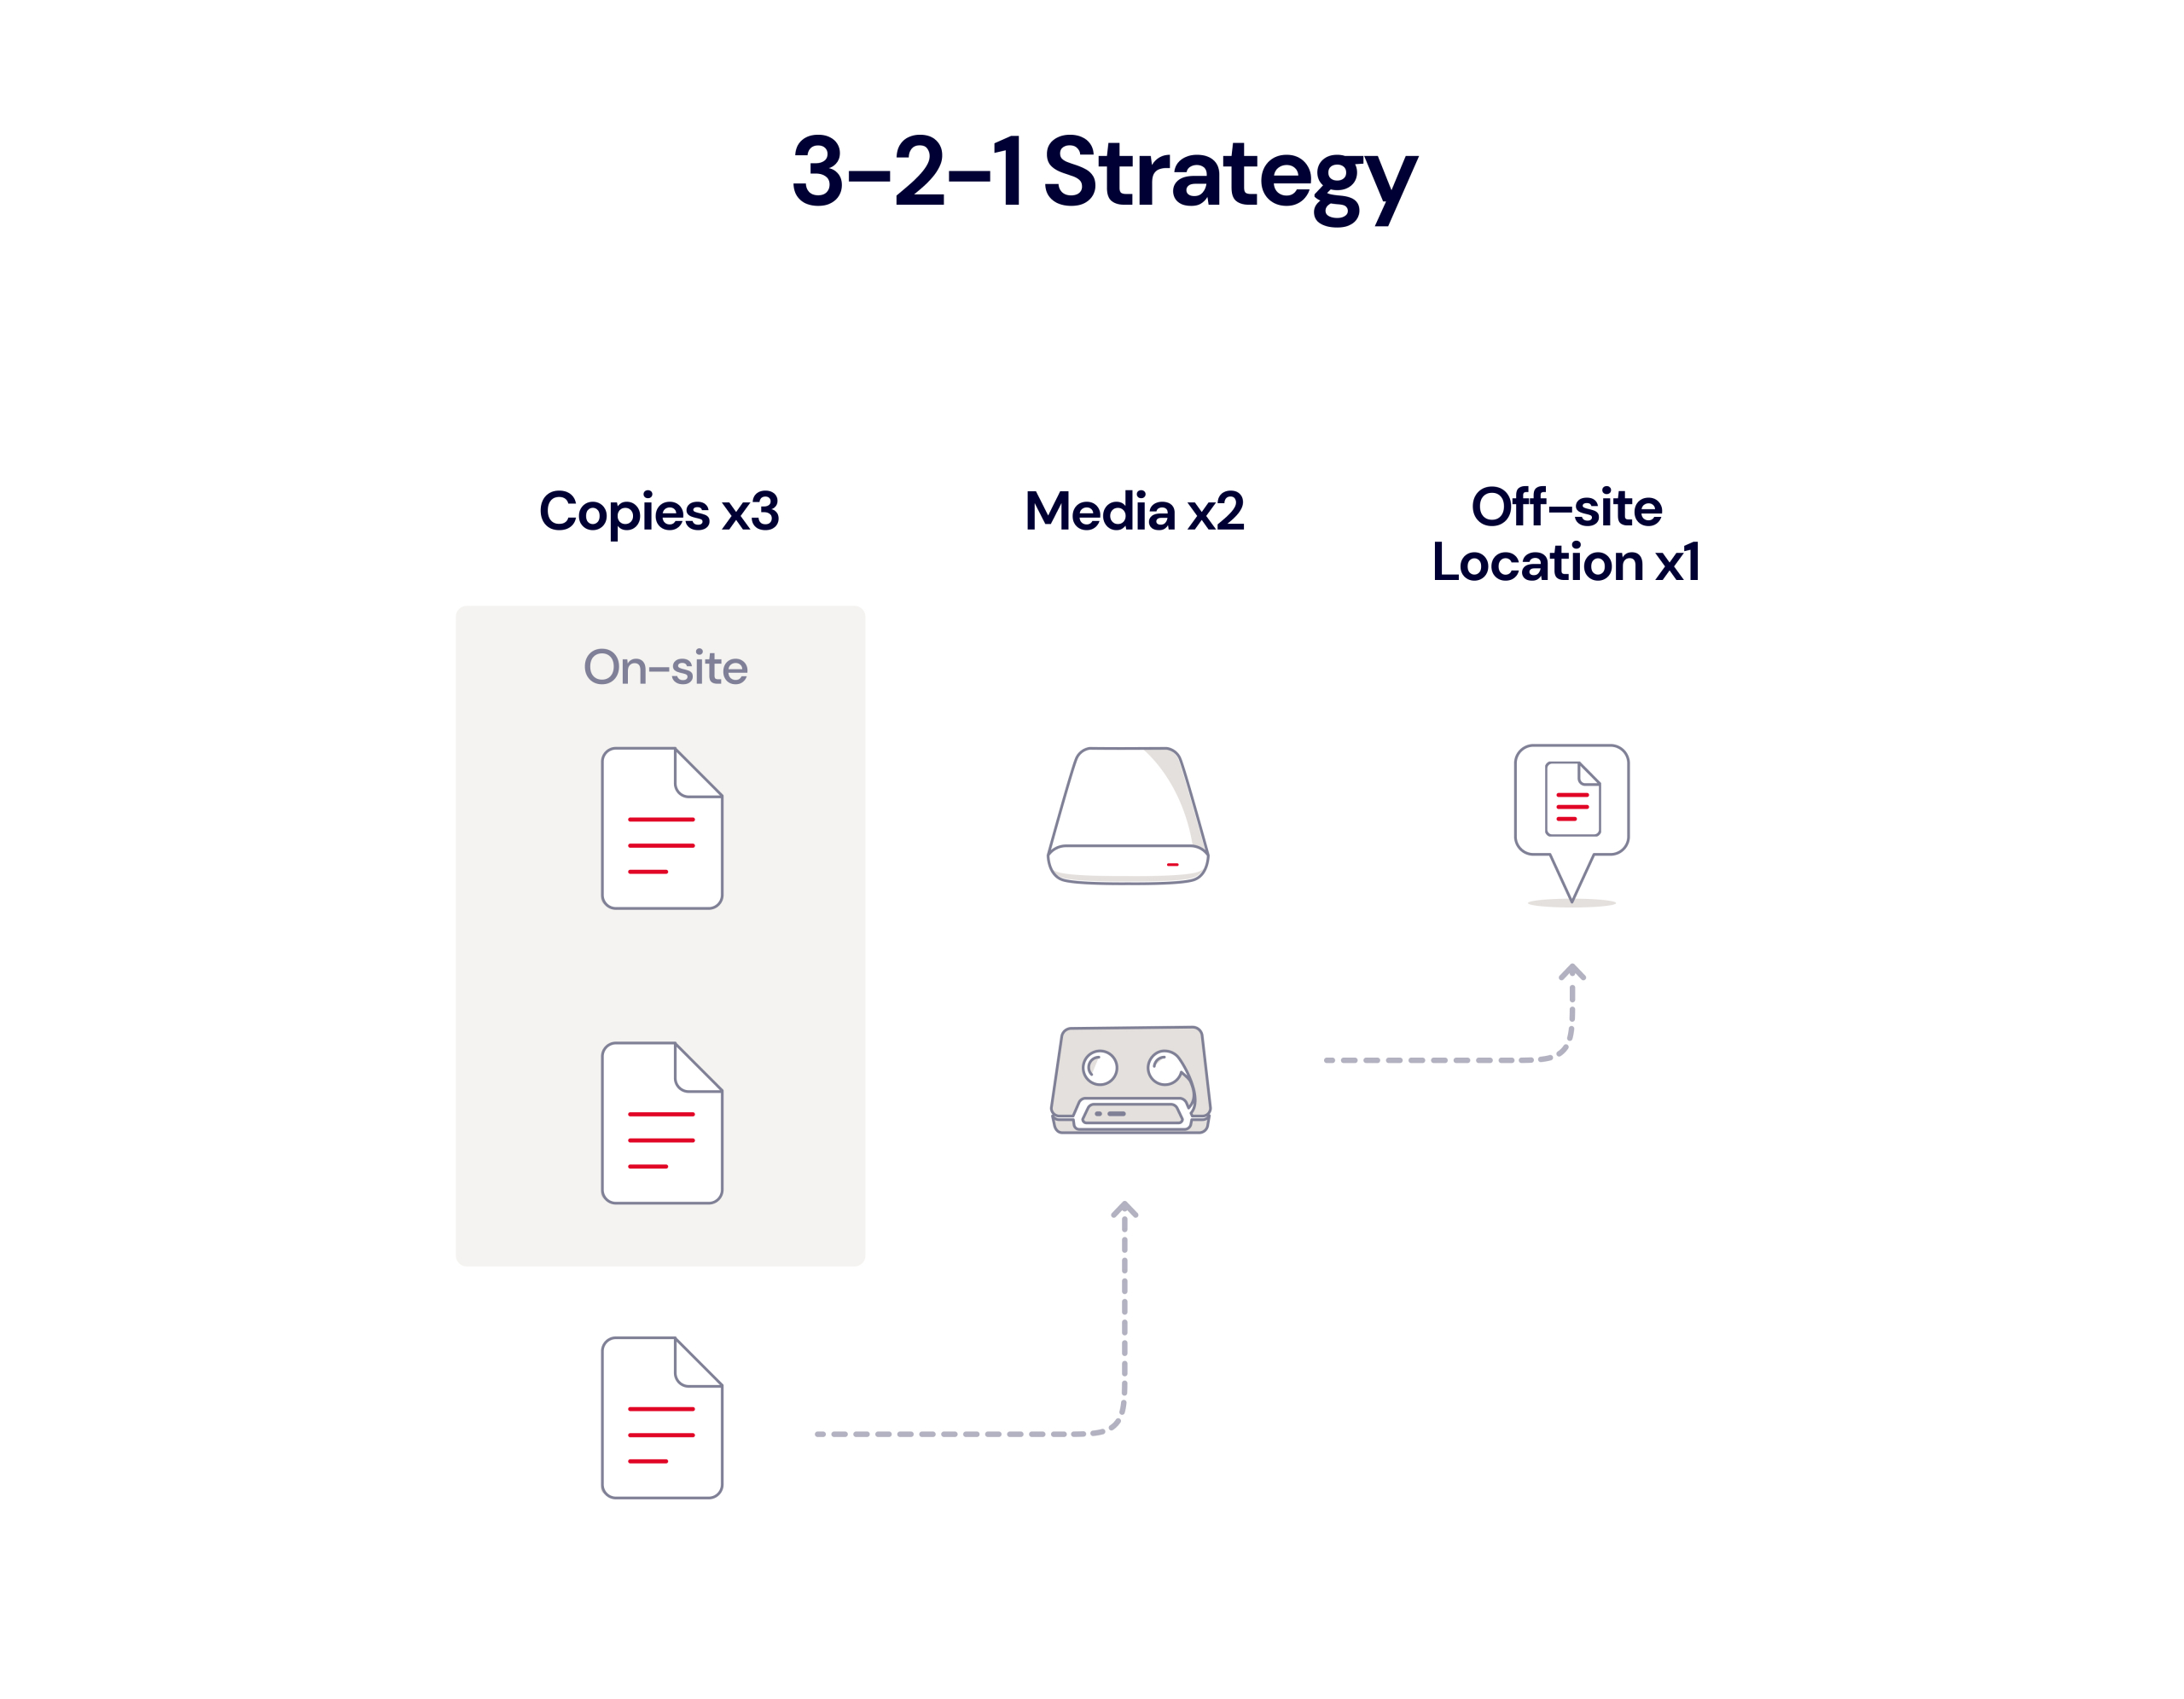
The 3-2-1 Backup Strategy
This is a concept that we wholeheartedly love at Backblaze and have written a lot about. The gist is that everyone should have at least three copies of their data: two on-site and one off-site. The on-site copy can include the original, but make sure that the second copy is on a different medium like an external hard drive. The off-site copy should be in an accessible location, ideally using a cloud-based system like Backblaze.
Extended Version History
Many services that sync your data have limited retention history, so if you remove or change something on your computer, it’ll also get removed or changed in other locations as well. Backblaze has 30 days of version history by default, but we offer Extended Version History for one year or forever in order to keep your data backed up for longer, just in case!
Password Best Practices
This is a general internet tip, but make sure that you are using different passwords for every website or service that you have an account with. This can absolutely get unruly, and so we recommend using a password manager like BitWarden, LastPass, or 1Password. They’re all great and can help you keep things organized and secure.
Two-factor Verification
Having strong passwords is a great first step to internet and account security. The next best thing to do is to enable two-factor verification. The most common form of doing this is with time-based, one-time passwords (ToTP). They typically live inside of apps (like the password managers above) or with dedicated ones like Google Authenticate. Another option is to use your phone number and get SMS-delivered ToTP, but that’s considered less secure since phone numbers can be spoofed.
Hopefully this overview of how to talk to your friends and family about backing up for World Backup Day was helpful, and maybe you learned something new in the process! If you’ve had this “talk” before and have an interesting angle that worked to get folks across the finish line and backing up, let us know in the comments below!
Here at Backblaze, we help people build applications, host content, manage media, back up and archive data, and more securely in the cloud—and that “securely” part of the equation has always been paramount. We use a variety of tools and techniques to stay ahead of any potential security threats, including our participation over the past year plus in the Bugcrowd security platform. Today, we are opening up our Bugcrowd Bug Bounty Program to all security researchers.
Now, anyone can join Bugcrowd and start hacking away at our desktop and mobile apps, APIs, or web applications in order to help us find any vulnerabilities and strengthen the security of our services. Read on to learn more about the program and the other measures we take to spot and address potential security vulnerabilities.
Join Ola Nordstrom, Lead Application Security Engineer; Chris Vickery, Senior Risk Assessment Specialist; and Pat Patterson, Chief Developer Evangelist, on April 21, 2022 at 1 p.m. PDT to learn more about why we decided to implement the Bugcrowd Bug Bounty Program, how it fits into the Backblaze security portfolio, and how you can join in on either side: as hacker or hackee.
But all those security features and frankly all software, not just Backblaze, are vulnerable to security bugs that can expose user information and data. Oftentimes, these are caused by implementation mistakes or changes in how a piece of software is used over time. The recent Log4j (aka Log4Shell) vulnerability affected nearly everyone due to its ubiquitous use across software platforms and the industry as a whole.
I’ve been working to secure software my whole career. Before the advent of crowdsourced security platforms such as Bugcrowd, managing vulnerability reports was a painful task. Emails, typically sent to [email protected], were copied back and forth between bug tracking platforms. Reviewing submissions and gathering metrics was difficult since every engineering team or organization always had their own process for tagging and categorizing bug reports. Everything was copied back and forth to make any sense of the data (Think Excel spreadsheets!). In a world where zero-day vulnerabilities are commonplace, such processes are just too slow and you end up playing catch-up with the bad guys.
How Does Bugcrowd Fit Into the Backblaze Security Portfolio?
Bugcrowd takes the grunt work out of the process to let us focus on addressing the vulnerability and communicating with researchers. Bugcrowd encourages white hat hackers to attack businesses, find vulnerabilities in their software and processes, and aid in guiding the remediation of those vulnerabilities before they can be exploited by anyone else.
What’s more, and perhaps most important to security researchers around the world, is that Bugcrowd allows us to pay security researchers for finding vulnerabilities. Without Bugcrowd, Backblaze wouldn’t have a cost-effective way to pay for a bug report from a researcher in another country or another continent. It’s only fair we pay for the work they do to help us out, and in addition, having a public program ensures transparency and fairness for everyone.
How You Can Join the Backblaze Bugcrowd Bug Bounty Program
Backblaze’s private beta has been running for over a year, but now that the program is public, any interested security researcher can sign up to hack away the company’s in-scope products and networks. If you think you’ve found a vulnerability or you’d like more information about the in-scope products, URLs, or bounty ranges, check out the Backblaze Bugcrowd Bug Bounty Program here. And, don’t forget to register for our webinar to learn more about the program.
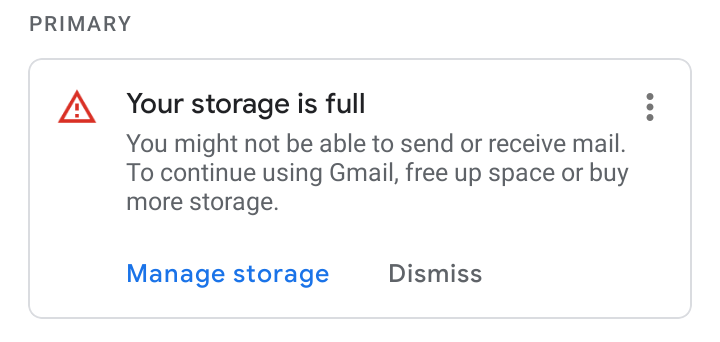
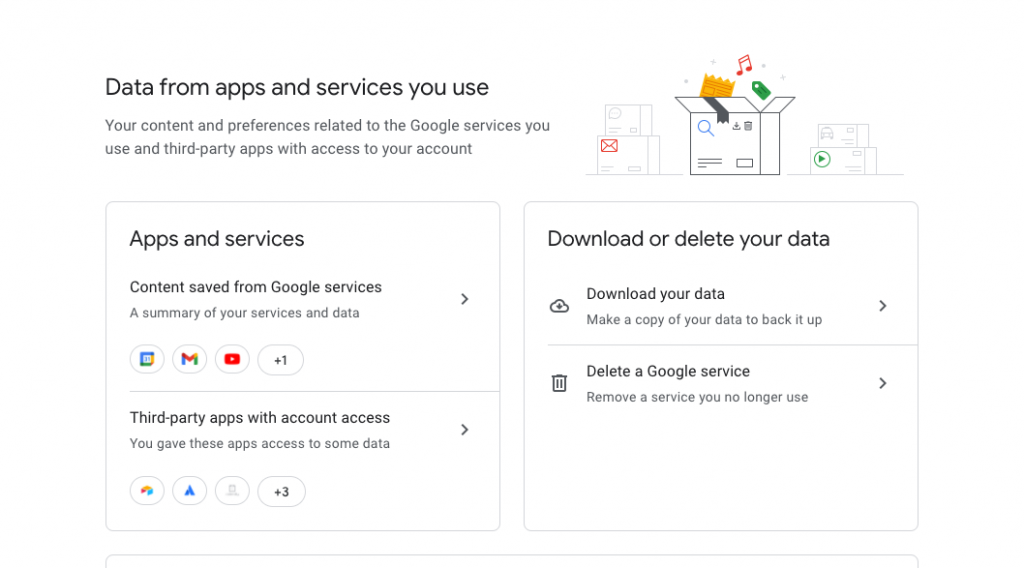
In case you missed it, we recently showed you how to back up your old email accounts, focusing on Outlook emails and Gmail. But what of those of us who remember the Wild Wild West days of the internet? Some of us have decades worth of emails gathering digital dust in AOL and Yahoo inboxes, and we want to back those up as well.
Let’s go through preserving these vintage emails with a little walk down memory lane.
The year was 1994. The White House had just launched its very first website; Katie Couric was famously asking, “What is the internet?” on the “Today” show; and everywhere, there was the sense that this so-called “information superhighway” might just be here to stay.
And one blog writer had just signed up for his very first America Online email address. Lured by the promises contained within each CD that arrived in his mailbox and welcomed to the digital ether by the screeching cacophony of a blazing fast 14.4K modem, he began his journey on the internet.
Looking back on those times now, I’m suddenly realizing what a time capsule I inadvertently created in my AOL inbox. The first emails I ever sent to high school friends after they went to college. Those first awkward exchanges between myself and my wife. My first dozen or so rejection letters from employers as I entered the “real world.” All locked up behind a password that I set when I was just 14.
These memories are too precious to trust to my AOL inbox, so as I look back on my digital life so far, I realize I need to preserve those moments in a backup I can trust. Join me, as I back up both my AOL and Yahoo accounts, savoring the embarrassing memories along the way.
How to Back Up Your Digital Life
Check out our series of guides to help you protect content across many different platforms—including social media, sync services, and more. This list is always a work in progress—please comment below if you’d like to see another platform covered.
We’ll start with my Yahoo Account, which should be easy since I only ever used this email address as a way to sign up for things online that I didn’t necessarily want tied to my main inbox. And since the message board for fans of the FX drama “The Shield” that I signed up for with this address has long since folded, my inbox currently sits empty. (It’s even free of spam, which is pretty impressive.)
So, I’ll simply send myself an email from an address I do use to get the ball rolling.
All I need to do is send myself my credit card number to secure my lottery winnings!
Step One: Finding Your Data
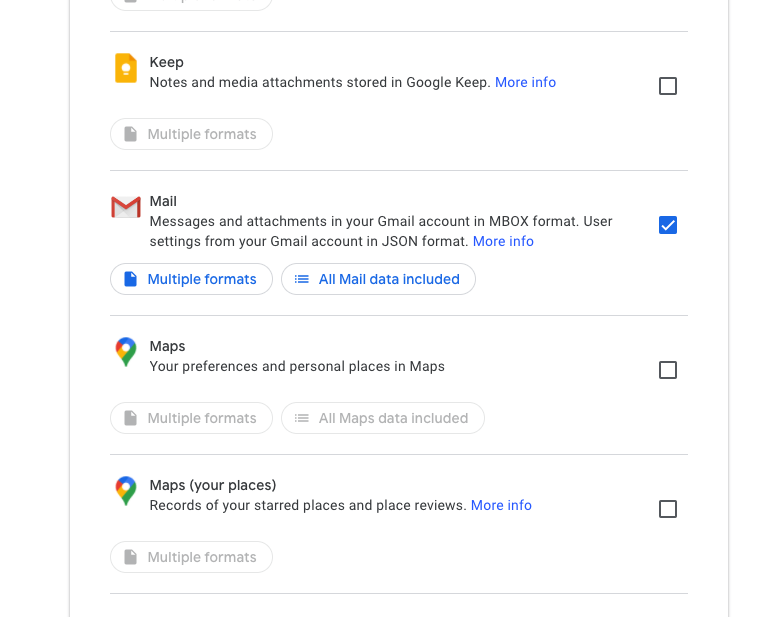
All of your Yahoo data can be found in your Privacy Dashboard, which can be tricky to find using the menus Yahoo offers, so we’ll just cut to the chase and give you the link.
This page gives you a few options, but when it comes to your inbox, it’s not as straightforward as simply downloading an MBOX file. Yahoo only gives you the option of configuring an Outlook, Mac Mail, or Thunderbird inbox using IMAP, downloading all of your data to a third-party app which you can then use to store your emails as files.
You can also use the links on the previous screen to download individual elements of your Yahoo account, from contacts and email preferences to usage and activity. However, Yahoo forces you to send a request to download this data, which they warn can take up to 30 days.
Two emails?! Look at Mr. Popularity over here.
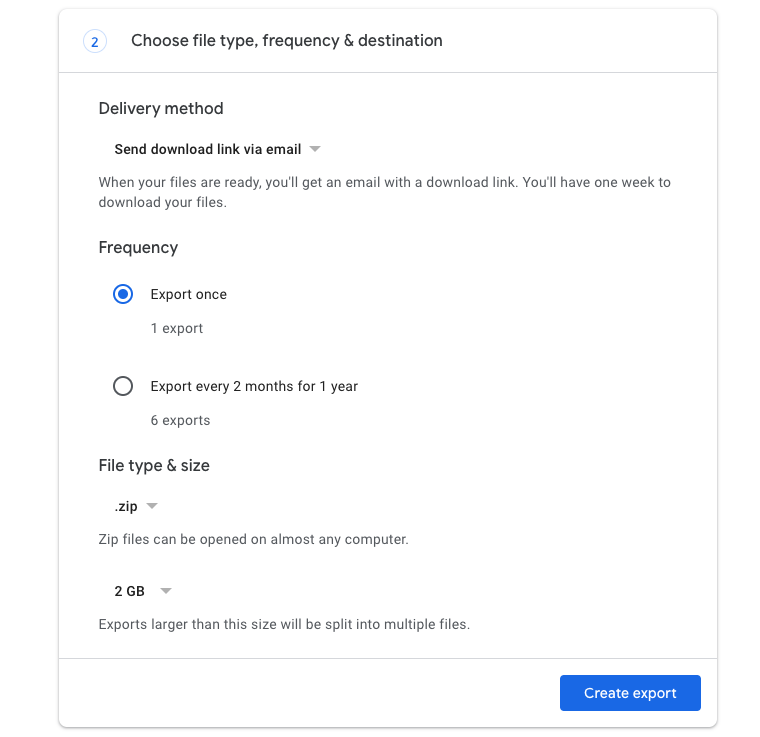
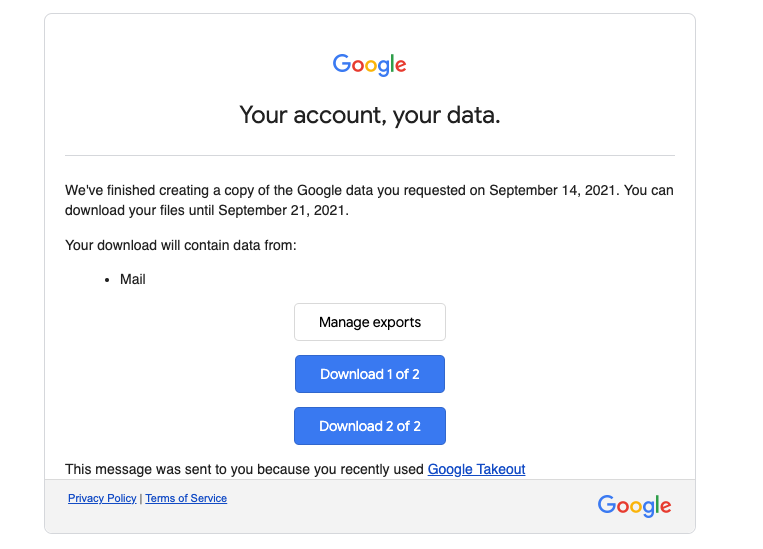
Step Two: Getting Your Data
Your mileage may vary, but the gist of what you want to do here is to set your third-party inbox to download and store your Yahoo emails. To do that, simply configure your IMAP settings to:
Incoming Mail (IMAP) Server
Server: export.imap.mail.yahoo.com
Port: 993
Requires SSL: Yes
Outgoing Mail (SMTP) Server
Server: smtp.mail.yahoo.com
Port: 465 or 587
Requires SSL: Yes
Requires authentication: Yes
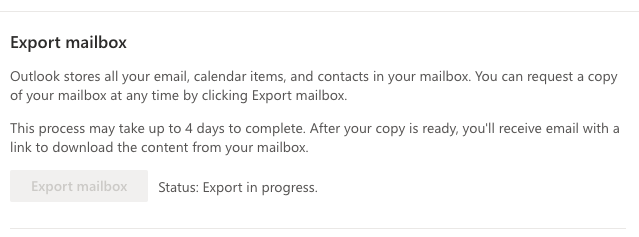
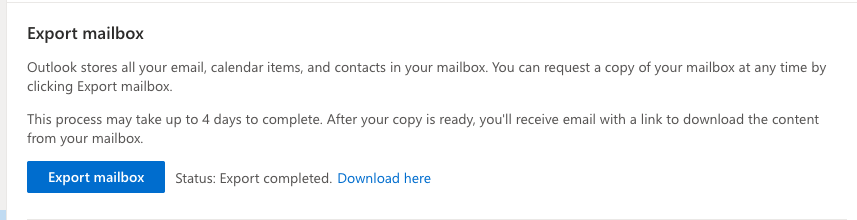
Every email client is different, but if you’re using Outlook you can find the steps to download your emails in our previous post.
How to Download AOL Data
Much to my dismay, when I logged onto my AOL account I found that all of my old emails, nearly 30 years of correspondence, were simply gone. Ah well, it’s hard to blame AOL for clearing up some space. After all, by my reckoning it had been at least 10 years since I opened this inbox. But it certainly underscores the need for backups, right?
My high school friends may not email me anymore, but the spammers do. The spammers never forget about me.
Regardless, I do have 130 emails in there so I can at least walk you through how you’d go about downloading them. Now there is always the print to PDF method, outlined in our previous post, which would certainly work here for individual emails. But if you’re looking to do a mass backup, fortunately you are not alone. Enough people have faced the same situation that a company called SysTools created an app specifically for backing up AOL emails.
Simply download the app, then either log in using your AOL credentials or by generating a one-time app password from your Account Security settings. The free version of the software will back up 100 emails, but you can purchase a license for $49 if you need to back up more. Whichever works for you, once you’re in, you’ll have four different email file formats to choose from: .EML, .MSG, .MBOX or .PST. You can also choose to save your emails as PDFs so they can be viewed across platforms.
Ah, all those precious memories, preserved forever.
And now we have all the emails in our inbox, saved on our computer in whichever file format floats our inbox, and we’re ready to move on to the next step. Your computer is just as fallible as AOL, and probably more so, so it’s time to move these into the cloud.
Backing Up Emails: To Sync or Not?
Now that we’ve rescued our emails from the digital ether, it’s time to put them somewhere a little more secure. If you use an automated backup service like Backblaze Personal Backup (and let’s be honest, you should), then it will be a pretty straightforward process consisting of two steps:
Step one: Do nothing.
Step two: Continue to do nothing, because Backblaze Personal Backup already did it for you.
Along with the rest of the world, the team at Backblaze is extremely saddened by the humanitarian crisis in Ukraine. To help both the people of Ukraine and our customers who call it home, we are taking three steps:
For our customers in Ukraine, we will be waiving charges for Backblaze services including Computer Backup license charges and B2 Cloud Storage charges until June 1, 2022.
For the people of Ukraine, we are making a monetary donation to Project Hope and United Help Ukraine.
We are promoting these charities to our employees in our philanthropy center, where we will also match their donations.
We share this commitment here in the hopes that it will encourage others to do what they can to help the people of Ukraine.
We hope for a swift and peaceful resolution to this situation. To our customers and the people of Ukraine: We sincerely hope that you and your friends and loved ones can stay healthy and safe.
Way back in 2012 we decided it was time to sunset our DVD restore option (Yes, that was a thing.) and replace it with USB flash drive restores to accompany our USB hard drives. Today, the time has come to bid farewell to those little flash keys as well.
Demand for USB flash drives has waned considerably since the halcyon days of 2012, while internet bandwidth has made smaller restores far easier. At the same time, demand for our USB hard drive restores has steadily increased. So while we bid a fond adieu to everyone’s favorite spy movie staple, we remain ready and able to fulfill your physical restore needs with larger-capacity USB hard drives should you need to recover a lot of data all at once.
Yes, as of March 3, we will no longer offer USB flash drive restores, but rest assured that the Backblaze Computer Backup service continues to offer many options to restore your files, including:
We like to think of our YouTube videos as being eternal, that somehow once we upload this little clip of our life, it will remain there safe in its URL forever.
The fact is, nothing lasts forever online except for those embarrassing pictures someone posted of you 10 years ago and the 1996 Space Jam website. Content is deleted every day, whether because a website shutters its operations or because the content gets caught up in the vagaries of copyright law. Your YouTube videos are no different.
If you’ve got a bunch of content living on YouTube and nowhere else, it’s time to download and back up your videos so you can control your content’s digital fate. In this post, learn how to download videos from YouTube and make sure they’re backed up safely.
How to Back Up Your Digital Life
Check out our series of guides to help you protect content across many different platforms—including social media, sync services, and more. This list is always a work in progress—please comment below if you’d like to see another platform covered.
Aside from the simple fact that having a solid data backup plan can help you avoid the fallout from all manner of tragedies like hardware loss, theft, or damage, keeping your YouTube videos backed up protects you from the ups and downs of an ever-changing YouTube ecosystem. Google’s side project has a bit of a troubled history of deleting videos without the owner’s knowledge or consent. After all, when you have terms of service that border on labyrinthine, enforced by an algorithm to strip spam, fraud, hate speech, copyright infringement, and all manner of ickiness from 30,000 hours of video uploaded every hour, there are bound to besomecasualties.
So how can you protect your precious memories from being dissolved in the digital ether? How can you ensure that your skillfully edited masterpiece doesn’t become a casualty of the algorithm? What if, let’s just say for example, you went up in a biplane one time and the camera on which you filmed this adventure has long been lost to the scrap heap of your junk drawer? What if a YouTube video is the only evidence you have of that time you forgot you had a cargo topper on your minivan and almost wrecked at the Mall of America? Hypothetically speaking?
The answer? Just as you upload the video to YouTube, it’s time to back it up both locally and in the cloud. And if you have a whole library of videos on YouTube, it’s time to download them so you can back those up, too.
A Short History of Downloading YouTube Content
There was a time not too long ago when downloading YouTube videos, even your own, meant delving into some of the darker corners of the internet. Often hosted on foreign servers to avoid Digital Millennium Copyright Act enforcement, these sites still exist. But now there’s a far easier native solution for downloading your content.
While they have done their level best to obscure this option, it’s right there for anyone to use. Just follow these simple steps below.
How to Download YouTube Videos
First, open the YouTube Creator Studio. YouTube Creator Studio is a terrific tool the site offers for managing your videos, customizing your channel, viewing analytics, and even monetizing your content. It’s also pretty well hidden, for reasons that aren’t immediately obvious.
To access YouTube Creator Studio on a desktop, click the hamburger menu at the top left of your screen and select “Your Videos.”
In this screenshot, my subscriptions have been blurred so you don’t judge me.
This will bring you to the content page of YouTube, with all of your cinematic achievements laid out before you. Select the video you want, click the kebab menu (the three vertical dots), and then select download. It’s just that easy!
If you’re curious, the video below the one I’m downloading is my dog riding an invisible bicycle.
You can also select multiple videos, click more actions, and download your videos.
Downloading Your Videos on Mobile
To download your videos on mobile, use your phone’s “phone” function to call up someone who has a desktop computer because YouTube Creator on mobile doesn’t let you download videos.
Backing Up Your Videos
Now that you’ve saved all of these videos from being potentially lost forever, how do you make sure they’re stored safely? By saving them locally, you haven’t really addressed the problem that they could be easily lost. Your computer and your external hard drives are, after all, probably more susceptible to data loss than YouTube is.
Which brings us to the 3-2-1 cloud backup strategy. Make sure to have three copies of your data on two different media (read: devices) with one stored off-site (typically in the cloud). Having two backups of your newly downloaded data on-site helps you recover quickly if you ever lose those videos you spent time capturing. And storing a copy in the cloud keeps one copy of your data geographically separated from the others in case of a major disaster like hardware loss, theft, or damage. But how you plan on using these videos will have an impact on which cloud storage method you pick.
If you want to keep copies of your YouTube archive locally, Backblaze Personal Backup is your best bet. It runs silently in the background of your computer. As soon as those YouTube videos hit your hard drive, it will automatically begin backing them up to the cloud, giving you a local copy and a copy on the cloud. If you create a second local copy on an external hard drive, you’re fully backed up and following a good 3-2-1 strategy.
If space is limited locally, and you don’t necessarily need the files on your own computer, Backblaze B2 Cloud Storage gives you plenty of space in the cloud to stash them until they’re needed. Say, when you have to prove to someone that you went up in a biplane that one time. Paired with local copies elsewhere, you could also use this method to achieve a 3-2-1 strategy without taking up a huge amount of space on your machine.
Do you have any techniques on how you download your data from YouTube or other social sites? Share them in the comments section below!
Backblaze started in a one-bedroom apartment in Palo Alto, California. Today, our products serve customers in more than 175 countries and are available in 11 languages. This would not have been possible without the diversity in culture, perspectives, and experiences within our team. Diversity has helped us understand the needs and expectations of the different markets we’re selling to. As a result of our diversity, we’ve come up with new features, solved interesting problems in an innovative way, and connected with our customers all around the world.
Today, we are sharing some stories of how diversity has helped our business throughout the years as well as our efforts to make our workplace more diverse and inclusive. We know we still have a lot to learn. Our initiatives are always evolving and changing as we strive to foster a diverse environment, and we hope that by sharing these stories we can do our part to promote diversity and inclusion more broadly.
How Diversity Helped Our Business
Building the Storage Pod Was an International Effort
Every true Backblaze fan knows that we built our own Storage Pods. After all, our blog post about how to build cheap cloud storage is one of our most popular posts. What fans may not know is that our staff’s bilingual skills are what helped us make our own Storage Pods. When the founders opened up the disk port multipliers they had just bought, they noticed there was a board inside with the name of the manufacturer: Chyang Fun Industry (CFI Group). This was a Taiwanese company, and they only spoke Mandarin. One of our founders, Billy Ng, spoke to them in Mandarin and explained that we needed 150 boards. These boards were essential pieces to building our Storage Pods.
Not only was Billy able to speak to the manufacturer in their native language, but he also knew the cultural standards so he was aware of what was culturally appropriate. After that initial sale, Backblaze continued to have a great relationship with CFI Group. Over the years, they continued to sell us boards which we used to make our Storage Pods. Brian Wilson, our chief technology officer, said, “Without Billy’s bilingual skills, the company would not have survived because we could not have survived without the Storage Pods.” As a result of Billy’s bilingual skills and bicultural understanding, we were able to build our own Storage Pods and store data from customers all around the world.
Translating the Product Into 11 Languages
Since we are an international company, our products and website are available in 11 languages. When the language features were initially created, our developers internationalized the product/website using Google Translate. However, they quickly realized these translations were not completely accurate. Backblaze then hired an external localization firm, but they were a bit pricey for us at the time—we were still a small, bootstrapped startup. We then looked internally and realized there were employees who were bilingual and even multilingual. These employees began reviewing the translations and fixing any errors. They even roped in friends and family to help with the translations. As a result of our diverse staff, we were able to fix the translations internally rather than spend tens of thousands of dollars on hiring an external localization firm.
Diversity and inclusion have always been valued at Backblaze. More than half of our founders were born in a country outside the U.S. (Fun fact: some of those countries don’t even exist anymore!) They collectively practice five different religions and speak various languages. Their diverse backgrounds have helped them build the company that Backblaze is today.
In the past year and a half, we’ve made a conscious effort to reinforce and further our commitment to diversity through a number of initiatives. We established a Diversity, Equity, and Inclusion (DEI) Committee made up of staff members from many different teams across the organization who are passionate about creating a safe and diverse workplace for their peers. Of their many initiatives, two we’re highlighting today include our hiring efforts and our inclusivity efforts.
Building Diversity in Hiring
The DEI Committee approached diversity in hiring by building out an internship program, which allowed us to bring on interns at various levels who come from different ethnicities, genders, socioeconomic statuses, etc. As a result of the program, we brought on some of the interns full-time, and we are excited to see them grow their careers at Backblaze!
In addition to the internship program, we’ve also worked with a variety of organizations that help bridge the gap between tech companies and underrepresented talent. These organizations have also provided internal training sessions which contributed to creating a safe and welcoming environment and continuing our positive retention rate.
Fostering a Safe and Inclusive Environment
We realize that it’s not only important to hire diverse employees, but to also create an inclusive and safe environment that supports these team members. The DEI Committee often hosts training sessions such as implicit bias training and gender inclusion training for employees, managers, Human Resources, and executive staff. The DEI Committee also hosts events like virtual panel discussions and movie nights to elevate social justice issues. These events lead to conversations afterward where employees engage in thoughtful discussions about the event, diversity, and social justice.
How Diversity and Inclusion Support a Strong Company Culture
By creating a diverse and inclusive environment, we are enhancing our company culture and reducing employee turnover. According to Gallup, U.S. businesses lose around $3 trillion every year due to employee turnover. As a result of our company culture where we value diversity and employees treat one another with respect, we have a very low attrition rate. Check out our Glassdoor reviews to get a glimpse into our culture!
We’re Always Learning
We understand that as an organization, we still have more to learn. We’re continuously looking for more opportunities to educate our employees and leadership team, whether that be through diversity training sessions or having more open conversations about difficult topics. We’re also listening to our employees and looking into how we can continue to build a workforce that encourages and strengthens our diversity.
We don’t have all the answers yet, but as an organization that encourages learning and development, we are continually refining our approach to diversity and inclusion in the workplace. We look forward to sharing future learnings and using our platform to continue to promote these values to other organizations.
Join Our Team!
We are excited to continue our efforts to make Backblaze a diverse and inclusive environment! If you’d like to join our team, you can check out our careers here. If you don’t see a role you’re looking for, feel free to email jobscontact@backblaze.com. We look forward to hearing from you!
It’s that time of year again—our annual roundup of the best of our blog. As 2021 comes to a close and we all get ready to celebrate the start of a new year, we wanted to take a moment to look back at the posts that you, our readers, loved the most.
We looked at the data from this year and sorted out the top 10 blog posts we published in 2021 by unique views. If you’re an avid reader of our blog, you might not be surprised that these posts made it to the top ten, but you might enjoy the trip down memory lane. And if you’re curious about our top blog posts of all time, we’ve listed those, too. Read on to see which posts made it to the top of the Backblaze blog.
Top Blog Posts of 2021
“Backblaze Drive Stats for Q1 2021.” You know them, you love them—it’s our quarterly Drive Stats data. The information from our first quarterly report of the year made it to the very top of the list with all the excitement of seeing how the drives in our data centers have been faring.
“Backblaze Drive Stats for Q2 2021.” Following in a close second is our second Drive Stats report of 2021, with even more data on the lifetime hard drive failure rates of our HDD and SSD boot drives.
“Are SSDs Really More Reliable Than Hard Drives?” Do SSDs really fail less often than HDDs? We took a look at this common question in response to our Drive Stats to see if the failure rate data could offer a definitive response. Turns out you were curious, too.
“The Next Backblaze Storage Pod.” A lot has changed since we first open-sourced the designs for our Storage Pods, so we shared the steps for our thought process on building the next generation of our storage servers. Pod posts are a perennial powerhouse, and this year was no different.
“Hold On, Back Up: This Is How to Save Your TikToks.” Here at Backblaze, we’re on the cutting edge of cloud storage and the latest social trends, plus we’re all about being proactive about protecting data, especially considering data loss can happen with social media apps at any moment. This guide walks you through downloading TikTok videos and making sure they’re backed up to the cloud.
“Chia Analysis: To Farm, or Not to Farm?” With the arrival of Chia, and after we open-sourced software to store Chia plots, we wondered if farming Chia was right for our business. We shared the analysis and what we learned from proving out if it was right for us.
“Easy Storage + Easy Provisioning: Backblaze Is Now a Terraform Provider.” In this post, we announced that Backblaze B2 Cloud Storage is a provider in the Terraform registry, which means that developers can provision and manage B2 Cloud Storage resources directly from a Terraform configuration file.
“NAS 101: A Buyer’s Guide to the Features and Capacity You Need.” Network attached storage (NAS) allows you to easily store and manage data, but if it’s your first time buying a NAS device or you’re looking to upgrade your setup, the number of options can be overwhelming. This guide aims at making that process easier.
“A Cloud Storage Experiment to Level Up Chia Farming.” As a precursor to our post sharing the analysis about whether Backblaze would choose to farm Chia, we open-sourced an experimental solution to store Chia plots on Backblaze B2. How’d it go? Read on!
“Backblaze Drive Stats for Q3 2021.” It’s no surprise to see the Q3 Hard Drive Stats make it to this list, rounding out the top 10, and you can check out all of the data we’ve published over the years here.
Top Blog Posts of All Time
After looking at the top 10 blog posts of 2021, we felt like some of our most popular blog posts of all time deserved some end-of-year attention as well. You may know them well. They’re the posts you return to year after year. And if you don’t know them well, we’ve rounded them up here for you to bookmark for the next time you’re wondering how to wipe a hard drive or recover from a ransomware attack.
“Guide to How to Wipe a Mac or Macbook Clean.” If you’re looking to upgrade your Mac or replace its drive, it’s important to make sure your data is backed up and securely erased before you toss out your old computer or pass it on to someone else. (Oh, and we have one for PCs as well.)
“SSD 101: How to Upgrade Your Computer With an SSD.” An SSD can boost performance in a computer, especially if you’re replacing a hard drive with an SSD. This guide walks through the process of upgrading your computer with an SSD.
“What’s the Diff: RAM vs. Storage.” People often use memory and storage interchangeably, but RAM and storage affect your computer’s performance in different ways. This post explains the difference.
“SSD 101: How Reliable Are SSDs?” All drives fail, but how do we know if SSDs fail more often than HDDs? In this post we take a deep dive into SSD reliability factors.
“What’s the Diff: Programs, Processes, and Threads.” If your computer is running slowly, knowing the difference between programs, processes, and threads can help you troubleshoot performance issues. We clarify the difference between the terms and describe the disadvantages and advantages of processes vs. threads.
“Guide to How to Recover and Prevent a Ransomware Attack.” Ransomware attacks are on the rise, so it’s more important than ever to make sure you’re protected against a potential cyber security threat and know how to recover from one.
“What’s the Diff: VMs vs. Containers.” Both VMs and containers can help get the most out of available hardware and software resources. We explain the differences between them and the best uses for both virtualization technologies.
“Hard Drive Cost Per Gigabyte.” This post from 2017 provides our own purchase data to explain the hard drive pricing curve from 2009 to 2017.
“What’s the Diff: NAS vs. SAN.” A NAS device and a storage area network (SAN) are two different ways to store data—this guide helps clarify which is right for you and the pros and cons of either choice.
Thanks for Reading the Backblaze Blog in 2021
It’s been another great year of writing about cloud storage, entrepreneurship, how to back up data, and more. We want to thank you for joining us on the blog and sharing your thoughts in the comments. Did you have a favorite post that didn’t make it to either of these lists? We’d love to hear from you below!
We hear it all the time: “I don’t need to back up my data, it’s already synced.” But backing up your data and syncing your data are two different animals—only a backup service actually protects all of your data while also making it accessible to you even when you’re away from your computer.
Are you using a sync service like Dropbox or OneDrive without a backup solution? If so, we’ll make the case for why you should use backup over sync, including the Backblaze features you won’t find from a sync service.
Read on for a refresher on the difference between backup and sync, and find out why choosing Backblaze over a sync service could be more beneficial to you.
Review: What’s the Difference Between Backup and Sync?
With the myriad of cloud services available, many people don’t understand the difference between sync and backup. You can read more about the difference between the two services here, but here’s a brief refresher:
Sync: These services allow you to access your files across different devices. You can also use sync services to share files with other users, where they can make changes from their computer that will be visible to you from your device.
Backup: These services usually work automatically in the background of your computer, backing up a copy of your new or changed data to another location (e.g., the cloud). Most backup services catalog and save the most recent version of your data, and some now offer features like Extended Version History, which you can use to recover files from even farther back in time than the standard 30 days.
Backup Pro Tip: Managing Your Devices
How many devices do you use to store and access your data on a given day? Between phones, tablets, laptops, and external hard drives, it can be a lot. We’ve created a few guides to help you make sure the data on your phone, computer, and hard drive is backed up or secured for whenever you plan to upgrade.
While sync tools are great for collaboration and 24/7 access to your data, they are not a viable backup solution and relying on them to protect your data can lead to trouble. If you or someone you shared a file with deletes that file, you are at risk of losing it forever unless the sync service you’re using has a version history feature. Sync services do not create a copy of your files for backup, and require additional setup to make sure you have some data protection enabled.
Data in sync services is also vulnerable to corruption by bad actors or malware as it does not provide a backup of your uncorrupted files. If your computer is hit with a ransomware attack and automatically synchronizes your data afterwards, all of your synced files will be corrupted.
Lastly, many people choose not to pay for a sync service, instead opting to use the free tier. For the most part, the free tiers of sync services have a cap on the amount of data you’re able to sync, meaning there will still be a portion of your data on your computer left unsynced, neither accessible by the service or protected in any capacity. Paying for more data in a sync service can become costly over time, and still does not offer protection against data loss.
The Backblaze Features You Won’t Get With a Sync Service
Sync and backup shouldn’t be thought of as opposing services—they’re better together. However, if your budget only allows for one, backup is the way to go.
Now, hear us out—as a backup provider, we may seem biased, but in reality, the benefits of using a backup service speak for themselves. Here are the Backblaze features you won’t get with a sync service:
Automatic, comprehensive data protection: Backblaze protects all of the data on your computer, not just the files in your synced folders. Think about all the things you save on your computer, but not in OneDrive or Dropbox. I imagine that might include important confidential documents like taxes, financial information, or legal documents, or just random stuff that doesn’t get saved to your sync service. With Backblaze, in case of potential data loss, you can find a copy of each of your files saved in the cloud. Also considering how much of our data is scattered across devices and platforms, having a backup of all of your data is valuable to keep it safe in case you can’t access a profile or device for any reason. (Check out our Backup Pro Tip below to learn more about how to back up your digital life.)
Fast and easy data restores: In the case that you lose your computer or it crashes and you need to restore all or some of your files, backup services like Backblaze allow you to download the important files you need via your internet connection and opt to have all of your files sent to you via USB hard drive. Meanwhile, downloading your data from a sync service depends on your internet bandwidth and can take days if not weeks. Also, with the Backblaze mobile apps for iOS and Android, all of your backed up data is with you, no matter where you are.
Extended Version History: Most backup providers offer version history for all of the data you are backing up. With this feature, you can restore your entire backup history, or just one file, from a specific point in time. Backblaze offers Extended Version History, so you can choose if you’d like to keep all versions of your data protected longer than the standard 30 days for a small additional fee. You can choose to keep versions for up to one year or forever. Not only does this feature provide better security for your data and the ability to restore files in the event of a potential cybersecurity breach, but it also gives you the ability to see changes to your edited files over time, much like with a sync service. Want to invite someone to collaborate on a file you’ve edited? You can even share files with other people by enabling Backblaze B2 Cloud Storage. Learn more about how to share files here, and more about B2 Cloud Storage here. (Note: Some sync services are catching on and starting to offer Extended Version History for customers on business or professional tiers or as add-ons. But, keep in mind, unless you’re on the highest tiers, chances are your storage is capped and you’re paying for extended versions of only some of your files.)
Ransomware protection: Another benefit of backup versus sync is protection against cybersecurity threats. In the case of a ransomware attack on your device, you will be able to completely restore your system from a backup that was created before the malware affected your files.
The ability to access your data from anywhere: While sync services are promoted as a way to access your files away from your computer, backup providers also allow you to download individual files or entire data backups from another device. Not only does this come in handy when transferring your data or restoring your old settings on an entirely new device, but also in the event that you need to access a file not covered by a sync service. Your data backup will have a copy of every single one of your files that you can access from another computer.
Location services: Additionally, some backup providers (Like us!) offer additional features or functionality—for example, location services like Backblaze’s Locate My Computer tool allow you to find a lost or stolen device. If you’re unable to get the device back, or you just need to access a file or folder when you’re away from your device, you can download or view data from a web browser or from the Backblaze mobile app.
Backup Pro Tip: Backing Up Your Digital Life
These days, our data is scattered across many different platforms—including social media, sync services, and more. We’ve gathered a handful of guides to help you protect your content. Read these guides to learn how to download your data and create a backup of it.
If you’re going to choose one service over the other, a backup service gives you the best of both worlds—you can make sure all of your data stays safe, you can access it from anywhere, and you can restore previous versions of your data whenever you need it. Backblaze Computer Backup let’s you do all of that, for Macs or PCs—learn more about it and download a free 15-day trial.
Do you have a preference for syncing your data vs. backing it up? We’d love to hear what you think in the comments.
My name is Jason Knight and I lead the Growth team here at Backblaze. There are certain annual events you experience working in tech: fiscal year budgeting, conferences, and when HR asks if you want summer interns, and you say “No.”
2020 was a different year, and as everyone knows, a lot of the difference wasn’t good. So when HR and the Diversity, Equity, and Inclusion Committee reached out asking who would take interns over the summer of 2021, the stakes seemed higher. Backblaze is the most diverse company I’ve ever worked for. For me, especially in the broader context of what is happening in society today, the importance of helping to create a more inclusive and diverse workplace felt more vital than ever.
And yet, when HR came knocking, it was hard to see how having interns was going to be additive to the team. I was the only member of a new team (Growth) being spun up within the Marketing department. We had ambitious goals, and a lot to do to achieve them. I was skeptical that taking on interns would be constructive for driving results.
I was also hearing from some of my peers that they didn’t believe having interns would or could be beneficial to the company. They had come to the same conclusion I had year after year, and that was the problem. We were the problem—the company was willing to provide the resources, but a bottom line mentality was preventing us from risking our short-term success.
The choice seemed to be whether or not to risk personal and team success for the opportunity to help young people gain access to exciting and potentially lucrative careers. I wish I could say the answer was clear, but it wasn’t. My peers and I were all considering this same question, and our collective response was going to have a meaningful impact on the nature of the society we live in.
Building Internships That Work…for Everyone
After a lot of thought, I acknowledged that the primary reason I didn’t want interns was my assumption that they couldn’t create value. But as any good marketer knows, assumptions and received wisdom are often wrong. I didn’t have any real evidence on hand that interns didn’t create value. It made me wonder: What if the real opportunity was to challenge received wisdom and create a compelling argument for my peers within and outside of Backblaze to take the risk and provide a bigger on-ramp for interns across the industry?
I took a step back and organized my thoughts: What do we really want in an internship program right now?
A program that adds value and makes the company money.
More importantly, a model that encourages others to bring on more interns.
The Growth-positive Internship
This was an intriguing proposition, so I started to think about the internships from a “Growth” perspective. I sketched out an approach:
Source candidates who have the potential to be A players.
Give interns goals that can deliver clear ROI.
Don’t defocus team leads with the program.
Publish learnings in the hopes that other firms and leaders will also be inspired to take the plunge.
I told HR we’d take three interns. Three because for some reason, three people can generally help each other out better than one or two. I also thought the success of a program was a lot of weight to put on one intern.
It was still the middle of the winter, and we weren’t expecting the interns to join us until summertime. So I went back to work and hoped that in six months we would be in position to deliver a useful program that would improve both our bottom line and people’s lives. Which—if you know Backblaze—is right in line with our company values.
Assembling an ROI-oriented Intern Team
And suddenly, the interns’ arrival was just a month away. As I considered how to achieve my goal of a growth-positive internship, I tried to zero in on the clearest way to link their effort to value. For my team, the most attributable ROI is closest to the transaction, so I decided to start with the fantastic Sales Development Representative (SDR) team led by SDR Manager, Adam.
My thought was for the interns to spend a full six weeks working as full-time SDRs. Then maybe three weeks on, they could work on paid user acquisition putting a campaign together, and then three weeks on SEO launching a campaign. I talked to Anna, Senior Manager of Data and Analytics, about helping the interns quantify the value they were creating for their resumes, and she enthusiastically agreed to pitch in. In my mind, I could see the bullet points and action verbs filling up their incipient resumes.
This was the plan. No ramp up, straight into the deep end of the pool. Everyone was fully on board. It was time to interview some candidates.
Adam joined me, and we very quickly identified that interns fell on a spectrum with two ends:
Students from elite schools with a history of relevant internships.
Students from non-elite schools with few internships on their resume.
Given that the whole point of our program was to help students access opportunities that otherwise would not be available to them, I made the choice to rule out candidates who already had experience or access to our field. My fantastic HR partner, our Marketing and Sales Recruiter, Desiree, explained that this was a fairly typical experience sourcing candidates. On the HR team, they have long been focused on expanding DEI efforts in our internship program, so they have plenty of experience encouraging hiring managers to look past the brand halo elite colleges confer to applicants.
As Adam, Desiree, and I synchronized our efforts and filters, we eventually identified three people we wanted to work with: Roland, Javier, and Katie. Offers were extended, start dates and pay agreed to, and they were on their way (virtually, for all the obvious reasons).
Turning Interns Into Teammates
We also reached out to senior leaders in the Marketing department who agreed to be mentors to our interns, so VP of Marketing, Nick, worked with Roland; Director of Marketing Operations, Shannon, worked with Katie; and Senior Director of Marketing, Yev, worked with Javier. The interns started work as junior SDRs and launched their outbound sequences within a week of starting. They joined all of the Growth team meetings, and I scheduled a weekly sync meeting with them. Other than that, they functioned exactly like a junior SDR team.
The interns understood that success for them was converting our leads into sales accepted leads (SALs). To do this, they used our Growth stack: ZoomInfo, Outreach, Salesforce, Calendly, and Slack. They learned from expert SDRs what it means to be creative, work with fortitude in a rejection-based environment, and to find a way to succeed.
It took about a month before the first SALs started rolling in, but it happened, and then it happened again, and again, and again. Six weeks into their work and the program was clearly a success in every dimension we could wish. They fit into the team, they helped us achieve our SAL goals, and the whole of the Growth team enjoyed sharing their knowledge and skills with our interns.
It is probably worth taking a moment to contextualize the historical moment they were working with us: The Delta variant was spreading throughout the U.S. and political and social divisions were on the nightly news. The ambient stress level, in other words, was high for everyone. Add to that the fact that we were a new team with big goals and high expectations. All this to say: The interns could easily have been perceived as an unnecessary distraction.
But it turned out the opposite was true: In the midst of stress and ambiguity, the ability to share and help others bonded our team. Our Slack channel was filled with jokes, encouragement, and laughter. The interns were a ray of sunshine for the team, and I will never forget how relieved I was halfway through the internship that we had made this commitment.
Where the Rubber Hit the Road With the Intern Team
As we reached the halfway point, I asked the interns to think about whether they wanted to continue to work as SDRs or if they were interested in exploring what the other team members were doing: paid user acquisition, customer journey marketing, and SEO. All three requested to continue to work as SDRs, and while it was a surprise on some levels, it also made sense: The interns were doing critical work, learning skills, having success, and clearly making a difference.
Oh yeah, and they also generated $1,500,000.00 in the SAL pipeline.
Ultimately, they worked as SDRs for the whole of their internship. We will have to wait and see how much of their pipeline ends up being closed with wins, but they generated enough leads that it is hard to imagine they didn’t pay for all the internships the company provided. In other words, the program exceeded our wildest expectations, and I’m happy to report back that internships, if structured properly, can in fact add enormous value to the companies that provide them.
Looking Forward, and Thanks
I’m already looking forward to meeting next year’s interns. As a team, we will do our very best to show them why we love marketing at Backblaze.
I’d like to end by thanking Roland, Javier, and Katie for spending their summer with us. We are incredibly proud of the SALs our colleagues generated, and happy to call them friends. I remember when I was interviewing Javier and I asked him why he wanted to work at a cloud storage company, and he said “I worked at a deli near the Salesforce headquarters, and every day, all the employees would come to order food, and I couldn’t imagine what they did for the company. This is my chance to find out what it is to work in a company like that.” Now Javier knows not only what they do, but that he can succeed at doing it as well.
Editor’s Note: This post has been updated since it was originally published in 2013 to provide the latest information and statistics.
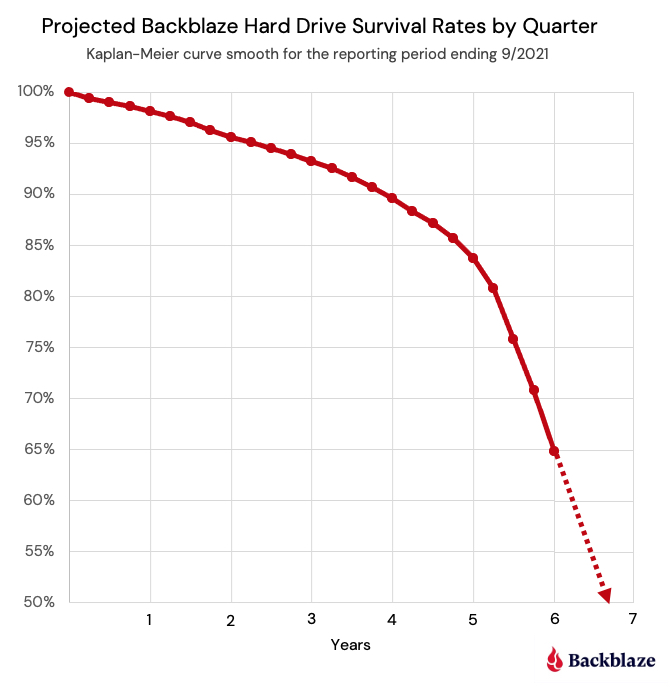
How long do disk drives last? We asked that question several years ago, and at the time the answer was: We didn’t know yet. Nevertheless, we did present the data we had up to that point and we made a few of predictions. Since that time, we’ve gone to school on hard disk drive (HDD) and solid-state drive (SSD) failure rates. Let’s see what we’ve learned.
The initial drive life study was done with 25,000 disk drives and about four years of data. Today’s study includes data from over 200,000 disk drives, many of which have survived six years and longer. This gives us more data to review and lets us extend our projections. For example, in our original report we reported that 78% of the drives we purchased were living longer than four years. Today, about 90% of the drives we own have lasted four years and 65% are living longer than six years. So how long do drives last? Keep reading.
How Drives Are Used at Backblaze
Backblaze currently uses over 200,000 hard drives to store our customers’ data. Drives range in size from 4TB to 18TB in size. When added together, we have over two exabytes of hard drive space under management. Most of these drives are mounted in a storage server which accommodates 60 drives, plus a boot drive. There are also a handful of storage servers which use only 45 hard drives. The storage servers consist of Storage Pods (our own homegrown storage servers) and storage servers from external manufacturers. Twenty storage servers are grouped into a Backblaze Vault, which utilizes our own Reed-Solomon erasure coding algorithm to replicate and store customer data across the 20 servers in a Backblaze Vault.
Types of Hard Drives in the Analysis
The hard drives we use to store customer data are standard 3.5 inch drives you can buy online or in stores. The redundancy provided by the Backblave Vault software ensures the data is safe, while allowing us to use off-the-shelf drives from the three primary disk drive manufacturers: Seagate, Western Digital, and Toshiba. The following chart breaks down our current drive count by manufacturer. Note that HGST is now part of Western Digital, but the drives themselves report as HGST drives so they are listed separately in the chart.
Each of the storage servers also uses a boot drive. Besides the obvious function of booting the server, we also use these drives to store log files recording system access and activities which are used for analytics and compliance purposes. A boot drive can be either an HDD or an SSD. If you’re interested, we’ve compared the reliability of HDDs versus SSDs as it relates to these boot drives.
Number of Hard Drives
As stated earlier, we currently have over 200,000 disk drives we manage and use for customer data storage. We use several different disk drive sizes as the table below shows, with over 60% of those drives being 12TB or 14TB in size.
Drive Failure Rates
Before diving into the data on failure rates, it’s worth spending a little time clarifying what exactly a failure rate means. The term failure rate alone is not very useful as it is missing the notion of time. For example, if you bought a hard drive, what is the failure rate of a hard drive that failed one week after you purchased it? What about one year after you purchased it? Five years? They can’t all be the same failure rate. What’s missing is time. When we produce our quarterly and annual Drive Stats reports, we calculate and publish the annualized failure rate (AFR). By using the AFR, all failure rates are translated to be annual so that regardless of the timeframe (e.g., one month, one year, three years) we can compare different cohorts of drives. Along with the reports, we include links to the drive data we use to calculate the stated failures rates.
The Bathtub Curve
Reliability engineers use something called the bathtub curve to describe expected failure rates. The idea is that defects come from three factors: (1) factory defects, resulting in “infant mortality,” (2) random failures, and (3) parts that wear out, resulting in failures after much use. The chart below (from Wikimedia Commons) shows how these three factors can be expected to produce a bathtub-shaped failure rate curve.
When our initial drive life study was done, the Backblaze experience matched the bathtub curve theory. When we recently revisited the bathtub curve, we found the bathtub to be leaking, as the left side of the Backblaze bathtub curve (decreasing failure rate) was much lower and more consistent with the constant failure rate. This can be seen in the chart below which covers the most recent six years worth of disk drive failure data.
The failure rate (the red line) is below 2% for the first three and a half years and then increases rapidly through year six. When we plot a trendline of the data (the blue dotted line, a second order polynomial) a parabolic curve emerges, but it is significantly lower on the left hand side, looking less like a bathtub and more like a shallow ladle or perhaps a hockey stick.
Calculating Life Expectancy
What’s the life expectancy of a hard disk drive? To answer that question, we first need to decide what we mean by “life expectancy.”
When measuring the life expectancy of people, the usual measure is the average number of years remaining at a given age. For example, the World Health Organization estimates that the life expectancy of all newborns in the world is currently 73 years. This means if we wait until all of those new people have lived out their lives in 120 or 130 years, the average of their lifespans will be 73.0.
For disk drives, it may be that all of them will wear out before they are 10 years old. Or it may be that some of them last 20 or 30 years. If some of them live a long, long time, it makes it hard to compute the average. Also, a few outliers can throw off the average and make it less useful.
The number that should be able to compute is the median lifespan of a new drive. That is the age at which half of the drives fail. Let’s see how close we can get to predicting the median lifespan of a new drive given all the data we’ve collected over the years.
Disk Drive Survival Rates
To this day it is surprisingly hard to get an answer to the question “How long will a hard drive last?” As noted, we regularly publish our Drive Stats reports, which lists the AFRs for the drive models we use. While these reports answer the question at what rate disk drives will fail, they don’t tell us how long they will last. Interestly, the same data we collect and use to predict drive failure can be used to figure out the life expectancy of the hard drive models we use. It is all a matter of how you look at the data.
When we apply life expectancy forecasting techniques to the drive data we have collected, we get the following chart:
The life expectancy decreases at a fairly stable rate of 2% to 2.5% a year for the first four years, then the decrease begins to accelerate. Looking back at the AFR by quarter chart above, this makes sense as the failure rate increases beginning in year four. After six years we end up with a life expectancy of 65%. Stated another way, if we bought a hard drive six years ago, there is a 65% chance it is still alive today.
How Long WILL the Hard Drives Last?
What happens to drives when they’re older than six years? We do have drives that are older than six years, so why did we stop there? We didn’t have enough data to be confident beyond six years as the number of drives drops off at that point and becomes composed almost entirely of one or two drive models versus a diverse selection. Instead, we used the data we had through six years and extrapolated from the life expectancy line to estimate the point at which half the drives will have died.
How long do drives last? It would appear a reasonable estimate of the median life expectancy is six years and nine months. That aligns with the minimal amount of data we have collected to date, but as noted, we don’t have quite enough data to be certain. Still, we know it is longer than six years for all the different drive models we use. We will continue to build up data over the coming months and years and see if anything changes.
In the meantime, how long should you assume a hard drive you are going to buy will last? The correct answer is to always have at least one backup and preferably two, keep them separate, and check them often一the 3-2-1 backup strategy. Every hard drive you buy will fail at some point—it could be in one day or 10 years—be prepared.
Does everyone in your family turn to you to help them fix some tech issue or another? Your uncle ever come to your house in the middle of the day to help him set up his iCloud account on his new iPhone? If the Wi-Fi goes down in the house, are you the first person your family calls before they call their internet provider? If you answered yes to any of these questions, congratulations! You are the family IT department.
Being the family IT admin is a job that you never formally applied for. It just happened over time as you continued to fix all the tech issues that accumulated around the house. If you’re looking for ways to best help your family manage their data and backups, this post will share some tips and advice so you can avoid those panicked requests from your parents or grandparents when they can’t find that favorite family photo or have trouble getting online.
Getting Started as the Head of the Family IT Department
Although it might feel like you’re always on-call to help your family with tech issues, there are a few ways you can set up your family with simple tech solutions even your grandfather will be able to figure out.
How to Back Up Your Digital Life
To start, check out our series of guides to help you protect content across many different platforms—including social media, sync services, and more. This list is always a work in progress—please comment below if you’d like to see another platform covered.
As the family IT admin, I’ve been asked to fix many issues, like devices that won’t start up or work properly, slow or interrupted internet connections, and even data loss. There are a few best practices you can follow to help encourage your family members to handle these problems independently, or even set up automated solutions. These best practices include:
Using the 3-2-1 backup strategy.
Keeping systems updated.
Troubleshooting network connectivity issues.
Setting up automated backups and a Group to centralize your family’s data backups.
The 3-2-1 Backup Method
While I have fixed a lot of issues, there are some issues that I have not been able to resolve, like retrieving a file on a damaged computer without a backup. Data loss can happen at any moment, from accidentally spilling something on your computer to system upgrades or even just accidental deletion. It’s always best to practice backup etiquette with the 3-2-1 method. Using this method, you will have the document saved in three different places—two copies of your data on-site but on different devices, for example, on your computer and an external hard drive, and one copy off-site, for example, in the cloud. In case you lose one, you have two as backup. There is no such thing as a perfect backup system, but the 3-2-1 approach is a great start for the majority of people and businesses, so it’s definitely good enough for your great aunt.
Keeping Systems Up-to-date
As the family IT admin, one of the most common issues you’ll probably face is a malfunctioning device, or a device that needs to be updated. A straightforward way to get started is by resetting the system—yes, just turn it off and turn it back on again. But the best way to ensure your devices are working properly is to ensure that all system updates have been properly installed. By making sure that all of your family’s devices are running on the most recent versions of their software, you can avoid running into problems with apps not working or other issues.
For many devices, running a software update or checking for a new software version is a pretty straightforward process. Apple has made it easy for iOS users—you can set software updates to automatically run in the background while you charge your phone at night. For a PC, you select the Start button, then select Settings > Update & security > Windows Update. Select Advanced Options, and then under “Choose how updates are installed,” select Automatic. You can even think about walking your family members through a check for updates so they can handle any issues on their own in the future.
Nowadays, we all use many devices to store and access our data every day. We’ve created a few guides to help you make sure the data on your phone, computer, and hard drive is backed up or secured for whenever you plan to upgrade.
When you’re dealing with a network issue, it can be frustrating because they often feel like they happen at the most inconvenient times. You can be on a call for work and bam! Lost connection. You want to play your PS5 games with friends after a long day at work? Think again, your internet was disconnected. Well, let me walk you through some of my thought process when I want to fix the internet connection.
Check if other devices that are connected to your Wi-Fi are having the same issues.
If not, then you will need to go to your network settings for that device. You can disconnect and reconnect to the Wi-Fi there.
If you are using an Ethernet cable, make sure that it’s properly connected.
Most internet providers have a service where you can check if the servers are down in your area. Double check that your home was not hit with an internet outage.
Go directly to the router and hit the reset button. Sometimes restarting helps solve the problem.
Setting Up Automated Data Backups
Typically, our data is scattered across many platforms and many devices. Take that, and multiply it by each member of your family—that’s a lot of data that needs to be backed up and secured. I can’t just sit and back up my family’s files and photos on a daily or weekly basis. Personally, I needed something I could install onto my family’s computers and forget about it, all while still knowing that it would back up their data without me constantly monitoring it. And remember, syncing your data is not the same as backing it up.
Backup tools are great for keeping your family’s data protected and ensuring your work as the family IT admin is made easier. Look for a simple app that can automate data backups and make them accessible from anywhere via the web or mobile apps.
(Shameless plug) Backblaze Computer Backup does just that. I set it up in minutes on all of my family’s computers, and now it just runs in the background of all of our devices.
How to Set Up Groups to Manage Your Family’s Backups
One feature that’s particularly helpful with using backup tools for protecting your family’s device data is centralizing your backups into a group. Groups are the best way to manage your family’s backups in one place. With Computer Backup, it’s easy to create a Group and add members to your Group.
First, go to your Backblaze account. If you don’t have Groups enabled, simply go to your Settings tab and check the box to enable Groups.
Now you can start your first Group. Name it whatever you want—I’m a very simple person so I call mine “Family,” but be as creative as you want.
After creating your Group, you can start inviting your family members. You can choose to share a direct link to the group or email them an invitation. Once they get the link, your family members can create an account and install the client on their own computer to start backing up their data.
How to Back Up Your Family’s Data
Once your family has the Backblaze client installed on their computer, you are set! The scheduling is automatically set to back up continuously, so you don’t have to worry if your family’s computers are getting backed up. You can sleep in peace now!
You’re not alone in being the family IT admin—even though it might not be an official job, we all take the responsibilities seriously because we care about our families. What are some of the technical problems that you have had to solve as the family IT admin? Let us know in the comments.
The holiday season is upon us, and here at Backblaze, we always love to see what cool, new things are out there for us to give to our friends and family. Every year, we ask our team members what gifts they’ll be giving (or treating themselves to) and share their ideas on our blog.
This year, our team’s gift ideas range from the latest in fitness trackers for the person who’s always on the go, to weighted blankets that keep you cozy, and helpful plant-rearing guides for blossoming green thumbs. Read on for some gift ideas that are sure to bring some holiday joy!
WHOOP is a fitness and health membership that offers a fitness tracker and an app that analyzes fitness, health, and sleep data as well as a way to connect with other WHOOP members. Their adjustable device can be worn with a range of garments or on their handy wristbands. And they’re stylish!
If you’re the type of person who needs to be reminded to drink water (me), this water bottle will glow when it’s time to hydrate. Luckily, it will not play obnoxious music.
If you or someone you know spent the early months of the pandemic transforming their home into a greenhouse (that also smelled of sourdough), this book provides all the houseplant tips and tricks they might need to keep their indoor garden thriving.
As many of us spend our days staring at screens that can strain our eyes over time, this eye massager is a great way to reduce tension and headaches. It even connects to your phone via Bluetooth so you can choose music to play as it works. Not to be confused with an
Oculus Quest 2.
Every kid will want one of these to decorate their room. You can light up your house with this multicolor light strip, which you can control from your phone.
This small batch coffee roaster uses sustainable and ethically-sourced coffee beans and donates 20% of their proceeds to Muttville, a San Francisco-based senior dog rescue shelter.
This is the world’s first RGB, modular mechanical keyboard. It’s easily customizable and needs no setup. For when you need your clanky keys to light up!
Have a friend or family member who’s constantly losing their keys or phone (or themselves)? Help them keep track of their items with this combo pack that works with Android or Apple devices.
Are they the most fashionable? Maybe not. But they might be the most comfortable, especially with the warm and fuzzy liner!
Give the Gift of Backblaze
Help your friends and family back up their data with Backblaze Computer Backup. They’ll thank you for helping make sure they never lose a file again.
Happy Gift-giving From Backblaze
We hope this gift guide has helped spark some ideas for your own holiday gift-giving! Comment below to tell us what gifts you’ll be giving your friends and family this year.
Halloween and its surrounding spooky season is my favorite time of the year. As the Computer Backup Steward at Backblaze, I often read people’s notes to us, which detail how we’ve helped them recover their files. As I was thinking about their experiences and our past Halloween blog posts detailing spooky data loss stories (Truly, what’s scarier than data loss?), I recalled a personal story that happened to my sister a few years ago when she was interning here at Backblaze. It reminded me that Backblaze Computer Backup doesn’t just recover people’s data, but we also help access it in times of need—which can be equally important. Like the Ghostbusters, when there’s something strange in your (data’s) neighborhood, who ya gonna call? …Backblaze, it’s Backblaze. So, on this, the Friday before Halloween, let me recount that tiny spooky tale for you today…
A long time ago, my sister Lisa was an intern with us here at Backblaze. It was just for a month, but she helped us build desks, digitized business cards (The horror!), and generally helped out around the office while getting a feel for working at a Silicon Valley tech startup. Like any good startup techie, after joining us for the summer, she started using Backblaze to back up her computer files, which makes sense because as a 19-year-old—a lot can happen to your computer.
My sister and I are really close, and we try to go on little trips together whenever possible. One of these opportunities arose in the form of a road trip from the San Francisco Bay to Los Angeles to see a comedy show. (For those curious, it was Kevin Smith and Ralph Garman recording their “Hollywood Babble-On” podcast.)
Driving down from the Bay Area to Los Angeles takes about five to six hours, sometimes longer depending on the traffic and where you’re headed. As we passed hour four, my sister turned to me and said, ”Hey, do I need my ID for this?” Cue: creepy forewarning music.
Now, this comedy show was held, oddly enough, in a comedy club (this sometimes happens when comedy is involved). An important thing to know about comedy clubs in general is that often they require people to be over 18, and are very serious about asking for ID so that underage people don’t imbibe, which makes sense—safety first.
So, yes. An ID was required, and yes she would need it, but no, she did not have it—nor her purse in general. Being an older brother is like that sometimes. I wasn’t about to turn around and drive back to San Francisco—partly because we had the show to go to that night, but also because I would get a bit of enjoyment from her having to sit outside while I enjoyed some comedy as a “lesson.” A sinister brotherly thought.
Luckily, I remembered that a few months back, my sister had to scan her passport as a PDF so that we could have a digital copy on another trip. I called up the comedy club and asked if they’d take a digital ID if we didn’t have a physical one, and while they were confused, they did say yes, so long as it was official. Good news! Once we arrived at the hotel, she logged on to Backblaze, found her backed up passport PDF, and we printed it out in the lobby. And we made it to the show on time. Happily ever after!
OK, so maybe it wasn’t really a horror story and the prospect of not making it to a comedy show may not seem scary to some people, but our family dynamic would mean that if she wasn’t able to attend and had to sit outside, she’d never have lived it down—low stakes slightly spooky (the best kind).
Growing up, a common conversation I overheard between my mom and grandma went like this: “Do you have that recipe from our great aunt?”
“Sure, I do. Let me email it to you. Also, I have some funny jokes to forward along.”
My mom, and I’m guessing many others too, have kept every email they’ve ever received from their parents, family, and friends because they don’t want to lose the funny jokes, family recipes, announcements, and more that they’ve sent back and forth over the years. In the moment, our email accounts can feel like a day-to-day concern, or worse, a repository of spam. But for most of us, every email account holds some amount of treasured memories.
Nowadays, my mom has many different email accounts. But, she wanted to find a way to keep all of those emails she loved without having to keep the accounts themselves. She also found that she had so many emails in her inbox that she was running out of storage space.
Buying more storage can become expensive and doesn’t guarantee that those emails are safely backed up and remain accessible. One option is to download the emails, delete them in the client, and back them up somewhere reliable and accessible for the long term.
If you’re looking for a way to keep old emails or just want to clean up your inbox storage because you’re running out of space, this post walks you through the steps of how to download your data from various email platforms.
We’ve gathered a handful of guides to help you protect content across many different platforms—including social media, sync services, and more. We’re working on developing this list—please comment below if you’d like to see another platform covered.
If you know the exact email you want to make sure you have a copy of, it’s very easy to download it from any client.
For this example, we are going to use Gmail, but this should work for most email clients. If you run into an email client that it does not work with, feel free to note it in the comments below and we’ll update the guidance.
Log in to the email address you would like to download a copy of the email from. (I’m using Gmail.)
Find the email you would like to download. For this example, I will be downloading a family recipe sent by my mom.
Select “Print” in the top right corner.
When the print screen appears, save the email as a PDF on to your computer.
And presto, you have a copy of that email you would like to save forever.
This process can be a bit tedious as you would have to download each email one at a time. It also can be tough if you don’t remember how to find the email you would like to save. If this is true, there are also ways that you can download all of your email data.
While there are other file formats you can download individual emails in, we strongly recommend that—if you want to be able to manage or search your old emails—you download all of your emails (which we explain how to do below). This provides the data in easily manageable formats and is far more time efficient.
Getting Serious: How to Download All of Your Emails
Below, I explain how to download your email data from two top free email websites. Don’t see the email platform you use? Leave a comment below and we’ll work to add material to help you!
How to Download Outlook Emails
A lot of people use Outlook for various reasons, often for work or school. If you downloaded Microsoft 365, then you also have access to Outlook email. To export your email from Outlook and save it as a PST file (don’t worry about what a PST file is quite yet, we’ll explain below), do the following:
Sign in to your Outlook account.
Click the gear button in the upper right corner.
Scroll down on the settings panel to “View all Outlook settings.”
Click on the button with a gear symbol labeled “General.”
Select “Privacy and data” on the second panel that appears.
On the right side, there will be a button labeled “Export mailbox.” Select this button.
The button will grey out and a status update will appear to let you know the download is in progress.
When the export is complete, we’ve found that Outlook may not notify your inbox. If this is the case, you will need to repeat steps one through five and navigate to the “Download here” button. This button will only appear once your emails are ready to download.
Click “Download here” to download your PST file with all of your email data. (Scroll past the section on downloading Gmail data to learn what to do with this file type.)
How to Download Gmail Emails
In a previous post, we explained how to download all of your data from Google Drive. But, if you are just looking to download your Gmail data, here is a more detailed way to just do that.
Log in to the Google Account you’d like to download your emails from.
Once signed in, you will want to go to: myaccount.google.com.
Go to the “Privacy & personalization” section and select “Manage your data & privacy.”
On the next screen it takes you to, you’ll want to scroll down to a section labeled “Data from apps and services you use.” Here, you’ll select “Download your data” in the “Download or delete your data” section.
From here, it’ll take you to the Google Takeout page. On this page, you’ll be given the option to select to download all of your Gmail emails and also your Google Chrome bookmarks, transactions from various Google services, locations stored in Google Maps, Google Drive contents, and other Google-related products you may use.
If you want to download all your Google data, keep everything selected. If you just want a copy of your emails, deselect all and only select Google Mail to be downloaded.
Click the next step on the bottom of the page.
On the next page, you’ll decide what file type you would like it sent as, the frequency you would like this action to happen (Example: If you would like your data to be downloaded every six months, this is where you can set that to happen.), and the destination you would like your data to be sent to. For this example, I picked a one time download.
Select “Create export” and you’ll see an export in progress page.
An email will appear in a few minutes, hours, or a couple of days (depending on the size of data you are downloading), informing you that your Google data is ready to download. Once you have this email in your inbox, you have a week to download the data. Click the “Download your files” button in the email and you will have a ZIP file or a TGZ file (depending on what type of file you picked) on your computer with your Google data.
When you open the ZIP, you will have all of your emails (including spam and trash) in an MBOX file.
What Is a PST File? What Is a MBOX File? How Do I Open Them?
A PST file is used by Microsoft programs to store data and items such as email messages, calendar events, and contacts. By moving items to an Outlook Data File (also known as a PST file) saved to your computer, you can free up storage space in the mailbox on your mail server. If you would like to make this file usable by other email clients, here’s a guide on how to convert your newly downloaded PST file to a MBOX file type.
An MBOX file is an email mailbox saved in a mail storage format used for organizing email messages in a single text file. It saves messages in a connected order where each message is stored after another, starting with the “From” header.
To open a MBOX file, you will need a third-party email program, such as Apple Mail or Mozilla Thunderbird. We recommend Mozilla Thunderbird, as it’s a free email client and it’s supported by both Macs and PCs.
This step is helpful if you would like to view the emails you downloaded. It also helps if you were looking to take the emails you downloaded and move them to a new inbox. For example, if you are afraid the email account you’ve used to sign up for everything over the past 10 years is vulnerable, you can download the emails from that inbox and move them to a new inbox using Apple Mail or Mozilla Thunderbird.
Great, now you’ve downloaded your emails. You’re not done yet! Read on to learn how to safely back up your emails so that you can hold on to them forever.
Use Backblaze B2 Cloud Storage Buckets to Keep an Organized Archive of Your Emails
Once you have your email data downloaded to your computer, it’s best practice to make sure that you have at least one copy of your data stored off-site in the cloud. Storing it in the cloud alongside two local copies ensures you never lose all those important emails.
A simple way to do this is with Backblaze B2, where you can upload and organize your files in buckets. To upload your files to a bucket, follow the steps below.
Sign in to your Backblaze account.
In the left hand column, select “Buckets” under the section “B2 Cloud Storage.”
Click on the button “Create a bucket.”
In the next step, you will need to create a unique name for your bucket and select some settings for it, like if it will be public or private or if you would like to enable encryption.
Once the bucket is created, it will take you to a page where you can upload your files. You will want to drag and drop the email files you want to upload to it. If the MBOX file is too large to drag and drop into the bucket, you can use a third-party integration like Cyberduck to facilitate the upload. You can read the guide to using Cyberduck for Backblaze B2 bucket uploads here.
Alternatively, if you’re not worried about organizing or working with your email archives and just want to know they’re stored away safely, you can keep your downloaded files on your computer. If you follow this route, remember to sign up for a backup service that makes a copy of all of your computer’s files in the cloud. In the case of any data loss, a service like Backblaze Computer Backup would have a copy of all of your data ready for you to restore. If your email applications are locally stored on your computer, Backblaze will automatically back up your emails. You can learn more about how this works here. This approach will take up more room on your computer, but it’s a simple path to peace of mind.
From here, your MBOX file with all your emails from your family, friends, and reminders to yourself (We all have those!) will be safe in the cloud. If you ever want to pull out the archive and read the emails you saved, remember to use the third-party tools mentioned above. What’s important is that you have all your memories stored, safely with a provider who will ensure their redundancy and reliability.
Have questions or want to see a guide for an email client we didn’t mention above? Feel free to let us know in the comments!
Students are starting to head back to the classroom all over the world and, while the timing might be the same, the way we’re thinking about school has changed a lot recently. Schoolwork and projects that previously would have been printed out and handed in have moved online along with classrooms and collaboration. The amount of flexibility this has allowed teachers, parents, students, and childcare professionals is great, but it also means that more schoolwork than ever is at risk of data loss.
As young folks are heading back to classrooms, especially those heading off to college farther afield, now is a great time to help teach the value of backing up their data.
Whether they are in person, online, or on a hybrid system, students will still be creating, collaborating, and consuming files on their computers. Setting them up with a backup service, or helping them install one can prevent them from calling you late at night in a panic after spilling Redbull or coffee on the machine they’re diligently (we’re sure) doing schoolwork on.
Backup Basics: The 3-2-1 Approach
Spilling something and frying the electronics inside of a computer is not the only way to lose data, so having an all-encompassing view to data care is important. At Backblaze, we recommend the 3-2-1 backup approach. That means keeping:
Three copies of your data.
Two copies of your data on-site but on different devices. (For example, on your computer and an external hard drive.)
One copy of your data off-site. (For example, in the cloud.)
Best Practices for Students
In addition to your basic 3-2-1 approach, there are a few best practices students can follow (and parents can encourage) to help them avoid scrambling to find their term paper the night before the final, including:
Instituting naming conventions.
Keeping data in a central repository.
Automating backups.
Creating archives.
Institute Naming Conventions
One common way of losing data is simply forgetting where it was created or saved, similar to misplacing a pair of keys. The easiest way to combat that is to have clear naming conventions for your folders and files and to use them consistently. Having a folder for every year of study, then semester, or quarter inside of it, then class inside of that, helps categorize data and is a great way to start building up good data hygiene.
Keep Data in a Central Repository
A typical student’s data is scattered across a variety of devices, apps, clouds, and computers—we call this “data scatter.” Even if they are using good data hygiene when naming and organizing these various locations, having a central repository—even if just for final documents—is important.
When they have their data in one centralized location, students can back it up frequently, so that even if work is lost from a collaborative place (like someone deleting a file or presentation from a shared folder), they’ll still have a copy locally and in an accessible location.
Automate Backups
Once the data is saved to the new location, the next best thing to do is make sure that there are automated backups running, so that—should anything happen to that machine or device—the data will still be accessible somewhere else (all part of the 3-2-1 strategy).
When selecting a backup tool, you want to look for something simple, affordable, and most importantly, accessible. That’s where apps like Backblaze really shine when it comes to computer backup, since they are designed to be unobtrusive, and the backed up data can be accessed anywhere in the world via web or mobile apps.
Create Archives
Creating archives is another tool in the fight to combat data loss and maintain good data hygiene. Archives differ from backups in that they tend to be permanent. Backups tend to be on a rolling basis (similar to an alarm system keeping a certain amount of video before it gets recycled—the thought being, if something happens you can recover the video for a certain period of time, but if nothing occurs it’s better to get that space back).
Archives, on the other hand, are more immutable in nature. Once you have an archive, it’s rare to remove it, unless you want to get rid of everything associated with it. There are many methods that people employ to archive their data, including having hard drives for every month or year that they create an archive for, but there are online tools as well. Backblaze B2 Cloud Storage has an Object Lock feature which allows users to upload data and have it stay there until expressly deleted by the user.
Backing Up Your Student’s Social Life
It’s probably not your top priority, but your student is likely just as concerned with backing up their social profiles and photos as they are with backing up their Econ 101 homework. Fortunately, we’ve got both covered. To help your student back up their digital social life, we put together a few handy guides:
The best time to start backing up is now. If Backblaze is a good choice for your family and school-aged kiddos, there’s a few ways to get started:
Here’s how to set up Backblaze on your kid’s computer before they head off to college:
Sign up for an account, and install Backblaze on your student’s computer. You can find our guides to installing on Mac here, and on Windows here.
Once you have installed the software, you can select what hard drives should be backed up, set your backup schedule, or change your performance settings. For more on how to do that, you can check out our Mac Settings Overview and Windows Settings Overview.
You can set up payment in the Billing section under My Account when you sign in to Backblaze.
If your student needs to restore a file, they can follow the steps here.
If your kid is more of a self-starter, send them a gift code—that way you’ll cover their first year, and after that it’s on them to handle the payment and maintenance (good for those who value their independence but maybe just need a jump-start): https://backblaze.com/gift.htm.
Consider using a Backblaze Group! A few years ago we wrote about how our Groups feature can help families maintain their digital lives, and you can read it here. This option is great if you have many family members, or if you just want one central place to manage billing for multiple accounts.
If you are a Backblaze customer, simply log in to Backblaze.com, go to the Settings page, and enable Business Groups. Once done, you can navigate to the Groups Management page and get started. More information on creating a Group can be found here.
If you are not yet a Backblaze customer and like the Groups approach, you can create a new Backblaze account with Groups enabled here.
Just like developing good habits for anything else, a strong understanding of data, where it lives, how it can be lost, and how to save it can be an incredibly important skill to develop. As the amount of data in the world increases and it increasingly becomes the digital world’s most precious resource, maintaining it will become one of the more important habits we can instill in our younger generations!
To provide the best experiences, we use technologies like cookies to store and/or access device information. Consenting to these technologies will allow us to process data such as browsing behavior or unique IDs on this site. Not consenting or withdrawing consent, may adversely affect certain features and functions.
Functional
Always active
The technical storage or access is strictly necessary for the legitimate purpose of enabling the use of a specific service explicitly requested by the subscriber or user, or for the sole purpose of carrying out the transmission of a communication over an electronic communications network.
Preferences
The technical storage or access is necessary for the legitimate purpose of storing preferences that are not requested by the subscriber or user.
Statistics
The technical storage or access that is used exclusively for statistical purposes.The technical storage or access that is used exclusively for anonymous statistical purposes. Without a subpoena, voluntary compliance on the part of your Internet Service Provider, or additional records from a third party, information stored or retrieved for this purpose alone cannot usually be used to identify you.
Marketing
The technical storage or access is required to create user profiles to send advertising, or to track the user on a website or across several websites for similar marketing purposes.


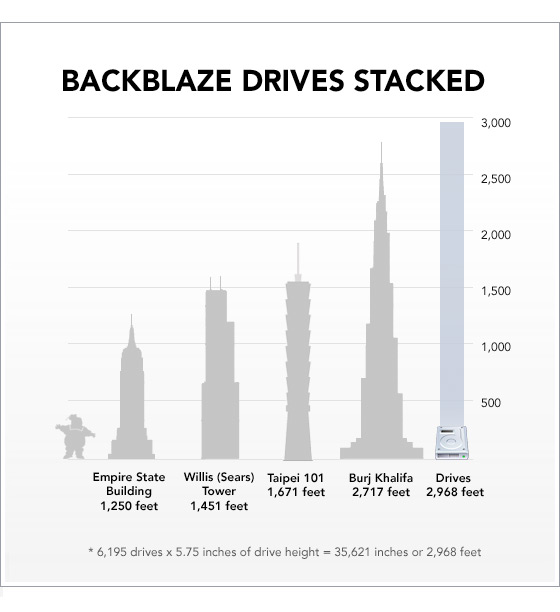
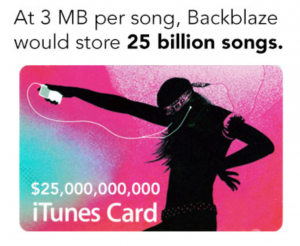


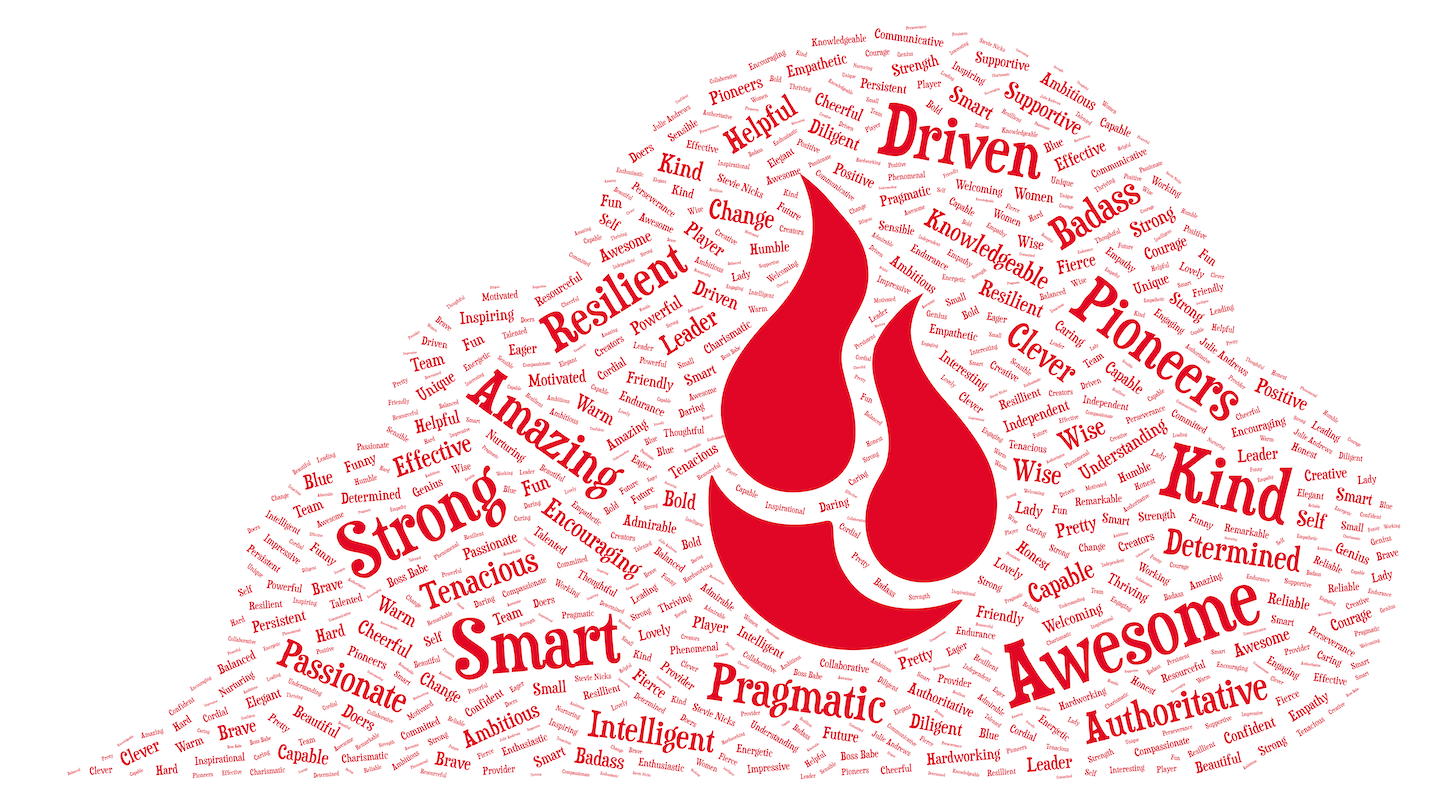


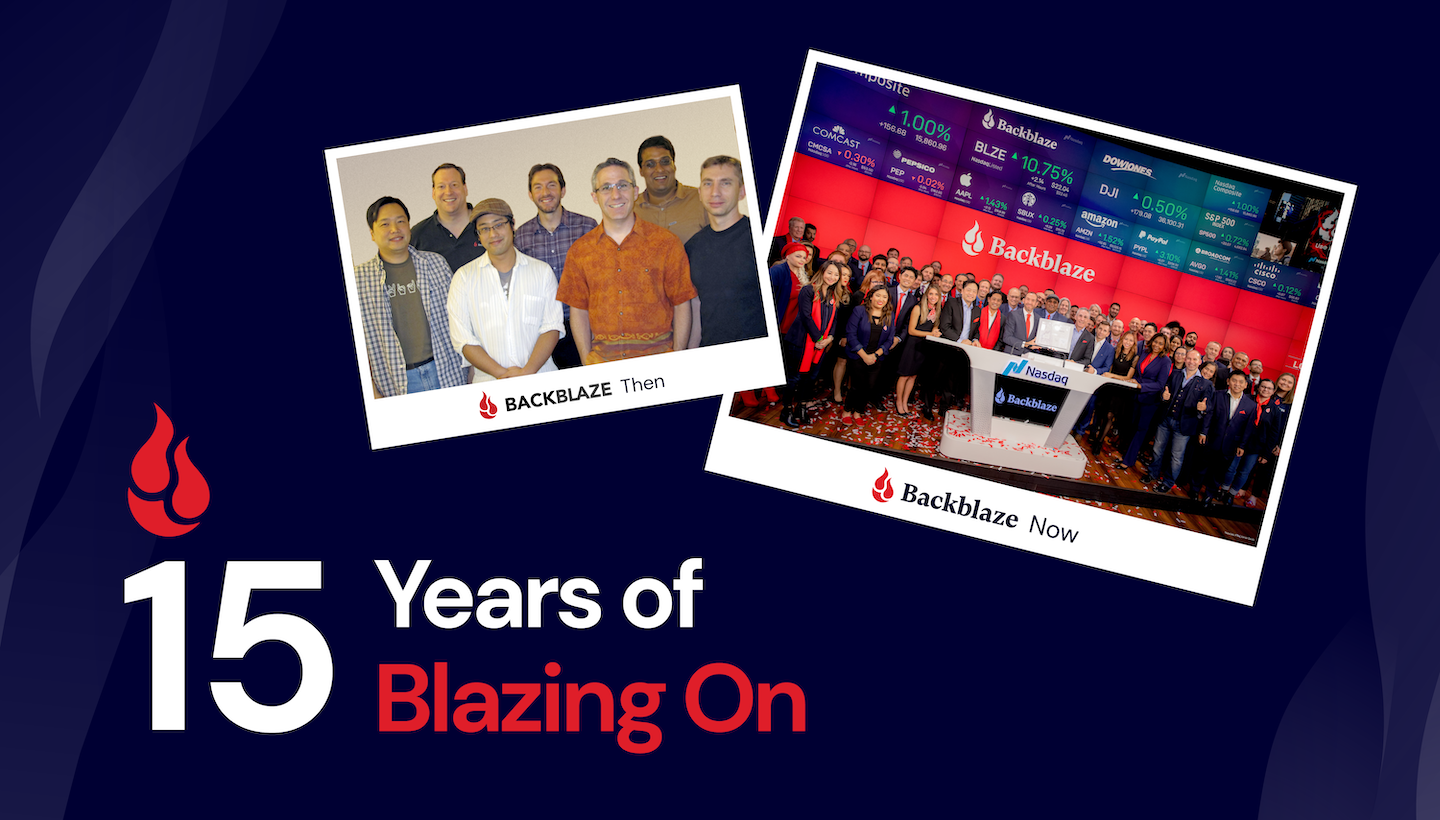


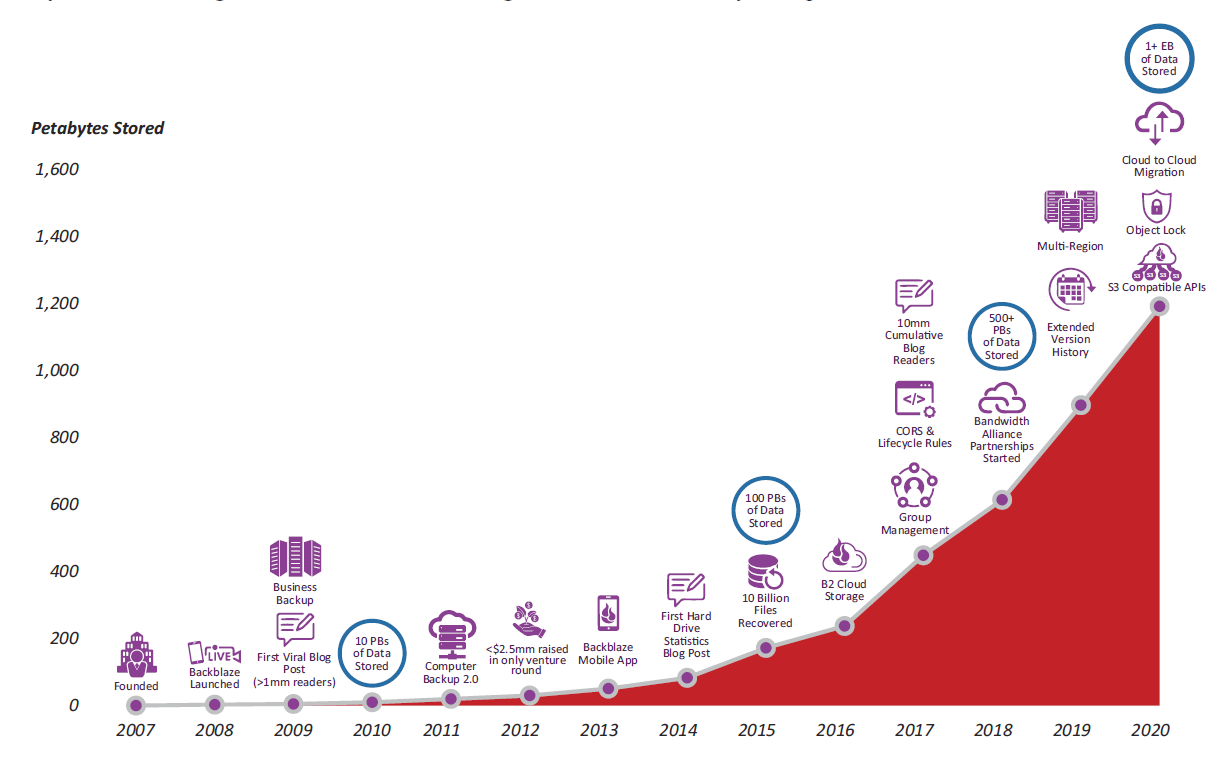


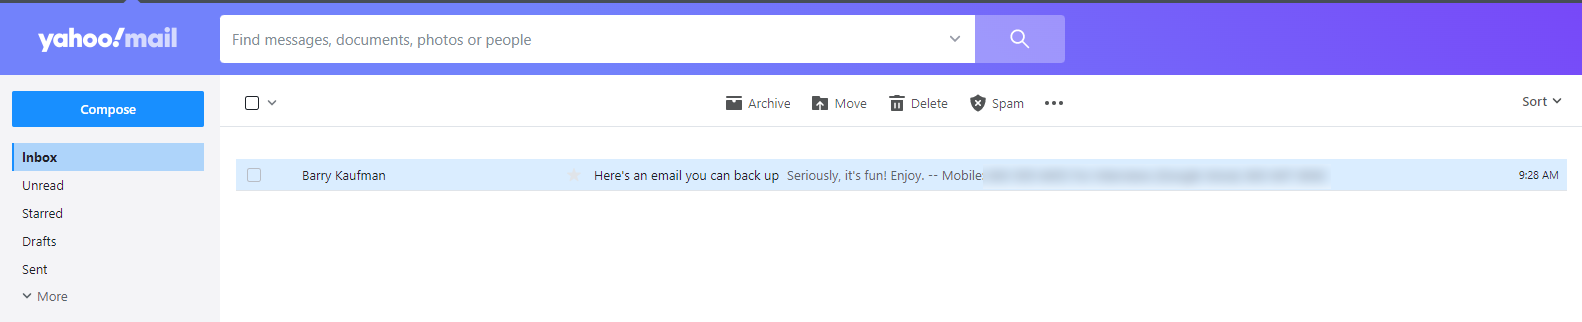

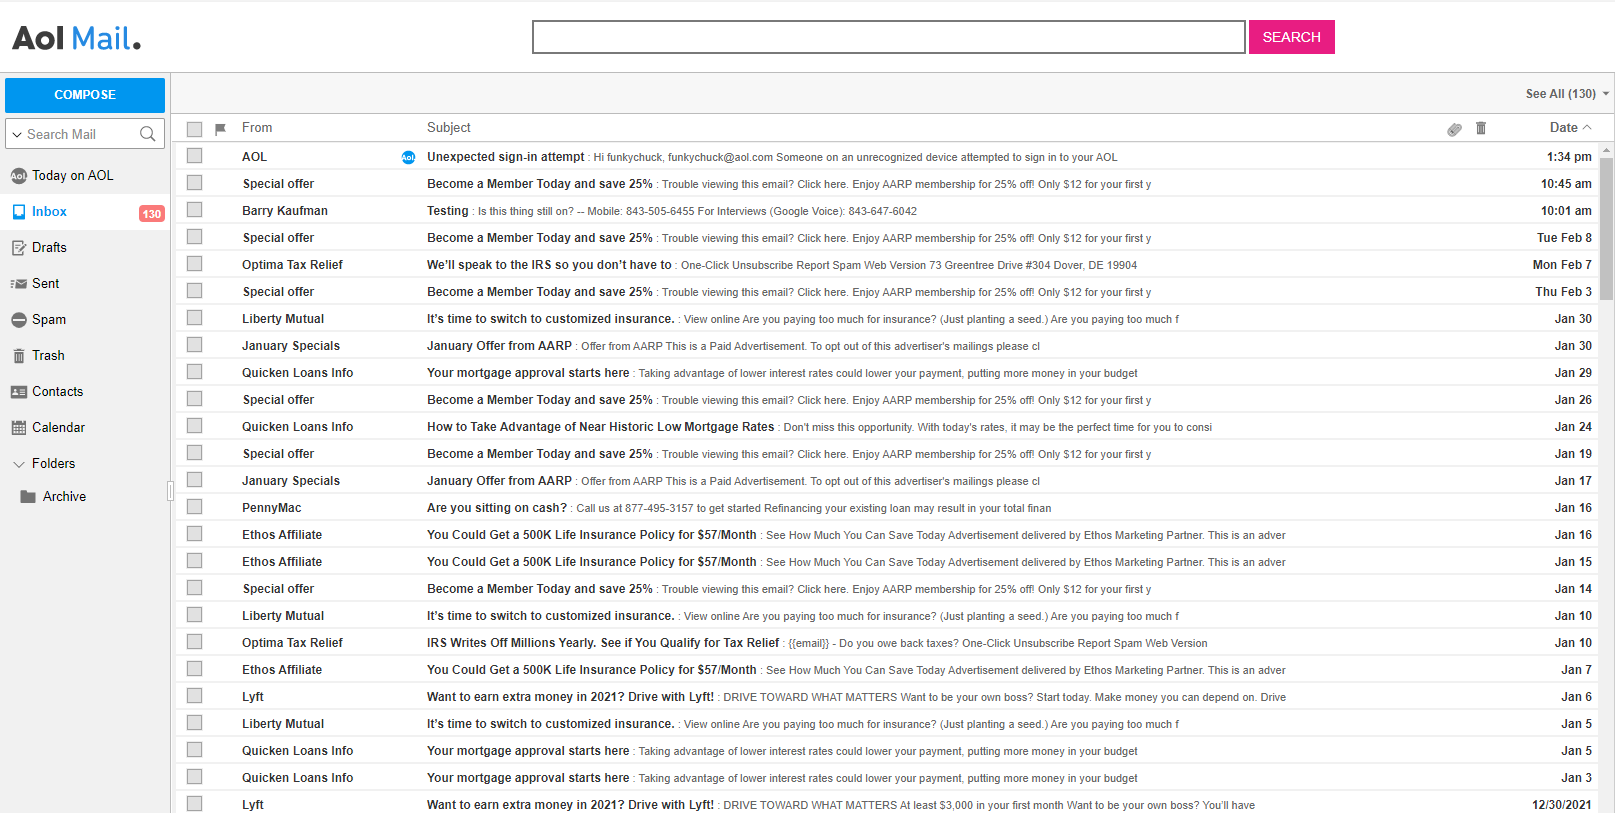
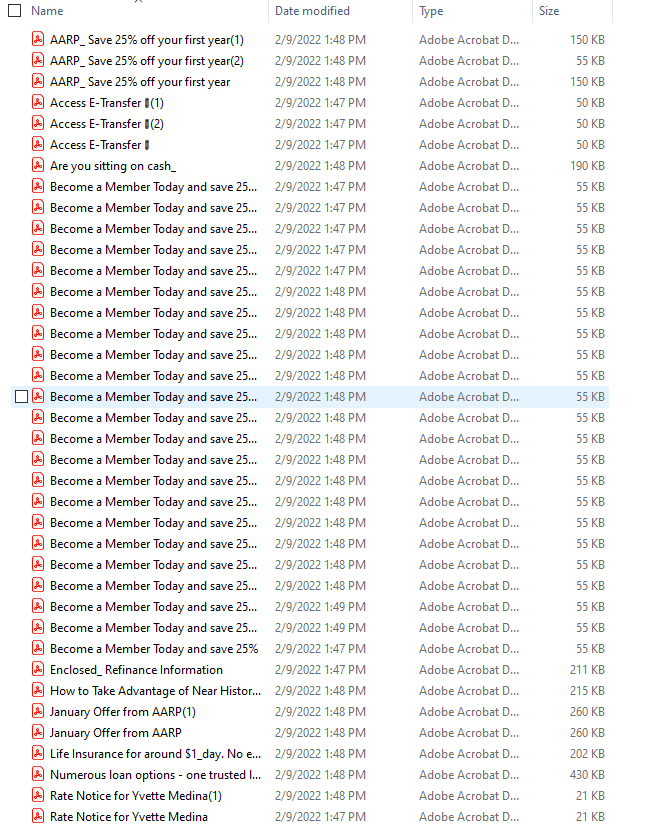


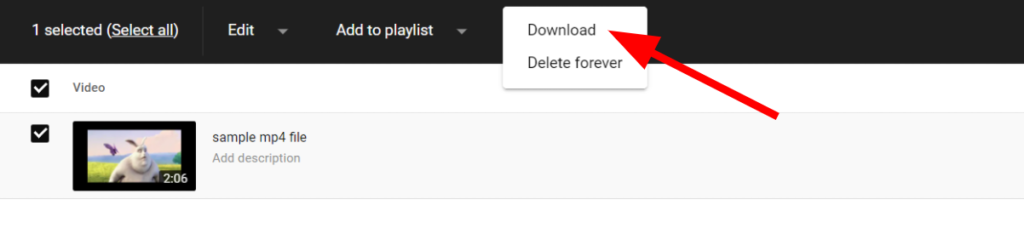


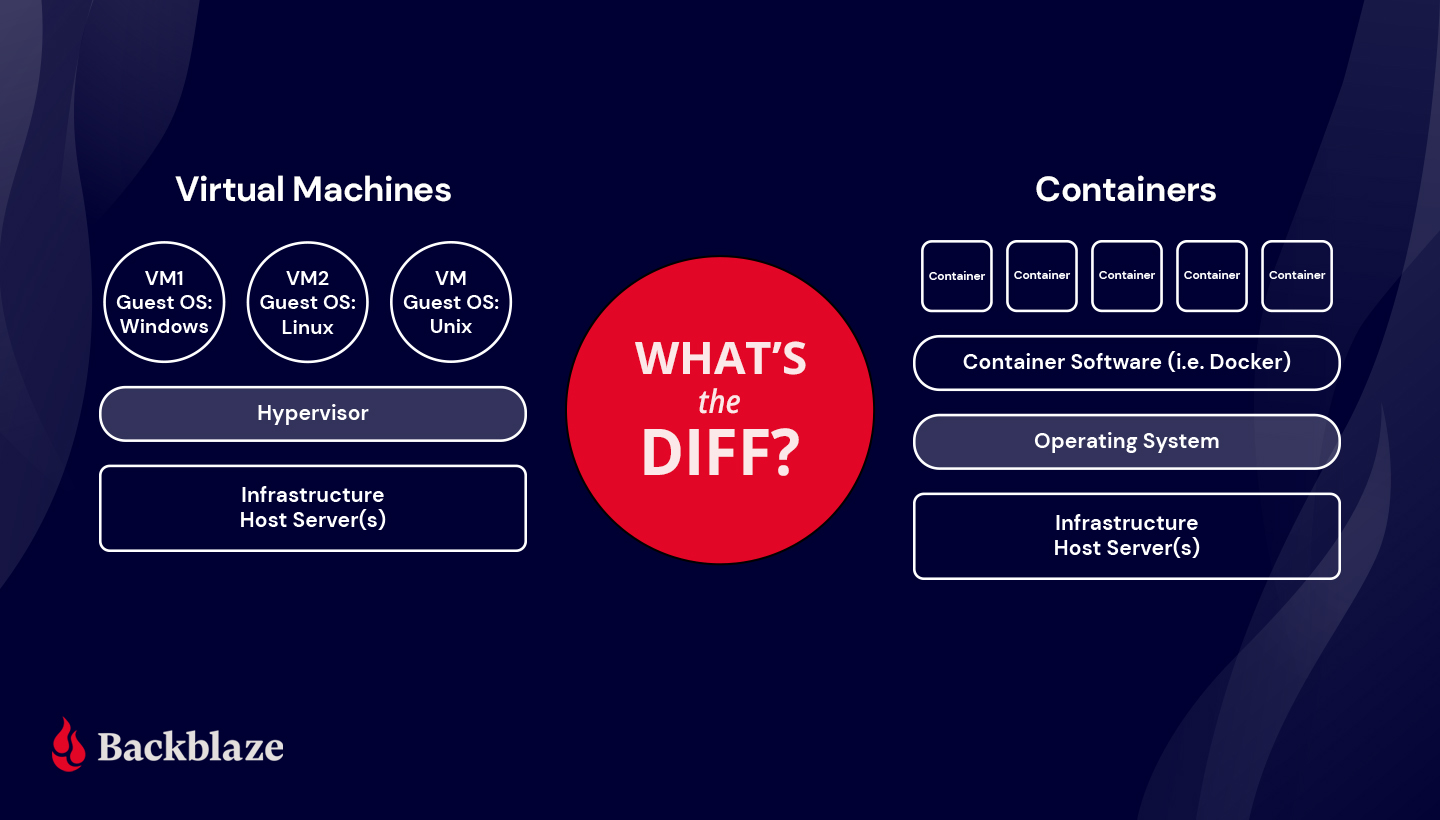
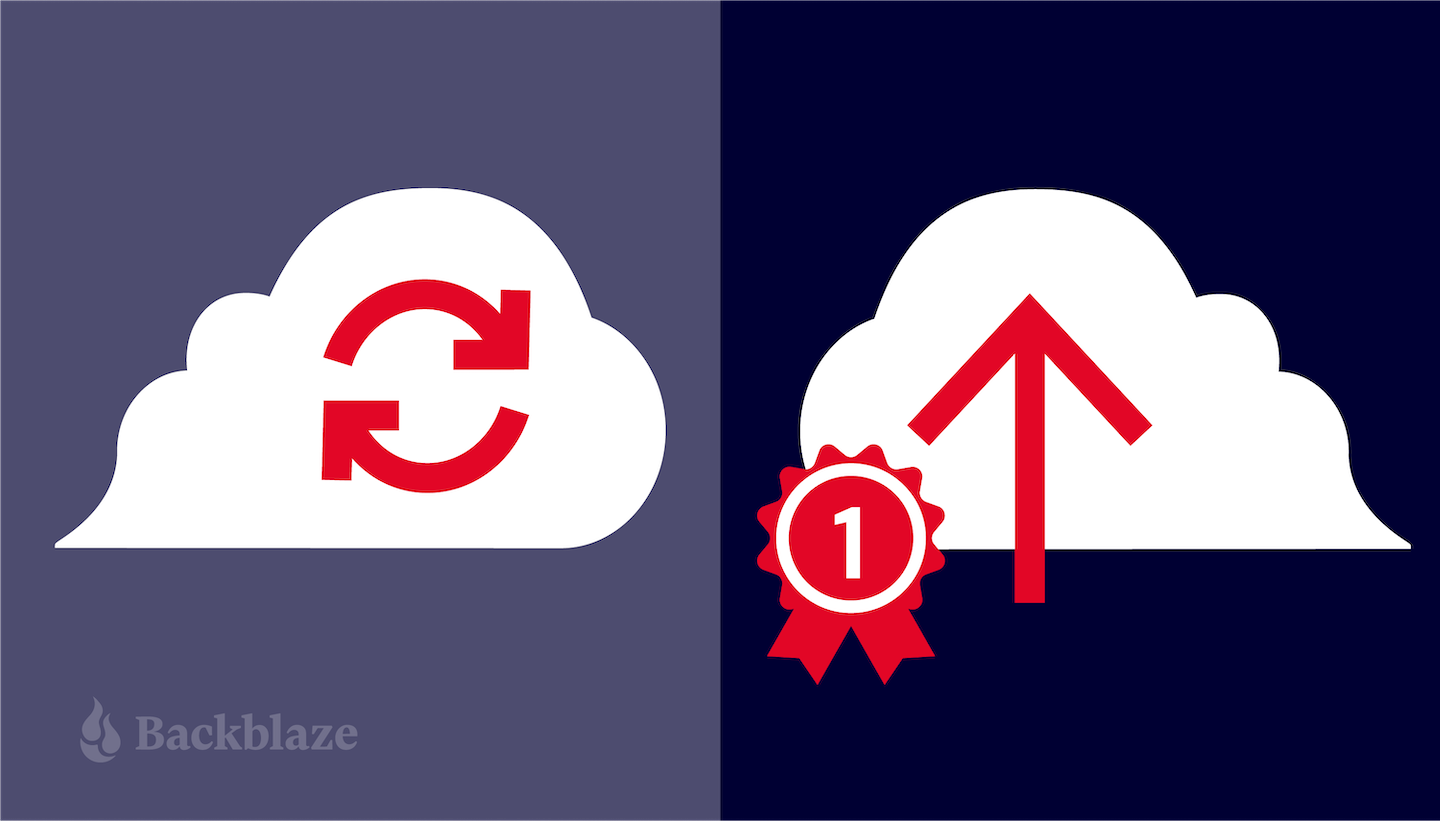


 filled with jokes, encouragement, and laughter. The interns were a ray of sunshine for the team, and I will never forget how relieved I was halfway through the internship that we had made this commitment.