Raspberry Pi 400 hasn’t even celebrated its first birthday yet (remember the launch in November?), but at only 249 days old, it already has ten variants to choose from.
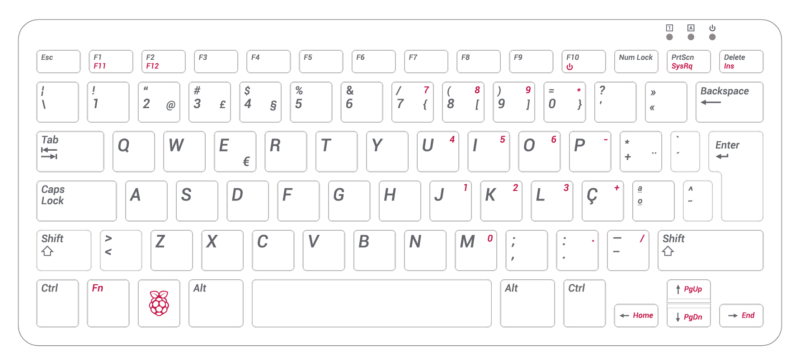
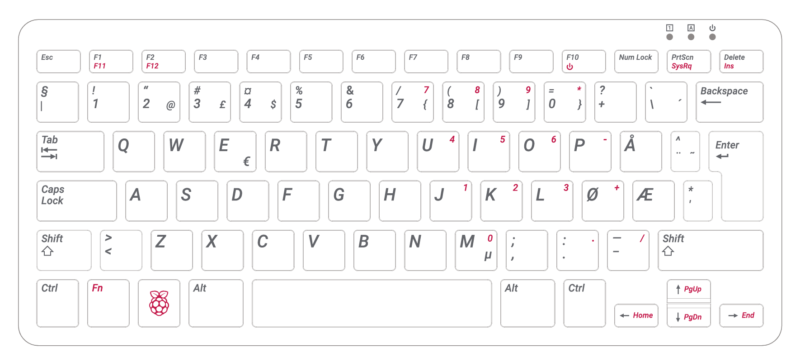
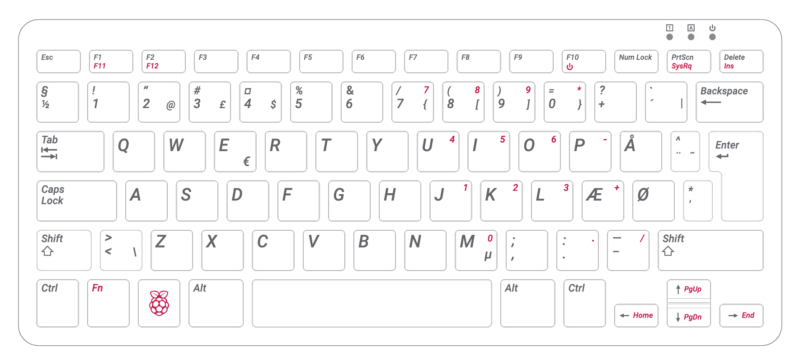
At launch, users could choose between English (UK and US), French, Italian, German, and Spanish keyboard layouts, and the new variants support Portuguese, Danish, Swedish and Norwegian. With a variant for Japan coming soon, Raspberry Pi 400 will soon be available with the same range of layouts as our official keyboard.
The nail varnish that shook the internet
Can we see?
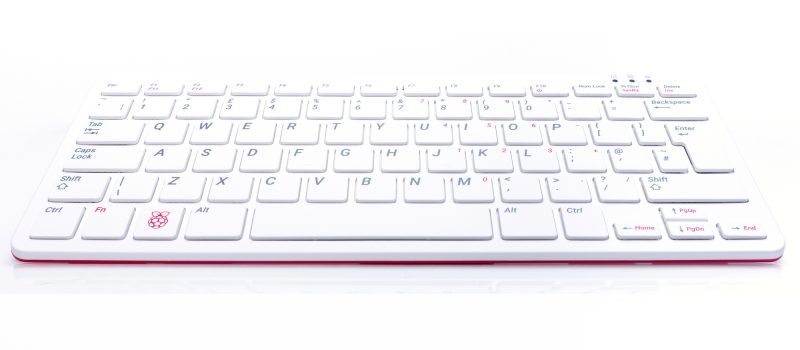
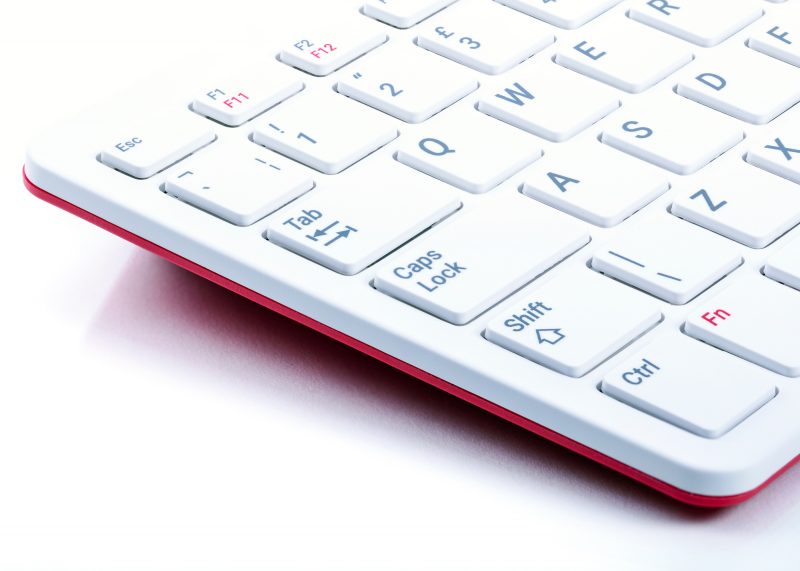
Here are the keyboard layouts of the four new variants, so you can take a closer look.
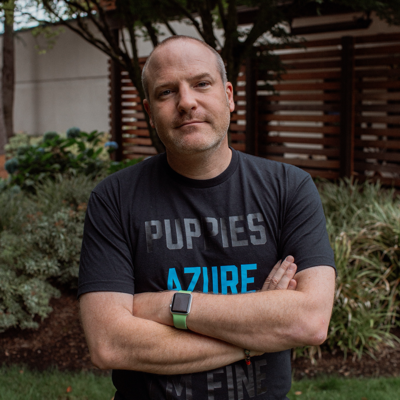
We have a special blog today from one of our own design engineers, Simon Martin. He’s the designer of Raspberry Pi 400 and our High Quality Camera and spends his free time tinkering with electronic music.
This video is a classic. Settle in…
Simon has wanted to make his own electronic musical instrument with Raspberry Pi for some time. He designed a circuit board for the project a year ago, but it lay around in a drawer in his desk while he finished Raspberry Pi 400. Finally, the winter months gave him the incentive to get it working.
Simon’s electronic musical journey
Simon: The Synth6581 device doesn’t look much like an electronic musical instrument, but just like circuit boards stacked on top of a Raspberry Pi 4. You have to plug a musical keyboard into a USB port and a pair of speakers into the audio jack on the bottom board to make it work.
Hefty stack ready to play some electronic music
The code is written almost entirely in Python, with a little bit of C to speed up the communications to the chips. I designed and laid out the circuit boards, which were ordered online. The first six boards cost only £20, but the components were another £100. I spent more than a day soldering the components on the boards by hand. It took much more time to check every chip and connection worked, a common problem with hand-soldering new boards.
Synth6581 — no ordinary sounding instrument
The 1982 Commodore 64 – works like Raspberry Pi 400, only slower
And Synth6581 is no ordinary sounding musical instrument. It’s based on the music chip inside a vintage computer: the Commodore 64. The microchips are almost forty years old and they have a quirky sound that kids in the 1980s loved and parents hated. By the way, did you know that the Commodore 64 was the inspiration for Raspberry Pi 400?
The SID chip sound
The MOS6581 SID chip — just a little smaller than a Raspberry Pi Pico board
I was one of many hobby programmers in the 1980s that used to attempt to program Commodore 64s. Much like people today dabble with programming on Raspberry Pi 400s, kids and adults were dabbling with the BASIC programming language on their Commodore 64s back then. Nowadays, Raspberry Pis have video, graphics, and audio readily available, but back in the 1980s, the hardware registers had to be ‘poked’ one by one into the console window. You had to get quite technical just to get the computer to make a musical sound. Those sounds came from the MOS6581 or ‘SID’ chip. It had such a famous sound character that it formed the basis of the chiptune music genre, and people are still writing music on Commodore 64s today.
Using BASIC POKE commands to control SID chips on a Commodore 64. Not the easiest thing to read.
Poking SID chips
By borrowing a few chips from broken Commodore 64s, including one or two lying around Raspberry Pi Towers, I made those 1980s ping noises into a polyphonic synthesiser controlled in Python on Raspberry Pi. The registers in the SID chips are simply being ‘poked’ by Raspberry Pi instead of Commodore 64. I also reverse-engineered the music from old games and made the sound effects and instruments work across the keyboard.
Simon with his electronic music creation
One of a kind electronic musical device
This device is unique: only one of these will ever be built, so please don’t wait for a launch date. There were over 10 million chips manufactured for Commodore 64, but production of the chips ended nearly 30 years ago. The Commodore 64s and spare parts for them are still in high demand, which is pushing up second hand prices. Nonetheless, the code and schematics are available online on GitHub, and I invite other Raspberry Pi users to use them to make musical instruments out of other games consoles. I reckon Sega Megadrive has a lot of potential for a Raspberry Pi port…
A few of the demos of the electronic instrument on Simon’s YouTube channel
The upside of headless is that my Raspberry Pi can be anywhere, not tied to a monitor, keyboard and mouse. The downside is programming and debugging it – do you plug your Raspberry Pi into a monitor and run the full Raspberry Pi OS desktop, or do you use Raspberry Pi OS Lite and try to program and debug over SSH using the command line? Or is there a better way?
Remote development with VS Code to the rescue
There is a better way – using Visual Studio Code remote development! Visual Studio Code, or VS Code, is a free, open source, developer’s text editor with a whole swathe of extensions to support you coding in multiple languages, and provide tools to support your development. I practically live day to day in VS Code: whether I’m writing blog posts, documentation or Python code, or programming microcontrollers, it’s my work ‘home’. You can run VS Code on Windows, macOS, and of course on a Raspberry Pi.
One of the extensions that helps here is the Remote SSH extension, part of a pack of remote development extensions. This extension allows you to connect to a remote device over SSH, and run VS Code as if you were running on that remote device. You see the remote file system, the VS Code terminal runs on the remote device, and you access the remote device’s hardware. When you are debugging, the debug session runs on the remote device, but VS Code runs on the host machine.
Raspberry Pi 4
For example – I can run VS Code on my MacBook Pro, and connect remotely to a Raspberry Pi 4 that is running headless. I can access the Raspberry Pi file system, run commands on a terminal connected to it, access whatever hardware my Raspberry Pi has, and debug on it.
Remote SSH needs a Raspberry Pi 3 or 4. It is not supported on older Raspberry Pis, or on Raspberry Pi Zero.
Set up remote development on Raspberry Pi
For remote development, your Raspberry Pi needs to be connected to your network either by ethernet or WiFi, and have SSH enabled. The Raspberry Pi documentation has a great article on setting up a headless Raspberry Pi if you don’t already know how to do this.
You also need to know either the IP address of the Raspberry Pi, or its hostname. If you don’t know how to do this, it is also covered in the Raspberry Pi documentation.
Connect to the Raspberry Pi from VS Code
Once the Raspberry Pi is set up, you can connect from VS Code on your Mac or PC.
First make sure you have VS Code installed. If not, you can install it from the VS Code downloads page.
From inside VS Code, you will need to install the Remote SSH extension. Select the Extensions tab from the sidebar menu, then search for Remote development. Select the Remote Development extension, and select the Install button.
Next you can connect to your Raspberry Pi. Launch the VS Code command palette using Ctrl+Shift+P on Linux or Windows, or Cmd+Shift+P on macOS. Search for and select Remote SSH: Connect current window to host (there’s also a connect to host option that will create a new window).
Enter the SSH connection details, using user@host. For the user, enter the Raspberry Pi username (the default is pi). For the host, enter the IP address of the Raspberry Pi, or the hostname. The hostname needs to end with .local, so if you are using the default hostname of raspberrypi, enter raspberrypi.local.
The .local syntax is supported on macOS and the latest versions of Windows or Linux. If it doesn’t work for you then you can install additional software locally to add support. On Linux, install Avahi using the command sudo apt-get install avahi-daemon. On Windows, install either Bonjour Print Services for Windows, or iTunes for Windows.
For example, to connect to my Raspberry Pi 400 with a hostname of pi-400 using the default pi user, I enter [email protected].
The first time you connect, it will validate the fingerprint to ensure you are connecting to the correct host. Select Continue from this dialog.
Enter your Raspberry Pi’s password when promoted. The default is raspberry, but you should have changed this (really, you should!).
VS Code will then install the relevant tools on the Raspberry Pi and configure the remote SSH connection.
Code!
You will now be all set up and ready to code on your Raspberry Pi. Start by opening a folder or cloning a git repository and away you go coding, debugging and deploying your applications.
In the remote session, not all extensions you have installed locally will be available remotely. Any extensions that change the behavior of VS Code as an application, such as themes or tools for managing cloud resources, will be available.
Things like language packs and other programming tools are not installed in the remote session, so you’ll need to re-install them. When you install these extensions, you’ll see the Install button has changed to Install in SSH:< hostname > to show it’s being installed remotely.
VS Code may seem daunting at first – it’s a powerful tool with a huge range of extensions. The good news is Microsoft has you covered with lots of hands-on, self-guided learning guides on how to use it with different languages and development tools, from using Git version control, to developing web applications. There’s even a guide to learning Python basics with Wonder Woman!
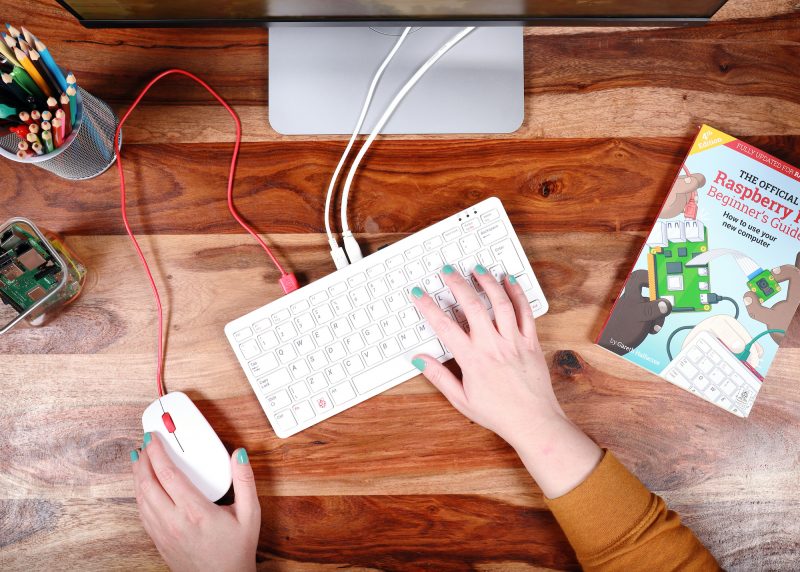
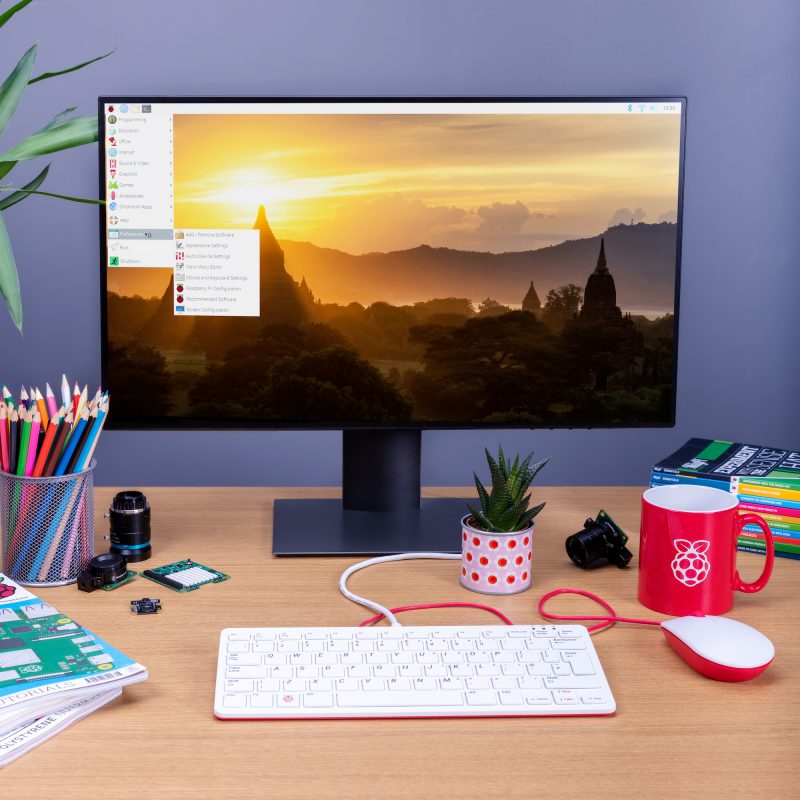
Did you get Raspberry Pi 400 as a home learning or working device? We hope you’ve been getting on well with our affordable all-in-one computing solution.
If you’re a new user, here are some tips for you to get the most out of your brand-new Raspberry Pi 400.
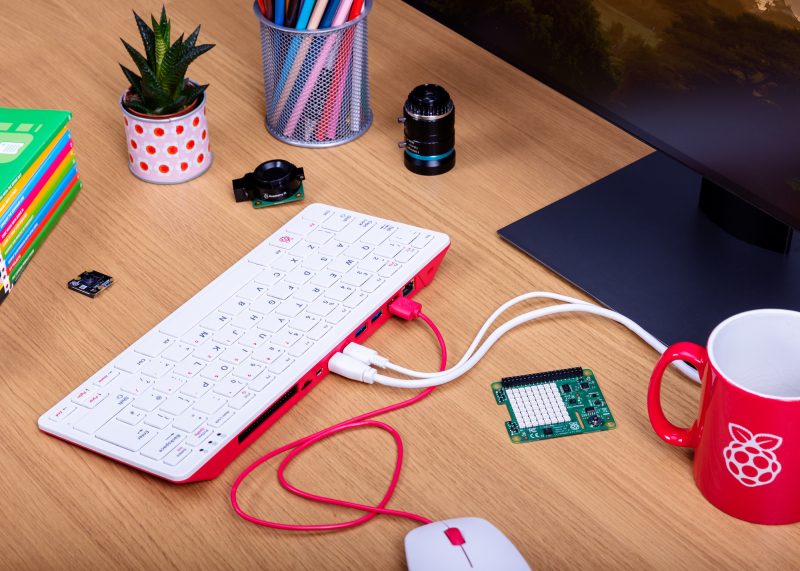
Does *anyone’s* home office desk look this tidy?..
First things first!
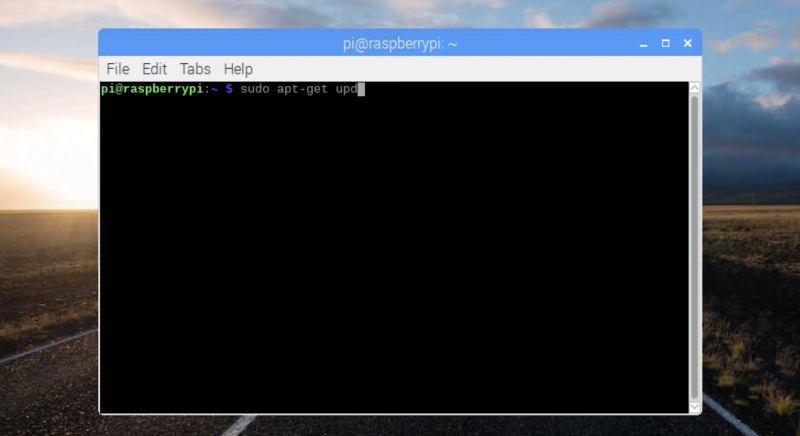
Make sure your Raspberry Pi runs the newest version of the Raspberry Pi OS. Here is how (and here is a video preview of what the process looks like):
Open a terminal window by clicking on the Terminal icon in the top menu bar. Then type this command in the terminal window:
sudo apt update
Press Enter on the keyboard. Once the update is downloaded, type into the window:
sudo apt full-upgrade
Press Enter again. It is safe to just accept the default answer to any questions you are asked during the procedure by typing y and pressing Enter.
Just log in with your username and password and start working or learning!
Raspberry Pi OS also has LibreOffice installed for working with text files, spreadsheets, and the like.
Printing on your Raspberry Pi
Go into the Preferences section in the main menu, and open Print Settings. This shows the system-config-printer dialog window, where you can do the usual things you’re familiar with from other operating systems: add new printers, remove old ones, set a printer as the default, and access the print queue for each printer.
Like most things in Linux-based operating systems such as Raspberry Pi OS, whether you can make your printer model work depends on user contributions; not every printer is supported yet. We’ve found that most networked printers work fine, while USB printers are a bit hit-and-miss. The best thing to do is to try it and see, and ask for help on our forums if your particular printer doesn’t seem to work.
More tips for using Raspberry Pi as a home computer
Our very own Alasdair Allen wrote a comprehensive guide that covers more topics of setting up a Raspberry Pi for home working, from getting your audio and video ready to setting up a Citrix workspace. Thanks Alasdair!
Free resources for learning at home
We’ve got a host of completely free resources for young people, parents, and teachers to continue computing school lessons at home and learn about digital making. Discover them all here!
What do you need?
Let us know in the comments if there are any niggles you’re experiencing, or if you have a top tip to help others who are just getting to grips with using Raspberry Pi as a home learning or working device.
To round off Computer Science Education Week 2020, the Google Code Next team, working with the Raspberry Pi Foundation and some incredible volunteers in the Chicago area, helped over 400 Black and Latinx high school students get coding using Raspberry Pi 400. Here’s Omnia Saed with more.
In partnership with Google Code Next, the Raspberry Pi Foundation curated a computer science activity for over 400 Chicago Public Schools students. Over 1000 kits with the newly released Raspberry Pi 400 were sent to six public schools to mark the end of Computer Science Education Week (7-14 December).
— Kelly College Prep SkillsUSA (@Kelly_SkillsUSA) December 8, 2020
Google Code Next
Google Code Next is a free computer science education program for Black and Latinx high school students. Between 2011 and 2018, Black and Hispanic college students each only made up 3 percent of computer science graduates; Code Next works to change that. The program provides students with the skills and inspiration needed for long and rewarding careers in computer science.
“We aim to provide Black and Latinx students with skills and technical social capital — that web of relationships you can tap into,” said Google Diversity STEM Strategist Shameeka Emanuel.
The main event
The virtual event brought over 80 Google volunteers, students and teachers together to create their very own “Raspimon”—a virtual monster powered by Raspberry Pi. For many students, it was their first time coding.
Matt Richardson, Executive Director of the Raspberry Pi Foundation North America, opened the event by telling students to share their work with family and friends.
“I hope you find new ways to solve problems or express yourselves creatively. More importantly, be sure to share what you create with someone you know – you might just spark curiosity in someone else,” he said.
— Kelly College Prep SkillsUSA (@Kelly_SkillsUSA) December 9, 2020
In an interview with the Chicago Sun Times, Troy Williams, Chicago Public Schools interim director of computer science, explains, “Our students being able to have access to these Raspberry Pis and other resources supplements the learning they’re doing in the classrooms, and brings another level of engagement where they can create on their own. It really helps toward closing the digital divide and the learning gap as well.”
Want to join in with the fun? You’ll find a copy of the activity and curriculum on the Code Next website.
And if you’re looking to introduce someone to coding over the holidays, there’s still time to order a Raspberry Pi 400 computer kit from our network of Raspberry Pi Approved Resellers.
It’s been a journey, but it’s finally here, and I can talk about the secret Raspberry Pi 400 project! I’ll also try to cover some of the questions you asked following Eben’s announcement of Raspberry Pi 400 yesterday.
Four years in the making
It’s been over four years since the original idea of a Raspberry Pi inside a keyboard was discussed, before I even started working at Raspberry Pi Towers. Initially, the plan was for a kit with all the parts needed for people simply to open the box and get started by connecting the accessories to a “classic” credit-card sized Raspberry Pi. The challenge was that we needed a mouse and a keyboard: if we could manufacture a mouse and a keyboard, we could make a complete kit. How hard could it be? Then, within a day of our announcing our new keyboard and mouse, we saw a blog from someone who had milled out the keyboard and integrated a Raspberry Pi 3 Model A+ into it.
Our jaws dropped – we were impressed but we couldn’t say a word. Then others did the same with a Raspberry Pi Zero, and by that point we kind of expected that. We knew it was a good idea.
The keyboard and mouse were the big things we needed to sort out: once the quality control and supply chain were in place for those, we could move to fitting keyboard matrices to Raspberry Pi 400s, and achieve final assembly in Sony’s manufacturing facility in Wales. We had first planned to make a Raspberry Pi 3-based version, but it was clear that getting such a complex item into product wouldn’t happen until after we’d launched Raspberry Pi 4, and this would make the new product seem like a runner-up. So, instead, we started work on the Raspberry Pi 4-based version as soon as the design for that was finalised.
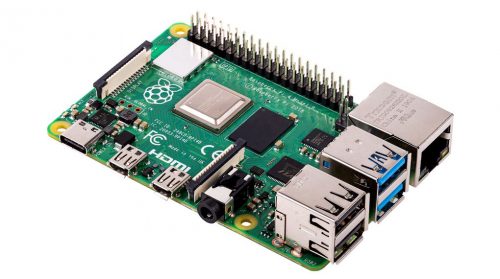
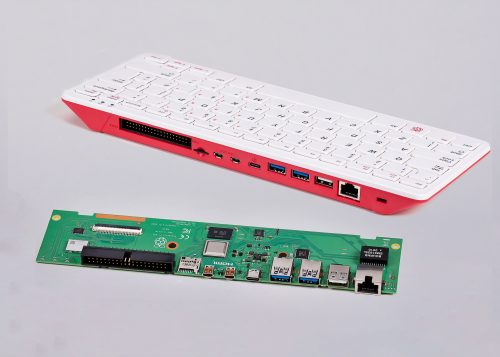
A fresh, new Raspberry Pi 4
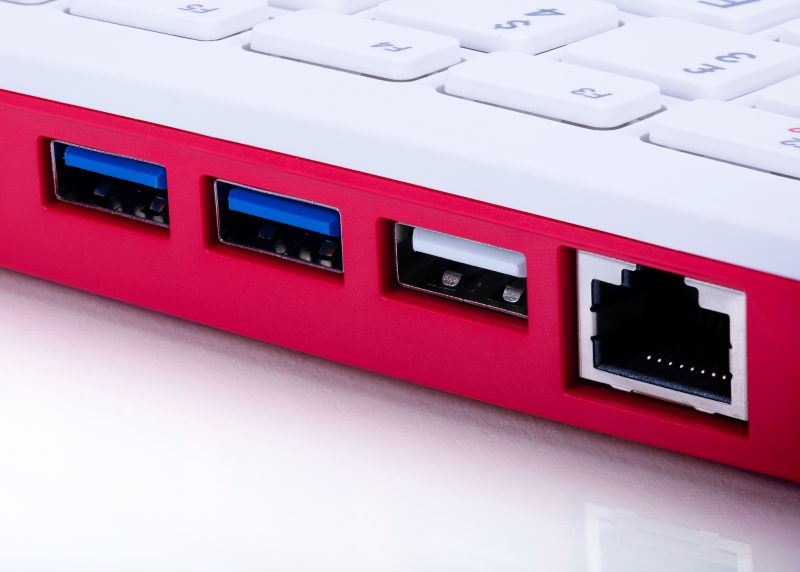
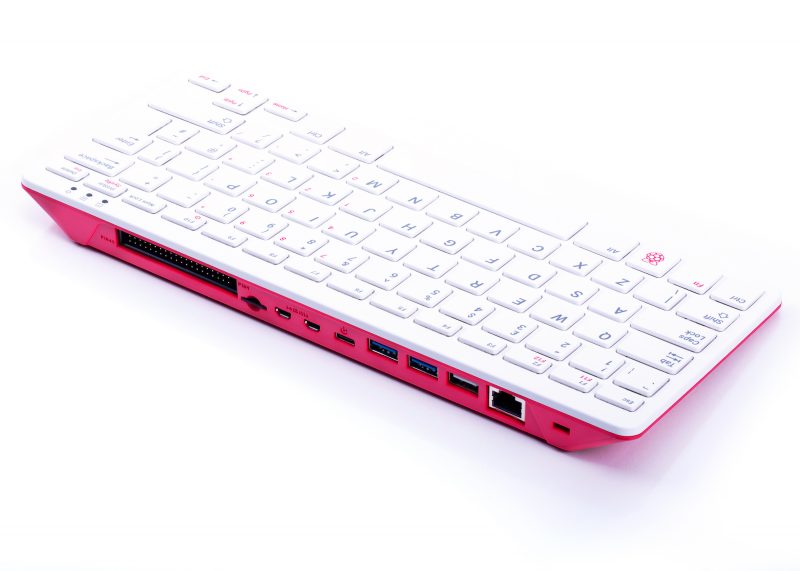
The board inside the housing is essentially a Raspberry Pi 4 unit, but with a fresh PCB design. It has the same USB and Ethernet system as the Raspberry Pi 4, but one of the USB2.0 ports is dedicated to the keyboard.
Left-handed?
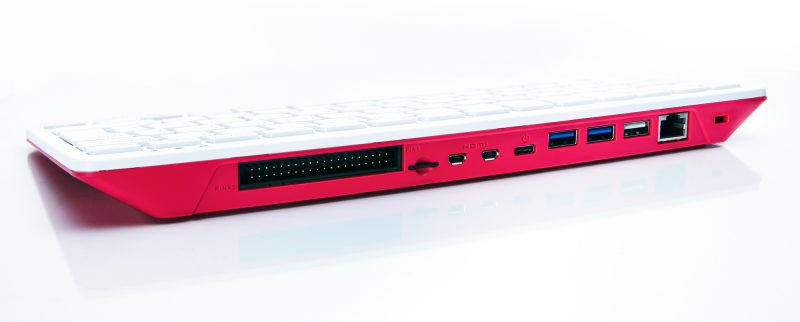
We have already seen a few comments about the USB ports being on the left side of the unit, and the fact that this makes the mouse cable cross over for most right-handed users. The PCB shape had to be defined early on so that the industrial designers could get on with the housing design, and I then stared endlessly at the PCB layout, trying to get one of the USB ports to route to the right side without wrecking the signal integrity of the memory or the HDMI; I could not find a way to do this. Left-handed folks and Bluetooth mouse-owners will be happy at least!
Micro HDMI
Raspberry Pi 400 has dual-band 802.11b/g/n/ac wireless LAN and Bluetooth 5.0. Like Raspberry Pi 4, it has dual micro HDMI output which achieves up to 4K video. It would have been be lovely to have had full-size HDMI connectors, but in order to achieve this we would have to remove other functions, or make a bulkier unit. However, the kit does come with a micro HDMI-to-HDMI cable to cheer you all up.
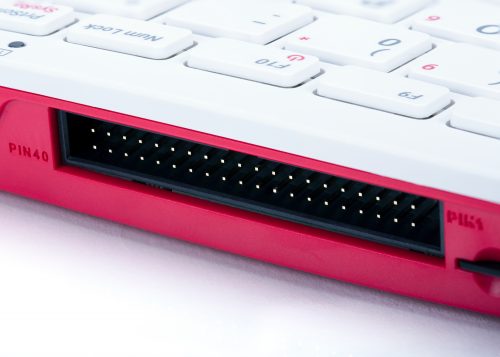
We kept the GPIO connector since it is loved so much by beginners and experts alike, and this is after all a Raspberry Pi – we want people to be able to use it for tinkering and prototyping. The HAT functionality works better with an extender cable, which you can buy from numerous websites.
1.8GHz!
Raspberry Pi 400 has the same circuit layout of the power management, processor, and memory as Raspberry Pi 4, but with one major difference: we’ve adjusted the operating point to 1.8GHz! And did I mention cooling? We’ve solved the cooling challenge so users don’t have to give this any thought. Raspberry Pi 400 contains a heat spreader that dissipates the heat across the whole unit, front and back, so that no part of it will feel too hot to touch. In fact, there is enough thermal margin to overclock it, if you’re so inclined.
Why not the Compute Module?
Some folks have asked us why we did not fit the Raspberry Pi Compute Module inside. The reason is that above a certain scale, it generally makes more sense to go with a custom PCB rather than a module with a carrier board. With hundreds of thousands of Raspberry Pi 400 units in the first instance, we are above that scale.
Turn it off and on again
We also have a feature that is completely new to Raspberry Pi products: an on/off button! Power off is achieved by pressing Fn+F10. This is a soft control that negotiates with Linux to shut down, so you don’t corrupt your memory card or your USB drive. Power can be restored by holding down F10 (or Fn+F10) for two seconds.
Prototyping
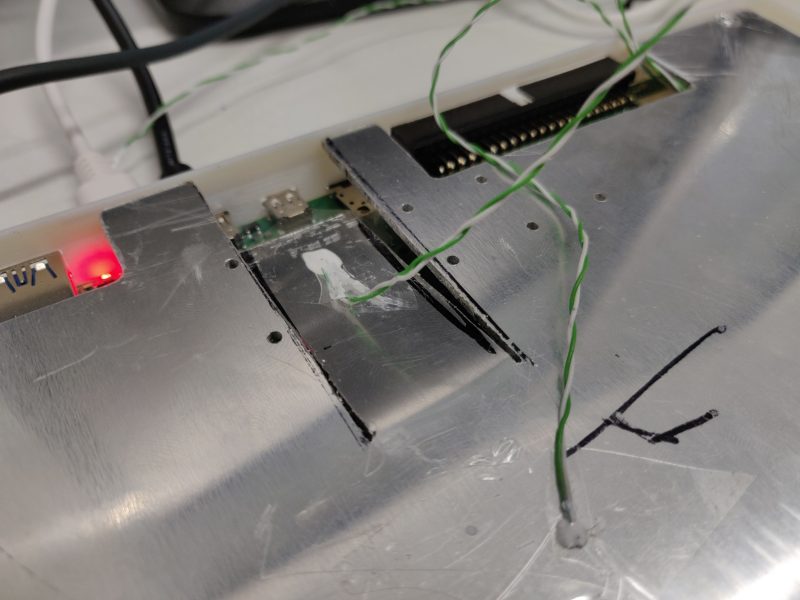
An early unit going through thermal analysis
A lot of love went into making this the best possible product we can manufacture, and it has been through extensive alpha testing and compliance testing. I thought I would show you the insides of a very early prototype. There are already some teardown videos online if you want to see how Raspberry Pi 400 is put together; it has not changed much from this:
Inside one of the first Raspberry Pi 400 units – 3D-printed and CNC-machined. ~£1500 each to build!
Raspberry Pi 400 kit
The official Raspberry Pi mouse has been a lovely product to have available where Raspberry Pi 400 is concerned, because now we can provide a complete kit of official matching Raspberry Pi parts that looks fantastic on your desk. The kit comes with the SD card already programmed and inserted, so on Christmas day, you just need to plug it into the family TV and start coding. No frantic searches for somewhere that sells memory cards!
The kit includes:
Raspberry Pi 400 computer with choice of six keyboard countries (more to follow)
Official Raspberry Pi mouse
Raspberry Pi USB-C DC power source, with adaptors for each country
SD card ready-fitted in the unit with the latest software release installed
micro HDMI to HDMI cable
Jewel box to store the SD card
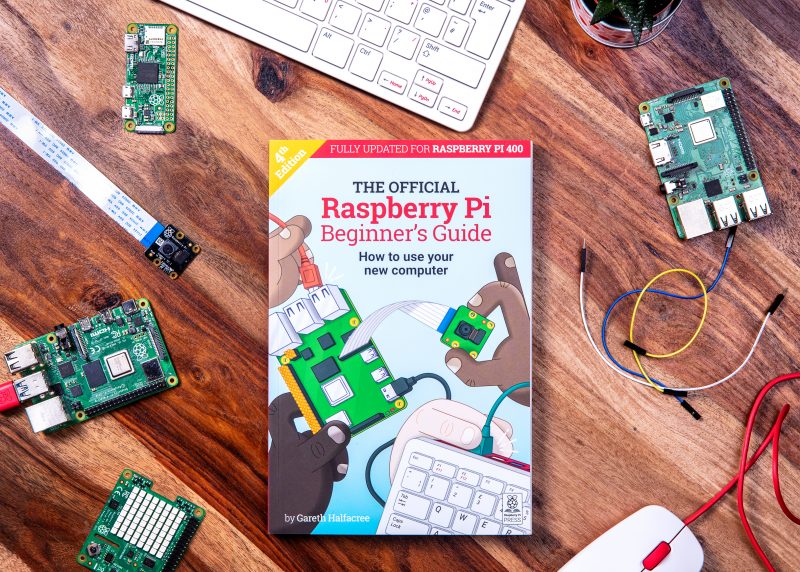
Fourth-edition Raspberry Pi Beginner’s Guide book with instructions for getting started with Raspberry Pi 400, as well as loads of things you can do with it
Ode to Commodore
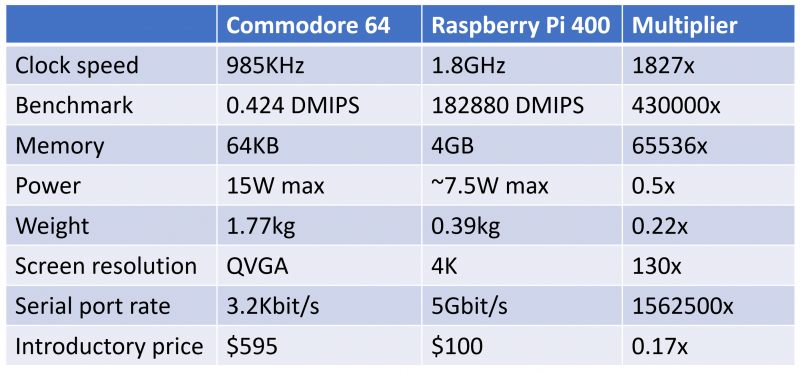
Finally, a bit of fun to finish with. On Christmas morning 1985, I opened the polystyrene box of a Commodore 64 computer and the world switched on for me. It had the best games and the best sound, and it was easy to program. We think the combination of gaming and programming still works today, but we’ve come a long way since 1985. Here’s a chart to show how a Commodore 64 and a Raspberry Pi 400 compare.
I particularly like the benchmark increase for less than half the power. This makes Raspberry Pi 4 almost a million times more efficient at processing data.
We do hope this bring smiles to the faces of those fortunate enough to get one by Christmas. The factory has been running flat-out for the last two months building up stock – order yours soon though, since they’ll sell quickly!
Special thanks to…
Alwyn Roberts, Andy Liu, Anthony Morton, Antti Silventoinen, Austin Su, Ben Stephens, Brendan Moran, Craig Wightman, Daniel Thompsett, David Christie, David John, David Lenton, Dominic Plunkett, Eddie Thorn, Gordon Hollingworth, Helen Marie, Jack Willis, James Adams, Jeremy Wang, Joe Whaley, Keiran Abraham, Keri Norris, Kuanhsi Ho, Laurent Le Mentec, Mandy Oliver, Mark Evans, Michael Howells, Mike Buffham, Mike Unwin, Peter Challis, Phil Elwell, Rhys Polley, Richard Jones, Rob Matthews, Roger Thornton, Sherman Liu, Simon Lewis, Simon Oliver, Tim Gover, Tony Jones, Viktor Lundström, Wu Hairong, and all the alpha testers and resellers who made Raspberry Pi 400 possible.
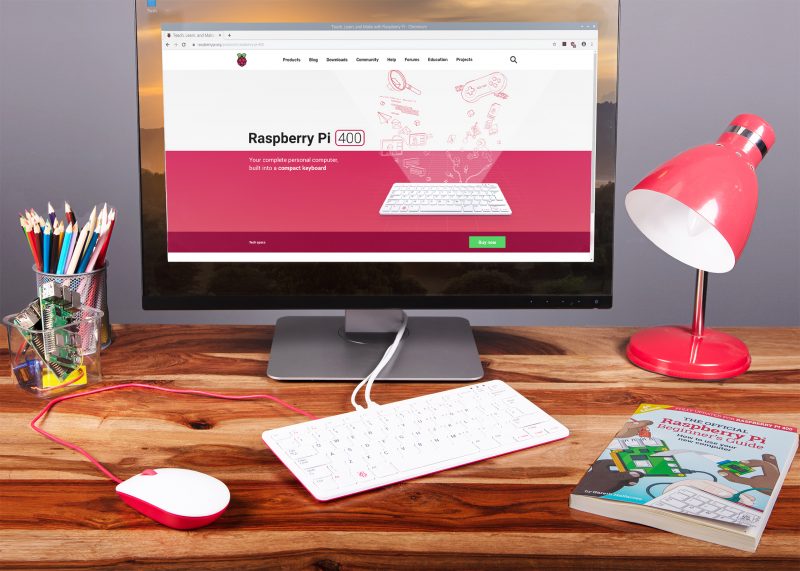
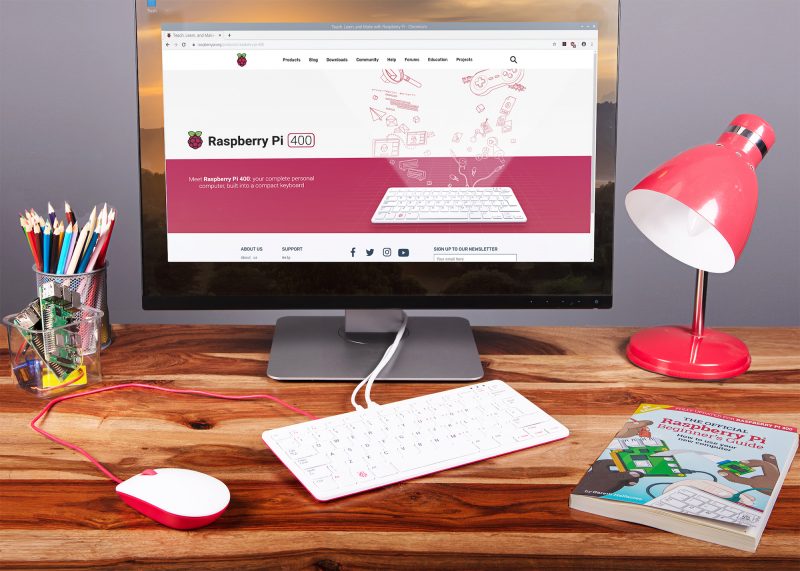
Raspberry Pi has always been a PC company. Inspired by the home computers of the 1980s, our mission is to put affordable, high-performance, programmable computers into the hands of people all over the world. And inspired by these classic PCs, here is Raspberry Pi 400: a complete personal computer, built into a compact keyboard.
Raspberry Pi 4, which we launched in June last year, is roughly forty times as powerful as the original Raspberry Pi, and offers an experience that is indistinguishable from a legacy PC for the majority of users. Particularly since the start of the COVID-19 pandemic, we’ve seen a rapid increase in the use of Raspberry Pi 4 for home working and studying.
But user friendliness is about more than performance: it can also be about form factor. In particular, having fewer objects on your desk makes for a simpler set-up experience. Classic home computers – BBC Micros, ZX Spectrums, Commodore Amigas, and the rest – integrated the motherboard directly into the keyboard. No separate system unit and case; no keyboard cable. Just a computer, a power supply, a monitor cable, and (sometimes) a mouse.
Raspberry Pi 400
We’ve never been shy about borrowing a good idea. Which brings us to Raspberry Pi 400: it’s a faster, cooler 4GB Raspberry Pi 4, integrated into a compact keyboard. Priced at just $70 for the computer on its own, or $100 for a ready-to-go kit, if you’re looking for an affordable PC for day-to-day use this is the Raspberry Pi for you.
Buy the kit
The Raspberry Pi 400 Personal Computer Kit is the “Christmas morning” product, with the best possible out-of-box experience: a complete PC which plugs into your TV or monitor. The kit comprises:
A Raspberry Pi 400 computer
Our official USB mouse
Our official USB-C power supply
An SD card with Raspberry Pi OS pre-installed
A micro HDMI to HDMI cable
The official Raspberry Pi Beginner’s Guide
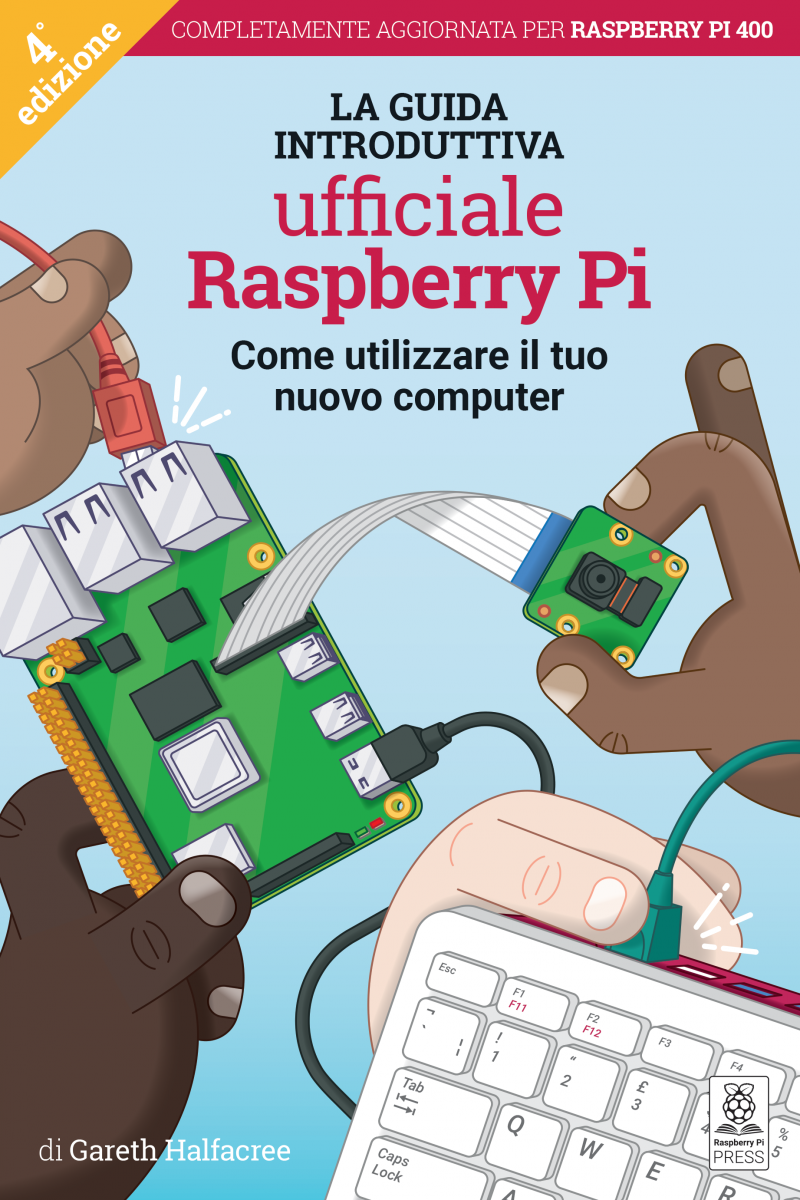
At launch, we are supporting English (UK and US), French, Italian, German, and Spanish keyboard layouts, with (for the first time) translated versions of the Beginner’s Guide. In the near future, we plan to support the same set of languages as our official keyboard.
Buy the computer
Saving money by bringing your own peripherals has always been part of the Raspberry Pi ethos. If you already have the other bits of the kit, you can buy a Raspberry Pi 400 computer on its own for just $70.
Buy the book
To accompany Raspberry Pi 400, we’ve released a fourth edition of our popular Raspberry Pi Beginner’s Guide, packed with updated material to help you get the most out of your new PC.
You can buy a copy of the Beginner’s Guide today from the Raspberry Pi Press store, or download a free PDF.
Where to buy Raspberry Pi 400
UK, US, and French Raspberry Pi 400 kits and computers are available to buy right now. Italian, German, and Spanish units are on their way to Raspberry Pi Approved Resellers, who should have them in stock in the next week.
We expect that Approved Resellers in India, Australia, and New Zealand will have kits and computers in stock by the end of the year. We’re rapidly rolling out compliance certification for other territories too, so that Raspberry Pi 400 will be available around the world in the first few months of 2021.
Of course, if you’re anywhere near Cambridge, you can head over to the Raspberry Pi Store to pick up your Raspberry Pi 400 today.
What does everyone else think?
We let a handful of people take an early look at Raspberry Pi 400 so they could try it out and pull together their thoughts to share with you. Here’s what some of them made of it.
Simon Martin, who has spent the last couple of years bringing Raspberry Pi 400 to life, will be here tomorrow to share some of the interesting technical challenges that he encountered along the way. In the meantime, start thinking about what you’ll do with your Raspberry Pi PC.
To provide the best experiences, we use technologies like cookies to store and/or access device information. Consenting to these technologies will allow us to process data such as browsing behavior or unique IDs on this site. Not consenting or withdrawing consent, may adversely affect certain features and functions.
Functional
Always active
The technical storage or access is strictly necessary for the legitimate purpose of enabling the use of a specific service explicitly requested by the subscriber or user, or for the sole purpose of carrying out the transmission of a communication over an electronic communications network.
Preferences
The technical storage or access is necessary for the legitimate purpose of storing preferences that are not requested by the subscriber or user.
Statistics
The technical storage or access that is used exclusively for statistical purposes.The technical storage or access that is used exclusively for anonymous statistical purposes. Without a subpoena, voluntary compliance on the part of your Internet Service Provider, or additional records from a third party, information stored or retrieved for this purpose alone cannot usually be used to identify you.
Marketing
The technical storage or access is required to create user profiles to send advertising, or to track the user on a website or across several websites for similar marketing purposes.