Tag Archives: Raspberry Pi 4

Digital making with Raspberry Pis in primary schools in Sarawak, Malaysia

Post Syndicated from Jenni Fletcher-McGrady original https://www.raspberrypi.org/blog/computing-education-primary-schools-sarawak-malaysia/

Dr Sue Sentance, Director of our Raspberry Pi Computing Education Research Centre at the University of Cambridge, shares what she learned on a recent visit in Malaysia to understand more about the approach taken to computing education in the state of Sarawak.

Dr Sue Sentance

Computing education is a challenge around the world, and it is fascinating to see how different countries and education systems approach it. I recently had the opportunity to attend an event organised by the government of Sarawak, Malaysia, to see first-hand what learners and teachers are achieving thanks to the state’s recent policies.

Raspberry Pis and training for Sarawak’s primary schools

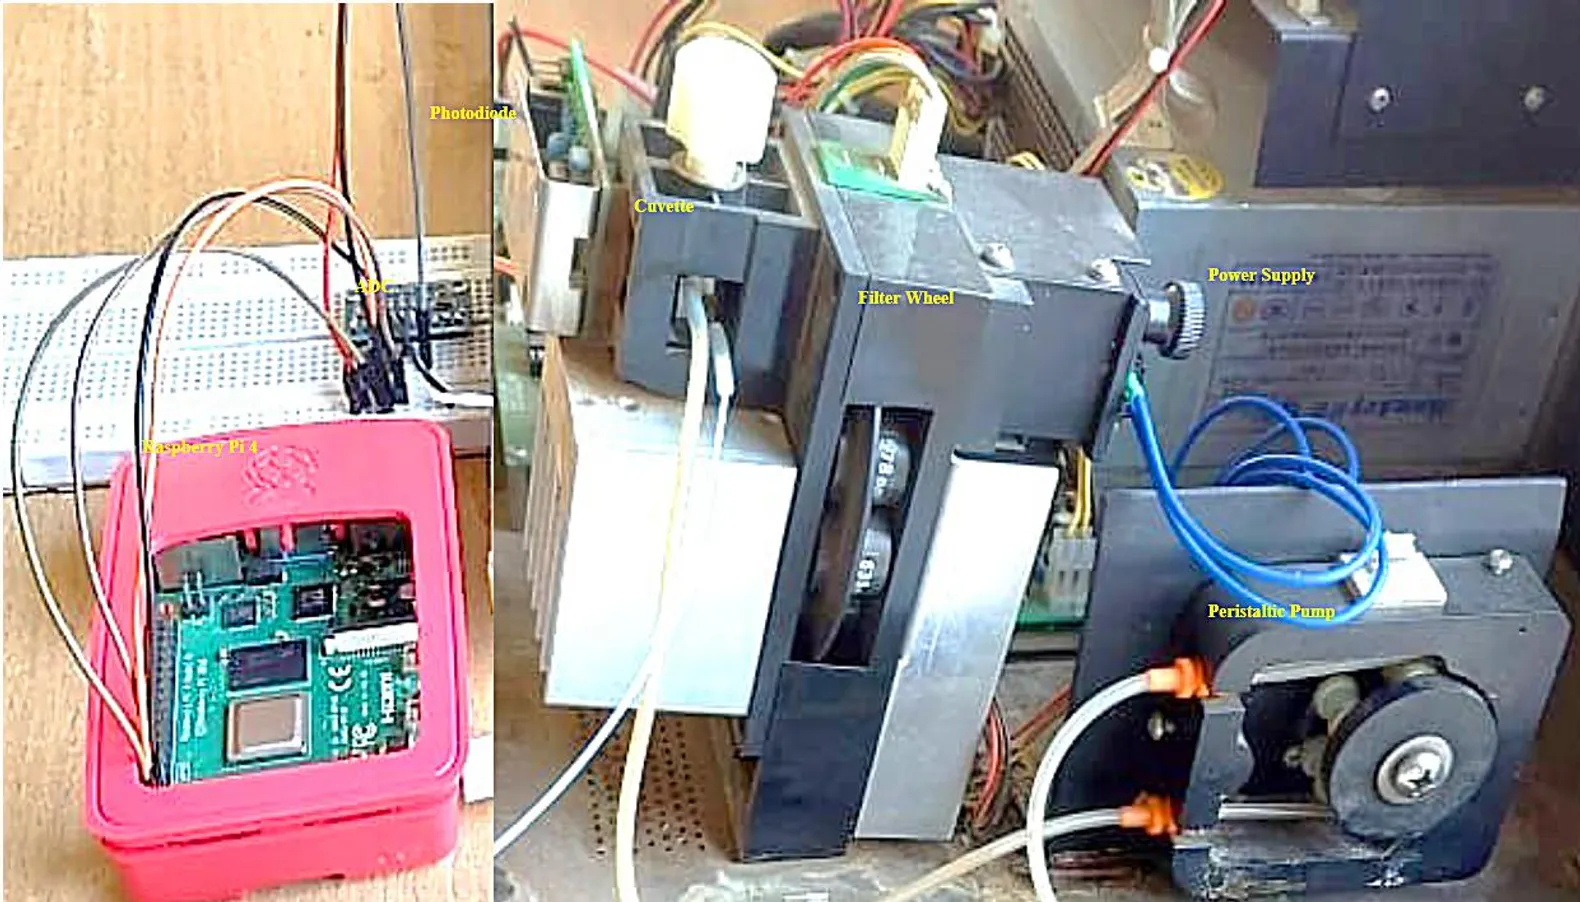
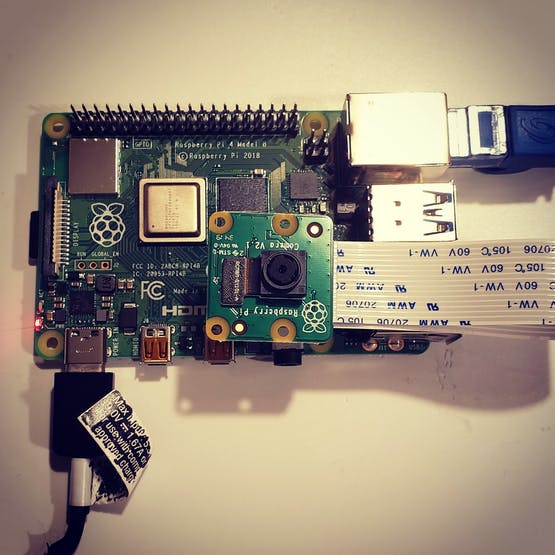
In Sarawak, the largest state of Malaysia, the local Ministry of Education, Innovation and Talent Development is funding an ambitious project through which all of Sarawak’s primary schools are receiving sets of Raspberry Pis. Learners use these as desktop computers and to develop computer science skills and knowledge, including the skills to create digital making projects.

The state of Sarawak, Malaysia circled on a map.
Sarawak is the largest state of Malaysia, situated on the island of Borneo

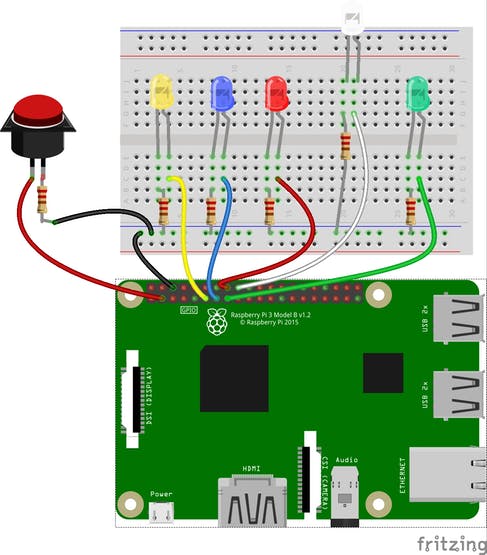
Crucially, the ministry is combining this hardware distribution initiative with a three-year programme of professional development for primary school teachers. They receive training known as the Raspberry Pi Training Programme, which starts with Scratch programming and incorporates elements of physical computing with the Raspberry Pis and sensors.

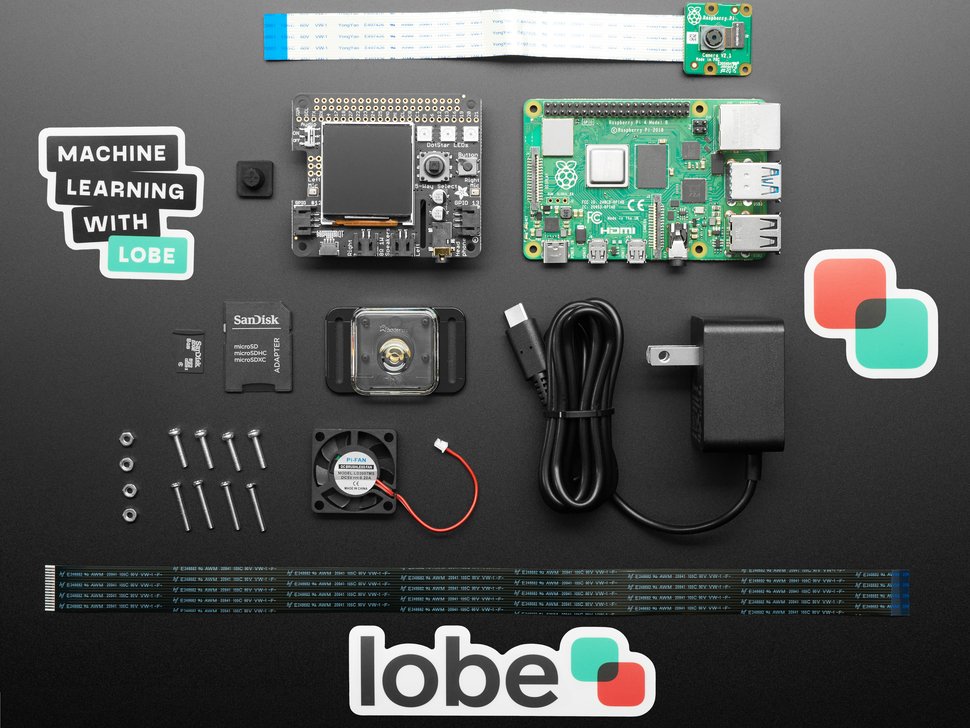
To date the project has provided 9436 kits (including Raspberry Pi computer, case, monitor, mouse, and keyboard) to schools, and training for over 1200 teachers.

The STEM Trailblazers event

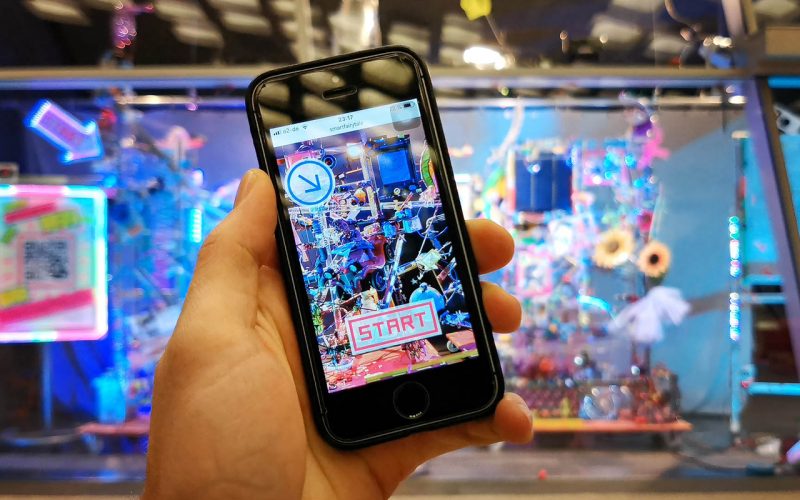
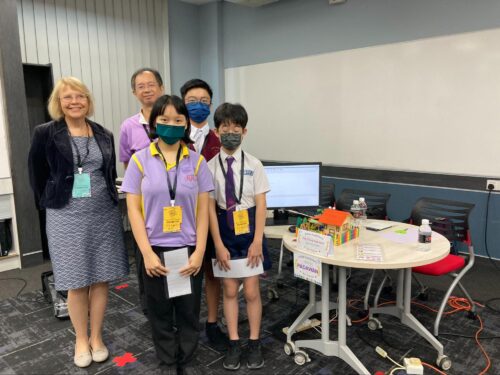
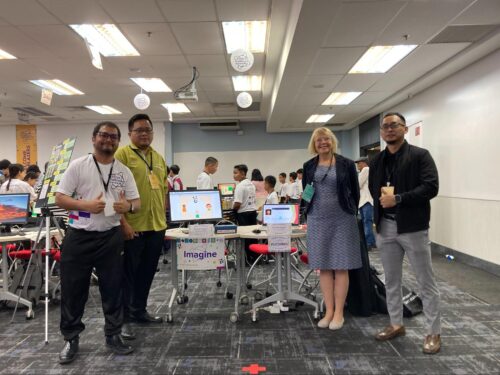
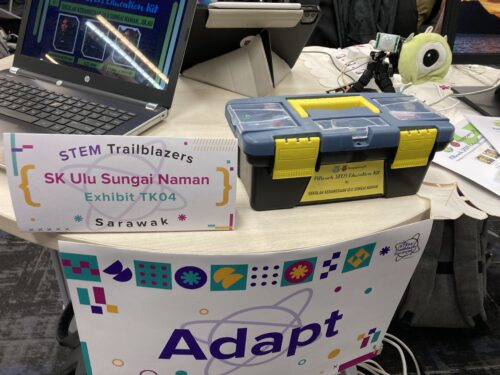
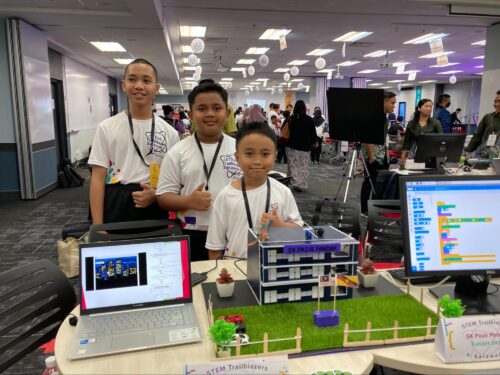
In order to showcase what has been achieved through the project so far, students and teachers were invited to use their schools’ Raspberry Pis to create projects to prototype solutions to real problems faced by their communities, and to showcase these projects at a special STEM Trailblazers event.

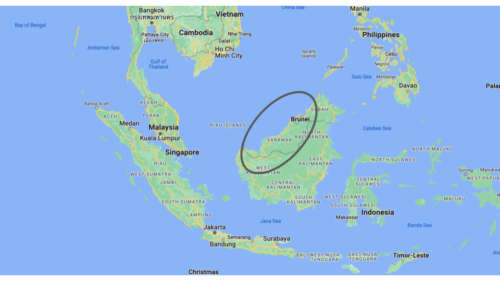
Geographically, Sarawak is Malaysia’s largest state, but it has a much smaller population than the west of the country. This means that towns and villages are very spread out and teachers and students had large distances to travel to attend the STEM Trailblazers event. To partially address this, the event was held in two locations simultaneously, Kuching and Miri, and talks were live-streamed between both venues.

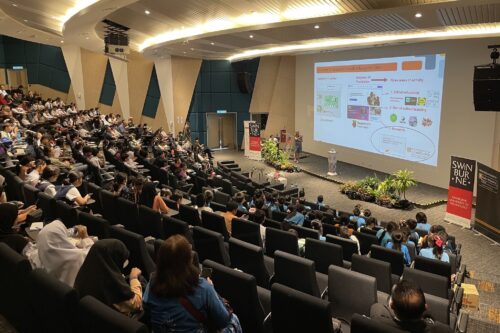
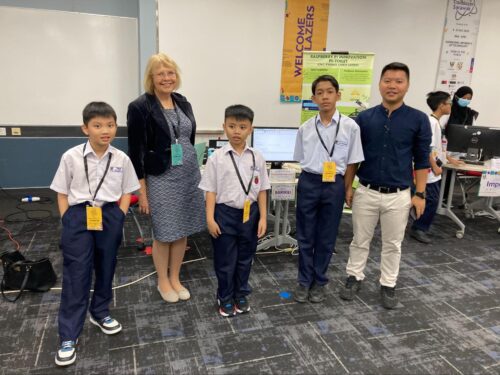
STEM Trailblazers featured a host of talks from people involved in the initiative. I was very honoured to be invited as a guest speaker, representing both the University of Cambridge and the Raspberry Pi Foundation as the Director of the Raspberry Pi Computing Education Research Centre.

Solving real-world problems

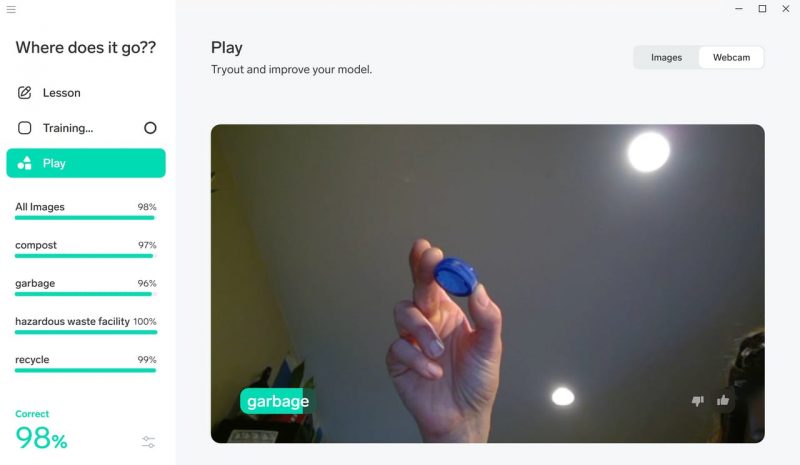
The Raspberry Pi projects at STEM Trailblazers were entered into a competition, with prizes for students and teachers. Most projects had been created using Scratch to control the Raspberry Pi as well as a range of sensors.

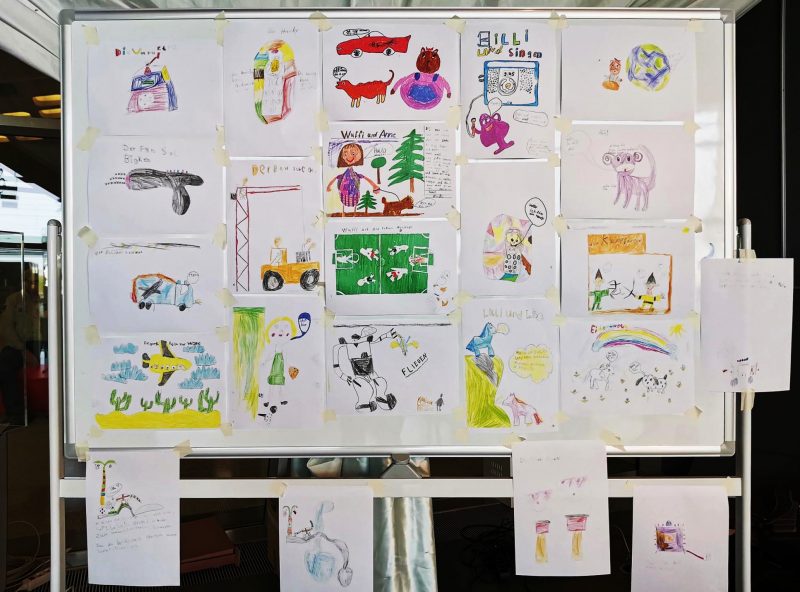
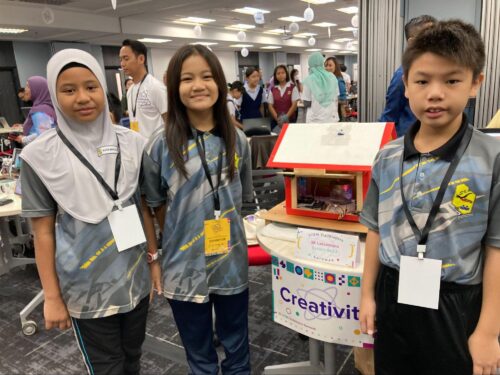
The children and teachers who participated came from both rural and urban areas, and it was clear that the issues they had chosen to address were genuine problems in their communities.

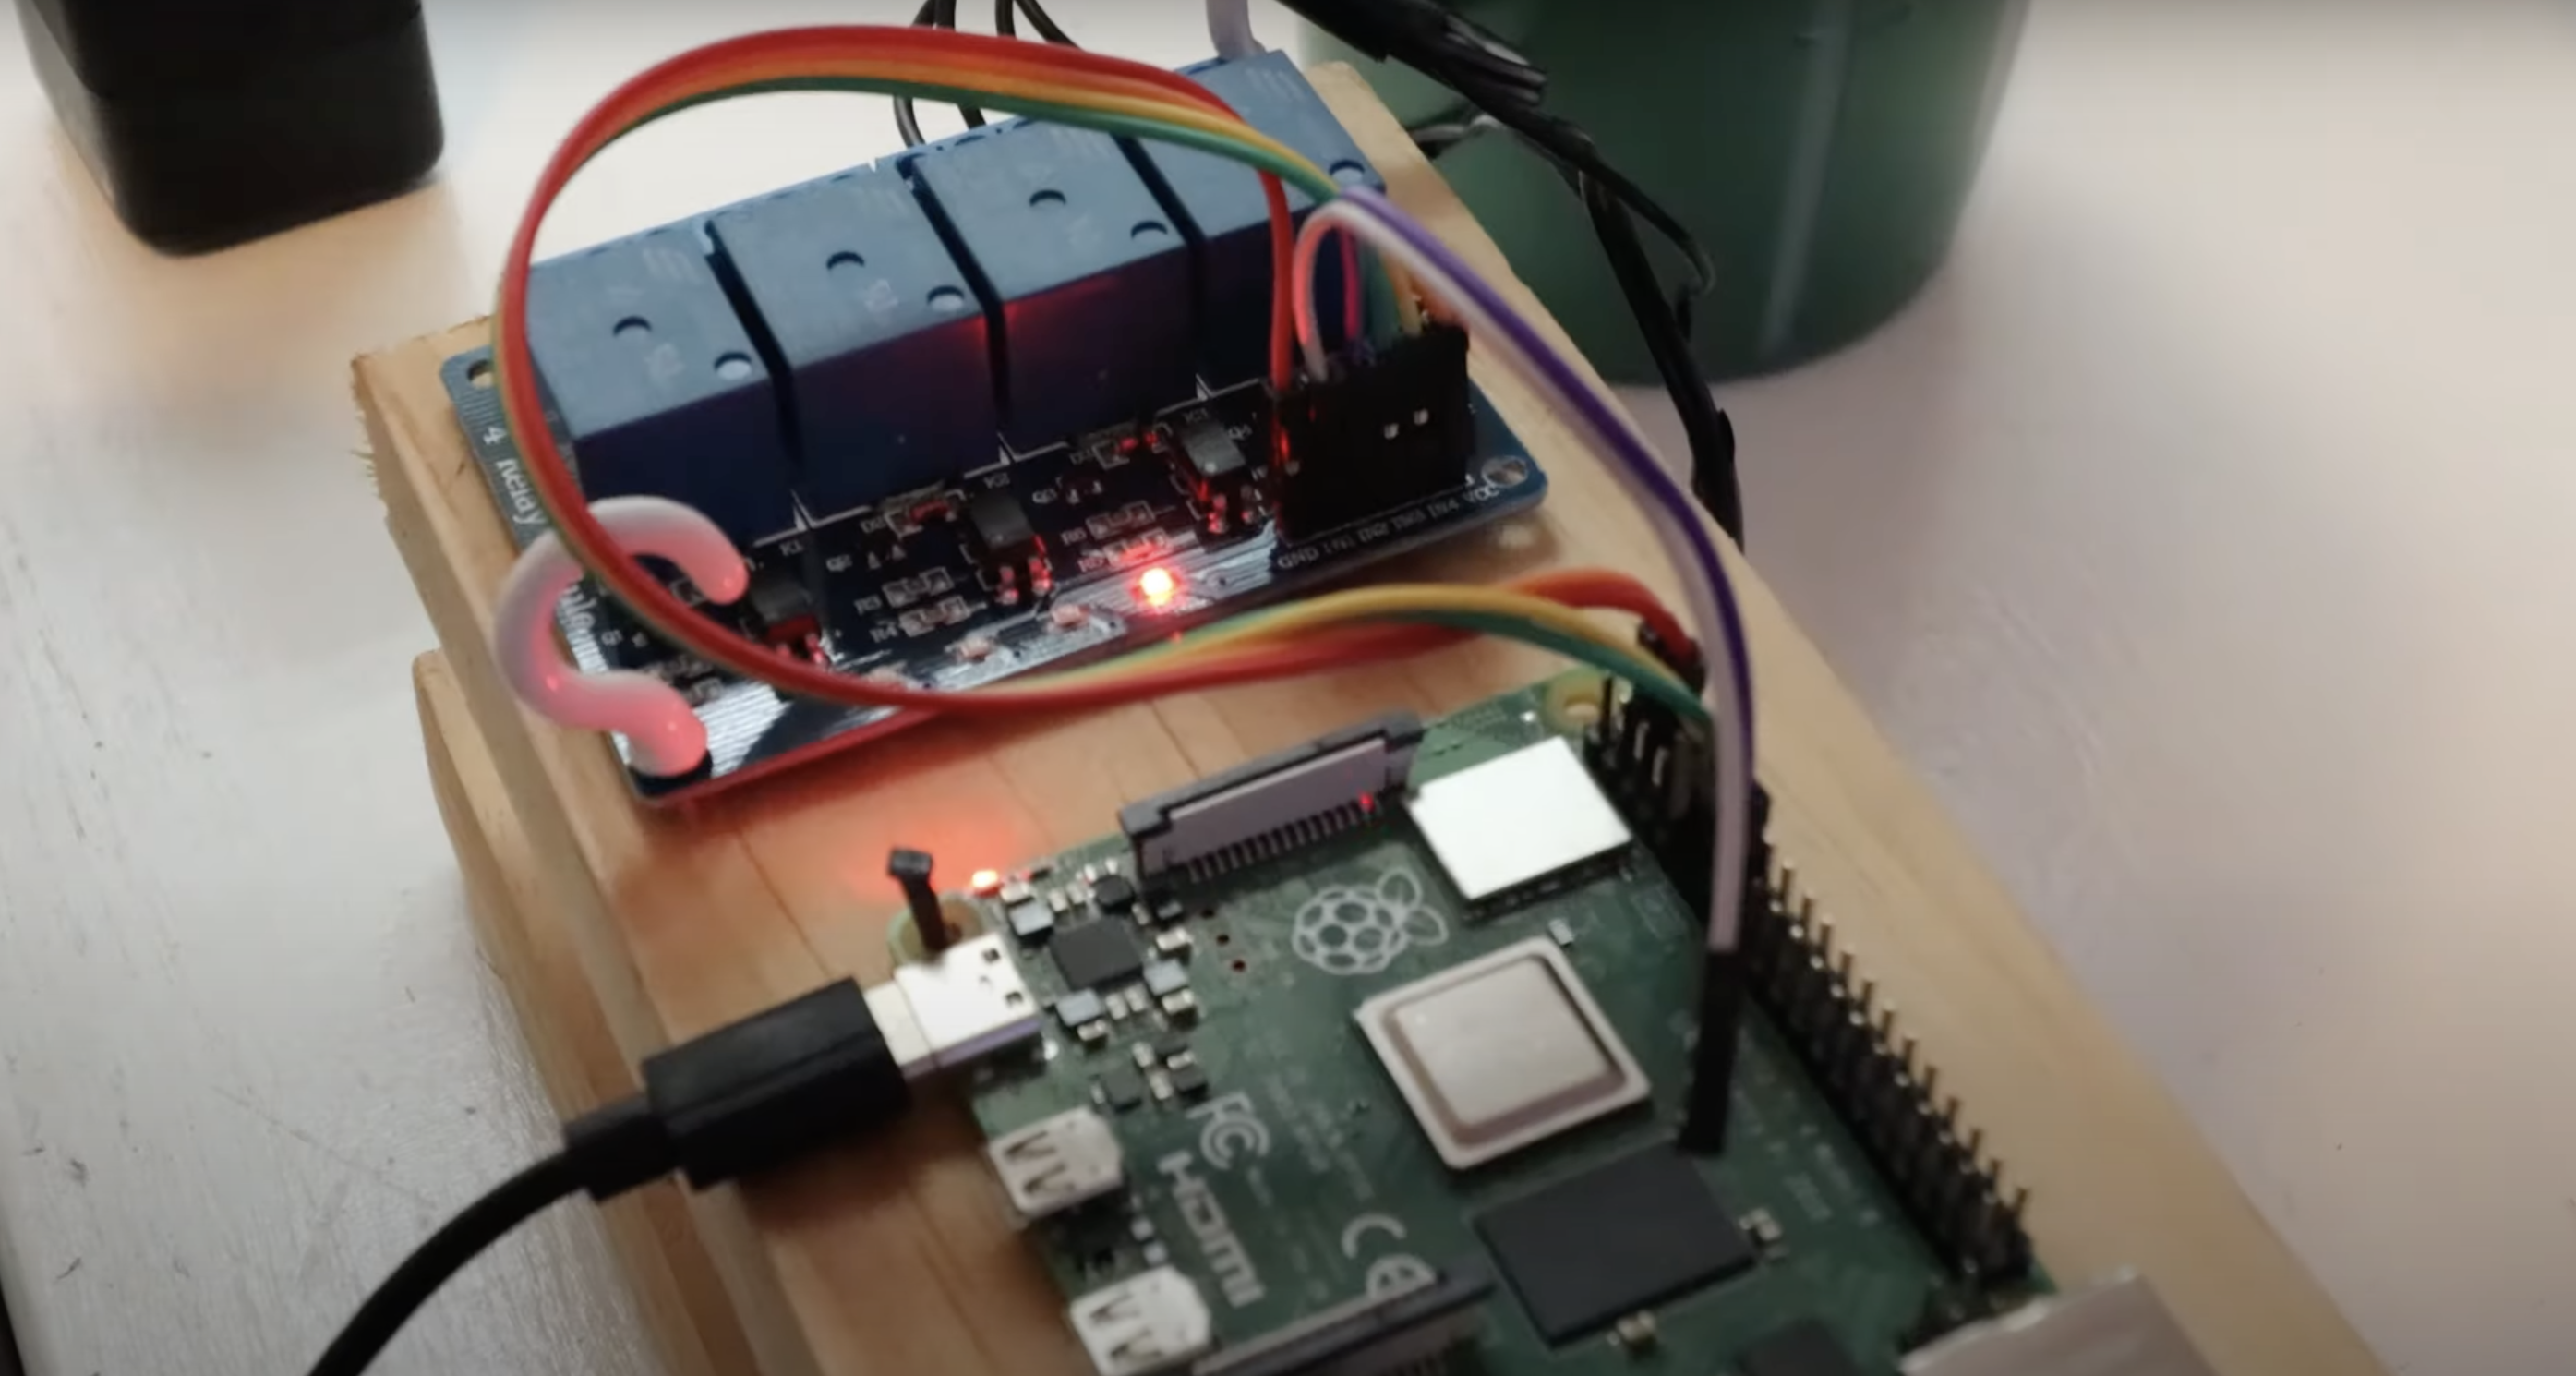
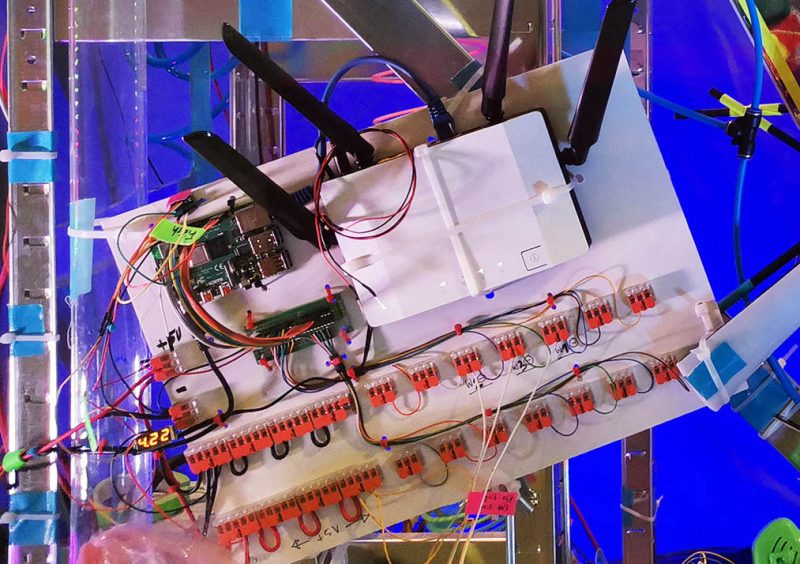
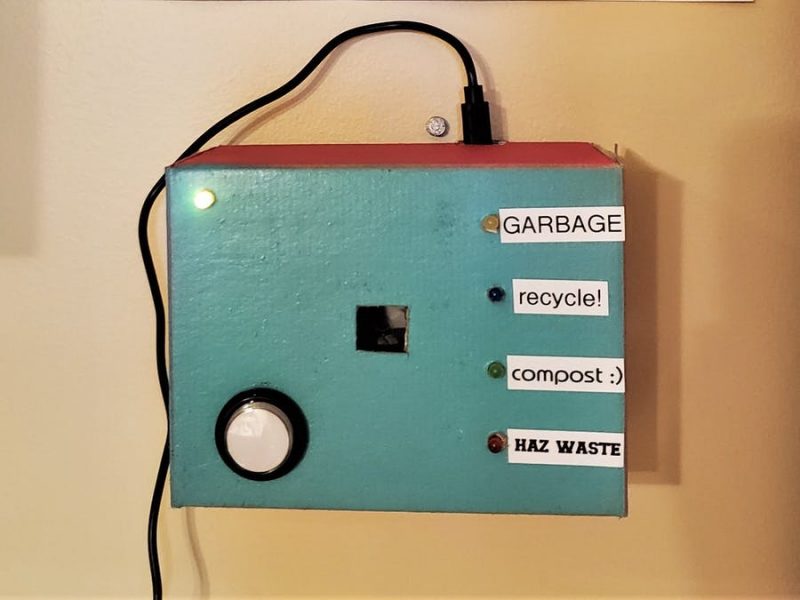
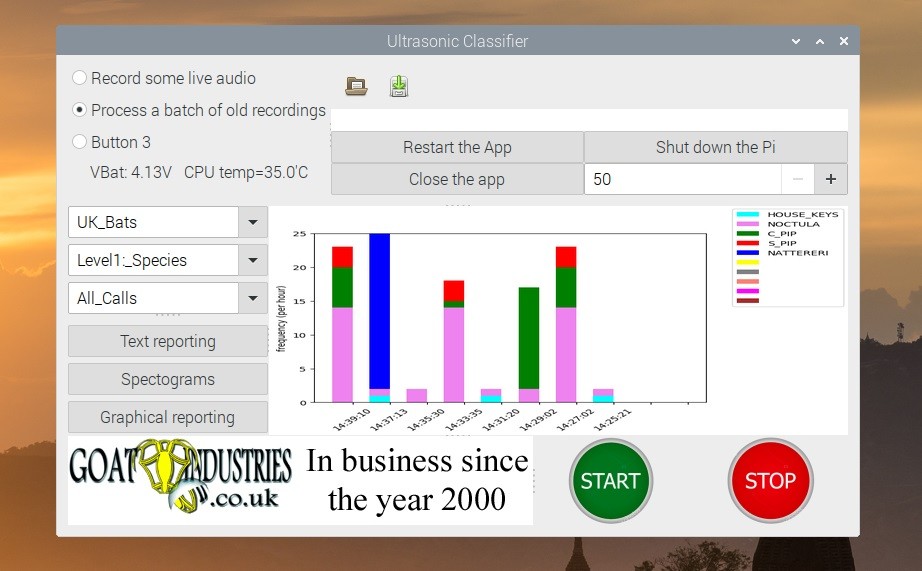
Many of the projects I saw related to issues that schools faced around heat and hydration: a Smart Bottle project reminded children to drink regularly, a shade creator project created shade when the temperature got too high, a teachers’ project told students that they could no longer play outside when the temperature exceeded 35 degrees, and a water cooling system project set off sprinklers when the temperature rose. Other themes of the projects were keeping toilets clean, reminding children to eat healthily, and helping children to learn the alphabet. One project that especially intrigued me was an alert system for large and troublesome birds that were a problem for rural schools.

Participants showcasing their project at the STEM Trailblazers event.

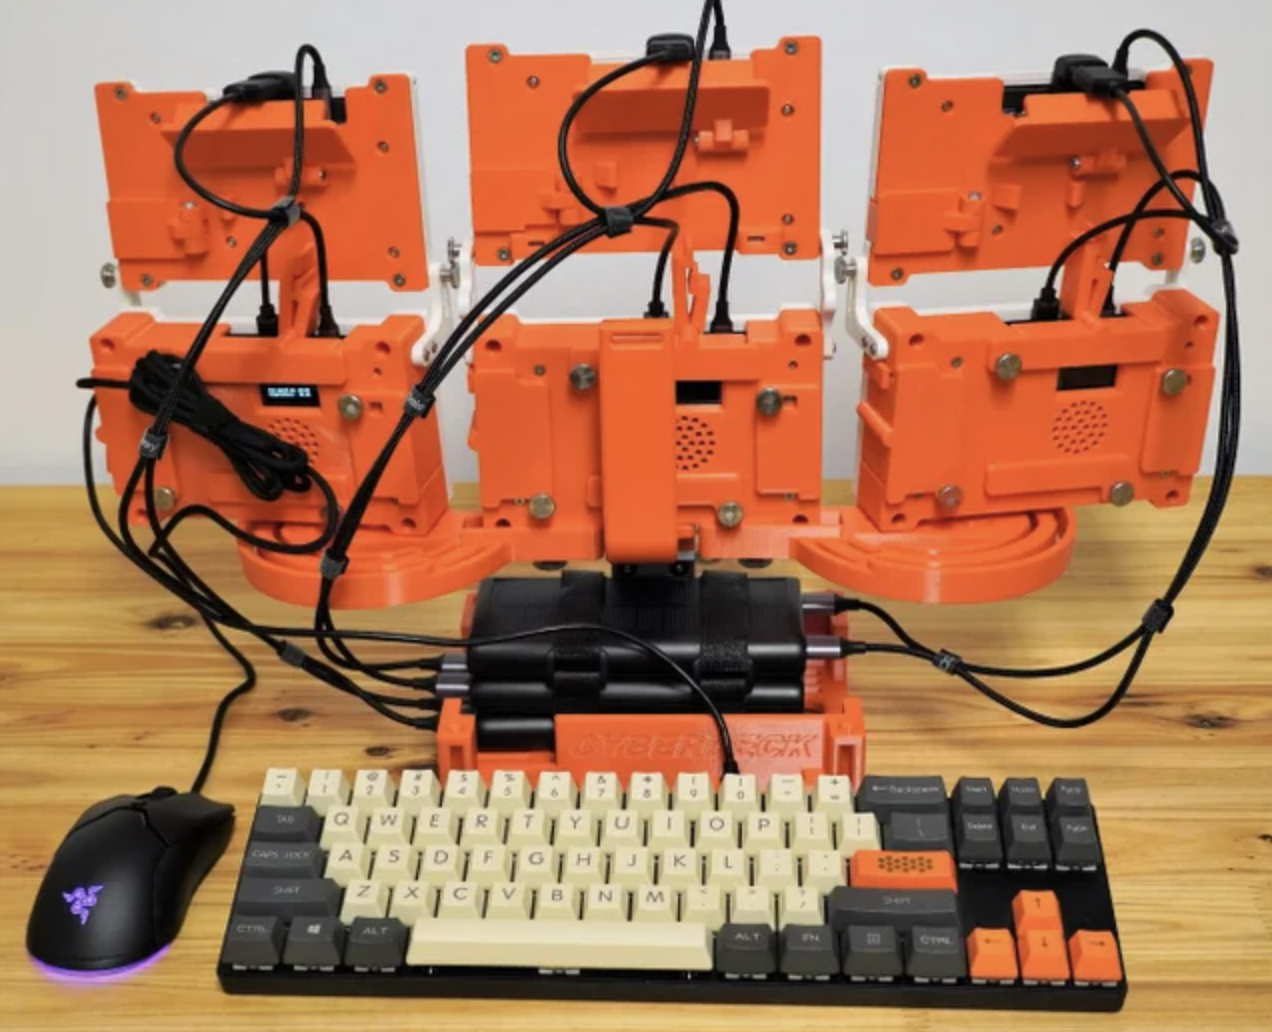
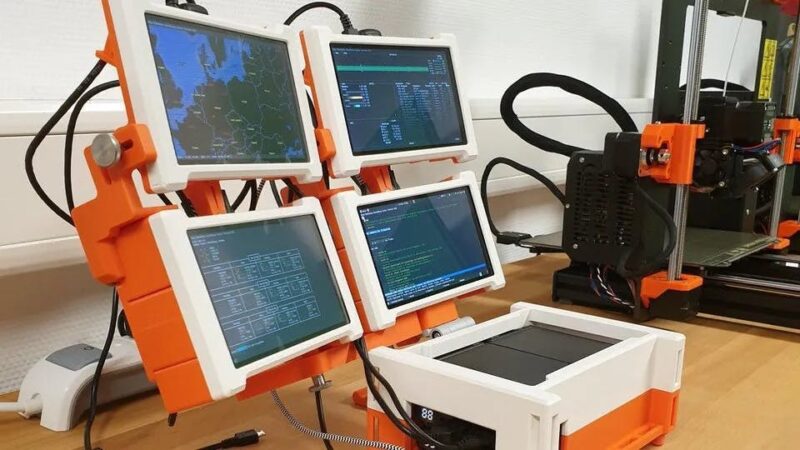
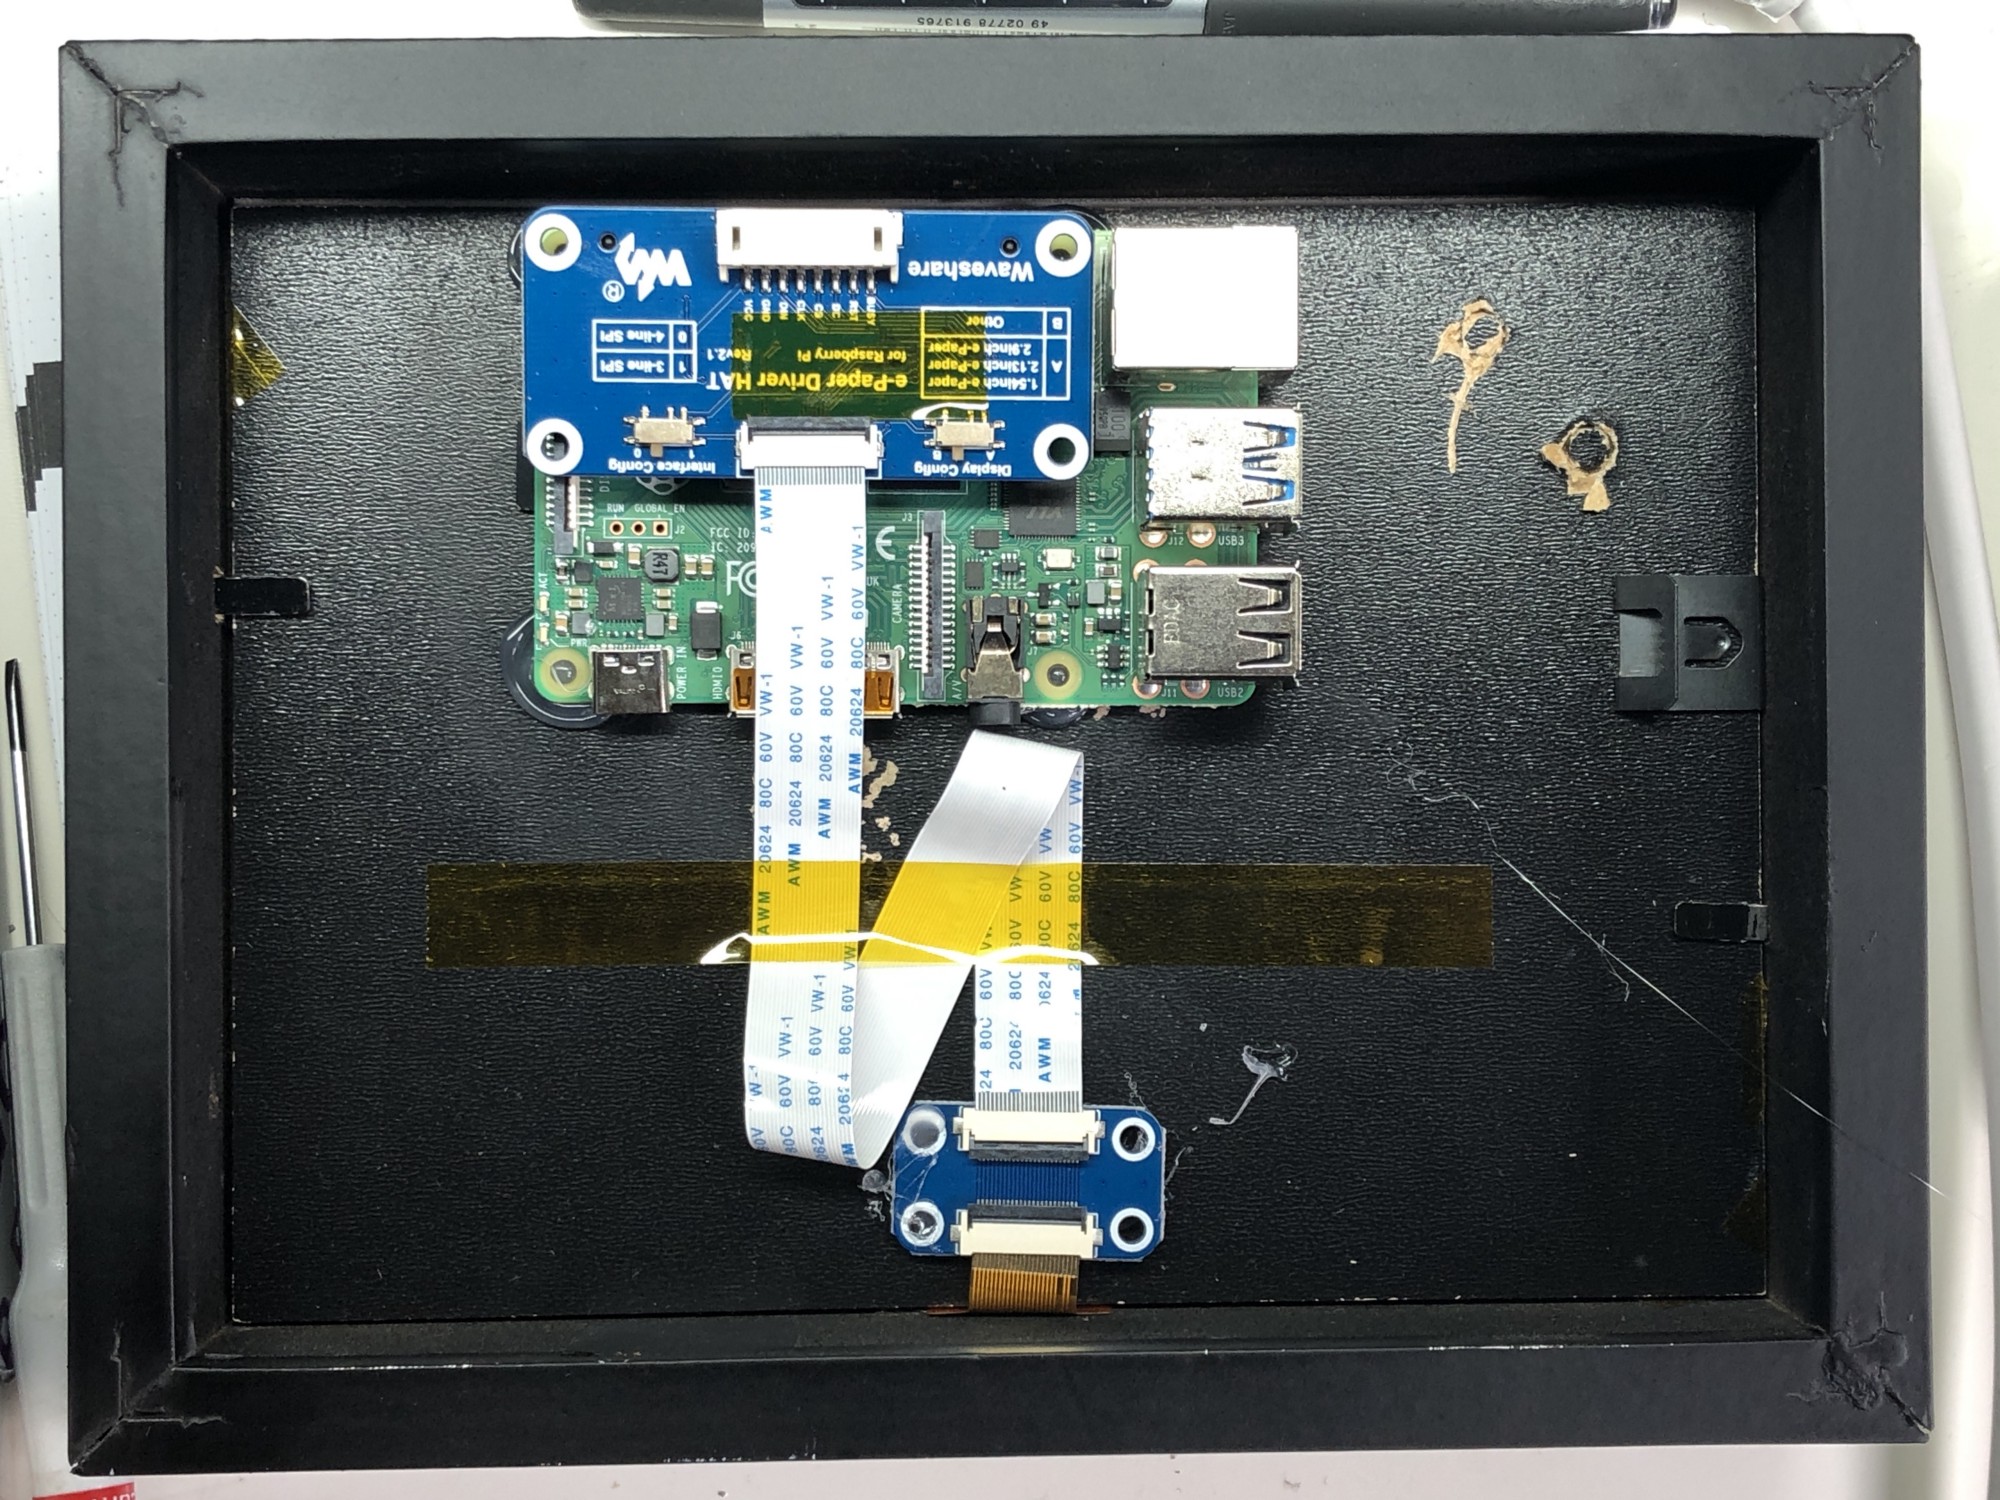
The creativity and quality of the projects on show was impressive given that all the students (and many of their teachers) had learned to program very recently, and also had to be quite innovative where they hadn’t been able to access all the hardware they needed to build their creations.

What we can learn from this initiative

Everyone involved in this project in Sarawak — including teachers, government representatives, university academics, and industry partners — is really committed to giving children the best opportunities to grow up with an understanding of digital technology. They know this is essential for their professional futures, and also fosters their creativity, independence, and problem-solving skills.

Young people showcasing their project at the STEM Trailblazers event.

Over the last ten years, I’ve been fortunate enough to travel widely in my capacity as a computing education researcher, and I’ve seen first-hand a number of the approaches countries are taking to help their young people gain the skills and understanding of computing technologies that they need for their futures.

It’s good for us to look beyond our own context to understand how countries across the world are preparing their young people to engage with digital technology. No matter how many similarities there are between two places, we can all learn from each other’s initiatives and ideas. In 2021 the Brookings Institution published a global review of how countries are progressing with this endeavour. Organisations such as UNESCO and WEF regularly publish reports that emphasise the importance for countries to develop their citizens’ digital skills, and also advanced technological skills. 

Young people showcasing their project at the STEM Trailblazers event.

The Sarawak government’s initiative is grounded in the use of Raspberry Pis as desktop computers for schools, which run offline where schools have no access to the internet. That teachers are also trained to use the Raspberry Pis to support learners to develop hands-on digital making skills is a really important aspect of the project.

Our commercial subsidiary Raspberry Pi Limited works with a company network of Approved Resellers around the globe; in this case the Malaysian reseller Cytron has been an enormous support in supplying Sarawak’s primary schools with Raspberry Pis and other hardware.

Schools anywhere in the world can also access the Raspberry Pi Foundation’s free learning and teaching resources, such as curriculum materials, online training courses for teachers, and our magazine for educators, Hello World. We are very proud to support the work being done in Sarawak.

As for what the future holds for Sarawak’s computing education, at the opening ceremony of the STEM Trailblazers event, the Deputy Minister announced that the event will be an annual occasion. That means every year more students and teachers will be able to come together, share their learning, and get excited about using digital making to solve the problems that matter to them.

The post Digital making with Raspberry Pis in primary schools in Sarawak, Malaysia appeared first on Raspberry Pi Foundation.

30-second blood analysis with Raspberry Pi

Post Syndicated from Ashley Whittaker original https://www.raspberrypi.org/blog/30-second-blood-analysis-with-raspberry-pi/

A portable, affordable Raspberry Pi-powered blood analyser is helping to “establish a robust healthcare ecosystem” in remote parts of India. Samples can be tested in just 30 seconds, and the cost and size of the parts make it an attractive solution for rural and resource-strapped areas.

It is the work of researchers Sangeeta Palekar and Jayu Kalambe from the Department of Electronics Engineering at Shri Ramdeobaba College of Engineering and Management.

blood analyser
(Image credit: Shri Ramdeobaba / College of Engineering And Management)

Tiny computer — massive processing power

Regular blood tests are vital in the tracking and elimination of many diseases, but there is a huge time and monetary cost currently tied to this type of laboratory work.

The researchers’s device measures light absorbance through a blood sample, a common type of analysis, and they harnessed the processing capability of Raspberry Pi 4 Model B to analyse the absorbance data. Their Raspberry Pi-powered solution was found to perform on a par with the kind of expensive lab-based blood test typically used.

Quick and easy

Sangeeta and Jayu’s analyser is not only cheaper to build and maintain than the lab-based version, it also does the job better. Using the lab-based method means that samples from patients in rural areas must be sent away for analysis, with results communicated back to patients at a much later date. In contrast, Sangeeta and Jayu’s device can process blood samples there and then. All you need is an electricity source. Patients get their results immediately, and there is no need to transport delicate samples across rural terrain.

Shri Ramdeobaba College of Engineering and Management

Incorporating an IoT element into their design, which would allow for remote monitoring, is the next step for the researchers. They also intend to develop their invention to allow it to carry out different types of blood analyses.

Read more about the science behind the creation

The full research paper is behind a paywall, but the abstract does a great job succinctly explaining all the science. Sangeeta herself also explains a lot of the magic behind her creation in this interview with IEEE Spectrum.

The post 30-second blood analysis with Raspberry Pi appeared first on Raspberry Pi.

Recycle your old Raspberry Pi boards with OKdo

Post Syndicated from Ashley Whittaker original https://www.raspberrypi.org/blog/recycle-your-old-raspberry-pi-boards-with-okdo/

Ever wondered what to do with Raspberry Pi boards you haven’t used in a while? Do you tend to upgrade your projects to newer models, leaving previous ones languishing at the back of a drawer? There are a lot of venerable Raspberry Pis out there doing useful stuff just as well as ever, and we take great care to make sure new versions of Raspberry Pi OS continue to run on these models, but we’re realists: we understand that ending up with older boards lying around doing nothing is a thing. Rather than leave them to gather dust, you now have a sustainable way to get your unused tech back in the hands of makers who’ll put it to work.

okdo renew logo for the raspberry pi boards recycling initiative

OKdo has partnered with Sony to launch the first official Raspberry Pi recycling initiative. OKdo Renew gives you rewards in return for your preloved boards.

Which boards can I recycle?

If you have any of these boards sitting around unused, you can recycle them:

Our Raspberry Pi boards are manufactured at the Sony Technology Centre in Wales, and that’s where OKdo returns all the hardware you donate. When it gets there, it’ll be tested, reconditioned, and repackaged, ready to be sold to its new home. OKdo will be offering the refurbished boards at a lower price than new boards, and they all come with a twelve-month warranty.

Some brand new Raspberry Pi boards coming to life at the Sony factory

How do I send my preloved Raspberry Pi boards to Sony?

If you have one of the boards listed above and it’s still in working order, you can register to renew your Raspberry Pi. Print the prepaid label so you can return you board for free! Then package up your board to avoid damage, being careful not to exceed the dimensions listed here.

Make sure you remove your memory card before posting your board. Sony can’t return them and we don’t want you to lose any important stuff you’ve got stored.

What’s my reward?

In return for recycling your board, you will get a £10 voucher to use towards your next OKdo purchase. You could upgrade to a faster board than the one you recycled, or pick up a new accessory.

The post Recycle your old Raspberry Pi boards with OKdo appeared first on Raspberry Pi.

Deter package thieves from your porch with Raspberry Pi

Post Syndicated from Ashley Whittaker original https://www.raspberrypi.org/blog/deter-package-thieves-from-your-porch-with-raspberry-pi/

This Raspberry Pi-based build aims to deter porch pirates from stealing packages left at your front door. In recent times, we’ve all relied on home-delivered goods more than ever, and more often than not we ask our delivery drivers to stash our package somewhere if we’re not home, leaving them vulnerable to thieves.

Watch the full build video: ‘Fighting porch pirates with artificial intelligence (and flour)’

Flashing lights, sirens, flour and sprinklers

When internet shopper and AI project maker Ryder had a package stolen from his porch, he wanted to make sure that didn’t happen again. He figured that package stealers would be deterred by blaring sirens and flashing red lights. He also went one step further, wanting to hamper the thief’s escape with motion-activated water sprinklers and a blast of flour ready to catch them as they run away.

package thief running away
A would-be package thief dropping their swag and running away from the sprinkler

A simple motion detector wouldn’t work because it would set off Ryder’s booby traps whenever an unsuspecting cat or legitimate visitor happened across his porch, or if Ryder himself arrived home and didn’t fancy a watery flour bath. So some machine learning and a Python script needed to be employed.

How does it catch package thieves?

inside the package thief build
It’s what’s on the inside that counts. Us. We’re on the inside.

The camera keeps an eye on Ryder’s porch and is connected wirelessly to a Raspberry Pi 4, which works with a custom TensorFlow machine learning model trained to recognise when a package is or isn’t present. If the system detects a package, it gets ready to deploy the anti-thief traps. The Raspberry Pi sets everything off if it detects that someone other than Ryder has removed the package from the camera’s view.

And Ryder had an interesting technique to train the machine learning model to recognise him:

If you want to make your own anti-porch pirate device, Ryder has shared everything you need on GitHub.

Wanna see some cool dogs?

We can always rely on Ryder Calm Down’s YouTube channel for unique and quasi-bonkers builds.

If you’re not familiar with Ryder’s dog-detecting (and happiness-boosting) build, check it out below. We also blogged about this project when we needed a good dopamine boost during lockdown.

The post Deter package thieves from your porch with Raspberry Pi appeared first on Raspberry Pi.

Mega six-screen cyberdeck

Post Syndicated from Ashley Whittaker original https://www.raspberrypi.org/blog/mega-six-screen-cyberdeck/

Holy cyberdecks! Redditor Holistech (aka Sören Gebbert) really leaned in to the “more is more” idiom when building this big orange cyberdeck using three Raspberry Pis. Why use just one screen to manipulate enemy cyberware and take down your cyberpunk foes, when you can have six?

six screen cyber deck rear view
Rear view (keep reading for the big reveal)

From four to six

We first came across Sören’s work on hackster.io and we were impressed with what we found, which was this four‑screen creation running Linux Mint on a dual Raspberry Pi setup:

four screen cyberdeck
The first, four-screen, iteration of this project is still impressive

So imagine our surprise when we clicked through to check out Holistech on reddit, only to be confronted with this six‑screen monstrosity of brilliance:

six screen cyberdeck
Level up

He’s only gone and levelled up his original creation already. And before we even had the chance to properly swoon over the original.

Under the hood

Originally, Sören wanted to use Raspberry Pi Zero because they’re tiny and easily hidden away inside projects. He needed more power though, so he went with Raspberry Pi 4 instead.

cyberdecks on a desk
The whole family

Sören 3D-printed the distinctive orange frame. On the back of the rig are openings for a fan for active cooling and a mini control display that shows the CPU temperature and the fan speed.

Six 5.5″ HD resolution screens are the eyes of the project. And everything is powered by hefty 26,000 mAh battery power banks.

Carry on

And it gets even better: this whole multi-screen thing is portable. Yes, portable. You can fold it up, pack it away in its suitably steampunk metal box, and carry it with you.

There are plenty more photos. Head to Instagram to take a closer look at how Sören’s genius design folds in on itself to enable portability.

The post Mega six-screen cyberdeck appeared first on Raspberry Pi.

Charge your Tesla automatically with Raspberry Pi

Post Syndicated from Ashley Whittaker original https://www.raspberrypi.org/blog/charge-your-tesla-automatically-with-raspberry-pi/

It’s the worst feeling in the world: waking up and realising you forgot to put your electric car on charge overnight. What do you do now? Dig a bike out of the shed? Wait four hours until there’s enough juice in the battery to get you where you need to be? Neither option works if you’re running late. If only there were a way to automate the process, so that when you park up, the charger find its way to the charging port on its own. That would make life so much easier.

This is quite the build

Of course, this is all conjecture, because I drive a car made in the same year I started university. Not even the windows go up and down automatically. But I can dream, and I still love this automatic Tesla charger built with Raspberry Pi.

Wait, don’t Tesla make those already?

Back in 2015 Tesla released a video of their own prototype which can automatically charge their cars. But things have gone quiet, and nothing seems to be coming to market any time soon – nothing directly from Tesla, anyway. And while we like the slightly odd snake-charmer vibes the Tesla prototype gives off, we really like Pat’s commitment to spending hours tinkering in order to automate a 20-second manual job. It’s how we do things around here.

This video makes me feel weird

Electric vehicle enthusiast Andrew Erickson has been keeping up with the prototype’s whereabouts, and discussed it on YouTube in 2020.

How did Pat build his home-made charger?

Tired of waiting on Tesla, Pat took matters into his own hands and developed a home-made solution with Raspberry Pi 4. Our tiny computer is the “brains of everything”, and is mounted to a carriage on Pat’s garage wall.

automatic tesla charger rig mounted on garage wall
The entire rig mounted to Pat’s garage wall

There’s a big servo at the end of the carriage, which rotates the charging arm out when it’s needed. And an ultrasonic distance sensor ensures none of the home-made apparatus hits the car.

automatic tesla charger sensors
Big white thing on the left is the charging arm. Pat pointing to the little green Raspberry Pi camera module up top. And the yellow box at the bottom is the distance sensor

How does the charger find the charging port?

A Raspberry Pi Camera Module takes photos and sends them back to a machine learning model (Pat used TensorFlow Lite) running on his Raspberry Pi 4. This is how the charging arm finds its way to the port. You can watch the model in action from this point in the build video.

automatic tesla charger in action
“Marco!” “Polo!” “Marco!” “Polo!”

Top stuff, Pat. Now I just need to acquire a Tesla from somewhere so I can build one for my own garage. Wait, I don’t have a garage either…

The post Charge your Tesla automatically with Raspberry Pi appeared first on Raspberry Pi.

Machine Learning made easy with Raspberry Pi, Adafruit and Microsoft

Post Syndicated from Ashley Whittaker original https://www.raspberrypi.org/blog/machine-learning-made-easy-with-raspberry-pi-adafruit-and-microsoft/

Machine learning can sound daunting even for experienced Raspberry Pi hobbyists, but Microsoft and Adafruit Industries are determined to make it easier for everyone to have a go. Microsoft’s Lobe tool takes the stress out of training machine learning models, and Adafruit have developed an entire kit around their BrainCraft HAT, featuring Raspberry Pi 4 and a Raspberry Pi Camera, to get your own machine learning project off to a flying start.

adafruit lobe kit
Adafruit developed this kit especially for the BrainCraft HAT to be used with Microsoft Lobe on Raspberry Pi

Adafruit’s BrainCraft HAT

Adafruit’s BrainCraft HAT fits on top of Raspberry Pi 4 and makes it really easy to connect hardware and debug machine learning projects. The 240 x 240 colour display screen also lets you see what the camera sees. Two microphones allow for audio input, and access to the GPIO means you can connect things likes relays and servos, depending on your project.

Adafruit’s BrainCraft HAT in action detecting a coffee mug

Microsoft Lobe

Microsoft Lobe is a free tool for creating and training machine learning models that you can deploy almost anywhere. The hardest part of machine learning is arguably creating and training a new model, so this tool is a great way for newbies to get stuck in, as well as being a fantastic time-saver for people who have more experience.

Get started with one of three easy, medium, and hard tutorials featured on the lobe-adafruit-kit GitHub.

This is just a quick snippet of Microsoft’s full Lobe tutorial video.
Look how quickly the tool takes enough photos to train a machine learning model

‘Bakery’ identifies and prices different pastries

Lady Ada demonstrated Bakery: a machine learning model that uses an Adafruit BrainCraft HAT, a Raspberry Pi camera, and Microsoft Lobe. Watch how easy it is to train a new machine learning model in Microsoft Lobe from this point in the Microsoft Build Keynote video.

A quick look at Bakery from Adafruit’s delightful YouTube channel

Bakery identifies different baked goods based on images taken by the Raspberry Pi camera, then automatically identifies and prices them, in the absence of barcodes or price tags. You can’t stick a price tag on a croissant. There’d be flakes everywhere.

Extra functionality

Running this project on Raspberry Pi means that Lady Ada was able to hook up lots of other useful tools. In addition to the Raspberry Pi camera and the HAT, she is using:

  • Three LEDs that glow green when an object is detected
  • A speaker and some text-to-speech code that announces which object is detected
  • A receipt printer that prints out the product name and the price

All of this running on Raspberry Pi, and made super easy with Microsoft Lobe and Adafruit’s BrainCraft HAT. Adafruit’s Microsoft Machine Learning Kit for Lobe contains everything you need to get started.

full adafruit lobe kit
The full Microsoft Machine Learning Kit for Lobe with Raspberry Pi 4 kit

Watch the Microsoft Build keynote

And finally, watch Microsoft CTO Kevin Scott introduce Limor Fried, aka Lady Ada, owner of Adafruit Industries. Lady Ada joins remotely from the Adafruit factory in Manhattan, NY, to show how the BrainCraft HAT and Lobe work to make machine learning accessible.

The post Machine Learning made easy with Raspberry Pi, Adafruit and Microsoft appeared first on Raspberry Pi.

‘Epigone drone’ pays homage to NASA’s Mars Helicopter | The MagPi #107

Post Syndicated from Rosie Hattersley original https://www.raspberrypi.org/blog/epigone-drone-pays-homage-to-nasas-mars-helicopter-the-magpi-107/

Inspired by NASA’s attempt to launch a helicopter on Mars, one maker made an Earth-bound one of her own. And she tells Rosie Hattersley all about it in the latest issue of The MagPi Magazine, out now.

Epigone drone hero
To avoid being swiped by the drone’s rotors, the Raspberry Pi 4, which uses NASA’s especially written F Prime code for telemetry, had to be positioned very carefully

Like millions of us, in April Avra Saslow watched with bated breath as NASA’s Perseverance rover touched down on the surface of Mars. 

Like most of us, Avra knew all about the other ground-breaking feat being trialled alongside Perseverance: a helicopter launch called Ingenuity, that was to be the first flight on another planet – “a fairly lofty goal”, says Avra, since “the atmosphere on Mars is 60 times less dense than Earth’s.” 

With experience of Raspberry Pi-based creations, Avra was keen to emulate Ingenuity back here on earth.

Project maker holding their creation
Avra’s videographer colleague lent her the drone that enables Epigone to achieve lift-off

NASA chose to use open-source products and use commercially available parts for its helicopter build. It just so happened that Avra had recently begun working at SparkFun, a Colorado-based reseller that sells the very same Garmin LIDAR-Lite v3 laser altimeter that NASA’s helicopter is based on. “It’s a compact optical distance measurement sensor that gives the helicopter ‘eyes’ to see how far it hovers above ground,” Avra explains.

NASA posted the Ingenuity helicopter’s open-source autonomous space-flight software, written specifically for use with Raspberry Pi, on GitHub. Avra took all this as a sign she “just had to experiment with the same technology they sent to Mars.”

F Prime and shine

Her plan was to see whether she could get GPS and lidar working within NASA’s framework, “and then take the sensors up on a drone and see how it all performed in the air.” Helpfully, NASA’s GitHub post included a detailed F Prime tutorial based around Raspberry Pi. Avra says understanding and using F Prime (F´) was the hardest part of her Epigone drone project. “It’s a beast to take on from an electronics enthusiast standpoint,” she says. Even so, she emphatically encourages others to explore and the opportunity  to make use of NASA’s code.

epigone drone front view
NASA recognises that Raspberry Pi offers a way to “dip your toe in embedded systems,” says Avra, and “encourages the idea that Linux can run on two planets in the solar system”

Raspberry Pi 4 brain

The Epigone Drone is built around Raspberry Pi 4 Model B; Garmin’s LIDAR-Lite v4, which connects to a Qwiic breakout board and has a laser rather than an LED; a battery pack; and a DJI Mini 2 drone borrowed from a videographer colleague. Having seen how small the drone was, Avra realised 3D-printing an enclosure case would make everything far too heavy. As it was, positioning the Epigone onto its host drone was challenging enough: the drone’s rotors passed worryingly close to the project’s Raspberry Pi, even when precisely positioned in the centre of the drone’s back. The drone has its own sensors to allow for controlled navigation, which meant Avra’s design had to diverge from NASA’s and have its lidar ‘eyes’ on its side rather than underneath.

Although her version piggybacks on an existing drone, Avra was amazed when her Epigone creation took flight:

“I honestly thought [it] would be too heavy to achieve lift, but what do ya know, it flew! It went up maybe 30 ft and we were able to check the sensors by moving it close and far from the SparkFun HQ [where she works].”

While the drone’s battery depleted in “a matter of minutes” due to its additional load, the Epigone worked well and could be deployed to map small areas of land such as elevation changes in a garden, Avra suggests.

The MagPi #107 out NOW!

MagPi 107 cover

You can grab the brand-new issue right now from the Raspberry Pi Press store, or via our app on Android or iOS. You can also pick it up from supermarkets and newsagents. There’s also a free PDF you can download.

The post ‘Epigone drone’ pays homage to NASA’s Mars Helicopter | The MagPi #107 appeared first on Raspberry Pi.

Commodore 64 + Raspberry Pi 4 = Synth6581

Post Syndicated from Simon Martin original https://www.raspberrypi.org/blog/commodore-64-raspberry-pi-4-synth6581/

We have a special blog today from one of our own design engineers, Simon Martin. He’s the designer of Raspberry Pi 400 and our High Quality Camera and spends his free time tinkering with electronic music.

This video is a classic. Settle in…

Simon has wanted to make his own electronic musical instrument with Raspberry Pi for some time. He designed a circuit board for the project a year ago, but it lay around in a drawer in his desk while he finished Raspberry Pi 400. Finally, the winter months gave him the incentive to get it working. 

Simon’s electronic musical journey

Simon: The Synth6581 device doesn’t look much like an electronic musical instrument, but just like circuit boards stacked on top of a Raspberry Pi 4. You have to plug a musical keyboard into a USB port and a pair of speakers into the audio jack on the bottom board to make it work.

Hefty stack ready to play some electronic music

The code is written almost entirely in Python, with a little bit of C to speed up the communications to the chips. I designed and laid out the circuit boards, which were ordered online. The first six boards cost only £20, but the components were another £100. I spent more than a day soldering the components on the boards by hand. It took much more time to check every chip and connection worked, a common problem with hand-soldering new boards.

Synth6581 — no ordinary sounding instrument

The 1982 Commodore 64 – works like Raspberry Pi 400, only slower

And Synth6581 is no ordinary sounding musical instrument. It’s based on the music chip inside a vintage computer: the Commodore 64. The microchips are almost forty years old and they have a quirky sound that kids in the 1980s loved and parents hated. By the way, did you know that the Commodore 64 was the inspiration for Raspberry Pi 400?

The SID chip sound

The MOS6581 SID chip — just a little smaller than a Raspberry Pi Pico board

I was one of many hobby programmers in the 1980s that used to attempt to program Commodore 64s. Much like people today dabble with programming on Raspberry Pi 400s, kids and adults were dabbling with the BASIC programming language on their Commodore 64s back then. Nowadays, Raspberry Pis have video, graphics, and audio readily available, but back in the 1980s, the hardware registers had to be ‘poked’ one by one into the console window. You had to get quite technical just to get the computer to make a musical sound. Those sounds came from the MOS6581 or ‘SID’ chip. It had such a famous sound character that it formed the basis of the chiptune music genre, and people are still writing music on Commodore 64s today.

Using BASIC POKE commands to control SID chips on a Commodore 64. Not the easiest thing to read.

Poking SID chips

By borrowing a few chips from broken Commodore 64s, including one or two lying around Raspberry Pi Towers, I made those 1980s ping noises into a polyphonic synthesiser controlled in Python on Raspberry Pi. The registers in the SID chips are simply being ‘poked’ by Raspberry Pi instead of Commodore 64. I also reverse-engineered the music from old games and made the sound effects and instruments work across the keyboard.

Simon with his creation
Simon with his electronic music creation

One of a kind electronic musical device

This device is unique: only one of these will ever be built, so please don’t wait for a launch date. There were over 10 million chips manufactured for Commodore 64, but production of the chips ended nearly 30 years ago. The Commodore 64s and spare parts for them are still in high demand, which is pushing up second hand prices. Nonetheless, the code and schematics are available online on GitHub, and I invite other Raspberry Pi users to use them to make musical instruments out of other games consoles. I reckon Sega Megadrive has a lot of potential for a Raspberry Pi port…

Simon Martin youtube channel
A few of the demos of the electronic instrument on Simon’s YouTube channel

For more video demos of this instrument, head to my YouTube channel.

The post Commodore 64 + Raspberry Pi 4 = Synth6581 appeared first on Raspberry Pi.

Raspberry Pi thermal camera

Post Syndicated from Ashley Whittaker original https://www.raspberrypi.org/blog/raspberry-pi-thermal-camera/

It has been a cold winter for Tom Shaffner, and since he is working from home and leaving the heating on all day, he decided it was finally time to see where his house’s insulation could be improved.

camera attached to raspberry pi in a case
Tom’s setup inside a case with a cooling fan; the camera is taped on bottom right

An affordable solution

His first thought was to get a thermal IR (infrared) camera, but he found the price hasn’t yet come down as much as he’d hoped. They range from several thousand dollars down to a few hundred, with a $50 option just to rent one from a hardware store for 24 hours.

When he saw the $50 option, he realised he could just buy the $60 (£54) MLX90640 Thermal Camera from Pimoroni and attach it to a Raspberry Pi. Tom used a Raspberry Pi 4 for this project. Problem affordably solved.

A joint open source effort

Once Tom’s hardware arrived, he took advantage of the opportunity to combine elements of several other projects that had caught his eye into a single, consolidated Python library that can be downloaded via pip and run both locally and as a web server. Tom thanks Валерий КурышевJoshua Hrisko, and Adrian Rosebrock for their work, on which this solution was partly based.

heat map image showing laptop and computer screen in red with surroundings in bluw
The heat image on the right shows that Tom’s computer and laptop screens are the hottest parts of the room

Tom has also published everything on GitHub for further open source development by any enterprising individuals who are interested in taking this even further.

Quality images

The big question, though, was whether the image quality would be good enough to be of real use. A few years back, the best cheap thermal IR camera had only an 8×8 resolution – not great. The magic of the MLX90640 Thermal Camera is that for the same price the resolution jumps to 24×32, giving each frame 768 different temperature readings.

heat map image showing window in blue and lamp in red
Thermal image showing heat generated by a ceiling lamp but lost through windows

Add a bit of interpolation and image enlargement and the end result gets the job done nicely. Stream the video over your local wireless network, and you can hold the camera in one hand and your phone in the other to use as a screen.

Bonus security feature

Bonus: If you leave the web server running when you’re finished thermal imaging, you’ve got yourself an affordable infrared security camera.

video showing the thermal camera cycling through interpolation and color modes and varying view
Live camera cycling through interpolation and colour modes and varying view

Documentation on the setup, installation, and results are all available on Tom’s GitHub, along with more pictures of what you can expect.

And you can connect with Tom on LinkedIn if you’d like to learn more about this “technically savvy mathematical modeller”.

The post Raspberry Pi thermal camera appeared first on Raspberry Pi.

Machine learning and depth estimation using Raspberry Pi

Post Syndicated from David Plowman original https://www.raspberrypi.org/blog/machine-learning-and-depth-estimation-using-raspberry-pi/

One of our engineers, David Plowman, describes machine learning and shares news of a Raspberry Pi depth estimation challenge run by ETH Zürich (Swiss Federal Institute of Technology).

Spoiler alert – it’s all happening virtually, so you can definitely make the trip and attend, or maybe even enter yourself.

What is Machine Learning?

Machine Learning (ML) and Artificial Intelligence (AI) are some of the top engineering-related buzzwords of the moment, and foremost among current ML paradigms is probably the Artificial Neural Network (ANN).

They involve millions of tiny calculations, merged together in a giant biologically inspired network – hence the name. These networks typically have millions of parameters that control each calculation, and they must be optimised for every different task at hand.

This process of optimising the parameters so that a given set of inputs correctly produces a known set of outputs is known as training, and is what gives rise to the sense that the network is “learning”.

A popular type of ANN used for processing images is the Convolutional Neural Network. Many small calculations are performed on groups of input pixels to produce each output pixel

Machine Learning frameworks

A number of well known companies produce free ML frameworks that you can download and use on your own computer. The network training procedure runs best on machines with powerful CPUs and GPUs, but even using one of these pre-trained networks (known as inference) can be quite expensive.

One of the most popular frameworks is Google’s TensorFlow (TF), and since this is rather resource intensive, they also produce a cut-down version optimised for less powerful platforms. This is TensorFlow Lite (TFLite), which can be run effectively on Raspberry Pi.

Depth estimation

ANNs have proven very adept at a wide variety of image processing tasks, most notably object classification and detection, but also depth estimation. This is the process of taking one or more images and working out how far away every part of the scene is from the camera, producing a depth map.

Here’s an example:

Depth estimation example using a truck

The image on the right shows, by the brightness of each pixel, how far away the objects in the original (left-hand) image are from the camera (darker = nearer).

We distinguish between stereo depth estimation, which starts with a stereo pair of images (taken from marginally different viewpoints; here, parallax can be used to inform the algorithm), and monocular depth estimation, working from just a single image.

The applications of such techniques should be clear, ranging from robots that need to understand and navigate their environments, to the fake bokeh effects beloved of many modern smartphone cameras.

Depth Estimation Challenge

C V P R conference logo with dark blue background and the edge of the earth covered in scattered orange lights connected by white lines

We were very interested then to learn that, as part of the CVPR (Computer Vision and Pattern Recognition) 2021 conference, Andrey Ignatov and Radu Timofte of ETH Zürich were planning to run a Monocular Depth Estimation Challenge. They are specifically targeting the Raspberry Pi 4 platform running TFLite, and we are delighted to support this effort.

For more information, or indeed if any technically minded readers are interested in entering the challenge, please visit:

The conference and workshops are all taking place virtually in June, and we’ll be sure to update our blog with some of the results and models produced for Raspberry Pi 4 by the competing teams. We wish them all good luck!

The post Machine learning and depth estimation using Raspberry Pi appeared first on Raspberry Pi.

Get VMWare on Raspberry Pi

Post Syndicated from Ashley Whittaker original https://www.raspberrypi.org/blog/get-vmware-on-raspberry-pi/

Hacking apart a sweet, innocent Raspberry Pi – who would do such a thing? Network Chuck, that’s who. But he has a very cool reason for it so, we’ll let him off the hook.

Subscribe to Network Chuck on YouTube

He’s figured out how to install VMware ESXi on Raspberry Pi, and he’s sharing the step-by-step process with you because he loves you. And us. We think. We hope.

Get cutting

In a nutshell, Chuck hacks apart a Raspberry Pi, turning it into three separate computers, each running different software at the same time. He’s a wizard.

Our poor sweet baby 😮

VMware is cool because it’s Virtual Machine software big companies use on huge servers, but you can deploy it on one of our tiny devices and learn how to use it in the comfort of your own home if you follow Chuck’s instructions.

Raspberry Pi cut into three pieces with labels showing how powerful each bit is and what it's capable of
Useful labels explaining which bit of Raspberry Pi is capable of what

What do you need?

Make sure you’re up to date

So easy, it only takes 40 seconds to explain

Firstly, you need to make sure you’re running the latest version of Raspberry Pi OS. Chuck uses Raspberry Pi Imager to do this, and the video above shows you how to do the same.

Format your SD card

Network Chuck removing SD card from Raspberry Pi 4
It’s teeny, but powerful

Then you’ll need to format your SD card ready for VMware ESXi. This can be done with Raspberry Pi Imager too. You’ll need to download these two things:

Chuck is the kind of good egg who walks you through how to do this on screen at this point in the project video.

VMware installation

Then you’ll need to create the VMWare Installer to install the actual software. It’s at this point your USB flash drive takes centre stage. Here’s everything you’ll need:

And this is the point in the video at which Chuck walks you through the process.

Once that’s all done, stick your USB flash drive into your Raspberry Pi and get going. You need to be quick off the mark for this bit – there’s some urgent Escape key pressing required, but don’t worry, Chuck walks you through everything.

Create a VM and expand your storage

Once you’ve followed all those steps, you will be up, running, and ready to go. The installation process only takes up the first 15 minutes of Chuck’s project video, and he spends the rest of his time walking you through creating your first VM and adding more storage.

Top job, Chuck.

Keep up with Chuck

Network Chuck holding a Raspberry Pi 4 next to his broadcasting microphone
Fun fact: Raspberry Pi 4 is the same length as Network Chuck’s beard

Network Chuck live-streams every Monday on his YouTube channel, and you can follow him on Twitter too.

There’s also the brilliant networkchuck.com.

The post Get VMWare on Raspberry Pi appeared first on Raspberry Pi.

Smart Fairy Tale

Post Syndicated from Ashley Whittaker original https://www.raspberrypi.org/blog/smart-fairy-tale/

This is creepy, and we love it. OK, it’s not REALLY creepy, it’s just that some people have an aversion to dolls that appear to move of their own accord, due to a disturbing childhood experience — but enough about me.

Smart Fairy Tale is a whimsical, unique community project created by Berlin-based installation artist Niklas Roy and interaction designer Felix Fisgus.

Using a smartphone app, viewers determine which way a ball travels through transparent pipes, and depending on which light barriers the ball interrupts on its journey, various toys are animated to tell different stories.

The server of the installation is a Raspberry Pi 4. Via its GPIO pins, it controls the track switches and releases the ball.

Raspberry Pi 4 mounted onto plastic with the installation's servo and all the microcontrollers
Raspberry Pi 4 tucked in the top right-hand corner, mounted together with the router. Photo courtesy of Niklas’ project page

The apparatus is full of toys donated by residents of Wolfsburg, Germany. The artists wanted local people to not only be able to operate the mechanical piece, but also to have a hand in creating it. Each animatronic toy is made as a separate module, controlled by its own Arduino Nano.

Smart Fairy Tale can be remotely controlled by viewers who want to check in on the toys they gifted to the installation, and by any other curious people elsewhere in the world.

A phone using the app to control the installation. The installation is out of focus in the background
The app in action. Photo from Felix’s project page.

Better yet, the stories the toys tell were devised by local school students. The artists showed the gifted toys to a few elementary school classes, and the students drew several stories featuring toys they liked. The makers then programmed the toys to match what the drawings said they could do. A servo here, a couple of LEDs there, and the students’ stories were brought to life.

Some drawings local children made suggesting storylines for each of the gifted toys
Some of the storylines drawn by local children. Photo courtesy of Felix’s project page.

So what kind of stories did Wolfsburg’s finest come up with? One of the creators explains:

“There were a lot of scenes to interpret, like the blow-up love story, the chemtrail conspiracy, and the fossil fuel disaster, which culminates in a major traffic jam. The latter one even involved a laboratory for breeding synthetic dinosaurs by the use of renewable energies.”

Felix Fisgus

We LOVE it. Don’t tell me this isn’t creepy though…

WHY DO YOU HAUNT MY DREAMS???

You’ll find tonnes of extra technical specs and images in the project posts on both Felix and Niklas‘ websites.

The post Smart Fairy Tale appeared first on Raspberry Pi.

Classify your trash with Raspberry Pi

Post Syndicated from Ashley Whittaker original https://www.raspberrypi.org/blog/classify-your-trash-with-raspberry-pi/

Maker Jen Fox took to hackster.io to share a Raspberry Pi–powered trash classifier that tells you whether the trash in your hand is recyclable, compostable, or just straight-up garbage.

Jen reckons this project is beginner-friendly, as you don’t need any code to train the machine learning model, just a little to load it on Raspberry Pi. It’s also a pretty affordable build, costing less than $70 including a Raspberry Pi 4.

“Haz waste”?!

Hardware:

  • Raspberry Pi 4 Model B
  • Raspberry Pi Camera Module
  • Adafruit push button
  • Adafruit LEDs
Watch Jen giving a demo of her creation

Software

The code-free machine learning model is created using Lobe, a desktop tool that automatically trains a custom image classifier based on what objects you’ve shown it.

The image classifier correctly guessing it has been shown a bottle cap

Training the image classifier

Basically, you upload a tonne of photos and tell Lobe what object each of them shows. Jen told the empty classification model which photos were of compostable waste, which were of recyclable and items, and which were of garbage or bio-hazardous waste. Of course, as Jen says, “the more photos you have, the more accurate your model is.”

Loading up Raspberry Pi

Birds eye view of Raspberry Pi 4 with a camera module connected
The Raspberry Pi Camera Module attached to Raspberry Pi 4

As promised, you only need a little bit of code to load the image classifier onto your Raspberry Pi. The Raspberry Pi Camera Module acts as the image classifier’s “eyes” so Raspberry Pi can find out what kind of trash you hold up for it.

The push button and LEDs are wired up to the Raspberry Pi GPIO pins, and they work together with the camera and light up according to what the image classifier “sees”.

Here’s the fritzing diagram showing how to wire the push button and LEDS to the Raspberry Pi GPIO pins

You’ll want to create a snazzy case so your trash classifier looks good mounted on the wall. Kate cut holes in a cardboard box to make sure that the camera could “see” out, the user can see the LEDs, and the push button is accessible. Remember to leave room for Raspberry Pi’s power supply to plug in.

Jen’s hand-painted case mounted to the wall, having a look at a plastic bag

Jen has tonnes of other projects on her Hackster profile — check out the micro:bit Magic Wand.

The post Classify your trash with Raspberry Pi appeared first on Raspberry Pi.

Hire Raspberry Pi as a robot sous-chef in your kitchen

Post Syndicated from Ashley Whittaker original https://www.raspberrypi.org/blog/hire-raspberry-pi-as-a-robot-sous-chef-in-your-kitchen/

Design Engineering student Ben Cobley has created a Raspberry Pi–powered sous-chef that automates the easier pan-cooking tasks so the head chef can focus on culinary creativity.

Ben named his invention OnionBot, as the idea came to him when looking for an automated way to perfectly soften onions in a pan while he got on with the rest of his dish. I have yet to manage to retrieve onions from the pan before they blacken so… *need*.

OnionBot robotic sous-chef set up in a kitchen
The full setup (you won’t need a laptop while you’re cooking, so you’ll have counter space)

A Raspberry Pi 4 Model B is the brains of the operation, with a Raspberry Pi Touch Display showing the instructions, and a Raspberry Pi Camera Module keeping an eye on the pan.

OnionBot robotic sous-chef hardware mounted on a board
Close up of the board-mounted hardware and wiring

Ben’s affordable solution is much better suited to home cooking than the big, expensive robotic arms used in industry. Using our tiny computer also allowed Ben to create something that fits on a kitchen counter.

OnionBot robotic sous-chef hardware list

What can OnionBot do?

  • Tells you on-screen when it is time to advance to the next stage of a recipe
  • Autonomously controls the pan temperature using PID feedback control
  • Detects when the pan is close to boiling over and automatically turns down the heat
  • Reminds you if you haven’t stirred the pan in a while
OnionBot robotic sous-chef development stages
Images from Ben’s blog on DesignSpark

How does it work?

A thermal sensor array suspended above the stove detects the pan temperature, and the Raspberry Pi Camera Module helps track the cooking progress. A servo motor controls the dial on the induction stove.

Screenshot of the image classifier of OnionBot robotic sous-chef
Labelling images to train the image classifier

No machine learning expertise was required to train an image classifier, running on Raspberry Pi, for Ben’s robotic creation; you’ll see in the video that the classifier is a really simple drag-and-drop affair.

Ben has only taught his sous-chef one pasta dish so far, and we admire his dedication to carbs.

Screenshot of the image classifier of OnionBot robotic sous-chef
Training the image classifier to know when you haven’t stirred the pot in a while

Ben built a control panel for labelling training images in real time and added labels at key recipe milestones while he cooked under the camera’s eye. This process required 500–1000 images per milestone, so Ben made a LOT of pasta while training his robotic sous-chef’s image classifier.

Diagram of networked drivers and devices in OnionBot robotic sous-chef

Ben open-sourced this project so you can collaborate to suggest improvements or teach your own robot sous-chef some more dishes. Here’s OnionBot on GitHub.

The post Hire Raspberry Pi as a robot sous-chef in your kitchen appeared first on Raspberry Pi.

Raspberry Pi High Quality security camera

Post Syndicated from Ashley Whittaker original https://www.raspberrypi.org/blog/raspberry-pi-high-quality-security-camera/

DJ from the element14 community shows you how to build a red-lensed security camera in the style of Portal 2 using the Raspberry Pi High Quality Camera.

The finished camera mounted on the wall

Portal 2 is a puzzle platform game developed by Valve — a “puzzle game masquerading as a first-person shooter”, according to Forbes.

DJ playing with the Raspberry Pi High Quality Camera

Kit list

No code needed!

DJ was pleased to learn that you don’t need to write any code to make your own security camera, you can just use a package called motionEyeOS. All you have to do is download the motionEyeOS image, pop the flashed SD card into your Raspberry Pi, and you’re pretty much good to go.

Dj got everything set up on a 5″ screen attached to the Raspberry Pi

You’ll find that the default resolution is 640×480, so it will show up as a tiny window on your monitor of choice, but that can be amended.

Simplicity

While this build is very simple electronically, the 20-part 3D-printed shell is beautiful. A Raspberry Pi is positioned on a purpose-built platform in the middle of the shell, connected to the Raspberry Pi High Quality Camera, which sits at the front of that shell, peeking out.

All the 3D printed parts ready to assemble

The 5V power supply is routed through the main shell into the base, which mounts the build to the wall. In order to keep the Raspberry Pi cool, DJ made some vent holes in the lens of the shell. The red LED is routed out of the side and sits on the outside body of the shell.

Magnetising

Raspberry Pi 4 (centre) and Raspberry Pi High Quality Camera (right) sat inside the 3D printed shell

This build is also screwless: the halves of the shell have what look like screw holes along the edges, but they are actually 3mm neodymium magnets, so assembly and repair is super easy as everything just pops on and off.

The final picture (that’s DJ!)

You can find all the files you need to recreate this build, or you can ask DJ a question, at element14.com/presents.

The post Raspberry Pi High Quality security camera appeared first on Raspberry Pi.

Scroll text across your face mask with NeoPixel and Raspberry Pi

Post Syndicated from Ashley Whittaker original https://www.raspberrypi.org/blog/scroll-text-across-your-face-mask-with-neopixel-and-raspberry-pi/

Have you perfected your particular combination of ‘eye widening then squinting’ to let people know you’re smiling at them behind your mask? Or do you need help expressing yourself from this text-scrolling creation by Caroline Dunn?

The mask running colourful sample code

What’s it made of?

The main bits of hardware need are a Raspberry Pi 3 or Raspberry Pi 4 or Raspberry Pi Zero W (or a Zero WH with pre-soldered GPIO header if you don’t want to do soldering yourself), and an 8×8 Flexible NeoPixel Matrix with individually addressable LEDs. The latter is a two-dimensional grid of NeoPixels, all controlled via a single microcontroller pin.

Raspberry Pi and the NeoPixel Matrix (bottom left) getting wired up

The NeoPixel Matrix is attached to a cloth face that which has a second translucent fabric layer. The translucent layer is to sew your Raspberry Pi project to, the cloth layer underneath is a barrier for germs.

You’ll need a separate 5V power source for the NeoPixel Matrix. Caroline used a 5V power bank, which involved some extra fiddling with cutting up and stripping an old USB cable. You may want to go for a purpose-made traditional power supply for ease.

Running the text

To prototype, Caroline connected the Raspberry Pi computer to the NeoPixel Matrix via a breadboard and some jumper wires. At this stage of your own build, you check everything is working by running this sample code from Adafruit, which should get your NeoPixel Matrix lighting up like a rainbow.

The internal website on the left

Once you’ve got your project up and running, you can ditch the breadboard and wires and set up the key script, app.py, to run on boot.

Going mobile

To change the text scrolling across your mask, you use the internal website that’s part of Caroline’s code.

And for a truly mobile solution, you can access the internal website via mobile phone by hooking up your Raspberry Pi using your phone’s hotspot functionality. Then you can alter the scrolling text while you’re out and about.

Caroline wearing the 32×8 version

Caroline also created a version of her project using a 32×8 Neopixel Matrix, which fits on the across the headband of larger plastic face visors.

If you want to make this build for yourself, you’d do well to start with the very nice in-depth walkthrough Caroline created. It’s only three parts; you’ll be fine.

The post Scroll text across your face mask with NeoPixel and Raspberry Pi appeared first on Raspberry Pi.

Build an e-paper to-do list with Raspberry Pi

Post Syndicated from Ashley Whittaker original https://www.raspberrypi.org/blog/build-an-e-paper-to-do-list-with-raspberry-pi/

James Bruxton (or @xrobotosuk on Instagram) built an IoT-controlled e-paper message board using Raspberry Pi. Updating it is easy: just edit a Google sheet, and the message board will update with the new data.

Harnessing Google power

This smart message board uses e-paper, which has very low power consumption. Combining this with the Google Docs API (which allows you to write code to read and write to Google Docs) and Raspberry Pi makes it possible to build a message board that polls a Google Sheet and updates whenever there’s new data. This guide helped James write the Google Docs API code.

We’ll do #4 for you, James!

Why e-paper?

James’s original plan was to hook up his Raspberry Pi to a standard monitor and use Google Docs so people could update the display via mobile app. However, a standard monitor consumes a lot of power, due to its backlight, and if you set it to go into sleep mode, people would just walk past it and not see updates to the list unless they remember to wake the device up.

Raspberry Pi wearing its blue e-paper HAT on the left, which connects to the display on the right via a ribbon cable

Enter e-paper (the same stuff used for Kindle devices), which only consumes power when it’s updating. Once you’ve got the info you want on the e-paper, you can even disconnect it entirely from your power source and the screen will still display whatever the least update told it to. James’s top tip for your project: go for the smallest e-paper display possible, as those things are expensive. He went with this one, which comes with a HAT for Raspberry Pi and a ribbon cable to connect the two.

The display disconnected from any power and still clearly readable

The HAT has an adaptor for plugging into the Raspberry Pi GPIO pins, and a breakout header for the SPI pins. James found it’s not as simple as enabling the SPI on his Raspberry Pi and the e-paper display springing to life: you need a bit of code to enable the SPI display to act as the main display for the Raspberry Pi. Luckily, the code for this is on the wiki of Waveshare, the producer of HAT and display James used for this project.

Making it pretty

A 3D-printed case, which looks like a classic photo frame but with a hefty in-built stand to hold it up and provide enough space for the Raspberry Pi to sit on, is home to James’s finished smart to-do list. The e-paper is so light and thin it can just be sticky-taped into the frame.

The roomy frame stand

James’s creation is powered by Raspberry Pi 4, but you don’t need that much power, and he’s convinced you’ll be fine with any Raspberry Pi model that has 40 GPIO pins.

Extra points for this maker, as he’s put all the CAD files and code you’ll need to make your own e-paper message board on GitHub.

If you’re into e-paper stuff but are wedded to your handwritten to-do lists, then why not try building this super slow movie player instead? The blog squad went *nuts* for it when we posted it last month.

The post Build an e-paper to-do list with Raspberry Pi appeared first on Raspberry Pi.

Ultrasonically detect bats with Raspberry Pi

Post Syndicated from Ashley Whittaker original https://www.raspberrypi.org/blog/ultrasonically-detect-bats-with-raspberry-pi/

Welcome to October, the month in which spiderwebs become decor and anything vaguely gruesome is considered ‘seasonal’. Such as bats. Bats are in fact cute, furry creatures, but as they are part of the ‘Halloweeny animal’ canon, I have a perfect excuse to sing their praises.

baby bats in a row wrapped up like human babies
SEE? Baby bats wrapped up cute like baby humans

Tegwyn Twmffat was tasked with doing a bat survey on a derelict building, and they took to DesignSpark to share their Raspberry Pi–powered solution.

UK law protects nesting birds and roosting bats, so before you go knocking buildings down, you need a professional to check that no critters will be harmed in the process.

The acoustic signature of an echo-locating brown long-eared bat

The problem with bats, compared to birds, is they are much harder to spot and have a tendency to hang out in tiny wall cavities. Enter this big ultrasonic microphone.

Raspberry Pi 4 Model B provided the RAM needed for this build

After the building was declared safely empty of bats, Tegwyn decided to keep hold of the expensive microphone (the metal tube in the image above) and have a crack at developing their own auto-classification system to detect which type of bats are about.

How does it work?

The ultrasonic mic picks up the audio data using an STM M0 processor and streams it to Raspberry Pi via USB. Raspberry Pi runs Alsa driver software and uses the bash language to receive the data.

Tegwyn turned to the open-source GTK software to process the audio data

It turns out there are no publicly available audio records of bats, so Tegwyn took to their own back garden and found 6 species to record. And with the help of a few other bat enthusiasts, they cobbled together an audio dataset of 9 of the 17 bat species found in the UK!

Tegwyn’s original post about their project features a 12-step walkthrough, as well as all the code and commands you’ll need to build your own system. And here’s the GitHub repository, where you can check for updates.

The post Ultrasonically detect bats with Raspberry Pi appeared first on Raspberry Pi.

Raspberry Pi powered e-paper display takes months to show a movie

Post Syndicated from Ashley Whittaker original https://www.raspberrypi.org/blog/raspberry-pi-powered-e-paper-display-takes-months-to-show-a-movie/

We loved the filmic flair of Tom Whitwell‘s super slow e-paper display, which takes months to play a film in full.

Living art

His creation plays films at about two minutes of screen time per 24 hours, taking a little under three months for a 110-minute film. Psycho played in a corner of his dining room for two months. The infamous shower scene lasted a day and a half.

Tom enjoys the opportunity for close study of iconic filmmaking, but you might like this project for the living artwork angle. How cool would this be playing your favourite film onto a plain wall somewhere you can see it throughout the day?

The Raspberry Pi wearing its e-Paper HAT

Four simple steps

Luckily, this is a relatively simple project – no hardcore coding, no soldering required – with just four steps to follow if you’d like to recreate it:

  1. Get the Raspberry Pi working in headless mode without a monitor, so you can upload files and run code
  2. Connect to an e-paper display via an e-paper HAT (see above image; Tom is using this one) and install the driver code on the Raspberry Pi
  3. Use Tom’s code to extract frames from a movie file, resize and dither those frames, display them on the screen, and keep track of progress through the film
  4. Find some kind of frame to keep it all together (Tom went with a trusty IKEA number)
Living artwork: the Psycho shower scene playing alongside still artwork in Tom’s home

Affordably arty

The entire build cost £120 in total. Tom chose a 2GB Raspberry Pi 4 and a NOOBS 64gb SD Card, which he bought from Pimoroni, one of our approved resellers. NOOBS included almost all the libraries he needed for this project, which made life a lot easier.

His original post is a dream of a comprehensive walkthrough, including all the aforementioned code.

2001: A Space Odyssey would take months to play on Tom’s creation

Head to the comments section with your vote for the creepiest film to watch in ultra slow motion. I came over all peculiar imaging Jaws playing on my living room wall for months. Big bloody mouth opening slooooowly (pales), big bloody teeth clamping down slooooowly (heart palpitations). Yeah, not going to try that. Sorry Tom.

The post Raspberry Pi powered e-paper display takes months to show a movie appeared first on Raspberry Pi.