Tag Archives: Tech Lab

New Open Source Tool for Consistency in Cassandra Migrations

Post Syndicated from Elliott Sims original https://www.backblaze.com/blog/new-open-source-tool-for-consistency-in-cassandra-migrations/

A decorative image showing the Cassandra logo with a function represented by two servers on either side of the logo.

Sometimes you find a problem because something breaks, and other times you find a problem the good way—by thinking it through before things break. This is a story about one of those bright, shining, lightbulb moments when you find a problem the good way.

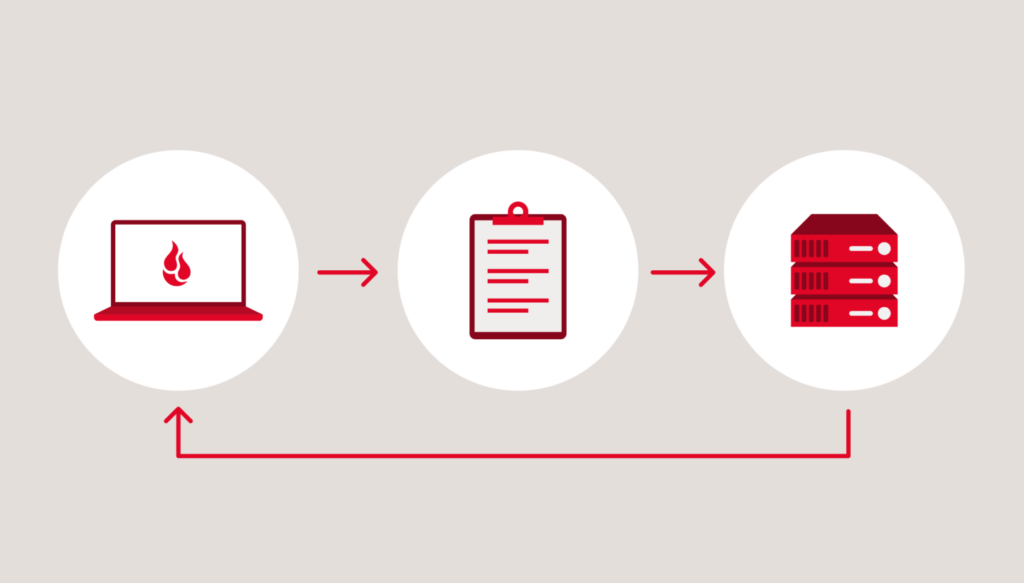
On the Backblaze Site Reliability Engineering (SRE) team, we were thinking through an upcoming datacenter migration in Cassandra. We were running through all of the various types of queries we would have to do when we had the proverbial “aha” moment. We discovered an inconsistency in the way Cassandra handles lightweight transactions (LWTs).

If you’ve ever tried to do a datacenter migration in Cassandra and something got corrupted in the process but you couldn’t figure out why or how—this might be why. I’m going to walk through a short intro on Cassandra, how we use it, and the issue we ran into. Then, I’ll explain the workaround, which we open sourced. 

Get the Open Source Code

You can download the open source code from our Git repository. We’d love to know how you’re using it and how it’s working for you—let us know in the comments.

How We Use Cassandra

First, if you’re not a Cassandra dev, I should mention that when we say “datacenter migration” it means something slightly different in Cassandra than what it sounds like. It doesn’t mean a data center migration in the physical sense (although you can use datacenter migrations in Cassandra when you’re moving data from one physical data center to another). In the simplest terms, it involves moving data between two Cassandra or Cassandra-compatible database replica sets within a cluster.

And, if you’re not familiar with Cassandra at all, it’s an open-source, NoSQL, distributed database management system. It was created to handle large amounts of data across many commodity servers, so it fits our use case—lots of data, lots of servers. 

At Backblaze, we use Cassandra to index filename to location for data stored in Backblaze B2, for example. Because it’s customer data and not just analytics, we care more about durability and consistency than some other applications of Cassandra. We run with three replicas in a single datacenter and “batch” mode to require writes to be committed to disk before acknowledgement rather than the default “periodic.”

Datacenter migrations are an important aspect of running Cassandra, especially on bare metal. We do a few datacenter migrations per year either for physical data moves, hardware refresh, or to change certain cluster layout parameters like tokens per host that are otherwise static. 

What Are LWTs and Why Do They Matter for Datacenter Migrations in Cassandra?

First of all, LWTs are neither lightweight nor transactions, but that’s neither here nor there. They are an important feature in Cassandra. Here’s why. 

Cassandra is great at scaling. In something like a replicated SQL cluster, you can add additional replicas for read throughput, but not writes. Cassandra scales writes (as well as reads) nearly linearly with the number of hosts—into the hundreds. Adding nodes is a fairly straightforward and “automagic” process as well, with no need to do something like manual token range splits. It also handles individual down nodes with little to no impact on queries. Unfortunately, these properties come with a trade-off: a complex and often nonintuitive consistency model that engineers and operators need to understand well.

In a distributed database like Cassandra, data is replicated across multiple nodes for durability and availability. 

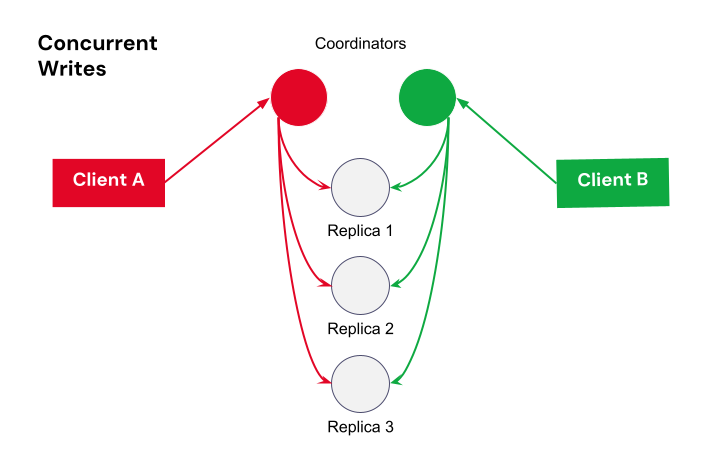
Although databases generally allow multiple reads and writes to be submitted at once, they make it look to the outside world like all the operations are happening in order, one at a time. This property is known as serializability, and Cassandra is not serializable. Although it does have a “last write wins” system, there’s no transaction isolation and timestamps can be identical. 

It’s possible, for example, to have a row that has some columns from one write and other columns from another write. It’s safe if you’re only appending additional rows, but mutating existing rows safely requires careful design. Put another way, you can have two transactions with different data that, to the system, appear to have equal priority. 

How Do LWTs Solve This Problem?

As a solution for cases where stronger consistency is needed, Cassandra has a feature called “Lightweight Transactions” or LWTs. These are not really identical to traditional database transactions, but provide a sort of “compare and set” operation that also guarantees pending writes are completed before answering a read. This means if you’re trying to change a row’s value from “A” to “B”, a simultaneous attempt to change that row from “A” to “C” will return a failure. This is accomplished by doing a full—not at all lightweight—Paxos round complete with multiple round trips and slow expensive retries in the event of a conflict.

In Cassandra, the minimum consistency level for read and write operations is ONE, meaning that only a single replica needs to acknowledge the operation for it to be considered successful. This is fast, but in a situation where you have one down host, it could mean data loss, and later reads may or may not show the newest write depending on which replicas are involved and whether they’re received the previous write. For better durability and consistency, Cassandra also provides various quorum levels that require a response from multiple replicas, as well as an ALL consistency that requires responses from every replica.

Cassandra Is My Type of Database

Curious to know more about consistency limitations and LWTs in Cassandra? Christopher Batey’s presentation at the 2016 Cassandra Summit does a good job of explaining the details.

The Problem We Found With LWTs During Datacenter Migrations

Usually we use one datacenter in Cassandra, but there are circumstances where we sometimes stand up a second datacenter in the cluster and migrate to it, then tear down the original. We typically do this either to change num_tokens, to move data when we’re refreshing hardware, or to physically move to another nearby data center.

The TL:DR

We reasoned through the interaction between LWTs/serial and datacenter migrations and found a hole—there’s no guarantee of LWT correctness during a topology change (that is, a change to the number of replicas) large enough to change the number of replicas needed to satisfy quorum. It turns out that combining LWTs and datacenter migrations can violate consistency guarantees in subtle ways without some specific steps and tools to work around it.

The Long Version

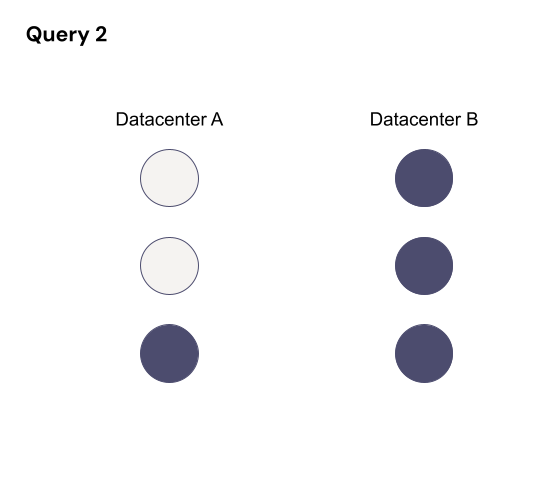
Let’s say you are standing up a new datacenter, and you need to copy an existing datacenter to it. So, you have two datacenters—datacenter A, the existing datacenter, and datacenter B, the new datacenter. Let’s say datacenter A has three replicas you need to copy for simplicity’s sake, and you’re using quorum writes to ensure consistency.

Refresher: What is Quorum-Based Consistency in Cassandra?

Quorum consistency in Cassandra is based on the concept that a specific number of replicas must participate in a read or write operation to ensure consistency and availability—a majority (n/2 +1) of the nodes must respond before considering the operation as successful. This ensures that the data is durably stored and available even if a minority of replicas are unavailable.

You have different types of quorum you can choose from, and here’s how those defaults make a decision: 

  • Local quorum: Two out of the three replicas in the datacenter I’m talking to must respond in order to return success. I don’t care about the other datacenter.
  • Global quorum: Four out of the six total replicas must respond in order to return success, and it doesn’t matter which datacenter they come from.
  • Each quorum: Two out of the three replicas in each datacenter must respond in order to return success.

Most of these quorum types also have a serial equivalent for LWTs.

Type of Quorum Serial Regular
Local LOCAL_SERIAL LOCAL_QUORUM
Each unsupported EACH_QUORUM
Global SERIAL QUORUM

The problem you might run into, however, is that LWTs do not have an each_serial mode. They only have local and global. There’s no way to tell the LWT you want quorum in each datacenter. 

local_serial is good for performance, but transactions on different datacenters could overlap and be inconsistent. serial is more expensive, but normally guarantees correctness as long as all queries agree on cluster size. But what if a query straddles a topology change that changes quorum size? 

Let’s use global quorum to show how this plays out. If a LWT starts when RF=3, at least two hosts must process it. 

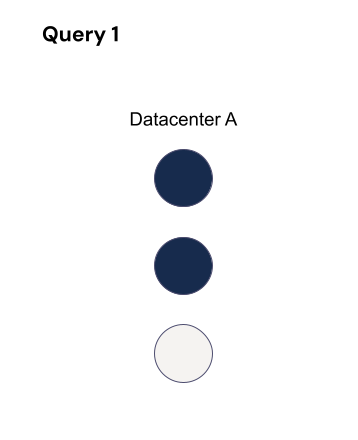
While it’s running, the topology changes to two datacenters (A and B) each with RF=3 (so six replicas total) with a quorum of four. There’s a chance that a query affecting the same partition could then run without overlapping nodes, which means consistency guarantees are not maintained for those queries. For that query, quorum is four out of six where those four could be the three replicas in datacenter B and the remaining replica in datacenter A. 

Those two queries are on the same partition, but they’re not overlapping any hosts, so they don’t know about each other. It violates the LWT guarantees.

The Solution to LWT Inconsistency

What we needed was a way to make sure that the definition of “quorum” didn’t change too much in the middle of a LWT running. Some change is okay, as long as old and new are guaranteed to overlap.

To account for this, you need to change the replication factor one level at a time and make sure there are no transactions still running that started before the previous topology change before you make the next. Three replicas with a quorum of two can only change to four replicas with a quorum of three. That way, at least one replica must overlap. The same thing happens when you go from four to five replicas or five to six replicas. This also applies when reducing the replication factor, such as when tearing down the old datacenter after everything has moved to the new one.

Then, you just need to make sure no LWT overlaps multiple changes. You could just wait long enough that they’ve timed out, but it’s better to be sure. This requires querying the internal-only system.paxos table on each host in the cluster between topology changes.

We built a tool that checks to see whether there are still transactions running from before we made a topology change. It reads system.paxos on each host, ignoring any rows with proposal_ballot=null, and records them. Then after a short delay, it re-reads system.paxos, ignoring any rows that weren’t present in the previous run, or any with proposal_ballot=null in either read, or any where in_progress_ballot has changed. Any remaining rows are potentially active transactions. 

This worked well the first few times that we used it, on 3.11.6. To our surprise, when we tried to migrate a cluster running 3.11.10 the tool reported hundreds of thousands of long-running LWTs. After a lot of digging, we found a small (but fortunately well-commented) performance optimization added as part of a correctness fix (CASSANDRA-12126), which means proposal_ballot does not get set to null if the proposal is empty/noop. To work around this, we had to actually parse the proposal field. Fortunately all we need is the is_empty flag in the third field, so no need to reimplement the full parsing code. A big impact to us for a seemingly small and innocuous change piggy-backed onto a correctness fix, but that’s the risk of directly reading internal-only tables. 

We’ve used the tool several times now for migrations with good results, but it’s still relatively basic and limited. It requires running repeatedly until all transactions are complete, and sometimes manual intervention to deal with incomplete transactions. In some cases we’ve been able to force-commit a long-pending LWT by doing a SERIAL read of the partition affected, but in a couple of cases we actually ended up running across LWTs that still didn’t seem to complete. Fortunately in every case so far it was in a temporary table and a little work allowed us to confirm that we no longer needed the partition at all and could just delete it.

Most people who use Cassandra may never run across this problem, and most of those who do will likely never track down what caused the small mystery inconsistency around the time they did a datacenter migration. If you rely on LWTs and are doing a datacenter migration, we definitely recommend going through the extra steps to guarantee consistency until and unless Cassandra implements an EACH_SERIAL consistency level.

Using the Tool

If you want to use the tool for yourself to help maintain consistency through datacenter migrations, you can find it here. Drop a note in the comments to let us know how it’s working for you and if you think of any other ways around this problem—we’re all ears!

If You’ve Made It This Far

You might be interested in signing up for our Developer Newsletter where our resident Chief Technical Evangelist, Pat Patterson, shares the latest and greatest ways you can use B2 Cloud Storage in your applications.

The post New Open Source Tool for Consistency in Cassandra Migrations appeared first on Backblaze Blog | Cloud Storage & Cloud Backup.

Backblaze Network Stats

Post Syndicated from Brent Nowak original https://www.backblaze.com/blog/backblaze-network-stats/

A decorative image displaying the headline Welcome to Network Stats.

At the end of Q3 2023, Backblaze was monitoring 263,992 hard disk drives (HDDs) and solid state drives (SSDs) in our data centers around the world. We’ve reported on those drives for many years. But, all the data on those drives needs to somehow get from your devices to our storage servers. You might be wondering, “How does that happen?” and “Where does that happen?” Or, more likely, “How fast does that happen?”

These are all questions we want to start to answer.

Welcome to our new Backblaze Network Stats series, where we’ll explore the world of network connectivity and how we better serve our customers, partners, and the internet community at large. We hope to share our challenges, initiatives, and engineering perspective as we build the open cloud with our Partners.

In this first post, we will explore two issues: how we connect our network with the internet and the distribution of our peering traffic. As we expand this series, we hope to capture and share more metrics and insights.

Nice to Meet You; I’m Brent

Since this is the first time you’re hearing from me, I thought I should introduce myself. I’m a Senior Network Engineer here at Backblaze. The Network Engineering group is responsible for ensuring the reliability, capacity, and security of network traffic. 

My interest in computer networking began in my childhood when I first persuaded my father to upgrade our analog modem to a ISDN line by providing a financial comparison of time sink due to large download times I was conducting (nothing like using all the family dial-up time to download multi-megabyte SimCity 2000 and Doom customizations). Needless to say, I’m still interested in those same types of networking metrics, and that’s why I’m here sharing them with you at Backblaze.

First, Some Networking Basics

If you’ve ever heard folks joke about the internet being a series of tubes, well, it may be widely mocked, but it’s not entirely wrong. The internet as we know it is fundamentally a complex network of all the computers on the planet. Whenever we’re typing in an internet address into a web browser, we’re basically giving our computer the address of a computer (or server, etc.) to locate, and that computer will hopefully display data to you that it’s storing. 

Of course, it’s not a free-for-all. Internet protocols like TLS/SSL are the boundaries that set the rules for how computers communicate, and networks allow different levels of access to outsiders. Internet service providers (ISPs) are defined and regulated, and we’ll outline some of those roles and how Backblaze interacts with them below. But, all that communication between computers has to be powered by hardware, which is why, at one point, we actually had to solve the problem of sharks attacking the internet. Good news: since 2006, sharks have accounted for less than one percent of fiber optic cable attacks. 

Wireless internet has largely made this connectivity invisible to consumers, but the job of Wi-Fi is to broadcast a short-range network that connects you to this series of cables and “tubes.” That’s why when you’re transmitting or storing larger amounts of data, you typically get better speeds when you use a wired connection. (A good consumer example: setting up NAS devices works better with an ethernet cable.)

When you’re talking about storing and serving petabytes of data for a myriad of use cases, then you have to create and use different networks to connect to the internet effectively. Think of it like water: both a fire hose and your faucet are connected to utility lines, but they have to move different amounts of water, so they have different kinds of connections to the main utility.   

And, that brings us to peering, the different levels of internet service providers, and many, many more things that Backblaze Network Engineers deal with from both a hardware and a software perspective on a regular basis. 

What Is Peering?

Peering on the internet is akin to building direct express lanes between neighborhoods. Instead of all data (residents) relying on crowded highways (public internet), networks (neighborhoods) establish peering connections—dedicated pathways connecting them directly. This allows data to travel faster and more efficiently, reducing congestion and delays. Peering is like having exclusive lanes, streamlining communication between networks and enhancing the overall performance of the internet “transportation” system. 

We connect to various types of networks to help move your data. I’ll explain the different types below.

The Bit Exchange

Every day we move multiple petabytes of traffic between our internet connectivity points and our scalable data center fabric layer to be delivered to either our SSD caching layer (what we call a “shard stash”) or spinning hard drives for storage.

Our data centers are connected to the world in three different ways.

1. Direct Internet Access (DIA)

The most common way we reach everyone is via a DIA connection with a Tier 1 internet service provider. These connections give us access to long-haul, high-capacity fiber infrastructure that spans continents and oceans. Connecting to a Tier 1 ISP has the advantage of scale and reach, but this scale comes at a cost—we may not have the best path to our customers. 

If we draw out the hierarchy of networks that we have to traverse to reach you, it would look like a series of geographic levels (Global, Regional, and Local). The Tier 1 ISPs would be positioned at the top, leasing bandwidth on their networks to smaller Tier 2 and Tier 3 networks, which are closer to our customer’s home and office networks.

A chart showing an example of network and ISP reroutes between Backblaze and a customer.
How we get from B to C (Backblaze to customer).

Since our connections to the Tier 1 ISPs are based on leased bandwidth, we pay based on how much data we transfer. The bill grows the more we transfer. There are commitments and overage charges, and the relationship is more formal since a Tier 1 ISP is a for-profit company. Sometimes you just want unlimited bandwidth, and that’s where the role of the internet exchange (IX) helps us.

2. Internet Exchange (IX)

We always want to be as close to the client as possible and our next connectivity option allows us to join a community of peers that exchange traffic more locally. Peering with an IX means that network traffic doesn’t have to bubble up to a Tier 1 National ISP to eventually reach a regional network. If we are on an advantageous IX, we transfer data locally inside a data center or within the same data center campus, thus reducing latency and improving the overall experience.

Benefits of an IX, aka the “Unlimited Plan,” include:

  • Paying a flat rate per month to get a fiber connection to the IX equipment versus paying based on how much data we transfer.
  • No price negotiation based on bandwidth transfer rates.
  • No overage charges.
  • Connectivity to lower tiered networks that are closer to consumer and business networks.
  • Participation helps build a more egalitarian internet.

In short, we pay a small fee to help the IX remain financially stable, and then we can exchange as much or as little traffic as we want.

Our network connectivity standard is to connect to multiple Tier 1 ISPs and a localized IX at every location to give us the best of both solutions. Every time we have to traverse a network, we’re adding latency and increasing the total amount of time for a file to upload or download. Internet routing prefers the shortest path, so if we have a shorter (faster) way to reach you, we will talk over the IX versus the Tier 1 network.

A decorative image showing two possible paths to serve data from Backblaze to the customer.
Less is more—the fewer networks between us and you, the better.

3. Private Network Interconnect (PNI)

The most direct and lowest latency way for us to exchange traffic is with a PNI. This option is used for direct fiber connections within the same data center or metro region to some of our specific partners like Fastly and Cloudflare. Our edge routing equipment—that is, the appliances that allow us to connect our internal network to external networks—is connected directly to our partner’s edge routing equipment. To go back to our neighborhood analogy, this would be if you and your friend put a gate in the fences that connect your backyards. With a PNI, the logical routing distance between us and our partners is the best it can be. 

IX Participation

Personally, the internet exchange path is the most exciting for me as a network engineer. It harkens back to the days of the early internet (IX points began as Network Access Points and were a key component of Al Gore’s National Information Infrastructure (NII) plan way back in 1991), and the growth of an IX feels communal, as people are joining to help the greater whole. When we add our traffic to an IX as a new peer, it increases participation, further strengthening the advantage of contributing to the local IX and encouraging more organizations to join.

Backblaze Joins the Equinix Silicon Valley (SV1) Internet Exchange

Our San Jose data center is a major point of presence (PoP) (that is, a point where a network connects to the internet) for Backblaze, with the site connecting us in the Silicon Valley region to many major peering networks.

In November, we brought up connectivity to Equinix IX peering exchange in San Jose, bringing us closer to 278 peering networks at the time of publishing. Many of the networks that participate on this IX are very logically close to our customers. The participants are some of the well known ISPs that serve homes, offices, and business in the region, including Comcast, Google Fiber, Sprint, and Verizon.

Now, for the Stats

As soon as we turned up the connection, 26% inbound traffic that was being sent to our DIA connections shifted to the local Equinix IX, as shown in the pie chart below.

Two side by side pie charts comparing traffic on the different types of network connections.
Before: 98% direct internet access (DIA); 2% private network interconnect (PNI). After: 72% DIA; 2% PNI; 26% internet exchange (IX).

The below graph shows our peering traffic load over the edge router and how immediately the traffic pattern changed as soon as we brought up the peer. Green indicates inbound traffic, while yellow shows outbound traffic. It’s always exciting to see a project go live with such an immediate reaction!

A graph showing networking uploads and downloads increasing as Backblaze brought networks up to peer.

To give you an idea of what we mean by better network proximity, let’s take a look at our improved connectivity to Google Fiber. Here’s a diagram of the three pathways that our edge routers see that show how to get to Google Fiber. With the new IX connection, we see a more advantageous path and pick that as our method to exchange traffic. We no longer have to send traffic to the Tier 1 providers and can use them as backup paths.

A graph showing possible network paths now that peering is enabled.
Taking faster local roads.

What Does This Mean for You?

We here at Backblaze are always trying to improve the performance and reliability of our storage platform while scaling up. We monitor our systems for inefficiencies, and improving the network components is one way that we can deliver a better experience. 

By joining the Equinix SV1 peering exchange, we shorten the number of network hops that we have to transit to communicate with you. And that reduces latency, speeding up your backup job upload, allowing for faster image download, or supporting Partners

Cheers from the NetEng team! We’re excited to start this series and bring you more content as our solutions evolve and grow. Some of the coverage we hope to share in the future includes analyzing our proximity to our peers and Partners, how we can improve those connections further, and stats to show the amount of bits per second that we process in our data centers to ensure that we not only have a file, but all the related redundancy shard components related to it. So, stay tuned!

The post Backblaze Network Stats appeared first on Backblaze Blog | Cloud Storage & Cloud Backup.

How to Run AI/ML Workloads on CoreWeave + Backblaze

Post Syndicated from Pat Patterson original https://www.backblaze.com/blog/how-to-run-ai-ml-workloads-on-coreweave-backblaze/

A decorative image showing the Backblaze and CoreWeave logos superimposed on clouds.

Backblaze compute partner CoreWeave is a specialized GPU cloud provider designed to power use cases such as AI/ML, graphics, and rendering up to 35x faster and for 80% less than generalized public clouds. Brandon Jacobs, an infrastructure architect at CoreWeave, joined us earlier this year for Backblaze Tech Day ‘23. Brandon and I co-presented a session explaining both how to backup CoreWeave Cloud storage volumes to Backblaze B2 Cloud Storage and how to load a model from Backblaze B2 into the CoreWeave Cloud inference stack.

Since we recently published an article covering the backup process, in this blog post I’ll focus on loading a large language model (LLM) directly from Backblaze B2 into CoreWeave Cloud.

Below is the session recording from Tech Day; feel free to watch it instead of, or in addition to, reading this article.

More About CoreWeave

In the Tech Day session, Brandon covered the two sides of CoreWeave Cloud: 

  1. Model training and fine tuning. 
  2. The inference service. 

To maximize performance, CoreWeave provides a fully-managed Kubernetes environment running on bare metal, with no hypervisors between your containers and the hardware.

CoreWeave provides a range of storage options: storage volumes that can be directly mounted into Kubernetes pods as block storage or a shared file system, running on solid state drives (SSDs) or hard disk drives (HDDs), as well as their own native S3 compatible object storage. Knowing that, you’re probably wondering, “Why bother with Backblaze B2, when CoreWeave has their own object storage?”

The answer echoes the first few words of this blog post—CoreWeave’s object storage is a specialized implementation, co-located with their GPU compute infrastructure, with high-bandwidth networking and caching. Backblaze B2, in contrast, is general purpose cloud object storage, and includes features such as Object Lock and lifecycle rules, that are not as relevant to CoreWeave’s object storage. There is also a price differential. Currently, at $6/TB/month, Backblaze B2 is one-fifth of the cost of CoreWeave’s object storage.

So, as Brandon and I explained in the session, CoreWeave’s native storage is a great choice for both the training and inference use cases, where you need the fastest possible access to data, while Backblaze B2 shines as longer term storage for training, model, and inference data as well as the destination for data output from the inference process. In addition, since Backblaze and CoreWeave are bandwidth partners, you can transfer data between our two clouds with no egress fees, freeing you from unpredictable data transfer costs.

Loading an LLM From Backblaze B2

To demonstrate how to load an archived model from Backblaze B2, I used CoreWeave’s GPT-2 sample. GPT-2 is an earlier version of the GPT-3.5 and GPT-4 LLMs used in ChatGPT. As such, it’s an accessible way to get started with LLMs, but, as you’ll see, it certainly doesn’t pass the Turing test!

This sample comprises two applications: a transformer and a predictor. The transformer implements a REST API, handling incoming prompt requests from client apps, encoding each prompt into a tensor, which the transformer passes to the predictor. The predictor applies the GPT-2 model to the input tensor, returning an output tensor to the transformer for decoding into text that is returned to the client app. The two applications have different hardware requirements—the predictor needs a GPU, while the transformer is satisfied with just a CPU, so they are configured as separate Kubernetes pods, and can be scaled up and down independently.

Since the GPT-2 sample includes instructions for loading data from Amazon S3, and Backblaze B2 features an S3 compatible API, it was a snap to modify the sample to load data from a Backblaze B2 Bucket. In fact, there was just a single line to change, in the s3-secret.yaml configuration file. The file is only 10 lines long, so here it is in its entirety:

apiVersion: v1
kind: Secret
metadata:
  name: s3-secret
  annotations:
     serving.kubeflow.org/s3-endpoint: s3.us-west-004.backblazeb2.com
type: Opaque
data:
  AWS_ACCESS_KEY_ID: <my-backblaze-b2-application-key-id>
  AWS_SECRET_ACCESS_KEY: <my-backblaze-b2-application-key>

As you can see, all I had to do was set the serving.kubeflow.org/s3-endpoint metadata annotation to my Backblaze B2 Bucket’s endpoint and paste in an application key and its ID.

While that was the only Backblaze B2-specific edit, I did have to configure the bucket and path where my model was stored. Here’s an excerpt from gpt-s3-inferenceservice.yaml, which configures the inference service itself:

apiVersion: serving.kubeflow.org/v1alpha2
kind: InferenceService
metadata:
  name: gpt-s3
  annotations:
    # Target concurrency of 4 active requests to each container
    autoscaling.knative.dev/target: "4"
    serving.kubeflow.org/gke-accelerator: Tesla_V100
spec:
  default:
    predictor:
      minReplicas: 0 # Allow scale to zero
      maxReplicas: 2 
      serviceAccountName: s3-sa # The B2 credentials are retrieved from the service account
      tensorflow:
        # B2 bucket and path where the model is stored
        storageUri: s3://<my-bucket>/model-storage/124M/
        runtimeVersion: "1.14.0-gpu"
        ...

Aside from storageUri configuration, you can see how the predictor application’s pod is configured to scale from between zero and two instances (“replicas” in Kubernetes terminology). The remainder of the file contains the transformer pod configuration, allowing it to scale from zero to a single instance.

Running an LLM on CoreWeave Cloud

Spinning up the inference service involved a kubectl apply command for each configuration file and a short wait for the CoreWeave GPU cloud to bring up the compute and networking infrastructure. Once the predictor and transformer services were ready, I used curl to submit my first prompt to the transformer endpoint:

% curl -d '{"instances": ["That was easy"]}' http://gpt-s3-transformer-default.tenant-dead0a.knative.chi.coreweave.com/v1/models/gpt-s3:predict
{"predictions": ["That was easy for some people, it's just impossible for me,\" Davis said. \"I'm still trying to" ]}

In the video, I repeated the exercise, feeding GPT-2’s response back into it as a prompt a few times to generate a few paragraphs of text. Here’s what it came up with:

“That was easy: If I had a friend who could take care of my dad for the rest of his life, I would’ve known. If I had a friend who could take care of my kid. He would’ve been better for him than if I had to rely on him for everything.

The problem is, no one is perfect. There are always more people to be around than we think. No one cares what anyone in those parts of Britain believes,

The other problem is that every decision the people we’re trying to help aren’t really theirs. If you have to choose what to do”

If you’ve used ChatGPT, you’ll recognize how far LLMs have come since GPT-2’s release in 2019!

Run Your Own Large Language Model

While CoreWeave’s GPT-2 sample is an excellent introduction to the world of LLMs, it’s a bit limited. If you’re looking to get deeper into generative AI, another sample, Fine-tune Large Language Models with CoreWeave Cloud, shows how to fine-tune a model from the more recent EleutherAI Pythia suite.

Since CoreWeave is a specialized GPU cloud designed to deliver best-in-class performance up to 35x faster and 80% less expensive than generalized public clouds, it’s a great choice for workloads such as AI, ML, rendering, and more, and, as you’ve seen in this blog post, easy to integrate with Backblaze B2 Cloud Storage, with no data transfer costs. For more information, contact the CoreWeave team.

The post How to Run AI/ML Workloads on CoreWeave + Backblaze appeared first on Backblaze Blog | Cloud Storage & Cloud Backup.

Digging Deeper Into Object Lock

Post Syndicated from Pat Patterson original https://www.backblaze.com/blog/digging-deeper-into-object-lock/

A decorative image showing data inside of a vault.

Using Object Lock for your data is a smart choice—you can protect your data from ransomware, meet compliance requirements, beef up your security policy, or preserve data for legal reasons. But, it’s not a simple on/off switch, and accidentally locking your data for 100 years is a mistake you definitely don’t want to make.

Today we’re taking a deeper dive into Object Lock and the related legal hold feature, examining the different levels of control that are available, explaining why developers might want to build Object Lock into their own applications, and showing exactly how to do that. While the code samples are aimed at our developer audience, anyone looking for a deeper understanding of Object Lock should be able to follow along.

I presented a webinar on this topic earlier this year that covers much the same ground as this blog post, so feel free to watch it instead of, or in addition to, reading this article. 

Check Out the Docs

For even more information on Object Lock, check out our Object Lock overview in our Technical Documentation Portal as well as these how-tos about how to enable Object Lock using the Backblaze web UI, Backblaze B2 Native API, and the Backblaze S3 Compatible API:

What Is Object Lock?

In the simplest explanation, Object Lock is a way to lock objects (aka files) stored in Backblaze B2 so that they are immutable—that is, they cannot be deleted or modified, for a given period of time, even by the user account that set the Object Lock rule. Backblaze B2’s implementation of Object Lock was originally known as File Lock, and you may encounter the older terminology in some documentation and articles. For consistency, I’ll use the term “object” in this blog post, but in this context it has exactly the same meaning as “file.”

Object Lock is a widely offered feature included with backup applications such as Veeam and MSP360, allowing organizations to ensure that their backups are not vulnerable to deliberate or accidental deletion or modification for some configurable retention period.

Ransomware mitigation is a common motivation for protecting data with Object Lock. Even if an attacker were to compromise an organization’s systems to the extent of accessing the application keys used to manage data in Backblaze B2, they would not be able to delete or change any locked data. Similarly, Object Lock guards against insider threats, where the attacker may try to abuse legitimate access to application credentials.

Object Lock is also used in industries that store sensitive or personal identifiable information (PII) such as banking, education, and healthcare. Because they work with such sensitive data, regulatory requirements dictate that data be retained for a given period of time, but data must also be deleted in particular circumstances. 

For example, the General Data Protection Regulation (GDPR), an important component of the EU’s privacy laws and an international regulatory standard that drives best practices, may dictate that some data must be deleted when a customer closes their account. A related use case is where data must be preserved due to litigation, where the period for which data must be locked is not fixed and depends on the type of lawsuit at hand. 

To handle these requirements, Backblaze B2 offers two Object Lock modes—compliance and governance—as well as the legal hold feature. Let’s take a look at the differences between them.

Compliance Mode: Near-Absolute Immutability

When objects are locked in compliance mode, not only can they not be deleted or modified while the lock is in place, but the lock also cannot be removed during the specified retention period. It is not possible to remove or override the compliance lock to delete locked data until the lock expires, whether you’re attempting to do so via the Backblaze web UI or either of the S3 Compatible or B2 Native APIs. Similarly, Backblaze Support is unable to unlock or delete data locked under compliance mode in response to a support request, which is a safeguard designed to address social engineering attacks where an attacker impersonates a legitimate user.

What if you inadvertently lock many terabytes of data for several years? Are you on the hook for thousands of dollars of storage costs? Thankfully, no—you have one escape route, which is to close your Backblaze account. Closing the account is a multi-step process that requires access to both the account login credentials and two-factor verification (if it is configured) and results in the deletion of all data in that account, locked or unlocked. This is a drastic step, so we recommend that developers create one or more “burner” Backblaze accounts for use in developing and testing applications that use Object Lock, that can be closed if necessary without disrupting production systems.

There is one lock-related operation you can perform on compliance-locked objects: extending the retention period. In fact, you can keep extending the retention period on locked data any number of times, protecting that data from deletion until you let the compliance lock expire.

Governance Mode: Override Permitted

In our other Object Lock option, objects can be locked in governance mode for a given retention period. But, in contrast to compliance mode, the governance lock can be removed or overridden via an API call, if you have an application key with appropriate capabilities. Governance mode handles use cases that require retention of data for some fixed period of time, with exceptions for particular circumstances.

When I’m trying to remember the difference between compliance and governance mode, I think of the phrase, “Twenty seconds to comply!”, uttered by the ED-209 armed robot in the movie “RoboCop.” It turned out that there was no way to override ED-209’s programming, with dramatic, and fatal, consequences.

ED-209: as implacable as compliance mode.

Legal Hold: Flexible Preservation

While the compliance and governance retention modes lock objects for a given retention period, legal hold is more like a toggle switch: you can turn it on and off at any time, again with an application key with sufficient capabilities. As its name suggests, legal hold is ideal for situations where data must be preserved for an unpredictable period of time, such as while litigation is proceeding.

The compliance and governance modes are mutually exclusive, which is to say that only one may be in operation at any time. Objects locked in governance mode can be switched to compliance mode, but, as you might expect from the above explanation, objects locked in compliance mode cannot be switched to governance mode until the compliance lock expires.

Legal hold, on the other hand, operates independently, and can be enabled and disabled regardless of whether an object is locked in compliance or governance mode.

How does this work? Consider an object that is locked in compliance or governance mode and has legal hold enabled:

  • If the legal hold is removed, the object remains locked until the retention period expires.
  • If the retention period expires, the object remains locked until the legal hold is removed.

Object Lock and Versioning

By default, Backblaze B2 Buckets have versioning enabled, so as you upload successive objects with the same name, previous versions are preserved automatically. None of the Object Lock modes prevent you from uploading a new version of a locked object; the lock is specific to the object version to which it was applied.

You can also hide a locked object so it doesn’t appear in object listings. The hidden version is retained and can be revealed using the Backblaze web UI or an API call.

As you might expect, locked object versions are not subject to deletion by lifecycle rules—any attempt to delete a locked object version via a lifecycle rule will fail.

How to Use Object Lock in Applications

Now that you understand the two modes of Object Lock, plus legal hold, and how they all work with object versions, let’s look at how you can take advantage of this functionality in your applications. I’ll include code samples for Backblaze B2’s S3 Compatible API written in Python, using the AWS SDK, aka Boto3, in this blog post. You can find details on working with Backblaze B2’s Native API in the documentation.

Application Key Capabilities for Object Lock

Every application key you create for Backblaze B2 has an associated set of capabilities; each capability allows access to a specific functionality in Backblaze B2. There are seven capabilities relevant to object lock and legal hold. 

Two capabilities relate to bucket settings:

  1. readBucketRetentions 
  2. writeBucketRetentions

Three capabilities relate to object settings for retention: 

  1. readFileRetentions 
  2. writeFileRetentions 
  3. bypassGovernance

And, two are specific to Object Lock: 

  1. readFileLegalHolds 
  2. writeFileLegalHolds 

The Backblaze B2 documentation contains full details of each capability and the API calls it relates to for both the S3 Compatible API and the B2 Native API.

When you create an application key via the web UI, it is assigned capabilities according to whether you allow it access to all buckets or just a single bucket, and whether you assign it read-write, read-only, or write-only access.

An application key created in the web UI with read-write access to all buckets will receive all of the above capabilities. A key with read-only access to all buckets will receive readBucketRetentions, readFileRetentions, and readFileLegalHolds. Finally, a key with write-only access to all buckets will receive bypassGovernance, writeBucketRetentions, writeFileRetentions, and writeFileLegalHolds.

In contrast, an application key created in the web UI restricted to a single bucket is not assigned any of the above permissions. When an application using such a key uploads objects to its associated bucket, they receive the default retention mode and period for the bucket, if they have been set. The application is not able to select a different retention mode or period when uploading an object, change the retention settings on an existing object, or bypass governance when deleting an object.

You may want to create application keys with more granular permissions when working with Object Lock and/or legal hold. For example, you may need an application restricted to a single bucket to be able to toggle legal hold for objects in that bucket. You can use the Backblaze B2 CLI to create an application key with this, or any other set of capabilities. This command, for example, creates a key with the default set of capabilities for read-write access to a single bucket, plus the ability to read and write the legal hold setting:

% b2 create-key --bucket my-bucket-name my-key-name listBuckets,readBuckets,listFiles,readFiles,shareFiles,writeFiles,deleteFiles,readBucketEncryption,writeBucketEncryption,readBucketReplications,writeBucketReplications,readFileLegalHolds,writeFileLegalHolds

Enabling Object Lock

You must enable Object Lock on a bucket before you can lock any objects therein; you can do this when you create the bucket, or at any time later, but you cannot disable Object Lock on a bucket once it has been enabled. Here’s how you create a bucket with Object Lock enabled:

s3_client.create_bucket(
    Bucket='my-bucket-name',
    ObjectLockEnabledForBucket=True
)

Once a bucket’s settings have Object Lock enabled, you can configure a default retention mode and period for objects that are created in that bucket. Only compliance mode is configurable from the web UI, but you can set governance mode as the default via an API call, like this:

s3_client.put_object_lock_configuration(
    Bucket='my-bucket-name',
    ObjectLockConfiguration={
        'ObjectLockEnabled': 'Enabled',
        'Rule': {
            'DefaultRetention': {
                'Mode': 'GOVERNANCE',
                'Days': 7
            }
        }
    }
)

You cannot set legal hold as a default configuration for the bucket.

Locking Objects

Regardless of whether you set a default retention mode for the bucket, you can explicitly set a retention mode and period when you upload objects, or apply the same settings to existing objects, provided you use an application key with the appropriate writeFileRetentions or writeFileLegalHolds capability.

Both the S3 PutObject operation and Backblaze B2’s b2_upload_file include optional parameters for specifying retention mode and period, and/or legal hold. For example:

s3_client.put_object(
    Body=open('/path/to/local/file', mode='rb'),
    Bucket='my-bucket-name',
    Key='my-object-name',
    ObjectLockMode='GOVERNANCE',
    ObjectLockRetainUntilDate=datetime(
        2023, 9, 7, hour=10, minute=30, second=0
    )
)

Both APIs implement additional operations to get and set retention settings and legal hold for existing objects. Here’s an example of how you apply a governance mode lock:

s3_client.put_object_retention(
    Bucket='my-bucket-name',
    Key='my-object-name',
    VersionId='some-version-id',
    Retention={
        'Mode': 'GOVERNANCE',  # Required, even if mode is not changed
        'RetainUntilDate': datetime(
            2023, 9, 5, hour=10, minute=30, second=0
        )
    }
)

The VersionId parameter is optional: the operation applies to the current object version if it is omitted.

You can also use the web UI to view, but not change, an object’s retention settings, and to toggle legal hold for an object:

A screenshot highlighting where to enable Object Lock via the Backblaze web UI.

Deleting Objects in Governance Mode

As mentioned above, a key difference between the compliance and governance modes is that it is possible to override governance mode to delete an object, given an application key with the bypassGovernance capability. To do so, you must identify the specific object version, and pass a flag to indicate that you are bypassing the governance retention restriction:

# Get object details, including version id of current version
object_info = s3_client.head_object(
    Bucket='my-bucket-name',
    Key='my-object-name'
)

# Delete the most recent object version, bypassing governance
s3_client.delete_object(
    Bucket='my-bucket-name',
    Key='my-object-name',
    VersionId=object_info['VersionId'],
    BypassGovernanceRetention=True
)

There is no way to delete an object in legal hold; the legal hold must be removed before the object can be deleted.

Protect Your Data With Object Lock and Legal Hold

Object Lock is a powerful feature, and with great power… you know the rest. Here are some of the questions you should ask when deciding whether to implement Object Lock in your applications:

  • What would be the impact of malicious or accidental deletion of your application’s data?
  • Should you lock all data according to a central policy, or allow users to decide whether to lock their data, and for how long?
  • If you are storing data on behalf of users, are there special circumstances where a lock must be overridden?
  • Which users should be permitted to set and remove a legal hold? Does it make sense to build this into the application rather than have an administrator use a tool such as the Backblaze B2 CLI to manage legal holds?

If you already have a Backblaze B2 account, you can start working with Object Lock today; otherwise, create an account to get started.

The post Digging Deeper Into Object Lock appeared first on Backblaze Blog | Cloud Storage & Cloud Backup.

Load Balancing 2.0: What’s Changed After 7 Years?

Post Syndicated from nathaniel wagner original https://www.backblaze.com/blog/load-balancing-2-0-whats-changed-after-7-years/

A decorative image showing a file, a drive, and some servers.

What do two billion transactions a day look like? Well, the data may be invisible to the naked eye, but the math breaks down to just over 23,000 transactions every second. (Shout out to Kris Allen for burning into my memory that there are 86,400 seconds in a day and my handy calculator!) 

Part of my job as a Site Reliability Engineer (SRE) at Backblaze is making sure that greater than 99.9% of those transactions are what we consider “OK” (via status code), and part of the fun is digging for the needle in the haystack of over 7,000 production servers and over 250,000 spinning hard drives to try and understand how all of the different transactions interact with the pieces of infrastructure. 

In this blog post, I’m going to pick up where Principal SRE Elliott Sims left off in his 2016 article on load balancing. You’ll notice that the design principles we’ve employed are largely the same (cool!). So, I’ll review our stance on those principles, then talk about how the evolution of the B2 Cloud Storage platform—including the introduction of the S3 Compatible API—has changed our load balancing architecture. Read on for specifics. 

Editor’s Note

We know there are a ton of specialized networking terms flying around this article, and one of our primary goals is to make technical content accessible to all readers, regardless of their technical background. To that end, we’ve used footnotes to add some definitions and minimize the disruption to your reading experience.

What Is Load Balancing?

Load balancing is the process of distributing traffic across a network. It helps with resource utilization, prevents overloading any one server, and makes your system more reliable. Load balancers also monitor server health and redirect requests to the most suitable server.

With two billion requests per day to our servers, you can be assured that we use load balancers at Backblaze. Whenever anyone—a Backblaze Computer Backup or a B2 Cloud Storage customer—wants to upload or download data or modify or interact with their files, a load balancer will be there to direct traffic to the right server. Think of them as your trusty mail service, delivering your letters and packages to the correct destination—and using things like zip codes and addresses to interpret your request and get things to the right place.  

How Do We Do It?

We build our own load balancers using open-source tools. We use layer 4 load balancing with direct server response (DSR). Here are some of the resources that we call on to make that happen:  

  • Border gateway patrol (BGP) which is part of the Linux kernel1. It’s a standardized gateway protocol that exchanges routing and reachability information on the internet.   
  • keepalived, an open-source routing software. keepalived keeps track of all of our VIPs2 and IPs3 for each backend server. 
  • Hard disk drives (HDDs). We use the same drives that we use for other API servers and whatnot, but that’s definitely overkill—we made that choice to save the work of sourcing another type of device.  
  • A lot of hard work by a lot of really smart folks.

What We Mean by Layers

When we’re talking about layers in load balancing, it’s shorthand for how deep into the architecture your program needs to see. Here’s a great diagram that defines those layers: 

An image describing application layers.
Source.

DSR takes place at layer 4, but solves the problem presented by a full proxy4 method, having to see the original client’s IP address.

Why Do We Do It the Way We Do It?

Building our own load balancers, instead of buying an off-the-shelf solution, means that we have more control and insight, more cost-effective hardware, and more scalable architecture. In general, DSR is more complicated to set up and maintain, but this method also lets us handle lots of traffic with minimal hardware and supports our goal of keeping data encrypted, even within our own data center. 

What Hasn’t Changed

We’re still using a layer 4 DSR approach to load balancing, which we’ll explain below. For reference, other common methods of load balancing are layer 7, full proxy and layer 4, full proxy load balancing. 

First, I’ll explain how DSR works. DSR load balancing requires two things:

  1. A load balancer with the VIP address attached to an external NIC5 and ARPing6, so that the rest of the network knows it “owns” the IP.
  2. Two or more servers on the same layer 2 network that also have the VIP address attached to a NIC, either internal or external, but are not replying to ARP requests about that address. This means that no other servers on the network know that the VIP exists anywhere but on the load balancer.

A request packet will enter the network, and be routed to the load balancer. Once it arrives there, the load balancer leaves the source and destination IP addresses intact and instead modifies the destination MAC7 address to that of a server, then puts the packet back on the network. The network switch only understands MAC addresses, so it forwards the packet on to the correct server.

A diagram of how a packet moves through the network router and load balancer to reach the server, then respond to the original client request.

When the packet arrives at the server’s network interface, it checks to make sure the destination MAC address matches its own. The address matches, so the server accepts the packet. The server network interface then, separately, checks to see whether the destination IP address is one attached to it somehow. That’s a yes, even though the rest of the network doesn’t know it, so the server accepts the packet and passes it on to the application. The application then sends a response with the VIP as the source IP address and the client as the destination IP, so the request (and subsequent response) is routed directly to the client without passing back through the load balancer.

So, What’s Changed?

Lots of things. But, since we first wrote this article, we’ve expanded our offerings and platform. The biggest of these changes (as far as load balancing is concerned) is that we added the S3 Compatible API. 

We also serve a much more diverse set of clients, both in the size of files they have and their access patterns. File sizes affect how long it takes us to serve requests (larger files = more time to upload or download, which means an individual server is tied up for longer). Access patterns can vastly increase the amount of requests a server has to process on a regular, but not consistent basis (which means you might have times that your network is more or less idle, and you have to optimize appropriately). 

A definitely Photoshopped images showing a giraffe riding an elephant on a rope in the sky. The rope's anchor points disappear into clouds.
So, if we were to update this amazing image from the first article, we might have a tightrope walker with a balancing pole on top of the giraffe, plus some birds flying on a collision course with the elephant.

Where You Can See the Changes: ECMP, Volume of Data Per Month, and API Processing

DSR is how we send data to the customer—the server responds (sends data) directly to the request (client). This is the equivalent of going to the post office to mail something, but adding your home address as the return address (so that you don’t have to go back to the post office to get your reply).   

Given how our platform has evolved over the years, things might happen slightly differently. Let’s dig in to some of the details that affect how the load balancers make their decisions—what rules govern how they route traffic, and how different types of requests cause them to behave differently. We’ll look at:

  • Equal cost multipath routing (ECMP). 
  • Volume of data in petabytes (PBs) per month.
  • APIs and processing costs.

ECMP

One thing that’s not explicitly outlined above is how the load balancer determines which server should respond to a request. At Backblaze, we use stateless load balancing, which means that the load balancer doesn’t take into account most information about the servers it routes to. We use a round robin approach—i.e. the load balancers choose between one of a few hosts, in order, each time they’re assigning a request. 

We also use Maglev, so the load balancers use consistent hashing and connection tracking. This means that we’re minimizing the negative impact of unexpected faults failures from connection-oriented protocols. If a load balancer goes down, its server pool can be transferred to another, and it will make decisions in the same way, seamlessly picking up the load. When the initial load balancer comes back online, it already has a connection to its load balancer friend and can pick up where it left off. 

The upside is that it’s super rare to see a disruption, and it essentially only happens when the load balancer and the neighbor host go down in a short period of time. The downside is that the load balancer decision is static. If you have “better” servers for one reason or another—they’re newer, for instance—they don’t take that information into account. On the other hand, we do have the ability to push more traffic to specific servers through ECMP weights if we need to, which means that we have good control over a diverse fleet of hardware. 

Volume of Data

Backblaze now has over three exabytes of storage under management. Based on the scalability of the network design, that doesn’t really make a huge amount of difference when you’re scaling your infrastructure properly. What can make a difference is how people store and access their data. 

Most of the things that make managing large datasets difficult from an architecture perspective can also be silly for a client. For example: querying files individually (creating lots of requests) instead of batching or creating a range request. (There may be a business reason to do that, but usually, it makes more sense to batch requests.)

On the other hand, some things that make sense for how clients need to store data require architecture realignment. One of those is just a sheer fluctuation of data by volume—if you’re adding and deleting large amounts of data (we’re talking hundreds of terabytes or more) on a “shorter” cycle (monthly or less), then there will be a measurable impact. And, with more data stored, you have the potential for more transactions.

Similarly, if you need to retrieve data often, but not regularly, there are potential performance impacts. Most of them are related to caching, and ironically, they can actually improve performance. The more you query the same “set” of servers for the same file, the more likely that each server in the group will have cached your data locally (which means they can serve it more quickly). 

And, as with most data centers, we store our long term data on hard disk drives (HDDs), whereas our API servers are on solid state drives (SSDs). There are positives and negatives to each type of drive, but the performance impact is that data at rest takes longer to retrieve, and data in the cache is on a faster SSD drive on the API server. 

On the other hand, the more servers the data center has, the lower the chance that the servers can/will deliver cached data. And, of course, if you’re replacing large volumes of old data with new on a shorter timeline, then you won’t see the benefits. It sounds like an edge case, but industries like security camera data are a great example. While they don’t retrieve their data very frequently, they are constantly uploading and overwriting their data, often to meet different industry requirements about retention periods, which can be challenging to allocate a finite amount of input/output operations per second (IOPS) for uploads, downloads, and deletes.  

That said, the built-in benefit of our system is that adding another load balancer is (relatively) cheap. If we’re experiencing a processing chokepoint for whatever reason—typically either a CPU bottleneck or from throughput on the NIC—we can add another load balancer, and just like that, we can start to see bits flying through the new load balancer and traffic being routed amongst more hosts, alleviating the choke points. 

APIs and Processing Costs

We mentioned above that one of the biggest changes to our platform was the addition of the S3 Compatible API. When all requests were made through the B2 Native API, the Backblaze CLI tool, or the web UI, the processing cost was relatively cheap. 

That’s because of the way our upload requests to the Backblaze Vaults are structured. When you make an upload request via the Native API, there are actually two transactions, one to get an upload URL, and the second to send a request to the Vault. And, all other types of requests (besides upload) have always had to be processed through our load balancers. Since the S3 Compatible API is a single request, we knew we would have to add more processing power and load balancers. (If you want to go back to 2018 and see some of the reasons why, here’s Brian Wilson on the subject—read with the caveat that our current Tech Doc on the subject outlines how we solve the complications he points out.) 

We’re still leveraging DSR to respond directly to the client, but we’ve significantly increased the amount of transactions that hit our load balancers, both because it has to take on more of the processing during transit and because, well, lots of folks like to use the S3 Compatible API and our customer base has grown by a quite a bit since 2018. 

And, just like above, we’ve set ourselves up for a relatively painless fix: we can add another load balancer to solve most problems. 

Do We Have More Complexity?

This is the million dollar question, solved for a dollar: how could we not? Since our first load balancing article, we’ve added features, complexity, and lots of customers. Load balancing algorithms are inherently complex, but we (mostly Elliott and other smart people) have taken a lot of time and consideration to not just build a system that will scale to up and past two billion transactions a day, but that can be fairly “easily” explained and doesn’t require a graduate degree to understand what is happening.  

But, we knew it was important early on, so we prioritized building a system where we could “just” add another load balancer. The thinking is more complicated at the outset, but the tradeoff is that it’s simple once you’ve designed the system. It would take a lot for us to outgrow the usefulness of this strategy—but hey, we might get there someday. When we do, we’ll write you another article. 

Footnotes

  1. Kernel: A kernel is the computer program at the core of a computer’s operating system. It has control of the system and does things like run processes, manage hardware devices like the hard drive, and handle interrupts, as well as memory and input/output (I/O) requests from software, translating them to instructions for the central processing unit (CPU). ↩
  2. Virtual internet protocol (VIP): An IP address that does not correspond to a real place. ↩
  3. Internet protocol (IP): The global physical address of a device, used to identify devices on the internet. Can be changed.  ↩
  4. Proxy: In networking, a proxy is a server application that validates outside requests to a network. Think of them as a gatekeeper. There are several common types of proxies you interact with all the time—HTTPS requests on the internet, for example. ↩
  5. Network interface controller, or network interface card (NIC): This connects the computer to the network. ↩
  6. Address resolution protocol (ARP): The process by which a device or network identifies another device. There are four types. ↩
  7. Media access control (MAC): The local physical address of a device, used to identify devices on the same network. Hardcoded into the device. ↩

The post Load Balancing 2.0: What’s Changed After 7 Years? appeared first on Backblaze Blog | Cloud Storage & Cloud Backup.

Big Performance Improvements in Rclone 1.64.0, but Should You Upgrade?

Post Syndicated from Pat Patterson original https://www.backblaze.com/blog/big-performance-improvements-in-rclone-1-64-0-but-should-you-upgrade/

A decorative image showing a diagram about multithreading, as well as the Rclone and Backblaze logos.

Rclone is an open source, command line tool for file management, and it’s widely used to copy data between local storage and an array of cloud storage services, including Backblaze B2 Cloud Storage. Rclone has had a long association with Backblaze—support for Backblaze B2 was added back in January 2016, just two months before we opened Backblaze B2’s public beta, and five months before the official launch—and it’s become an indispensable tool for many Backblaze B2 customers. 

Rclone v1.64.0, released last week, includes a new implementation of multithreaded data transfers, promising much faster data transfer of large files between cloud storage services. 

Does it deliver? Should you upgrade? Read on to find out!

Multithreading to Boost File Transfer Performance

Something of a Swiss Army Knife for cloud storage, rclone can copy files, synchronize directories, and even mount remote storage as a local filesystem. Previous versions of rclone were able to take advantage of multithreading to accelerate the transfer of “large” files (by default at least 256MB), but the benefits were limited. 

When transferring files from a storage system to Backblaze B2, rclone would read chunks of the file into memory in a single reader thread, starting a set of multiple writer threads to simultaneously write those chunks to Backblaze B2. When the source storage was a local disk (the common case) as opposed to remote storage such as Backblaze B2, this worked really well—the operation of moving files from local disk to Backblaze B2 was quite fast. However, when the source was another remote storage—say, transferring from Amazon S3 to Backblaze B2, or even Backblaze B2 to Backblaze B2—data chunks were read into memory by that single reader thread at about the same rate as they could be written to the destination, meaning that all but one of the writer threads were idle.

What’s the Big Deal About Rclone v1.64.0?

Rclone v1.64.0 completely refactors multithreaded transfers. Now rclone starts a single set of threads, each of which both reads a chunk of data from the source service into memory, and then writes that chunk to the destination service, iterating through a subset of chunks until the transfer is complete. The threads transfer their chunks of data in parallel, and each transfer is independent of the others. This architecture is both simpler and much, much faster.

Show Me the Numbers!

How much faster? I spun up a virtual machine (VM) via our compute partner, Vultr, and downloaded both rclone v1.64.0 and the preceding version, v1.63.1. As a quick test, I used Rclone’s copyto command to copy 1GB and 10GB files from Amazon S3 to Backblaze B2, like this:

rclone --no-check-dest copyto s3remote:my-s3-bucket/1gigabyte-test-file b2remote:my-b2-bucket/1gigabyte-test-file

Note that I made no attempt to “tune” rclone for my environment by setting the chunk size or number of threads. I was interested in the out of the box performance. I used the --no-check-dest flag so that rclone would overwrite the destination file each time, rather than detecting that the files were the same and skipping the copy.

I ran each copyto operation three times, then calculated the average time. Here are the results; all times are in seconds:

Rclone version 1GB 10GB
1.63.1 52.87 725.04
1.64.0 18.64 240.45

As you can see, the difference is significant! The new rclone transferred both files around three times faster than the previous version.

So, copying individual large files is much faster with the latest version of rclone. How about migrating a whole bucket containing a variety of file sizes from Amazon S3 to Backblaze B2, which is a more typical operation for a new Backblaze customer? I used rclone’s copy command to transfer the contents of an Amazon S3 bucket—2.8GB of data, comprising 35 files ranging in size from 990 bytes to 412MB—to a Backblaze B2 Bucket:

rclone --fast-list --no-check-dest copyto s3remote:my-s3-bucket b2remote:my-b2-bucket

Much to my dismay, this command failed, returning errors related to the files being corrupted in transfer, for example:

2023/09/18 16:00:37 ERROR : tpcds-benchmark/catalog_sales/20221122_161347_00795_djagr_3a042953-d0a2-4b8d-8c4e-6a88df245253: corrupted on transfer: sizes differ 244695498 vs 0

Rclone was reporting that the transferred files in the destination bucket contained zero bytes, and deleting them to avoid the use of corrupt data.

After some investigation, I discovered that the files were actually being transferred successfully, but a bug in rclone 1.64.0 caused the app to incorrectly interpret some successful transfers as corrupted, and thus delete the transferred file from the destination. 

I was able to use the --ignore-size flag to workaround the bug by disabling the file size check so I could continue with my testing:

rclone --fast-list --no-check-dest --ignore-size copyto s3remote:my-s3-bucket b2remote:my-b2-bucket

A Word of Caution to Control Your Transaction Fees

Note the use of the --fast-list flag. By default, rclone’s method of reading the contents of cloud storage buckets minimizes memory usage at the expense of making a “list files” call for every subdirectory being processed. Backblaze B2’s list files API, b2_list_file_names, is a class C transaction, priced at $0.004 per 1,000 with 2,500 free per day. This doesn’t sound like a lot of money, but using rclone with large file hierarchies can generate a huge number of transactions. Backblaze B2 customers have either hit their configured caps or incurred significant transaction charges on their account when using rclone without the --fast-list flag.

We recommend you always use --fast-list with rclone if at all possible. You can set an environment variable so you don’t have to include the flag in every command:

export RCLONE_FAST_LIST=1

Again, I performed the copy operation three times, and averaged the results:

Rclone version 2.8GB tree
1.63.1 56.92
1.64.0 42.47

Since the bucket contains both large and small files, we see a lesser, but still significant, improvement in performance with rclone v1.64.0—it’s about 33% faster than the previous version with this set of files.

So, Should I Upgrade to the Latest Rclone?

As outlined above, rclone v1.64.0 contains a bug that can cause copy (and presumably also sync) operations to fail. If you want to upgrade to v1.64.0 now, you’ll have to use the --ignore-size workaround. If you don’t want to use the workaround, it’s probably best to hold off until rclone releases v1.64.1, when the bug fix will likely be deployed—I’ll come back and update this blog entry when I’ve tested it!

The post Big Performance Improvements in Rclone 1.64.0, but Should You Upgrade? appeared first on Backblaze Blog | Cloud Storage & Cloud Backup.

How to Use Cloud Replication to Automate Environments

Post Syndicated from Pat Patterson original https://www.backblaze.com/blog/how-to-use-cloud-replication-to-automate-environments/

A decorative image showing a workflow from a computer, to a checklist, to a server stack.

A little over a year ago, we announced general availability of Backblaze Cloud Replication, the ability to automatically copy data across buckets, accounts, or regions. There are several ways to use this service, but today we’re focusing on how to use Cloud Replication to replicate data between environments like testing, staging, and production when developing applications. 

First we’ll talk about why you might want to replicate environments and how to go about it. Then, we’ll get into the details: there are some nuances that might not be obvious when you set out to use Cloud Replication in this way, and we’ll talk about those so that you can replicate successfully.

Other Ways to Use Cloud Replication

In addition to replicating between environments, there are two main reasons you might want to use Cloud Replication:

  • Data Redundancy: Replicating data for security, compliance, and continuity purposes.
  • Data Proximity: Bringing data closer to distant teams or customers for faster access.

Maintaining a redundant copy of your data sounds, well, redundant, but it is the most common use case for cloud replication. It supports disaster recovery as part of a broad cyber resilience framework, reduces the risk of downtime, and helps you comply with regulations.

The second reason (replicating data to bring it geographically closer to end users) has the goal of improving performance and user experience. We looked at this use case in detail in the webinar Low Latency Multi-Region Content Delivery with Fastly and Backblaze.

Four Levels of Testing: Unit, Integration, System, and Acceptance

An image of the character, "The Most Interesting Man in the World", with the title "I don't always test my code, but when I do, I do it in production."
Friendly reminder to both drink and code responsibly (and probably not at the same time).

The Most Interesting Man in the World may test his code in production, but most of us prefer to lead a somewhat less “interesting” life. If you work in software development, you are likely well aware of the various types of testing, but it’s useful to review them to see how different tests might interact with data in cloud object storage.

Let’s consider a photo storage service that stores images in a Backblaze B2 Bucket. There are several real-world Backblaze customers that do exactly this, including Can Stock Photo and CloudSpot, but we’ll just imagine some of the features that any photo storage service might provide that its developers would need to write tests for.

Unit Tests

Unit tests test the smallest components of a system. For example, our photo storage service will contain code to manipulate images in a B2 Bucket, so its developers will write unit tests to verify that each low-level operation completes successfully. A test for thumbnail creation, for example, might do the following:

  1. Directly upload a test image to the bucket.
  2. Run the “‘Create Thumbnail” function against the test image.
  3. Verify that the resulting thumbnail image has indeed been created in the expected location in the bucket with the expected dimensions.
  4. Delete both the test and thumbnail images.

A large application might have hundreds, or even thousands, of unit tests, and it’s not unusual for development teams to set up automation to run the entire test suite against every change to the system to help guard against bugs being introduced during the development process.

Typically, unit tests require a blank slate to work against, with test code creating and deleting files as illustrated above. In this scenario, the test automation might create a bucket, run the test suite, then delete the bucket, ensuring a consistent environment for each test run.

Integration Tests

Integration tests bring together multiple components to test that they interact correctly. In our photo storage example, an integration test might combine image upload, thumbnail creation, and artificial intelligence (AI) object detection—all of the functions executed when a user adds an image to the photo storage service. In this case, the test code would do the following:

  1. Run the Add Image” procedure against a test image of a specific subject, such as a cat.
  2. Verify that the test and thumbnail images are present in the expected location in the bucket, the thumbnail image has the expected dimensions, and an entry has been created in the image index with the “cat” tag.
  3. Delete the test and thumbnail images, and remove the image’s entry from the index.

Again, integration tests operate against an empty bucket, since they test particular groups of functions in isolation, and require a consistent, known environment.

System Tests

The next level of testing, system testing, verifies that the system as a whole operates as expected. System testing can be performed manually by a QA engineer following a test script, but is more likely to be automated, with test software taking the place of the user. For example, the Selenium suite of open source test tools can simulate a user interacting with a web browser.   A system test for our photo storage service might operate as follows:

  1. Open the photo storage service web page.
  2. Click the upload button.
  3. In the resulting file selection dialog, provide a name for the image, navigate to the location of the test image, select it, and click the submit button.
  4. Wait as the image is uploaded and processed.
  5. When the page is updated, verify that it shows that the image was uploaded with the provided name.
  6. Click the image to go to its details.
  7. Verify that the image metadata is as expected. For example, the file size and object tag match the test image and its subject.

When we test the system at this level, we usually want to verify that it operates correctly against real-world data, rather than a synthetic test environment. Although we can generate “dummy data” to simulate the scale of a real-world system, real-world data is where we find the wrinkles and edge cases that tend to result in unexpected system behavior. For example, a German-speaking user might name an image “Schloss Schönburg.” Does the system behave correctly with non-ASCII characters such as ö in image names? Would the developers think to add such names to their dummy data?

A picture of Schönburg Castle in the Rhine Valley at sunset.
Non-ASCII characters: our excuse to give you your daily dose of seratonin. Source.

Acceptance Tests

The final testing level, acceptance testing, again involves the system as a whole. But, where system testing verifies that the software produces correct results without crashing, acceptance testing focuses on whether the software works for the user. Beta testing, where end-users attempt to work with the system, is a form of acceptance testing. Here, real-world data is essential to verify that the system is ready for release.

How Does Cloud Replication Fit Into Testing Environments?

Of course, we can’t just use the actual production environment for system and acceptance testing, since there may be bugs that destroy data. This is where Cloud Replication comes in: we can create a replica of the production environment, complete with its quirks and edge cases, against which we can run tests with no risk of destroying real production data. The term staging environment is often used in connection with acceptance testing, with test(ing) environments used with unit, integration, and system testing.

Caution: Be Aware of PII!

Before we move on to look at how you can put replication into practice, it’s worth mentioning that it’s essential to determine whether you should be replicating the data at all, and what safeguards you should place on replicated data—and to do that, you’ll need to consider whether or not it is or contains personally identifiable information (PII).

The National Institute of Science and Technology (NIST) document SP 800-122 provides guidelines for identifying and protecting PII. In our example photo storage site, if the images include photographs of people that may be used to identify them, then that data may be considered PII.

In most cases, you can still replicate the data to a test or staging environment as necessary for business purposes, but you must protect it at the same level that it is protected in the production environment. Keep in mind that there are different requirements for data protection in different industries and different countries or regions, so make sure to check in with your legal or compliance team to ensure everything is up to standard.

In some circumstances, it may be preferable to use dummy data, rather than replicating real-world data. For example, if the photo storage site was used to store classified images related to national security, we would likely assemble a dummy set of images rather than replicating production data.

How Does Backblaze Cloud Replication Work?

To replicate data in Backblaze B2, you must create a replication rule via either the web console or the B2 Native API. The replication rule specifies the source and destination buckets for replication and, optionally, advanced replication configuration. The source and destination buckets can be located in the same account, different accounts in the same region, or even different accounts in different regions; replication works just the same in all cases. While standard Backblaze B2 Cloud Storage rates apply to replicated data storage, note that Backblaze does not charge service or egress fees for replication, even between regions.

It’s easier to create replication rules in the web console, but the API allows access to two advanced features not currently accessible from the web console: 

  1. Setting a prefix to constrain the set of files to be replicated. 
  2. Excluding existing files from the replication rule. 

Don’t worry: this blog post provides a detailed explanation of how to create replication rules via both methods.

Once you’ve created the replication rule, files will begin to replicate at midnight UTC, and it can take several hours for the initial replication if you have a large quantity of data. Files uploaded after the initial replication rule is active are automatically replicated within a few seconds, depending on file size. You can check whether a given file has been replicated either in the web console or via the b2-get-file-info API call. Here’s an example using curl at the command line:

 % curl -s -H "Authorization: ${authorizationToken}" \
    -d "{\"fileId\":  \"${fileId}\"}" \
    "${apiUrl}/b2api/v2/b2_get_file_info" | jq .
{
  "accountId": "15f935cf4dcb",
  "action": "upload",
  "bucketId": "11d5cf096385dc5f841d0c1b",
  ...
  "replicationStatus": "pending",
  ...
}

In the example response, replicationStatus returns the response pending; once the file has been replicated, it will change to completed.

Here’s a short Python script that uses the B2 Python SDK to retrieve replication status for all files in a bucket, printing the names of any files with pending status:

import argparse
import os

from dotenv import load_dotenv

from b2sdk.v2 import B2Api, InMemoryAccountInfo
from b2sdk.replication.types import ReplicationStatus

# Load credentials from .env file into environment
load_dotenv()

# Read bucket name from the command line
parser = argparse.ArgumentParser(description='Show files with "pending" replication status')
parser.add_argument('bucket', type=str, help='a bucket name')
args = parser.parse_args()

# Create B2 API client and authenticate with key and ID from environment
b2_api = B2Api(InMemoryAccountInfo())
b2_api.authorize_account("production", os.environ["B2_APPLICATION_KEY_ID"], os.environ["B2_APPLICATION_KEY"])

# Get the bucket object
bucket = b2_api.get_bucket_by_name(args.bucket)

# List all files in the bucket, printing names of files that are pending replication
for file_version, folder_name in bucket.ls(recursive=True):
    if file_version.replication_status == ReplicationStatus.PENDING:
        print(file_version.file_name)

Note: Backblaze B2’s S3-compatible API (just like Amazon S3 itself) does not include replication status when listing bucket contents—so for this purpose, it’s much more efficient to use the B2 Native API, as used by the B2 Python SDK.

You can pause and resume replication rules, again via the web console or the API. No files are replicated while a rule is paused. After you resume replication, newly uploaded files are replicated as before. Assuming that the replication rule does not exclude existing files, any files that were uploaded while the rule was paused will be replicated in the next midnight-UTC replication job.

How to Replicate Production Data for Testing

The first question is: does your system and acceptance testing strategy require read-write access to the replicated data, or is read-only access sufficient?

Read-Only Access Testing

If read-only access suffices, it might be tempting to create a read-only application key to test against the production environment, but be aware that testing and production make different demands on data. When we run a set of tests against a dataset, we usually don’t want the data to change during the test. That is: the production environment is a moving target, and we don’t want the changes that are normal in production to interfere with our tests. Creating a replica gives you a snapshot of real-world data against which you can run a series of tests and get consistent results.

It’s straightforward to create a read-only replica of a bucket: you just create a replication rule to replicate the data to a destination bucket, allow replication to complete, then pause replication. Now you can run system or acceptance tests against a static replica of your production data.

To later bring the replica up to date, simply resume replication and wait for the nightly replication job to complete. You can run the script shown in the previous section to verify that all files in the source bucket have been replicated.

Read-Write Access Testing

Alternatively, if, as is usually the case, your tests will create, update, and/or delete files in the replica bucket, there is a bit more work to do. Since testing intends to change the dataset you’ve replicated, there is no easy way to bring the source and destination buckets back into sync—changes may have happened in both buckets while your replication rule was paused. 

In this case, you must delete the replication rule, replicated files, and the replica bucket, then create a new destination bucket and rule. You can reuse the destination bucket name if you wish since, internally, replication status is tracked via the bucket ID.

Always Test Your Code in an Environment Other Than Production

In short, we all want to lead interesting lives—but let’s introduce risk in a controlled way, by testing code in the proper environments. Cloud Replication lets you achieve that end while remaining nimble, which means you get to spend more time creating interesting tests to improve your product and less time trying to figure out why your data transformed in unexpected ways.  

Now you have everything you need to create test and staging environments for applications that use Backblaze B2 Cloud Object Storage. If you don’t already have a Backblaze B2 account, sign up here to receive 10GB of storage, free, to try it out.

The post How to Use Cloud Replication to Automate Environments appeared first on Backblaze Blog | Cloud Storage & Cloud Backup.

Streaming Media with Backblaze B2: A Data Storage Guide

Post Syndicated from Pat Patterson original https://www.backblaze.com/blog/roll-camera-streaming-media-from-backblaze-b2/

A decorative image showing a cloud with the Backblaze logo, a media icon, and a user icon.

You can store petabytes of audio and video assets in Backblaze B2 Cloud Storage, and lots of our customers do. While many customers archive their digital assets for long-term safekeeping, a growing number of customers use Backblaze B2 to deliver media assets to their end consumers, often embedded in web pages.

Embedding audio and video files in web pages for playback in the browser is nothing new, but there are a lot of ingredients in the mix, and it can be tricky to get right. Streaming media from Backblaze B2 simplifies sharing stored data. Whether you’re delivering content for web applications or supporting business workflows, Backblaze B2 offers a seamless way to store, protect, and share data.

After reading this blog post, you’ll be ready to deliver media assets from Backblaze B2 to website users reliably and affordably. I’ll cover:

  • A little bit of history on how streaming media came to be.
  • A primer on the various strands of technology and how they work.
  • A how-to guide for streaming media from your Backblaze B2 account.

The evolution of internet media streaming

Back in the early days of the web, audio and video content was a rarity. Most people connected to the internet via a dial-up link, and just didn’t have the bandwidth to stream audio, let alone video, content to their computer. Consequently, the early web standards specified how browsers should show images in web pages via the <img> tag, but made no mention of audio/visual resources. Digital storage media like floppy disks and magnetic disks were often used for storing and sharing multimedia content offline.

As bandwidth increased to the point where it was possible for more of us to stream large media files, Adobe’s Flash Player became the de facto standard for playing audio and video in the web browser. Flash allowed websites to embed and stream media files directly, revolutionizing the way content was consumed online. When YouTube launched, for example, in early 2005, it required the Flash Player plug-in to be installed in the browser to view the videos.

However, reliance on Flash presented limitations, including security vulnerabilities and compatibility issues across devices. As a result, web developers began exploring native solutions for streaming media. This resulted in a significant milestone in digital data delivery, as browsers and devices started incorporating built-in capabilities for playing media.

Meanwhile, the evolution of data storage media, including external hard drives, solid-state drives (SSDs), and cloud storage solutions, allowed users to store and access large media libraries more efficiently.

The HTML5 video element: Transforming online media playback

At around the same time, a consortium of the major browser vendors started work on a new version of HTML, the markup language that had been a part of the web since its inception. A major goal of HTML5 was to support multimedia content natively, and so, in its initial release in 2008, the specification introduced new <audio> and <video> tags to embed audiovisual content directly in web pages, without requiring additional plugins like Flash.

This development was a game-changer in digital storage media and content delivery, as it eliminated the need for third-party software and made streaming video and audio more accessible across devices. The shift also facilitated better cross-platform compatibility, a critical feature for supporting consumer devices such as smartphones, tablets, and smart TVs.

While web pages are written in HTML, they are delivered from the web server to the browser via the HTTP protocol. Web servers don’t just deliver web pages, of course—images, scripts, audio, and video files are also delivered via HTTP.

HTML5’s multimedia capabilities also introduced support for various codecs, enabling better compression and playback quality for formats like MP4. This innovation marked a significant step forward in how websites handled and delivered rich media experiences.

How streaming technology works

Understanding the key components of streaming technology will help you set up seamless digital data delivery on your site. Here, we’ll cover:

  • Streaming vs. progressive download.
  • HTTP 1.1 byte range serving.
  • Media file formats.
  • MIME types.

Streaming vs. progressive download

In common usage, the term, “streaming,” in the context of web media, can refer to any situation where the user can request content (for example, press a play button) and consume that content almost immediately, as opposed to downloading a media file, where the user has to wait to receive the entire file before they can watch or listen. This is particularly useful for media files stored on data storage media such as solid-state drives or cloud-based storage media.

Technically, however, the term, “streaming,” refers to a continuous delivery method, and uses transport protocols such as RTSP rather than HTTP. This form of streaming requires specialized software to handle data traffic in real time

Progressive download blends aspects of downloading and streaming. When the user presses play on a video on a web page, the browser starts to download the video file. However, the browser may begin playback before the download is complete. So, the user experience of progressive download is much the same as streaming, and I’ll use the term, “streaming” in its colloquial sense in this blog post. Progressive downloads rely on efficient data storage technology and protocols like HTTP to deliver content to consumer devices, such as laptops or smartphones.

Both streaming and progressive download are widely used in cloud environments today, and enable websites to serve media content directly from servers—whether local or in the cloud.

HTTP 1.1 byte range serving

HTTP enables progressive download through a feature known as range serving. Introduced to HTTP in version 1.1 back in 1997, byte range serving allows an HTTP client, such as your browser, to request a specific range of bytes from a resource, such as a video file, rather than the entire resource all at once.

Imagine you’re watching a video online and realize you’ve already seen the first half. You can click the video’s slider control, picking up the action at the appropriate point. Without byte range serving, your browser would be downloading the whole video, and you might have to wait several minutes for it to reach the halfway point and start playing. With byte range serving, the browser can specify a range of bytes in each request, so it’s easy for the browser to request data from the middle of the video file, skipping any amount of content almost instantly.

Byte range serving significantly enhances user experience and optimizes network bandwidth. It’s especially beneficial when serving large media files stored in cloud storage.

Backblaze B2 supports byte range serving in downloads via both the Backblaze B2 Native and S3 Compatible APIs. (Check out this post for an explainer of the differences between the two.)

Here’s an example range request for the first 10 bytes of a file in a Backblaze B2 bucket, using the cURL command line tool. 

You can see the Range header in the request, specifying bytes zero to nine, and the Content-Range header indicating that the response indeed contains bytes zero to nine of a total of 555,214,865 bytes. Note also the HTTP status code: 206, signifying a successful retrieval of partial content, rather than the usual 200.

% curl -I https://metadaddy-public.s3.us-west-004.backblazeb2.com/
example.mp4 -H 'Range: bytes=0-9'

HTTP/1.1 206
Accept-Ranges: bytes
Last-Modified: Tue, 12 Jul 2022 20:06:09 GMT
ETag: "4e104e1bd9a2111002a74c9c798515e6-106"
Content-Range: bytes 0-9/555214865
x-amz-request-id: 1e90f359de28f27a
x-amz-id-2: aMYY1L2apOcUzTzUNY0ZmyjRRZBhjrWJz
x-amz-version-id: 4_zf1f51fb913357c4f74ed0c1b_f202e87c8ea50bf77_
d20220712_m200609_c004_v0402006_t0054_u01657656369727
Content-Type: video/mp4
Content-Length: 10
Date: Tue, 12 Jul 2022 20:08:21 GMT

I recommend that you use S3-style URLs for media content, as shown in the above example, rather than Backblaze B2-style URLs of the form: https://f004.backblazeb2.com/file/metadaddy-public/example.mp4.

The B2 Native API responds to a range request that specifies the entire content, e.g., Range: 0-, with HTTP status 200, rather than 206. Safari interprets that response as indicating that Backblaze B2 does not support range requests, and thus will not start playing content until the entire file is downloaded. 

The S3 Compatible API returns HTTP status 206 for all range requests, regardless of whether they specify the entire content, so Safari will allow you to play the video as soon as the page loads.

Media file formats for storage and streaming

The third ingredient in streaming media successfully is the file format. There are several container formats for audio and video data, with familiar file name extensions such as .mov, .mp4, and .avi. Within these containers, media data can be encoded in many different ways by software components known as codecs, an abbreviation of coder/decoder.

Codecs play a critical role in digital storage media. They compress and decompress the data to optimize storage capacity while preserving playback quality. Choosing the right codec ensures efficient long-term storage and seamless delivery of high-quality media.

We could write a whole series of blog articles on containers and codecs, but the important point is that the media’s metadata—information regarding how to play the media, such as its length, bit rate, dimensions, and frames per second—must be located at the beginning of the video file, so that this information is immediately available as download starts. This optimization is known as “Fast Start” and is supported by software such as ffmpeg and Premiere Pro. Without this, there might be playback delays, negatively impacting the user experience.

Understanding MIME types for reliable media playback

The final piece of the puzzle is the media file’s MIME type, which identifies the file format for the browser or media player. You can see a MIME type in the Content-Type header in the above example request: video/mp4. You must specify the MIME type when you upload a file to Backblaze B2. You can set it explicitly, or use the special value b2/x-auto to tell Backblaze B2 to set the MIME type according to the file name’s extension, if one is present. It is important to set the MIME type correctly for reliable playback.

For those managing high-capacity storage, getting MIME types right helps streamline delivery and maintain compatibility with newer software and streaming protocols.

Putting it all together

So, we’ve covered the ingredients for streaming media from Backblaze B2 directly to a web page:

  • The HTML5 <audio> and <video> elements.
  • HTTP 1.1 byte range serving.
  • Encoding media for Fast Start.
  • Storing media files in Backblaze B2 with the correct MIME type.

Here’s an HTML5 page with a minimal example of an embedded video file:

<!DOCTYPE html>
<html>
<body>
<h1>Video</h1>
<video controls src="my-video.mp4" width="640px"></video>
</body>
</html>

The controls attribute tells the browser to show the default set of controls for playback. Setting the width of the video element makes it a more manageable size than the default, which is the video’s dimensions. This short video shows the video element in action:

Managing download costs with efficient data storage solutions

When serving media files from your account, you need to consider download charges as part of your overall data management strategy. Backblaze offers a few ways to manage these charges. To start, the first 1GB of data downloaded from your Backblaze B2 account per day is free. After that, we charge $0.01/GB—notably less than AWS at $0.05+/GB, Azure at $0.04+, and Google Cloud Platform at $0.12.

We also cover the download fees between Backblaze B2 and many CDN partners like Cloudflare, Fastly, and Bunny.net, so you can serve content closer to your end users via their edge networks. You’ll want to make sure you understand if there are limits on your media downloads from those vendors by checking the terms of service for your CDN account. Some service levels do restrict downloads of media content.

Start streaming: Your media storage journey begins

Now you know everything you need to know to get started encoding, uploading, and serving audio/visual content from Backblaze B2 Cloud Storage. Backblaze B2 is a great way to experiment with multimedia—the first 10GB of storage is free, and Backblaze pricing includes free egress per month. 

Sign up free, no credit card required, and start building your long-term backup and streaming infrastructure with Backblaze B2.

The post Streaming Media with Backblaze B2: A Data Storage Guide appeared first on Backblaze Blog | Cloud Storage & Cloud Backup