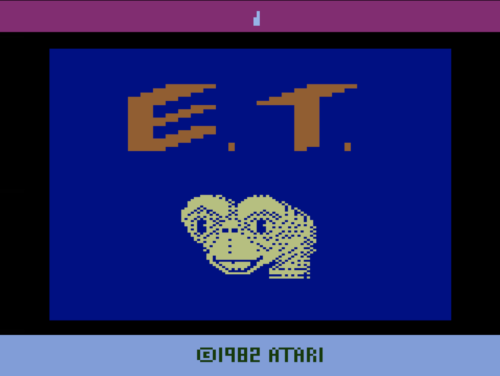
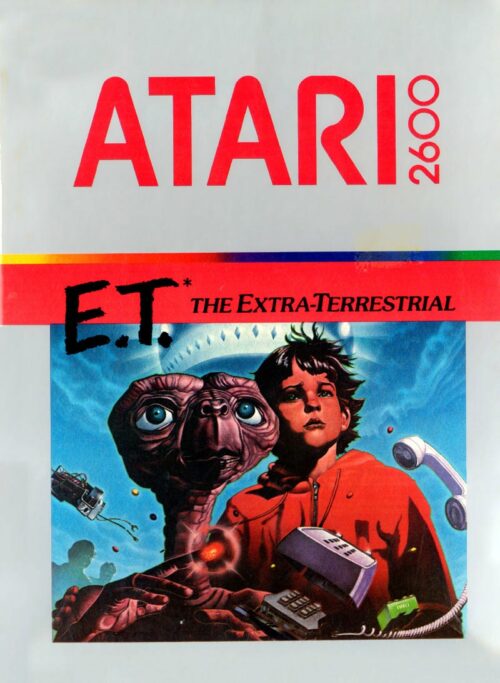
In the latest issue of Wireframe magazine, video game pioneer Howard Scott Warshaw reflects on the calamitous E.T. for the Atari 2600. Could it serve as a useful metaphor for real life?
When Julius Caesar ran into Brutus on the Ides of March so many years ago, it changed his life dramatically. I would say the same thing about my life when I ran into the E.T. project, though in my case, the change wasn’t quite so abrupt… or pointed. People say that my E.T. game was ahead of its time, so much so that it didn’t work for many players in its time. Fair enough. But E.T. is more than that. On many levels, that game has served as a metaphor for life, at least for my life. Let me explain, and perhaps it will sound familiar in yours as well.
There was an aura of promise and anticipation on the advent of the E.T. project – much like the prospect of graduating from college and entering the working world as a computer programming professional. This was super-exciting to me. Once I began the challenge of delivering this game, however, the bloom left the rose (no matter how many times I healed it). Similarly, on my entry into the working world, my excitement was quashed by the unsatisfying nature and demands of typical corporate computing tasks. This is analogous to the experience of E.T. players, having just unwrapped the game. They pop the cartridge in, fire it up, and venture forward with innocent exuberance… only to be crushed by a confusing and unforgiving game world. Perhaps the E.T. game was some sort of unconscious impulse on my part. Was I recreating the disappointment of my first foray into corporate life? Highly unlikely, but the therapist in me just had to ask.
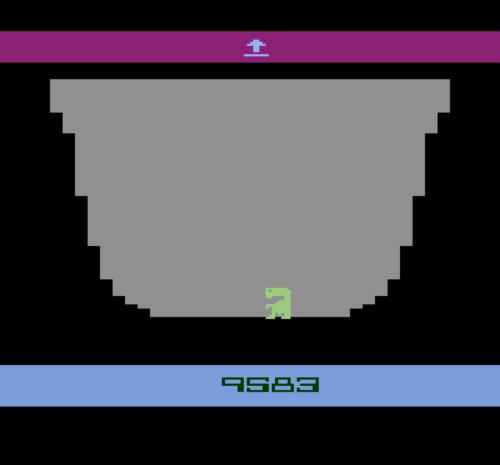
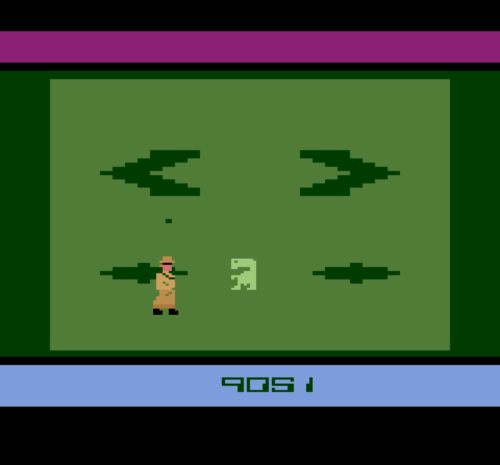
In the E.T. game, I spend a lot of time wandering around and falling into pits. Sometimes I find treasure in those pits. Sometimes I’m just stuck in a pit and I need to dig my way out. That costs energy I could have used on more productive endeavours. There’s also a power-up in the game you can use to find out if there is something worth diving in for. Sadly, there’s no such power-up in life. Figuring out the difference between the treasure and the waste has always been one of my biggest questions, and it’s rarely obvious to me.
One of the treasures you find in the game is the flower. The act of healing it brings benefits and occasional delightful surprises. I was at the bottom of a ‘pit’ in my life when I found the path to becoming a psychotherapist (another act of healing). It helped me climb out and take some big steps toward winning the bigger game.
E.T. is all about the pits, at least it seems so for many who talk about it. And they do so with such derision. Many times I’ve heard the phrase, “E.T. isn’t about the pits. It is the pits!” But are pits really so bad? After all, there are situations in which being stuck in a pit can be an advantage – OK, perhaps not so much in the game. But in life, I find it’s unwise to judge where I am until I see where it takes me. There have been times where major disappointments ended up saving me from a far worse fate had I been granted my original desire. And in more concrete terms, during a hurricane or tornado, there are far worse outcomes than stumbling into a pit. Sometimes when I trip and fall, I wind up dodging a bullet.
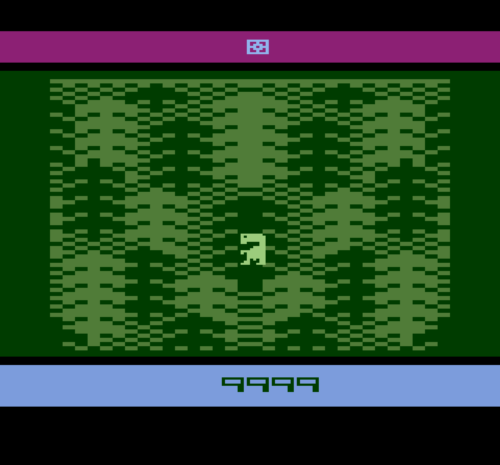
Yes, in the game you can wind up wandering aimlessly around, feeling hopeless and without direction (somehow, they didn’t put that on the box). But ultimately, if you persevere (and read the directions), you can create a reasonably satisfying win. After finishing development of the game, there was a long period of waiting before any feedback arrived. Then it came with a vengeance. Of course, that only lasted for decades. My life after Atari seemed a bit of a wasteland for a long time too. Rays of sunlight broke through on occasion, but mostly cloudy skies persisted. Things didn’t improve until I broke free from the world in which I was stuck in order to launch the improbable life I truly wanted.
But it’s not like there were no lingering issues from my E.T. experience. It turns out that ever since the E.T. project, I have a much greater propensity to procrastinate, regularly shorting myself of dev time. I didn’t used to do that before E.T., but I’ve done it quite a bit since. I delay launching a genuine effort, then rush into things and try to do them too quickly. This results in a flurry of motion that doesn’t quite realise the potential of the original concept. More flailing and more failing. It doesn’t mean my idea was poor; it means it was unrefined and didn’t receive sufficient nourishment. On reflection, I see there are both challenges and opportunities at every turn. Pits and treasures. Which of those I emphasise as I move forward is how I construct the life I’m going to have, and I’m doing that all the time.
Pits and treasures, this is much of life. My E.T. game has mostly pits. Truth be known, people like to call them ‘pits’, but I’ve always thought of them as wells: a place to hide, to take repose and to weather out life’s storms. For me, that has been the value of having so many wells. I hope it works for you as well. Try it on. It just might fit like Caesar’s toga. And if it doesn’t, you can say what Brutus said on that fateful day: “At least I took a stab at it.”
Get your copy of Wireframe issue 55
You can read more features like this one in Wireframe issue 54, available directly from Raspberry Pi Press — we deliver worldwide.
And if you’d like a handy digital version of the magazine, you can also download issue 54 for free in PDF format.
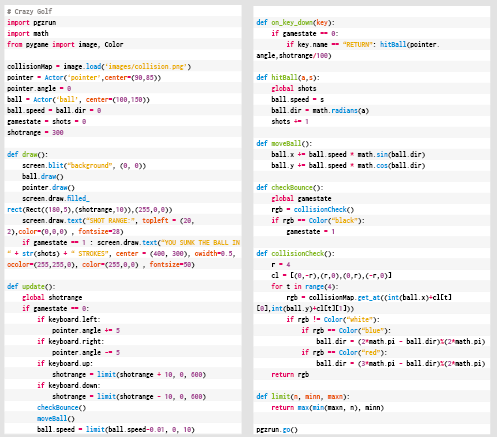
Putt the ball around irrational obstacles in our retro take on golf. Mark Vanstone has the code
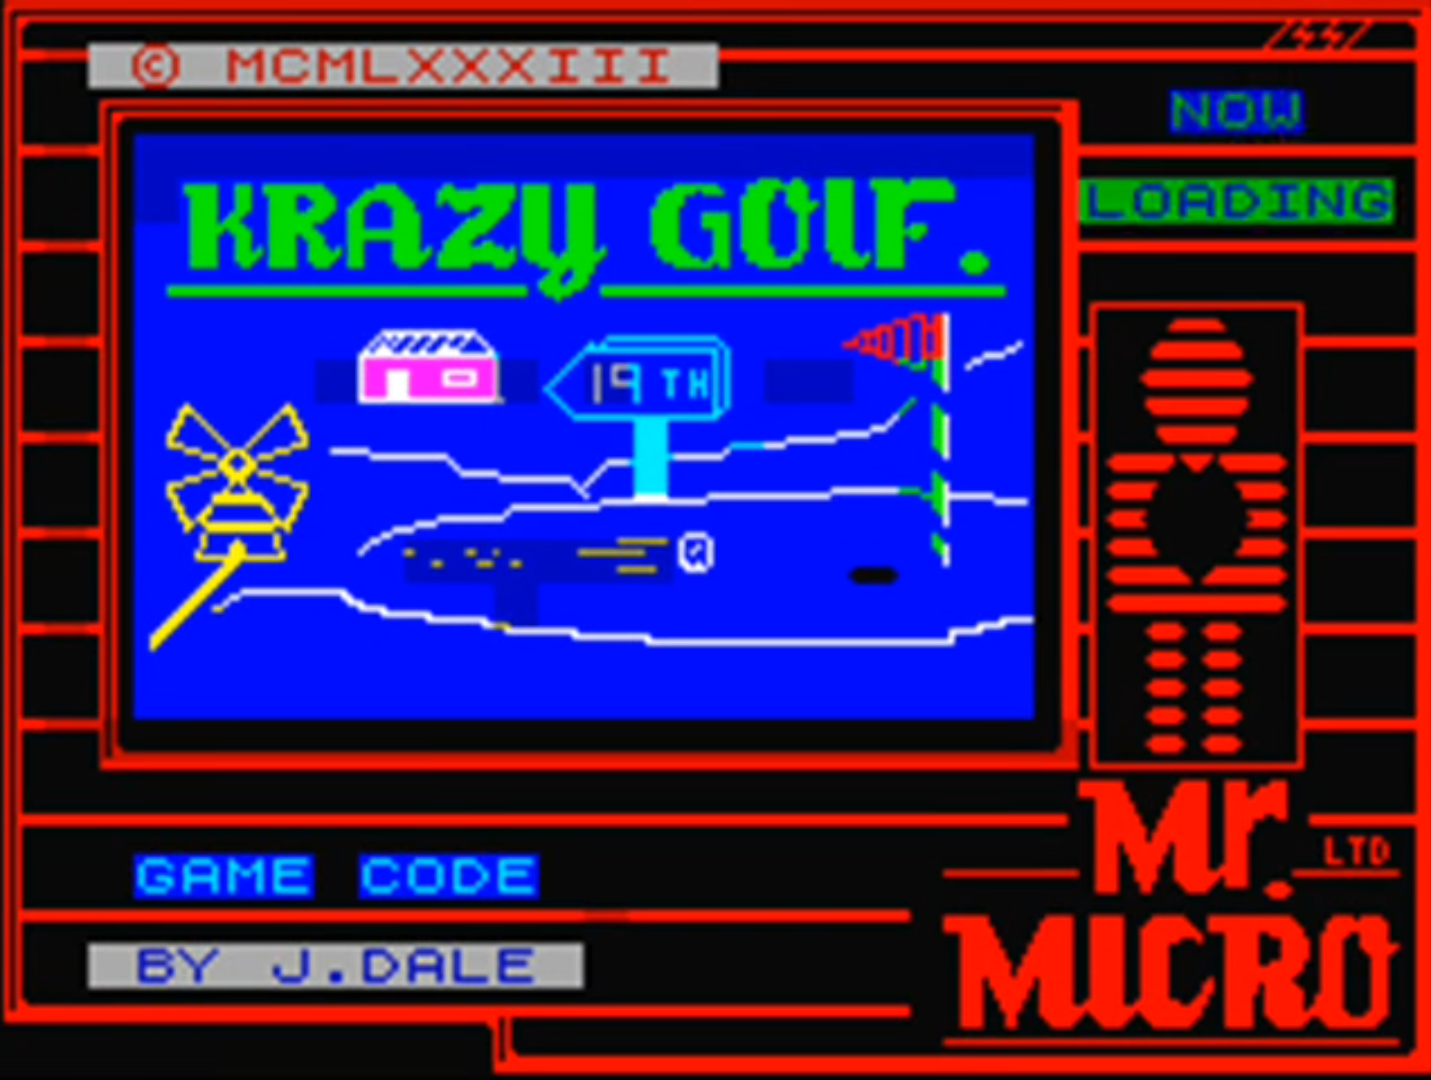
First released by Mr. Micro in 1983 – then under the banner of Sinclair Research – Krazy Golf was, confusingly, also called Crazy Golf. The loading screen featured the Krazy spelling, but on the cover, it was plain old Crazy Golf.
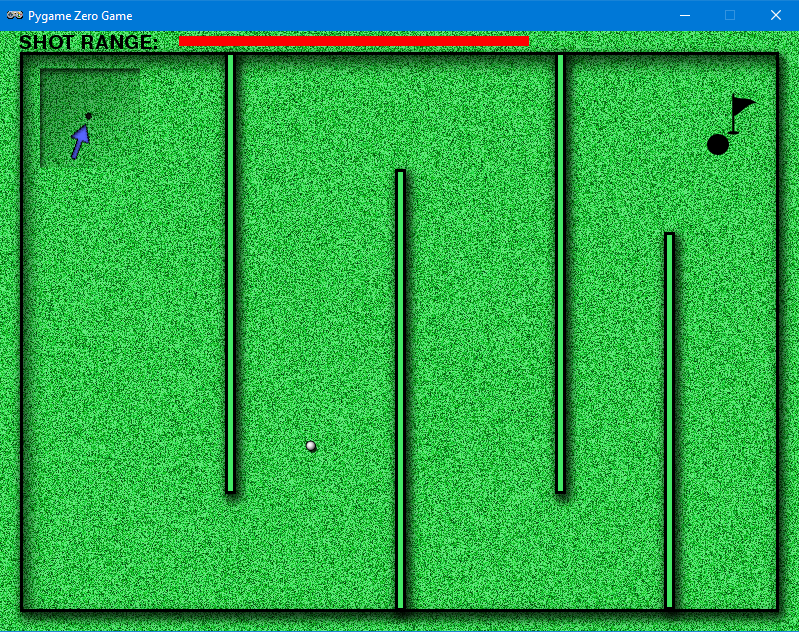
Designed for the ZX Spectrum, the game provided nine holes and a variety of obstacles to putt the ball around. Crazy Golf was released at a time when dozens of other games were hitting the Spectrum market, and although it was released under the Sinclair name and reviewed in magazines such as Crash, it didn’t make much impact. The game itself employed a fairly rudimentary control system, whereby the player selects the angle of the shot at the top left of the screen, sets the range via a bar along the top, and then presses the RETURN key to take the shot.
The game was called Crazy Golf on the cover, but weirdly, the loading screen spelled the name as Krazy Golf. The early games industry was strange.
If you’ve been following our Source Code articles each month, you will have seen the pinball game where a ball bounces off various surfaces. In that example, we used a few shortcuts to approximate the bounce angles. Here, we’re only going to have horizontal and vertical walls, so we can use some fairly straightforward maths to calculate more precisely the new angle as the ball bounces off a surface. In the original game, the ball was limited to only 16 angles, and the ball moved at the same speed regardless of the strength of the shot. We’re going to improve on this a bit so that there’s more flexibility around the shot angle; we’ll also get the ball to start moving fast and then reduce its speed until it stops.
Horizontal or vertical obstruction?
To make this work, we need to have a way of defining whether an obstruction is horizontal or vertical, as the calculation is different for each. We’ll have a background graphic showing the course and obstacles, but we’ll also need another map to check our collisions. We need to make a collision map that just has the obstacles on it, so we need a white background; mark all the horizontal surfaces red and all the vertical surfaces blue.
As we move the ball around the screen (in much the same way as our pinball game) we check to see if it has collided with a surface by sampling the colours of the pixels from the collision map. If the pixel’s blue, we know that the ball has hit a vertical wall; if it’s red, the wall’s horizontal. We then calculate the new angle for the ball. If we mark the hole as black, then we can also test for collision with that – if the ball’s in the hole, the game ends.
The pointer’s angle is rotated using degrees, but we’ll use radians for our ball direction as it will simplify our movement and bounce calculations.
Get the code
We have our ball bouncing mechanism, so now we need our user interaction system. We’ll use the left and right arrow keys to rotate our pointer, which designates the direction of the next shot. We also need a range-setting gizmo, which will be shown as a bar at the top of the screen. We can make that grow and shrink with the up and down arrows.
Then when we press the RETURN key, we transfer the pointer angle and the range to the ball and watch it go. We ought to count each shot so that we can display a tally to the player once they’ve putted the ball into the hole. From this point, it’s a simple task to create another eight holes – and then you’ll have a full crazy golf game!
Here’s Mark’s code for a simple golf game. To get it running on your system, you’ll need to install Pygame Zero. And for the full code, head to our Github.
Get your copy of Wireframe issue 55
You can read more features like this one in Wireframe issue 54, available directly from Raspberry Pi Press — we deliver worldwide.
And if you’d like a handy digital version of the magazine, you can also download issue 54 for free in PDF format.
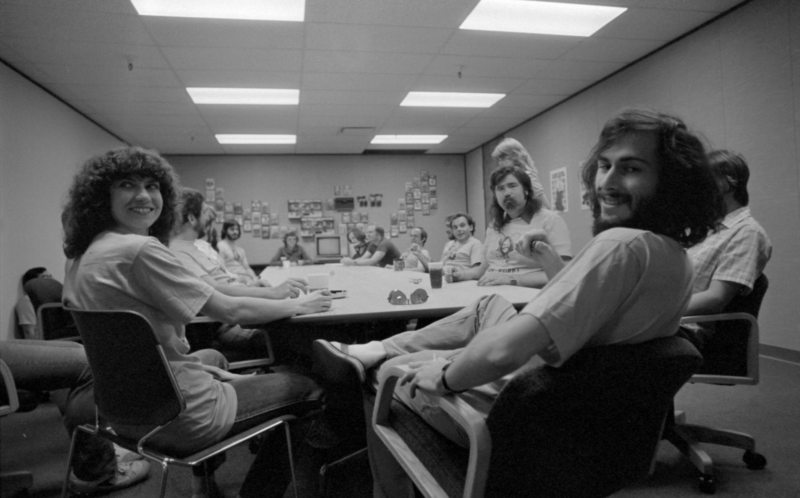
We love Wireframe magazine’s regular feature ‘The principles of game design’. They’re written by video game pioneer Howard Scott Warshaw, who authored several of Atari’s most famous and infamous titles. In the latest issue of Wireframe, he provides a snapshot of the hell-raising that went on behind the scenes at Atari…
A moment of relative calm in Atari’s offices, circa the early 1980s. There’s Howard nearest the camera on the right
Video game creation is unusual in that developers need to be focused intently on achieving design goals while simultaneously battling tunnel vision and re-evaluating those goals. It’s a demanding and frustrating predicament. Therefore, a solid video game creator needs two things: a way to let ideas simmer (since rumination is how games grow from mediocre to fabulous) and a way to blow off steam (since frustration abounds while trying to achieve fabulous). At Atari, there was one place where things both simmered and got steamy… the hot tub. The only thing we couldn’t do was keep a lid on the antics cooked up inside.
The hot tub was situated in the two-storey engineering building. This was ironic, because the hot tub generated way more than two stories in that building. The VCS/2600 and Home Computer development groups were upstairs. The first floor held coin-op development, a kitchen/cafeteria, and an extremely well-appointed gym. The gym featured two appendages: a locker area and the hot tub room. Many shenanigans were hatched and/or executed in the hot tub. One from the more epic end of the spectrum comes to mind: the executive birthday surprise.
Those prizes look pretty impressive
It was during the birthday celebration of a VP who shall remain nameless, but it might have been the one who used to keep a canister of nitrous oxide and another of pure oxygen in his office. The nitrous oxide was for getting high and laughing some time away, while the oxygen was used for rapid sobering up in the event a spontaneous meeting was called (which happened regularly at Atari). As the party raged on, a small crew of revellers migrated to the small but accommodating hot tub room. Various intoxicants (well beyond the scope of nitrous) were being consumed in celebration of the special event (although by this standard, nearly every day was a special event at Atari).
As the party rolled on, inhibitions were shed along with numerous articles of clothing. At one point, the birthday boy was adjudged to be in dire need of a proper tubbing as he hadn’t lost sufficient layers to keep pace with the party at large. The birthday boy disagreed, and the ensuing negotiation took the form of a lively chase around the area. The VP ran out of the hot tub room and headed for the workout area with a wet posse in hot pursuit, all in varying stages of undress.
Refreshments were readily available at Atari in its heyday
It’s important to note here that although refreshments and revelry were widely available at Atari, one item in short supply was conference rooms. Consequently, meetings could pop up in odd locales. Any place an aggregation could be achieved was a potential meeting spot. The sensitivity of the subject matter would determine the level of privacy required on a case-by-case basis. Since people weren’t always working out, the gym had enough places to sit that it could serve as a decent host for gatherings. And as for sensitivity, the hot tub room was well sound-proofed, so intruding ears weren’t a concern.
As the crew of rowdy revellers followed the VP into the workout area, they were confronted by just such a collection of executives who happened to be meeting at the time. I don’t think the birthday party was on the agenda. However, they may have been pleased that the absentee VP had ultimately decided to join their number. It was embarrassing for some, entertaining for others, and nearly career-ending for a couple. The moral of this story being that Atari executives should never go anywhere without their oxygen tanks in tow.
Between developing games, Howard and Atari’s other programmers found time to play a bit of Frisbee
But morals aside, there was work to be done at Atari. In a place where work can lead to antics and antics can lead to work breakthroughs, it’s difficult at times to suss out the precise boundary between work and antics. It takes passion and commitment to pursue side quests productively and yet remain on task when necessary.
The main reason this was a challenge comes down to the fact there are so many distractions constantly going on. Creative people tend to be creative frequently and spontaneously. Also, their creativity is much more motivated by fascination and interest than it is by task lists or project plans. Fun can break out at any moment, and answering the call isn’t always the right choice, no matter how compelling the siren.
Nice hat
Rob Fulop, creator of Missile Command and Demon Attack for the Atari 2600 (among many other hits) isn’t only a great game maker, he’s also a keen observer of human nature. We used to chat about just where the edge is between work and play at Atari. Those who misjudge it can easily fall off the cliff.
Likewise, we explored the concept of what makes a good game designer. Rob said it’s just the right combination of silly and anal. He believed that the people who did well at Atari (and as game makers in general) were the people who could be silly enough to recognise fun, and anal enough to get all the minutia and details aligned correctly in order to deliver the fun. Of course, Rob (being the poet he is) created a wonderful phrasing to describe those with the right stuff. He put it like this: the people who did well at Atari were the people who could goof around as much as possible but still go to heaven.
Get your copy of Wireframe issue 53
You can read more features like this one in Wireframe issue 53, available directly from Raspberry Pi Press — we deliver worldwide.
And if you’d like a handy digital version of the magazine, you can also download issue 53 for free in PDF format.
Get flappers flapping and balls bouncing off bumpers. Mark Vanstone has the code in the new issue of Wireframe magazine, available now.
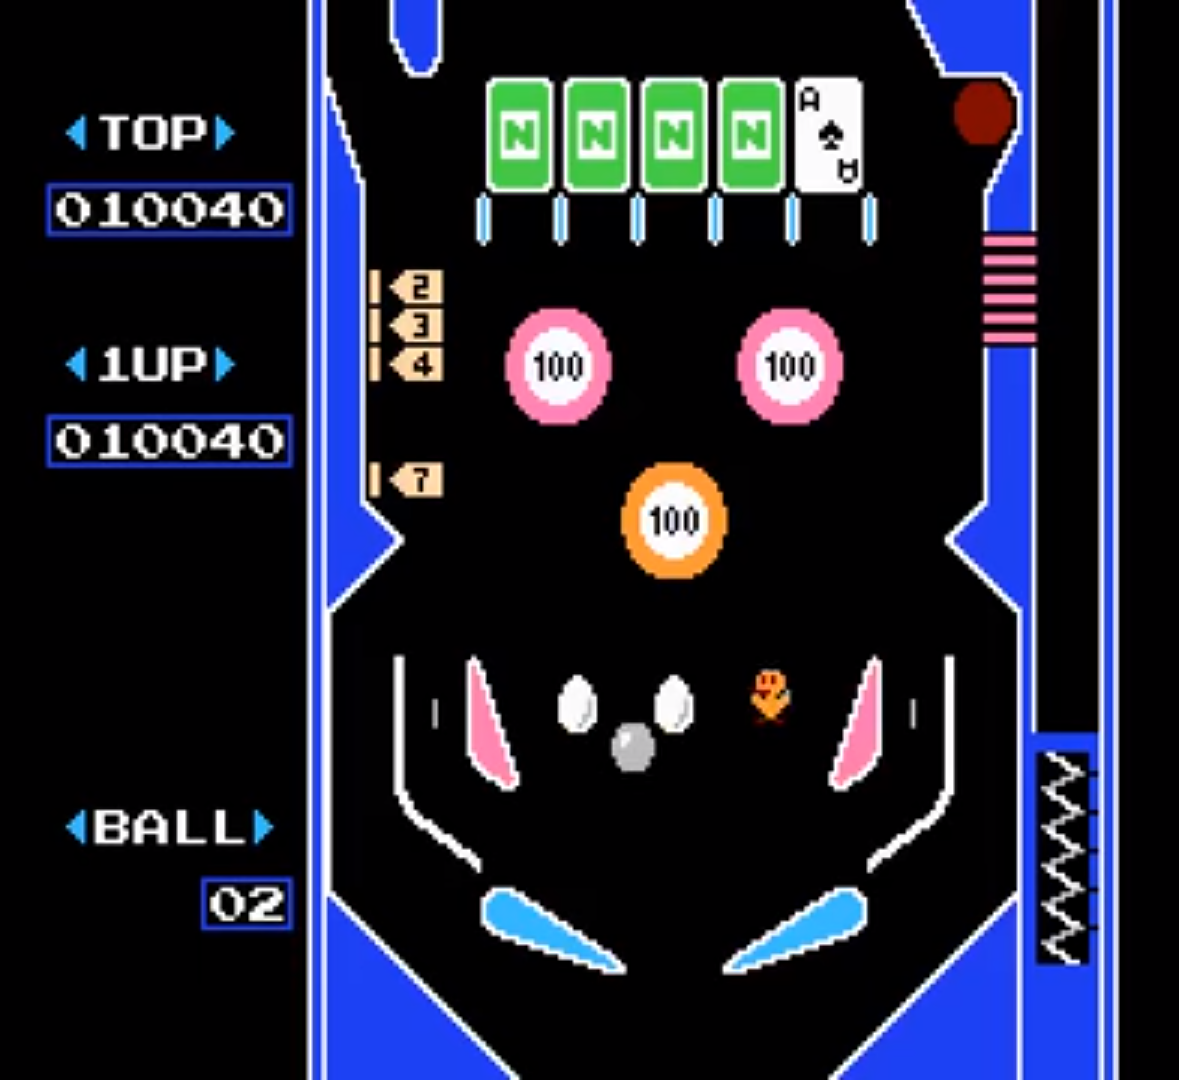
There are so many pinball video games that it’s become a genre in its own right. For the few of you who haven’t encountered pinball for some reason, it originated as an analogue arcade machine where a metal ball would be fired onto a sloping play area and bounce between obstacles. The player operates a pair of flippers by pressing buttons on each side of the machine, which will in turn ping the ball back up the play area to hit obstacles and earn points. The game ends when the ball falls through the exit at the bottom of the play area.
One of the earliest pinball video games – it’s the imaginatively-named Pinball on the NES.
Recreating pinball machines for video games
Video game developers soon started trying to recreate pinball, first with fairly rudimentary graphics and physics, but with increasingly greater realism over time – if you look at Nintendo’s Pinball from 1984, then, say, Devil’s Crush on the Sega Mega Drive in 1990, and then 1992’s Pinball Dreams on PC, you can see how radically the genre evolved in just a few years. In this month’s Source Code, we’re going to put together a very simple rendition of pinball in Pygame Zero. We’re not going to use any complicated maths or physics systems, just a little algebra and trigonometry.
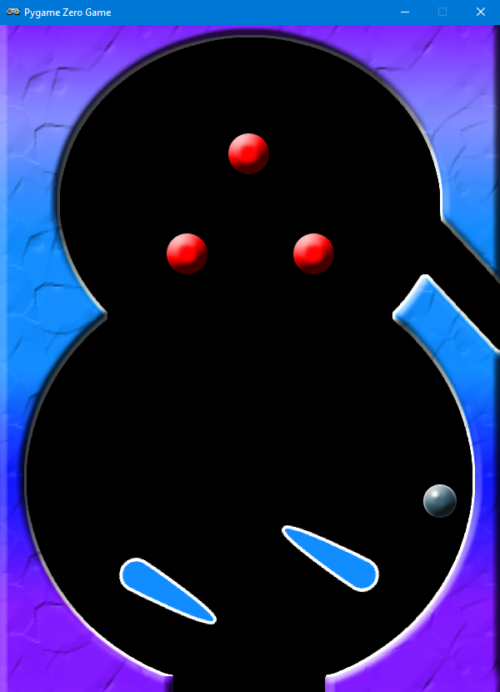
Let’s start with our background. We need an image which has barriers around the outside for the ball to bounce off, and a gap at the bottom for the ball to fall through. We also want some obstacles in the play area and an entrance at the side for the ball to enter when it’s first fired. In this case, we’re going to use our background as a collision map, too, so we need to design it so that all the areas that the ball can move in are black.
Here it is: your own pinball game in less than 100 lines of code.
Next, we need some flippers. These are defined as Actors with a pivot anchor position set near the larger end, and are positioned near the bottom of the play area. We detect left and right key presses and rotate the angle of the flippers by 20 degrees within a range of -30 to +30 degrees. If no key is pressed, then the flipper drops back down. With these elements in place, we have our play area and an ability for the player to defend the exit.
All we need now is a ball to go bouncing around the obstacles we’ve made. Defining the ball as an Actor, we can add a direction and a speed parameter to it. With these values set, the ball can be moved using a bit of trigonometry. Our new x-coordinate will move by the sin of the ball direction multiplied by the speed, and the new y-coordinate will move by the cos of the ball direction multiplied by speed. We need to detect collisions with objects and obstacles, so we sample four pixels around the ball to see if it’s hit anything solid. If it has, we need to make the ball bounce.
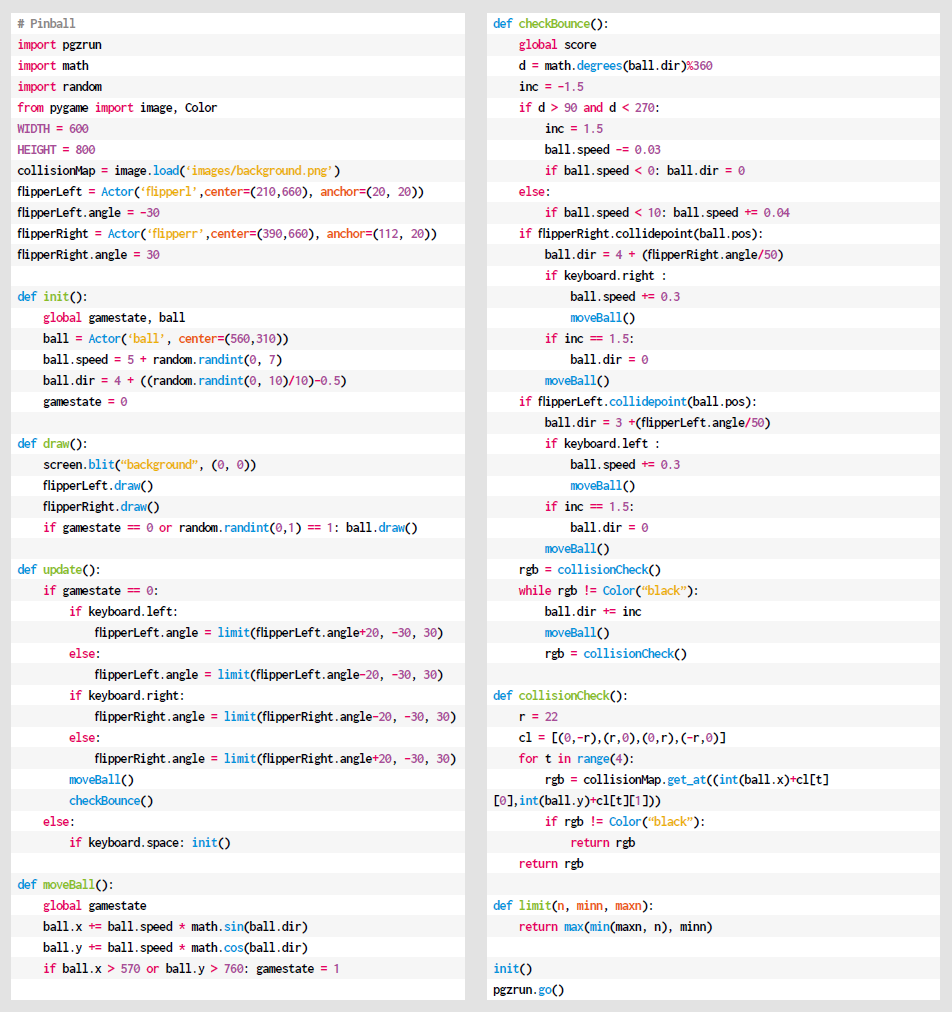
Get the code
Here’s Mark’s pinball code. To get it working on your system, you’ll need to install Pygame Zero. And to download the full code and assets, head here.
If you wanted more realistic physics, you’d calculate the reflection angle from the surface which has been hit, but in this case, we’re going to use a shortcut which will produce a rough approximation. We work out what direction the ball is travelling in and then rotate either left or right by a quarter of a turn until the ball no longer collides with a wall. We could finesse this calculation further to create a more accurate effect, but we’ll keep it simple for this sample. Finally, we need to add some gravity. As the play area is tilted downwards, we need to increase the ball speed as it travels down and decrease it as it travels up.
All of this should give you the bare bones of a pinball game. There’s lots more you could add to increase the realism, but we’ll leave you to discover the joys of normal vectors and dot products…
Get your copy of Wireframe issue 53
You can read more features like this one in Wireframe issue 53, available directly from Raspberry Pi Press — we deliver worldwide.
And if you’d like a handy digital version of the magazine, you can also download issue 53 for free in PDF format.
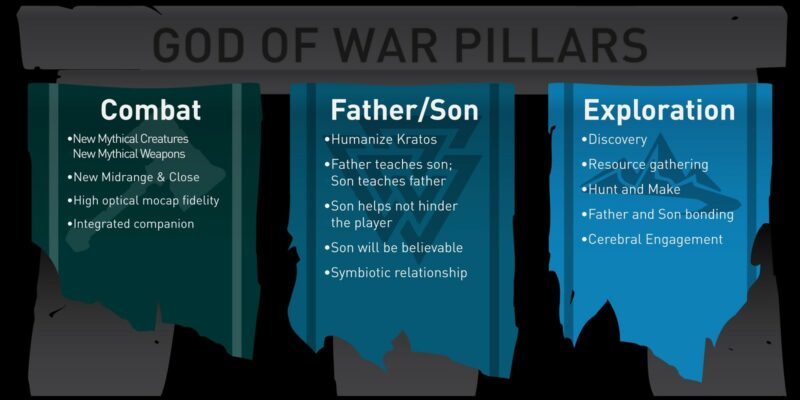
In game design, freedom can lead to paralysis. But in the latest issue of Wireframe magazine, Stuart Maine explains how game pillars and the iron triangle will help you focus on what’s important.
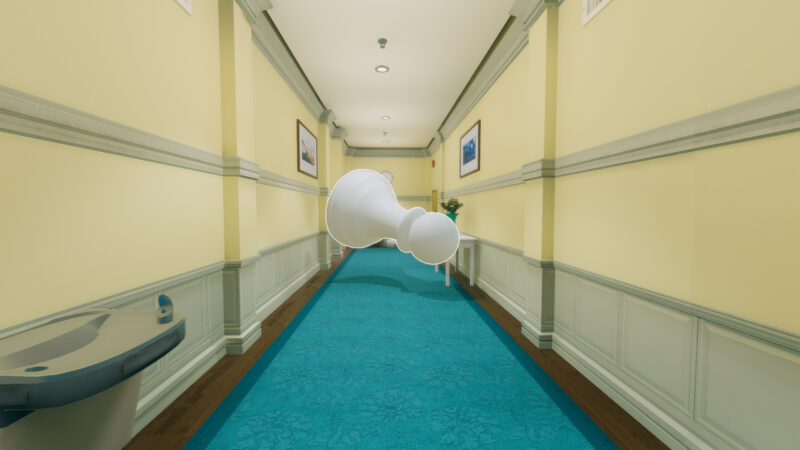
The flexibility of the medium of video games lets us experience concepts like the non-Euclidean geometry behind Superliminal’s ‘whatever you see is reality’
This article will cover two game development tools that are designed to help decide what’s important in the game you’re making. The iron triangle revolves around the practical realities of making a game, while game pillars cover the creative side, but both relate to the importance of focus. Let’s begin with pillars.
Game pillars
Every game media has its strengths, such as wargaming’s communities, the shared experiences of board games, or the collaboration of RPGs. One of the advantages of video games is their sheer flexibility – we can race across alien worlds, explore Egyptian tombs, or keep fit while going on magical quests. But that infinite flexibility can be a real problem for game creators, because if the game you’re making can include literally anything, then how do you know what to focus on?
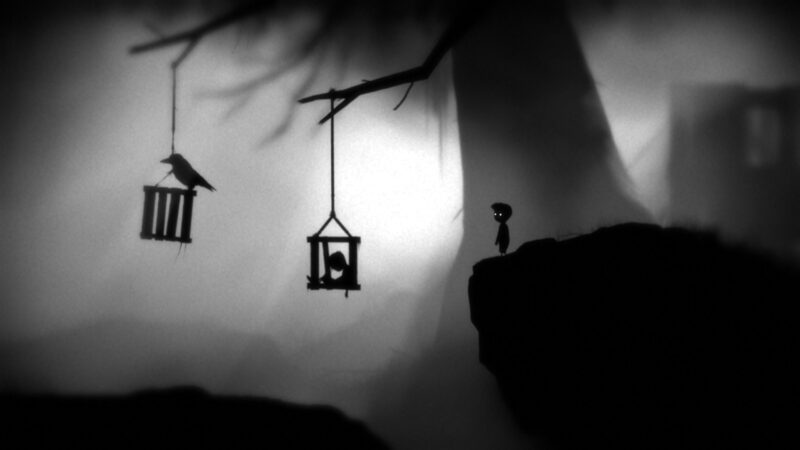
A pillar saying your game is a platformer doesn’t really help, it’s what you do or say with that basic framework that matters
Let’s assume you have an idea for a game based on a particular world or character, or a certain type of gameplay. Alternatively, you might have used player types (see Wireframe issue 39) to decide on a particular audience and the features they like, or if you’re working with someone else’s IP, then that brand’s owners might have a type of gameplay in mind. Game pillars help move beyond those starting points and guide you through development.
The basics
A game’s pillars are a list of around three ‘core statements’ created early in that game’s development. You could come up with your pillars before you’ve started development to help narrow down the possible game you might make, or you might do this after prototyping has given you an idea you want to pursue. You can even retroactively create pillars to help rescue a game that’s been in development for a while and has lost its way.
Each statement should be short – no more than a sentence – and each should be phrased as a rule you will follow throughout development.
Use active language. We will, we like, this game is, our audience wants, and so on. Don’t use negative language if you can rephrase the same statement as a positive.
Importantly, make your pillars focus on how your players will feel over the things they will do. This is probably the most important concept here, so let’s explore it further.
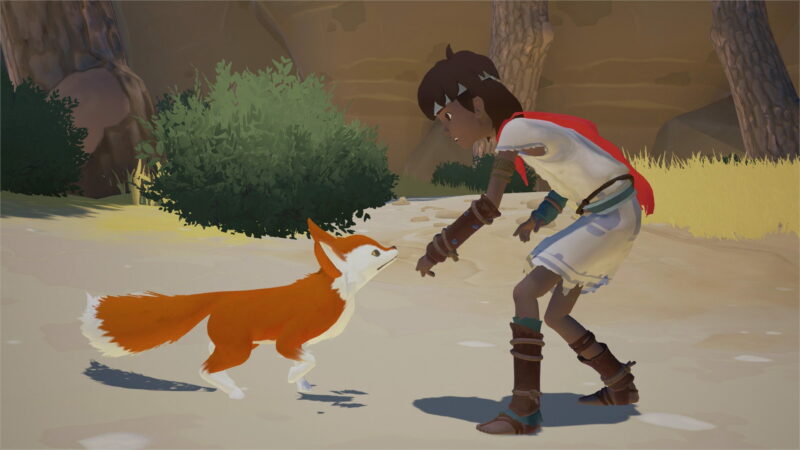
During development, Rime began to deviate from its original goals and the team had to take the decision to refocus on their pillars
Dig deeper into the ‘why’
It’s easy to write ‘our game will feature 2D puzzles and platforming’, and technically that is a pillar because you can refer back to it later. But it doesn’t really say anything about what that platforming is for. By that, I mean why are you making a game about platforming? To dig deeper into the ‘why’ behind your pillar, you could rewrite that sentence to one of these:
Explore evocative alien worlds, telling a story through atmosphere and details
It’s satisfying to master deep systems and figure out hidden rules
Our players will achieve a state of flow through challenging, precision gameplay
Those are my example guesses at a pillar each for the platform games Flashback, Spelunky, and Celeste. All are 2D platformers, but they’re ‘about’ very different things.
What to do with your pillars
Note that none of the above examples specifically talk about the gameplay being platforming, because pillars should focus on the feelings and emotions you want your game to evoke, rather than how you’re going to do it. That’s because pillars aren’t a feature list to check off, more a tool to help remember the things that are important when you’re submerged in the day-to-day realities of game development. Pillars are the why of your game, and the actual development process is coming up with the what to match those initial goals.
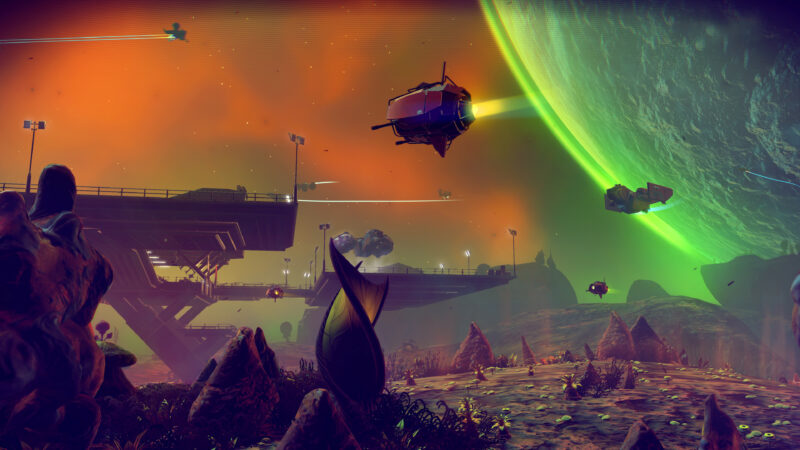
Another benefit of pillars is they can be used to communicate the game’s vision to the public, helping to balance reality and hype
Print your chosen pillars as large as you can and put them up somewhere you’ll see them every day. That way they’ll become ingrained in your thoughts and you’ll easily be able to refer to them when someone suggests a new feature or change to the game. Will that change help bring your game closer to your pillars (great), not really affect them (neutral), or work against them (bad)?
I’ve seen studios use pillars on struggling games to discard any areas which don’t match them. You particularly see this if a game is taking too long to release (because most professional studios have to get a game out to some sort of deadline – more on this below), with people looking back to their pillars to help work out what to cut. If feature A is cool, but feature B aligns with the pillars, it’ll take a strong argument to keep A.
Establishing pillars
There are a couple of approaches for coming up with a game’s pillars, each with advantages, but also potential problems to look out for. Both of these approaches assume you already know to some degree what the game will be. Your pillars will help guide the eventual game’s details, but they’re a tool for staying on track as you forge ahead, not for coming up with ideas in the first place. If you haven’t agreed on a concept for your game yet, then run game jams, conduct audience and market research, or paper prototype ideas first.
When you’re working with someone else’s brand, involve that IP’s holder in pillar discussions so that they’re onboard with your chosen direction
Second, both approaches assume any business, audience, IP, or technology factors are already agreed and set in stone. For example, you might already know that this will be a multiplayer game, that it must be released within this time frame, or that it must be built on the technology created for your previous game. We’ll talk more about this with the iron triangle, but basically, any real-world issues that are beyond your control must be acknowledged or you risk coming up with pillars that set you up for difficulties later.
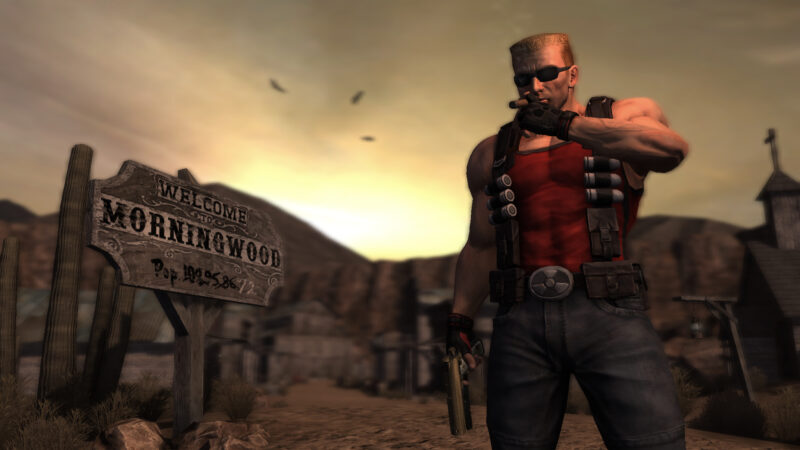
Duke Nukem Forever is an example of a major game that suffered for its lack of creative direction
Two approaches
The two approaches are to have the entire team brainstorm potential pillars, or have vision holders dictate them:
ONE: If the entire team is involved, then you run brainstorming sessions where everyone’s potential pillar ideas are stuck up on a wall. Then the group chooses the best pillars or combines a couple of ideas into pillars (remember the point about keeping them short – mashing many ideas into a long pillar is cheating).
The advantage of this approach is that everyone understands and buys into the chosen pillars because they had a say in creating them. The downside is that this process can take time, with potentially conflicting ideas needing to be whittled down until an agreement is reached.
TWO: The other approach is for ‘creative vision holders’ to come up with the game’s pillars and then present them to the rest of the team. Obviously, this is much less collaborative and more about saying, ‘I have a vision for this game which I think could be incredible, will you help me make it?’ The advantage of this is that everyone can rally behind a singular vision that someone is passionate about bringing to the world. As a result, the game’s pillars are likely to be extremely focused and all pointing in the same direction. The downside is that it requires everyone else to get on board with the game’s pillars even though they didn’t help come up with them.
Either way, once the pillars have been created, everyone on the team has to work with them in mind – there’s an implied contract that these rules must be enforced to ensure the game keeps moving in the right direction. Even though it can be unpopular to say no to someone’s idea, that’s what pillars are there to help with (and of course, pillars don’t say ‘that idea is bad’, simply that it doesn’t fit this particular game. Write the idea down and maybe build your next game around it).
Examples
Here are some actual pillars from games I’ve worked on:
Live through the apocalypse by any means necessary. This pillar from a military-themed game establishes that any action is acceptable in order to survive, implying a gritty, survival-of-the-fittest tone.
Does it make me feel loved? A pillar from a game that was designed to appeal to an audience that liked romances and was looking for escapism. This guided our characters, environments, and art style.
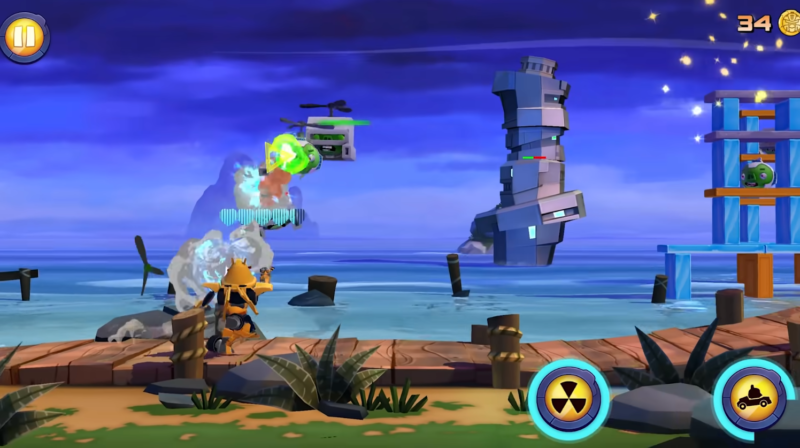
Make me feel powerful, and make me say, ‘That was awesome!’ It’s always worth considering a pillar covering who the player is in this game. If you’re making a game about being a giant robot, then ensure players feel big and powerful.
Small actions = epic reactions. From a puzzle game themed around combat. Because the player is making very small actions (tap, drag) we wanted to ensure the game responded with weighty reactions.
Express your own style in a safe way. If you’re working on a game for kids, it’s worth thinking about the challenges and worries in their lives, and whether your game can help them safely explore those areas.
Trust the player – it’s their game, let them play how they like. We used this for a procedurally created game, reminding the team not to create puzzles but to focus on systems that players could use and abuse any way they wanted.
The value of pillars
I realise that game pillars are quite an abstract topic, but in my experience across many games and studios, they have proven their worth. At the start of a project, they help avoid the ‘blank page’ problem of being able to make anything you can imagine, and later they help you say ‘this, but not that’ and avoid wandering in the development wilderness. So however you choose to structure or word your game pillars, I wholeheartedly recommend spending a little time thinking about the why before you launch into the what.
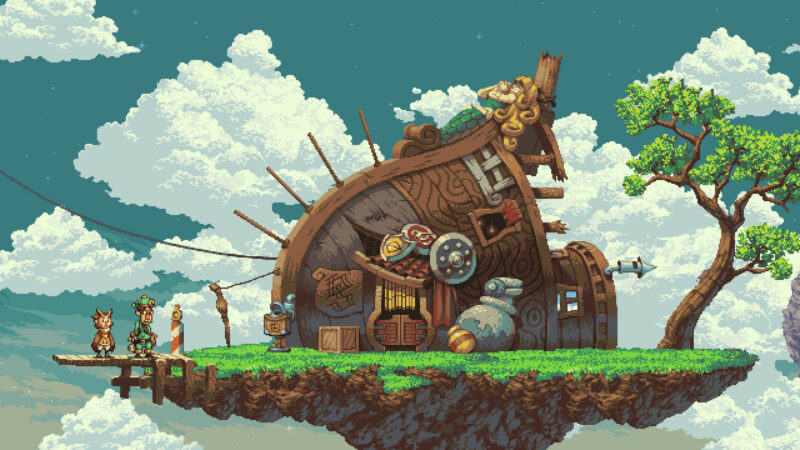
Owlboy: a game that favoured quality over time. It took about nine years to make, but looked spectacular
Speaking of which, let’s take a look at the iron triangle and how it will impact your game, because no matter what you do in the games industry, the triangle will impact you. As a result, it’s important to have an idea of how it works and what it means to your projects. A quick disclaimer: I’m going to simplify a complex area for space reasons, so if it interests you, check out online resources on this and other project management topics.
Art versus business
Have you ever played a game and clearly seen that it was unfinished? Missing features, obvious bugs, and a lack of polish show that you’re playing a game that needed more development time. The iron triangle is the reason games are released in an unfinished state, but it isn’t some malevolent force – it’s simply where reality butts up against creativity in game development.
Although no one sets out to make a bad game, movie licences often feel the pressure of the iron triangle due to their fixed release date
Coined by Dr. Martin Barnes, the triangle applies to premium games as much as free ones, and to indie games as equally as blockbusters. It relates to…
Three areas of game development
Quality: How ‘good’ is your game? Good could mean it has many features, levels, NPCs, and weapons, or that what you have is highly polished and balanced. It also dictates how many bugs you let through into the finished game (no one ever fixes all their bugs, you just choose which are most important).
Time: Implementing all of the above takes time, so this point of the triangle relates to how long your game will take to be released. Most game developers have to release their games to some sort of deadline; see ‘Time = money’ for more on this.
Money: The longer a game’s in development, the more money it costs, with most coming from the wages or living expenses of the team working on it. Money is the most complicated of the three factors because there’s a limit to how much you can throw at a game. A feature that’s going to take a lone developer ten months can’t be done in one simply by paying to put ten developers on it – people get in each other’s way and you have to pay even more because that many people need a lot of management.
Choose your priorities
Now we know the three points of the iron triangle – where things get interesting is that those points are all interrelated, and the rule is you can only control two of the three points. You can select which two points you want to control, but you have no say on what happens to the third. That’s why it’s called an iron triangle – the outcome of the third point is decided by what you do with the two you’ve chosen to control.
Shigeru Miyamoto spoke about delaying The Ocarina of Time until it was of the highest quality, making ‘cost’ the element out of his control
These are the outcomes you can expect based on the two points of the triangle you choose to control:
Controlling time and money is where you see licensed tie-in games. Because they need to release alongside (say) a movie, they must come out on a certain date, and they can’t cost more than a certain amount otherwise it isn’t worth making the game in the first place. The point of the triangle not controlled here is quality, meaning the game will be as big and polished as it happens to be when the time and money run out.
The second choice is to control time and quality, meaning the game must come out on a certain date and be at least ‘this’ good (e.g. large, polished, and bug-free). This option means you relinquish control over the game’s cost – it will simply cost as much as it needs to, to ensure it hits your quality bar and is released on time.
Finally, you can control money and quality, meaning the game will be big and polished, but the team is kept small to limit development costs. This means you have no control over how long the game will take to release because a small team making a polished product can only work so fast.
Business realities
You might be wondering why any of this matters – after all, you could be making a game in your spare time or working at a studio where other people make these decisions. But if you understand which of the points of the triangle your project is trying to control, then you can work more effectively, making choices that work towards those needs rather than against them.
As a side note, if you’re working at a studio and whoever’s in charge insists they can control all three points of the iron triangle, consider that a Big Red Warning. That sort of denial of the fundamentals of project management means overtime – and a game that’s likely to go off the rails.
The iron triangle isn’t about hateful business realities quashing your creative dreams, it’s about choosing and understanding your priorities so that you control your game, not the other way around.
Recap
To recap: choosing your game’s pillars helps you focus on what’s important, and choosing which two points of the iron triangle you want to control helps you focus on the reality of making a game. Both of these are important, because not deciding on a game’s pillars can lead to the end result being a mess of conflicting ideas pulling in multiple directions, and ignoring the iron triangle leads to games spiralling into overtime, delays, and impossible demands. Yes, making games should be fun, but a little focus early in a project’s life can pay off big time later on.
Get your copy of Wireframe issue 52
You can read more features like this one in Wireframe issue 52, available directly from Raspberry Pi Press — we deliver worldwide.
And if you’d like a handy digital version of the magazine, you can also download issue 52 for free in PDF format.
Code an homage to Konami’s classic shoot-’em-up, Gradius. Mark Vanstone has the code in the new edition of Wireframe magazine, available now.
Released by Konami in 1985, Gradius – also known as Nemesis outside Japan – brought a new breed of power-up system to arcades. One of the keys to its success was the way the player could customise their Vic Viper fighter craft by gathering capsules, which could then be ‘spent’ on weapons, speed-ups, and shields from a bar at the bottom of the screen.
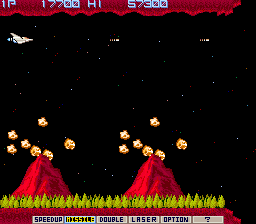
The Gradius volcanoes spew rocks at the player just before the end-of-level boss ship arrives.
Flying rocks
A seminal side-scrolling shooter, Gradius was particularly striking thanks to the variety of its levels: a wide range of hazards were thrown at the player, including waves of aliens, natural phenomena, and boss ships with engine cores that had to be destroyed in order to progress. One of the first stage’s biggest obstacles was a pair of volcanoes that spewed deadly rocks into the air: the rocks could be shot for extra points or just avoided to get through to the next section. In this month’s Source Code, we’re going to have a look at how to recreate the volcano-style flying rock obstacle from the game.
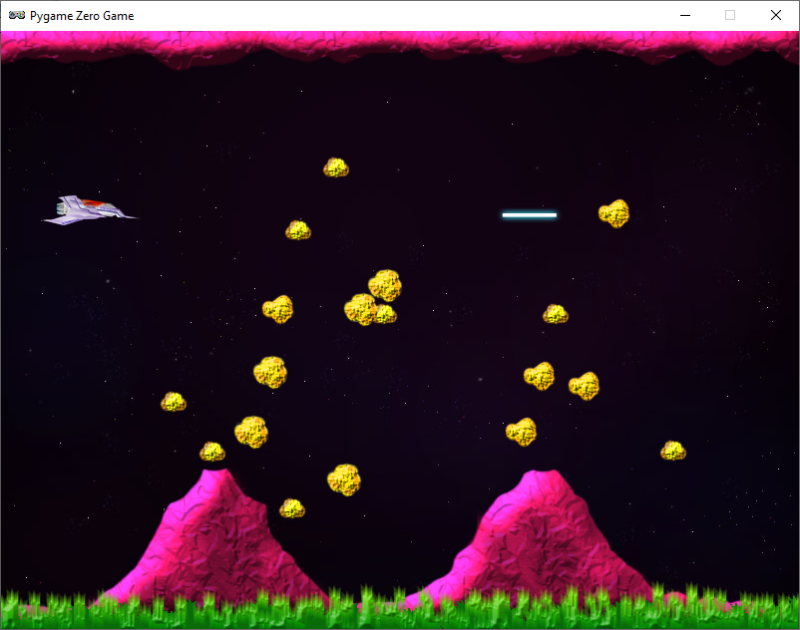
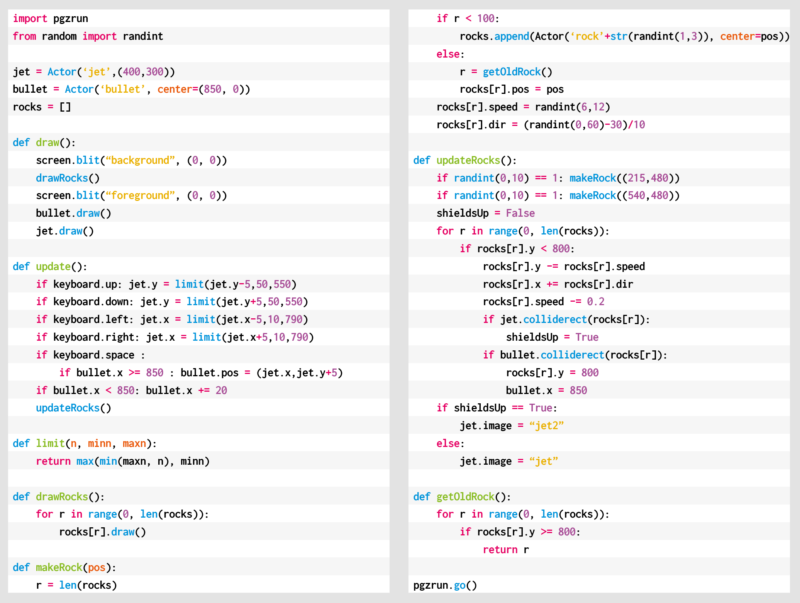
Our sample uses Pygame Zero and the randint function from the random module to provide the variations of trajectory that we need our rocks to have. We’ll need an actor created for our spaceship and a list to hold our rock Actors. We can also make a bullet Actor so we can make the ship fire lasers and shoot the rocks. We build up the scene in layers in our draw() function with a star-speckled background, then our rocks, followed by the foreground of volcanoes, and finally the spaceship and bullets.
Dodge and shoot the rocks in our homage to the classic Gradius.
Get the ship moving
In the update() function, we need to handle moving the ship around with the cursor keys. We can use a limit() function to make sure it doesn’t go off the screen, and the SPACE bar to trigger the bullet to be fired. After that, we need to update our rocks. At the start of the game our list of rocks will be empty, so we’ll get a random number generated, and if the number is 1, we make a new rock and add it to the list. If we have more than 100 rocks in our list, some of them will have moved off the screen, so we may as well reuse them instead of making more new rocks. During each update cycle, we’ll need to run through our list of rocks and update their position. When we make a rock, we give it a speed and direction, then when it’s updated, we move the rock upwards by its speed and then reduce the speed by 0.2. This will make it fly into the air, slow down, and then fall to the ground.
Collision detection
From this code, we can make rocks appear just behind both of the volcanoes, and they’ll fly in a random direction upwards at a random speed. We can increase or decrease the number of rocks flying about by changing the random numbers that spawn them. We should be able to fly in and out of the rocks, but we could add some collision detection to check whether the rocks hit the ship – we may also want to destroy the ship if it’s hit by a rock. In our sample, we have an alternative, ‘shielded’ state to indicate that a collision has occurred. We can also check for collisions with the bullets: if a collision’s detected, we can make the rock and the bullet disappear by moving them off-screen, at which point they’re ready to be reused.
That’s about it for this month’s sample, but there are many more elements from the original game that you could add yourself: extra weapons, more enemies, or even an area boss.
Here’s Mark’s volcanic code. To get it working on your system, you’ll need to install Pygame Zero. And to download the full code and assets, head here.
Get your copy of Wireframe issue 52
You can read more features like this one in Wireframe issue 52, available directly from Raspberry Pi Press — we deliver worldwide.
And if you’d like a handy digital version of the magazine, you can also download issue 52 for free in PDF format.
Grab onto ropes and swing across chasms in our Python rendition of an Atari 2600 classic. Mark Vanstone has the code
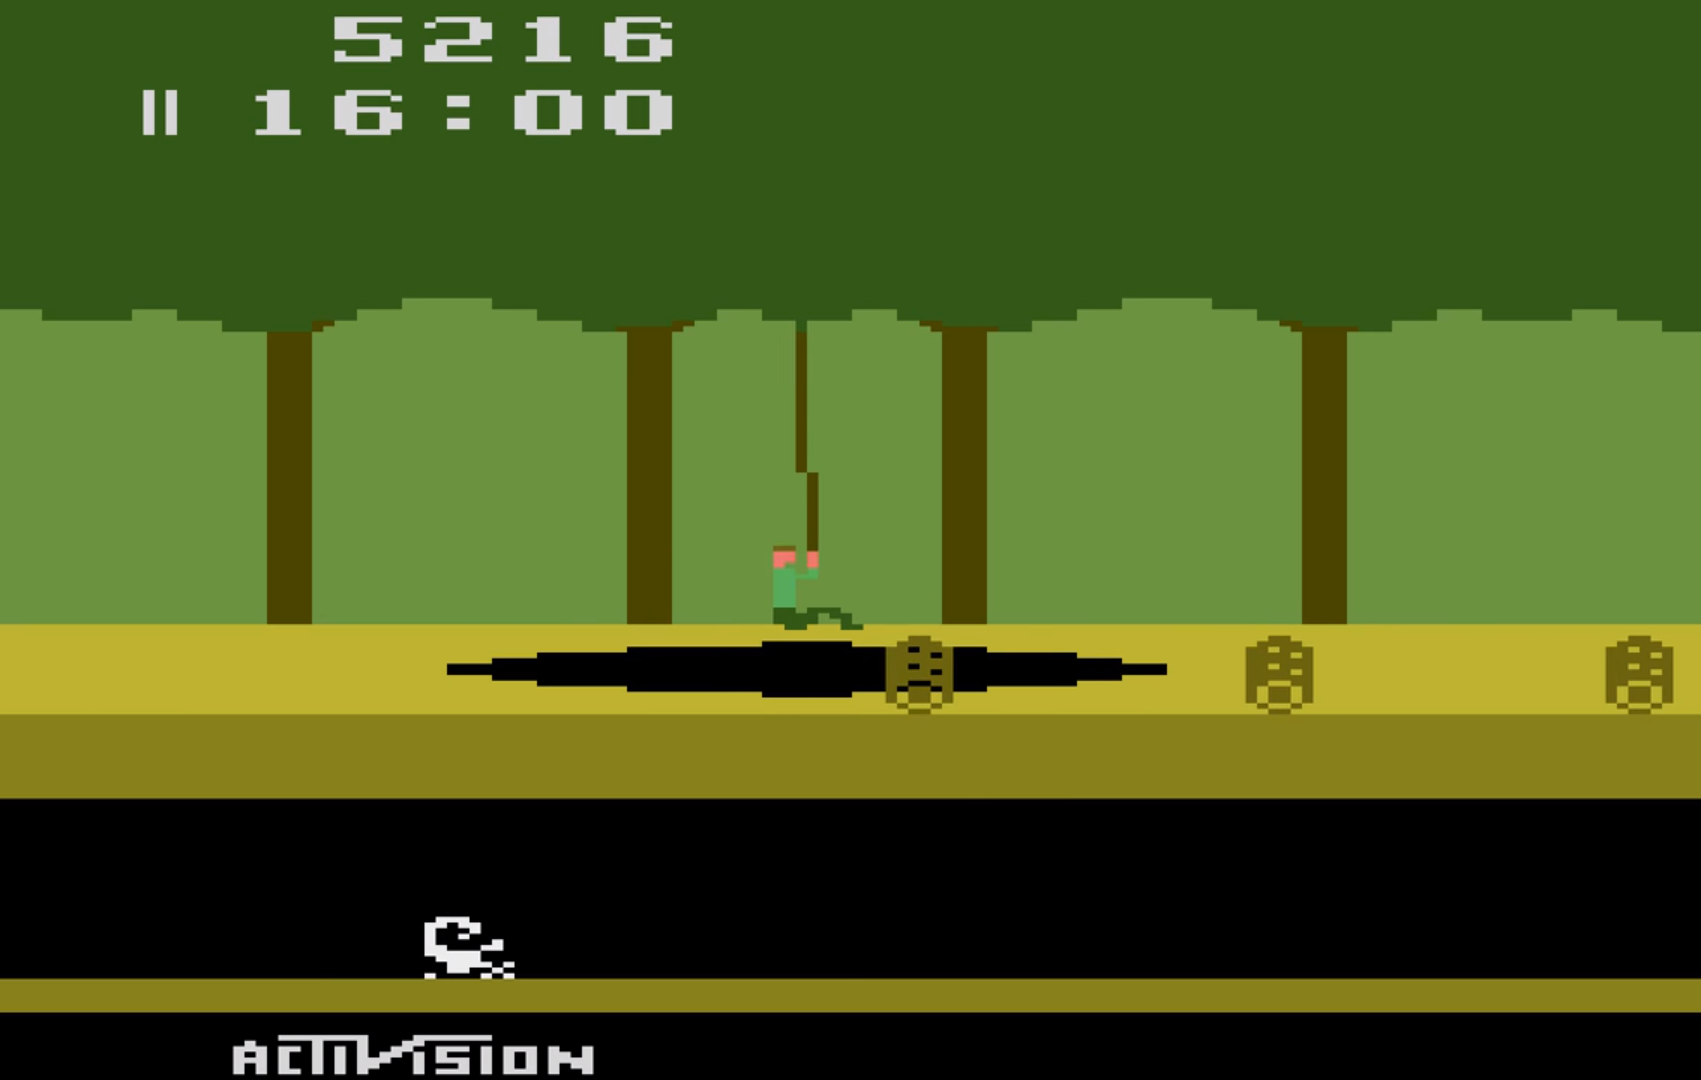
Whether it was because of the design brilliance of the game itself or because Raiders of the Lost Ark had just hit the box office, Pitfall Harry became a popular character on the Atari 2600 in 1982.
His hazardous attempts to collect treasure struck a chord with eighties gamers, and saw Pitfall!, released by Activision, sell over four million copies. A sequel, Pitfall II: The Lost Caverns quickly followed the next year, and the game was ported to several other systems, even making its way to smartphones and tablets in the 21st century.
Designed by David Crane, Pitfall! was released for the Atari 2600 and published by Activision in 1982
The game itself is a quest to find 32 items of treasure within a 20-minute time limit. There are a variety of hazards for Pitfall Harry to navigate around and over, including rolling logs, animals, and holes in the ground. Some of these holes can be jumped over, but some are too wide and have a convenient rope swinging from a tree to aid our explorer in getting to the other side of the screen. Harry must jump towards the rope as it moves towards him and then hang on as it swings him over the pit, releasing his grip at the other end to land safely back on firm ground.
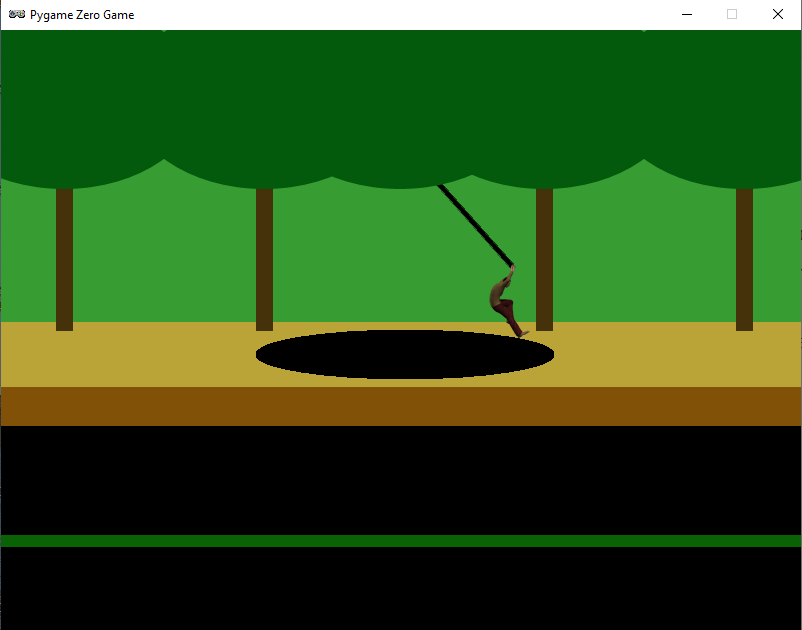
For this code sample, we’ll concentrate on the rope swinging (and catching) mechanic. Using Pygame Zero, we can get our basic display set up quickly. In this case, we can split the background into three layers: the background, including the back of the pathway and the tree trunks, the treetops, and the front of the pathway. With these layers we can have a rope swinging with its pivot point behind the leaves of the trees, and, if Harry gets a jump wrong, it will look like he falls down the hole in the ground. The order in which we draw these to the screen is background, rope, tree-tops, Harry, and finally the front of the pathway.
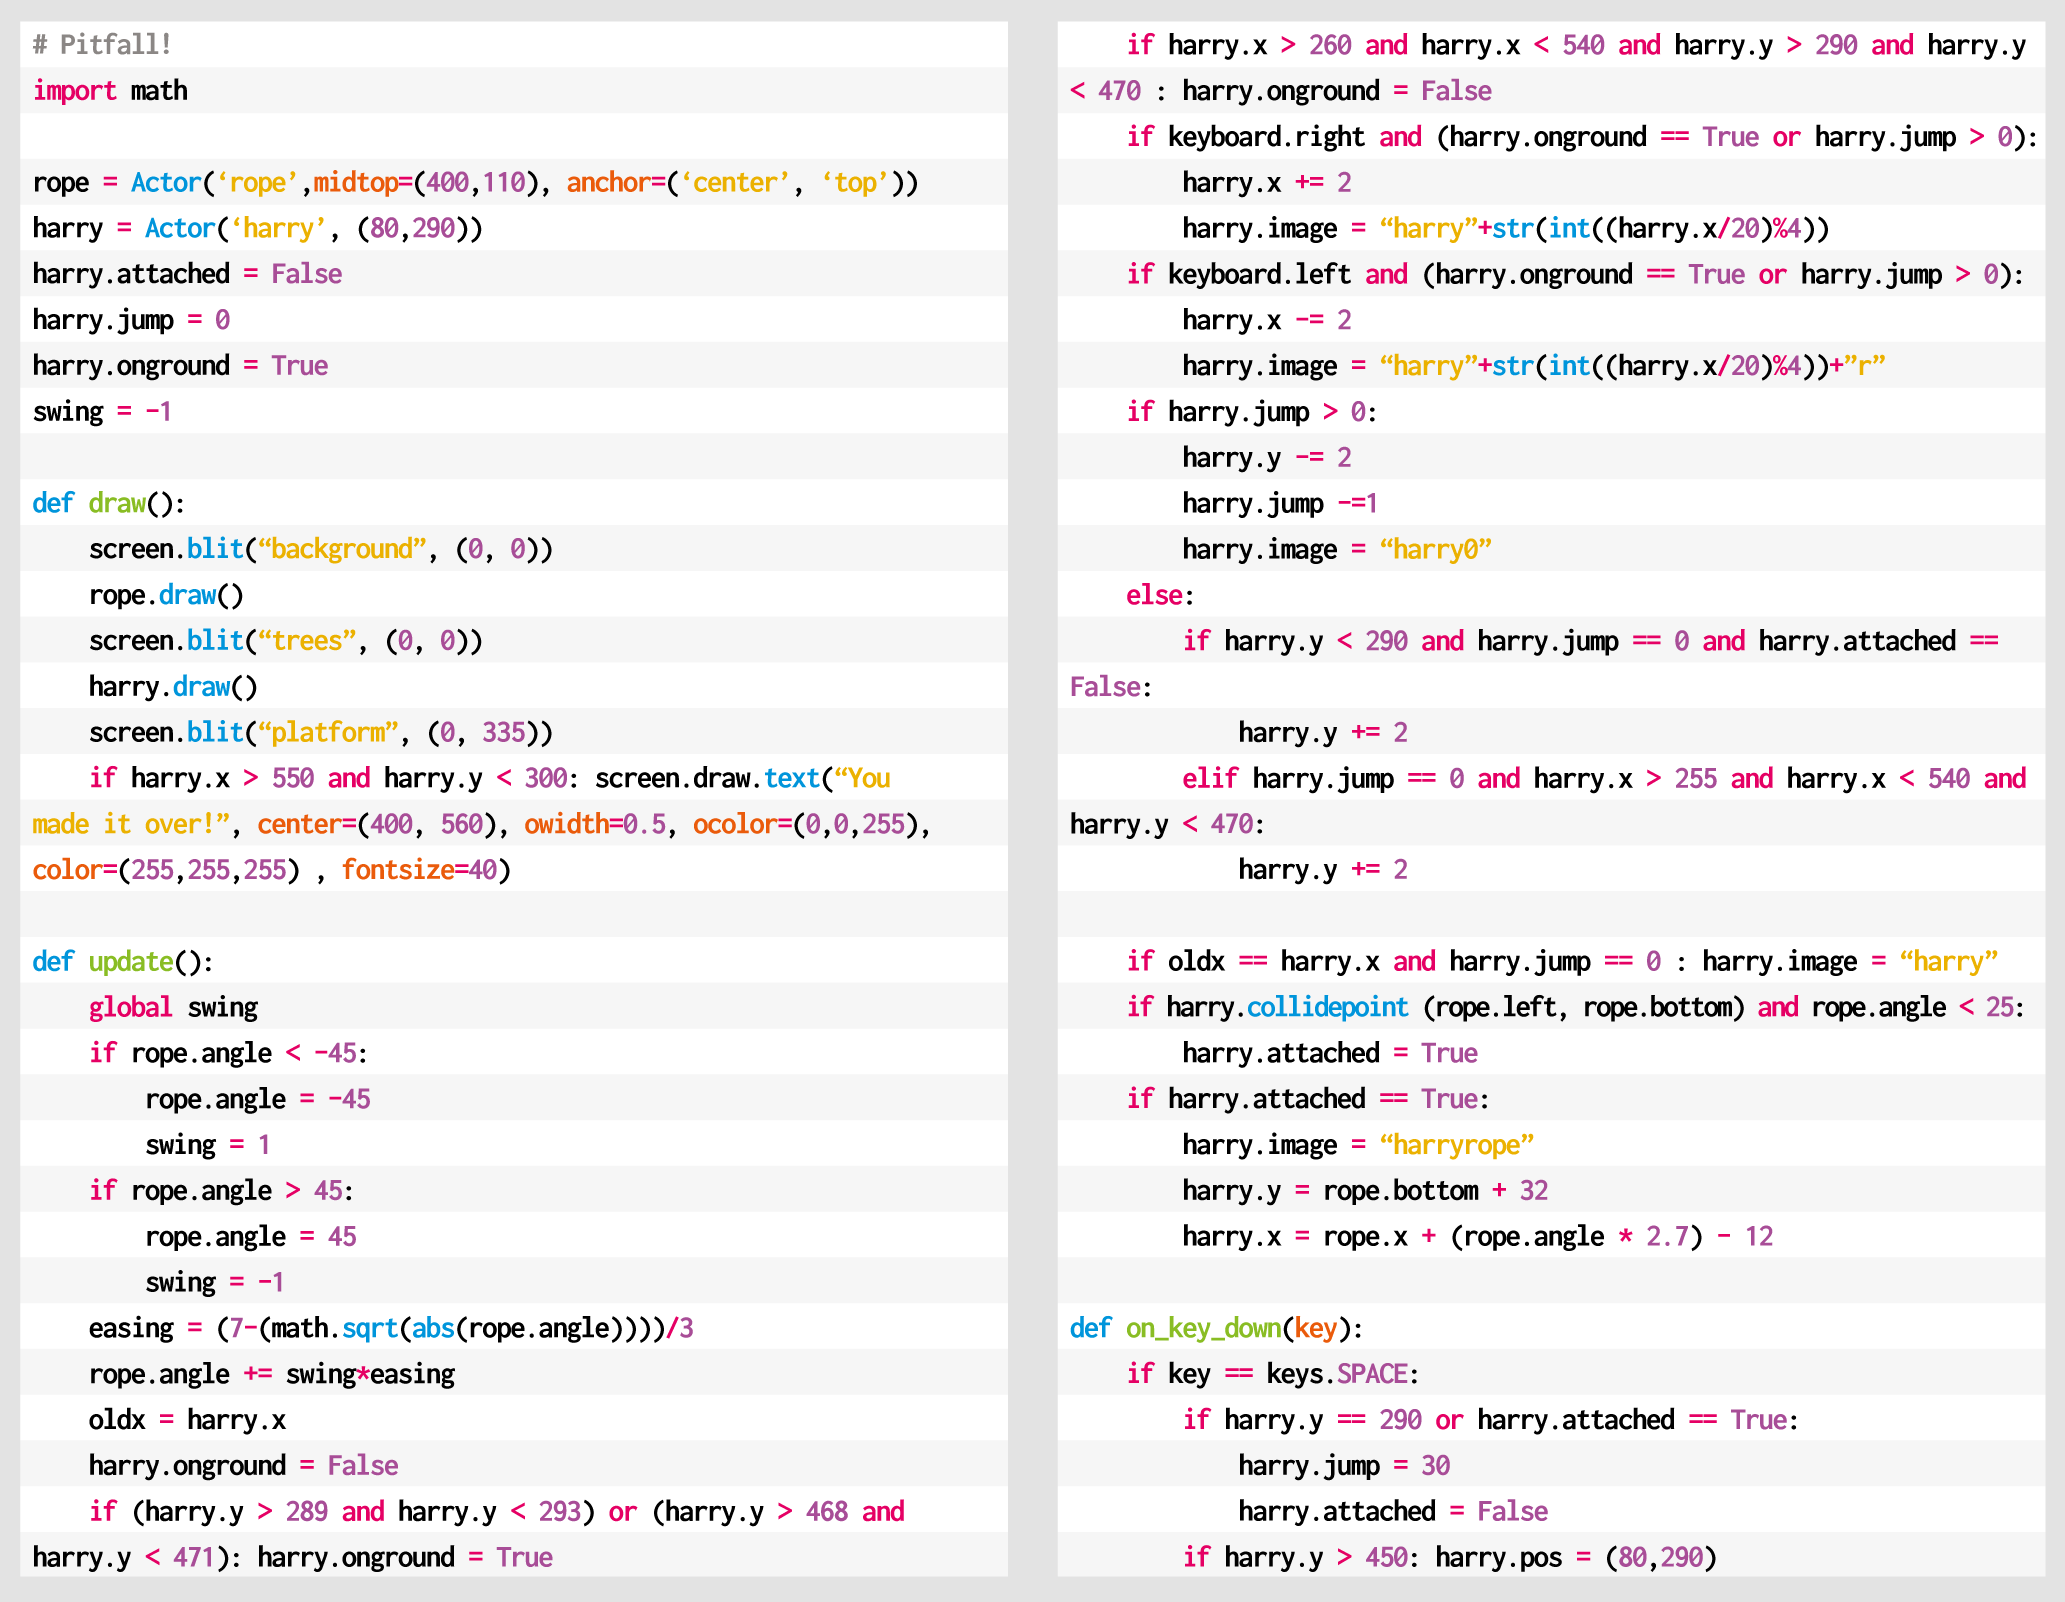
Now, let’s get our rope swinging. We can create an Actor and anchor it to the centre and top of its bounding box. If we rotate it by changing the angle property of the Actor, then it will rotate at the top of the Actor rather than the mid-point. We can make the rope swing between -45 degrees and 45 degrees by increments of 1, but if we do this, we get a rather robotic sort of movement. To fix this, we add an ‘easing’ value which we can calculate using a square root to make the rope slow down as it reaches the extremes of the swing.
Our homage to the classic Pitfall! Atari game. Can you add some rolling logs and other hazards?
Our Harry character will need to be able to run backwards and forwards, so we’ll need a few frames of animation. There are several ways of coding this, but for now, we can take the x coordinate and work out which frame to display as the x value changes. If we have four frames of running animation, then we would use the %4 operator and value on the x coordinate to give us animation frames of 0, 1, 2, and 3. We use these frames for running to the right, and if he’s running to the left, we just mirror the images. We can check to see if Harry is on the ground or over the pit, and if he needs to be falling downward, we add to his y coordinate. If he’s jumping (by pressing the SPACE bar), we reduce his y coordinate.
We now need to check if Harry has reached the rope, so after a collision, we check to see if he’s connected with it, and if he has, we mark him as attached and then move him with the end of the rope until the player presses the SPACE bar and he can jump off at the other side. If he’s swung far enough, he should land safely and not fall down the pit. If he falls, then the player can have another go by pressing the SPACE bar to reset Harry back to the start.
That should get Pitfall Harry over one particular obstacle, but the original game had several other challenges to tackle – we’ll leave you to add those for yourselves.
Here’s Mark’s code for a Pitfall!-style platformer. To get it working on your system, you’ll need to install Pygame Zero. And to download the full code and assets, head here.
Get your copy of Wireframe issue 48
You can read more features like this one in Wireframe issue 48, available directly from Raspberry Pi Press — we deliver worldwide.
And if you’d like a handy digital version of the magazine, you can also download issue 48 for free in PDF format.
Speed around an arena, avoiding walls and deadly trails in this Light Cycle minigame. Mark Vanstone has the code.
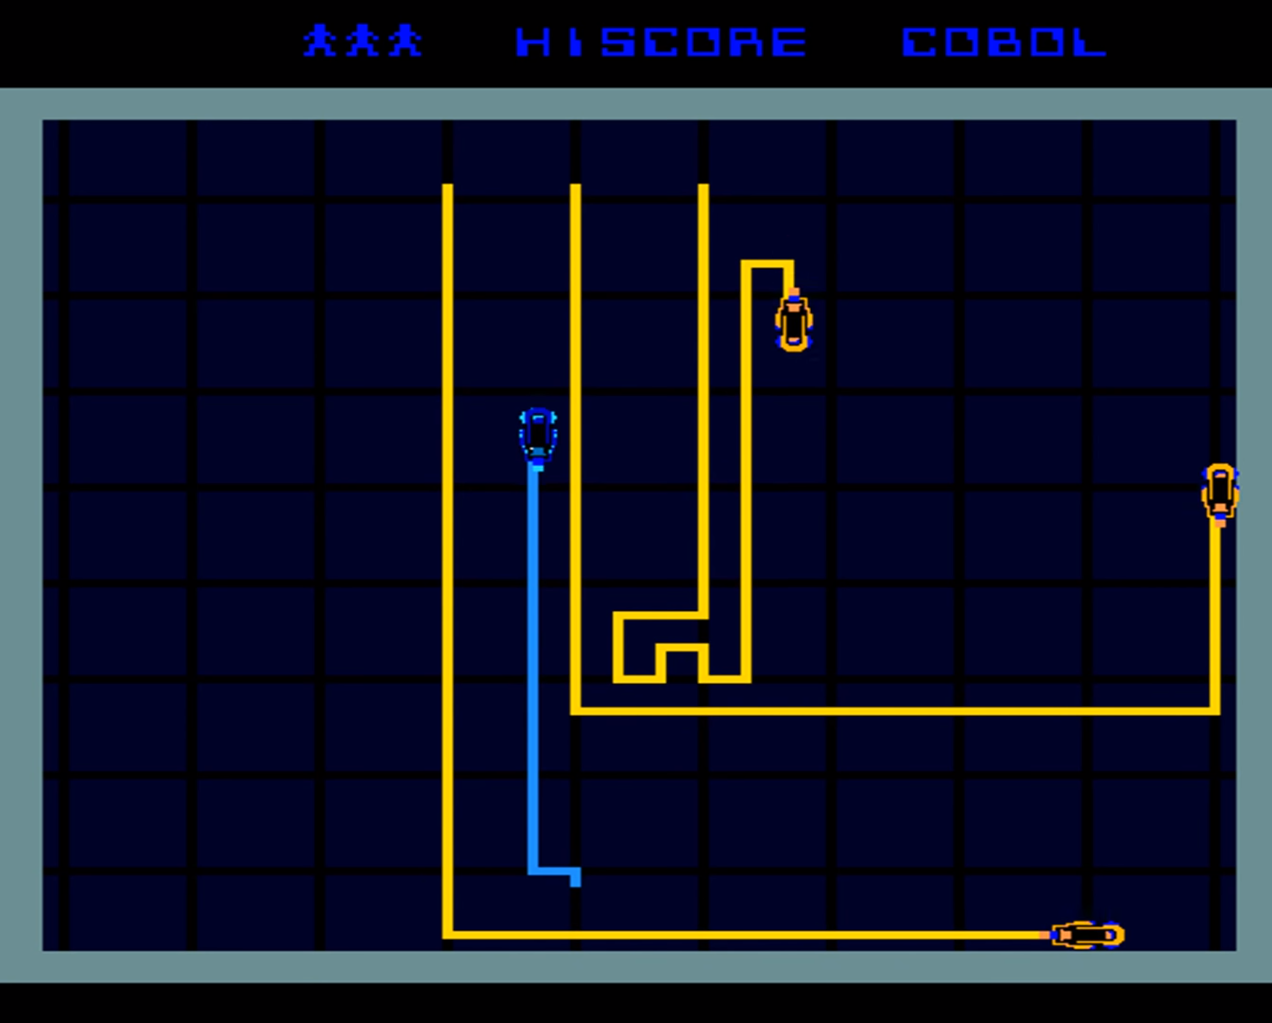
Battle against AI enemies in the original arcade classic.
At the beginning of the 1980s, Disney made plans for an entirely new kind of animated movie that used cutting-edge computer graphics. The resulting film was 1982’s TRON, and it inevitably sparked one of the earliest tie-in arcade machines.
The game featured several minigames, including one based on the Light Cycle section of the movie, where players speed around an arena on high-tech motorbikes, which leave a deadly trail of light in their wake. If competitors hit any walls or cross the path of any trails, then it’s game over.
Players progress through the twelve levels which were all named after programming languages. In the Light Cycle game, the players compete against AI players who drive yellow Light Cycles around the arena. As the levels progress, more AI Players are added.
The TRON game, distributed by Bally Midway, was well-received in arcades, and even won Electronic Games Magazine’s (presumably) coveted Coin-operated Game of the Year gong.
Although the arcade game wasn’t ported to home computers at the time, several similar games – and outright clones – emerged, such as the unsubtly named Light Cycle for the BBC Micro, Oric, and ZX Spectrum.
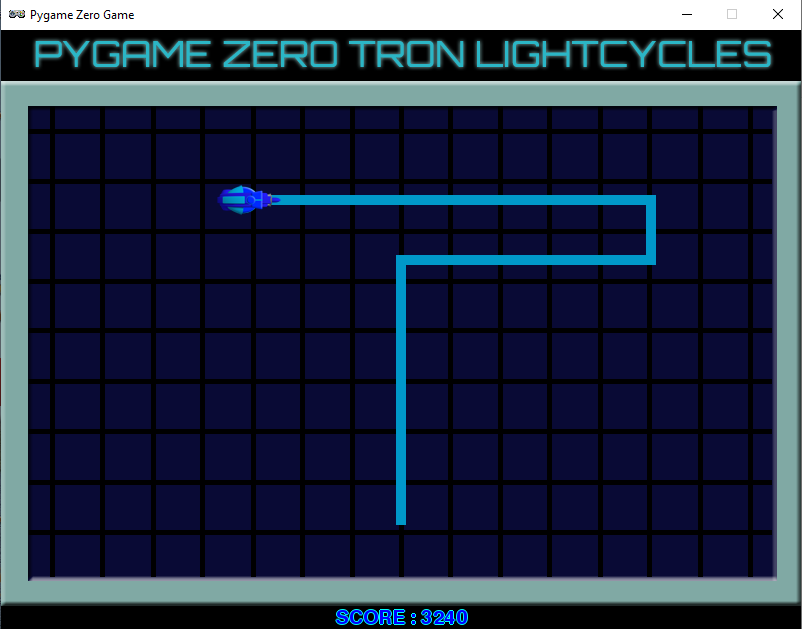
The Light Cycle minigame is essentially a variation on Snake, with the player leaving a trail behind them as they move around the screen. There are various ways to code this with Pygame Zero.
In this sample, we’ll focus on the movement of the player Light Cycle and creating the trails that are left behind as it moves around the screen. We could use line drawing functions for the trail behind the bike, or go for a system like Snake, where blocks are added to the trail as the player moves.
In this example, though, we’re going to use a two-dimensional list as a matrix of positions on the screen. This means that wherever the player moves on the screen, we can set the position as visited or check to see if it’s been visited before and, if so, trigger an end-game event.
Our homage to the TRON Light Cycle classic arcade game.
For the main draw() function, we first blit our background image which is the cross-hatched arena, then we iterate through our two-dimensional list of screen positions (each 10 pixels square) displaying a square anywhere the Cycle has been. The Cycle is then drawn and we can add a display of the score.
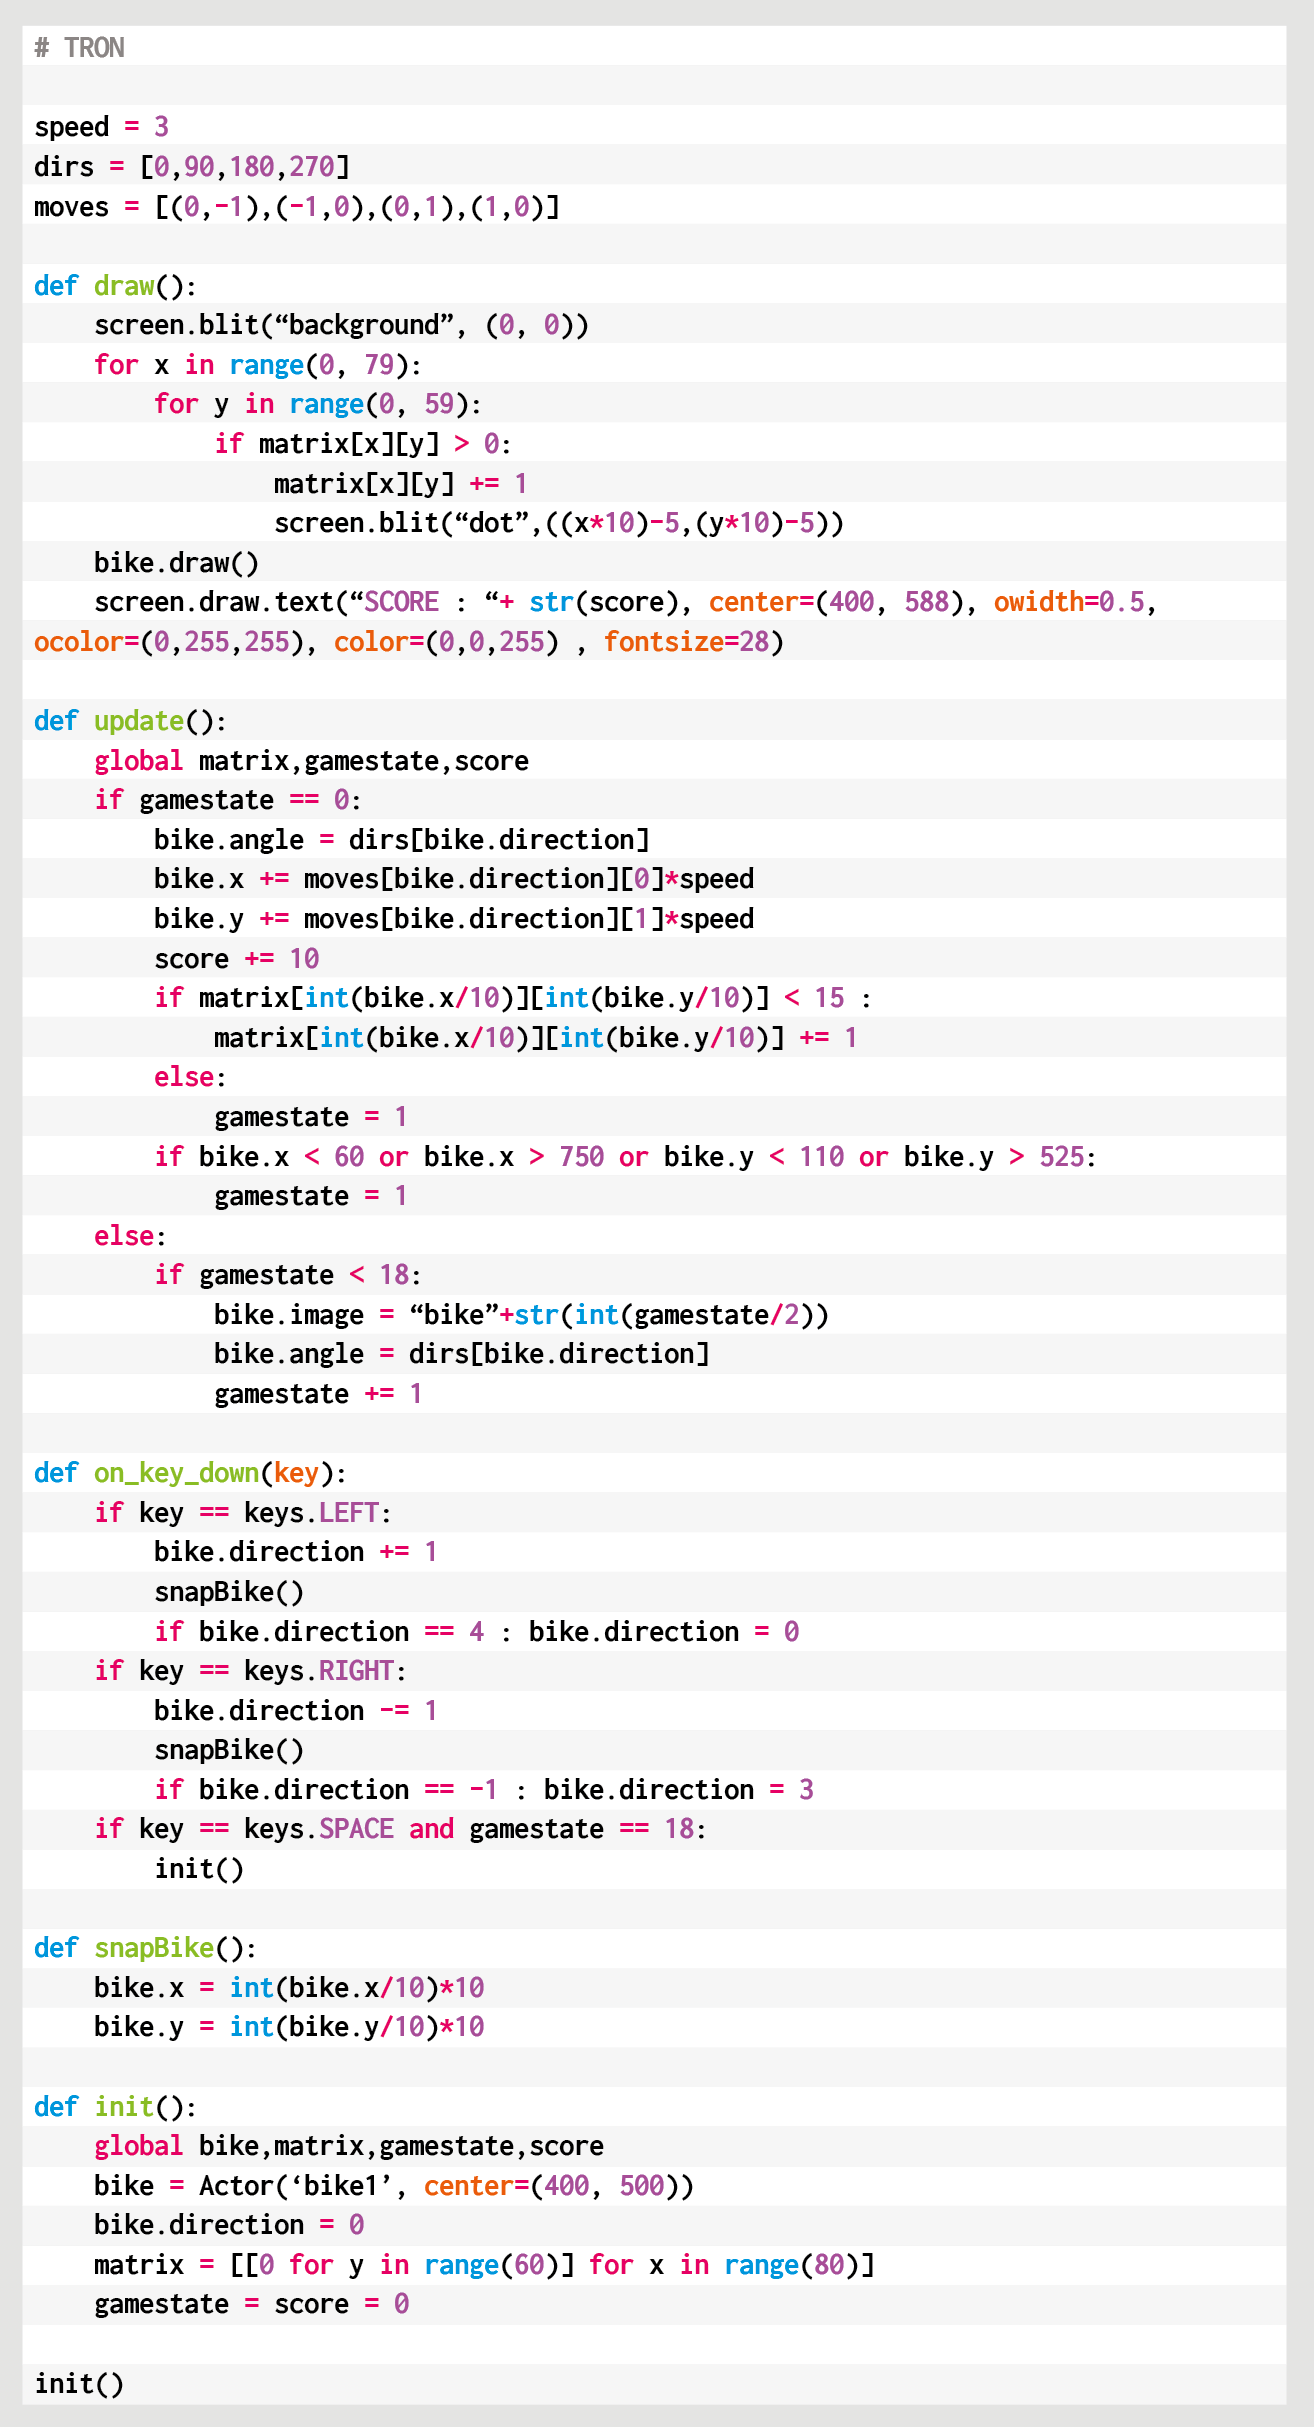
The update() function contains code to move the Cycle and check for collisions. We use a list of directions in degrees to control the angle the player is pointing, and another list of x and y increments for each direction. Each update we add x and y coordinates to the Cycle actor to move it in the direction that it’s pointing multiplied by our speed variable.
We have an on_key_down() function defined to handle changing the direction of the Cycle actor with the arrow keys. We need to wait a while before checking for collisions on the current position, as the Cycle won’t have moved away for several updates, so each screen position in the matrix is actually a counter of how many updates it’s been there for.
We can then test to see if 15 updates have happened before testing the square for collisions, which gives our Cycle enough time to clear the area. If we do detect a collision, then we can start the game-end sequence.
We set the gamestate variable to 1, which then means the update() function uses that variable as a counter to run through the frames of animation for the Cycle’s explosion. Once it reaches the end of the sequence, the game stops.
We have a key press defined (the SPACE bar) in the on_key_down() function to call our init() function, which will not only set up variables when the game starts but sets things back to their starting state.
Here’s Mark’s code for a TRON-style Light Cycle minigame. To get it working on your system, you’ll need to install Pygame Zero. And to download the full code and assets, head here.
So that’s the fundamentals of the player Light Cycle movement and collision checking. To make it more like the original arcade game, why not try experimenting with the code and adding a few computer-controlled rivals?
Get your copy of Wireframe issue 47
You can read more features like this one in Wireframe issue 47, available directly from Raspberry Pi Press — we deliver worldwide.
And if you’d like a handy digital version of the magazine, you can also download issue 47 for free in PDF format.
Create a network of pipes before the water starts to flow in our re-creation of a classic puzzler. Jordi Santonja shows you how.
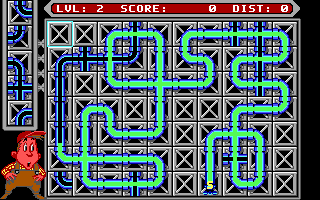
Pipe Mania’s design is so effective, it’s appeared in various guises elsewhere – even as a minigame in BioShock.
Pipe Mania, also called Pipe Dream in the US, is a puzzle game developed by The Assembly Line in 1989 for Amiga, Atari ST, and PC, and later ported to other platforms, including arcades. The player must place randomly generated sections of pipe onto a grid. When a counter reaches zero, water starts to flow and must reach the longest possible distance through the connected pipes.
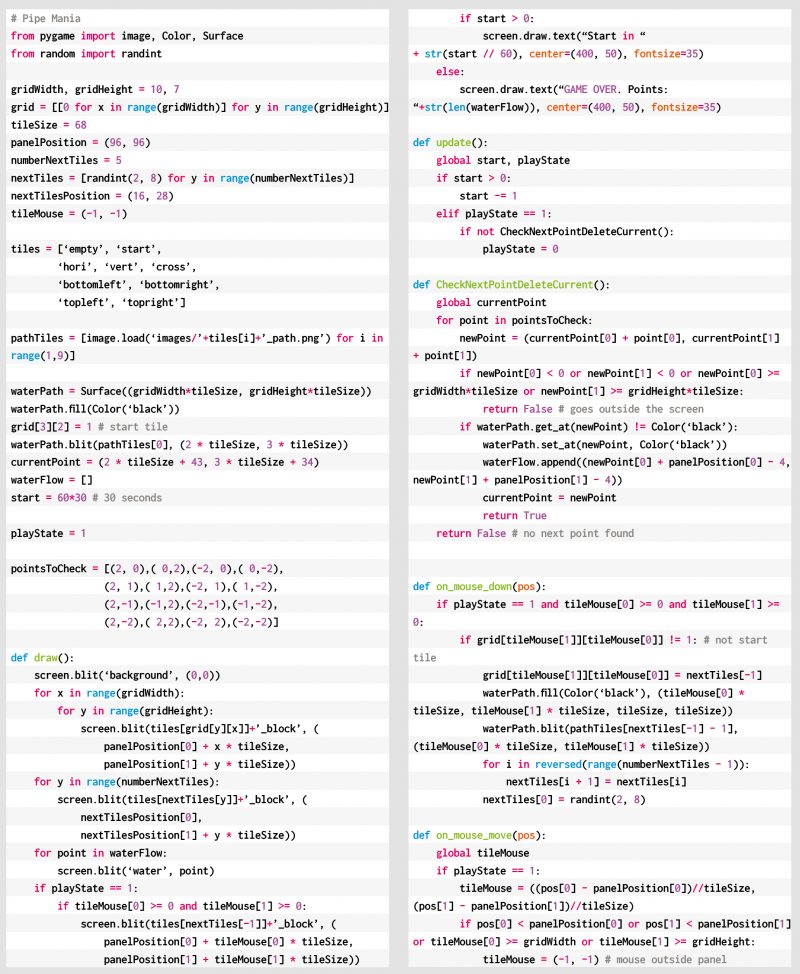
Let’s look at how to recreate Pipe Dream in Python and Pygame Zero. The variable start is decremented at each frame. It begins with a value of 60*30, so it reaches zero after 30 seconds if our monitor runs at 60 frames per second. In that time, the player can place tiles on the grid to build a path. Every time the user clicks on the grid, the last tile from nextTiles is placed on the play area and a new random tile appears at the top of the next tiles. randint(2,8) computes a random value between 2 and 8.
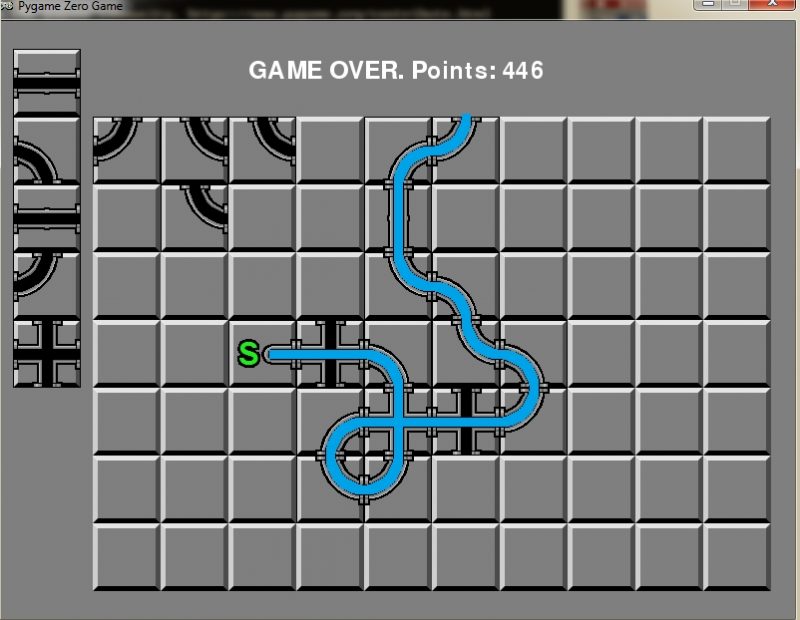
Our Pipe Mania homage. Build a pipeline before the water escapes, and see if you can beat your own score.
grid and nextTiles are lists of tile values, from 0 to 8, and are copied to the screen in the draw function with the screen.blit operation. grid is a two-dimensional list, with sizes gridWidth=10 and gridHeight=7. Every pipe piece is placed in grid with a mouse click. This is managed with the Pygame functions on_mouse_move and on_mouse_down, where the variable pos contains the mouse position in the window. panelPosition defines the position of the top-left corner of the grid in the window. To get the grid cell, panelPosition is subtracted from pos, and the result is divided by tileSize with the integer division //. tileMouse stores the resulting cell element, but it is set to (-1,-1) when the mouse lies outside the grid.
The images folder contains the PNGs with the tile images, two for every tile: the graphical image and the path image. The tiles list contains the name of every tile, and adding to it _block or _path obtains the name of the file. The values stored in nextTiles and grid are the indexes of the elements in tiles.
Here’s Jordi’s code for a Pipemania-style puzzler. To get it working on your system, you’ll need to install Pygame Zero. And to download the full code and assets, head here.
The image waterPath isn’t shown to the user, but it stores the paths that the water is going to follow. The first point of the water path is located in the starting tile, and it’s stored in currentPoint. update calls the function CheckNextPointDeleteCurrent, when the water starts flowing. That function finds the next point in the water path, erases it, and adds a new point to the waterFlow list. waterFlow is shown to the user in the draw function.
pointsToCheck contains a list of relative positions, offsets, that define a step of two pixels from currentPoint in every direction to find the next point. Why two pixels? To be able to define the ‘cross’ tile, where two lines cross each other. In a ‘cross’ tile the water flow must follow a straight line, and this is how the only points found are the next points in the same direction. When no next point is found, the game ends and the score is shown: the number of points in the water path, playState is set to 0, and no more updates are done.
Get your copy of Wireframe issue 46
You can read more features like this one in Wireframe issue 46, available directly from Raspberry Pi Press — we deliver worldwide.
And if you’d like a handy digital version of the magazine, you can also download issue 46 for free in PDF format.
Code an explosive homage to Toaplan’s classic blaster. Mark Vanstone has the details
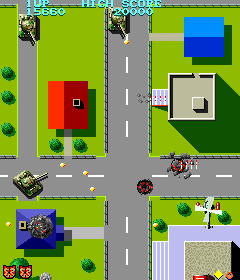
Tiger-Heli was developed by Toaplan and published in Japan by Taito and by Romstar in North America.
Released in 1985, Tiger-Heli was one of the earliest games from Japanese developer Toaplan: a top-down shoot-’em-up that pitted a lone helicopter against relentless waves of enemy tanks and military installations. Toaplan would go on to refine and evolve the genre through the eighties and nineties with such titles as Truxton and Fire Shark, so Tiger-Heli served as a kind of blueprint for the studio’s legendary blasters.
Tiger-Heli featured a powerful secondary weapon, too: as well as a regular shot, the game’s attack helicopter could also drop a deadly bomb capable of destroying everything within its blast radius. The mechanic was one that first appeared as far back as Atari’s Defender in 1981, but Toaplan quickly made it its own, with variations on the bomb becoming one of the signatures in the studio’s later games.
For our Tiger-Heli-style Pygame Zero code, we’ll concentrate on the unique bomb aspect, but first, we need to get the basic scrolling background and helicopter on the screen. In a game like this, we’d normally make the background out of tiles that can be used to create a varied but continuous scrolling image. For this example, though, we’ll keep things simple and have one long image that we scroll down the screen and then display a copy above it. When the first image goes off the screen, we just reset the co-ordinates to display it above the second image copy. In this way, we can have an infinitely scrolling background.
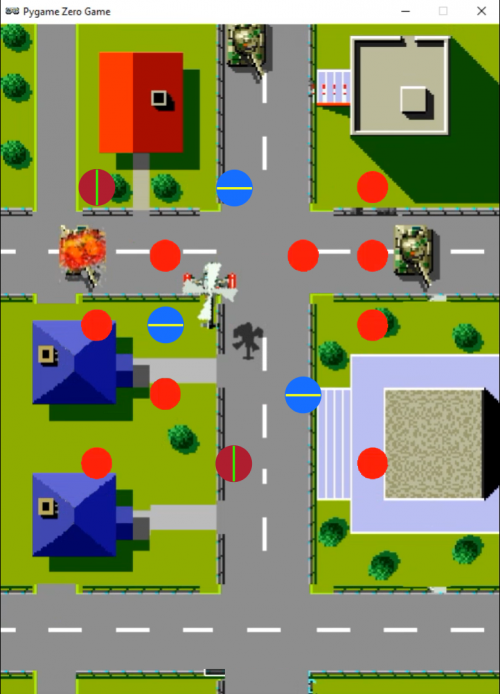
Our Tiger-Heli homage in Python. Fly over the military targets, firing missiles and dropping bombs.
The helicopter can be set up as an Actor with just two frames for the movement of the rotors. This should look like it’s hovering above the ground, so we blit a shadow bitmap to the bottom right of the helicopter. We can set up keyboard events to move the Actor left, right, up, and down, making sure we don’t allow it to go off the screen.
Now we can go ahead and set up the bombs. We can predefine a list of bomb Actors but only display them while the bombs are active. We’ll trigger a bomb drop with the SPACE bar and set all the bombs to the co-ordinates of the helicopter. Then, frame by frame, we move each bomb outwards in different directions so that they spread out in a pattern. You could try adjusting the number of bombs or their pattern to see what effects can be achieved. When the bombs get to frame 30, we start changing the image so that we get a flashing, expanding circle for each bomb.
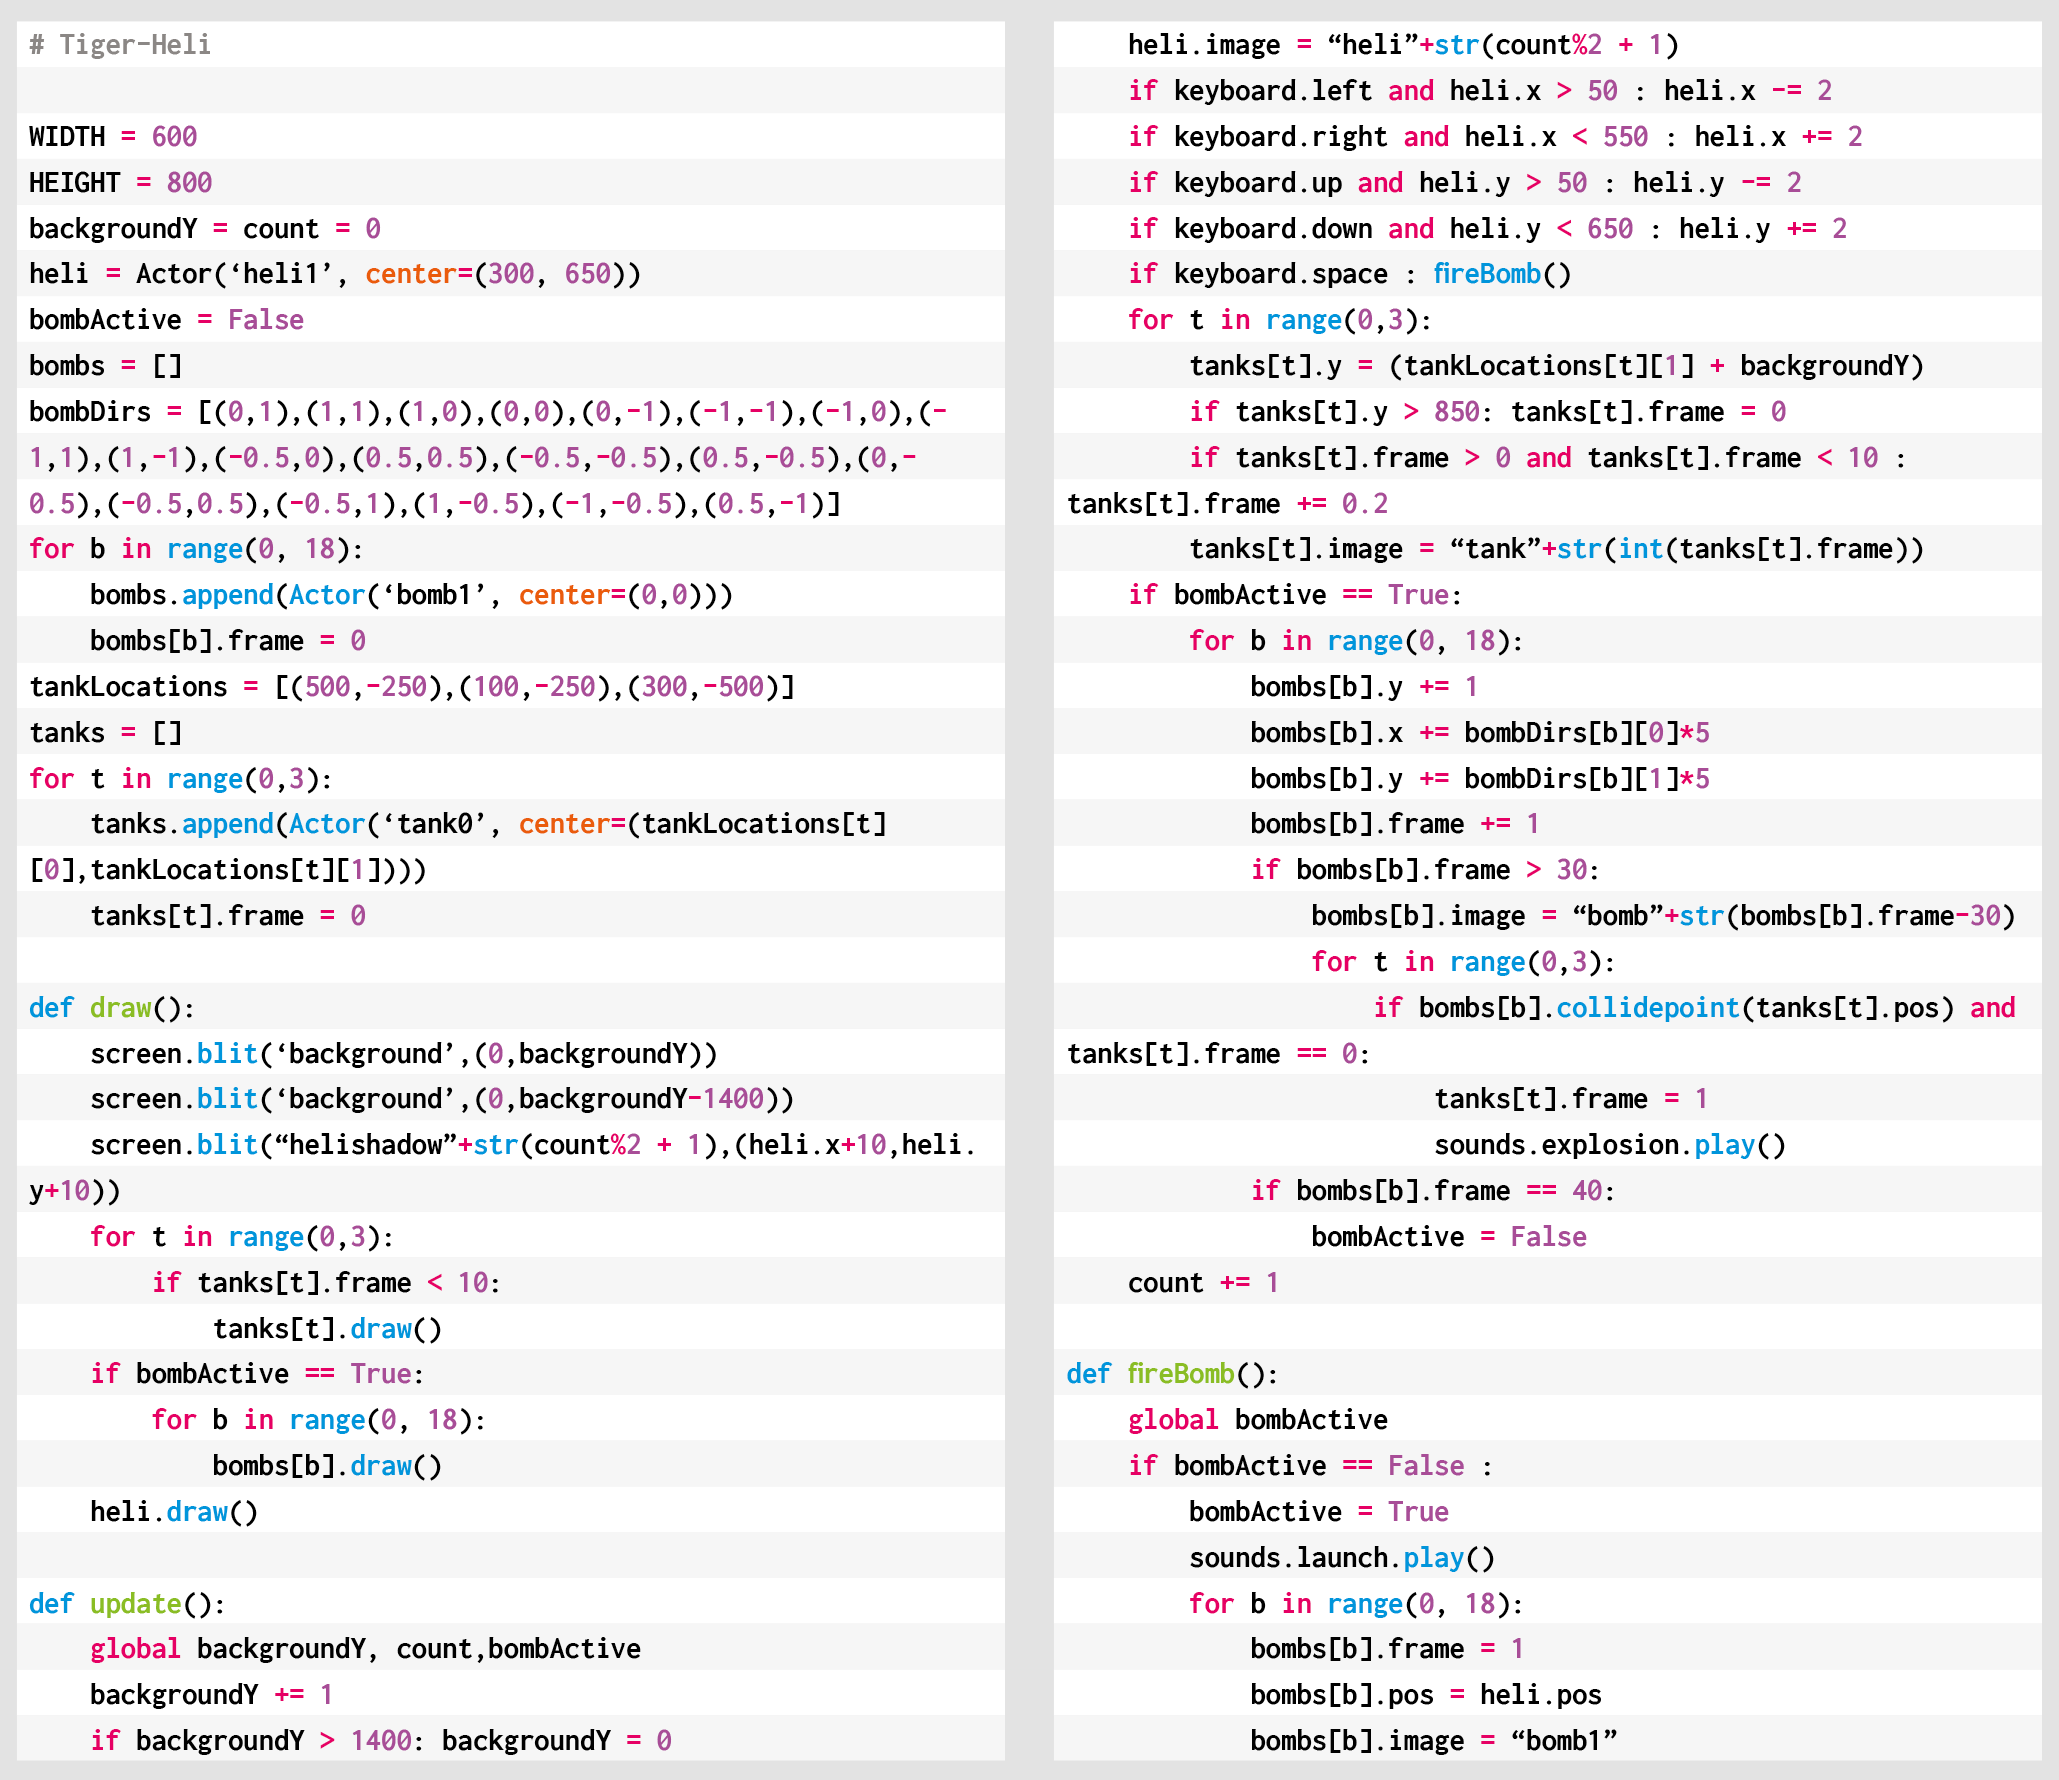
Here’s Mark’s code for a Tiger-Heli-style shooter. To get it working on your system, you’ll need to install Pygame Zero. And to download the full code and assets, head here.
It’s all very well having bombs to fire, but we could really do with something to drop them on, so let’s make some tank Actors waiting on the ground for us to destroy. We can move them with the scrolling background so that they look like they’re static on the ground. Then if one of our bombs has a collision detected with one of the tanks, we can set an animation going by cycling through a set of explosion frames, ending with the tank disappearing.
We can also add in some sound effects as the bombs are dropped, and explosion sounds if the tanks are hit. And with that, there you have it: the beginnings of a Tiger-Heli-style blaster.
Get your copy of Wireframe issue 45
You can read more features like this one in Wireframe issue 45, available directly from Raspberry Pi Press — we deliver worldwide.
And if you’d like a handy digital version of the magazine, you can also download issue 45 for free in PDF format.
Baldur’s Gate III: our cover star for Wireframe #45.
Make sure to follow Wireframe on Twitter and Facebook for updates and exclusive offers and giveaways. Subscribe on the Wireframe website to save up to 72% compared to newsstand pricing!
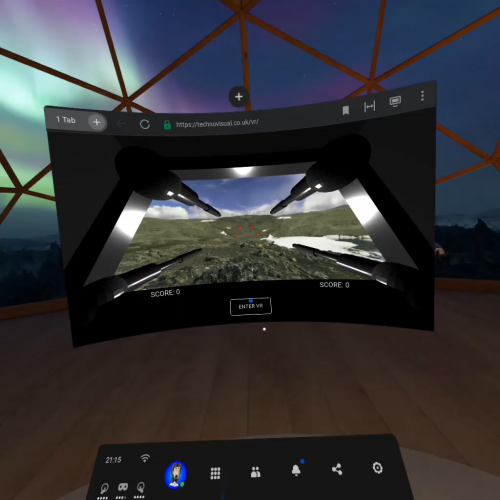
In the latest issue of Wireframe magazine, Mark Vanstone shows you how to turn a 3D shooter into a VR game for a variety of viewers, from Google Cardboard to gaming headsets.
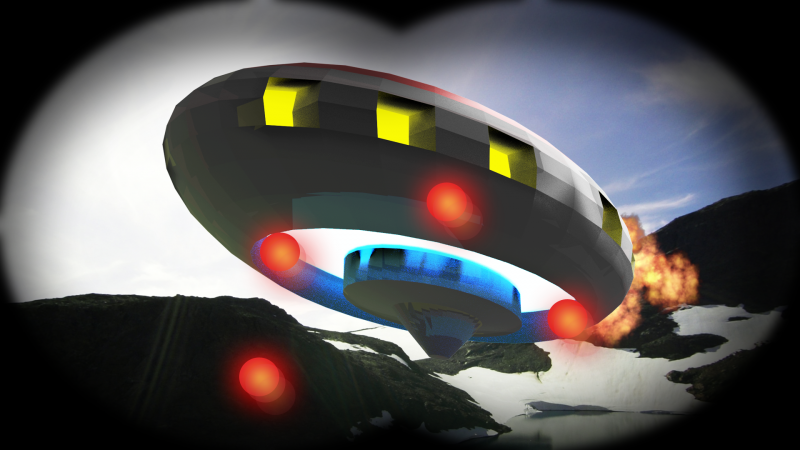
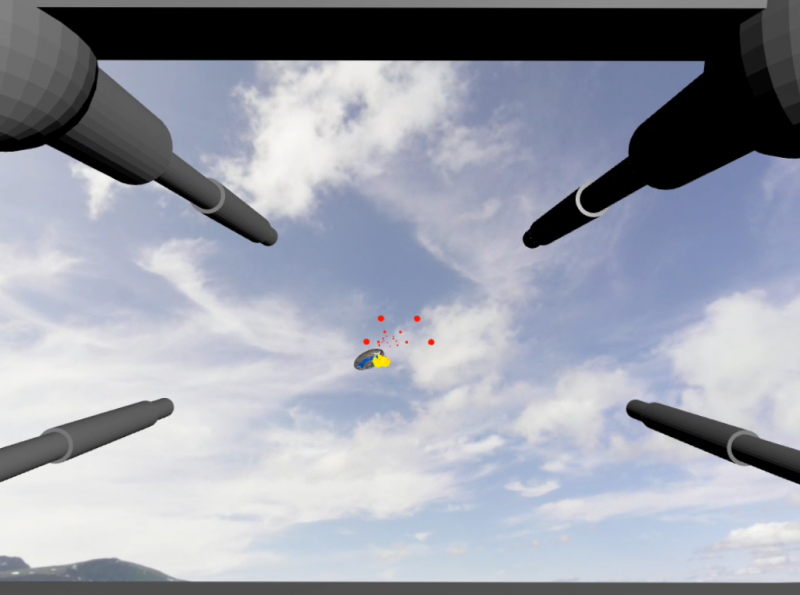
Our shooter, now in VR format. Blast aliens from the sky as they fly over the mountains.
Browser development has really matured of late, with a number of exciting new features coming to the fore. Where WebGL was well supported, the new WebXR (previously WebVR) is now becoming standard in modern browsers. JavaScript ES5 has now been superseded by ES6, and with these new technologies, making browser-based apps – and specifically 3D games – is now a serious proposition. The other part of VR technology, the hardware, has also evolved – as mobile tech has become more powerful, so have the opportunities for cost-effective VR experiences.
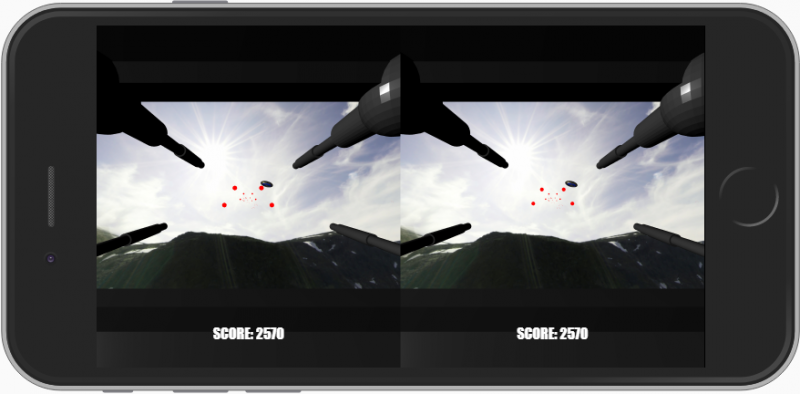
With a mobile phone you can create a stereoscopic display for use with a simple Cardboard viewer.
If you have an old mobile phone, perhaps an Make your own virtual reality 3D Shooter B iPhone 6 or a Samsung S7, you can get a Google Cardboard headset for £6 and turn it into a rudimentary VR viewer. In this article, we’ll show you how to set up a 3D shooter to run not only on that hardware, but also on other viewers such as the Gear VR or Daydream, and even gaming headsets such as the Oculus, HTC, or Valve. All of these have web browsers built in which can support WebXR or a 3D display, and although there are some differences between how they work, the process of displaying a 3D scene is mostly the same on all of them, so we can use the Three.js JavaScript library.
There’s a wide range of VR viewers and headsets on the market, from Google Cardboard to pricey gaming headsets like the Oculus, HTC, HP, Microsoft, and Valve ranges.
To begin, we’ll start with the Three.js 3D shooter we made in Wireframe #32 – if you missed it, you can download a copy. We’ll use the same models and much of the same code. The first change, though, is to update the code to run as an ES6 module. The non-module version of Three.js is being phased out at the end of 2020, so it’s probably best to get with the times and use the new stuff. As with our earlier shooter, you’ll need to run this code from a secure web server, which, for mobile phones and gaming headsets, will mean uploading it to somewhere suitable, but if you want to see it running, you can play it at technovisual.co.uk/vr.
Basic VR viewers
Now we need to consider the hardware we’re going to use to run our game. Let’s start at our baseline, Google Cardboard, and work up from there. Available from many outlets online (including Google’s store), it’s a cut-out kit, which you fold up to create a viewer.
From a browser window inside a gaming headset environment, you can launch a Three.js VR experience
There are two lenses to look through, two magnets in a recess on the side, and velcro tabs to hold a mobile phone. The magnets on the side serve as a selection mechanism which we’ll explore later.
Next, we have Gear VR-style viewers. There are many different types, priced from around £12 to £40, and these are essentially a better-built plastic version of the Cardboard but with a button on top to act as a selector. Phones of varying sizes can be used, and as long as the device isn’t more than about four years old, it should be up-to-date enough to run the 3D software.
For example, the six-year-old Samsung S5 is capable of displaying VR, but it’s a bit too slow to make the experience pleasant, whereas a five-year-old iPhone 6 is quite capable of displaying simple VR scenes smoothly. (With iPhones, you may need to switch on Experimental Features in the Safari settings, however.)
Proper pro kit
Gaming headsets are a bit different, since they have a built-in screen in the headset, and – in the case of the Oculus Go and Quest – an Android computer in there as well. Tethered headsets use the power of a connected computer to generate the display, and all of them use a slightly different Three.js system from the cheaper viewers to generate the 3D display.
As time goes on, it’s likely that more mobile phones will be compatible with the VR software used by the untethered gaming headsets. Gaming headsets also have sensors that track your movement as well as the tilt of the headset, providing six degrees of freedom.
Get the rest of the tutorial in Wireframe #44
This is just a taste of the comprehensive guide included in the latest issue of Wireframe magazine. If you’re not a subscriber, you can download a PDF copy for free from the Wireframe magazine website. Start at page 50 and work your way through to create your own VR shooter game.
And if you want to take advantage of Wireframe magazine’s latest subscription deal, you can get it for just £10 at the official Raspberry Pi Press online store.
Fire artillery shells to blow up the enemy with Mark Vanstone’s take on a classic two-player artillery game
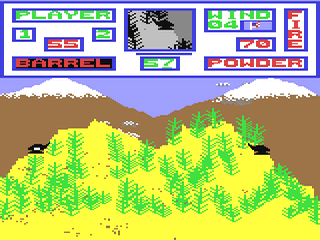
Artillery Duel was an early example of the genre, and appeared on such systems as the Bally Astrocade and Commodore 64 (pictured).
To pick just one artillery game is difficult since it’s a genre in its own right. Artillery simulations and games have been around for almost as long as computers, and most commonly see two players take turns to adjust the trajectory of their tank’s turret and fire a projectile at their opponent. The earliest versions for microcomputers appeared in the mid-seventies, and the genre continued to develop; increasingly complex scenarios appeared involving historical settings or, as we saw from the mid-90s on, even offbeat ideas like battles between factions of worms.
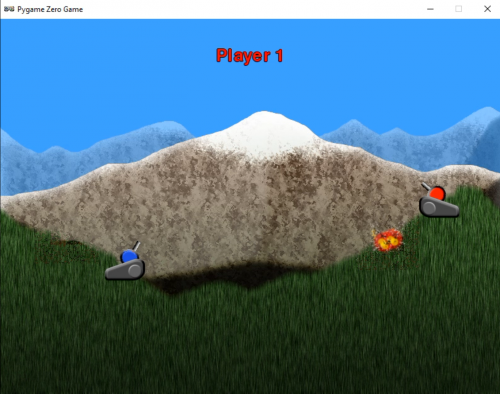
To code the basics of an artillery game, we’ll need two tanks with turrets, a landscape, and some code to work out who shot what, in which direction, and where said shot landed. Let’s start with the landscape. If we create a landscape in two parts – a backdrop and foreground – we can make the foreground destructible so that when a missile explodes it damages part of the landscape. This is a common effect used in artillery games, and sometimes makes the gameplay more complicated as the battle progresses. In our example, we have a grass foreground overlaid on a mountain scene. We then need a cannon for each player. In this case, we’ve used a two-part image, one for the base and one for the turret, which means the latter can be rotated using the up and down keys.
Our homage to the artillery game genre. Fire away at your opponent, and hope they don’t hit back first.
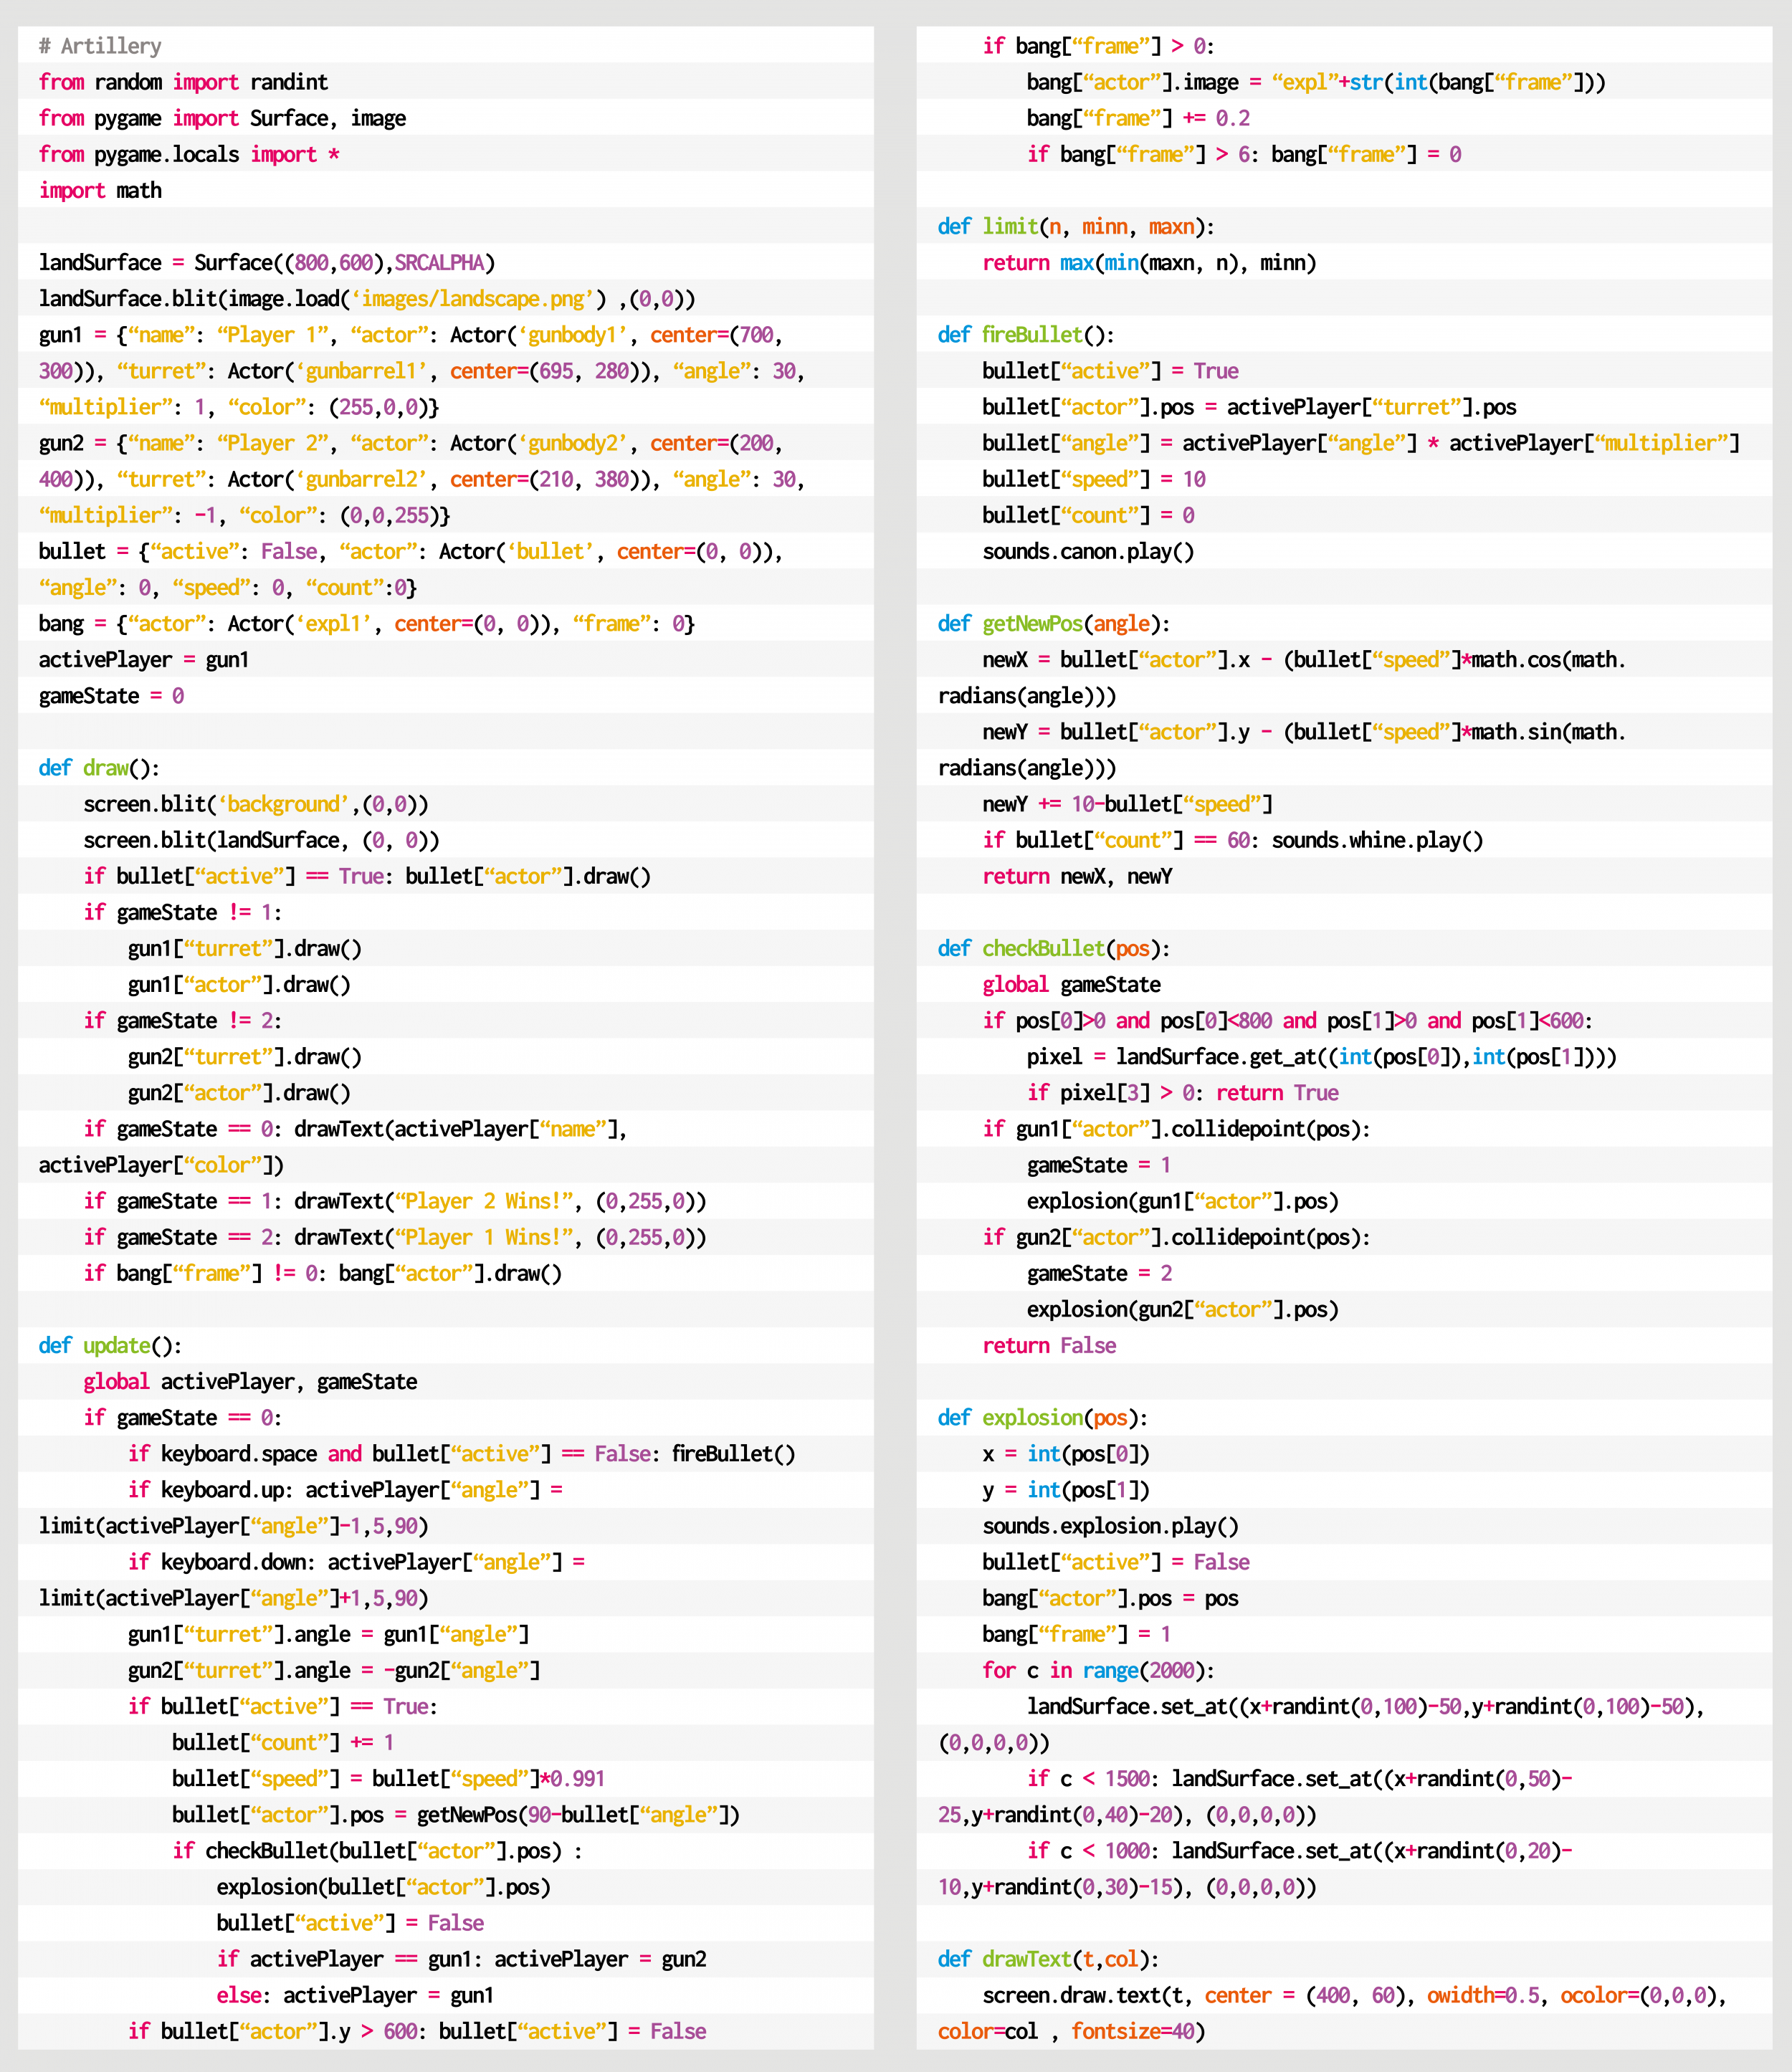
For this code example, we can use the Python dictionary to store several bits of data about the game objects, including the Actor objects. This makes the data handling tidy and is quite similar to the way that JSON is used in JavaScript. We can use this method for the two cannons, the projectile, and an explosion object. As this is a two-player game, we’ll alternate between the two guns, allowing the arrow keys to change the angle of the cannon. When the SPACE bar is pressed, we call the firing sequence, which places the projectile at the same position as the gun firing it. We then move the missile through the air, reducing the speed as it goes and allowing the effects of gravity to pull it towards the ground.
We can work out whether the bullet has hit anything with two checks. The first is to do a pixel check with the foreground. If this comes back as not transparent, then it has hit the ground, and we can start an explosion. To create a hole in the foreground, we can write transparent pixels randomly around the point of contact and then set off an explosion animation. If we test for a collision with a gun, we may find that the bullet has hit the other player and after blowing up the tank, the game ends. If the impact only hit the landscape, though, we can switch control over to the other player and let them have a go.
So that’s your basic artillery game. But rest assured there are plenty of things to add – for example, wind direction, power of the shot, variable damage depending on proximity, or making the tanks fall into holes left by the explosions. You could even change the guns into little wiggly creatures and make your own homage to Worms.
Here’s Mark’s code for an artillery-style tank game. To get it working on your system, you’ll need to install Pygame Zero. And to download the full code and assets, head here.
Get your copy of Wireframe issue 44
You can read more features like this one in Wireframe issue 44, available directly from Raspberry Pi Press — we deliver worldwide.
And if you’d like a handy digital version of the magazine, you can also download issue 44 for free in PDF format.
Wireframe #44, bringing the past and future of Worms to the fore.
Make sure to follow Wireframe on Twitter and Facebook for updates and exclusive offers and giveaways. Subscribe on the Wireframe website to save up to 72% compared to newsstand pricing!
Discover how non-player characters make decisions by tinkering with this Unity-based Pac-Man homage. Paul Roberts wrote this for the latest issue of Wireframe magazine.
From the first video game to the present, artificial intelligence has been a vital part of the medium. While most early games had enemies that simply walked left and right, like the Goombas in Super Mario Bros., there were also games like Pac-Man, where each ghost appeared to move intelligently. But from a programming perspective, how do we handle all the different possible states we want our characters to display?
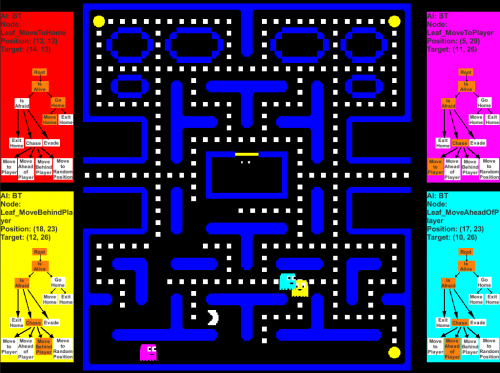
Here’s AI-Man, our homage to a certain Namco maze game. You can switch between AI types to see how they affect the ghosts’ behaviours.
For example, how do we control whether a ghost is chasing Pac-Man, or running away, or even returning to their home? To explore these behaviours, we’ll be tinkering with AI-Man – a Pac-Man-style game developed in Unity. It will show you how the approaches discussed in this article are implemented, and there’s code available for you to modify and add to. You can freely download the AI-Man project here. One solution to managing the different states a character can be in, which has been used for decades, is a finite state machine, or FSM for short. It’s an approach that describes the high-level actions of an agent, and takes its name simply from the fact that there are a finite number of states from which to transition between, with each state only ever doing one thing.
Altered states
To explain what’s meant by high level, let’s take a closer look at the ghosts in Pac-Man. The highlevel state of a ghost is to ‘Chase’ Pac-Man, but the low level is how the ghost actually does this. In Pac-Man, each ghost has its own behaviour in which it hunts the player down, but they’re all in the same high-level state of ‘Chase’. Looking at Figure 1, you can see how the overall behaviour of a ghost can be depicted extremely easily, but there’s a lot of hidden complexity. At what point do we transition between states? What are the conditions on moving between states across the connecting lines? Once we have this information, the diagram can be turned into code with relative ease. You could use simple switch statements to achieve this, or we could achieve the same using an object-oriented approach.
Figure 1: A finite state machine
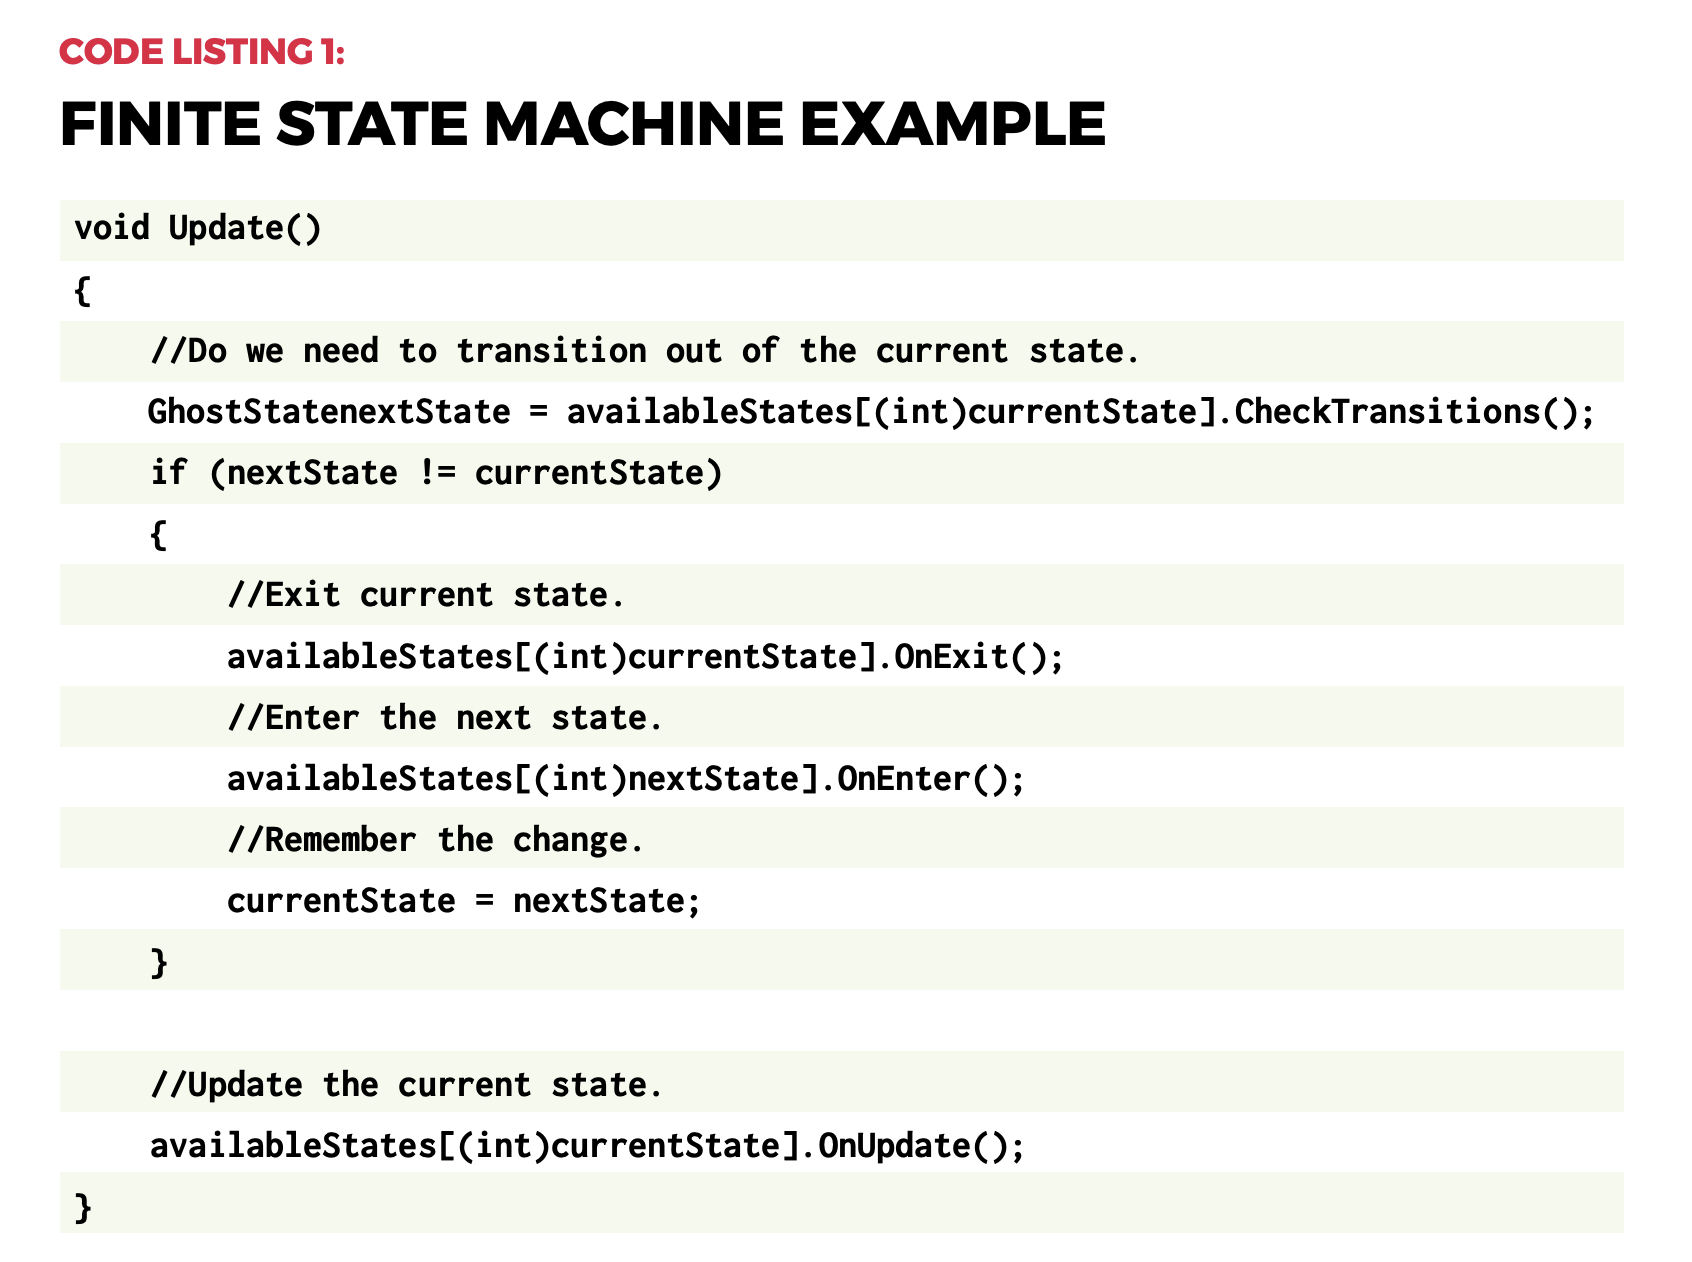
Using switch statements can quickly become cumbersome the more states we add, so I’ve used the object-oriented approach in the accompanying project, and an example code snippet can be seen in Code Listing 1. Each state handles whether it needs to transition into another state, and lets the state machine know. If a transition’s required, the Exit() function is called on the current state, before calling the Enter() function on the new state. This is done to ensure any setup or cleanup is done, after which the Update() function is called on whatever the current state is. The Update()function is where the low-level code for completing the state is processed. For a project as simple as Pac-Man, this only involves setting a different position for the ghost to move to.
Hidden complexity
Extending this approach, it’s reasonable for a state to call multiple states from within. This is called a hierarchical finite state machine, or HFSM for short. An example is an agent in Call of Duty: Strike Team being instructed to seek a stealthy position, so the high-level state is ‘Find Cover’, but within that, the agent needs to exit the dumpster he’s currently hiding in, find a safe location, calculate a safe path to that location, then repeatedly move between points on that path until he reaches the target position.
FSMs can appear somewhat predictable as the agent will always transition into the same state. This can be accommodated for by having multiple options that achieve the same goal. For example, when the ghosts in our Unity project are in the ‘Chase’ state, they can either move to the player, get in front of the player, or move to a position behind the player. There’s also an option to move to a random position. The FSM implemented has each ghost do one of these, whereas the behaviour tree allows all ghosts to switch between the options every ten seconds. A limitation of the FSM approach is that you can only ever be in a single state at a particular time. Imagine a tank battle game where multiple enemies can be engaged. Simply being in the ‘Retreat’ state doesn’t look smart if you’re about to run into the sights of another enemy. The worst-case scenario would be our tank transitions between ‘Attack’ and ‘Retreat’ states on each frame – an issue known as state thrashing – and gets stuck, and seemingly confused about what to do in this situation. What we need is away to be in multiple states at the same time: ideally retreating from tank A, whilst attacking tank B. This is where fuzzy finite state machines, or FFSM for short, come in useful.
This approach allows you to be in a particular state to a certain degree. For example, my tank could be 80% committed to the Retreat state (avoid tank A), and 20% committed to the Attack state (attack tank B). This allows us to both Retreat and Attack at the same time. To achieve this, on each update, your agent needs to check each possible state to determine its degree of commitment, and then call each of the active states’ updates. This differs from a standard FSM, where you can only ever be in a single state. FFSMs can be in none, one, two, or however many states you like at one time. This can prove tricky to balance, but it does offer an alternative to the standard approach.
No memory
Another potential issue with an FSM is that the agent has no memory of what they were previously doing. Granted, this may not be important: in the example given, the ghosts in Pac-Man don’t care about what they were doing, they only care about what they are doing, but in other games, memory can be extremely important. Imagine instructing a character to gather wood in a game like Age of Empires, and then the character gets into a fight. It would be extremely frustrating if the characters just stood around with nothing to do after the fight had concluded, and for the player to have to go back through all these characters and reinstruct them after the fight is over. It would be much better for the characters to return to their previous duties.
“FFSMs can be in one, none,
two, or however many states
you like.”
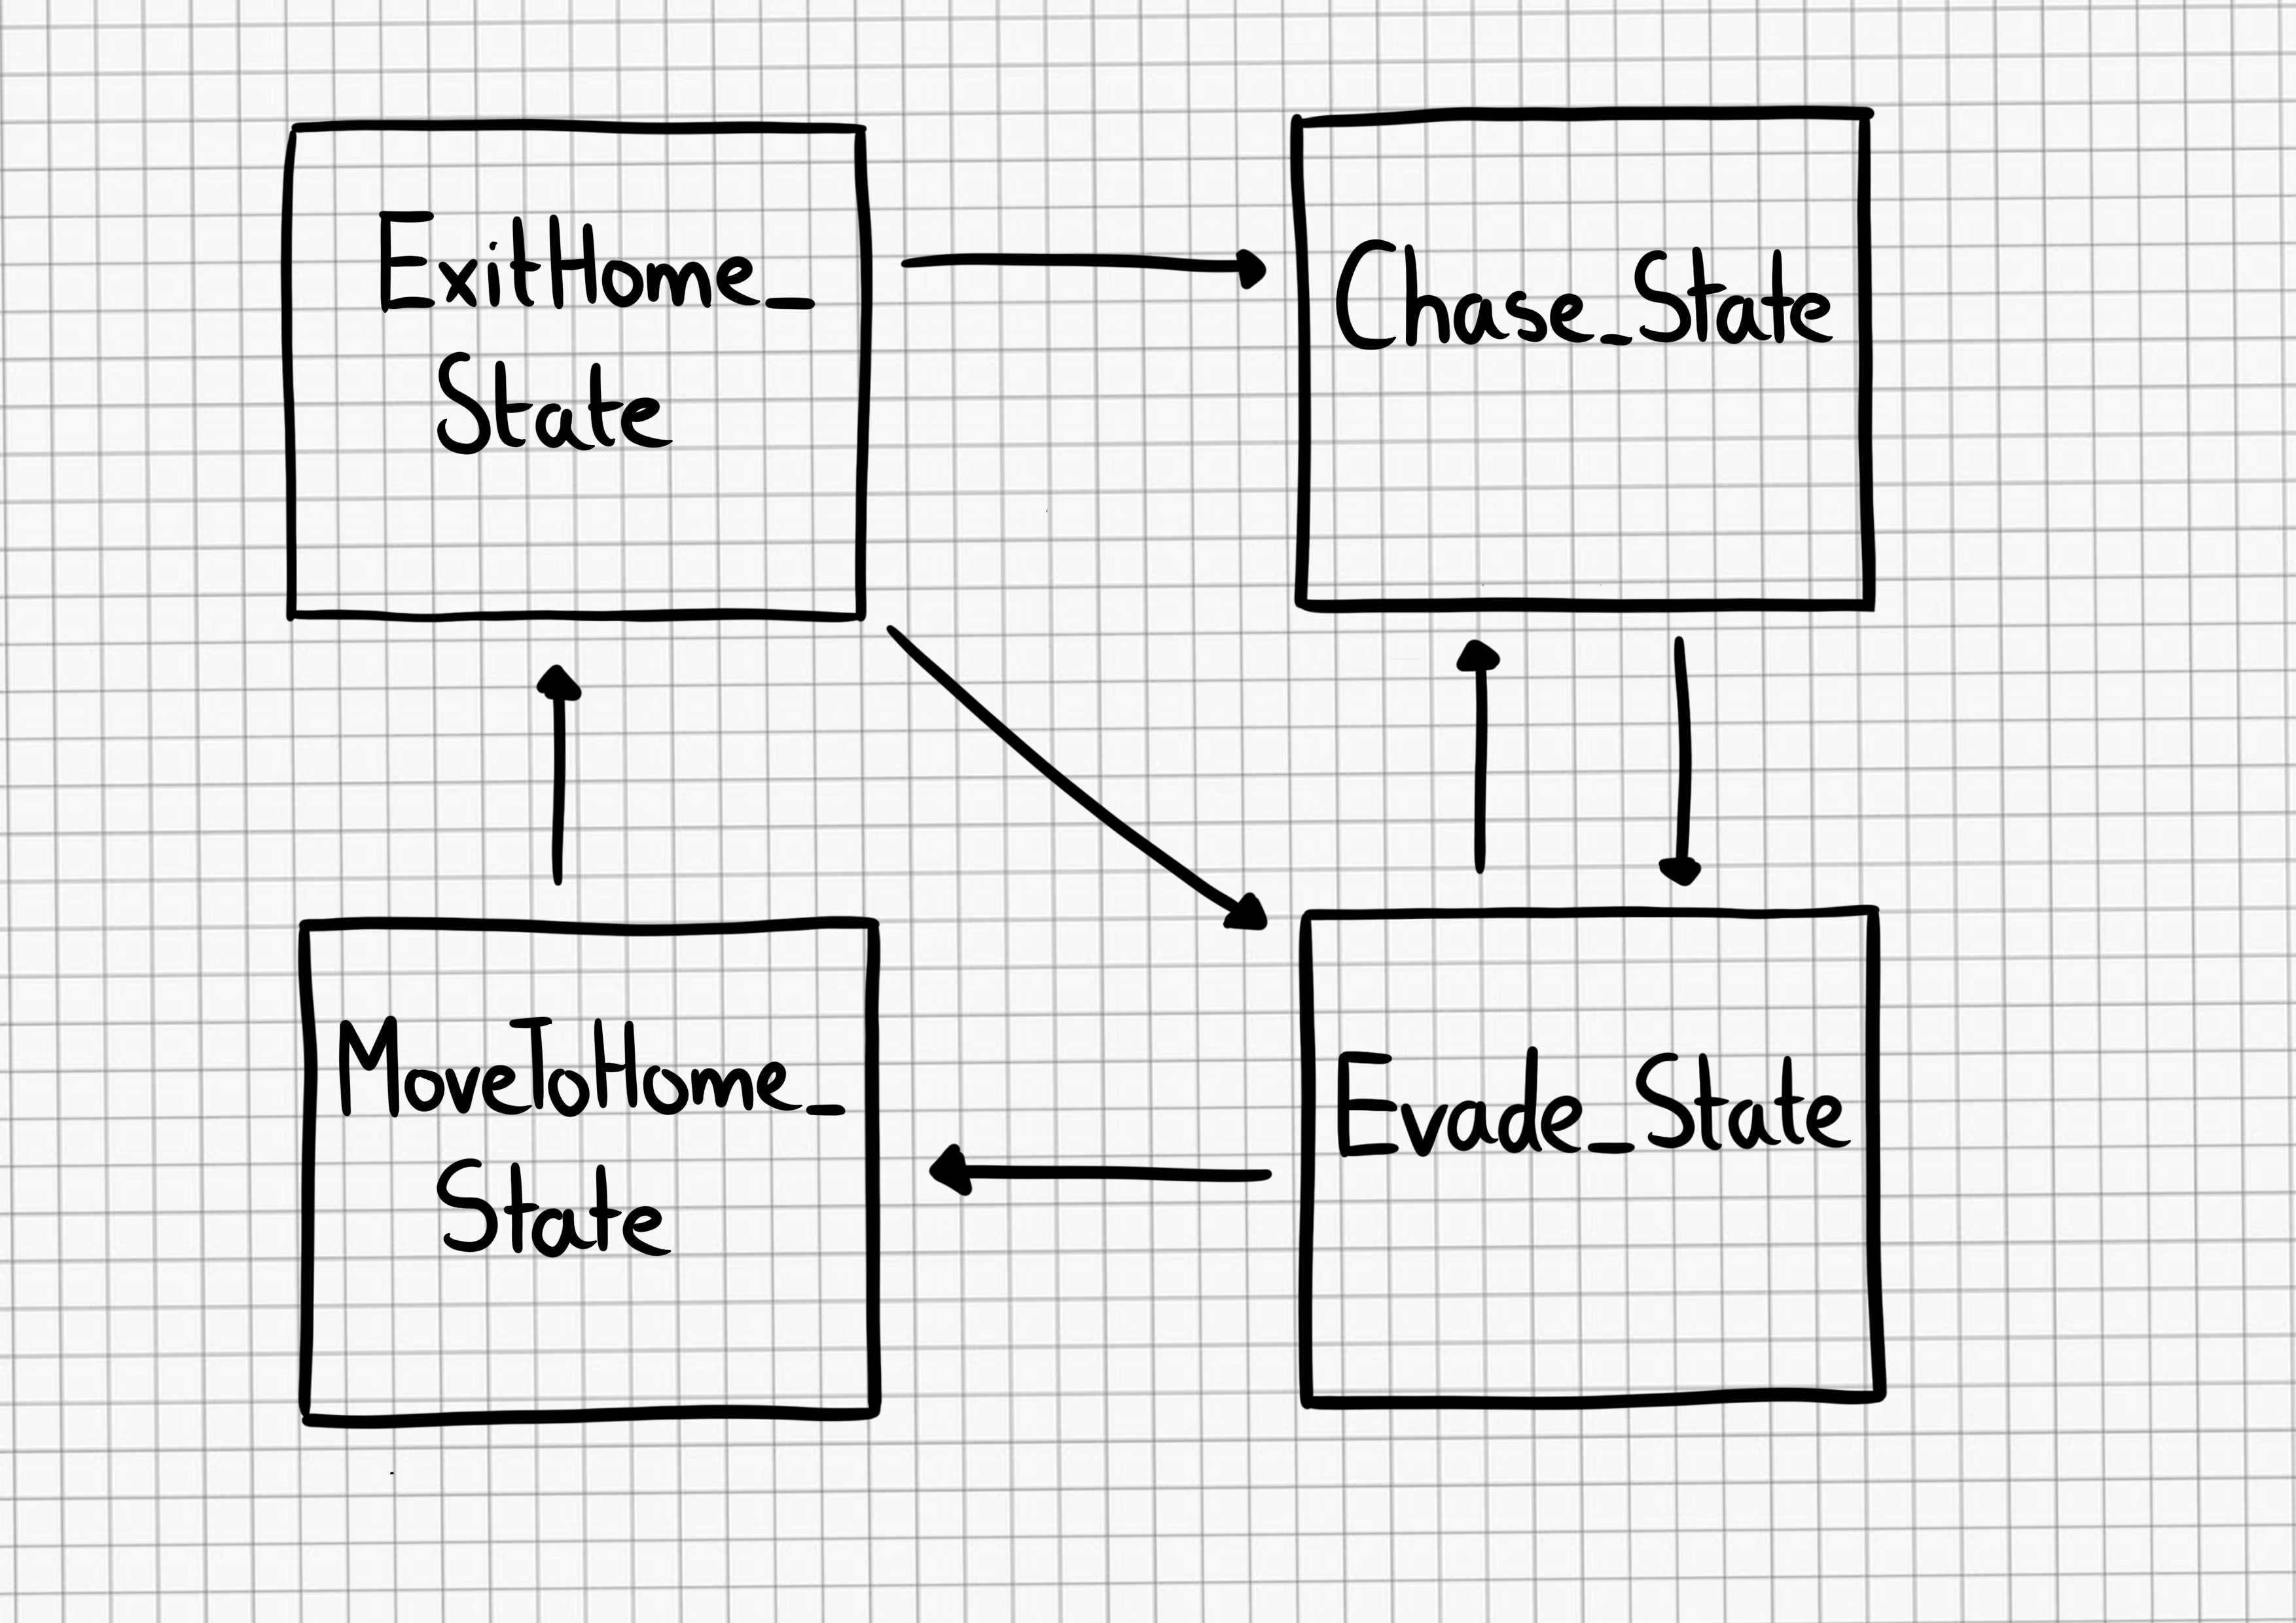
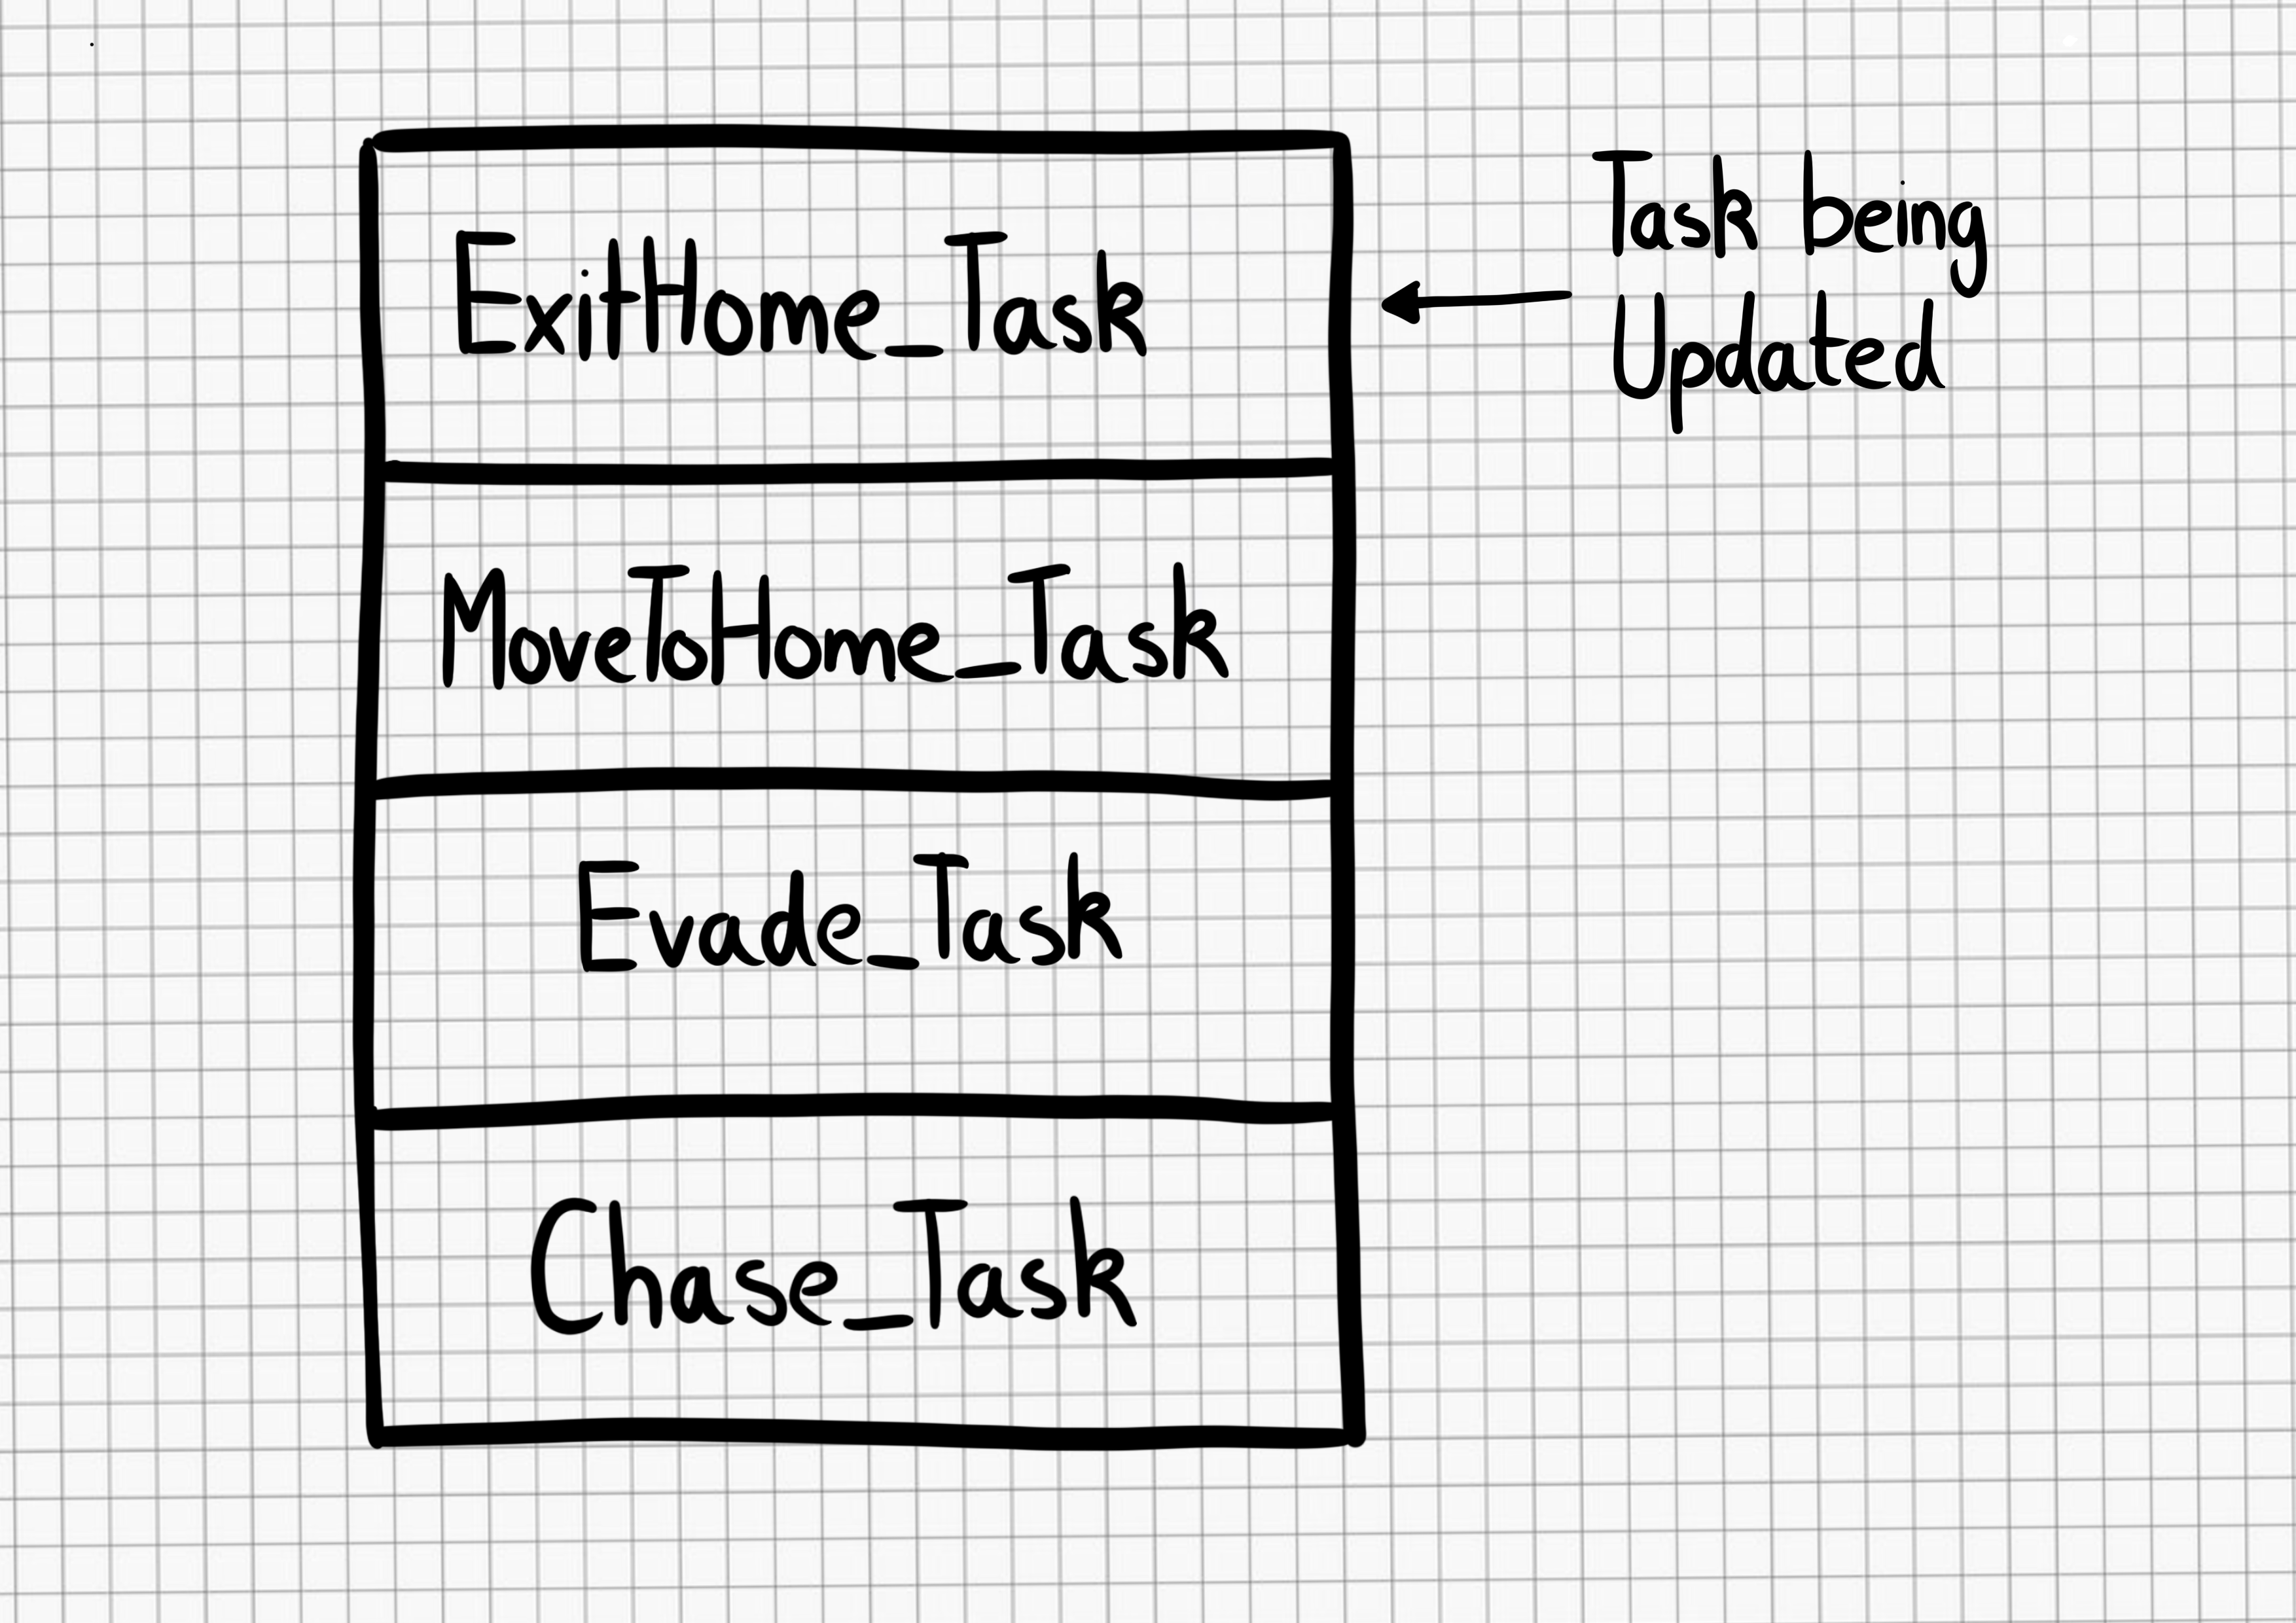
We can incorporate the idea of memory quite easily by using the stack data structure. The stack will hold AI states, with only the top-most element receiving the update. This in effect means that when a state is completed, it’s removed from the stack and the previous state is then processed. Figure 2 depicts how this was achieved in our Unity project. To differentiate the states from the FSM approach, I’ve called them tasks for the stackbased implementation. Looking at Figure 2, it shows how (from the bottom), the ghost was chasing the player, then the player collected a power pill, which resulted in the AI adding an Evade_Task – this now gets the update call, not the Chase_Task. While evading the player, the ghost was then eaten.
At this point, the ghost needed to return home, so the appropriate task was added. Once home, the ghost needed to exit this area, so again, the relevant task was added. At the point the ghost exited home, the ExitHome_Task was removed, which drops processing back to MoveToHome_Task. This was no longer required, so it was also removed. Back in the Evade_Task, if the power pill was still active, the ghost would return to avoiding the player, but if it had worn off, this task, in turn, got removed, putting the ghost back in its default task of Chase_Task, which will get the update calls until something else in the world changes.
Figure 2: Stack-based finite state machine.
Behaviour trees
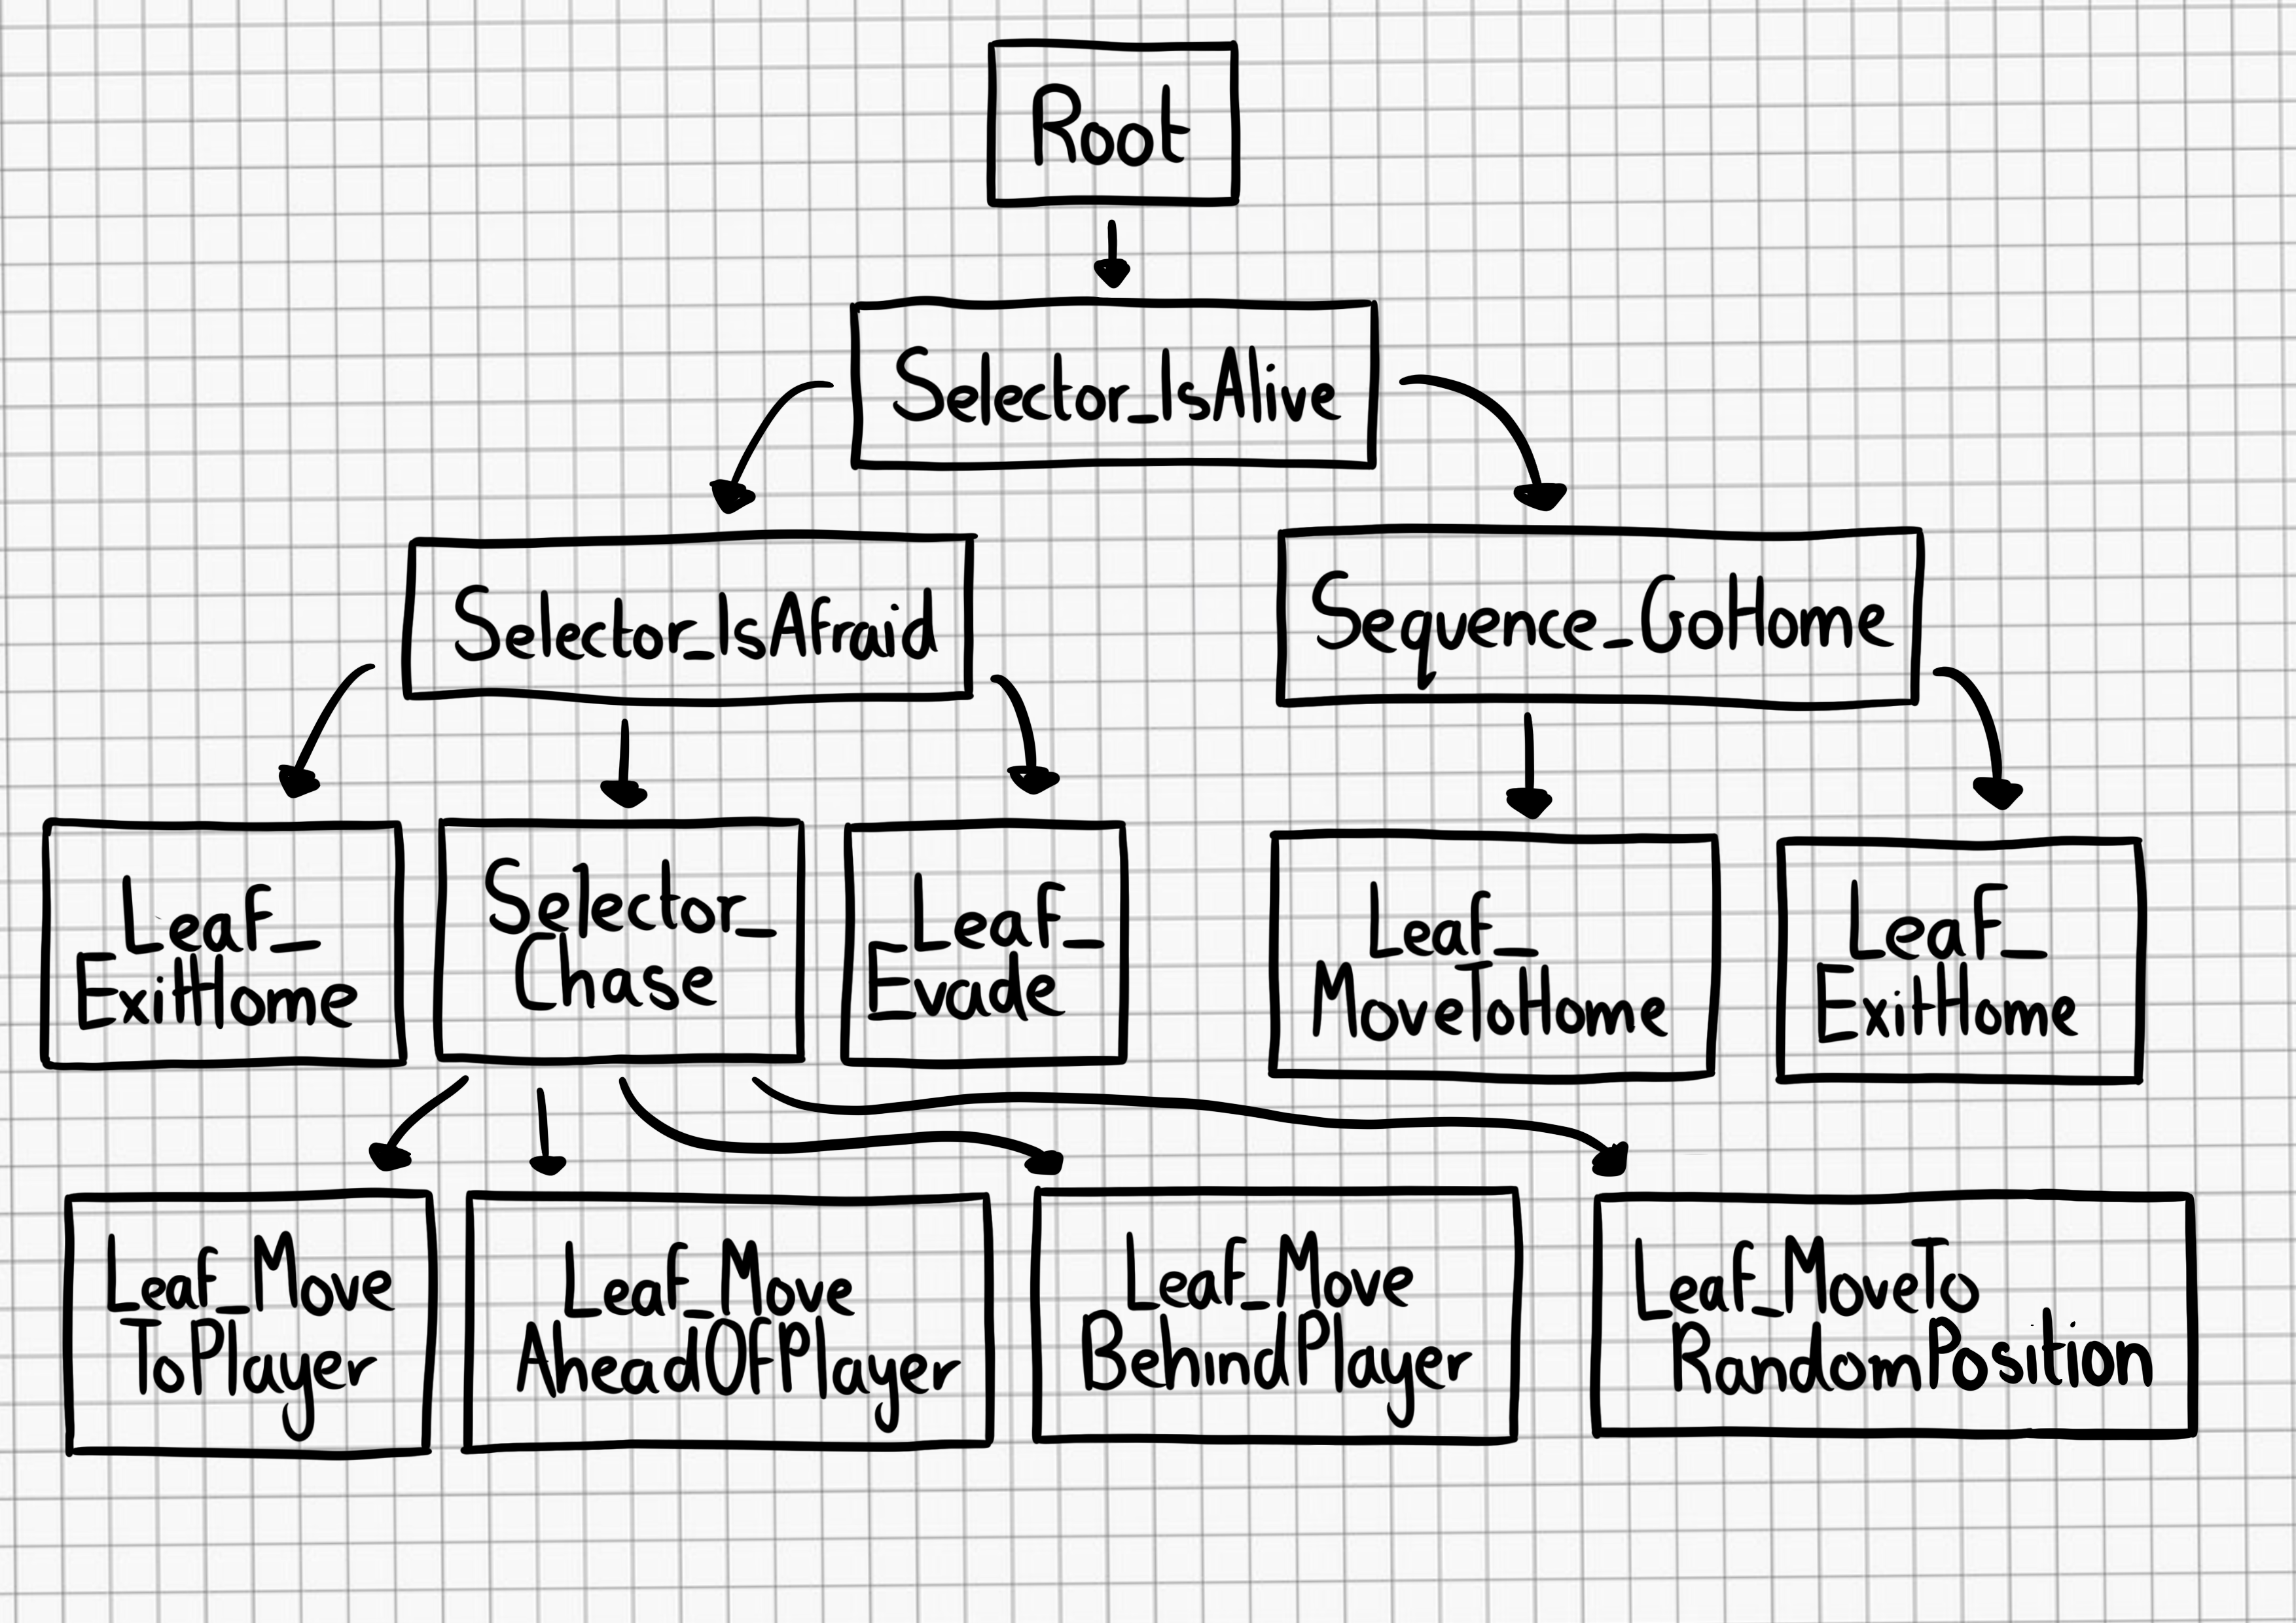
In 2002, Halo 2 programmer Damian Isla expanded on the idea of HFSM in a way that made it more scalable and modular for the game’s AI. This became known as the behaviour tree approach. It’s now a staple in AI game development. The behaviour tree is made up of nodes, which can be one of three types – composite, decorator, or leaf nodes. Each has a different function within the tree and affects the flow through the tree. Figure 3 shows how this approach is set up for our Unity project. The states we’ve explored so far are called leaf nodes. Leaf nodes end a particular branch of the tree and don’t have child nodes – these are where the AI behaviours are located. For example, Leaf_ExitHome, Leaf_Evade, and Leaf_ MoveAheadOfPlayer all tell the ghost where to move to. Composite nodes can have multiple child nodes and are used to determine the order in which the children are called. This could be in the order in which they’re described by the tree, or by selection, where the children nodes will compete, with the parent node selecting which child node gets the go-ahead. Selector_Chase allows the ghost to select a single path down the tree by choosing a random option, whereas Sequence_ GoHome has to complete all the child paths to complete its behaviour.
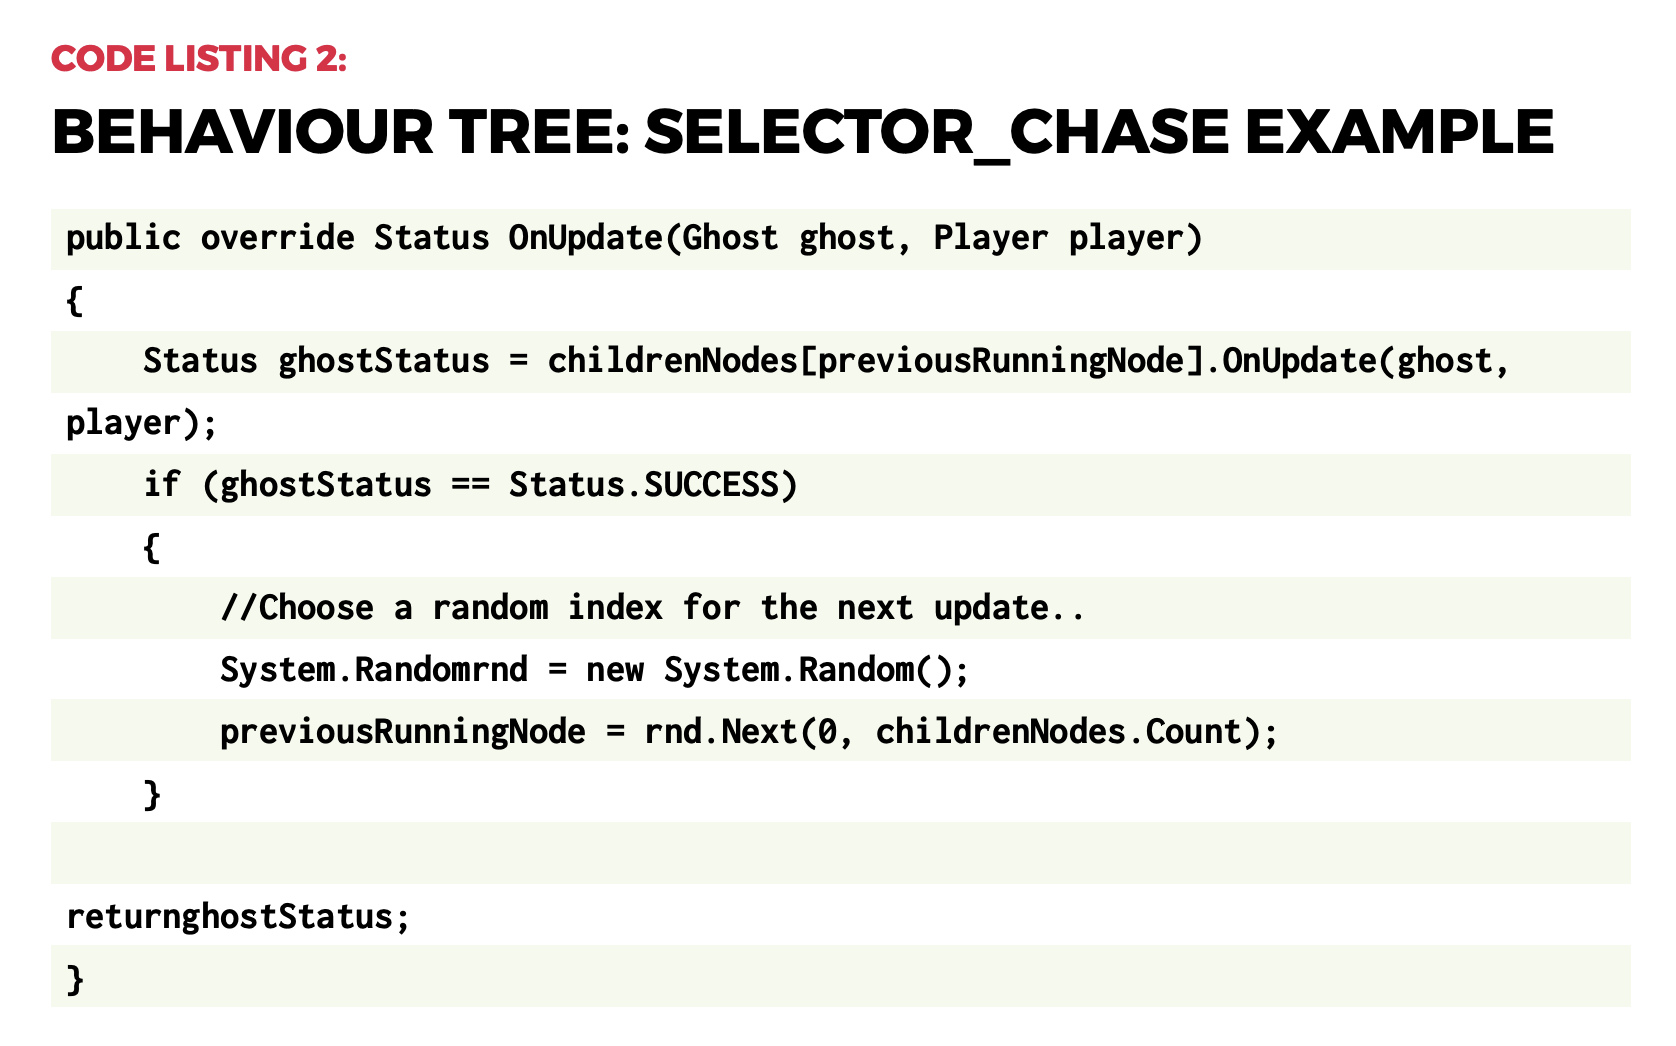
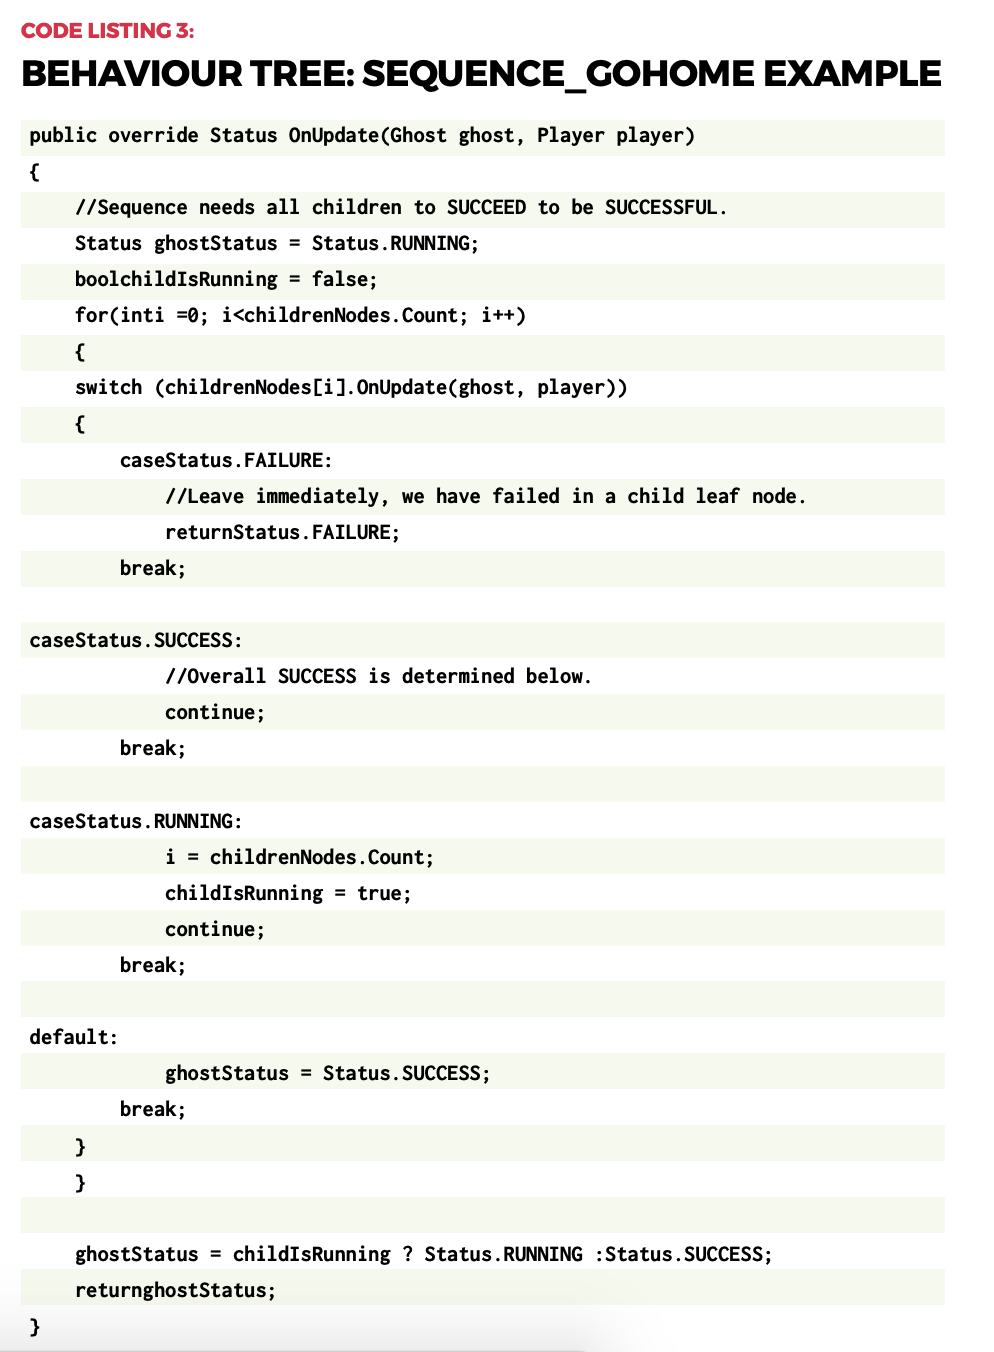
Code Listing 2 shows how simple it is to choose a random behaviour to use – just be sure to store the index for the next update. Code Listing 3 demonstrates how to go through all child nodes, and to return SUCCESS only when all have completed, otherwise the status RUNNING is returned. FAILURE only gets returned when a child node itself returns a FAILURE status.
Complex behaviours
Although not used in our example project, behaviour trees can also have nodes called decorators. A decorator node can only have a single child, and can modify the result returned. For example, a decorator may iterate the child node for a set period, perhaps indefinitely, or even flip the result returned from being a success to a failure. From what first appears to be a collection of simple concepts, complex behaviours can then develop.
Figure 3: Behaviour tree
Video game AI is all about the illusion of intelligence. As long as the characters are believable in their context, the player should maintain their immersion in the game world and enjoy the experience we’ve made. Hopefully, the approaches introduced here highlight how even simple approaches can be used to develop complex characters. This is just the tip of the iceberg: AI development is a complex subject, but it’s also fun and rewarding to explore.
Wireframe #43, with the gorgeous Sea of Stars on the cover.
Race around using a mini-map for navigation, just like the arcade classic, Rally-X. Mark Vanstone has the code
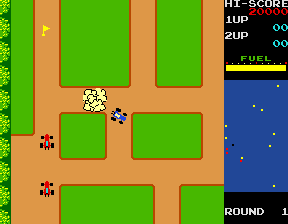
In Namco’s original arcade game, the red cars chased the player relentlessly around each level. Note the handy mini-map on the right.
The original Rally-X arcade game blasted onto the market in 1980, at the same time as Pac‑Man and Defender. This was the first year that developer Namco had exported its games outside Japan thanks to the deal it struck with Midway, an American game distributor. The aim of Rally-X is to race a car around a maze, avoiding enemy cars while collecting yellow flags – all before your fuel runs out.
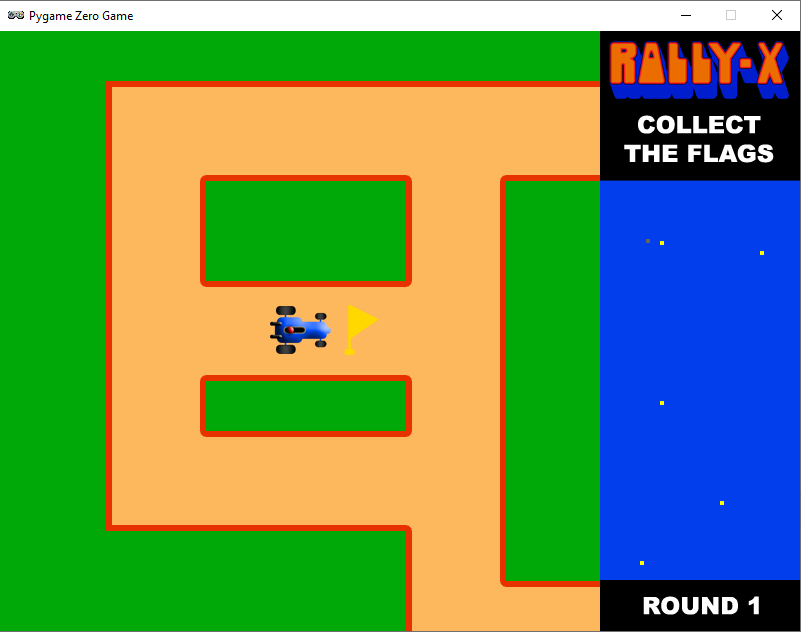
The aspect of Rally-X that we’ll cover here is the mini-map. As the car moves around the maze, its position can be seen relative to the flags on the right of the screen. The main view of the maze only shows a section of the whole map, and scrolls as the car moves, whereas the mini-map shows the whole size of the map but without any of the maze walls – just dots where the car and flags are (and in the original, the enemy cars). In our example, the mini-map is five times smaller than the main map, so it’s easy to work out the calculation to translate large map co‑ordinates to mini-map co-ordinates.
To set up our Rally-X homage in Pygame Zero, we can stick with the default screen size of 800×600. If we use 200 pixels for the side panel, that leaves us with a 600×600 play area. Our player’s car will be drawn in the centre of this area at the co-ordinates 300,300. We can use the in-built rotation of the Actor object by setting the angle property of the car. The maze scrolls depending on which direction the car is pointing, and this can be done by having a lookup table in the form of a dictionary list (directionMap) where we define x and y increments for each angle the car can travel. When the cursor keys are pressed, the car stays central and the map moves.
Roam the maze and collect those flags in our Python homage to Rally-X.
To detect the car hitting a wall, we can use a collision map. This isn’t a particularly memory-efficient way of doing it, but it’s easy to code. We just use a bitmap the same size as the main map which has all the roads as black and all the walls as white. With this map, we can detect if there’s a wall in the direction in which the car’s moving by testing the pixels directly in front of it. If a wall is detected, we rotate the car rather than moving it. If we draw the side panel after the main map, we’ll then be able to see the full layout of the screen with the map scrolling as the car navigates through the maze.
We can add flags as a list of Actor objects. We could make these random, but for the sake of simplicity, our sample code has them defined in a list of x and y co-ordinates. We need to move the flags with the map, so in each update(), we loop through the list and add the same increments to the x and y co‑ordinates as the main map. If the car collides with any flags, we just take them off the list of items to draw by adding a collected variable. Having put all of this in place, we can draw the mini-map, which will show the car and the flags. All we need to do is divide the object co-ordinates by five and add an x and y offset so that the objects appear in the right place on the mini-map.
And those are the basics of Rally-X! All it needs now is a fuel gauge, some enemy cars, and obstacles – but we’ll leave those for you to sort out…
Here’s Mark’s code for a Rally-X-style driving game with mini-map. To get it running on your system, you’ll need to install Pygame Zero. And to download the full code and assets, head here.
Get your copy of Wireframe issue 43
You can read more features like this one in Wireframe issue 43, available directly from Raspberry Pi Press — we deliver worldwide.
And if you’d like a handy digital version of the magazine, you can also download issue 43 for free in PDF format.
Wireframe #43, with the gorgeous Sea of Stars on the cover.
Make sure to follow Wireframe on Twitter and Facebook for updates and exclusive offers and giveaways. Subscribe on the Wireframe website to save up to 49% compared to newsstand pricing!
Code the mechanics of an eighties arcade hit in Python and Pygame Zero. Mark Vanstone shows you how
Players must change the colour of every cube to complete the level.
Late in 1982, a funny little orange character with a big nose landed in arcades. The titular Q*bert’s task was to jump around a network of cubes arranged in a pyramid formation, changing the colours of each as they went. Once the cubes were all the same colour, it was on to the next level; to make things more interesting, there were enemies like Coily the snake, and objects which helped Q*bert: some froze enemies in their tracks, while floating discs provided a lift back to the top of the stage.
Q*bert was designed by Warren Davis and Jeff Lee at the American company Gottlieb, and soon became such a smash hit that, the following year, it was already being ported to most of the home computer platforms available at the time. New versions and remakes continued to appear for years afterwards, with a mobile phone version appearing in 2003. Q*bert was by far Gottlieb’s most popular game, and after several changes in company ownership, the firm is now part of Sony’s catalogue – Q*bert’s main character even made its way into the 2015 film, Pixels.
Q*bert uses isometric-style graphics to draw a pseudo-3D display – something we can easily replicate in Pygame Zero by using a single cube graphic with which we make a pyramid of Actor objects. Starting with seven cubes on the bottom row, we can create a simple double loop to create the pile of cubes. Our Q*bert character will be another Actor object which we’ll position at the top of the pile to start. The game screen can then be displayed in the draw() function by looping through our 28 cube Actors and then drawing Q*bert.
Our homage to Q*bert. Try not to fall into the terrifying void.
We need to detect player input, and for this we use the built-in keyboard object and check the cursor keys in our update() function. We need to make Q*bert move from cube to cube so we can move the Actor 32 pixels on the x-axis and 48 pixels on the y-axis. If we do this in steps of 2 for x and 3 for y, we will have Q*bert on the next cube in 16 steps. We can also change his image to point in the right direction depending on the key pressed in our jump() function. If we use this linear movement in our move() function, we’ll see the Actor go in a straight line to the next block. To add a bit of bounce to Q*bert’s movement, we add or subtract (depending on the direction) the values in the bounce[] list. This will make a bit more of a curved movement to the animation.
Now that we have our long-nosed friend jumping around, we need to check where he’s landing. We can loop through the cube positions and check whether Q*bert is over each one. If he is, then we change the image of the cube to one with a yellow top. If we don’t detect a cube under Q*bert, then the critter’s jumped off the pyramid, and the game’s over. We can then do a quick loop through all the cube Actors, and if they’ve all been changed, then the player has completed the level. So those are the basic mechanics of jumping around on a pyramid of cubes. We just need some snakes and other baddies to annoy Q*bert – but we’ll leave those for you to add. Good luck!
Here’s Mark’s code for a Q*bert-style, cube-hopping platform game. To get it running on your system, you’ll need to install Pygame Zero. And to download the full code and assets, head here.
Get your copy of Wireframe issue 42
You can read more features like this one in Wireframe issue 42, available directly from Raspberry Pi Press — we deliver worldwide.
And if you’d like a handy digital version of the magazine, you can also download issue 42 for free in PDF format.
Make sure to follow Wireframe on Twitter and Facebook for updates and exclusive offers and giveaways. Subscribe on the Wireframe website to save up to 49% compared to newsstand pricing!
To provide the best experiences, we use technologies like cookies to store and/or access device information. Consenting to these technologies will allow us to process data such as browsing behavior or unique IDs on this site. Not consenting or withdrawing consent, may adversely affect certain features and functions.
Functional
Always active
The technical storage or access is strictly necessary for the legitimate purpose of enabling the use of a specific service explicitly requested by the subscriber or user, or for the sole purpose of carrying out the transmission of a communication over an electronic communications network.
Preferences
The technical storage or access is necessary for the legitimate purpose of storing preferences that are not requested by the subscriber or user.
Statistics
The technical storage or access that is used exclusively for statistical purposes.The technical storage or access that is used exclusively for anonymous statistical purposes. Without a subpoena, voluntary compliance on the part of your Internet Service Provider, or additional records from a third party, information stored or retrieved for this purpose alone cannot usually be used to identify you.
Marketing
The technical storage or access is required to create user profiles to send advertising, or to track the user on a website or across several websites for similar marketing purposes.