All posts by Dinesh Prabakaran

Building a scalable code modernization solution with AWS Transform custom

Post Syndicated from Dinesh Prabakaran original https://aws.amazon.com/blogs/devops/building-a-scalable-code-modernization-solution-with-aws-transform-custom/

Introduction

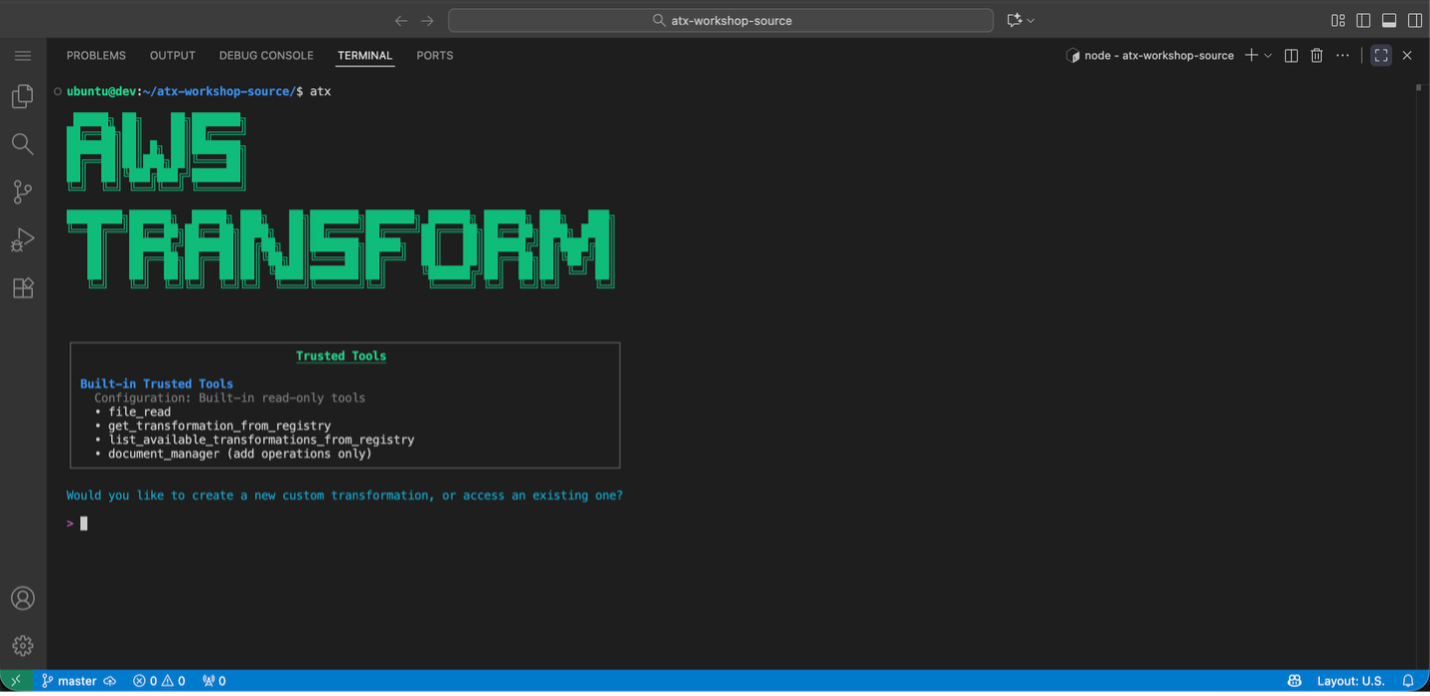
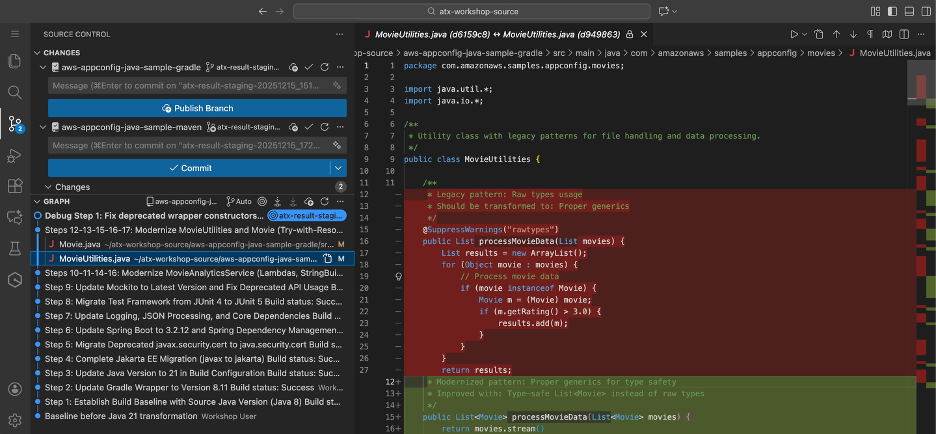
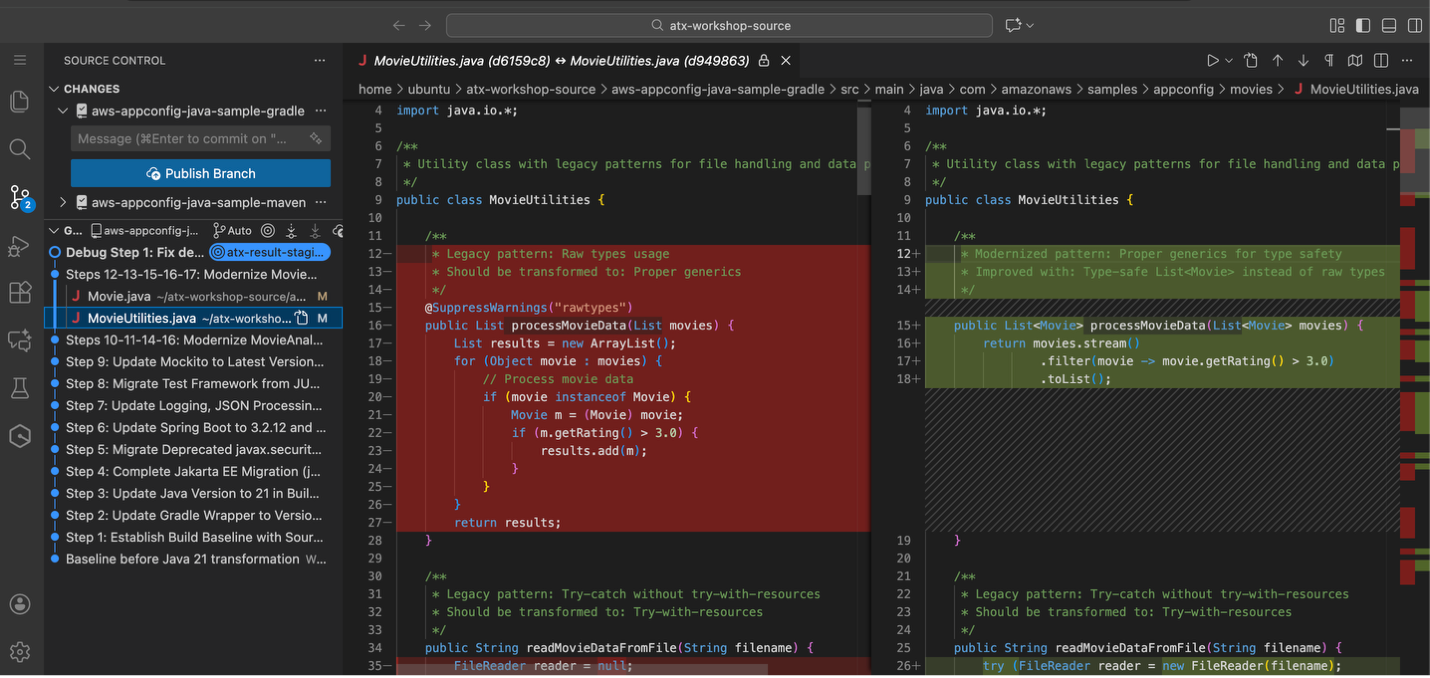
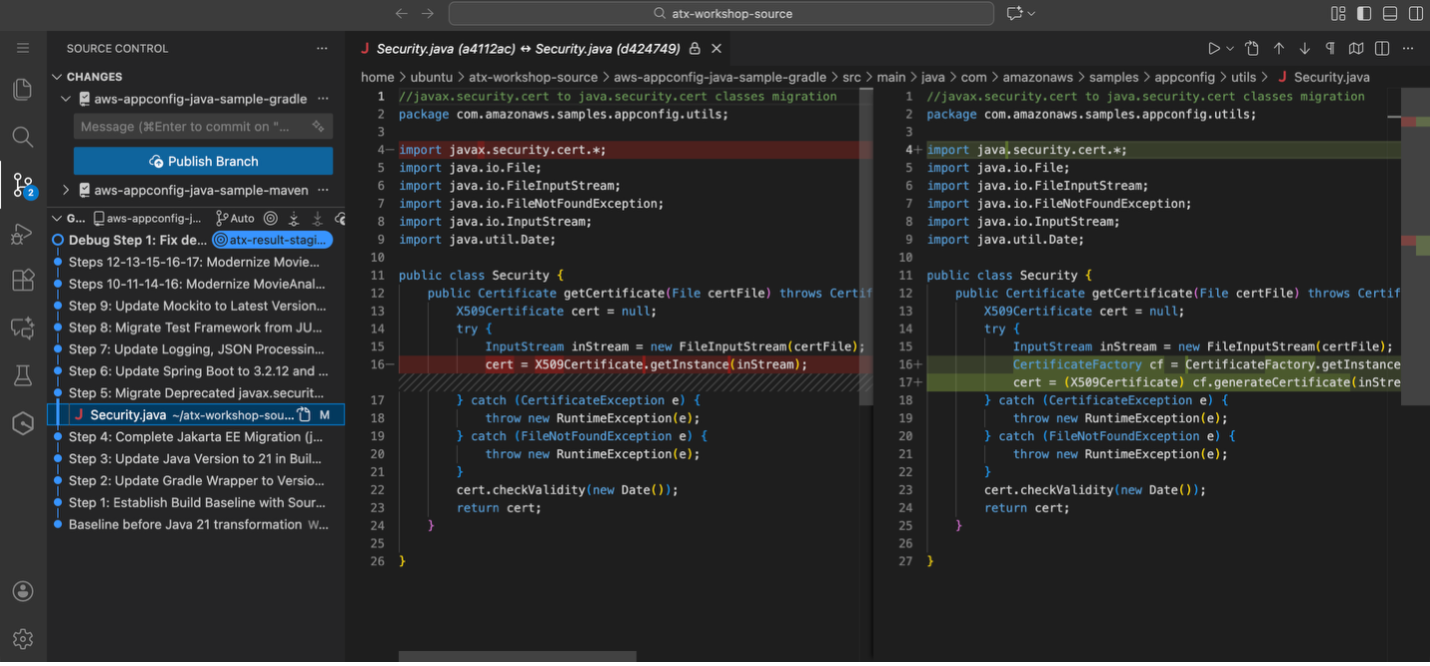
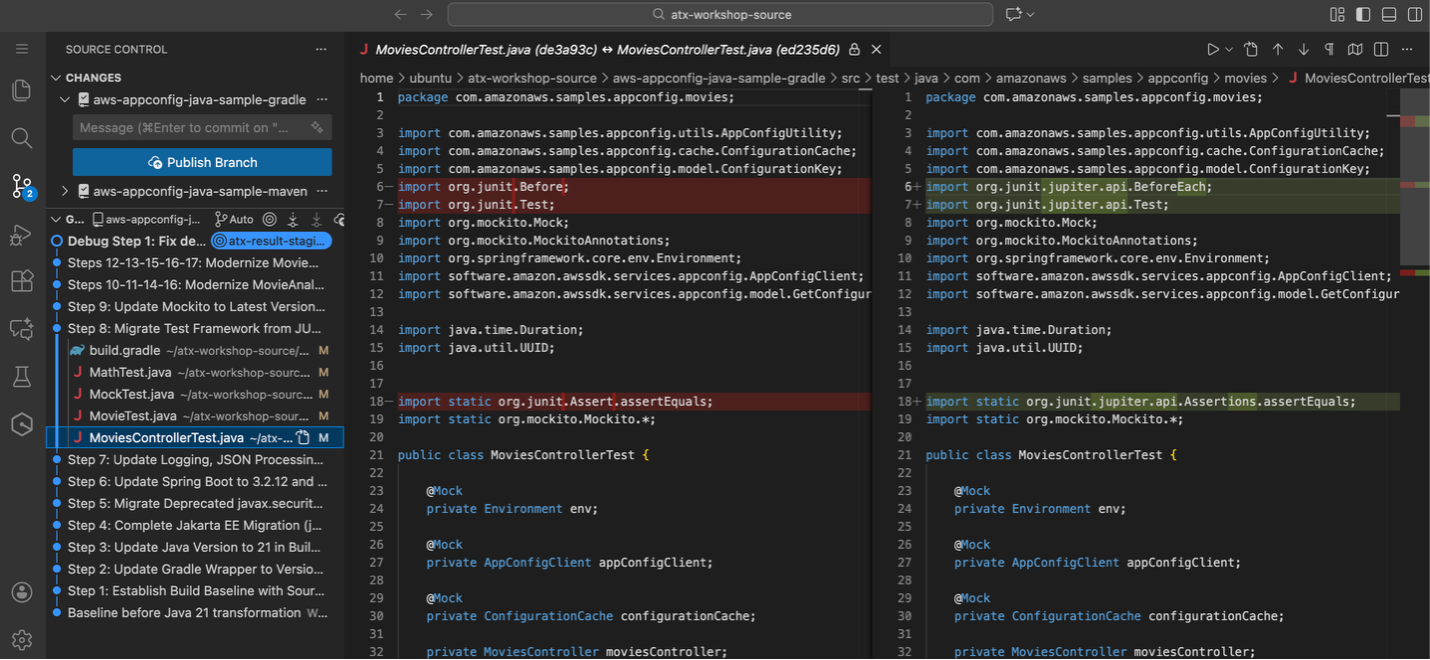
Software maintenance and modernization is a critical challenge for enterprises managing hundreds or thousands of repositories. Whether upgrading Java versions, migrating to new AWS SDKs, or modernizing frameworks, the scale of transformation work can be overwhelming. AWS Transform custom uses agentic AI to perform large-scale modernization of software, code, libraries, and frameworks to reduce technical debt. It handles diverse scenarios including language version upgrades, API and service migrations, framework upgrades and migrations, code refactoring, and organization-specific transformations. Through continual learning, the agent improves from every execution and developer feedback, delivering high-quality, repeatable transformations without requiring specialized automation expertise.

Organizations need to run transformations using AWS Transform custom concurrently across their entire code estate to meet aggressive modernization timelines and compliance deadlines. Running it at enterprise scale requires a solution to process repositories in parallel, in a controlled remote cloud environment, manage credentials securely, and provide visibility into transformation progress. Today, we’re introducing an open-source solution that brings production-grade scalability, reliability, and monitoring to AWS Transform custom. This infrastructure enables you to run transformations on thousands of repositories in parallel using AWS Batch and AWS Fargate, with REST API access for programmatic control and comprehensive Amazon CloudWatch monitoring.

Requirements for Enterprise-Scale Code Modernization

AWS Transform custom provides powerful AI-driven code transformation capabilities through its CLI. To effectively scale transformations across enterprise codebases, organizations need:

Scale: Ability to run transformations on 1000+ repositories concurrently rather than one-by-one
Infrastructure: Dedicated compute resources for long-running transformations beyond developers’ laptops
API Access: REST API for programmatic orchestration and seamless integration with CI/CD pipelines
Monitoring: Centralized visibility into transformation progress and status across multiple repositories
Reliability: Automatic retries, secure credential management, and built-in fault tolerance

The Solution: Batch Infrastructure with REST API

This solution provides complete, production-ready infrastructure that addresses these challenges:

Core Capabilities

  • Scalable Batch Processing Run transformations on thousands of repositories in parallel using AWS Batch with Fargate. The default configuration (256 max vCPUs, 2 vCPUs per job) supports up to 128 concurrent jobs, with automatic queuing and resource management. The compute environment scales based on your needs and Fargate service quotas.
  • REST API for Programmatic Access Seven API endpoints provide complete job lifecycle management, enabling you to submit single jobs or bulk batches of thousands in one request. The API offers real-time status tracking and progress monitoring, with Amazon Identity and access Management (IAM) authentication ensuring secure access to transformation operations.
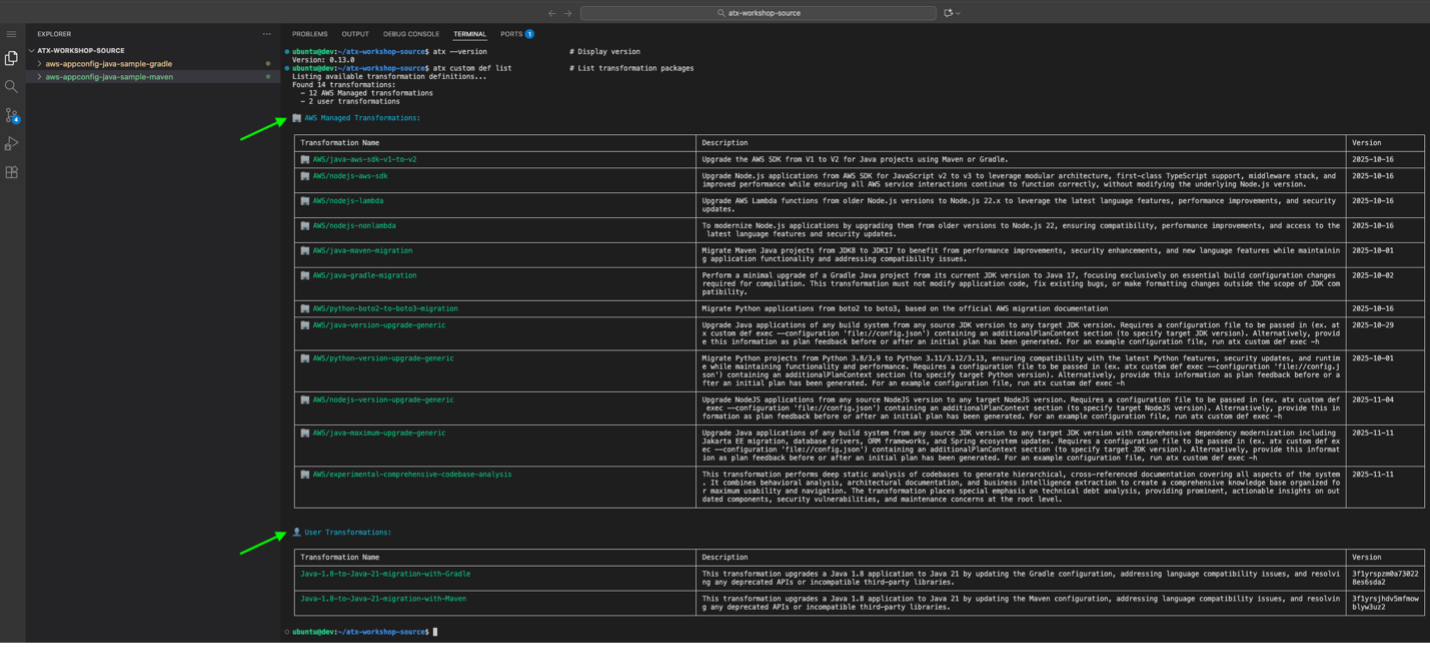
  • Multi-Language Container The solution includes a container supporting Java (8, 11, 17, 21), Python (3.8-3.13), and Node.js (16-24) with all build tools pre-installed, including Maven, Gradle, npm, and yarn. The AWS Transform CLI and AWS CLI v2 are bundled in. The container is fully extensible for custom requirements—you can add your own libraries, languages, or tools by customizing the Dockerfile to meet their specific needs
  • Enterprise-Grade Reliability Automatic IAM credential management eliminates long-lived keys, with credentials auto-refreshing every 45 minutes for jobs up to 12 hours. The system includes automatic retries for transient failures (default: 3 attempts), with configurable timeout and retry settings to match your transformation complexity.
  • Comprehensive Monitoring A CloudWatch dashboard provides job tracking with success and failure rates, trends over time, and API and Lambda health metrics. Real-time log streaming enables you to monitor transformation progress and quickly diagnose issues.

Architecture

The solution uses a serverless architecture built on AWS managed services:

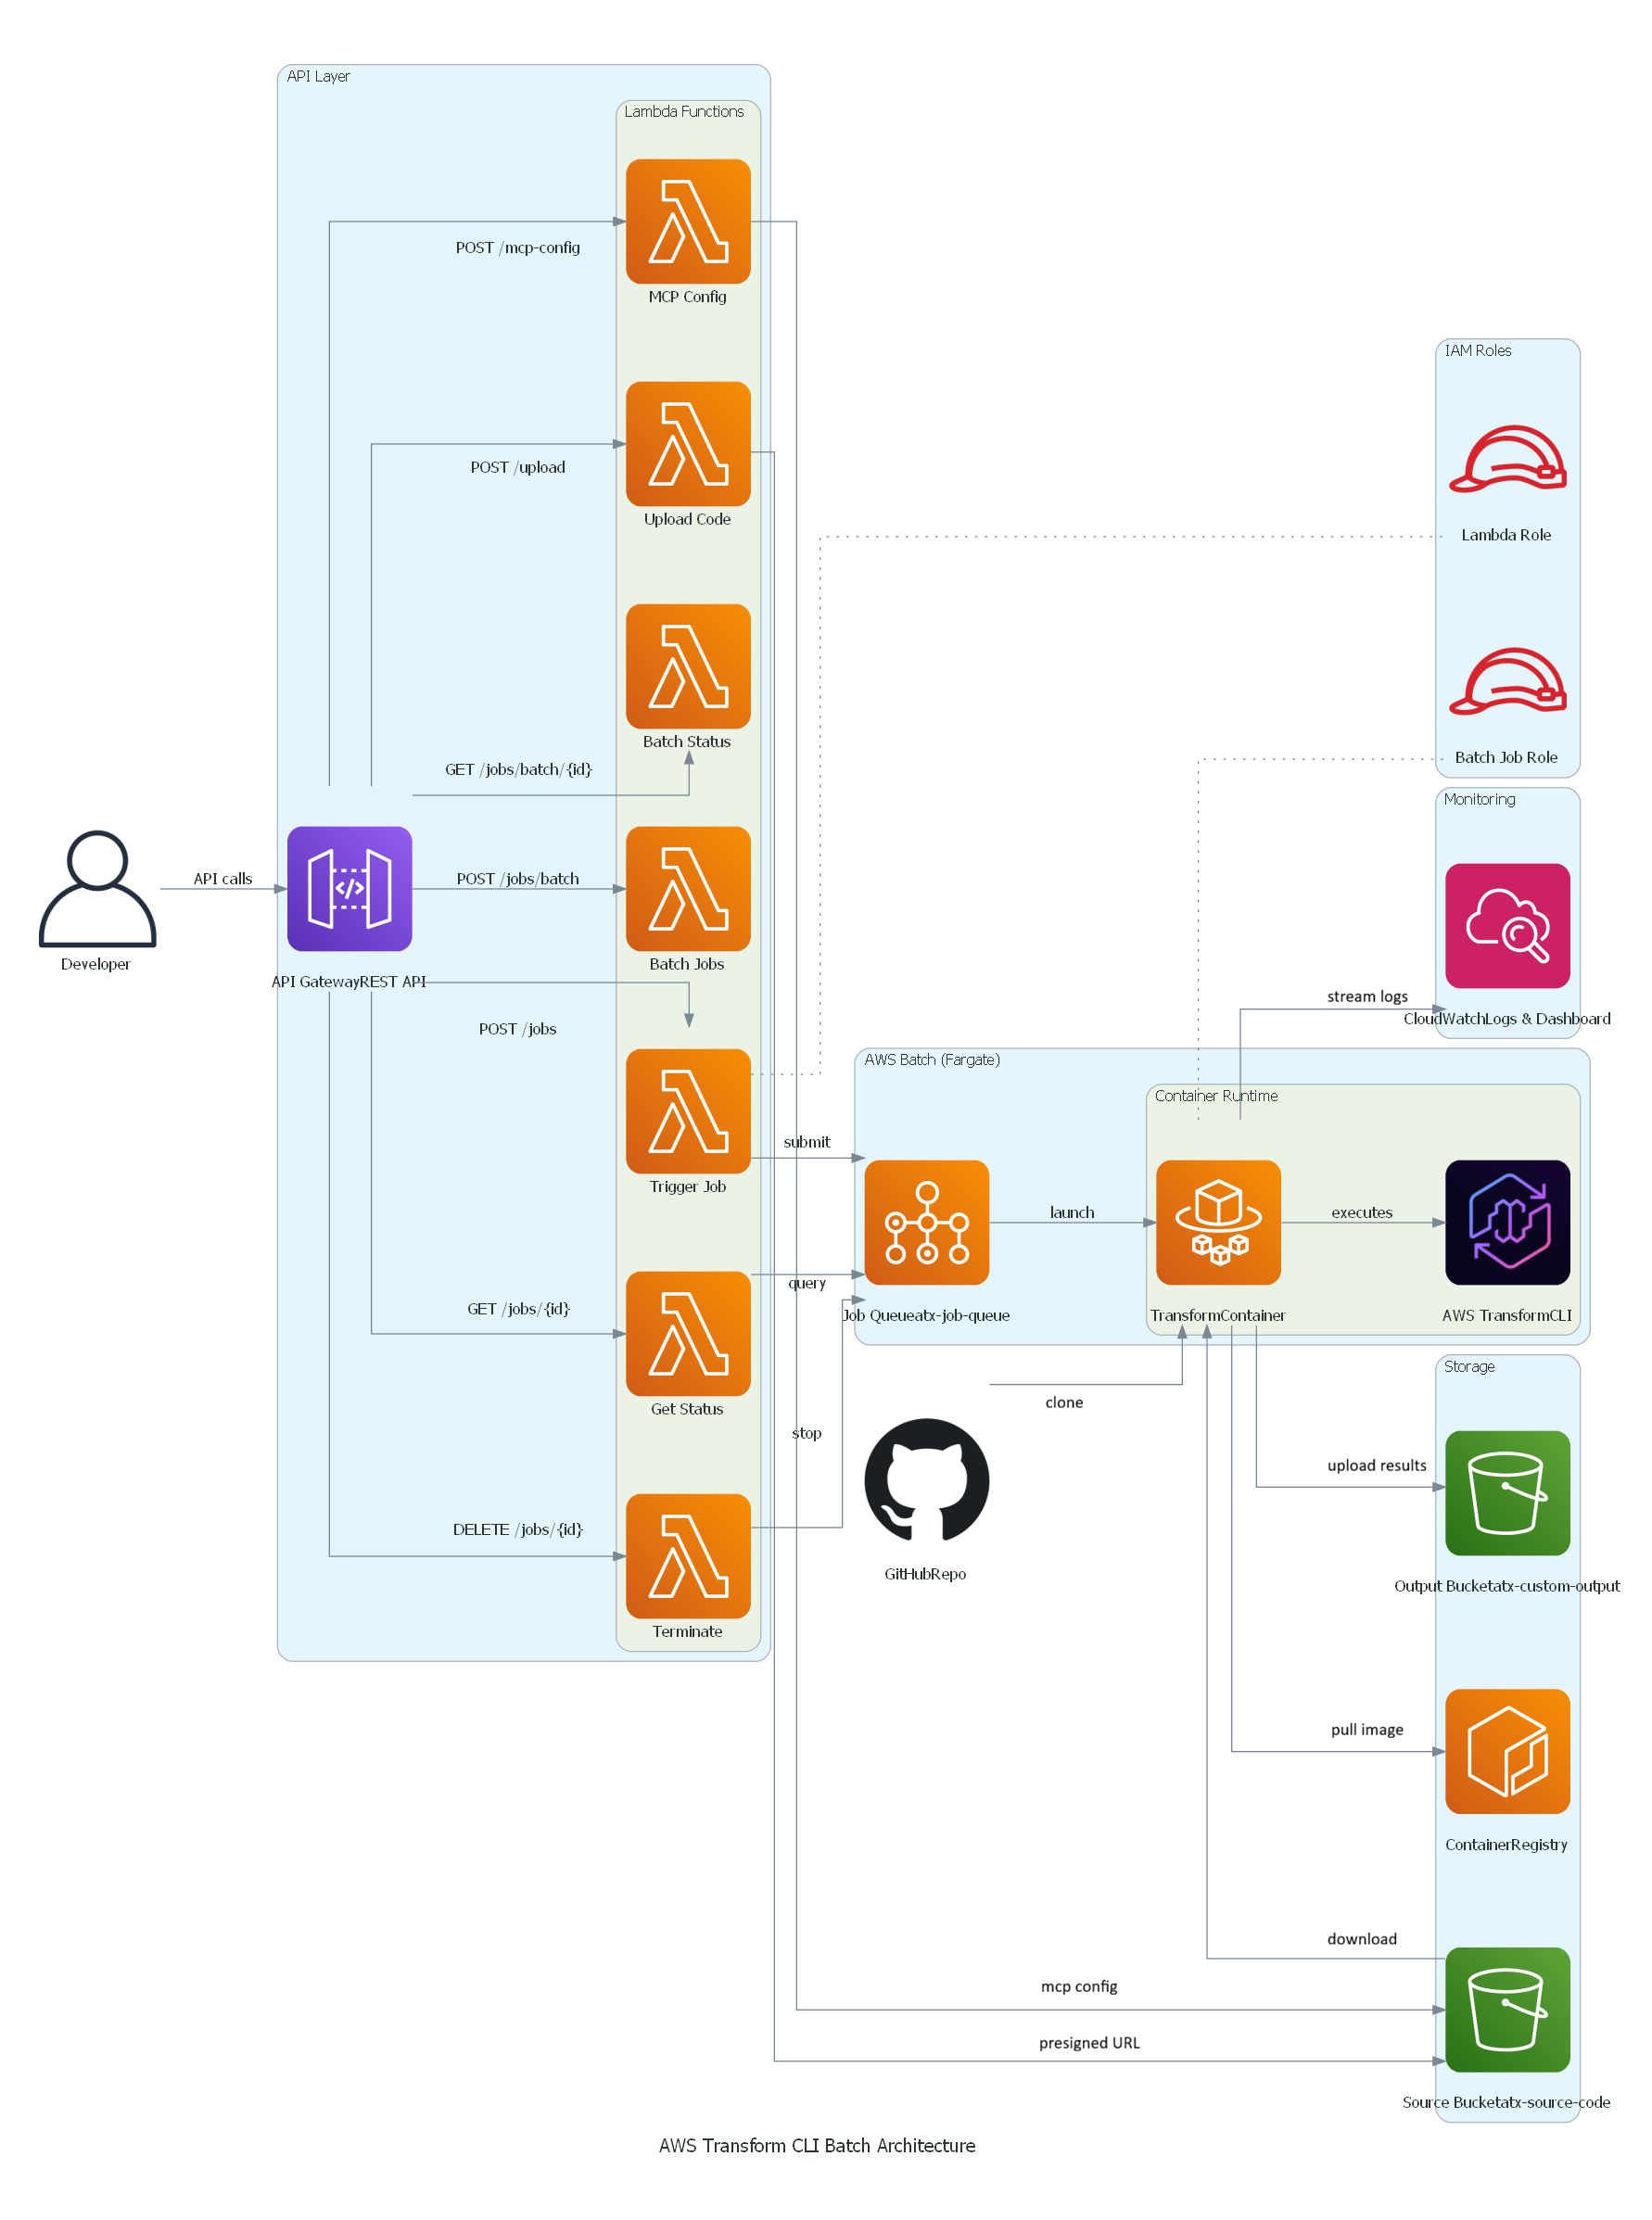
AWS Transform custom Batch solution architecture

Key Components:

  • API Gateway: REST API with IAM authentication
  • Lambda Functions: Job orchestration, status tracking, bulk submission
  • AWS Batch: Job queue and compute environment management
  • Fargate: Serverless container execution (no EC2 to manage)
  • S3: Source code input and transformation results output
  • CloudWatch: Logs, metrics, and operational dashboard

Getting Started

Prerequisites

Before deploying, ensure you have:

  • AWS Account with appropriate IAM permissions (ECR, S3, IAM, Batch, Lambda, API Gateway, CloudWatch)
  • AWS CLI v2 configured with credentials or AWS SSO login
  • Docker installed and running
  • Git for cloning the repository
  • Node.js 18+ and AWS CDK (for CDK deployment)
  • Python3for testing the APIs

Deployment Options

Option 1: CDK Deployment (Recommended)

Step 1: Clone the Repository

git clone https://github.com/aws-samples/aws-transform-custom-samples.git

cd aws-transform-custom-samples/scaled-execution-containers

Step 2: Set Environment Variables

export AWS_ACCOUNT_ID=$(aws sts get-caller-identity --query Account --output text)
export CDK_DEFAULT_ACCOUNT=$AWS_ACCOUNT_ID
export CDK_DEFAULT_REGION=us-east-1

Step 3: Verify prerequisites

This checks that Docker is installed and running, AWS CLI v2 is configured with credentials, Git is available, and your AWS account has the required VPC and public subnets.

cd deployment
chmod +x *.sh
./check-prereqs.sh

Step 4: Set up IAM Permissions (Optional, but recommended)

Generate a least-privilege IAM policy instead of using broad permissions:

./generate-custom-policy.sh

This creates iam-custom-policy.json with minimum permissions scoped to your specific resources.

Create and attach the policy:

aws iam create-policy \
  --policy-name ATXCustomDeploymentPolicy \
  --policy-document file://iam-custom-policy.json
aws iam attach-user-policy \
  --user-name YOUR_USERNAME \
  --policy-arn arn:aws:iam::$(aws sts get-caller-identity --query Account --output text):policy/ATXCustomDeploymentPolicy

Note: If you have administrator access, you can skip this step and proceed directly to deployment.

Step 5: Deploy with CDK (One Command Does Everything!)

cd ../cdk
chmod +x *.sh
./deploy.sh

Time: 20-25 minutes (all resources)

What CDK Does Automatically:

  1. Builds Docker image from Dockerfile
  2. Pushes image to ECR
  3. Creates all AWS resources
  4. Configures everything

What Gets Deployed:

  • ECR repository with Docker image
  • S3 buckets (output, source)
  • IAM roles with least-privilege
  • AWS Batch infrastructure (Fargate)
  • 7 Lambda functions
  • API Gateway REST API
  • CloudWatch logs and dashboard

See cdk/README.md for detailed instructions and configuration options.

Step 6: Get Your API Endpoint

After deployment completes, retrieve the API endpoint URL:

export API_ENDPOINT=$(aws cloudformation describe-stacks \
  --stack-name AtxApiStack \
  --query 'Stacks[0].Outputs[?OutputKey==`ApiEndpoint`].OutputValue' \
  --output text)

echo "API Endpoint: $API_ENDPOINT"

This endpoint is used in all subsequent API calls.

Option 2: Bash Scripts (Alternative)

If you prefer manual control over each deployment step or need to customize individual components, use the bash script deployment. See deployment/README.md for the complete 3-step process with detailed explanations of what each script deploys.

Using the Solution

Single Job Submission

Quick test: Run cd ../test && ./test-apis.sh to validate all API endpoints (MCP, transformations, bulk jobs, campaigns).

Submit a Python version upgrade transformation:

cd ..
python3 utilities/invoke-api.py \
  --endpoint "$API_ENDPOINT" \
  --path "/jobs" \
  --data '{
    "source": "https://github.com/venuvasu/todoapilambda",
    "command": "atx custom def exec -n AWS/python-version-upgrade -p /source/todoapilambda -c noop --configuration \"validationCommands=pytest,additionalPlanContext=The target Python version to upgrade to is Python 3.13. Python 3.13 is already installed at /usr/bin/python3.13\" -x -t"
  }'

This API call triggers a Python version upgrade transformation on the todoapilambda public git repository. The transformation uses the AWS Managed transformation to upgrade from the current Python version to Python 3.13. The configuration parameter specifies additional validation command to be run and plan context to specifies the location of python 3.13 installation in the container and the target version. The -x flag is for non-interactive mode of the transformation , and -t flag is to trust all tools for this transformation.

API returns a job ID for tracking. Job names are auto-generated from the source repository and transformation type.

See api/README.md for complete API documentation with examples for Java, Node.js, and other transformations.

Bulk Job Submission

Transform multiple repositories in a single API call:

python3 utilities/invoke-api.py \
  --endpoint "$API_ENDPOINT" \
  --path "/jobs/batch" \
  --data '{
    "batchName": "codebase-analysis-2025",
    "jobs": [
      {"source": "https://github.com/spring-projects/spring-petclinic", "command": "atx custom def exec -n AWS/early-access-comprehensive-codebase-analysis -p /source/spring-petclinic -x -t"},
      {"source": "https://github.com/venuvasu/todoapilambda", "command": "atx custom def exec -n AWS/early-access-comprehensive-codebase-analysis -p /source/todoapilambda -x -t"},
      {"source": "https://github.com/venuvasu/toapilambdanode16", "command": "atx custom def exec -n AWS/early-access-comprehensive-codebase-analysis -p /source/toapilambdanode16 -x -t"}
    ]
  }'

This API call triggers a deep static analysis of the codebase to generate hierarchical, cross-referenced documentation for three open source repositories in parallel. The transformation uses the AWS Managed transformation to generate behavioral analysis, architectural documentation, and business intelligence extraction to create a comprehensive knowledge base organized for maximum usability and navigation.

The API submits these jobs in a async manner. i.e the API returns a batch id upon submitting these jobs to AWS Batch. Then you can monitor the progress as specified below.

See api/README.md for status checking, MCP configuration, and other API endpoints.

Monitoring Progress

Check batch status:

python3 utilities/invoke-api.py \
  --endpoint "$API_ENDPOINT" \
  --method GET \
  --path "/jobs/batch/BATCH_ID"

Response shows real-time progress:

{
  "status": "RUNNING",
  "progress": 45.5,
  "totalJobs": 1000,
  "statusCounts": {
    "RUNNING": 195,
    "SUCCEEDED": 432,
    "FAILED": 23
  }
}

Viewing Results

After a job completes, the results are stored in your S3 output bucket.

S3 Output Structure:

Results are organized by job name and conversation ID:

s3://atx-custom-output-{account-id}/
└── transformations/
    └── {job-name}/                           # e.g., guava-early-access-comprehensive-codebase-analysis
        └── {timestamp}{conversation-id}/     # e.g., 20251227_051626_8f344f5f
            ├── code/                         # Full source code + transformed changes
            └── logs/                         # Execution logs and artifacts
                └── custom/
                    └── {timestamp}{conversation-id}/
                        └── artifacts/
                            └── validation_summary.md

Validation Summary:

AWS Transform CLI generates a validation summary showing all changes made:

s3://atx-custom-output-{account-id}/transformations/{job-name}/{timestamp}{conversation-id}/logs/custom/{timestamp}{conversation-id}/artifacts/validation_summary.md

This file contains:

  • Summary of all code changes
  • Files modified, added, or deleted
  • Validation results
  • Transformation statistics

Download Results:

# Download all results for a specific job
aws s3 sync s3://atx-custom-output-{account-id}/transformations/{job-name}/{timestamp}{conversation-id}/ ./local-results/

# Download just the validation summary
aws s3 cp s3://atx-custom-output-{account-id}/transformations/{job-name}/{timestamp}{conversation-id}/logs/custom/{timestamp}{conversation-id}/artifacts/validation_summary.md ./

# Download transformed code only
aws s3 sync s3://atx-custom-output-{account-id}/transformations/{job-name}/{timestamp}{conversation-id}/code/ ./transformed-code/

Monitoring and Observability

The solution includes a CloudWatch dashboard with operational metrics:

Job Tracking:

  • Completion rate with hourly trends (completed vs failed)
  • Recent jobs table showing job name, timestamp, last message, and log stream
  • Real-time visibility into job execution

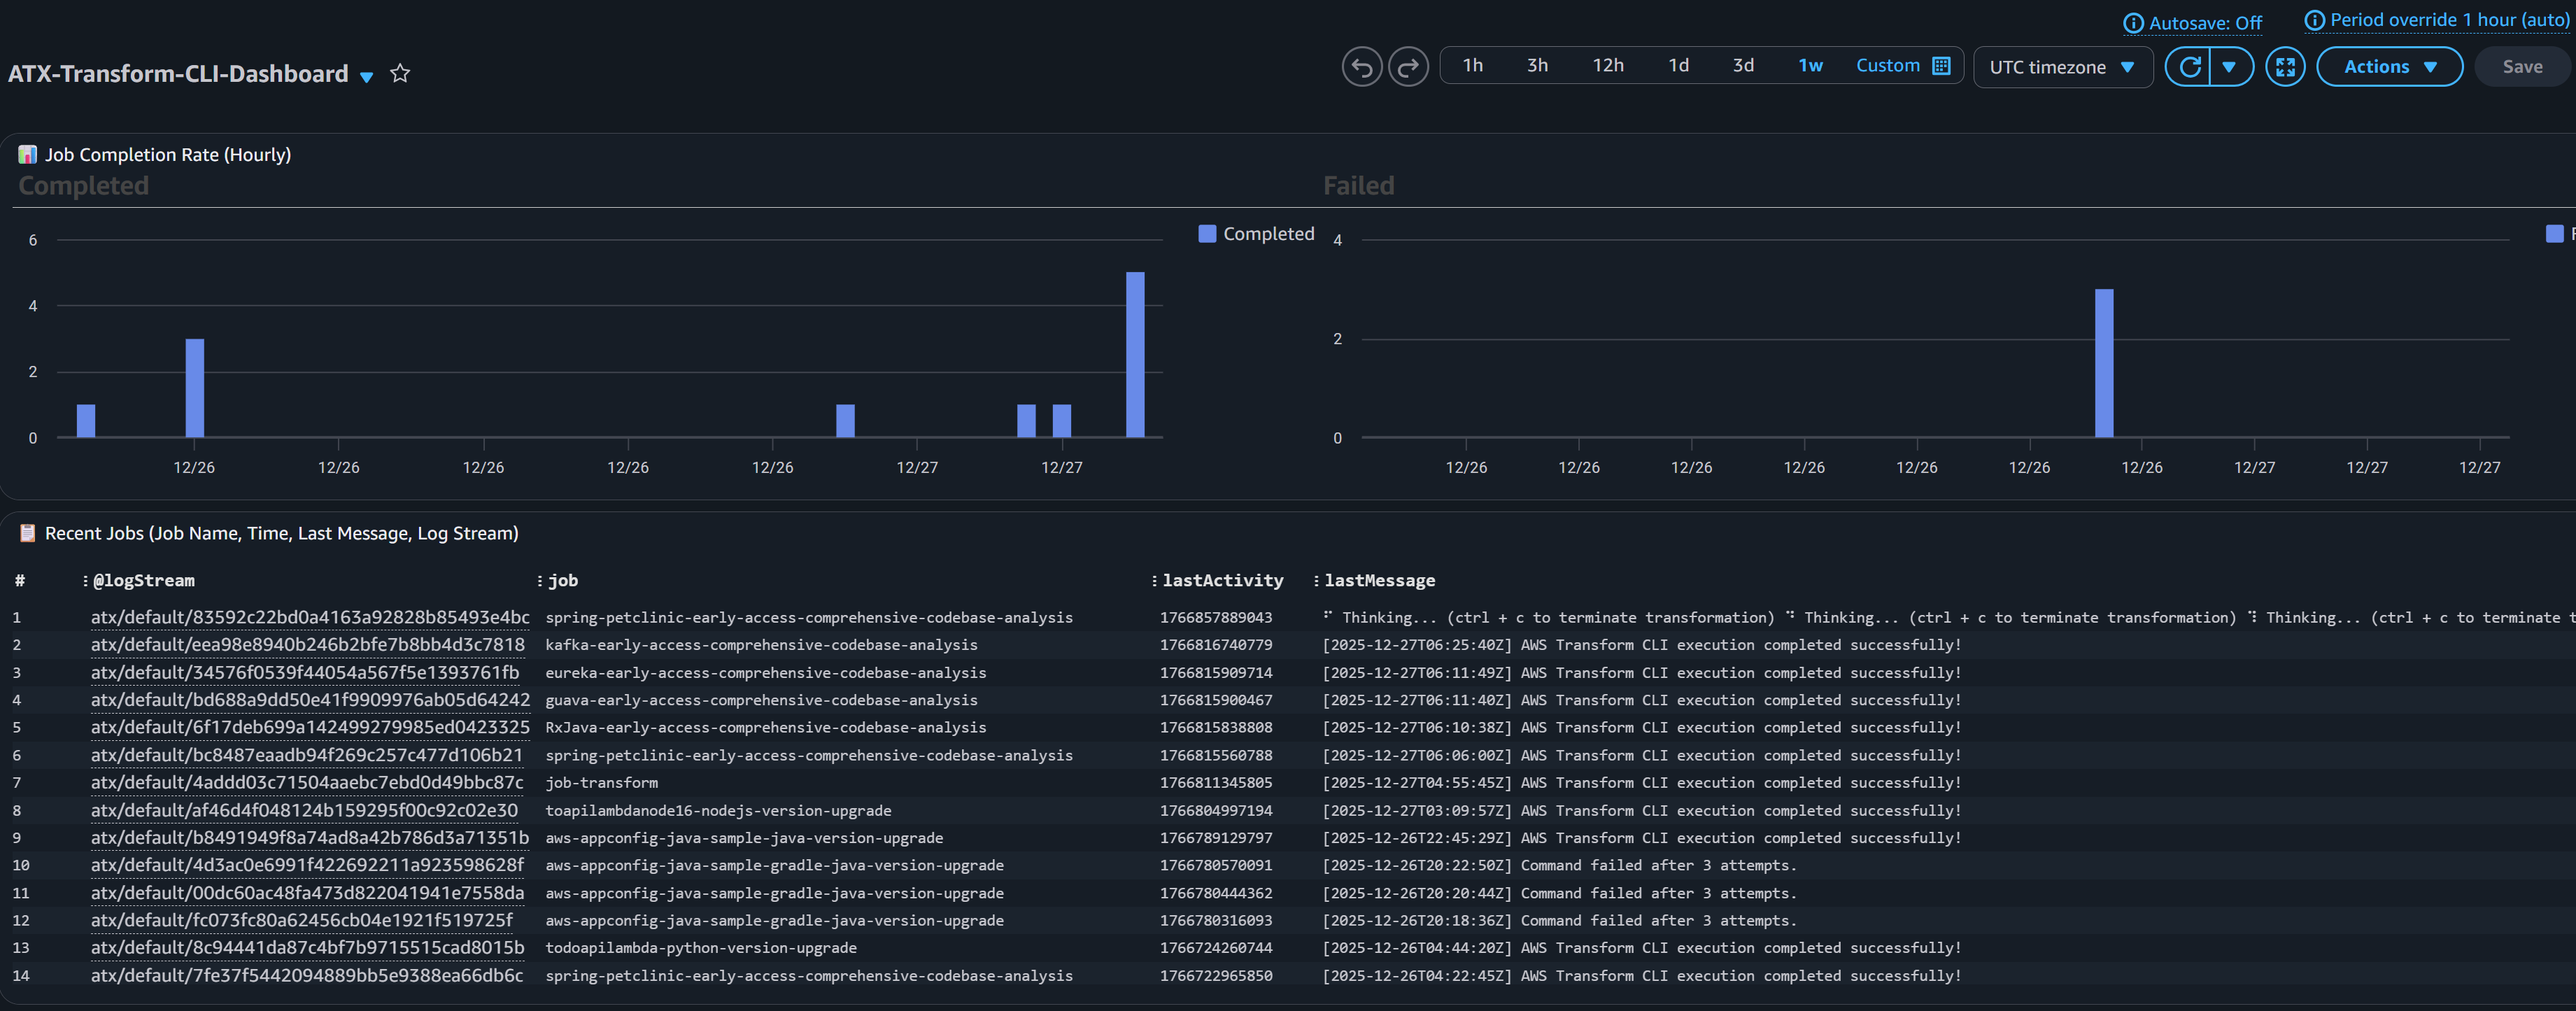
CloudWatch Dashboard screenshot for Job tracking

API and Lambda Health:

  • API Gateway request counts and error rates
  • Lambda invocation metrics per function
  • Performance monitoring (duration by function)

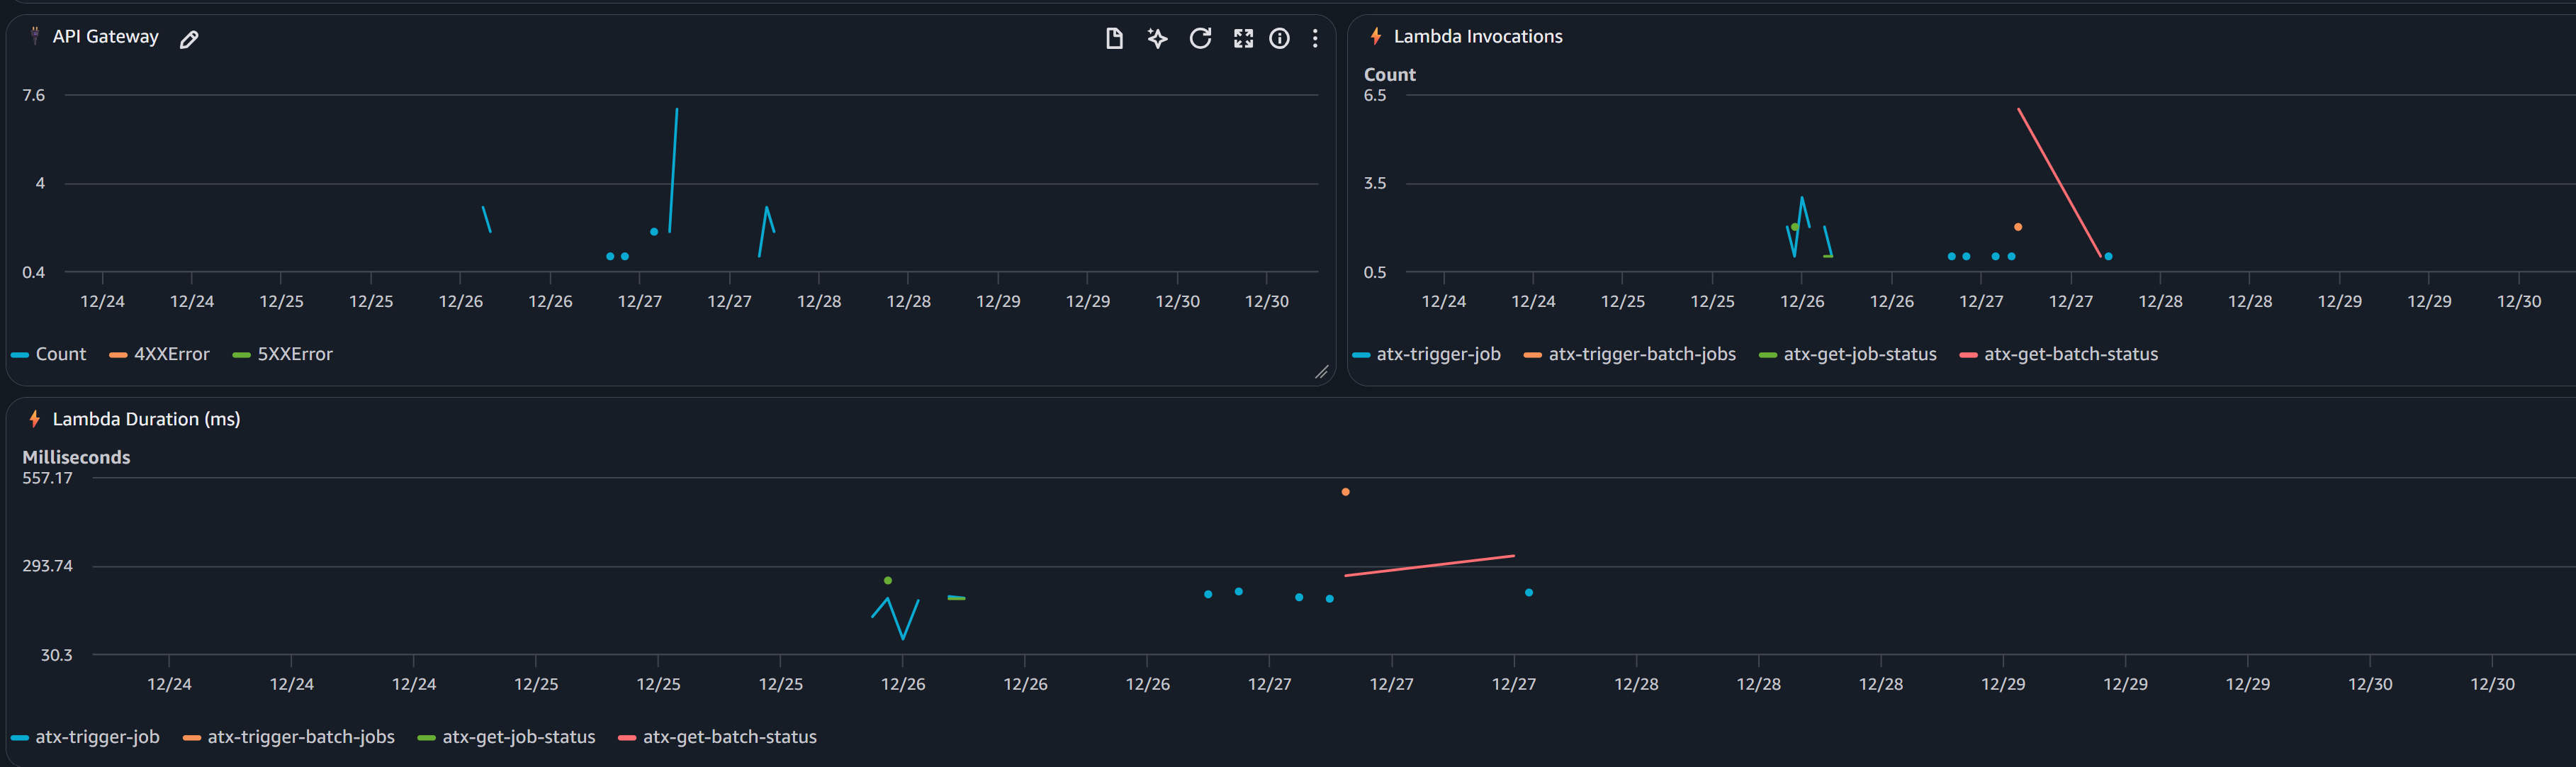
CloudWatch Dashboard screenshot for API and Lambda Health

CloudWatch Logs:

All logs are centralized in CloudWatch Logs (/aws/batch/atx-transform) with real-time streaming.

View logs via AWS CLI:

aws logs tail /aws/batch/atx-transform --follow --region us-east-1

Or use the included utility:

python3 utilities/tail-logs.py JOB_ID --region us-east-1

View in AWS Console: CloudWatch → Log Groups → /aws/batch/atx-transform

Model Context Protocol (MCP) Integration

AWS Transform custom supports Model Context Protocol (MCP) servers to extend the AI agent with additional tools. Configure MCP servers via API:

python3 utilities/invoke-api.py \
  --endpoint "$API_ENDPOINT" \
  --path "/mcp-config" \
  --data '{
    "mcpConfig": {
      "mcpServers": {
        "github": {"command": "npx", "args": ["-y", "@modelcontextprotocol/server-github"]},
        "fetch": {"command": "uvx", "args": ["mcp-server-fetch"]}
      }
    }
  }'

The configuration is stored in S3 and automatically available to all transformations. Test with atx mcp tools to list configured servers.

See api/README.md for status checking, MCP configuration, and other API endpoints.

Customization for Private Repositories

You may need to access private repositories and artifact registries. Extend the base container to add credentials:

To access your private Git repositories or artifact registries during transformations:

Two approaches:

  1. AWS Secrets Manager (RECOMMENDED) – Credentials fetched at runtime, never stored in image
  2. Hardcode in Dockerfile (NOT RECOMMENDED) – For testing only

Steps:

  1. Uncomment placeholders in container/entrypoint.sh (Secrets Manager) or container/Dockerfile (hardcoded)
  2. Redeploy container (see below)

See container/README.md for complete setup instructions, examples, and security best practices.

Redeploying after customization:

If using CDK:

cd cdk && ./deploy.sh

CDK automatically detects Dockerfile changes and rebuilds. If changes aren’t detected, force rebuild:

cd cdk && ./deploy.sh —force

If using bash scripts:

cd deployment
./1-build-and-push.sh --rebuild
./2-deploy-infrastructure.sh

The infrastructure will use your custom container with private repository access. You can also customize the container to add support for additional language versions or entirely new languages based on their specific requirements.

See container/README.md for complete examples.

Note: For automated PR creation and pushing changes back to remote repositories after transformation, you have two options: (1) extend container/entrypoint.sh with git commands using your private credentials (see commented placeholder in the script), or (2) use a custom Transformation definition with MCP configured to connect to GitHub/GitLab for more sophisticated PR workflows.

Campaigns

Central platform teams can create campaigns through the AWS Transform web interface to manage enterprise-wide migration and modernization projects. For instance, to upgrade all repositories from Java 8 to Java 21, teams create a campaign with the Java upgrade transformation definition and target repository list. As developers execute transformations, repositories automatically register with the campaign, enabling you to track progress and monitor across your organization.

Creating a Campaign

  1. Setup Users and Login to AWS Transform web application
  2. Create a Workspace and Create a Job
  3. In the chat, specify the type of the job . For example , “I would like comprehensive code analysis on multiple repos”
  4. Based on your request, AWS Transform will display the list of transformation that matches the criteria, in this case “AWS/early-access-comprehensive-codebase-analysis (Early Access)”
  5. Once you confirm the transformation, AWS Transform will create a campaign and a command to execute for the transformation. You can just copy that command and execute via the API as described below replacing the repo details.
atx custom def exec \
--code-repository-path <path-to-repo> \
--non-interactive \
--trust-all-tools \
--campaign 0d0c7e9f-5cb2-4569-8c81-7878def8e49e \
--repo-name <repo-name> \
--add-repo

Executing the Transformation in a Campaign

python3 utilities/invoke-api.py \
  --endpoint "$API_ENDPOINT" \
  --path "/jobs" \
  --data '{
    "source": "https://github.com/spring-projects/spring-petclinic",
    "command": "atx custom def exec --code-repository-path /source/spring-petclinic --non-interactive --trust-all-tools --campaign 0d0c7e9f-5cb2-4569-8c81-7878def8e49e --repo-name spring-petclinic --add-repo"
  }'

Once this transformation Job is successful, you can view the results and dashboard in Web application as well.

Cleanup

To remove all deployed resources:

CDK Cleanup (Recommended)

cd cdk ./destroy.sh

Bash Scripts Cleanup (Alternate)

cd deployment ./cleanup.sh

This script deletes:

  • AWS Batch resources (compute environment, job queue, job definitions)
  • Lambda functions and API Gateway
  • IAM roles
  • S3 buckets (after emptying)
  • CloudWatch logs and dashboard
  • ECR repository

Conclusion

Enterprise software modernization requires infrastructure that can operate at scale with reliability and observability. This solution provides a production-ready platform for running AWS Transform custom transformations on thousands of repositories concurrently.

By combining AWS Batch’s scalability, Fargate’s serverless compute, and a REST API for programmatic access, you can:

  • Accelerate modernization initiatives
  • Reduce manual effort and human error
  • Gain visibility into transformation progress
  • Integrate with existing DevOps workflows

The code repository is open-source, fully automated, and ready for you to deploy in your AWS account today.

Get started today with AWS Transform custom

About the authors

Profile image for Venugopalan Vasudevan

Venugopalan Vasudevan

Venugopalan Vasudevan (Venu) is a Senior Specialist Solutions Architect at AWS, where he leads Generative AI initiatives focused on Amazon Q Developer, Kiro, and AWS Transform. He helps customers adopt and scale AI-powered developer and modernization solutions to accelerate innovation and business outcomes.

Profile image for Dinesh Balaaji Prabakaran

Dinesh Balaaji Prabakaran

Dinesh is a Enterprise Support Lead at AWS who specializes in supporting Independent Software Vendors (ISVs) on their cloud journey. With expertise in AWS Generative AI Services, he helps customers leverage Amazon Q Developer, Kiro, and AWS Transform to accelerate application development and modernization through AI-powered assistance.

Profile image for Brent Everman

Brent Everman

Brent Everman is a Senior Technical Account Manager with AWS, based out of Pittsburgh. He has over 17 years of experience working with enterprise and startup customers. He is passionate about improving the software development experience and specializes in the AWS Next Generation Developer Experience services.

AWS Transform custom: AI-driven Java modernization to reduce tech debt

Post Syndicated from Dinesh Prabakaran original https://aws.amazon.com/blogs/devops/aws-transform-custom-ai-driven-java-modernization-to-reduce-tech-debt/

In today’s rapidly evolving software landscape, maintaining and modernizing Java applications is a critical challenge for many organizations. As new Java versions are released and best practices evolve, the need for efficient code transformation becomes increasingly important. Organizations today face significant challenges when modernizing their Java applications. Legacy codebases often contain outdated patterns, deprecated APIs, and inefficient implementations that hinder performance and maintainability. Traditional manual refactoring approaches are time-consuming, error-prone, and difficult to scale across large codebases. In addition, as developers spend more time on new development and deployment, the volume of technical debt continues to rise, requiring transformation of legacy code at-scale.

AWS Transform custom addresses these challenges through intelligent automation, providing AWS-managed transformations – standardized transformation packages for common scenarios like Java version upgrades. These transformations enable teams to achieve quick wins through standardized, tested transformation patterns that can be executed at scale, bringing significant time and cost savings to customers. In addition, customers can create custom user defined transformations to address technical debt with code transformations across languages, frameworks, and more.

This post explores how to leverage AWS Transform custom’s out-of-the-box transformation for Java upgrades. By the end of this post, you’ll understand how to use these standardized transformations to modernize your Java applications efficiently while maintaining full control over the transformation process.

Introduction to AWS Transform custom

AWS Transform custom uses agentic AI to automate large-scale code modernization, handling language version upgrades, API migrations, framework updates, and organization-specific transformations. Through continual learning, the agent improves from every execution and developer feedback, delivering high-quality, repeatable transformations without requiring specialized automation expertise.

Prerequisites

Before starting your Java modernization journey with AWS Transform custom, ensure you have the necessary development environment, build tools, and AWS Transform custom command line interface (CLI) installed. For detailed prerequisites and setup instructions, refer to the AWS Transform custom Prerequisites Guide.

Understanding the Modernization Scenario

We’ll demonstrate AWS Transform custom using a Movie Service application – a Spring Boot REST API built on Java 8 with Gradle. This represents a typical enterprise modernization challenge with legacy dependencies, outdated patterns, and technical debt.

Leveraging AWS-Managed Transformations

AWS Transform custom focuses on leveraging AWS-managed transformations designed for common modernization tasks like Java version upgrades.

AWS-managed transformations are pre-built, AWS-vetted transformations for common use cases that are ready to use without any additional setup. These transformations provide immediate value with minimal configuration, making them ideal for standard upgrade scenarios.

Understanding AWS Transform custom CLI Capabilities

AWS Transform custom provides a comprehensive command-line interface that enables both interactive and automated transformation workflows:

atx --version                    # Display ATX version
atx --help                       # Display general help
atx custom def list              # List transformation packages
atx                              # Start interactive conversation

For detailed information on all available commands, refer to the AWS Transform custom command reference.

Screenshot of AWS Transform custom interactive mode.
Figure 1:AWS Transform custom interactive mode

Discovering Available Transformations

Use atx custom def list to view all available transformations, including AWS-managed transformations and custom-defined (user-defined) transformations created by your organization. Key AWS-managed transformations include Java/Python/Node.js version upgrades and AWS SDK migrations.

Screenshot of AWS Transform interface displaying categorized lists of AWS Managed transformations and user-defined custom
transformations.
Figure 2: AWS Transform custom lists available AWS Managed and custom-defined (user-defined) transformations

Applying AWS-Managed Transformations

Before applying any transformations, ensure your project is initialized with Git and that all build and test cases are working correctly with Java 8 (Test cases can be skipped when necessary by using the appropriate build command option and instructions to the agent). For Gradle projects, verify that ./gradlew build executes successfully.

The transformation process follows a structured approach:

  1. Ensure Clean Git State:
git status
git add .
git commit -m "Baseline before Java 21 transformation"
  1. Apply Transformation: You can apply transformations using either interactive or direct command modes. In this blog, we will use the interactive mode to walk through the process step-by-step:

Interactive Mode (used in this blog):

First, create a config.json file with your transformation configuration:

{
  "codeRepositoryPath": "/path/to/your/aws-appconfig-java-sample-gradle",
  "transformationName": "AWS/java-version-upgrade",
  "buildCommand": "./gradlew clean build",
  "validationCommands": "build and validate using \"./gradlew clean build\" after transformation to test with java 21",
  "additionalPlanContext": "This is a Java 8 to 21 transformation of a gradle app , also include all dependency migration as well. Use java path /path/to/your/java-8/bin/java and /path/to/your/java-21/bin/java when building before and after transformation. We are using gradle wrapper gradlew, update it if needed for java 21 upgrade. Check for deprecated methods and dependencies and update them."
}

Update the codeRepositoryPath in your config.json to point to your local project directory and update the Java path in additionalPlanContext to match your Java 8 and 21 installation. For more details about configuration files and their parameters, refer to Using Configuration Files.

Then execute the transformation in interactive mode (used for this blog walkthrough):

For Java version upgrade with Gradle using config.json (Interactive Mode):
atx custom def exec -t --configuration file://config.json

Screenshot of AWS Transform interface displaying categorized lists of AWS Managed transformations and user-defined custom transformations.
Figure 3: AWS Transform custom execute a gradle transformation in interactive mode with transformation configuration supplied from config.json

Direct Command Mode (alternative approach): Use this mode for automated CI/CD pipelines or when you want to execute transformations without interactive prompts.

atx custom def exec -x -t --configuration “file://config.json”

Parameter explanation:

--configuration: Specifies the configuration file for interactive mode

-x: Executes the transformation automatically without interactive prompts (direct mode)

-t: Enables test mode for validation during execution (direct mode)

--configuration: Specifies the configuration file path with file://prefix (direct mode)

ATX Execution Command Executing AWS managed Java version upgrade transformation for Gradle project using ATX CLI

  1. Review Transformation Plan: AWS Transform custom analyzes your project based on the configuration provided in config.json and generates a comprehensive transformation plan. This plan details all proposed changes, including:
  • Java version updates: Migration from Java 8 to Java 21 configurations
  • API migration patterns: Automatic updates for deprecated APIs and modern alternatives
  • Framework modernization: Spring Boot version upgrades and compatibility updates
  • Dependency modifications: Updated library versions compatible with Java 21
  • Build system updates: Gradle configuration and plugin changes for Java 21 compatibility
  • Code pattern improvements: Implementation of modern Java features and best practices

We recommend doing a thorough review of the transformation plan to ensure it encompasses all expected updates. The additionalPlanContext in your config.json helps guide the transformation to include dependency migrations and Gradle wrapper updates. If adjustments are needed, provide feedback through the CLI interface.

Additionally, if you want to customize the transformation to target additional changes, for example upgrading additional legacy dependencies contained in the project, you can provide this as feedback when reviewing the transformation plan. AWS Transform custom incorporates all feedback provided to refine the transformation plan before proceeding.

  1. Apply the Transformation: After confirming the transformation plan meets your requirements, type proceed and press Enter. AWS Transform custom executes the transformation according to the approved plan.

The transformation process automatically:

– Creates a new branch and commits the transformed changes in there

– Updates Gradle configuration for Java 21

– Migrates Java EE to Jakarta EE packages (if applicable)

– Updates framework dependencies for Java 21 compatibility

– Applies all necessary code changes

– Updates test cases and testing frameworks for Java 21 compatibility

– Runs comprehensive validation builds

Results of AWS-Managed Transformations

After applying the Java version upgrade transformation, below changes are observed:

Configuration Updates: – Java version: 1.8 → 21 – Spring Boot version upgrades – Gradle plugin and configuration updates – Dependency version modernization

To validate the changes, switch to Java 21 and run ./gradlew build to ensure the transformation was successful, then test the application functionality.

Figure 4: displaying Updated Gradle Configuration Gradle build.gradle showing updated Java 21 configuration and modernized
dependencies
Figure 4: Updated Gradle Configuration Gradle build.gradle showing updated Java 21 configuration and modernized dependencies

Figure 5: Updated code where legacy pattern of raw types usage is transformed to generics
Figure 6: Second example of updated code where legacy pattern of raw types usage is transformed to generics
Figure 7: Updated dependency from javax.security to java.security and uses CertificateFactory to get X509Certificate
Figure 7: Updated dependency from javax.security to java.security and uses CertificateFactory to get X509Certificate
Figure 8: Updated Test cases from junit 4 to junit5

Beyond AWS-Managed Transformations: Custom-Defined Transformations

While AWS-managed transformations provide excellent coverage for standard Java modernization scenarios, there are cases where the available AWS-managed transformations may not address your specific transformation requirements. In such situations, AWS Transform custom enables users to create and test their own organization specific, custom-defined transformation definitions.

When to Create Custom-Defined Transformations

Custom-defined transformations become necessary when AWS-managed transformations don’t cover your specific needs, such as proprietary frameworks, organization-specific coding standards, or complex multi-step migration scenarios.

Creating Custom-Defined Transformations

AWS Transform custom enables teams to develop custom transformations using transformation rules and configuration files. This allows organizations to define transformation logic specific to their requirements, test on sample code, and share validated transformations across teams.

AWS Transform custom’s interactive mode (atx) is particularly beneficial for creating Custom-defined transformations, enabling conversational interaction to iteratively refine requirements and get real-time feedback. Custom-defined transformations provide flexibility to extend AWS Transform custom’s capabilities when AWS-managed transformations don’t meet specific modernization needs.

Continual Learning and Knowledge Items

AWS Transform custom automatically learns from each transformation execution to improve future results. For Java upgrades specifically, the service captures patterns like successful refactoring strategies, common dependency conflicts, and framework compatibility matrices across Java versions. This knowledge feeds back into future transformations, making them more accurate at predicting successful upgrade paths and reducing manual intervention.

Knowledge items are account-specific and remain within your AWS account boundaries. Users can enable or disable continual learning, providing full control over this preference.

Conclusion

In this blog, we demonstrated how AWS Transform custom enables efficient Java application modernization using AWS managed transformations. Starting with a legacy Movie Service application running Java 8 and Spring Boot 2.x, we successfully transformed it to Java 21 with modern dependencies and patterns.

The step-by-step process showed how to establish a baseline, discover available transformations using atx custom def list, and apply transformations through AWS Transform custom’s CLI. The result was a fully modernized application with updated Java versions, Spring Boot upgrades, and modern Java features like enhanced switch expressions and local variable type inference – all achieved in minutes rather than weeks of manual refactoring.

Beyond Java Modernization

Beyond Java modernization, AWS Transform custom’s transformation capabilities extend to other programming languages and frameworks, making it a versatile solution for comprehensive application portfolio modernization across diverse technology stacks. The agent supports diverse transformation use cases including:

  • Version upgrades for Java, Python, and Node.js
  • Runtime and API migrations (AWS SDK v1→v2, Boto2→Boto3)
  • Framework transitions and upgrades
  • Language translations and architectural changes
  • Organization-specific, custom-defined transformations

Through its define once, transform everywhere approach, AWS Transform custom enables organizations to capture and amplify transformation knowledge by defining transformations once and executing repeatable tasks across the entire organization. This reduces knowledge silos and ensures consistent quality regardless of team or project scope.

Getting Started

Ready to modernize your Java applications with AWS Transform custom? Here’s how to begin:

  1. Install AWS Transform custom CLI (atx) using the installation script and verify your environment
  2. Configure AWS credentials with transform-custom:* permissions
  3. Explore available AWS-managed transformations using atx custom def list
  4. Apply transformations to your Java applications using direct execution mode (atx custom def exec) or interactive mode (atx)
  5. Validate results through comprehensive testing with ./gradlew build for Gradle projects
  6. Scale across your application portfolio for consistent modernization

Additional Resources

For detailed setup instructions and documentation, visit:

Start your modernization journey today and experience the power of AI-driven code transformation at scale.

About the authors

Profile image for Venugopalan Vasudevan

Venugopalan Vasudevan

Venugopalan Vasudevan (Venu) is a Senior Specialist Solutions Architect at AWS, where he leads Generative AI initiatives focused on Amazon Q Developer, Kiro, and AWS Transform. He helps customers adopt and scale AI-powered developer and modernization solutions to accelerate innovation and business outcomes.

Profile image for Dinesh Balaaji Prabakaran

Dinesh Balaaji Prabakaran

Dinesh is a Enterprise Support Lead at AWS who specializes in supporting Independent Software Vendors (ISVs) on their cloud journey. With expertise in AWS Generative AI Services, he helps customers leverage Amazon Q Developer, Kiro, and AWS Transform to accelerate application development and modernization through AI-powered assistance.

Profile image for Sureshkumar Natarajan

Sureshkumar Natarajan

Sureshkumar Natarajan is a Senior Technical Account Manager at AWS, where he supports Enterprise customers in their cloud journey with a focus on Generative AI initiatives. He guides organizations in leveraging Amazon Q Developer, Kiro, and AWS Transform to unlock new capabilities, streamline development workflows, and achieve transformative business results.

Profile image for Anjan Dave

Anjan Dave

Anjan Dave is a Principal Solutions Architect at AWS with over 25 years of IT experience. He specializes in generative AI application modernization, infrastructure scalability, and developer productivity initiatives.
Anjan leads GenAI and modernization strategies across global projects, influencing technology roadmaps for HCM providers through event-driven and microservices architectures. He advocates for integrating Generative AI into the software development lifecycle to automate routine tasks, enabling engineering teams to focus on high-value architectural work.

Using Amazon Q Developer CLI for custom Java application transformations

Post Syndicated from Dinesh Prabakaran original https://aws.amazon.com/blogs/devops/using-amazon-q-developer-cli-for-custom-java-application-transformations/

In today’s rapidly evolving software landscape, maintaining and modernizing Java applications is a critical challenge for many organizations. As new Java versions are released and best practices evolve, the need for efficient code transformation becomes increasingly important. Amazon Q Developer transformation for Java using the Command Line Interface (CLI) presents a powerful alternative to integrated development environments (IDEs), offering unique advantages in scenarios requiring batch processing, CI/CD integration, headless environments, and custom automation workflows. By leveraging the CLI, development teams can perform consistent, scalable, and easily reproducible transformations across extensive codebases.

One key difference between CLI and IDE-based transformations lies in the standardization and customization capabilities. With CLI transformations, teams can define and enforce standardized transformation rules across the entire organization, ensuring consistency in code modernization efforts. This standardization is particularly valuable for large teams or distributed development environments. Additionally, the CLI approach allows for deeper customization of transformation rules, enabling teams to tailor the modernization process to their specific needs and coding standards. Whether updating deprecated APIs, migrating to newer Java versions, or enforcing coding standards, Amazon Q Developer’s CLI transformations provide a flexible and powerful solution.

This blog will explore how to use Amazon Q Developer’s CLI capabilities to create custom transformations for upgrading Java applications. We’ll dive into the process of defining transformation rules, executing them across your codebase, and demonstrate how to customize these transformations to meet specific requirements. By the end of this blog, you’ll have a clear understanding of how to leverage Amazon Q Developer’s CLI for Java transformations, enabling you to modernize your applications more efficiently and with greater control. You’ll be equipped to standardize your transformation processes across teams and projects while also customizing them to fit your unique requirements.

Pre-requisites

Before you begin a transformation, see the prerequisites for transformation on the command line with Amazon Q Developer.

Note: The Amazon Q Developer command line tool for transformation (qct cli) is distinct from the Amazon Q Developer CLI – while qct cli is specifically designed for code transformations, the Amazon Q Developer CLI provides features such as autocompletion, Amazon Q chat, inline ZShell completion, etc.

These pre-requisites ensure that you have all the necessary tools and permissions to use Amazon Q Developer’s CLI capabilities for custom transformations on your Java applications.

About the Application

This sample project will be used to demonstrate the Amazon Q Developer CLI code transformation feature in action. It’s a Java 1.8 based microservice application that displays a free list of movies for the month using configuration stored in AWS AppConfig service. Originally open sourced in 2020, it intentionally uses legacy versions of libraries (Spring Boot 2.x, Log4j 2.13.x, Mockito 1.x, Javax and Junit 4) to showcase the upgrade process. The application includes a dependency on another module built in both Java 1.8 and 17, specifically to demonstrate how post transformation steps can be used to modernize your application’s internal dependencies. You can download this sample project to experiment with the CLI upgrade feature in your own environment.

Overview

You will use Amazon Q Developer command line tool for transformation to perform custom transformations on a Java application. This will involve:

  1. Configure Amazon Q command line tool for transformation.
  2. Use pre-transformation template to identify unused imports and variables and remove them before transformation.
  3. After pre-transformation, upgrade the application to Java 17 to leverage the latest features.
  4. Use post transformation template to
    • Modify the POM file to point internal dependencies to the latest Java 17 or 21 (1p) version.
    • Modify your code to replace deprecated methods from internal dependencies.
    • Identify System.out.println statements and replace them with a proper logger framework.

Walkthrough

Setting up the transformation environment

First, ensure you have the Amazon Q command line tool for transformation installed. You can verify this by running:

which qct

Figure 1: Output of 'which qct' command showing the installation path of Amazon Q Developer CLI
Figure 1: which qct

If it’s not installed, follow the installation instructions in the Amazon Q Developer documentation.

Configuring Amazon Q command line tool and authenticate

Configure the Amazon Q command line tool for transformation by running the qct configure command:

qct configure

This command will:

  1. Prompt you to specify the JDK path for Java 8, 11, 17 and 21. You only need to specify the path to the JDK of the Java version you are upgrading.
  2. Two options are available for authentication
    • Option 1 authenticates with IAM credentials stored in your AWS CLI profile. Refer Figure 2.
    • Figure 2: Screenshot showing the Amazon Q Developer CLI authentication prompt using IAM credentials, displaying AWS profile selection options
    • Figure 2: qct configure – Authenticate with IAM
      • Provide the AWS CLI profile to use for the IAM authentication. You can specify a specific profile name or press enter to use the default profile.
      • Provide a file path that will point to a CSV file which will be used to add tags for your transformation (optional). The CSV must have two columns, with headers titled key and value, where tag key-value pairs are listed.
    • Option 2 authenticates with IDC (IAM Identity Center). Refer Figure 3.
    • Figure 3: Screenshot of Amazon Q Developer CLI configuration screen showing IAM Identity Center (IDC) authentication options and prompts
    • Figure 3: qct configure – Authenticate with IDC
      • Prompt you to provide the Start URL to authenticate to Amazon Q Developer Pro. The Start URL can be obtained from the console in the Q Developer > Settings.
      • Provide the AWS Region
  3. If you’re upgrading your code’s Java version, you have the option to receive your code suggestions from Amazon Q in one commit or multiple commits. Amazon Q will split the upgraded code into multiple commits by default. If you want all your code changes to appear in one commit, enter the letter ‘O’ for one commit when prompted.

For more information on how Amazon Q splits up the code changes, see Reviewing the transformation summary and accepting changes.

Customizing transformations

You can customize transformations by providing custom logic in the form of ast-grep rules that Amazon Q uses to make changes to your code.

To start with customization, create an Orchestrator file where you provide the paths to the custom transformation files. The Orchestrator file is a YAML file containing paths to custom pre-transformation and post-transformation files, which contain ast-grep rules that will run before and after transformation.

Here’s an example:

orchestrator_qct_cli.yaml

name: orchestrator_qct_cli
description: My collection of custom transformations to run before and after a transformation.

pre_qct_actions:
  ast-grep:
    rules:
      - custom-transformation-pre-qct.yaml

post_qct_actions:
  ast-grep:
    rules:
      - custom-transformation-post-qct.yaml

The pre-transformation rules file shown below is used to

  • Identify unused local variables declarations and remove them
  • Identify unused import declarations and remove them

This custom transformation cleans up unused local variable declarations and imports, helping in reducing the number of lines that will be considered for transformation as demonstrated in the following example:

custom-transformation-pre-qct.yaml

id: no-unused-vars
language: java
rule:
    kind: local_variable_declaration
    all:
        - has:
              has:
                  kind: identifier
                  pattern: $IDENT
        - not:
              precedes:
                  stopBy: end
                  has:
                      stopBy: end
                      any:
                          - { kind: identifier, pattern: $IDENT }
                          - { has: {kind: identifier, pattern: $IDENT, stopBy: end}}
fix: ''

--- # this is YAML doc separator to have multiple rules in one file

id: no-unused-imports
rule:
    kind: import_declaration
    all:
        - has:
            has:
                kind: identifier
                pattern: $IDENT
        - not:
            precedes:
                stopBy: end
                has:
                    stopBy: end
                    any:
                        - { kind: type_identifier, pattern: $IDENT }
                        - { has: {kind: type_identifier, pattern: $IDENT, stopBy: end}}
fix: ''

The post-transformation rules file serves multiple purposes and helps customers seamlessly upgrade their first-party (1P) dependencies after QCT transforms their application to Java 17 or 21:

  1. When your project uses internal AWS dependencies that have been upgraded to Java 17 or 21, these rules automatically update your POM file to use the latest compatible versions. This eliminates manual dependency version updates and resolves build errors related to private dependencies.
  2. After updating the POM file, the rules automatically modify your code to replace deprecated methods from internal dependencies with their latest supported versions, ensuring compatibility with the upgraded dependencies.
  3. The rules identify System.out.println statements and replace them with a proper logger framework, improving application observability.
    This automated approach significantly simplifies the migration process by handling both the application transformation and internal dependency updates in one streamlined operation.

These rules help modernize your codebase and ensure compatibility with updated dependencies.

custom-transformation-post-qct.yaml

id: update-movie-service-util-java17
language: html
rule:
    pattern: |-
        <dependency>
            <groupId>org.amazonaws.samples</groupId>
            <artifactId>movie-service-utils</artifactId>
            <version>$VERSION</version>
        </dependency>
constraints:
    VERSION:
        regex: "^0\\.1\\.0"
fix: |-
    <dependency>
        <groupId>org.amazonaws.samples</groupId>
        <artifactId>movie-service-utils</artifactId>
        <version>0.2.0</version>
    </dependency>

--- # this is YAML doc separator to have multiple rules in one file
id: update-movie-service-util-method
language: java
rule:
    pattern: |-
        MovieUtils.isValidMovieName($MOVIE_NAME)
fix: |-
    MovieUtils.isValidMovie($MOVIE_NAME, movieId)

--- # this is YAML doc separator to have multiple rules in one file
id: sysout-to-logger
language: java
rule:
    pattern: System.out.println($MATCH)
fix: logger.info($MATCH)

Both pre- and post-transformation enhances logging capabilities, increases configurability, improves error handling, and makes the application more production-ready, while the use of transformation rules automates the process, saving time and reducing errors in large codebases.

Executing the transformation

Now, run the transformation using the Amazon Q Developer CLI:

qct transform --source_folder <path-to-folder>
    --custom_transformation_file <path-to-orchestrator-file> 
    --target_version <your-target-java-version> 

Here,

–source_folder points to the path of the folder containing the Java application that needs to be transformed from version 8 to either 17 or 21.

–custom_transformation_file specifies the path to the orchestrator file (orchestrator_qct_cli.yaml).

–target_version refers to the target Java version to which the application will be transformed. It can be either JAVA_17 or JAVA_21.

If you have common requirements across all the applications you’re transforming, it’s better to store this file in a shared location and use an absolute path during transformation.

For applications with specific requirements, you can include the orchestrator file in the application’s codebase and use a relative path.

Once you execute the transform command if you choose to authenticate with IDC, it will prompt to authenticate providing a URL using the credentials set up in identity center that have access to Amazon Q Developer Pro:
Figure 4: Screenshot showing Amazon Q Developer CLI transform command prompting for IAM Identity Center authentication with a browser verification code
Figure 4: qct transform authentication with the IAM Identity provider

After logging in through the browser, verify if the code matches with the code in the CLI and approve access to Amazon Q Developer.

Once the request is approved – enter Y in the command line to proceed with transformation:

Before starting the transformation, the agent verifies if you have at least the minimum supported version of Maven for transformation

Figure 5: Screenshot of terminal output showing Amazon Q Developer CLI transform command execution, displaying pre-processing steps and transformation job initiation
Figure 5: qct transform starts with pre-processing followed with transformation job

First ast-grep command is run using the pre-transformation template before transformation and once it’s successful, the Q Developer transformation job begins.

Figure 6: Screenshot of terminal showing successful completion of Amazon Q Developer CLI transformation, displaying the newly created Git branch name containing the transformed code
Figure 6: qct transform completed with the results committed to a new branch

After the transformation is complete the changes are saved to a local branch and the branch name can be obtained from CLI output.

After successful transformation ast-grep post-transformation step is executed and the branch is updated with the custom transformed code.

Reviewing and applying the changes

After the transformation is complete, review the changes in the new branch that’s in the CLI output. Use “git branch” to view the new branch created with the transformed files.

git branch

Figure 7: Screenshot of terminal output from 'git branch' command highlighting the newly created branch containing the transformed code
Figure 7: git branch – shows the new branch containing transformation result

Now compare the transformed branch with the source branch in our case its change-branch.

git diff change-branch

Figure 8: Screenshot of Git diff output showing Spring Boot dependency version update from 2.0.5 to 3.3.8 in the project's POM file
Figure 8: Spring boot upgraded to 3.3.8 from 2.0.5

Figure 8: Screenshot of Git diff output showing Java version configuration change from 8 to 17 in the project's build configuration
Figure 9: Java upgraded from 8 to 17

You can see the application is upgraded to Java 17, Spring Boot upgraded to 3.3.0 form 2.0.5, and the internal dependency movie-service-utils upgraded to 0.2.0 version to support Java 17.

Figure 10: Screenshot of Git diff output showing two code changes: removal of unused variables and replacement of System.out.println statements with logger.info calls
Figure 10: Unused variable removed also System.out.println replaced with Logging framework

Figure 11: Screenshot of Git diff output highlighting the removal of unused Java import statements from the source code
Figure 11: Unused imports removed

Figure 12: Screenshot of Git diff output showing MovieUtils.isValidMovie method signature change with updated parameters to align with new dependency version
Figure 12: MobieUtils.isValidMovie method updated to match the updated internal dependency

During pre-transformation

  • Unused local variables are identified and removed from the code.
  • Unused imports are identified and removed

During post-transformation

  • Using custom transformation, the sysout statements are replaced with logger framework.
  • The internal dependency MovieUtils.isValidMovieName method is updated with the required parameters that are required for the latest version using custom post transformation template.

Other changes of the Java 8 to 17 transformation are mentioned here.

Pre-transformation, transformation, and post-transformation changes are committed separately to help users compare differences and identify changes made in each step.

If you’re satisfied with the results, you can create a pull request from the branch which contains the transformed code to your corresponding release branch.

Troubleshooting

When working with Amazon Q Developer CLI transformations, you might encounter some common issues. Here’s how to address them:

  • Unstaged Git Commits
  • Before running a transformation, make sure to stash or commit any pending changes to your local branch. This ensures a clean working directory for the transformation process.
  • Clearing the Working Directory
  • If a transformation fails, clear the workspace located at ~/.aws/qcodetransform/transformation_projects/<your project name> before retrying the transformation. This step is only necessary for failed transformations.

Clean up

To clean up after the transformation:

  • Remove the user or group access to the Amazon Q Developer Pro application
  • Unsubscribe from Amazon Q Developer Pro

Call to Action

Ready to modernize your Java applications? Here’s how to get started:

Conclusion

Using Amazon Q Developer’s CLI capabilities for custom transformations provides a powerful and flexible way to upgrade Java applications. This approach allows you to automate the modernization process, saving time and reducing the risk of manual errors.

By leveraging custom rules, you can tailor the transformation to your specific needs, whether it’s updating deprecated methods, migrating to new APIs, or applying best practices across your codebase.

As you continue to work with Amazon Q Developer, explore more advanced transformation scenarios and integrate this process into your development workflow for ongoing modernization efforts.

About the authors

Profile image for Dinesh Balaaji Prabakaran

Dinesh Balaaji Prabakaran

Dinesh is a Senior Technical Account Manager at AWS based in Richmond, VA. He specializes in supporting Independent Software Vendors (ISVs) on the AWS platform. His expertise includes AWS Generative AI Services, AWS Storage solutions, and architecting event-driven serverless solutions on AWS.

Profile image for Venugopalan Vasudevan

Venugopalan Vasudevan

Venugopalan is a Senior Specialist Solutions Architect at Amazon Web Services (AWS), where he specializes in AWS Generative AI services. His expertise lies in helping customers leverage cutting-edge services like Amazon Q, and Amazon Bedrock to streamline development processes, accelerate innovation, and drive digital transformation.

Profile image for Anita Srivastava

Anita Srivastava

Anita Srivastava is a Partner Solutions Architect at Amazon Web Services. She works with a leading Global System Integrator (GSI) to provide architectural guidance and support them in building strategic industry solutions on AWS.