Post Syndicated from Eduardo Monich Fronza original https://aws.amazon.com/blogs/architecture/deploying-ibm-cloud-pak-for-data-on-red-hat-openshift-service-on-aws/
Amazon Web Services (AWS) customers who are looking for a more intuitive way to deploy and use IBM Cloud Pak for Data (CP4D) on the AWS Cloud, can now use the Red Hat OpenShift Service on AWS (ROSA).
ROSA is a fully managed service, jointly supported by AWS and Red Hat. It is managed by Red Hat Site Reliability Engineers and provides a pay-as-you-go pricing model, as well as a unified billing experience on AWS.
With this, customers do not manage the lifecycle of Red Hat OpenShift Container Platform clusters. Instead, they are free to focus on developing new solutions and innovating faster, using IBM’s integrated data and artificial intelligence platform on AWS, to differentiate their business and meet their ever-changing enterprise needs.
CP4D can also be deployed from the AWS Marketplace with self-managed OpenShift clusters. This is ideal for customers with requirements, like Red Hat OpenShift Data Foundation software defined storage, or who prefer to manage their OpenShift clusters.
In this post, we discuss how to deploy CP4D on ROSA using IBM-provided Terraform automation.
Cloud Pak for data architecture
Here, we install CP4D in a highly available ROSA cluster across three availability zones (AZs); with three master nodes, three infrastructure nodes, and three worker nodes.
Review the AWS Regions and Availability Zones documentation and the regions where ROSA is available to choose the best region for your deployment.
This is a public ROSA cluster, accessible from the internet via port 443. When deploying CP4D in your AWS account, consider using a private cluster (Figure 1).

Figure 1. IBM Cloud Pak for Data on ROSA
We are using Amazon Elastic Block Store (Amazon EBS) and Amazon Elastic File System (Amazon EFS) for the cluster’s persistent storage. Review the IBM documentation for information about supported storage options.
Review the AWS prerequisites for ROSA, and follow the Security best practices in IAM documentation to protect your AWS account before deploying CP4D.
Cost
The costs associated with using AWS services when deploying CP4D in your AWS account can be estimated on the pricing pages for the services used.
Prerequisites
This blog assumes familiarity with: CP4D, Terraform, Amazon Elastic Compute Cloud (Amazon EC2), Amazon EBS, Amazon EFS, Amazon Virtual Private Cloud, and AWS Identity and Access Management (IAM).
You will need the following before getting started:
- Access to an AWS account, with permissions to create the resources described in the installation steps section.
- An AWS IAM user, with the permissions described in the AWS prerequisites for ROSA documentation.
- Sufficient AWS service quotas to deploy ROSA. You can request service-quota increases from the AWS console.
- An IBM entitlement API key: either a 60-day trial or an existing entitlement.
- A bastion host to run the CP4D installer, with the following packages:
- AWS Command Line Interface (aws cli)
- OpenShift command-line interface (oc)
- Kubernetes command-line tool (kubectl)
- Terraform
- Git
- Podman
- Python 3.8
- httpd-tools, jq, wget, vim, unzip
Installation steps
Complete the following steps to deploy CP4D on ROSA:
- First, enable ROSA on the AWS account. From the AWS ROSA console, click on Enable ROSA, as in Figure 2.

Figure 2. Enabling ROSA on your AWS account
- Click on Get started. Redirect to the Red Hat website, where you can register and obtain a Red Hat ROSA token.
- Navigate to the AWS IAM console. Create an IAM policy named cp4d-installer-policy and add the following permissions:
{ "Version": "2012-10-17", "Statement": [ { "Effect": "Allow", "Action": [ "autoscaling:*", "cloudformation:*", "cloudwatch:*", "ec2:*", "elasticfilesystem:*", "elasticloadbalancing:*", "events:*", "iam:*", "kms:*", "logs:*", "route53:*", "s3:*", "servicequotas:GetRequestedServiceQuotaChange", "servicequotas:GetServiceQuota", "servicequotas:ListServices", "servicequotas:ListServiceQuotas", "servicequotas:RequestServiceQuotaIncrease", "sts:*", "support:*", "tag:*" ], "Resource": "*" } ] } - Next, let’s create an IAM user from the AWS IAM console, which will be used for the CP4D installation:
a. Specify a name, like ibm-cp4d-bastion.
b. Set the credential type to Access key – Programmatic access.
c. Attach the IAM policy created in Step 3.
d. Download the .csv credentials file. - From the Amazon EC2 console, create a new EC2 key pair and download the private key.
- Launch an Amazon EC2 instance from which the CP4D installer is launched:
a. Specify a name, like ibm-cp4d-bastion.
b. Select an instance type, such as t3.medium.
c. Select the EC2 key pair created in Step 4.
d. Select the Red Hat Enterprise Linux 8 (HVM), SSD Volume Type for 64-bit (x86) Amazon Machine Image.
e. Create a security group with an inbound rule that allows connection. Restrict access to your own IP address or an IP range from your organization.
f. Leave all other values as default. - Connect to the EC2 instance via SSH using its public IP address. The remaining installation steps will be initiated from it.
- Install the required packages:
$ sudo yum update -y $ sudo yum install git unzip vim wget httpd-tools python38 -y $ sudo ln -s /usr/bin/python3 /usr/bin/python $ sudo ln -s /usr/bin/pip3 /usr/bin/pip $ sudo pip install pyyaml $ curl "https://awscli.amazonaws.com/awscli-exe-linux-x86_64.zip" -o "awscliv2.zip" $ unzip awscliv2.zip $ sudo ./aws/install $ wget "https://github.com/stedolan/jq/releases/download/jq-1.6/jq-linux64" $ chmod +x jq-linux64 $ sudo mv jq-linux64 /usr/local/bin/jq $ wget "https://mirror.openshift.com/pub/openshift-v4/clients/ocp/4.10.15/openshift-client-linux-4.10.15.tar.gz" $ tar -xvf openshift-client-linux-4.10.15.tar.gz $ chmod u+x oc kubectl $ sudo mv oc /usr/local/bin $ sudo mv kubectl /usr/local/bin $ sudo yum install -y yum-utils $ sudo yum-config-manager --add-repo $ https://rpm.releases.hashicorp.com/RHEL/hashicorp.repo $ sudo yum -y install terraform $ sudo subscription-manager repos --enable=rhel-7-server-extras-rpms $ sudo yum install -y podman - Configure the AWS CLI with the IAM user credentials from Step 4 and the desired AWS region to install CP4D:
$ aws configure AWS Access Key ID [None]: AK****************7Q AWS Secret Access Key [None]: vb************************************Fb Default region name [None]: eu-west-1 Default output format [None]: json - Clone the following IBM GitHub repository:
https://github.com/IBM/cp4d-deployment.git$ cd ~/cp4d-deployment/managed-openshift/aws/terraform/ - For the purpose of this post, we enabled Watson Machine Learning, Watson Studio, and Db2 OLTP services on CP4D. Use the example in this step to create a Terraform variables file for CP4D installation. Enable CP4D services required for your use case:
region = "eu-west-1" tenancy = "default" access_key_id = "your_AWS_Access_key_id" secret_access_key = "your_AWS_Secret_access_key" new_or_existing_vpc_subnet = "new" az = "multi_zone" availability_zone1 = "eu-west-1a" availability_zone2 = "eu-west-1b" availability_zone3 = "eu-west-1c" vpc_cidr = "10.0.0.0/16" public_subnet_cidr1 = "10.0.0.0/20" public_subnet_cidr2 = "10.0.16.0/20" public_subnet_cidr3 = "10.0.32.0/20" private_subnet_cidr1 = "10.0.128.0/20" private_subnet_cidr2 = "10.0.144.0/20" private_subnet_cidr3 = "10.0.160.0/20" openshift_version = "4.10.15" cluster_name = "your_ROSA_cluster_name" rosa_token = "your_ROSA_token" worker_machine_type = "m5.4xlarge" worker_machine_count = 3 private_cluster = false cluster_network_cidr = "10.128.0.0/14" cluster_network_host_prefix = 23 service_network_cidr = "172.30.0.0/16" storage_option = "efs-ebs" ocs = { "enable" : "false", "ocs_instance_type" : "m5.4xlarge" } efs = { "enable" : "true" } accept_cpd_license = "accept" cpd_external_registry = "cp.icr.io" cpd_external_username = "cp" cpd_api_key = "your_IBM_API_Key" cpd_version = "4.5.0" cpd_namespace = "zen" cpd_platform = "yes" watson_knowledge_catalog = "no" data_virtualization = "no" analytics_engine = "no" watson_studio = "yes" watson_machine_learning = "yes" watson_ai_openscale = "no" spss_modeler = "no" cognos_dashboard_embedded = "no" datastage = "no" db2_warehouse = "no" db2_oltp = "yes" cognos_analytics = "no" master_data_management = "no" decision_optimization = "no" bigsql = "no" planning_analytics = "no" db2_aaservice = "no" watson_assistant = "no" watson_discovery = "no" openpages = "no" data_management_console = "no" - Save your file, and launch the commands below to install CP4D and track progress:
$ terraform init -input=false $ terraform apply --var-file=cp4d-rosa-3az-new-vpc.tfvars \ -input=false | tee terraform.log - The installation runs for 4 or more hours. Once installation is complete, the output includes (as in Figure 3):
a. Commands to get the CP4D URL and the admin user password
b. CP4D admin user
c. Login command for the ROSA cluster


Figure 3. CP4D installation output
Validation steps
Let’s verify the installation!
- Log in to your ROSA cluster using your cluster-admin credentials.
$ oc login https://api.cp4dblog.17e7.p1.openshiftapps.com:6443 --username cluster-admin --password *****-*****-*****-***** - Initiate the following command to get the cluster’s console URL (Figure 4):
$ oc whoami --show-console
Figure 4. ROSA console URL
- Run the commands in this step to retrieve the CP4D URL and admin user password (Figure 5).
$ oc extract secret/admin-user-details \
  --keys=initial_admin_password --to=- -n zen
$ oc get routes -n zen
Figure 5. Retrieve the CP4D admin user password and URL
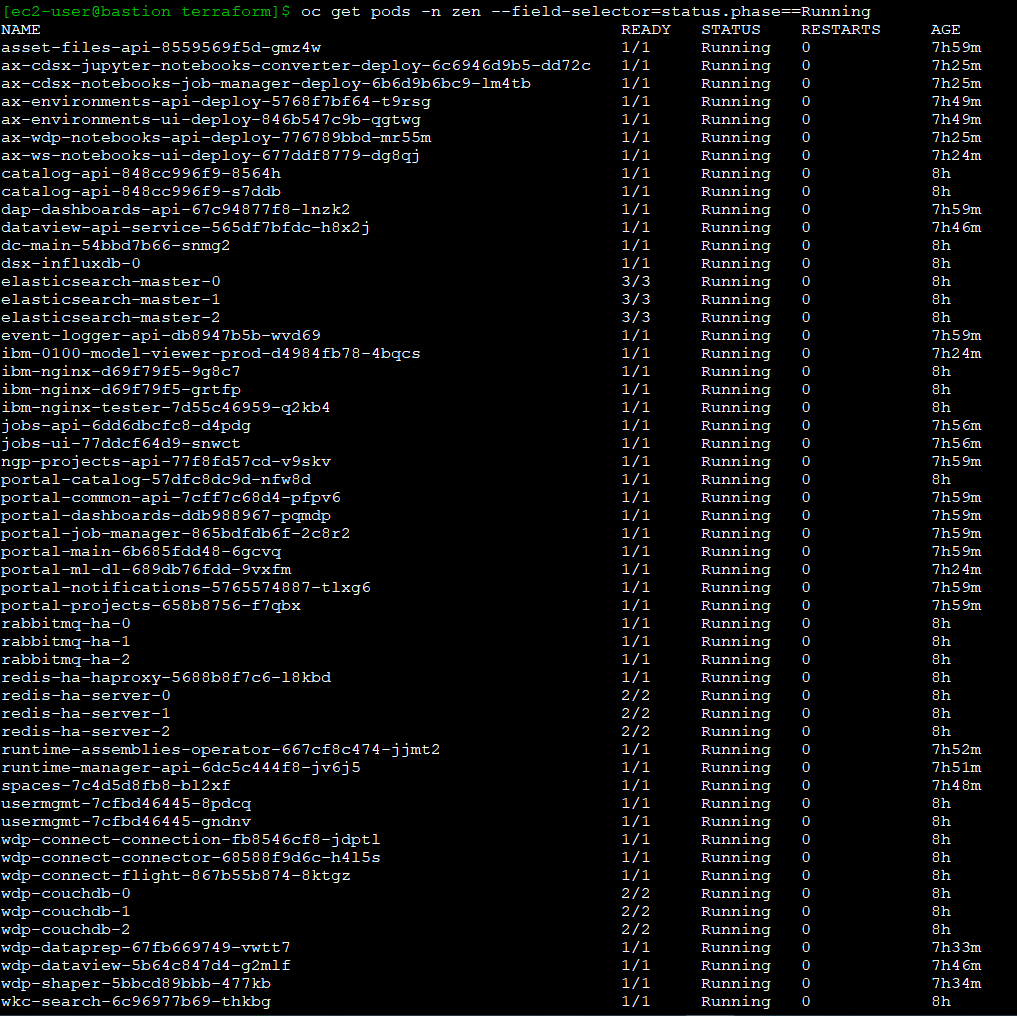
- Initiate the following commands to have the CP4D workloads in your ROSA cluster (Figure 6):
$ oc get pods -n zen
$ oc get deployments -n zen
$ oc get svc -n zen
$ oc get pods -n ibm-common-services
$ oc get deployments -n ibm-common-services
$ oc get svc -n ibm-common-services
$ oc get subs -n ibm-common-services
Figure 6. Checking the CP4D pods running on ROSA
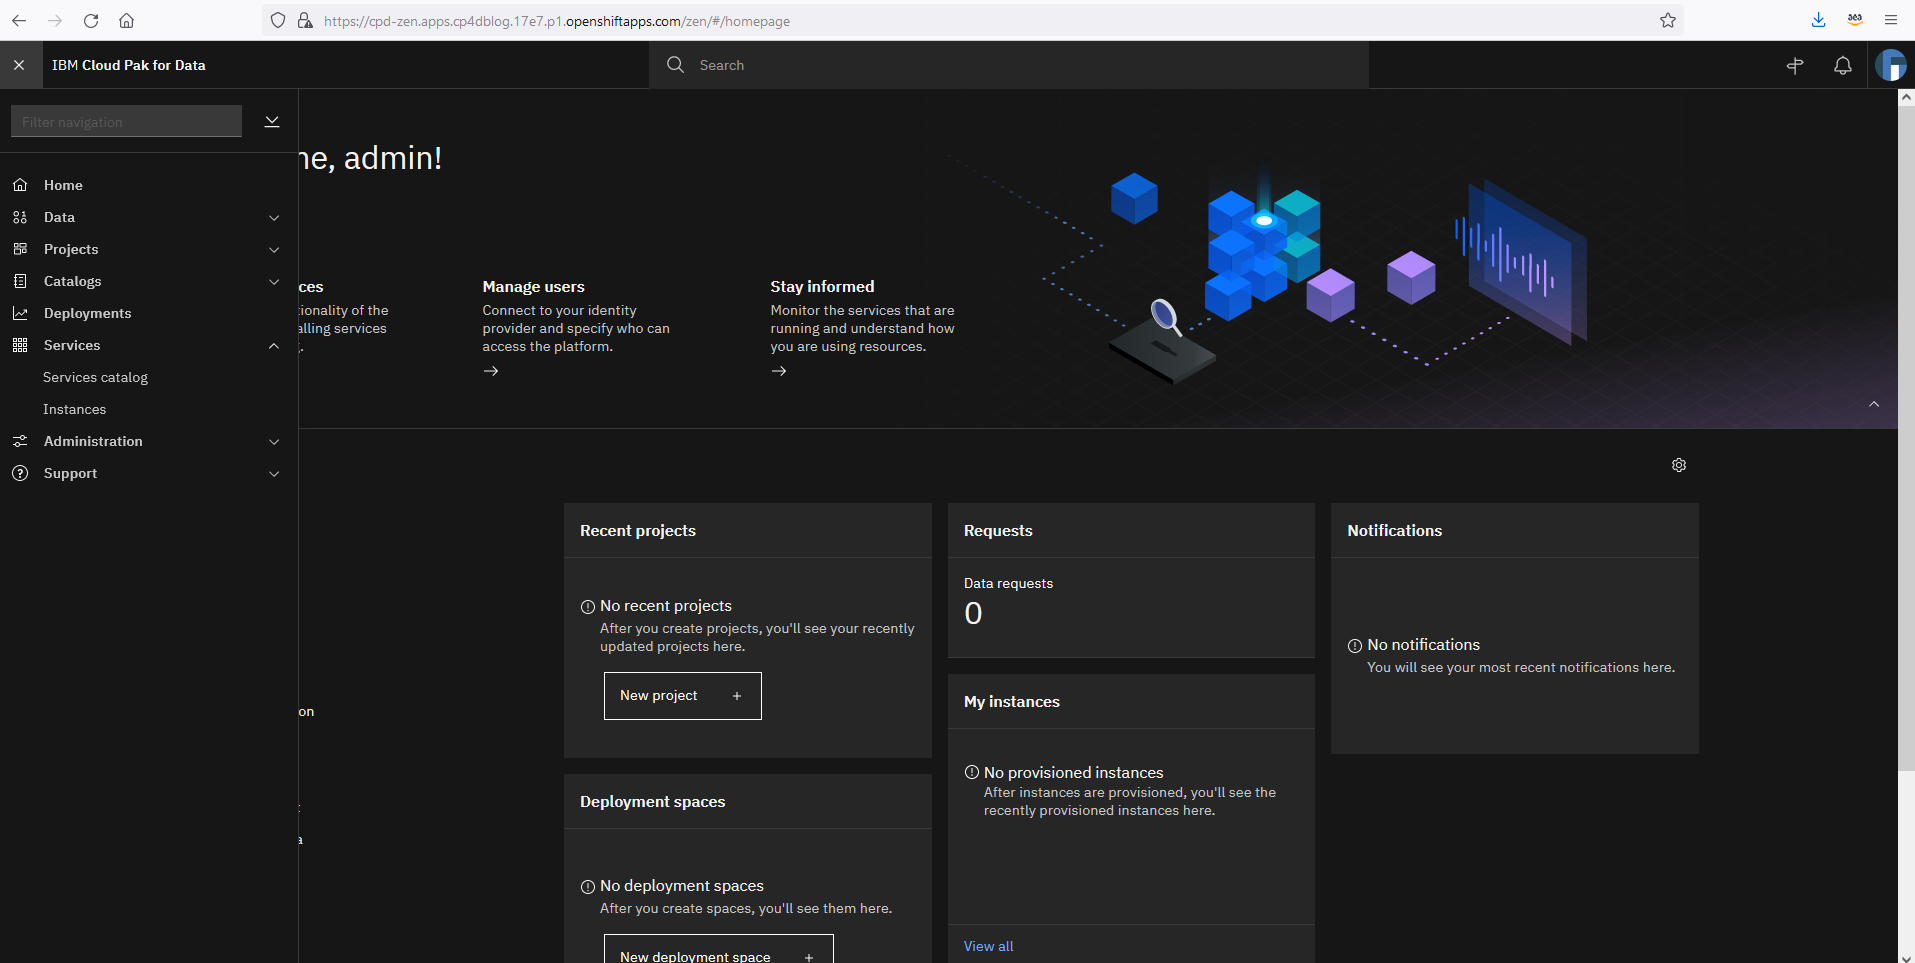
- Log in to your CP4D web console using its URL and your admin password.
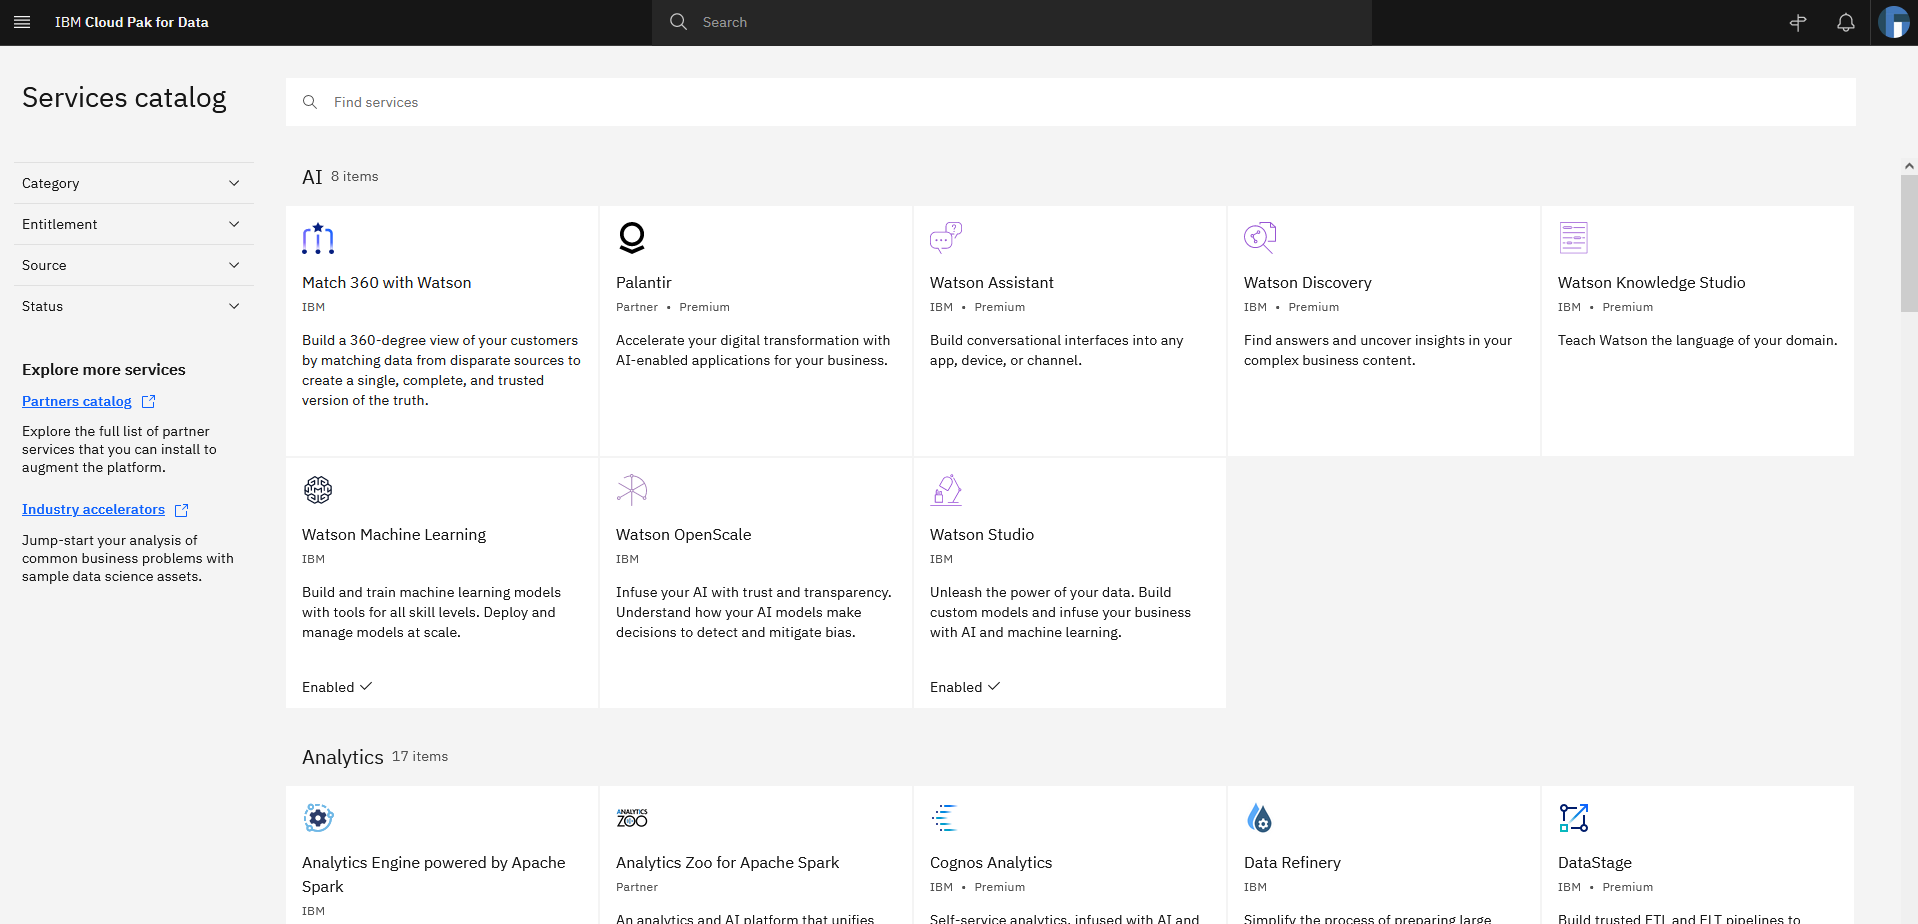
- Expand the navigation menu. Navigate to Services > Services catalog for the available services (Figure 7).

Figure 7. Navigating to the CP4D services catalog
- Notice that the services set as “enabled” correspond with your Terraform definitions (Figure 8).

Figure 8. Services enabled in your CP4D catalog


Congratulations! You have successfully deployed IBM CP4D on Red Hat OpenShift on AWS.
Post installation
Refer to the IBM documentation on setting up services, if you need to enable additional services on CP4D.
When installing CP4D on productive environments, please review the IBM documentation on securing your environment. Also, the Red Hat documentation on setting up identity providers for ROSA is informative. You can also consider enabling auto scaling for your cluster.
Cleanup
Connect to your bastion host, and run the following steps to delete the CP4D installation, including ROSA. This step avoids incurring future charges on your AWS account.
$ cd ~/cp4d-deployment/managed-openshift/aws/terraform/
$ terraform destroy -var-file="cp4d-rosa-3az-new-vpc.tfvars"
If you’ve experienced any failures during the CP4D installation, run these next steps:
$ cd ~/cp4d-deployment/managed-openshift/aws/terraform
$ sudo cp installer-files/rosa /usr/local/bin
$ sudo chmod 755 /usr/local/bin/rosa
$ Cluster_Name=`rosa list clusters -o yaml | grep -w "name:" | cut -d ':' -f2 | xargs`
$ rosa remove cluster --cluster=${Cluster_Name}
$ rosa logs uninstall -c ${Cluster_Name } –watch
$ rosa init --delete-stack
$ terraform destroy -var-file="cp4d-rosa-3az-new-vpc.tfvars"
Conclusion
In summary, we explored how customers can take advantage of a fully managed OpenShift service on AWS to run IBM CP4D. With this implementation, customers can focus on what is important to them, their workloads, and their customers, and less on managing the day-to-day operations of managing OpenShift to run CP4D.
Check out the IBM Cloud Pak for Data Simplifies and Automates How You Turn Data into Insights blog to learn how to use CP4D on AWS to unlock the value of your data.


