Tag Archives: AWS Marketplace

Simplify cloud security with managed rules from AWS Marketplace for AWS Network Firewall

Post Syndicated from Dhanil Parwani original https://aws.amazon.com/blogs/security/simplify-cloud-security-with-managed-rules-from-aws-marketplace-for-aws-network-firewall/

AWS Network Firewall now supports managed rules curated by AWS Partners—giving you pre-built threat intelligence and security controls that reduce the need to create and maintain your own rule sets. This new capability helps organizations strengthen their network security posture with continuously updated AWS partner managed protection.

What are managed rules from AWS Marketplace for Network Firewall?

Managed rules from AWS Marketplace are curated by AWS Partners who automatically update rules to address emerging threats, providing you comprehensive protection without the operational overhead of managing custom rules. As shown in Figure 1, you can now deploy Network Firewall managed rules from AWS Marketplace in a few clicks, reducing the time it takes you to create custom security rules. You can use the AWS Management Console to choose from a variety of specialized rule groups tailored to different industry needs, compliance requirements, and threat landscapes.

Figure 1: Adding managed rules from AWS Marketplace for AWS Network Firewall

Figure 1: Managed rules from AWS Marketplace for AWS Network Firewall

Key benefits and use cases

Managing firewalls across multiple virtual private clouds (VPCs) can become challenging when it comes to keeping up with creating, maintaining, and updating custom rule sets. This only increases with the growing number of firewalls that require constant monitoring to protect against emerging threats and new attack vectors. While AWS Managed Rules rule groups provide a solid foundation, managed rules from AWS Marketplace help customers add expert-curated rules with a few clicks.

You can associate managed rules from AWS Marketplace partners directly to your AWS Network Firewall and see them in action in one of the many network firewall deployment models as shown in Deployment models for AWS Network Firewall with VPC routing enhancements. These rules seamlessly fit into your traffic inspection patterns and don’t require additional routing-related configuration changes.

Keeping up to date on the constantly changing threat landscape can be time-consuming and expensive. AWS Marketplace partners automatically update managed rule groups and provide new versions of rule groups when new vulnerabilities and threats emerge. Continuously updated rules lead to a more robust security posture.

Prerequisites

To start using managed rules from AWS Marketplace, you need to meet the following prerequisites:

You can use managed rules from AWS Marketplace partners with all Network Firewall deployment models.

Set up AWS Marketplace managed rules

With the prerequisites in place, you’re ready to set up managed rules from AWS Marketplace.

To set up managed rules:

  1. Sign in to the Amazon Virtual Private Cloud (Amazon VPC) console.
  2. In the navigation pane, choose Network Firewall and then choose Network Firewall rule groups.
  3. Choose AWS Marketplace.

    Figure 2: AWS Marketplace rule groups

    Figure 2: AWS Marketplace rule groups

  4. Under AWS Marketplace, you’ll see different types of rule groups curated by AWS Partners. You can select the partner and the rule group you want to apply as part of your Network Firewall policies. Locate the partner and rule group that you want to add and choose View subscription options next to that rule group.

    Figure 3: View subscription options for partner rule groups in AWS Marketplace

    Figure 3: View subscription options for partner rule groups in AWS Marketplace

  5. After you choose View subscription options, you’ll see the Subscription options window. Review the options and then choose Subscribe.

    Figure 4: Review subscription options and subscribe to partner product

    Figure 4: Review subscription options and subscribe to partner product

  6. When subscribed, go to Firewall Policies and choose from an existing firewall policy or create a new one as described in Creating a firewall policy.

    Figure 5: Choose a firewall policy to associate rule groups

    Figure 5: Choose a firewall policy to associate rule groups

  7. After you select the firewall policy, choose Actions and then select Add Partner managed rule groups.
    Figure 6: Add partner managed rule groups

    Figure 6: Add partner managed rule groups

  8. After you choose Add partner managed rule groups, select the previously subscribed rule groups.
    Figure 7: Select the rule groups

    Figure 7: Select the rule groups

  9. Choose Add to policy and confirm the rule groups were added to your firewall policy. You can modify rule groups later if necessary.

The firewall policy with partner managed rule groups is now ready to be associated to your Network Firewall as noted in Step 7 of Create a firewall.

Launch partners

We had the pleasure to work with the following partners at the launch of managed rules from AWS Marketplace for Network Firewall. Here is what some of our partners (in alphabetical order) have been saying. We continue to work with our partners to create more managed rule groups over time, which you can follow at AWS Network Firewall Partners.

Check Point Software

From pioneering stateful firewalls to our AI-powered, cloud-delivered security solutions, Check Point Software is committed to safeguarding organizations with an industry-leading 99.9% prevention rate. Check Point Managed Rules for AWS Network Firewall simplifies security by providing pre-configured rule sets designed by Check Point ThreatCloud AI experts. Delivered directly through AWS Marketplace, these rules enhance protection against hundreds of Common Vulnerabilities and Exposures (CVEs) and OWASP Top 10 vulnerabilities reducing manual effort and strengthening your cloud security posture.

Fortinet

Fortinet, a global leader in cybersecurity and trusted name in next-generation firewalls, now brings its AI-driven threat intelligence to AWS Network Firewall. The new Fortinet Managed IPS Rules deliver continuously updated, automated protection against exploits, malware, and command-and-control threats—enhancing AWS security without added complexity.

Infoblox

Infoblox unites networking, security and cloud with a protective DDI platform that delivers enterprise resilience and agility. Trusted by more than 13,000 customers, including the majority of Fortune 100 companies as well as emerging innovators, we seamlessly integrate, secure and automate critical network services so businesses can move fast without compromise.

Lumen

Lumen is thrilled to launch Defender Managed Rules for AWS Network Firewall, available now on AWS Marketplace. In partnership with AWS, this managed rule group brings proactive Black Lotus Labs-powered threat intelligence directly into AWS environments—enabling organizations to automatically block risky IPs using real-time, backbone-level data from Lumen’s global network. With seamless AWS Management Console integration and automatic updates, security and network teams can strengthen cloud defenses with expert-curated protection—no manual rule writing needed.

Rapid7

Rapid7 Managed Rules for AWS Network Firewall converts our curated, high-fidelity threat intelligence into dynamic, self-cleaning rule groups, delivering expert-vetted protection directly into your native AWS environment. Instantly deploy current protections against today’s most pressing threats, allowing your team to act with confidence and significantly reduce alert fatigue.

ThreatSTOP

ThreatSTOP delivers continuously updated threat intelligence that automatically blocks malicious domains and IPs through AWS Network Firewall. Building on its proven protection for AWS WAF, ThreatSTOP extends the same trusted enforcement to the network layer to protect both inbound and outbound traffic. The managed rules leverage thousands of curated global sources and proprietary research from the ThreatSTOP Security, Intelligence, and Research team to block command-and-control, phishing, and malware traffic in real time. Available in AWS Marketplace, ThreatSTOP helps organizations strengthen their cloud security posture, reduce unwanted connections, and maintain compliance with ITAR and OFAC requirements.

Trend Micro

Trend Micro, a leader in cloud-native application protection platforms (CNAPP), brings deep expertise in securing cloud environments to AWS customers. Backed by Trend Zero Day Initiative (ZDI), Trend Micro delivers curated, continuously updated malware rule groups, with CVE and exploit protection coming soon. Using early threat intelligence from ZDI, protections are published faster than other vendors, helping AWS customers stay ahead of attackers.

Partner statements represent their own views and claims. AWS does not independently verify partner performance metrics.

Conclusion

With managed rules from AWS Marketplace, customers can find, buy, and deploy industry-leading threat intelligence directly from the AWS Network Firewall console. By using these pre-built rules, security teams can focus on strategic initiatives while maintaining strong network protection. Evaluate available partner offerings and select rules that align with your security requirements and compliance needs.

Visit the AWS Network Firewall Documentation to learn more about implementing partner managed rules for your organization.

If you have feedback about this post, submit comments in the Comments section below. If you have questions about this post, start a new thread on AWS Network Firewall re:Post or contact AWS Support.

Dhanil Parwani
Dhanil Parwani

Dhanil is a Senior Partner Solutions Architect at AWS. He works closely with networking, security, and AI partners to build solutions and capabilities to enable and simplify their migrations and operations in the cloud. He holds an MS in telecommunications from the University of Colorado Boulder and has a passion for computer networking. Outside of work, Dhanil is an avid traveler and enjoys cheering on Liverpool, FC.
Amish Shah
Amish Shah

Amish is a seasoned product leader with more than 15 years of experience developing innovative and scalable solutions for networking, security, and cloud use cases. He currently leads the AWS Network Firewall service, where he helps develop security solutions that protect AWS workloads. Outside of work, Amish enjoys playing cricket and soccer, loves to travel, and has recently started collecting niche fragrances..

Introducing Oracle Database@AWS for simplified Oracle Exadata migrations to the AWS Cloud

Post Syndicated from Channy Yun (윤석찬) original https://aws.amazon.com/blogs/aws/introducing-oracle-databaseaws-for-simplified-oracle-exadata-migrations-to-the-aws-cloud/

Today, we’re announcing the general availability of Oracle Database@AWS, a new offering for Oracle Exadata workloads, including Oracle Real Application Clusters (RAC) within AWS.

In the past 14 years, customers had the choice of self-managing Oracle database workloads in the cloud using Amazon Elastic Compute Cloud (Amazon EC2) or using fully managed Amazon Relational Database Service (Amazon RDS) for Oracle. Now, you have an additional option for your workloads that require Oracle RAC or Oracle Exadata for quicker and simpler migrations to the cloud. You also get a single invoice through AWS Marketplace, which counts towards AWS commitments and Oracle license benefits, including Bring Your Own License (BYOL) and discount programs such as Oracle Support Rewards.

With Oracle Database@AWS, you can migrate your Oracle Exadata workloads to Oracle Exadata Database Service on Dedicated Infrastructure or Oracle Autonomous Database on Dedicated Exadata Infrastructure within AWS with minimal changes. You can purchase, provision, and manage your Oracle Database@AWS deployments through familiar AWS tools and interfaces such as AWS Management Console, AWS Command Line Interface (AWS CLI), or AWS APIs for applications running on AWS. The AWS APIs call the corresponding Oracle Cloud Infrastructure (OCI) APIs necessary to provision and manage the resources.

Since its preview last December, we’ve improved or added features to help run production workloads at general availability:

  • Regional expansion – You can now use Oracle Database@AWS in the U.S. East (N. Virginia) and U.S. West (Oregon) Regions today. We are also announcing plans to expand to 20 AWS Regions globally. This broader availability supports the diverse needs of our customers across various geographical areas so more enterprises can benefit from this option. You can choose from different Exadata system sizes to match your workload requirements in your AWS Region.
  • Zero-ETL and S3 backups – You can now benefit from zero-ETL integration with Amazon Redshift for analytics to remove the need to build and manage data pipelines for extract, transform, and load operations. With zero-ETL, you can unify your data on AWS without incurring cross network data transfer costs. We’re providing Amazon Simple Storage Service (Amazon S3) backups with up to eleven nines of data durability.
  • Autonomous VM cluster – You can now provision an Autonomous VM Cluster in addition to an Exadata VM cluster on the Exadata Dedicated Infrastructure. You can run Oracle Autonomous Database on Dedicated Exadata Infrastructure, a fully managed database environment using committed hardware and software resources.

Oracle Database@AWS also integrates with other AWS services such as Amazon Virtual Private Cloud (Amazon VPC) Lattice for configuring network paths to AWS services such as S3 and Redshift directly, AWS Identity and Access Management (IAM) for authentication and authorization, Amazon EventBridge for monitoring database lifecycle events, AWS CloudFormation for infrastructure automation, Amazon CloudWatch for collecting and monitoring metrics, and AWS CloudTrail for logging API operations.

Getting started with Oracle Database@AWS
Oracle Database@AWS supports two key services: Oracle Exadata Database Service on Dedicated Infrastructure and Oracle Autonomous Database on Dedicated Exadata Infrastructure within AWS data centers.

These services physically reside within an Availability Zone in an AWS Region and logically reside in an OCI region, enabling seamless integration with AWS services through high-speed, low-latency connections.

You create an ODB network, a private, isolated network that hosts Oracle Exadata VM Clusters within an Availability Zone. Then, you use ODB peering accessible to EC2 application servers running in a VPC. To learn more, visit How Oracle Database@AWS works in the AWS documentation.

Request a private offer in AWS Marketplace

To begin your journey with Oracle Database@AWS, visit the AWS console or request the AWS Marketplace private offer. Your AWS and Oracle sales team will receive your request, then contact you to find the best option for your workloads, and activate your account.

When you activate and get access to Oracle Database@AWS, you can use the Dashboard to create an ODB network, Exadata infrastructure, and Exadata VM cluster or Autonomous VM cluster, and ODB peering connection.

To learn more, visit the Onboarding to Oracle Database@AWS and AWS Marketplace buyer private offers in the AWS documentation.

Create an ODB network

An ODB network is a private isolated network that hosts OCI infrastructure on AWS. The ODB network maps directly to the network that exists within the OCI child site, thus serving as the means of communication between AWS and OCI.

In the Dashboard, choose Create ODB network, enter a network name, choose the Availability Zone, and specify a CIDR ranges for client connections established by applications and backup connections used for taking automated backups. You can also enter a name to use as a prefix to your domain fixed as oraclevcn.com. For example, if you enter myhost, the fully qualified domain name is myhost.oraclevcn.com.

Optionally, you can configure ODB network access to perform automated backups to Amazon S3 and zero-ETL for near real-time analytics and ML on your Oracle data using Amazon Redshift.

After you create your ODB network, update your VPC route tables of your EC2 application servers with the client connection CIDR in the ODB network. To learn more, visit ODB network, ODB peering, and Configuring VPC route tables for ODB peering in the AWS documentation.

Create Exadata infrastructure

The Oracle Exadata infrastructure is the underlying architecture of your database servers, storage servers, and networking that run your Oracle Exadata databases.

Choose Create Exadata infrastructure, enter a name, and use the default Availability Zone. In the next step, you can choose Exadata.X11M for the Exadata system model. You can also set a default of 2 or up to 32 database servers and 3 or up to 64 storage servers with 80 TB storage capacity per server.

Finally, you can configure system maintenance preferences, such as scheduling, patching mode, and OCI maintenance notification contacts. You can’t modify an infrastructure after you create it from the AWS console. But, you can navigate to the OCI console and modify it.

To delete an Exadata infrastructure, visit Deleting an Oracle Exadata infrastructure in Oracle Database@AWS in the AWS documentation.

Create an Exadata VM cluster or Autonomous VM cluster

You can create VM clusters on Exadata infrastructure and deploy multiple VM clusters with different Oracle Exadata infrastructures in the same ODB network.

Here are two types of VM clusters:

  • An Exadata VM cluster is a set of virtual machines that has a complete Oracle database installation that includes all features of Oracle Enterprise Edition.
  • An Autonomous VM cluster is a set of fully managed databases that automate key management tasks using AI/ML with no human intervention required.

Choose Create Exadata VM cluster, enter a VM cluster name and a time zone, choose Bring Your Own License (BYOL) or license included for license options. In the next step, you can choose your Exadata infrastructure, grid infrastructure version, and Exadata image version. For database servers, you can choose the CPU core count, memory, and local storage for each VM or accept the defaults.

In the next step, you can configure the connectivity setting by choosing your ODB network and entering a prefix for the VM cluster. You can enter a port number for TCP access to the single client access name (SCAN) listener. The default port is 1521 or you can enter a custom SCAN port in the range 1024–8999. For SSH key pairs, enter the public key portion of one or more key pairs used for SSH access to the VM cluster.

Then, you can choose diagnostics and tags, review your settings, and create a VM cluster. The creation process can take up to 6 hours, depending on the size of the VM cluster.

Create and manage an Oracle database

When the VM cluster is ready, you can create and manage your Oracle Exadata databases in the OCI console. Choose Manage in OCI in the details page of the Exadata VM cluster. You will be redirected to the OCI console.

When you create an Oracle Database in the OCI console, you can select Oracle Database 19c or 23ai. When enabling automatic backups for your provisioned databases, you can use an S3 bucket or OCI Object Storage in the OCI region. To learn more, visit Provision Oracle Exadata Database Service in Oracle Database@AWS in the OCI documentation.

Things to know
Here are a couple of things to know about Oracle Database@AWS:

  • Monitoring – You can monitor Oracle Database@AWS using Amazon CloudWatch metrics in the AWS/ODB namespaces for VM clusters, container databases, and pluggable databases. AWS CloudTrail captures all AWS API calls for Oracle Database@AWS as events. Using CloudTrail logs, you can determine the request that was made to Oracle Database@AWS, the IP address from which the request was made, when it was made, and additional details. To learn more, visit Monitoring Oracle Database@AWS.
  • Security – You can use IAM to assign permissions that determine who is allowed to manage Oracle Database@AWS resources and SSL/TLS encrypted connections to secure data. You can also use Amazon EventBridge for seamless event-driven database operations—all working together to maintain security standards while enabling efficient cloud operations. To learn more, visit Security in Oracle Database@AWS.
  • Compliance – Your compliance responsibility when using Oracle Database@AWS is determined by the sensitivity of your data, your company’s compliance objectives, and applicable laws and regulations. We provides the following compliances with Oracle Database@AWS: SOC 1, SOC 2, SOC 3, HIPAA, C5, CSA STAR Attest, CSA STAR Cert, HDS (France), ISO Series (ISO/IEC 9001, 20000-1, 27001, 27017, 27018, 27701, 22301), PCI DSS, and HITRUST. To learn more, visit Compliance validation for Oracle Database@AWS.
  • Support – Your AWS or Oracle sales account team can help you evaluate your current database infrastructure, determine how Oracle Database@AWS can best serve your organization’s requirements, and develop a tailored migration strategy and timeline. You can also get help from AWS Oracle Competency Partners specialized to architect, deploy, and manage Oracle-based workloads running in the AWS Cloud.

Now available and coming soon
Oracle Database@AWS is now available in the U.S. East (N. Virginia) and U.S. West (Oregon) Regions through the AWS Marketplace. Oracle Database@AWS pricing and any AWS Marketplace private offers are set by Oracle. You can see specific details around pricing on Oracle’s pricing page for the offering.

Oracle Database@AWS will expand to 20 more AWS Regions across the Americas, Europe, and Asia-Pacific including: US East (Ohio), US West (N. California), Asia Pacific (Hyderabad), Asia Pacific (Melbourne), Asia Pacific (Mumbai), Asia Pacific (Osaka), Asia Pacific (Seoul), Asia Pacific (Singapore), Asia Pacific (Sydney), Asia Pacific (Tokyo), Canada (Central), Europe (Frankfurt), Europe (Ireland), Europe (London), Europe (Milan), Europe (Paris), Europe (Spain), Europe (Stockholm), Europe (Zurich), and South America (São Paulo).

You can get started with Oracle Database@AWS with using AWS console. To learn more, visit the Oracle Database@AWS User Guide and OCI documentation and send feedback through your usual AWS Support contacts or OCI support.

Channy

Introducing Buy with AWS: an accelerated procurement experience on AWS Partner sites, powered by AWS Marketplace

Post Syndicated from Prasad Rao original https://aws.amazon.com/blogs/aws/introducing-buy-with-aws-an-accelerated-procurement-experience-on-aws-partner-sites-powered-by-aws-marketplace/

Today, we are announcing Buy with AWS, a new way to discover and purchase solutions available in AWS Marketplace from AWS Partner sites. You can use Buy with AWS to accelerate and streamline your product procurement process on websites outside of Amazon Web Services (AWS). This feature provides you the ability to find, try, and buy solutions from Partner websites using your AWS account

AWS Marketplace is a curated digital store for you to find, buy, deploy, and manage cloud solutions from Partners. Buy with AWS is another step towards AWS Marketplace making it easy for you to find and procure the right Partner solutions, when and where you need them. You can conveniently find and procure solutions in AWS Marketplace, through integrated AWS service consoles, and now on Partner websites.

Accelerate cloud solution discovery and evaluation

You can now discover solutions from Partners available for purchase through AWS Marketplace as you explore solutions on the web beyond AWS.

Look for products that are “Available in AWS Marketplace” when browsing on Partner sites, then accelerate your evaluation process with fast access to free trials, demo requests, and inquiries for custom pricing.

For example, I want to evaluate Wiz to see how it can help with my cloud security requirements. While browsing the Wiz website, I come across a page where I see “Connect Wiz with Amazon Web Services (AWS)”.

Wiz webpage featuring Buy With AWS

I choose Try with AWS. It asks me to sign in to my AWS account if I’m not signed in already. I’m then presented with a Wiz and AWS co-branded page for me to sign up for the free trial.

Wiz and AWS co-branded page to sign up for free trial using Buy with AWS through AWS Marketplace

The discovery experience that you see will vary depending on type of the Partner website you’re shopping from. Wiz is an example of how Buy with AWS can be implemented by an independent software vendor (ISV). Now, let’s look at an example of an AWS Marketplace Channel Partner, or reseller, who operates a storefront of their own.

I browse to the Bytes storefront with product listings from AWS Marketplace. I have the option to filter and search from the curated product listings, which are available in AWS Marketplace, on the Bytes site.

Bytes storefront with product listings from AWS Marketplace

I choose View Details for Fortinet and see an option to Request Private Offer from AWS.

Bytes storefront with option to Request Private Offer for Fortinet from AWS Marketplace

As you can tell, on a Channel Partner site, you can browse curated product listings available in AWS Marketplace, filter products, and request custom pricing using your AWS account directly from their website.

Streamline product procurement on AWS Partner sites
I had a seamless experience using Buy with AWS to access a free trial for Wiz and browse through the Bytes storefront to request a private offer.

Now I want to try Databricks for one of the applications I’m building. I sign up for a Databricks trial through their website.

Database homepage after login with option to Upgrade

I chose Upgrade and see Databricks is available in AWS Marketplace, which gives me the option to Buy with AWS.

Option to upgrade to Databricks premium using Buy with AWS feature of AWS marketplace

I choose Buy with AWS, and after I sign in to my AWS account, I land on a Databricks and AWS Marketplace co-branded procurement page.

Databricks and AWS co-branded page to subscribe using Buy with AWS

I complete the purchase on the co-branded procurement page and continue to set up my Databricks account.

Databricks and AWS co-branded page after subscribing using Buy with AWS

As you can tell, I didn’t have to navigate the challenge of managing procurement processes for multiple vendors. I also didn’t have to speak with a sales representative or onboard a new vendor in my billing system, which would have required multiple approvals and delayed the overall process.

Access centralized billing and benefits through AWS Marketplace
Because Buy with AWS purchases are transacted through and managed in AWS Marketplace, you also benefit from the post-purchase experience of AWS Marketplace, including consolidated AWS billing, centralized subscription management, and access to cost optimization tools.

For example, through the AWS Billing and Cost Management console, I can centrally manage all my AWS purchases, including Buy with AWS purchases, from one dashboard. I can easily access and process invoices for all of my organization’s AWS purchases. I also need to have valid AWS Identity and Access Management (IAM) permissions to manage subscriptions and make a purchase through AWS Marketplace.

AWS Marketplace not only simplifies my billing but also helps in maintaining governance over spending by helping me manage purchasing authority and subscription access for my organization with centralized visibility and controls. I can manage my budget with pricing flexibility, cost transparency, and AWS cost management tools.

Buy with AWS for Partners
Buy with AWS enables Partners who sell or resell products in AWS Marketplace to create new solution discovery and buying experiences for customers on their own websites. By adding call to action (CTA) buttons to their websites such as “Buy with AWS”, “Try free with AWS”, “Request private offer”, and “Request demo”, Partners can help accelerate product evaluation and the path-to-purchase for customers.

By integrating AWS Marketplace APIs, Partners can display products from the AWS Marketplace catalog, allow customers to sort and filter products, and streamline private offers. Partners implementing Buy with AWS can access AWS Marketplace creative and messaging resources for guidance on building their own web experiences. Partners who implement Buy with AWS can access metrics for insights into engagement and conversion performance.

The Buy with AWS onboarding guide in the AWS Marketplace Management Portal details how Partners can get started.

Learn more
Visit the Buy with AWS page to learn more and explore Partner sites that offer Buy with AWS.

To learn more about selling or reselling products using Buy with AWS on your website, visit:

Prasad

AWS Weekly Roundup — AWS Control Tower new API, TLS 1.3 with API Gateway, Private Marketplace Catalogs, and more — February 19, 2024

Post Syndicated from Irshad Buchh original https://aws.amazon.com/blogs/aws/aws-weekly-roundup-aws-control-tower-new-api-tls-1-3-with-api-gateway-private-marketplace-catalogs-and-more-february-19-2024/

Over the past week, our service teams have continued to innovate on your behalf, and a lot has happened in the Amazon Web Services (AWS) universe that I want to tell you about. I’ll also share about all the AWS Community events and initiatives that are happening around the world.

Let’s dive in!

Last week’s launches
Here are some launches that got my attention during the previous week.

AWS Control Tower introduces APIs to register organizational units – With these new APIs, you can extend governance to organizational units (OUs) using APIs and automate your OU provisioning workflow. The APIs can also be used for OUs that are already under AWS Control Tower governance to re-register OUs after landing zone updates. These APIs include AWS CloudFormation support, allowing customers to manage their OUs with infrastructure as code (IaC).

API Gateway now supports TLS 1.3 – By using TLS 1.3 with API Gateway as the centralized point of control, developers can secure communication between the client and the gateway; uphold the confidentiality, integrity, and authenticity of their API traffic; and benefit from API Gateway’s integration with AWS Certificate Manager (ACM) for centralized deployment of SSL certificates using TLS.

Amazon OpenSearch Service now lets you update cluster volume without blue/green – While blue/green deployments are meant to avoid any disruption to your clusters because the deployment uses additional resources on the domain, it is recommended that you perform them during low traffic periods. Now, you can update volume-related cluster configuration without requiring a blue/green deployment, ensuring minimal performance impact on your online traffic and avoiding any potential disruption to your cluster operations.

Amazon GuardDuty Runtime Monitoring protects clusters running in shared VPC – With this launch, customers who are already opted into automated agent management in GuardDuty will benefit from a renewed 30-day trial of GuardDuty Runtime Monitoring, where we will automatically start monitoring the resources (clusters) deployed in a shared VPC setup. Customers also have the option to manually manage the agent and provision the virtual private cloud (VPC) endpoint in their shared VPC environment.

AWS Marketplace now supports managing Private Marketplace catalogs for OUs – This capability supports distinct product catalogs per business unit or development environment, empowering organizations to align software procurement with specific needs. Additionally, customers can designate a trusted member account as a delegated administrator for Private Marketplace administration, reducing the operational burden on management account administrators. With this launch, organizations can procure more quickly by providing administrators with the agile controls they need to scale their procurement governance across distinct business and user needs.

For a full list of AWS announcements, be sure to keep an eye on the What’s New at AWS page.

Other AWS news

Join AWS Cloud Clubs Captains – The C3 cohort of AWS Cloud Club Captains is open for applications from February 5–23, 2024, at 5:00 PM EST.

AWS open source news and updates – Our colleague Ricardo writes this weekly open source newsletter highlighting new open source projects, tools, and demos from the AWS Community.

Upcoming AWS events

Check your calendars and sign up for upcoming AWS events:

Building with Generative AI on AWS using PartyRock, Amazon Bedrock and Amazon Q – You will gain skills in prompt engineering and using the Amazon Bedrock API. We will also explore how to “chat with your documents” through knowledge bases, Retrieval Augmented Generation (RAG), embeddings, and agents. We will also use next-generation developer tools Amazon Q and Amazon CodeWhisperer to assist in coding and debugging.

Location: AWS Skills Center, 1550-G Crystal Drive, Arlington, VA

AI/ML security – Artificial intelligence and machine learning (AI/ML) and especially generative AI  have become top of mind for many organizations, but even the companies who want to move forward with this new and transformative technology are hesitating. They don’t necessarily understand how they can ensure that what they build will be secure. This webinar explains how they can do that.

AWS Jam Session – Canada Edition – AWS JAM is a gamified learning platform where you come to play, learn, and validate your AWS skills. The morning will include a mix of challenges across various technical domains – security, serverless, AI/ML, analytics, and more. The afternoon will be focused on a different specialty domain each month. You can form teams of up to four people to solve the challenges. There will be prizes for the top three winning teams.

Whether you’re in the Americas, Asia Pacific and Japan, or the EMEA region, there’s an upcoming AWS Innovate Online event that fits your time zone. Innovate Online events are free, online, and designed to inspire and educate you about AWS.

AWS Summits are a series of free online and in-person events that bring the cloud computing community together to connect, collaborate, and learn about AWS. These events are designed to educate you about AWS products and services and help you develop the skills needed to build, deploy, and operate your infrastructure and applications. Find an AWS Summit near you and register or set a notification to know when registration opens for a Summit that interests you.

AWS Community re:Invent re:Caps – Join a Community re:Cap event organized by volunteers from AWS User Groups and AWS Cloud Clubs around the world to learn about the latest announcements from AWS re:Invent.

You can browse all upcoming in-person and virtual events.

That’s all for this week. Check back next Monday for another Weekly Roundup!

– Irshad

This post is part of our Weekly Roundup series. Check back each week for a quick roundup of interesting news and announcements from AWS!

AWS Weekly Roundup — Amazon API Gateway, AWS Step Functions, Amazon ECS, Amazon EKS, Amazon LightSail, Amazon VPC, and more — January 29, 2024

Post Syndicated from Sébastien Stormacq original https://aws.amazon.com/blogs/aws/aws-weekly-roundup-amazon-api-gateway-aws-step-functions-amazon-ecs-amazon-eks-amazon-lightsail-amazon-vpc-and-more-january-29-2024/

This past week our service teams continue to innovate on your behalf, and a lot has happened in the Amazon Web Services (AWS) universe. I’ll also share about all the AWS Community events and initiatives that are happening around the world.

Let’s dive in!

Last week’s launches
Here are some launches that got my attention:

AWS Step Functions adds integration for 33 services including Amazon Q – AWS Step Functions is a visual workflow service capable of orchestrating over 11,000+ API actions from over 220 AWS services to help customers build distributed applications at scale. This week, AWS Step Functions expands its AWS SDK integrations with support for 33 additional AWS services, including Amazon Q, AWS B2B Data Interchange, and Amazon CloudFront KeyValueStore.

Amazon Elastic Container Service (Amazon ECS) Service Connect introduces support for automatic traffic encryption with TLS Certificates – Amazon ECS launches support for automatic traffic encryption with Transport Layer Security (TLS) certificates for its networking capability called ECS Service Connect. With this support, ECS Service Connect allows your applications to establish a secure connection by encrypting your network traffic.

Amazon Elastic Kubernetes Service (Amazon EKS) and Amazon EKS Distro support Kubernetes version 1.29Kubernetes version 1.29 introduced several new features and bug fixes. You can create new EKS clusters using v1.29 and upgrade your existing clusters to v1.29 using the Amazon EKS console, the eksctl command line interface, or through an infrastructure-as-code (IaC) tool.

IPv6 instance bundles on Amazon Lightsail – With these new instance bundles, you can get up and running quickly on IPv6-only without the need for a public IPv4 address with the ease of use and simplicity of Amazon Lightsail. If you have existing Lightsail instances with a public IPv4 address, you can migrate your instances to IPv6-only in a few simple steps.

Amazon Virtual Private Cloud (Amazon VPC) supports idempotency for route table and network ACL creationIdempotent creation of route tables and network ACLs is intended for customers that use network orchestration systems or automation scripts that create route tables and network ACLs as part of a workflow. It allows you to safely retry creation without additional side effects.

Amazon Interactive Video Service (Amazon IVS) announces audio-only pricing for Low-Latency Streaming – Amazon IVS is a managed live streaming solution that is designed to make low-latency or real-time video available to viewers around the world. It now offers audio-only pricing for its Low-Latency Streaming capability at 1/10th of the existing HD video rate.

Sellers can resell third-party professional services in AWS Marketplace – AWS Marketplace sellers, including independent software vendors (ISVs), consulting partners, and channel partners, can now resell third-party professional services in AWS Marketplace. Services can include implementation, assessments, managed services, training, or premium support.

Introducing the AWS Small and Medium Business (SMB) Competency – This is the first go-to-market AWS Specialization designed for partners who deliver to small and medium-sized customers. The SMB Competency provides enhanced benefits for AWS Partners to invest and focus on SMB customer business, such as becoming the go-to standard for participation in new pilots and sales initiatives and receiving unique access to scale demand generation engines.

For a full list of AWS announcements, be sure to keep an eye on the What’s New at AWS page.

X in Y – We launched existing services and instance types in additional Regions:

Other AWS news
Here are some additional projects, programs, and news items that you might find interesting:

Get The NewsExport a Software Bill of Materials using Amazon Inspector – Generating an SBOM gives you critical security information that offers you visibility into specifics about your software supply chain, including the packages you use the most frequently and the related vulnerabilities that might affect your whole company. My colleague Varun Sharma in South Africa shows how to export a consolidated SBOM for the resources monitored by Amazon Inspector across your organization in industry standard formats, including CycloneDx and SPDX. It also shares insights and approaches for analyzing SBOM artifacts using Amazon Athena.

AWS open source news and updates – My colleague Ricardo writes this weekly open source newsletter in which he highlights new open source projects, tools, and demos from the AWS Community.

Upcoming AWS events
Check your calendars and sign up for these AWS events:

AWS InnovateAWS Innovate: AI/ML and Data Edition – Register now for the Asia Pacific & Japan AWS Innovate online conference on February 22, 2024, to explore, discover, and learn how to innovate with artificial intelligence (AI) and machine learning (ML). Choose from over 50 sessions in three languages and get hands-on with technical demos aimed at generative AI builders.

AWS Summit Paris 2024AWS Summit Paris  – The AWS Summit Paris is an annual event that is held in Paris, France. It is a great opportunity for cloud computing professionals from all over the world to learn about the latest AWS technologies, network with other professionals, and collaborate on projects. The Summit is free to attend and features keynote presentations, breakout sessions, and hands-on labs. Registrations are open!

AWS Community re:Invent re:CapsAWS Community re:Invent re:Caps – Join a Community re:Cap event organized by volunteers from AWS User Groups and AWS Cloud Clubs around the world to learn about the latest announcements from AWS re:Invent.

You can browse all upcoming in-person and virtual events.

That’s all for this week. Check back next Monday for another Weekly Roundup!

— seb

This post is part of our Weekly Roundup series. Check back each week for a quick roundup of interesting news and announcements from AWS!

Easily deploy SaaS products with new Quick Launch in AWS Marketplace

Post Syndicated from Marcia Villalba original https://aws.amazon.com/blogs/aws/easily-deploy-saas-products-with-new-quick-launch-in-aws-marketplace/

Today we are excited to announce the general availability of SaaS Quick Launch, a new feature in AWS Marketplace that makes it easy and secure to deploy SaaS products.

Before SaaS Quick Launch, configuring and launching third-party SaaS products could be time-consuming and costly, especially in certain categories like security and monitoring. Some products require hours of engineering time to manually set up permissions policies and cloud infrastructure. Manual multistep configuration processes also introduce risks when buyers rely on unvetted deployment templates and instructions from third-party resources.

SaaS Quick Launch helps buyers make the deployment process easy, fast, and secure by offering step-by-step instructions and resource deployment using preconfigured AWS CloudFormation templates. The software vendor and AWS validate these templates to ensure that the configuration adheres to the latest AWS security standards.

Getting started with SaaS Quick Launch
It’s easy to find which SaaS products have Quick Launch enabled when you are browsing in AWS Marketplace. Products that have this feature configured have a Quick Launch tag in their description.

Quick Launch tag in AWS Marketplace

After completing the purchase process for a Quick Launch–enabled product, you will see a button to set up your account. That button will take you to the Configure and launch page, where you can complete the registration to set up your SaaS account, deploy any required AWS resources, and launch the SaaS product.

Step 1 - set permissions

The first step ensures that your account has the required AWS permissions to configure the software.

Step 1 - set permissions

The second step involves configuring the vendor account, either to sign in to an existing account or to create a new account on the vendor website. After signing in, the vendor site may pass essential keys and parameters that are needed in the next step to configure the integration.

Step 2 - Log into the vendor account

The third step allows you to configure the software and AWS integration. In this step, the vendor provides one or more CloudFormation templates that provision the required AWS resources to configure and use the product.

Step 3 - Configure your software and AWS integration

The final step is to launch the software once everything is configured.

Step 6 - Launch your software

Availability
Sellers can enable this feature in their SaaS product. If you are a seller and want to learn how to set this up in your product, check the Seller Guide for detailed instructions.

To learn more about SaaS in AWS Marketplace, visit the service page and view all the available SaaS products currently in AWS Marketplace.

Marcia

Streaming Android games from cloud to mobile with AWS Graviton-based Amazon EC2 G5g instances

Post Syndicated from Sheila Busser original https://aws.amazon.com/blogs/compute/streaming-android-games-from-cloud-to-mobile-with-aws-graviton-based-amazon-ec2-g5g-instances/

This blog post is written by Vincent Wang, GCR EC2 Specialist SA, Compute.

Streaming games from the cloud to mobile devices is an emerging technology that allows less powerful and less expensive devices to play high-quality games with lower battery consumption and less storage capacity. This technology enables a wider audience to enjoy high-end gaming experiences from their existing devices, such as smartphones, tablets, and smart TVs.

To load games for streaming on AWS, it’s necessary to use Android environments that can utilize GPU acceleration for graphics rendering and optimize for network latency. Cloud-native products, such as the Anbox Cloud Appliance or Genymotion available on the AWS Marketplace, can provide a cost-effective containerized solution for game streaming workloads on Amazon Elastic Compute Cloud (Amazon EC2).

For example, Anbox Cloud’s virtual device infrastructure can run games with low latency and high frame rates. When combined with the AWS Graviton-based Amazon EC2 G5g instances, which offer a cost reduction of up to 30% per-game stream per-hour compared to x86-based GPU instances, it enables companies to serve millions of customers in a cost-efficient manner.

In this post, we chose the Anbox Cloud Appliance to demonstrate how you can use it to stream a resource-demanding game called Genshin Impact. We use a G5g instance along with a mobile phone to run the streamed game inside of a Firefox browser application.

Overview

Graviton-based instances utilize fewer compute resources than x86-based instances due to the 64-bit architecture of Arm processors used in AWS Graviton servers. As shown in the following diagram, Graviton instances eliminate the need for cross-compilation or Android emulation. This simplifies development efforts and reduces time-to-market, thereby lowering the cost-per-stream. With G5g instances, customers can now run their Android games natively, encode CPU or GPU-rendered graphics, and stream the game over the network to multiple mobile devices.

Architecture difference when running Android on X86-based instance and Graviton-based instance.

Figure 1: Architecture difference when running Android on X86-based instance and Graviton-based instance.

Real-time ray-traced rendering is required for most modern games to deliver photorealistic objects and environments with physically accurate shadows, reflections, and refractions. The G5g instance, which is powered by AWS Graviton2 processors and NVIDIA T4G Tensor Core GPUs, provides a cost-effective solution for running these resource-intensive games.

Architecture

Architecture of Android Streaming Game.

Figure 2: Architecture of Android Streaming Game.

When streaming games from a mobile device, only input data (touchscreen, audio, etc.) is sent over the network to the game streaming server hosted on a G5g instance. Then, the input is directed to the appropriate Android container designated for that particular client. The game application running in the container processes the input and updates the game state accordingly. Then, the resulting rendered image frames are sent back to the mobile device for display on the screen. In certain games, such as multiplayer games, the streaming server must communicate with external game servers to reflect the full game state. In these cases, additional data is transferred to and from game servers and back to the mobile client. The communication between clients and the streaming server is performed using the WebRTC network protocol to minimize latency and make sure that users’ gaming experience isn’t affected.

The Graviton processor handles compute-intensive tasks, such as the Android runtime and I/O transactions on the streaming server. However, for resource-demanding games, the Nvidia GPU is utilized for graphics rendering. To scale effortlessly, the Anbox Cloud software can be utilized to manage and execute several game sessions on the same instance.

Prerequisites

First, you need an Ubuntu single sign-on (SSO) account. If you don’t have one yet, you may create one from Ubuntu One website. Then you need an Android mobile phone with Firefox or Chrome browser installed to play the streaming games.

Setup

We can install Anbox Cloud Appliance in the AWS Marketplace. Select the Arm variant so that it works on Graviton-based instances. If the subscription doesn’t work on the first try, then you receive an email which guides you to a page where you can try again.

Figure 3: Subscribe Anbox Cloud Appliance in AWS Marketplace.

Figure 3: Subscribe Anbox Cloud Appliance in AWS Marketplace.

In this demonstration, we select G5g.xlarge in the Instance type section and leave all settings with default values, except the storage as per the following:

  1. A root disk with minimum 50 GB (required)
  2. An additional Amazon Elastic Block Store (Amazon EBS) volume with at least 100 GB (recommended)

For the Genshin Impact demo, we recommend a specific amount of storage. However, when deploying your Android applications, you must select an appropriate storage size based on the package size. Additionally, you should choose an instance size based on the resources that you plan to utilize for your gaming sessions, such as CPU, memory, and networking. In our demo, we launched only one session from a single mobile device.

Launch the instance and wait until it reaches running status. Then you can secure shell (SSH) to the instance to configure the Android environment.

Install Anbox cloud

To make sure of the security and reliability of some of the package repositories used, we update the CUDA Linux GPG Repository Key. View this Nvidia blog post for more details on this procedure.

$ sudo apt-key del 7fa2af80

$ wget

https://developer.download.nvidia.com/compute/cuda/repos/ubuntu2004/sbsa/cuda keyring_1.0-1_all.deb

$ sudo dpkg -i cuda-keyring_1.0-1_all.deb

As the Android in Anbox Cloud Appliance is running in an LXD container environment, upgrade LXD to the latest version.

  $ sudo snap refresh –channel=5.0/stable lxd

Install the Anbox Cloud Appliance software using the following command and selecting the default answers:

  $ sudo anbox-cloud-appliance init

Watch the status page at https://$(ec2_public_DNS_name) for progress information.

Figure 4: The status of deploying Anbox Cloud.

Figure 4: The status of deploying Anbox Cloud.

The initialization process takes approximately 20 minutes. After it’s complete, register the Ubuntu SSO account previously created, then follow the instructions provided to finalize the process.

  $ anbox-cloud-appliance dashboard register <your Ubuntu SSO email address>

Stream an Android game application

Use the sample from the following repo to setup the service on the streaming server:

  $ git clone https://github.com/anbox-cloud/cloud-gaming-demo.git

Build the Flutter web UI:

$ sudo snap install flutter –classic

$ cd cloud-gaming-demo/ui && flutter build web && cd ..

$ mkdir -p backend/service/static

$ cp -av ui/build/web/* backend/service/static

Then build the backend service which processes requests and interacts with the Anbox Stream Gateway to create instances of game applications. Start by preparing the environment:

$ sudo apt-get install python3-pip

$ sudo pip3 install virtualenv

$ cd backend && virtualenv venv

Create the configuration file for the backend service so that it can access the Anbox Stream Gateway. There are two parameters to set: gateway-URL and gateway-token. The gateway token can be obtained from the following command:

$ anbox-cloud-appliance gateway account create <account-name>

Create a file called config.yaml that contains the two values:

gateway-url: https:// <EC2 public DNS name>

gateway-token: <gateway_token>

Add the following line to the activate hook in the backend/venv/bin/ directory so that the backend service can read config.yaml on its startup:

$ export CONFIG_PATH=<path_to_config_yaml>

Now we can launch the backend service which will be served by default on TCP port 8002.

$./run.sh

In the next steps, we download a game and build it via Anbox Cloud. We need an Android APK and a configuration file. Create a folder under the HOME directory and create a manifest.yaml file in the folder. In this example, we must add the following details in the file. You can refer to the Anbox Cloud documentation for more information on the format.

name: genshin

instance-type: g10.3

resources:

cpus: 10

memory: 25GB

disk-size: 50GB

gpu-slots: 15

features: [“enable_virtual_keyboard”]

Select an APK for the arm64-v8a architecture which is natively supported on Graviton. In this example, we download Genshin Impact, an action role-playing game developed and published by miHoYo. You must supply your own Android APK if you want to try these steps. Download the APK into the folder and rename it to app.apk. Overall, the final layout of the game folder should look as follows:

.

├── app.apk

└── manifest.yaml

Run the following command from the folder to create the application:

$ amc application create  .

Wait until the application status changes to ready. You can monitor the status with the following command:

$ amc application ls

Edit the following:

  1. Update the gameids variable defined in the ui/lib/homepage.dart file to include the name of the game (as declared in the manifest file).
  2. Insert a new key/value pair to the static appNameMap and appDesMap variables defined in the lib/api/application.dart file.
  3. Provide a screenshot of the game (in jpeg format), rename it to <game-name>.jpeg, and put it into the ui/lib/assets directory.

Then, re-build the web UI, copy the contents from the ui/build/web folder to the backend/service/static directory, and refresh the webpage.

Test the game

Using your mobile phone, open the Firefox browser or another browser that supports WebRTC. Type the public DNS name of the G5g instance with the 8002 TCP port, and you should see something similar to the following:

Figure 5: The webpage of the Android streaming game portal.

Figure 5: The webpage of the Android streaming game portal.

Select the Play now button, wait a moment for the application to be setup on the server side, and then enjoy the game.

Figure 6: The screen capture of playing Android streaming game.

Figure 6: The screen capture of playing Android streaming game.

Clean-up

Please cancel the subscription of the Anbox Cloud Appliance in the AWS Marketplace, you can follow the AWS Marketplace Buyer Guide for more details, then terminate the G5g.xlarge instance to avoid incurring future costs.

Conclusion

In this post, we demonstrated how a resource-intensive Android game runs natively on a Graviton-based G5g instance and is streamed to an Arm-based mobile device. The benefits include better price-performance, reduced development effort, and faster time-to-market. One way to run your games efficiently on the cloud is through software available on the AWS Marketplace, such as the Anbox Cloud Appliance, which was showcased as an example method.

To learn more about AWS Graviton, visit the official product page and the technical guide.

AWS Marketplace Vendor Insights – Simplify Third-Party Software Risk Assessments

Post Syndicated from Sébastien Stormacq original https://aws.amazon.com/blogs/aws/aws-marketplace-vendor-insights-simplify-third-party-software-risk-assessments/

AWS Marketplace Vendor Insights is a new capability of AWS Marketplace. It simplifies third-party software risk assessments when procuring solutions from the AWS Marketplace.

It helps you to ensure that the third-party software continuously meets your industry standards by compiling security and compliance information, such as data privacy and residency, application security, and access control, in one consolidated dashboard.

As a security engineer, you may now complete third-party software risk assessment in a few days instead of months. You can now:

  • Quickly discover products in AWS Marketplace that meet your security and certification standards by searching for and accessing Vendor Insights profiles.
  • Access and download current and validated information, with evidence gathered from the vendors’ security tools and audit reports. Reports are available for download on AWS Artifact third-party reports (now available in preview).
  • Monitor your software’s security posture post-procurement and receive notifications for security and compliance events.

As a software vendor, you can now reduce the operational burden of responding to buyer requests for risk assessment information. It gives your customers a self-service access experience. You can now:

  • Build your product’s security profile by uploading your ISO 27001 or SOC2 Type 2 report and completing a software risk assessment with AWS Audit Manager.
  • Store and share your compliance reports such as ISO 27001 and SOC2 Type 2, using AWS Artifact third-party reports (preview).
  • View and approve your buyer requests for viewing security controls and compliance artifacts stored in Vendor Insights.

Let’s See It in Action
I want to procure a solution on the AWS Marketplace. But before purchasing the product, as a security engineer, I want to review its compliance. I navigate to the AWS Marketplace page of the AWS Management Console. I use the faceted search on the left side to select vendors that are ISO 27001 compliant.

AWS MArketplace vendor insights - faceted searchI select a product. On the Product Overview page, I select View assessment data on the top right side (not shown on the screenshot). Then, I can see the overview page, which shows the Security certification received and the Expiration date.

AWS MArketplace vendor insights - certification receivedI select the Security and compliance tab and see that I need to request access to see the detailed security and compliance information. I select the Request access button on the top right side to ask the vendor for access to their compliance documents.

AWS MArketplace vendor insights - request access part 1

On the next page, I fill in the Your information form with my details, and I select Request access.

AWS MArketplace vendor insights - request access part 2The Next Steps section details what will happen next. The seller will contact me to sign a nondisclosure agreement (NDA). The seller will notify AWS Marketplace when the NDA is signed. Then, I will be granted access to Vendor Insights data.

The process can take a few days. For this demo, I switch to a fictional product—Everest—for which I have access to the compliance data. Here is the Security and compliance tab when my request for access is accepted.

The Summary section shows how many controls are available. It reports how many have been validated with evidence and how many have been self-reported by the seller. It also shows how many noncompliant controls are reported.

I can scroll down the page to see the details for multiple categories: Audit, compliance and security policy, Data security, Access management, Application security, Risk management and incident response, Business resiliency and continuity, End user device security, Infrastructure security, Human resources, and Security and configuration policy. The screenshot does not show all of them.

AWS Marketplace vendor insights - security and complianceI select the detail for Access control and see the list under Control name. For each of them, I can see the compliance for SOC2 Type 2, ISO 27001, and the Vendor self-assessment.

AWS Marketplace vendor insights - access controlI select the noncompliant one to get the details and the explanation the vendor provided.

AWS Marketplace vendor insights - non compliant details

If needed, I might also use AWS Artifact third-party reports (preview) to download the compliance reports.

For Software Vendors
As a software vendor, you can create a security profile for your SaaS products on AWS Marketplace and share this profile with your prospective and existing buyers. It helps you to reduce the manual work for engineering and security teams to respond to your customer questionnaires.

To create a security profile, you will need to complete a self-assessment using AWS Audit Manager on your marketplace management AWS account, share the current SOC2 Type II and ISO27001 compliance artifacts, if available, and turn on automated assessment using Audit Manager and AWS Config on your production AWS accounts.

Our team has created an AWS CloudFormation template to automate the onboarding steps. You can find the technical resources, such as the setup guide and the onboarding templates, on our GitHub repository. Once the profile is created, Vendor Insights will keep your security profile up to date by using automated evidence from Audit Manager and AWS Config. The updates to your profile are sent as notifications. Your security and compliance team can review the updates before they are shared with buyers.

With Vendor Insights, you manage access to your product’s security profile by approving the buyer’s subscription requests. When a buyer requests access, Vendor Insights shares their contact information over email to your compliance or deal-desk operations team. They can complete the NDA with the buyer and notify AWS Marketplace to grant the buyer access to your security profile. You can also request AWS Marketplace to revoke the buyer’s subscription on a later day if you don’t want to share your product’s security and compliance posture information with the buyer anymore.

The entire process is documented in the AWS Marketplace Vendor Insights seller guide.

Pricing and Availability
Vendor Insights is now available in all AWS Regions where AWS Marketplace is available.

The pricing model is very simple; there is no charge involved for using AWS Marketplace Vendor Insights.

For buyers, you can access and download assets during your procurement phase. You lose access to the Vendor Insights profile if you have not purchased the product after 60 days. When you purchase the product, you keep access to the product’s security profile for continuous monitoring of its compliance status.

For sellers, AWS Marketplace doesn’t charge to activate and use Vendor Insights. You will incur fees for using Audit Manager and AWS Config.

Go and start your risk assessments on the AWS Marketplace today.

— seb

New – AWS Marketplace for Containers Now Supports Direct Deployment to Amazon EKS Clusters

Post Syndicated from Channy Yun original https://aws.amazon.com/blogs/aws/new-aws-marketplace-for-containers-now-supports-direct-deployment-to-amazon-eks-clusters/

Today we are announcing the extension of the Amazon Elastic Kubernetes Service (EKS) add-ons deployment experience to include software from AWS Marketplace for Containers. Amazon EKS add-ons allow you to consistently ensure that your EKS clusters are secure and stable and reduce the amount of work that you need to do in order to install, configure, and update Kubernetes software.

This new launch makes it easier for you to find third-party Kubernetes operation software from the Amazon EKS console and deploy it to your EKS clusters using the same commands used to deploy EKS add-ons.

Amazon EKS customers can now find and deploy third-party operational software to their EKS clusters through the EKS console or using command-line interface (CLI), eksctl, AWS APIs, or infrastructure as code tools such as AWS CloudFormation and Terraform. All software in AWS Marketplace is continually scanned for common vulnerabilities and exposures (CVEs), providing you confidence when deploying software onto your EKS clusters.

In this launch, you can find commercial software from popular independent software vendors (ISVs), such as Kubecost, Teleport, Tetrate, Upbound, Factorhouse, and Dynatrace.

Deploying AWS Marketplace for Containers to Your EKS Clusters
To get started, in the Amazon EKS console, go to your EKS clusters, and in the Add-ons tab, select Get more add-ons to find new third-party EKS add-ons in the cluster setting of your existing EKS clusters.

You can see a list of Amazon EKS add-ons provided by AWS and a list of products from independent software vendors provided by AWS Marketplace add-ons. You can use the search bar and filter by categories, vendors, and pricing models. Check your favorite add-ons and select Next.

In the next step, configure selected add-ons, such as the version and some optional settings for each add-on. In step 3, you can review and add your third-party add-ons in your EKS cluster.

If you do not have a subscription to Kubecost, you will be presented with a button to redirect you to the AWS Marketplace website to complete the subscription.

Subscribe to the software in AWS Marketplace. You will need to accept the end user license agreement (EULA), select the version of the software you would like to deploy, and finally configure the software if required.

You can also deploy kubecost using the AWS Command Line Interface (AWS CLI). Using the create-addon API, you can install Kubernetes software from AWS Marketplace. If you try to deploy software from AWS Marketplace without first subscribing to it, the API will return an error and redirect you to subscribe to the software.

$ aws eks create-addon --cluster-name channy-eks --addon-name kubecost_kubecost  
{
"addon": {
"addonName": "kubecost_kubecost",
"clusterName": "channy-eks",
"status": "CREATING",
"addonVersion": "v1.97.0-eksbuild.1",
"health": {
 "issues": []
     }
       }
}

As I noted, after subscribing your software, you can finish add-ons settings for selected software. To learn more, see the Amazon EKS add-ons documentation or the Amazon EKS API reference.

AWS Marketplace seller EKS Add-ons Available at Launch
Here is a list of AWS Marketplace software sellers that support Amazon EKS add-ons today.

All software in AWS Marketplace is continually scanned for common vulnerabilities and exposures (CVEs) and is validated by AWS to work with EKS. After deployment, customers will receive notifications when new versions of the software are available to upgrade and ensure they are running the latest patches at all times. Try them out today!

To learn more details about creating container products on AWS Marketplace, visit Getting started as a seller and Container-based products in the AWS documentation. If you have any further questions please email [email protected] or contact your usual AWS partner contact.

Available Now
The feature of AWS Marketplace for Amazon EKS add-ons is available now in all commercial Regions that support AWS Marketplace and Amazon EKS. You can start using the feature directly from the above products of launch partners.

Give it a try, and please send us feedback either in the AWS re:Post for Amazon EKS, AWS Marketplace, or through your usual AWS support contacts.

Channy

Deploying IBM Cloud Pak for Data on Red Hat OpenShift Service on AWS

Post Syndicated from Eduardo Monich Fronza original https://aws.amazon.com/blogs/architecture/deploying-ibm-cloud-pak-for-data-on-red-hat-openshift-service-on-aws/

Amazon Web Services (AWS) customers who are looking for a more intuitive way to deploy and use IBM Cloud Pak for Data (CP4D) on the AWS Cloud, can now use the Red Hat OpenShift Service on AWS (ROSA).

ROSA is a fully managed service, jointly supported by AWS and Red Hat. It is managed by Red Hat Site Reliability Engineers and provides a pay-as-you-go pricing model, as well as a unified billing experience on AWS.

With this, customers do not manage the lifecycle of Red Hat OpenShift Container Platform clusters. Instead, they are free to focus on developing new solutions and innovating faster, using IBM’s integrated data and artificial intelligence platform on AWS, to differentiate their business and meet their ever-changing enterprise needs.

CP4D can also be deployed from the AWS Marketplace with self-managed OpenShift clusters. This is ideal for customers with requirements, like Red Hat OpenShift Data Foundation software defined storage, or who prefer to manage their OpenShift clusters.

In this post, we discuss how to deploy CP4D on ROSA using IBM-provided Terraform automation.

Cloud Pak for data architecture

Here, we install CP4D in a highly available ROSA cluster across three availability zones (AZs); with three master nodes, three infrastructure nodes, and three worker nodes.

Review the AWS Regions and Availability Zones documentation and the regions where ROSA is available to choose the best region for your deployment.

This is a public ROSA cluster, accessible from the internet via port 443. When deploying CP4D in your AWS account, consider using a private cluster (Figure 1).

IBM Cloud Pak for Data on ROSA

Figure 1. IBM Cloud Pak for Data on ROSA

We are using Amazon Elastic Block Store (Amazon EBS) and Amazon Elastic File System (Amazon EFS) for the cluster’s persistent storage. Review the IBM documentation for information about supported storage options.

Review the AWS prerequisites for ROSA, and follow the Security best practices in IAM documentation to protect your AWS account before deploying CP4D.

Cost

The costs associated with using AWS services when deploying CP4D in your AWS account can be estimated on the pricing pages for the services used.

Prerequisites

This blog assumes familiarity with: CP4D, Terraform, Amazon Elastic Compute Cloud (Amazon EC2), Amazon EBS, Amazon EFS, Amazon Virtual Private Cloud, and AWS Identity and Access Management (IAM).

You will need the following before getting started:

Installation steps

Complete the following steps to deploy CP4D on ROSA:

  1. First, enable ROSA on the AWS account. From the AWS ROSA console, click on Enable ROSA, as in Figure 2.

    Enabling ROSA on your AWS account

    Figure 2. Enabling ROSA on your AWS account

  2. Click on Get started. Redirect to the Red Hat website, where you can register and obtain a Red Hat ROSA token.
  3. Navigate to the AWS IAM console. Create an IAM policy named cp4d-installer-policy and add the following permissions:
    {
        "Version": "2012-10-17",
        "Statement": [
            {
                "Effect": "Allow",
                "Action": [
                    "autoscaling:*",
                    "cloudformation:*",
                    "cloudwatch:*",
                    "ec2:*",
                    "elasticfilesystem:*",
                    "elasticloadbalancing:*",
                    "events:*",
                    "iam:*",
                    "kms:*",
                    "logs:*",
                    "route53:*",
                    "s3:*",
                    "servicequotas:GetRequestedServiceQuotaChange",
                    "servicequotas:GetServiceQuota",
                    "servicequotas:ListServices",
                    "servicequotas:ListServiceQuotas",
                    "servicequotas:RequestServiceQuotaIncrease",
                    "sts:*",
                    "support:*",
                    "tag:*"
                ],
                "Resource": "*"
            }
        ]
    }
  4. Next, let’s create an IAM user from the AWS IAM console, which will be used for the CP4D installation:
    a. Specify a name, like ibm-cp4d-bastion.
    b. Set the credential type to Access key – Programmatic access.
    c. Attach the IAM policy created in Step 3.
    d. Download the .csv credentials file.
  5. From the Amazon EC2 console, create a new EC2 key pair and download the private key.
  6. Launch an Amazon EC2 instance from which the CP4D installer is launched:
    a. Specify a name, like ibm-cp4d-bastion.
    b. Select an instance type, such as t3.medium.
    c. Select the EC2 key pair created in Step 4.
    d. Select the Red Hat Enterprise Linux 8 (HVM), SSD Volume Type for 64-bit (x86) Amazon Machine Image.
    e. Create a security group with an inbound rule that allows connection. Restrict access to your own IP address or an IP range from your organization.
    f. Leave all other values as default.
  7. Connect to the EC2 instance via SSH using its public IP address. The remaining installation steps will be initiated from it.
  8. Install the required packages:
    $ sudo yum update -y
    $ sudo yum install git unzip vim wget httpd-tools python38 -y
    
    $ sudo ln -s /usr/bin/python3 /usr/bin/python
    $ sudo ln -s /usr/bin/pip3 /usr/bin/pip
    $ sudo pip install pyyaml
    
    $ curl "https://awscli.amazonaws.com/awscli-exe-linux-x86_64.zip" -o "awscliv2.zip"
    $ unzip awscliv2.zip
    $ sudo ./aws/install
    
    $ wget "https://github.com/stedolan/jq/releases/download/jq-1.6/jq-linux64"
    $ chmod +x jq-linux64
    $ sudo mv jq-linux64 /usr/local/bin/jq
    
    $ wget "https://mirror.openshift.com/pub/openshift-v4/clients/ocp/4.10.15/openshift-client-linux-4.10.15.tar.gz"
    $ tar -xvf openshift-client-linux-4.10.15.tar.gz
    $ chmod u+x oc kubectl
    $ sudo mv oc /usr/local/bin
    $ sudo mv kubectl /usr/local/bin
    
    $ sudo yum install -y yum-utils
    $ sudo yum-config-manager --add-repo $ https://rpm.releases.hashicorp.com/RHEL/hashicorp.repo
    $ sudo yum -y install terraform
    
    $ sudo subscription-manager repos --enable=rhel-7-server-extras-rpms
    $ sudo yum install -y podman
  9. Configure the AWS CLI with the IAM user credentials from Step 4 and the desired AWS region to install CP4D:
    $ aws configure
    
    AWS Access Key ID [None]: AK****************7Q
    AWS Secret Access Key [None]: vb************************************Fb
    Default region name [None]: eu-west-1
    Default output format [None]: json
  10. Clone the following IBM GitHub repository:
    https://github.com/IBM/cp4d-deployment.git

    $ cd ~/cp4d-deployment/managed-openshift/aws/terraform/
  11. For the purpose of this post, we enabled Watson Machine Learning, Watson Studio, and Db2 OLTP services on CP4D. Use the example in this step to create a Terraform variables file for CP4D installation. Enable CP4D services required for your use case:
    region			= "eu-west-1"
    tenancy			= "default"
    access_key_id 		= "your_AWS_Access_key_id"
    secret_access_key 	= "your_AWS_Secret_access_key"
    
    new_or_existing_vpc_subnet	= "new"
    az				= "multi_zone"
    availability_zone1		= "eu-west-1a"
    availability_zone2 		= "eu-west-1b"
    availability_zone3 		= "eu-west-1c"
    
    vpc_cidr 		= "10.0.0.0/16"
    public_subnet_cidr1 	= "10.0.0.0/20"
    public_subnet_cidr2 	= "10.0.16.0/20"
    public_subnet_cidr3 	= "10.0.32.0/20"
    private_subnet_cidr1 	= "10.0.128.0/20"
    private_subnet_cidr2 	= "10.0.144.0/20"
    private_subnet_cidr3 	= "10.0.160.0/20"
    
    openshift_version 		= "4.10.15"
    cluster_name 			= "your_ROSA_cluster_name"
    rosa_token 			= "your_ROSA_token"
    worker_machine_type 		= "m5.4xlarge"
    worker_machine_count 		= 3
    private_cluster 			= false
    cluster_network_cidr 		= "10.128.0.0/14"
    cluster_network_host_prefix 	= 23
    service_network_cidr 		= "172.30.0.0/16"
    storage_option 			= "efs-ebs" 
    ocs 				= { "enable" : "false", "ocs_instance_type" : "m5.4xlarge" } 
    efs 				= { "enable" : "true" }
    
    accept_cpd_license 		= "accept"
    cpd_external_registry 		= "cp.icr.io"
    cpd_external_username 	= "cp"
    cpd_api_key 			= "your_IBM_API_Key"
    cpd_version 			= "4.5.0"
    cpd_namespace 		= "zen"
    cpd_platform 			= "yes"
    
    watson_knowledge_catalog 	= "no"
    data_virtualization 		= "no"
    analytics_engine 		= "no"
    watson_studio 			= "yes"
    watson_machine_learning 	= "yes"
    watson_ai_openscale 		= "no"
    spss_modeler 			= "no"
    cognos_dashboard_embedded 	= "no"
    datastage 			= "no"
    db2_warehouse 		= "no"
    db2_oltp 			= "yes"
    cognos_analytics 		= "no"
    master_data_management 	= "no"
    decision_optimization 		= "no"
    bigsql 				= "no"
    planning_analytics 		= "no"
    db2_aaservice 			= "no"
    watson_assistant 		= "no"
    watson_discovery 		= "no"
    openpages 			= "no"
    data_management_console 	= "no"
  12. Save your file, and launch the commands below to install CP4D and track progress:
    $ terraform init -input=false
    $ terraform apply --var-file=cp4d-rosa-3az-new-vpc.tfvars \
       -input=false | tee terraform.log
  13. The installation runs for 4 or more hours. Once installation is complete, the output includes (as in Figure 3):
    a. Commands to get the CP4D URL and the admin user password
    b. CP4D admin user
    c. Login command for the ROSA cluster
CP4D installation output

Figure 3. CP4D installation output

Validation steps

Let’s verify the installation!

  1. Log in to your ROSA cluster using your cluster-admin credentials.
    $ oc login https://api.cp4dblog.17e7.p1.openshiftapps.com:6443 --username cluster-admin --password *****-*****-*****-*****
  2. Initiate the following command to get the cluster’s console URL (Figure 4):
    $ oc whoami --show-console

    ROSA console URL

    Figure 4. ROSA console URL

  3. Run the commands in this step to retrieve the CP4D URL and admin user password (Figure 5).
    $ oc extract secret/admin-user-details \
      --keys=initial_admin_password --to=- -n zen
    $ oc get routes -n zen

    Retrieve the CP4D admin user password and URL

    Figure 5. Retrieve the CP4D admin user password and URL

  4. Initiate the following commands to have the CP4D workloads in your ROSA cluster (Figure 6):
    $ oc get pods -n zen
    $ oc get deployments -n zen
    $ oc get svc -n zen 
    $ oc get pods -n ibm-common-services 
    $ oc get deployments -n ibm-common-services
    $ oc get svc -n ibm-common-services
    $ oc get subs -n ibm-common-services

    Checking the CP4D pods running on ROSA

    Figure 6. Checking the CP4D pods running on ROSA

  5. Log in to your CP4D web console using its URL and your admin password.
  6. Expand the navigation menu. Navigate to Services > Services catalog for the available services (Figure 7).

    Navigating to the CP4D services catalog

    Figure 7. Navigating to the CP4D services catalog

  7. Notice that the services set as “enabled” correspond with your Terraform definitions (Figure 8).

    Services enabled in your CP4D catalog

    Figure 8. Services enabled in your CP4D catalog

Congratulations! You have successfully deployed IBM CP4D on Red Hat OpenShift on AWS.

Post installation

Refer to the IBM documentation on setting up services, if you need to enable additional services on CP4D.

When installing CP4D on productive environments, please review the IBM documentation on securing your environment. Also, the Red Hat documentation on setting up identity providers for ROSA is informative. You can also consider enabling auto scaling for your cluster.

Cleanup

Connect to your bastion host, and run the following steps to delete the CP4D installation, including ROSA. This step avoids incurring future charges on your AWS account.

$ cd ~/cp4d-deployment/managed-openshift/aws/terraform/
$ terraform destroy -var-file="cp4d-rosa-3az-new-vpc.tfvars"

If you’ve experienced any failures during the CP4D installation, run these next steps:

$ cd ~/cp4d-deployment/managed-openshift/aws/terraform
$ sudo cp installer-files/rosa /usr/local/bin
$ sudo chmod 755 /usr/local/bin/rosa
$ Cluster_Name=`rosa list clusters -o yaml | grep -w "name:" | cut -d ':' -f2 | xargs`
$ rosa remove cluster --cluster=${Cluster_Name}
$ rosa logs uninstall -c ${Cluster_Name } –watch
$ rosa init --delete-stack
$ terraform destroy -var-file="cp4d-rosa-3az-new-vpc.tfvars"

Conclusion

In summary, we explored how customers can take advantage of a fully managed OpenShift service on AWS to run IBM CP4D. With this implementation, customers can focus on what is important to them, their workloads, and their customers, and less on managing the day-to-day operations of managing OpenShift to run CP4D.

Check out the IBM Cloud Pak for Data Simplifies and Automates How You Turn Data into Insights blog to learn how to use CP4D on AWS to unlock the value of your data.

Additional resources

Fortinet FortiCNP – Now Available in AWS Marketplace

Post Syndicated from Jeff Barr original https://aws.amazon.com/blogs/aws/fortinet-forticnp-now-available-in-aws-marketplace/

When I first started to talk about AWS in front of IT professionals, they would always listen intently and ask great questions. Invariably, a seasoned pro would raise there hand and ask “This all sounds great, but have you thought about security?” Of course we had, and for a while I would describe our principal security features ahead of time instead of waiting for the question.

Today, the field of cloud security is well-developed, as is the practice of SecOps (Security Operations). There are plenty of tools, plenty of best practices, and a heightened level of awareness regarding the important of both. However, as on-premises workloads continue to migrate to the cloud, SecOps practitioners report that they are concerned about alert fatigue, while having to choose tools that ensure the desired level of workload coverage. According to a recent survey conducted by Fortinet, 78% of the respondents were looking for a single cloud security platform that offers sufficient workload coverage to address all of their needs.

Fortinet FortiCNP
In response to this clear need for a single tool that addresses cloud workloads and cloud storage, Fortinet has launched FortiCNP (Cloud Native Protection). As the name implies, this security product is designed to offer simple & effective protection of cloud resources. It monitors and tracks multiple sources of security issues including configurations, user activity, and VPC Flow Logs. FortiCNP scans cloud storage for content that is sensitive or malicious, and also inspects containers for vulnerabilities and misconfigurations. The findings and alerts generated by all of this monitoring, tracking, and scanning is mapped into actionable insights and compliance reports, all available through a single dashboard.

Now in AWS Marketplace
I am happy to report that FortiCNP is now available in AWS Marketplace and that you can start your subscription today! It connects to multiple AWS security tools including Amazon Inspector, AWS Security Hub, and Amazon GuardDuty, with plans to add support for Amazon Macie, and other Fortinet products such as FortiEDR (Endpoint Detection and Response) and FortiGate-VM (next-generation firewall) later this year.

FortinCNP provides you with features that are designed to address your top risk management, threat management, compliance, and SecOps challenges. Drawing on all of the data sources and tools that I mentioned earlier, it runs hundreds of configuration assessments to identify risks, and then presents the findings in a scored, prioritized fashion.

Getting Started with FortiCNP
After subscribing to FortiCNP in AWS Marketplace, I set up my accounts and enable some services. In the screenshots that follow I will show you the highlights of each step, and link you to the docs for more information:

Enable Security Hub and EventBridge – Following the instructions in AWS Security Hub and EventBridge Configuration, I choose an AWS region to hold my aggregated findings, enable Amazon GuardDuty and Amazon Inspector, and route the findings to AWS Security Hub.

Add VPC Flow Logs – Again following the instructions (AWS Traffic Configuration), I enable VPC Flow Logs. This allows FortiCNP to access cloud traffic data and present it in the Traffic view.

Add AWS Accounts – FortiCNP can protect a single AWS account or all of the accounts in an entire Organization, or anywhere in-between. Accounts and Organizations can be added manually, or by using a CloudFormation template that sets up an IAM Role, enables CloudTrail, and takes care of other housekeeping. To learn more, read Amazon Web Services Account OnBoarding. Using the ADMIN page of FortiCNP, I choose to add a single account using a template:

Following the prompts, I run a CloudFormation template and review the resources that it creates:

After a few more clicks, FortiCNP verifies my license and then I am ready to go.

Enable Storage Guardian – I can enable data protection for individual S3 buckets, and initiate a scan (more info at Activate Data Protection on Bucket / Container).

With all of the setup steps complete, I can review and act on the findings. I start by reviewing the dashboard:

Because I just started using the product, the overall risk trend section at the top has just a few days worth of history. The Resource Overview shows that my resources are at low risk, with only informational messages. I have no exposed storage with sensitive data, and none with malware (always good to know).

I can click on a resource type to learn more the findings. Each resource has an associated risk score:

From here I can click on a resource to see which of the findings contribute to the risk score:

I can switch to the Changes tab to see all relevant configuration changes for the resource:

I can also add notes to the resource, and I can send notifications to several messaging and ticketing systems:

Compliance reports are generated automatically on a monthly, quarterly, and yearly basis. I can also generate a one-time compliance report to cover any desired time frame:

Reports are available immediately, and can be downloaded for review:

The policies that are used to generate findings are open and accessible,and can be enabled, disabled, and fine-tuned. For example, the Alert on activity from suspicious locations (sorry, all of you who are connecting from Antarctica):

There’s a lot more but I am just about out of space. Check out the online documentation to learn a lot more.

Available Today
You can subscribe to FortiCNP now and start enjoying the benefits today!

Jeff;

New – Cloud NGFW for AWS

Post Syndicated from Jeff Barr original https://aws.amazon.com/blogs/aws/new-cloud-ngfw-for-aws/

In 2018 I wrote about AWS Firewall Manager (Central Management for Your Web Application Portfolio) and showed you how you could host multiple applications, perhaps spanning multiple AWS accounts and regions, while maintaining centralized control over your organization’s security settings and profile. In the same way that Amazon Relational Database Service (RDS) supports multiple database engines, Firewall Manager supports multiple types of firewalls: AWS Web Application Firewall, AWS Shield Advanced, VPC security groups, AWS Network Firewall, and Amazon Route 53 DNS Resolver DNS Firewall.

Cloud NGFW for AWS
Today we are introducing support for Palo Alto Networks Cloud NGFW in Firewall Manager. You can now use Firewall Manager to centrally provision & manage your Cloud next-generation firewall resources (also called NGFWs) and monitor for non-compliant configurations, all across multiple accounts and Virtual Private Clouds (VPCs). You get the best-in-class security features offered by Cloud NGFW as a managed service wrapped inside a native AWS experience, with no hardware hassles, no software upgrades, and pay-as-you-go pricing. You can focus on keeping your organization safe and secure, even as you add, change, and remove AWS resources.

Palo Alto Networks pioneered the concept of deep packet inspection in their NGFWs. Cloud NGFW for AWS can decrypt network packets, look inside, and then identify applications using signatures, protocol decoding, behavioral analysis, and heuristics. This gives you the ability to implement fine-grained, application-centric security management that is more effective than simpler models that are based solely on ports, protocols, and IP addresses. Using Advanced URL Filtering, you can create rules that take advantage of curated lists of sites (known as feeds) that distribute viruses, spyware, and other types of malware, and you have many other options for identifying and handling desirable and undesirable network traffic. Finally, Threat Prevention stops known vulnerability exploits, malware, and command-and-control communication.

The integration lets you choose the deployment model that works best with your network architecture:

Centralized – One firewall running in a centralized “inspection” VPC.

Distributed – Multiple firewalls, generally one for each VPC within the scope managed by Cloud NGFW for AWS.

Cloud NGFW protects outbound, inbound, and VPC-to-VPC traffic. We are launching with support for all traffic directions.

AWS Inside
In addition to centralized provisioning and management via Firewall Manager, Cloud NGFW for AWS makes use of many other parts of AWS. For example:

AWS Marketplace – The product is available in SaaS form on AWS Marketplace with pricing based on hours of firewall usage, traffic processed, and security features used. Cloud NGFW for AWS is deployed on a highly available compute cluster that scales up and down with traffic.

AWS Organizations – To list and identify new and existing AWS accounts and to drive consistent, automated cross-account deployment.

AWS Identity and Access Management (IAM) – To create cross-account roles for Cloud NGFW to access log destinations and certificates in AWS Secrets Manager.

AWS Config – To capture changes to AWS resources such as VPCs, VPC route configurations, and firewalls.

AWS CloudFormation – To run a StackSet that onboards each new AWS account by creating the IAM roles.

Amazon S3, Amazon CloudWatch, Amazon Kinesis – Destinations for log files and records.

Gateway Load Balancer – To provide resiliency, scale, and availability for the NGFWs.

AWS Secrets Manager – To store SSL certificates in support of deep packet inspection.

Cloud NGFW for AWS Concepts
Before we dive in and set up a firewall, let’s review a few important concepts:

Tenant – An installation of Cloud NGFW for AWS associated with an AWS customer account. Each purchase from AWS Marketplace creates a new tenant.

NGFW – A firewall resource that spans multiple AWS Availability Zones and is dedicated to a single VPC.

Rulestack – A set of rules that defines the access controls and threat protections for one or more NGFWs.

Global Rulestack – Represented by an FMS policy, contains rules that apply to all of the NGFWs in an AWS Organization.

Getting Started with Cloud NGFW for AWS
Instead of my usual step-by-step walk-through, I am going to show you the highlights of the purchasing and setup process. For a complete guide, read Getting Started with Cloud NGFW for AWS.

I start by visiting the Cloud NGFW Pay-As-You-Go listing in AWS Marketplace. I review the pricing and terms, click Continue to Subscribe, and proceed through the subscription process.

After I subscribe, Cloud NGFW for AWS will send me an email with temporary credentials for the Cloud NGFW console. I use the credential to log in, and then I replace the temporary password with a long-term one:

I click Add AWS Account and enter my AWS account Id. The console will show my account and any others that I subsequently add:

The NGFW console redirects me to the AWS CloudFormation console and prompts me to create a stack. This stack sets up cross-account IAM roles, designates (but does not create) logging destinations, and lets Cloud NGFW access certificates in Secrets Manager for packet decryption.

From here, I proceed to the AWS Firewall Manager console and click Settings. I can see that my cloud NGFW tenant is ready to be associated with my account. I select the radio button next to the name of the firewall, in this case “Palo Alto Networks Cloud NGFW” and then click the Associate button. Note that the subscription status will change to Active in a few minutes.

Screenshot showing the account association process

Once the NGFW tenant is associated with my account I return to the AWS Firewall Manager console and click Security policies to proceed. There are no policies yet, and I click Create policy to make one:

I select Palo Alto Networks Cloud NGFW, choose the Distributed model, pick an AWS region, and click Next to proceed (this model will create a Cloud NGFW endpoint in each in-scope VPC):

I enter a name for my policy (Distributed-1), and select one of the Cloud NGFW firewall policies that are available to my account. I can also click Create firewall policy to navigate to the Palo Alto Networks console and step through the process of creating a new policy. Today I select grs-1:

I have many choices and options when it comes to logging. Each of the three types of logs (Traffic, Decryption, and Threat) can be routed to an S3 bucket, a CloudWatch log group, or a Kinesis Firehose delivery stream. I choose an S3 bucket and click Next to proceed:

A screenshot showing the choices for logging.

Now I choose the Availability Zones where I need endpoints. I have the option to select by name or by ID, and I can optionally designate a CIDR block within each AZ that will be used for the subnets:

The next step is to choose the scope: the set of accounts and resources that are covered by this policy. As I noted earlier, this feature works hand-in-hand with AWS Organizations and gives me multiple options to choose from:

The CloudFormation template linked above is used to create an essential IAM role in each member account. When I run it, I will need to supply values for the CloudNGFW Account ID and ExternalId parameters, both of which are available from within the Palo Alto Networks console. On the next page I can tag my newly created policy:

On the final page I review and confirm all of my choices, and click Create policy to do just that:

My policy is created right away, and it will start to list the in-scope accounts within minutes. Under the hood, AWS Firewall Manager calls Cloud NGFW APIs to create NGFWs for the VPCs in my in-scope accounts, and the global rules are automatically associated with the created NGFWs. When the NGFWs are ready to process traffic, AWS Firewall Manager creates the NGFW endpoints in the subnets.

As new AWS accounts join my organization, AWS Firewall Manager automatically ensures they are compliant by creating new NGFWs as needed.

Next I review the Cloud NGFW threat logs to see what threats are being blocked by Cloud NGFW. In this example Cloud NGFW protected my VPC against SIPVicious scanning activity:

Screenshot showing the threat log detecting SIPVicious activity

And in this example, Cloud NGFW protected my VPC against a malware download:

a screenshot showing the threat log of malware detection

Things to Know
Both AWS Firewall Manager and Cloud NGFW are regional services and my AWS Firewall Manager policy is therefore regional. Cloud NGFW is currently available in the US East (N. Virginia) and US West (N. Califormia) Regions, with plans to expand in the near future.

Jeff;

New – AWS Marketplace for Containers Anywhere to Deploy Your Kubernetes Cluster in Any Environment

Post Syndicated from Channy Yun original https://aws.amazon.com/blogs/aws/new-aws-marketplace-for-containers-anywhere-to-deploy-your-kubernetes-cluster-in-any-environment/

More than 300,000 customers use AWS Marketplace today to find, subscribe to, and deploy third-party software packaged as Amazon Machine Images (AMIs), software-as-a-service (SaaS), and containers. Customers can find and subscribe containerized third-party applications from AWS Marketplace and deploy them in Amazon Elastic Container Service (Amazon ECS) and Amazon Elastic Kubernetes Service (Amazon EKS).

Many customers that run Kubernetes applications on AWS want to deploy them on-premises due to constraints, such as latency and data governance requirements. Also, once they have deployed the Kubernetes application, they need additional tools to govern the application through license tracking, billing, and upgrades.

Today, we announce AWS Marketplace for Containers Anywhere, a set of capabilities that allows AWS customers to find, subscribe to, and deploy third-party Kubernetes applications from AWS Marketplace on any Kubernetes cluster in any environment. This capability makes the AWS Marketplace more useful for customers who run containerized workloads.

With this launch, you can deploy third party Kubernetes applications to on-premises environments using Amazon EKS Anywhere or any customer self-managed Kubernetes cluster in on-premises environments or in Amazon Elastic Compute Cloud (Amazon EC2), enabling you to use a single catalog to find container images regardless of where they eventually plan to deploy.

With AWS Marketplace for Containers Anywhere, you can get the same benefits as any other products in AWS Marketplace, including consolidated billing, flexible payment options, and lower pricing for long-term contracts. You can find vetted, security-scanned, third-party Kubernetes applications, manage upgrades with a few clicks, and track all licenses and bills. You can migrate applications between any environment without purchasing duplicate licenses. After you have subscribed to an application using this feature, you can migrate your Kubernetes applications to AWS by deploying the independent software vendor (ISV) provided Helm charts onto their Kubernetes clusters on AWS without changing their licenses.

Getting Started with AWS Marketplace for Containers Anywhere
You can get started by visiting AWS Marketplace. Easily search in Delivery methods in all products, then filter Helm Chart in the catalog to find Kubernetes-based applications that they can deploy on AWS and on premises.

If you chose to subscribe to your favorite product, you would select Continue to Subscribe.

Once you accept the seller’s end user license agreement (EULA), select Create Contract and Continue to Configuration.

You can configure the software deployment using the dropdowns. Once Fulfillment option and Software Version are selected, choose Continue to Launch.

To deploy on Amazon EKS, you have the option to deploy the application on a new EKS cluster or copy and paste commands into existing clusters. You can also deploy into self-managed Kubernetes in EC2 by clicking on the self-managed Kubernetes option in the supported services.

To deploy on-premises or in EC2, you can select EKS Anywhere and then take an additional step to request a license token on the AWS Marketplace launch page. You will then use commands provided by AWS Marketplace to download container images, Helm charts from the AWS Marketplace Elastic Container Registry (ECR), the service account creation, and the token to apply IAM Roles for Service Accounts on your EKS cluster.

To upgrade or renew your existing software licenses, you can go to the AWS Marketplace website for a self-service upgrade or renewal experience. You can also negotiate a private offer directly with ISVs to upgrade and renew the application. After you subscribe to the new offer, the license is automatically updated in AWS License Manager. You can view all the licenses you have purchased from AWS Marketplace using AWS License Manager, including the application capabilities you’re entitled to and the expiration date.

Launch Partners of AWS Marketplace for Containers Anywhere
Here is the list of our launch partners to support an on-premises deployment option. Try them out today!

  • D2iQ delivers the leading independent platform for enterprise-grade Kubernetes implementations at scale and across environments, including cloud, hybrid, edge, and air-gapped.
  • HAProxy Technologies offers widely used software load balancers to deliver websites and applications with the utmost performance, observability, and security at any scale and in any environment.
  • Isovalent builds open-source software and enterprise solutions such as Cilium and eBPF solving networking, security, and observability needs for modern cloud-native infrastructure.
  • JFrog‘s “liquid software” mission is to power the world’s software updates through the seamless, secure flow of binaries from developers to the edge.
  • Kasten by Veeam provides Kasten K10, a data management platform purpose-built for Kubernetes, an easy-to-use, scalable, and secure system for backup and recovery, disaster recovery, and application mobility.
  • Nirmata, the creator of Kyverno, provides open source and enterprise solutions for policy-based security and automation of production Kubernetes workloads and clusters.
  • Palo Alto Networks, the global cybersecurity leader, is shaping the cloud-centric future with technology that is transforming the way people and organizations operate.
  • Prosimo‘s SaaS combines cloud networking, performance, security, AI powered observability and cost management to reduce enterprise cloud deployment complexity and risk.
  • Solodev is an enterprise CMS and digital ecosystem for building custom cloud apps, from content to crypto. Get access to DevOps, training, and 24/7 support—powered by AWS.
  • Trilio, a leader in cloud-native data protection for Kubernetes, OpenStack, and Red Hat Virtualization environments, offers solutions for backup and recovery, migration, and application mobility.

If you are interested in offering your Kubernetes application on AWS Marketplace, register and modify your product to integrate with AWS License Manager APIs using the provided AWS SDK. Integrating with AWS License Manager will allow the application to check licenses procured through AWS Marketplace.

Next, you would create a new container product on AWS Marketplace with a contract offer by submitting details of the listing, including the product information, license options, and pricing. The details would be reviewed, approved, and published by AWS Marketplace Technical Account Managers. You would then submit the new container image to AWS Marketplace ECR and add it to a newly created container product through the self-service Marketplace Management Portal. All container images are scanned for Common Vulnerabilities and Exposures (CVEs).

Finally, the product listing and container images would be published and accessible by customers on AWS Marketplace’s customer website. To learn more details about creating container products on AWS Marketplace, visit Getting started as a seller and Container-based products in the AWS documentation.

Available Now
The feature of AWS Marketplace for Containers Anywhere is available now in all Regions that support AWS Marketplace. You can start using the feature directly from the product of launch partners.

Give it a try, and please send us feedback either in the AWS forum for AWS Marketplace or through your usual AWS support contacts.

Channy

AWS IQ expansion: Connect with Experts and Consulting Firms based in the UK and France

Post Syndicated from Alex Casalboni original https://aws.amazon.com/blogs/aws/aws-iq-expansion-experts-uk-france/

AWS IQ launched in 2019 and has been helping customers worldwide engage thousands of AWS Certified third-party experts and consulting firms for on-demand project work. Whether you need to learn about AWS, plan your project, setup new services, migrate existing applications, or optimize your spend, AWS IQ connects you with experts and consulting firms who can help. You can share your project objectives with a description, receive responses within the AWS IQ application, approve permissions and budget, and will be charged directly through AWS billing.

Until yesterday, experts had to reside in the United States to offer their hands-on help on AWS IQ. Today, I’m happy to announce that AWS Certified experts and consulting firms based in the UK and France can participate in AWS IQ.

If you are an AWS customer based in the UK or France and need to connect with local AWS experts, now you can reach out to a wider pool of experts and consulting firms during European business hours. When creating a new project, you can now indicate a preferred expert location.

As an AWS Certified expert you can now view the buyer’s preferred expert location to ensure the right fit. AWS IQ simplifies finding relevant opportunities and it helps you access a customer’s AWS environment securely. It also takes care of billing so more time is spent on solving customer problems, instead of administrative tasks. Your payments will be disbursed by AWS Marketplace in USD towards a US bank account. If you don’t already have a US bank account, you may be able to obtain one through third-party services such as Hyperwallet.

AWS IQ User Interface Update
When you create a new project request, you can select a Preferred expert or firm location: Anywhere, France, UK, or US.

Check out Jeff Barr’s launch article to learn more about the full request creation process.

You can also work on the same project with multiple experts from different locations.

When browsing experts and firms, you will find their location under the company name and reviews.

Available Today
AWS IQ is available for customers anywhere in the world (except China) for all sorts of project work, delivered by AWS experts in the United States, the United Kingdom, and France. Get started by creating your project request on iq.aws.amazon.com. Here you can discover featured experts or browse experts for a specific service such as Amazon Elastic Compute Cloud (EC2) or DynamoDB.

If you’re interested in getting started as an expert, check out AWS IQ for Experts. Your profile will showcase your AWS Certifications as well as the ratings and reviews from completed projects.

I’m excited about the expansion of AWS IQ for experts based in the UK and France, and I’m looking forward to further expansions in the future.

Alex

17 additional AWS services authorized for DoD workloads in the AWS GovCloud Regions

Post Syndicated from Tyler Harding original https://aws.amazon.com/blogs/security/17-additional-aws-services-authorized-for-dod-workloads-in-the-aws-govcloud-regions/

I’m pleased to announce that the Defense Information Systems Agency (DISA) has authorized 17 additional Amazon Web Services (AWS) services and features in the AWS GovCloud (US) Regions, bringing the total to 105 services and major features that are authorized for use by the U.S. Department of Defense (DoD). AWS now offers additional services to DoD mission owners in these categories: business applications; computing; containers; cost management; developer tools; management and governance; media services; security, identity, and compliance; and storage.

Why does authorization matter?

DISA authorization of 17 new cloud services enables mission owners to build secure innovative solutions to include systems that process unclassified national security data (for example, Impact Level 5). DISA’s authorization demonstrates that AWS effectively implemented more than 421 security controls by using applicable criteria from NIST SP 800-53 Revision 4, the US General Services Administration’s FedRAMP High baseline, and the DoD Cloud Computing Security Requirements Guide.

Recently authorized AWS services at DoD Impact Levels (IL) 4 and 5 include the following:

Business Applications

Compute

Containers

Cost Management

  • AWS Budgets – Set custom budgets to track your cost and usage, from the simplest to the most complex use cases
  • AWS Cost Explorer – An interface that lets you visualize, understand, and manage your AWS costs and usage over time
  • AWS Cost & Usage Report – Itemize usage at the account or organization level by product code, usage type, and operation

Developer Tools

  • AWS CodePipeline – Automate continuous delivery pipelines for fast and reliable updates
  • AWS X-Ray – Analyze and debug production and distributed applications, such as those built using a microservices architecture

Management & Governance

Media Services

  • Amazon Textract – Extract printed text, handwriting, and data from virtually any document

Security, Identity & Compliance

  • Amazon Cognito – Secure user sign-up, sign-in, and access control
  • AWS Security Hub – Centrally view and manage security alerts and automate security checks

Storage

  • AWS Backup – Centrally manage and automate backups across AWS services

Figure 1 shows the IL 4 and IL 5 AWS services that are now authorized for DoD workloads, broken out into functional categories.
 

Figure 1: The AWS services newly authorized by DISA

Figure 1: The AWS services newly authorized by DISA

To learn more about AWS solutions for the DoD, see our AWS solution offerings. Follow the AWS Security Blog for updates on our Services in Scope by Compliance Program. If you have feedback about this blog post, let us know in the Comments section below.

Want more AWS Security how-to content, news, and feature announcements? Follow us on Twitter.

Author

Tyler Harding

Tyler is the DoD Compliance Program Manager for AWS Security Assurance. He has over 20 years of experience providing information security solutions to the federal civilian, DoD, and intelligence agencies.

New – Multiple Private Marketplace Catalogs

Post Syndicated from Martin Beeby original https://aws.amazon.com/blogs/aws/new-multiple-private-marketplace-catalogs/

We launched AWS Marketplace in 2014, and it allows customers to find, buy, and immediately start using cloud-based applications developed by independent software vendors (ISVs). In 2018, we added the ability to add a Private Marketplace where you can curate a list of approved products your users can purchase from AWS Marketplace. Today we are adding a new feature so that you can create multiple Private Marketplace catalogs within your AWS Organizations. Each Private Marketplace can contain a different set of products to provide a tailored experience for particular groups of accounts.

Customers with diverse sets of users need to scale their governance to meet business needs. For example, a large enterprise with subsidiaries in different industries has varying software needs and policies for each subsidiary. IT administrators struggle with scaling their procurement process to address these differing needs across their organization and often revert to one procurement policy to govern their entire org. While there are exceptions, companies depend on time-consuming, manual processes to ensure the correct products are approved and procured. As a result, customers struggle to scale their procurement and governance process to meet their organization’s speed and agility demands.

After listening to customers explain these sorts of issues, we set about developing a solution to help, and the concept of multiple Private Marketplace catalogs was born. We call these Private Marketplace experiences. They represent the experience that your users will see when they browse their AWS Marketplace. Each experience is a collection of approved AWS Marketplace products that you, as an administrator, select and curate. You can add any of the 8000-plus products from AWS Marketplace to an experience and customize the look and feel by changing the Private Marketplace logo, wording, and color.

In the Private Marketplace admin portal, within the AWS Marketplace interface, you can create an Account group, which is essentially a way of grouping together a number of AWS accounts. You can then associate an experience with an Account group, enabling you to give different users distinct experiences. This association allows you to govern the use of third-party software subscriptions and ensure they adhere to your internal procurement policies.

To give you a flavor of this feature, I will create a new Private Marketplace experience.

How to Create a Private Marketplace Experience
I head over to the Private Marketplace interface and select the Experiences link; this lists the default experience called Private Marketplace Experience. I then press the Create experience button.

I give the experience a name and a description and click the Create experience button.

If I drill into the details for my newly created experience, I can then start to add products to my catalog. I use the search in the All AWS Marketplace products section and look for Tableau. I find the Tableau Server product and select it. I then click the Add button which adds the product to my catalog.

Screenshot, adding a product

To associate this experience with a set of AWS accounts, I click on the Create association button; this allows me to create a new Account group.

I give my account group the title Business Intelligence Group and add a description. I then associate AWS accounts that I want to be part of this group. Finally, I associate this group with the Business Intelligence Team experience I created earlier and finally click Create account group.

I now go to the settings for the experience and change the switch so that the experience is now live. On this screen I can also customize the look and feel of the Private Marketplace by uploading a logo, changing the color, and adding custom wording.

Now, if I log in and browse the AWS Marketplace using an account that is in the Account group I just created, I will see the Private Marketplace experience rather than the regular AWS Marketplace.

Available now
The ability to create multiple Private Marketplace catalogs is available now in all regions that support AWS Marketplace, and you can start using the feature directly from the Private Marketplace interface. Additionally, you can use the accompanying set of APIs so that you can integrate with existing approval or ticketing systems to simplify management across catalogs.

Visit the Private Marketplace page to get started and learn more. Happy curating.

— Martin

Developing, testing, and deploying custom connectors for your data stores with AWS Glue

Post Syndicated from Bo Li original https://aws.amazon.com/blogs/big-data/developing-testing-and-deploying-custom-connectors-for-your-data-stores-with-aws-glue/

AWS Glue is a serverless data integration service that makes it easy to discover, prepare, and combine data for analytics, machine learning, and application development. AWS Glue already integrates with various popular data stores such as the Amazon Redshift, RDS, MongoDB, and Amazon S3. Organizations continue to evolve and use a variety of data stores that best fit their applications and data requirements. We recently announced general availability of AWS Glue custom connectors, which makes it easy to discover and integrate with variety of additional data sources, such as SaaS applications and your custom data sources. With just a few clicks, you can search and select connectors from the AWS Marketplace and begin your data preparation workflow in minutes. We are also releasing a new framework to develop, validate, and deploy your own custom connectors (bring your own connectors / BYOC).

In this blog post, we go over three key aspects of AWS Glue custom connectors. First, we introduce the two mechanisms using which you can plug in a custom connector by either subscribing from AWS Marketplace or bring your own connector into Glue Spark jobs. Second, we describe the three interfaces based on Apache Spark DataSource, Amazon Athena Federated Query, and JDBC, which you can use to develop a custom connector with the released Glue Spark runtime.  Finally, we get deeper into the development process, and describe how Glue Spark runtime interfaces simplify data integration by offering powerful features that are built-in for Glue custom connectors. These features include job bookmarks for incremental loads of your data, at-source data filtering with SQL queries, partitioned execution for data parallelism, data type mapping, advanced Spark and built-in AWS Glue data transformations, integration with AWS Secrets Manager to securely store authentication credentials, AWS Glue Data Catalog for storing connections and table metadata. Glue custom connectors are also supported with AWS Glue Studio that enables visual authoring of your data integration jobs.

These data sources cover the following categories:

This post introduces two mechanisms to use custom connectors with AWS Glue Spark runtime and AWS Glue Studio console. First, we go over the user experience for seamless discovery and subscription to custom connectors developed by AWS Glue partners that are hosted on AWS Marketplace. Next, we go deeper into the five simple steps to develop and test your own connectors with AWS Glue Spark runtime, and deploy them into your production Apache Spark applications for ETL and analytics workloads that run on AWS Glue.

AWS Glue custom connectors: AWS Marketplace and BYOC

You can use an AWS Glue connector available on AWS Marketplace or bring your own connector (BYOC) and plug it into AWS Glue Spark runtime. This is in addition to the native connectors available with AWS Glue.

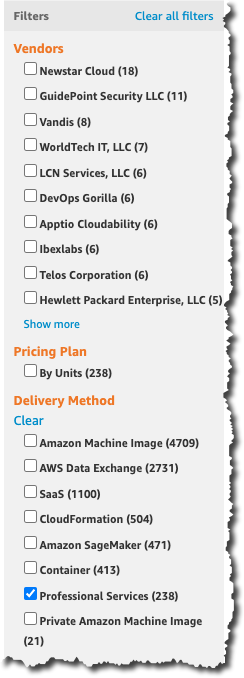
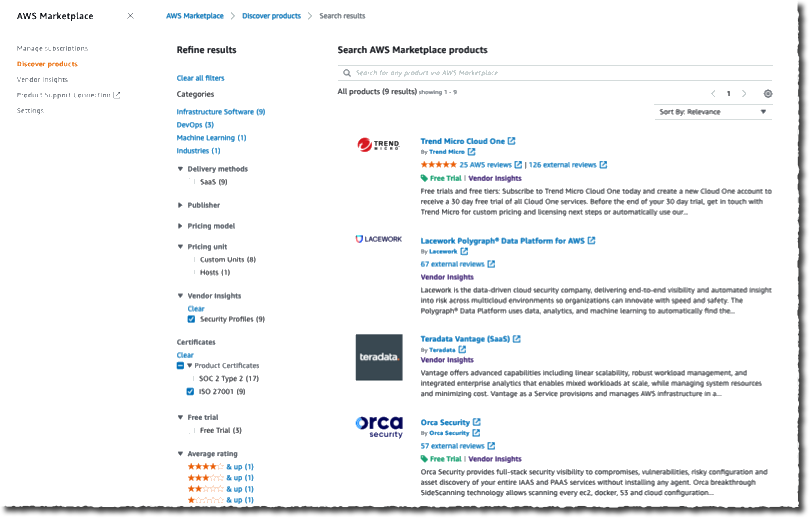
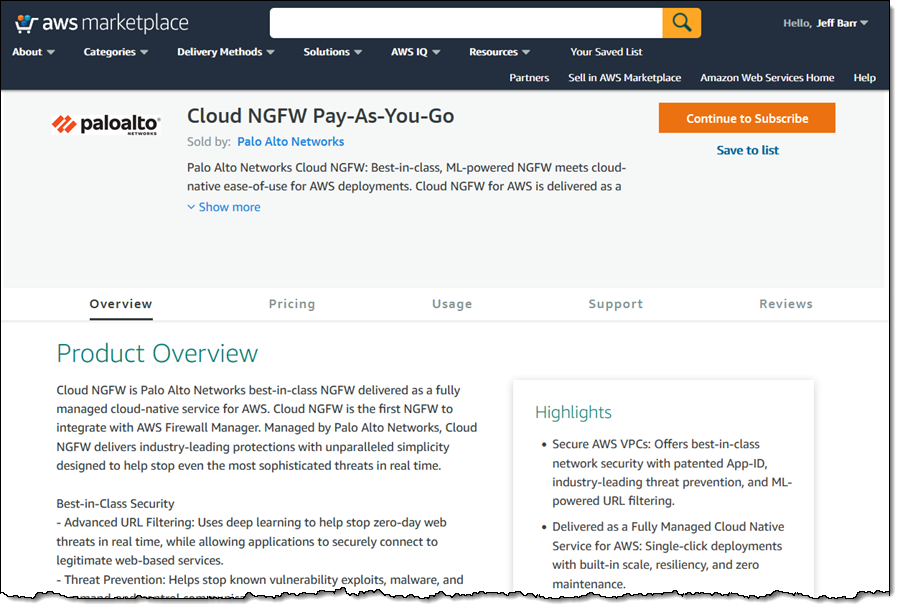
Connectors available on AWS Marketplace

As we make AWS Glue custom connectors generally available today, we have an ecosystem of Glue connectors listed on AWS Marketplace available from different AWS Glue partners, big data architects, and third-party developers. The following posts go into more detail on using some of these connectors for different use cases with AWS Glue:

BYOC connector example

Customers and application developers also need a method to develop connectors for custom data stores. The next section describes the end-to-end process to develop and test a custom connector using the AWS Glue Spark runtime library and interfaces locally.

After testing and validating, you can package and deploy the custom connector using the BYOC workflow in AWS Glue Studio. For instructions on deploying and using the Snowflake connector with AWS Glue jobs as a BYOC custom connector, see Performing data transformations using Snowflake and AWS Glue.

AWS Glue Spark runtime connector interfaces

AWS Glue Spark runtime offers three interfaces to plug in custom connectors built for existing frameworks: the Spark DataSource API, Amazon Athena Data Source API, or Java JDBC API. The following code snippets show how you can plug in these connectors into AWS Glue Spark runtime without any changes.

For connectors subscribed from AWS Marketplace, use the following code:

Datasource = glueContext.create_dynamic_frame.from_options(connection_type = "marketplace.spark|athena|jdbc", connection_options = {"dbTable":"Account","connectionName":"my-marketplace-connection"}, transformation_ctx = "DataSource0)

For custom connectors developed and deployed with AWS Glue, use the following code:

Datasource = glueContext.create_dynamic_frame.from_options(connection_type = "custom.spark|athena|jdbc", connection_options = {"dbTable":"Account","connectionName":"my-custom-connection"}, transformation_ctx = "DataSource0")

The following table summarizes the interfaces you need to implement for connectivity with AWS Glue Spark runtime using the Spark DataSource API.

Interfaces Description
DataSourceV2 The base interface for Spark DataSource v2 API.
ReadSupport A mix-in interface for DataSourceV2 for the connector to provide data reading ability and scan the data from the data source.
DataSourceReader A data source reader that is created by ReadSupport to scan the data from this data source. It also supports reading actual schema and generating a list of InputPartition for parallel reads from Spark executors.
InputPartition Each InputPartition is responsible for creating a data reader to read data into one RDD partition. InputPartitions are serialized and sent to executors, then the reader is created on executors to do the actual reading.
InputPartitionReader Responsible for reading data into an RDD partition.

The following table summarizes the interfaces you need to implement for connectivity with AWS Glue Spark runtime using the Athena Data Source API.

Interfaces Description
MetadataHandler
doGetSplits Splits up the reads required to scan the requested batch of partitions.
doListSchemaNames Gets the list of schemas (databases) that this source contains.
doGetTable Gets a definition (such as field names, types, and descriptions) of a table.
doListTables Gets the list of tables that this source contains.
getPartitions Gets the partitions that must be read from the request table.
RecordHandler
doReadRecords Reads the row data associated with the provided split.

The following diagram shows the class structure for the three interfaces and their execution on Spark drivers to read metadata and Spark executors to read data from the underlying datasource. The classes shown in pink are the ones that need to be implemented as part of the connector. Classes shown in green are already implemented as part of the Glue Spark runtime.

Steps to develop a custom connector

In the following sections, we describe how to develop, test, and validate an AWS Glue custom connector. We also show how to deploy the connectors to AWS Glue jobs using the AWS Glue Studio console.

Implementing the solution includes the following 5 high-level steps:

  1. Download and install AWS Glue Spark runtime, and review sample connectors.
  2. Develop using the required connector interface.
  3. Build, test, and validate your connector locally.
  4. Package and deploy the connector on AWS Glue.
  5. Use AWS Glue Studio to author a Spark application with the connector.

Downloading and installing AWS Glue Spark runtime and reviewing sample connectors

The first step to developing a connector is to install the Glue Spark runtime from Maven and refer to AWS Glue sample connectors on AWS Glue GitHub repository.

Developing and testing using the required connector interface

As discussed earlier, you can develop AWS Glue custom connectors with one of the following interfaces:

  • Spark DataSource
  • Athena Federated Query
  • JDBC

In this section, we walk you through each interface.

Spark DataSource interface

We use a simple example to illustrate the development of an AWS Glue custom connector with the Spark DataSource interface. You can also find intermediate and complex examples for developing connectors with more functionality for different data sources.

This solution implements a DataSourceReader that returns predefined data as InputPartitions stored in-memory with a given schema. The following interfaces need to be implemented for DataSourceReader. The DataSourceReader implementation runs on the Spark driver and plans the execution of Spark executors reading the data in InputPartitions:

class Reader implements DataSourceReader {
        public StructType readSchema() { ... }
        
        public List<InputPartition<InternalRow>> planInputPartitions() { ... }
}

The InputPartitions are read in parallel by different Spark executors using the InputPartitionReader implementation, which returns the records in Spark’s InternalRow format. The InputPartitionReader is essentially implemented to return an iterator of the records scanned from the underlying data store. Refer the following code:

class SimpleInputPartitionReader implements InputPartitionReader<InternalRow> {
    public boolean next() { ... }

    public InternalRow get() { ... }

    public void close() throws IOException { ... }
}

The second connector example shows how to use an Amazon S3 client to read the data in CSV format from an S3 bucket and path supplied as reader options. The third connector example shows how to use a JDBC driver to read data from a MySQL source. It also shows how to push down a SQL query to filter records at source and authenticate with the user name and password supplied as reader options.

You can plug the connectors based on the Spark DataSource API into AWS Glue Spark runtime as follows. You need to supply the connection_type for custom.spark and an AWS Glue catalog connection containing the reader options, such as user name and password. AWS Glue Spark runtime automatically converts the data source into a Glue DynamicFrame. The following code is an example to plug in the Elasticsearch Spark connector:

Datasource = glueContext.create_dynamic_frame.from_options(connection_type = "custom.spark", connection_options = {"path": "test", "es.nodes": "https://search-glue-etl-job-xxx.us-east-1.es.amazonaws.com","es.net.http.auth.user": "user","es.net.http.auth.pass": "pwd","es.port": "443","es.nodes.wan.only": "true" ,"connectionName":"my-custom-es-connection"}, transformation_ctx = "DataSource0")

AWS Glue Studio provides a visual ETL console that can also auto-generate the preceding code to construct a DynamicFrame for a deployed Spark connector (as described later in this post).

Athena Federated Query interface

AWS Glue Spark runtime also supports connectors developed with the Athena connector interface for federated queries. Similar to the Spark DataSource API, it requires implementation of two key handler interfaces: MetadataHandler and RecordHandler.

The MetadataHandler implementation runs on the Spark driver and contains the functions required to compute the schema, tables, and table partitions, and plan the actual scan by splitting the reads of individual partitions into different splits. See the following code:

public class MyMetadataHandler extends MetadataHandler{
       ListSchemasResponse doListSchemaNames(BlockAllocator allocator, ListSchemasRequest request) { … }

       ListTablesResponse doListTables(BlockAllocator allocator, ListTablesRequest request) { … }

       GetTableResponse doGetTable(BlockAllocator allocator, GetTableRequest request) { … }

       void getPartitions(BlockWriter blockWriter, GetTableLayoutRequest request, QueryStatusChecker queryStatusChecker) { … }

       GetSplitsResponse doGetSplits(BlockAllocator allocator, GetSplitsRequest request) { … }
}

The RecordHandler implements the reader to scan the data from the underlying data store associated with the split contained in the ReadRecordsRequest structure.

AWS Glue custom connectors uses the Athena RecordHandler interface, but it do not need the BlockSpiller implementation or use AWS Lambda to read the data from the underlying data store. Instead, the implementation directly runs inline within each Spark executor to return the records as Apache Arrow column vector batches. Refer the following code:

public class MyRecordHandlerextends RecordHandler{

void readWithConstraint(ConstraintEvaluator constraints, BlockSpiller spiller, ReadRecordsRequest recordsRequest, QueryStatusChecker queryStatusChecker){…}
}

AWS Glue Spark runtime can convert records returned by plugging in an Athena connector to an AWS Glue DynamicFrame as follows:

Datasource = glueContext.create_dynamic_frame.from_options(connection_type = "custom.athena", connection_options = {"tableName":"table","schemaName":"schema","connectionName":"my-custom-athena-connection"}, transformation_ctx = "DataSource0")

JDBC interface

AWS Glue Spark runtime also allows you to plug in any connector compliant with the JDBC interface. It allows you to pass in any connection option available with the JDBC connector as follows:

Datasource = glueContext.create_dynamic_frame.from_options(connection_type = "custom.jdbc", connection_options = {"dbTable":"Account","connectionName":"my-custom-jdbc-connection"}, transformation_ctx = "DataSource0")

Advanced ETL and analytics with AWS Glue

AWS Glue Spark runtime also provides different features supported out-of-the-box with the custom connectors to enable advanced extract, data transformations, and load.

AWS Glue Studio for visual authoring of ETL jobs

Data type mapping

You can type cast the columns while reading them from the underlying data store itself. For example, a dataTypeMapping of {"INTEGER":"STRING"} casts all integer columns to string while parsing the records and constructing the DynamicFrame. This also helps you cast columns to types of your choice. Refer the following code:

DataSource0 = glueContext.create_dynamic_frame.from_options(connection_type = "custom.jdbc", connection_options = {"dataTypeMapping":{"INTEGER":"STRING"}", connectionName":"test-connection-snowflake-jdbc"}, transformation_ctx = "DataSource0")

Partitioning for parallel reads

AWS Glue allows you to read data in parallel from the data store by partitioning it on a column by specifying the partitionColumn, lowerBound, upperBound, and numPartitions. This allows you to use data parallelism and multiple Spark executors allocated for the Spark application. Refer the following code, which reads data from Snowflake using 4 Spark executors in parallel. Data is partitioned across executors uniformly along the id column in the range [0, 200]:

DataSource0 = glueContext.create_dynamic_frame.from_options(connection_type = "custom.jdbc", connection_options = {"upperBound":"200","numPartitions":"4","partitionColumn":"id","lowerBound":"0","connectionName":"my-connection-snowflake"}, transformation_ctx = "DataSource0")

Glue Data Catalog connections

You can encapsulate all your connection properties with Glue Data Catalog connections and supply the connection name as follows. Integration with Glue Data Catalog connections allows you to use the same connection properties across multiple calls in a single Spark application or across different applications. See the following code:

DataSource = glueContext.create_dynamic_frame.from_options(connection_type = "custom.jdbc", connection_options = {"connectionName":"my-connection-snowflake"}, transformation_ctx = "DataSource0")

Secrets Manager for credentials

The Data Catalog connection can also contain a secretId corresponding to a secret stored in AWS Secrets Manager that can be used to securely gather authentication and credentials information at runtime. For more details on using a secretId on the AWS Glue Studio console, see Adding connectors to AWS Glue Studio. secretId can also be specified within the ETL script as follows.

DataSource = glueContext.create_dynamic_frame.from_options(connection_type = "custom.jdbc", connection_options = {"connectionName":"my-connection-snowflake", "secretId"-> "my-secret-id"}, transformation_ctx = "DataSource0")

Secret Id can be used to store credentials for different authentication mechanisms that your connector can support such as username/password, access keys, and OAuth.

SQL queries at source: Filtering with row predicates and column projections

AWS Glue Spark runtime allows you to push down SQL queries to filter data at source with row predicates and column projections. This allows you to load filtered data faster from data stores that support pushdowns. An example SQL query pushed down to a JDBC data source is SELECT id, name, department FROM department WHERE id < 200. Refer the following code:

DataSource = glueContext.create_dynamic_frame.from_options(connection_type = "custom.jdbc", connection_options = {"query":"SELECT id, name, department FROM department WHERE id < 200","connectionName":"my-connection-snowflake "}, transformation_ctx = "DataSource0")

Job bookmarks

AWS Glue job bookmarks allows for incremental loading of data from JDBC sources. It keeps track of the last processed record from the data store and processes new data records in subsequent AWS Glue job runs. Job bookmarks use the primary key as the default column as the bookmark key if it increases or decreases sequentially. Refer the following code that uses a transformation_ctx with job bookmarks enabled for the job:

DataSource0 = glueContext.create_dynamic_frame.from_options(connection_type = "custom.jdbc", connection_options = {"connectionName":"test-connection-snowflake-jdbc"}, transformation_ctx = "DataSource0")

AWS Glue transformations

AWS Glue offers more than 35 commonly used data transformation operations with DynamicFrames and Spark DataFrames. These transforms allow you to get insights from your data and prepare it for further analytics using hundreds of available Spark SQL functions. These transformations include popular functions for schema manipulation, projecting columns, and performing joins across different data sources; transforming data with map, split, and explode; flattening nested datasets with relationalize and unnest; group and aggregate records; and run arbitrary SQL on datasets.

VPC support for networking

AWS Glue jobs allow you to securely connect to your data stores within a private VPC subnet. You can also enable a NAT (Network Address Translation) gateway within a VPC to access both VPC resources and public internet.

Building, testing, and validating your connector locally

After developing the connector for your favorite data store with the interface of your choice, you can follow the instructions to build the connector using Maven by doing a maven install. This builds the connector and installs the resulting JAR into your local Maven repository. You can now include this JAR in the class path of your IDE or AWS Glue Spark runtime downloaded from Maven.

After you build and import the JAR, you can test it locally by plugging it in AWS Glue Spark runtime and writing a validation test. We provide sample validation tests in the AWS Glue’s GitHub repository. These cover several scenarios for both local testing and validation on the AWS Glue job system. The following table lists the validation tests, the functionality they test, and the associated interfaces.

Test Name Description JDBC Spark Athena
DataSourceTest Tests connector connectivity and reading functionality. x x x
ReadWriteTest Tests reading and writing end-to-end workflow. x x x
CatalogConnectionTest Tests catalog connection integration. x x x
DataSchemaTest Tests data schema from reading with the connector. x x x
SecretsManagerTest Tests Secrets Manager integration. x x
DataSinkTest Tests connector connectivity and writing functionality x x
ColumnPartitioningTest Tests connector column partitioning functionality. x
FilterPredicateTest Tests connector filter predicate functionality. x
JDBCUrlTest Tests connector extra parameters for JDBC Url functionality. x
DbtableQueryTest Tests connector dbTable and query option functionality. x
DataTypeMappingTest Tests connector custom data type mapping functionality. x

Functionality such as AWS Glue job bookmarks that allow incremental loads can be tested on the AWS Glue job system only. We also provide a Python script to run all tests together as a suite on the AWS Glue job system.

Packaging and deploying the connector on AWS Glue

We now discuss how you can package your connector and deploy it on AWS Glue using the BYOC workflow:

  1. Package the custom connector as a JAR and upload the JAR file to an Amaon S3 bucket in your account.
  2. Follow the flow to create a custom connector referencing the JAR in Amazon S3 from AWS Glue Studio.
  3. Instantiate a connection for that connector and create an AWS Glue job using it.

For step-by-step instructions on the BYOC workflow, see Creating custom connectors.

Alternatively, we also provide the scripts and instructions for you to share the connector publicly using AWS Marketplace for a price or free. For instructions on subscribing to the connector, see Subscribing to AWS Marketplace connectors.

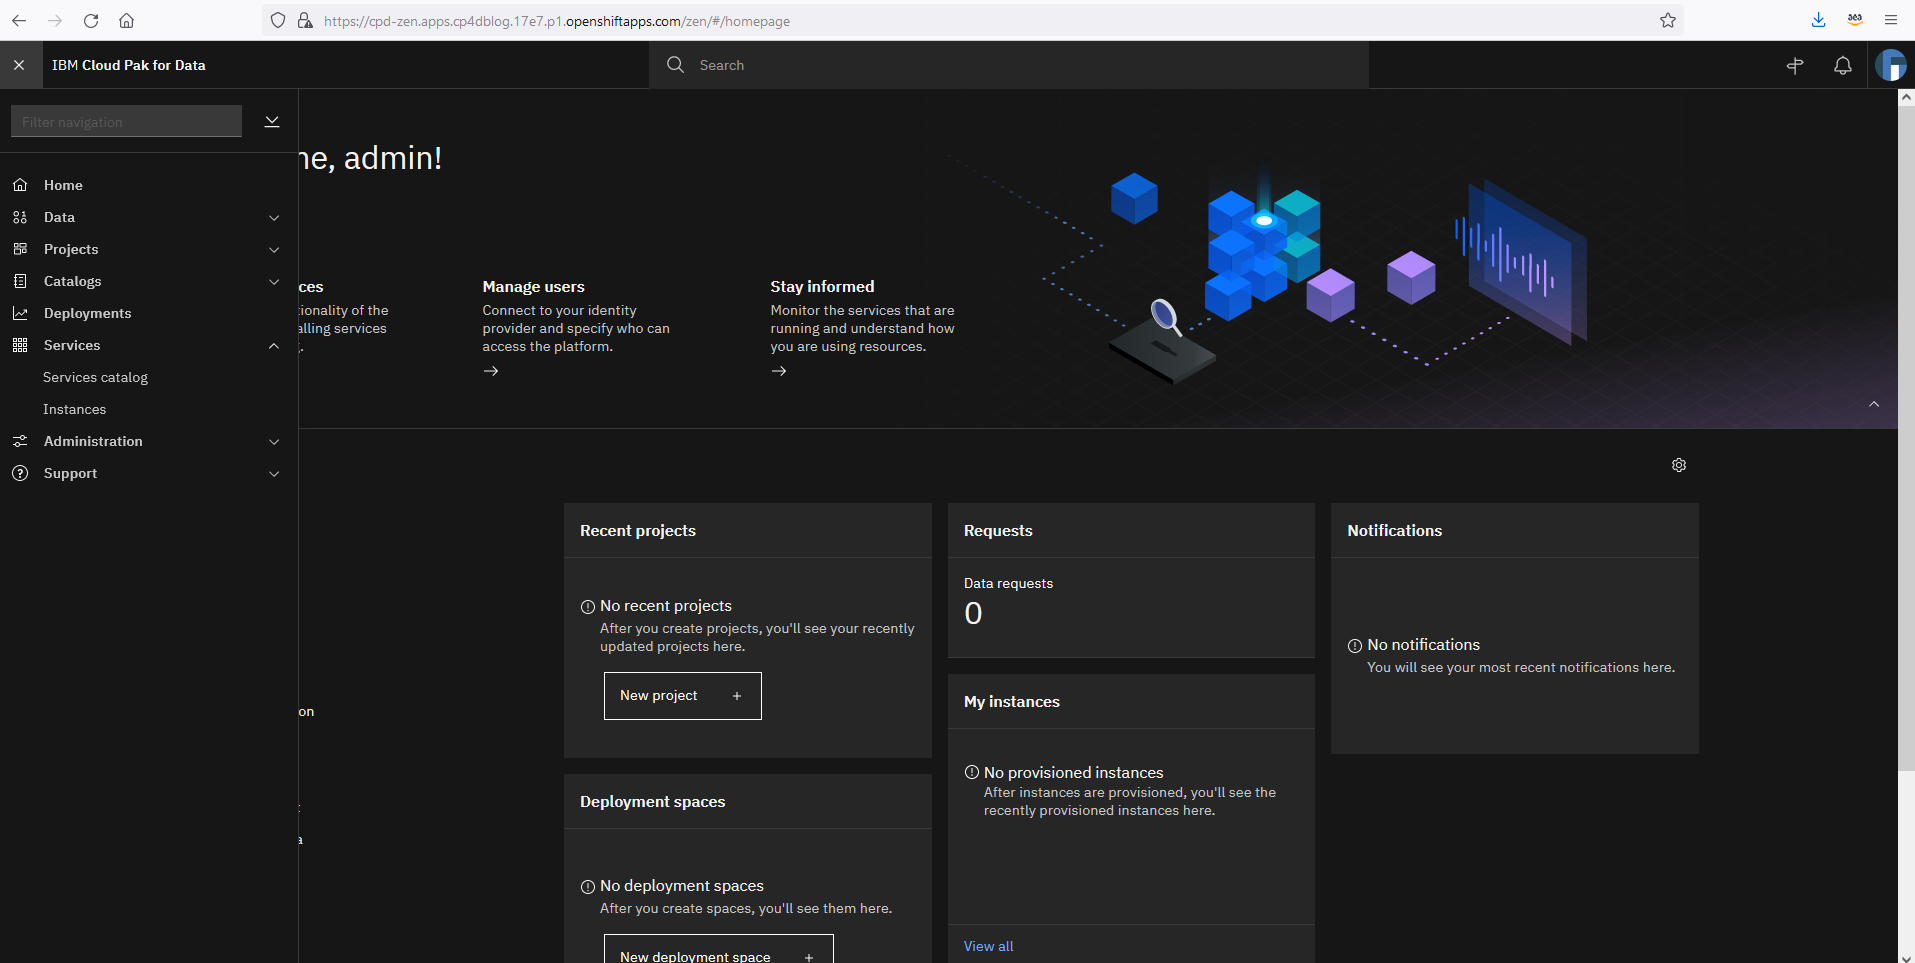
Using AWS Glue Studio to author a Spark application

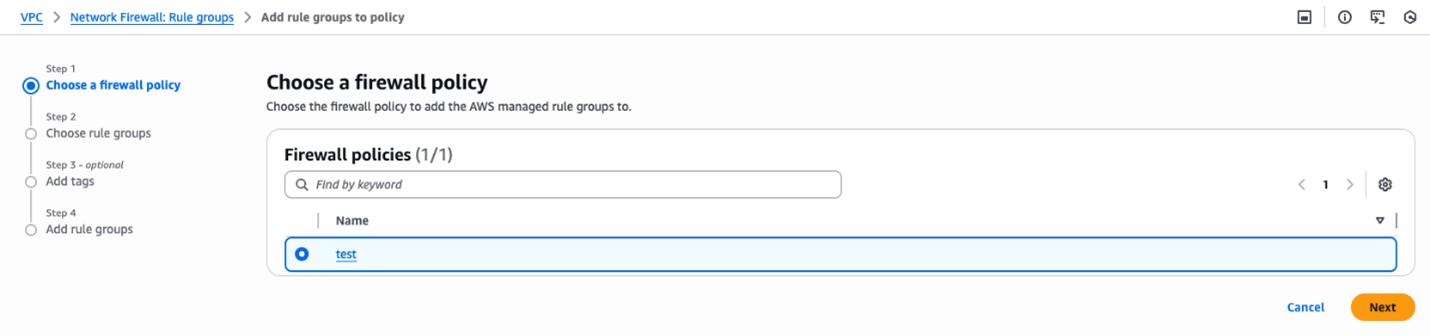
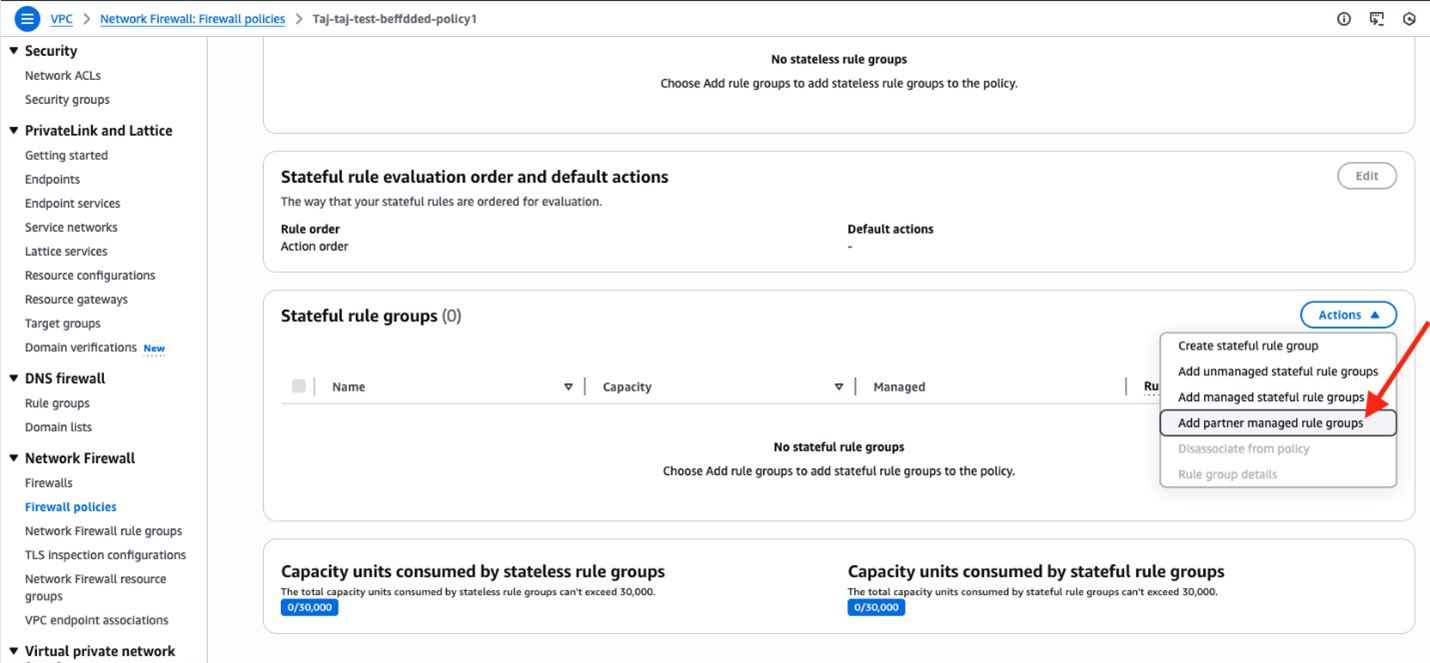
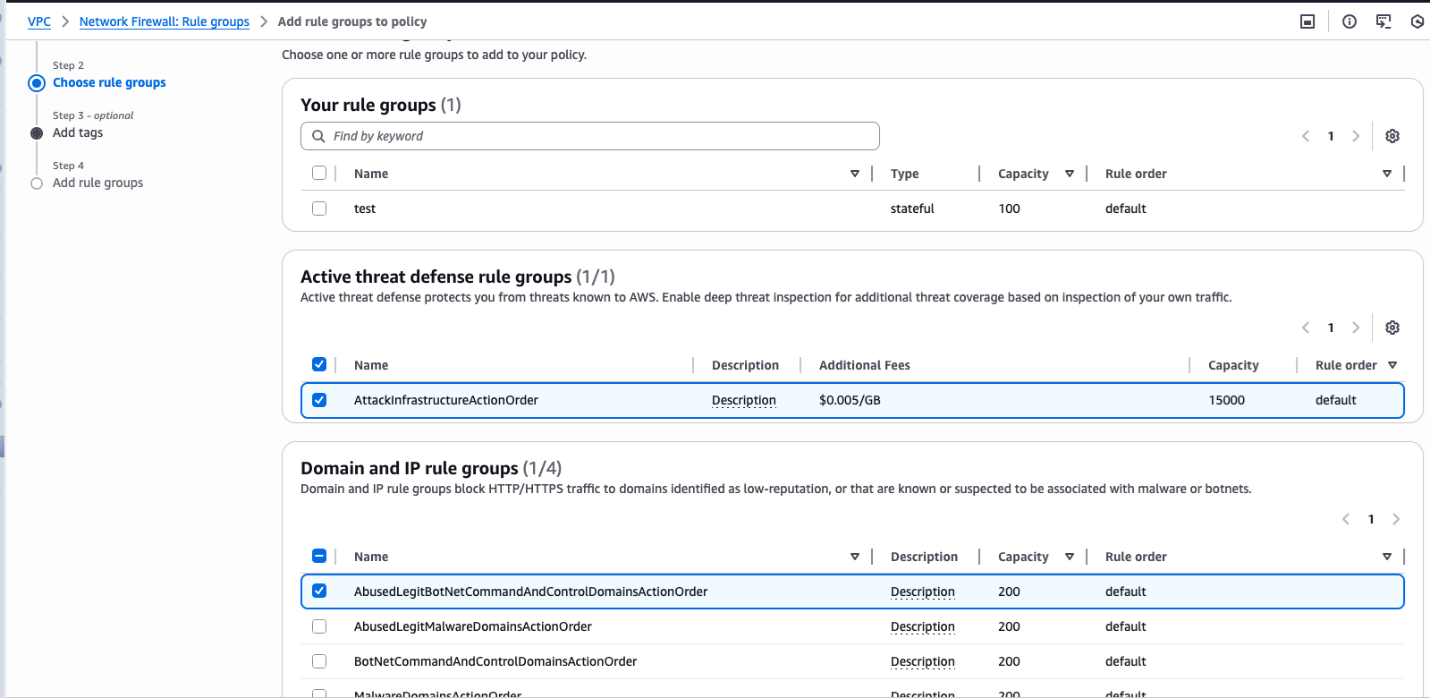
After you create a connection for using a BYOC or AWS Marketplace – AWS Glue connector, you can follow the instructions to visually author a Spark ETL application with AWS Glue Studio. These instructions are available here for Job Authoring with custom connectors. Following are screenshots from AWS Glue Studio:

Connectors on AWS Marketplace

Connectors on AWS Marketplace

Visually author Glue jobs using connectors with AWS Glue Studio

Step 1 – Select a connector

Following are screenshots from AWS Glue Studio:

Step 2 – Visually author the job using the associated connection

Conclusion

You can use two different mechanisms to use custom connectors with AWS Glue Spark runtime and AWS Glue Studio console. In this post, we discussed the user experience for seamless discovery and subscription to custom connectors, and walked you through developing and testing your own connectors with AWS Glue Spark runtime, and deploying them into your production Apache Spark applications for ETL and analytics workloads that run on AWS Glue.

Build a custom connector yourself or try one on AWS Marketplace with AWS Glue Studio.

If you would like to partner or add a new Glue connector to AWS Marketplace, please reach out to us at [email protected]

Resources

For additional resources, see the following:


About the Authors

Bo Li is a software engineer in AWS Glue and devoted to designing and building end-to-end solutions to address customer’s data analytic and processing needs with cloud-based data-intensive technologies.


Yubo Xu is a Sofware Development Engineer on the AWS Glue team. His main focus is to improve the stability and efficiency of Spark runtime for AWS Glue and the easiness to connect to various data sources. Outside of work, he enjoys reading books and hiking the trails in the Bay area with his dog, Luffy, a one-year old Shiba Inu.


Xiaoxi Liu is a software engineer at AWS Glue team. Her passion is building scalable distributed systems for efficiently managing big data on cloud and her concentrations are distributed system, big data and cloud computing


Mohit Saxena is a Software Development Manager at AWS Glue. His team works on Glue’s Spark runtime to enable new customer use cases for efficiently managing data lakes on AWS and optimize Apache Spark for performance and reliability.

AWS Marketplace Now Offers Professional Services

Post Syndicated from Marcia Villalba original https://aws.amazon.com/blogs/aws/aws-marketplace-now-offers-professional-services/

Now with AWS Marketplace, customers can not only find and buy third-party software but also the professional services needed to support the full lifecycle of those products, including planning, deployment and support. This simplifies the software supply chain including tasks like managing provider relationships and procurement processes and also consolidates billing and invoices in one place.

Until today, customers have used AWS Marketplace for buying software and then used a separate process for contracting professional services. Many customers need extra professional services when they purchase third-party software, like premium support, implementation, or training. The additional effort to support different procurement processes impacts customers’ project timelines and adds a lot complexity to the customer’s organization.

Last year we announced AWS IQ, a service that helps you engage with AWS Certified third-party experts for AWS project work. This year we want to go one step further and help you find professional services for all those third-party software solutions you currently buy from AWS Marketplace.

For the Buyers
Buyers can now discover professional services using AWS Marketplace from multiple trusted sellers, manage the invoices and payments from software and services together and reduce procurement time, accelerating the process from months to days.

This new feature allow buyers to choose from a selection of professional services such as assessments, implementation, premium support, and managed services and training from consulting partners, managed service providers and independent software vendors.

To get started finding and buying professional services, first you need to find the right service for you. If you are looking for a professional service associated with a particular piece of software, using the search tool in AWS Marketplace, you can search for the software and the related professional services will appear in the search results. Use the delivery method to filter the results to just include professional services.

Screenshot of searching for professional services

After you find the service you are looking for, you can visit the service details page and learn more information about the listing. If you want to buy the service, just click continue.

Screenshot of service page

That will open the request service form where you can connect to the seller and request the service. The seller will receive a notification and then they can contact you to agree on the scope of the work including deliverables, milestones, pricing, payment schedules, and service terms.

Screenshot of request service form

Once you agree with the seller on all the specific details of the contract, the seller sends you a private offer. Now the offer page will show the private offer details instead of a request for service form. You can review the pricing, payment schedule, and contract terms and create the contract.

Screenshot of private offer

The service subscription starts after you review and accept the private offer on AWS Marketplace. Also, you will receive an invoice from AWS Marketplace and you can track your subscriptions in the buyers management console. The purchases of the services are itemized on your AWS invoice, simplifying payments and cost management.

For the Sellers
This new feature of AWS Marketplace enables you, the seller, to grow your business and reach new customers by listing your professional service offerings. You can list professional services offerings as individual products or alongside existing software products in AWS Marketplace using pricing, payment schedule, and service terms that are independent from the software.

In AWS Marketplace you will create your seller page, where all your information as a seller will be displayed to the potential buyers.

Public professional service listings are discoverable by search and visible in your seller profile. You will receive customer requests for each of the services listed. Agree with the customer on the details of the service contract and then send a private offer to them.

Screenshot for creating a professional service

AWS Marketplace will invoice and collect the payments from the customers and distribute the funds to your bank account after the customers pay. AWS Marketplace also offers you seller reports that are updated daily to understand how your business is doing.

Availability
To learn more about buying and selling professional services in AWS Marketplace, visit the AWS Marketplace service page

Marcia

Managed Entitlements in AWS License Manager Streamlines License Tracking and Distribution for Customers and ISVs

Post Syndicated from Harunobu Kameda original https://aws.amazon.com/blogs/aws/managed-entitlements-for-aws-license-manager-streamlines-license-management-for-customers-and-isvs/

AWS License Manager is a service that helps you easily manage software licenses from vendors such as Microsoft, SAP, Oracle, and IBM across your Amazon Web Services (AWS) and on-premises environments. You can define rules based on your licensing agreements to prevent license violations, such as using more licenses than are available. You can set the rules to help prevent licensing violations or notify you of breaches. AWS License Manager also offers automated discovery of bring your own licenses (BYOL) usage that keeps you informed of all software installations and uninstallations across your environment and alerts you of licensing violations.

License Manager can manage licenses purchased in AWS Marketplace, a curated digital catalog where you can easily find, purchase, deploy, and manage third-party software, data, and services to build solutions and run your business. Marketplace lists thousands of software listings from independent software vendors (ISVs) in popular categories such as security, networking, storage, machine learning, business intelligence, database, and DevOps.

Managed entitlements for AWS License Manager
Starting today, you can use managed entitlements, a new feature of AWS License Manager that lets you distribute licenses across your AWS Organizations, automate software deployments quickly and track licenses – all from a single, central account. Previously, each of your users would have to independently accept licensing terms and subscribe through their own individual AWS accounts. As your business grows and scales, this becomes increasingly inefficient.

Customers can use managed entitlements to manage more than 8,000 listings available for purchase from more than 1600 vendors in the AWS Marketplace. Today, AWS License Manager automates license entitlement distribution for Amazon Machine Image, Containers and Machine Learning products purchased in the Marketplace with a variety of solutions.

How It Works
Managed entitlements provides built-in controls that allow only authorized users and workloads to consume a license within vendor-defined limits. This new license management mechanism also eliminates the need for ISVs to maintain their own licensing systems and conduct costly audits.

overview

Each time a customer purchases licenses from AWS Marketplace or a supported ISV, the license is activated based on AWS IAM credentials, and the details are registered to License Manager.

list of granted license

Administrators distribute licenses to AWS accounts. They can manage a list of grants for each license.

list of grants

Benefits for ISVs
AWS License Manager managed entitlements provides several benefits to ISVs to simplify the automatic license creation and distribution process as part of their transactional workflow. License entitlements can be distributed to end users with and without AWS accounts. Managed entitlements streamlines upgrades and renewals by removing expensive license audits and provides customers with a self-service tracking tool with built-in license tracking capabilities. There are no fees for this feature.

Managed entitlements provides the ability to distribute licenses to end users who do not have AWS accounts. In conjunction with the AWS License Manager, ISVs create a unique long-term token to identify the customer. The token is generated and shared with the customer. When the software is launched, the customer enters the token to activate the license. The software exchanges the long-term customer token for a short-term token that is passed to the API and the setting of the license is completed. For on-premises workloads that are not connected to the Internet, ISVs can generate a host-specific license file that customers can use to run the software on that host.

Now Available
This new enhancement to AWS License Manager is available today for US East (N. Virginia), US West (Oregon), and Europe (Ireland) with other AWS Regions coming soon.

Licenses purchased on AWS Marketplace are automatically created in AWS License Manager and no special steps are required to use managed entitlements. For more details about the new feature, see the managed entitlement pages on AWS Marketplace, and the documentation. For ISVs to use this new feature, please visit our getting started guide.

Get started with AWS License Manager and the new managed entitlements feature today.

– Kame

Introducing AWS Gateway Load Balancer – Easy Deployment, Scalability, and High Availability for Partner Appliances

Post Syndicated from Channy Yun original https://aws.amazon.com/blogs/aws/introducing-aws-gateway-load-balancer-easy-deployment-scalability-and-high-availability-for-partner-appliances/

Last year, we launched Virtual Private Cloud (VPC) Ingress Routing to allow routing of all incoming and outgoing traffic to/from an Internet Gateway (IGW) or Virtual Private Gateway (VGW) to the Elastic Network Interface of a specific Amazon Elastic Compute Cloud (EC2) instance. With VPC Ingress Routing, you can now configure your VPC to send all […]