Is Raspberry Pi 4 a goodbye or a good buy for running Zabbix? How is it performance-wise? Is it reliable? Here’s my nine-month review of it, with a splash of appliance/application performance monitoring.
In about April 2022 when it became clear that I am going to continue my home monitoring project, I bought a Raspberry Pi 4 to run the show. Here’s my opinion on how well it is suited for running Zabbix.
Installing Zabbix
Applying that delicious layer of Zabbix on top of your Raspberry Pi 4 cake is extremely straightforward, as just like for every other platform that Zabbix officially supports, they do have packages and instructions to set up what you’d like to run.
So many options to choose from!
After installing the packages, the next steps are just like with Zabbix running on any other platform, so I am not going to dive into that now.
Modifications to my Raspberry setup
As I do not need to run a graphical environment on my Raspberry, I did disable the graphical environment from starting at all to save some precious RAM and other resources.
After some time I did also purchase an external USB hard disk, as the memory card from where Raspberry Pi 4 runs its OS is not very snappy, especially with write operations, and can also run tight on free space.
Other than that, my Raspberry Pi 4 is running pretty much by default.
How about the performance?
The graphs that you are about to see are from nine months period of time, as that’s about as long I have had the device.
No problem with the CPU usage. It’s been creeping up a little bit over time though, as I have been adding new items to monitoring and also additional software, such as HomeBridge and Home Assistant.
It still has available memory, even though the device runs Zabbix server, MariaDB, Grafana, Mosquitto, Home Assistant and HomeBridge.
As you can see, the number of running processes has grown significantly as I have been adding other stuff than Zabbix.
It’s easy to see when I did switch from an internal memory card to an external USB drive. The disk I/O utilization percentage is hovering at very tolerable levels.
I/O latency has remained about the same.
With only Zabbix, MariaDB and Grafana running the device remained around the 55-60C area, but has been warming to about 70C with the additional software. Still not too bad.
Splash of APM
Have you ever wondered what happens to the memory usage of a wrapper shell script that runs other scripts in a loop and keeps doing that until it’s manually stopped? This happens, it’s boringly stable. The results are brought you to by Zabbix Agent 2 process discovery.
Really, it does not vary much.
But as I have been adding new stuff, clearly the OS needs to do some more swapping and even the script has more page faults than before.
There’s more than that to process discovery, but those were some examples.
Zabbix server itself is doing very well, here are some example stats.
My conclusion: Raspberry Pi 4 is an excellent Zabbix server for smaller environments and a very good Zabbix proxy candidate. It’s been rock solid.
This post was originally published on the author’s page.
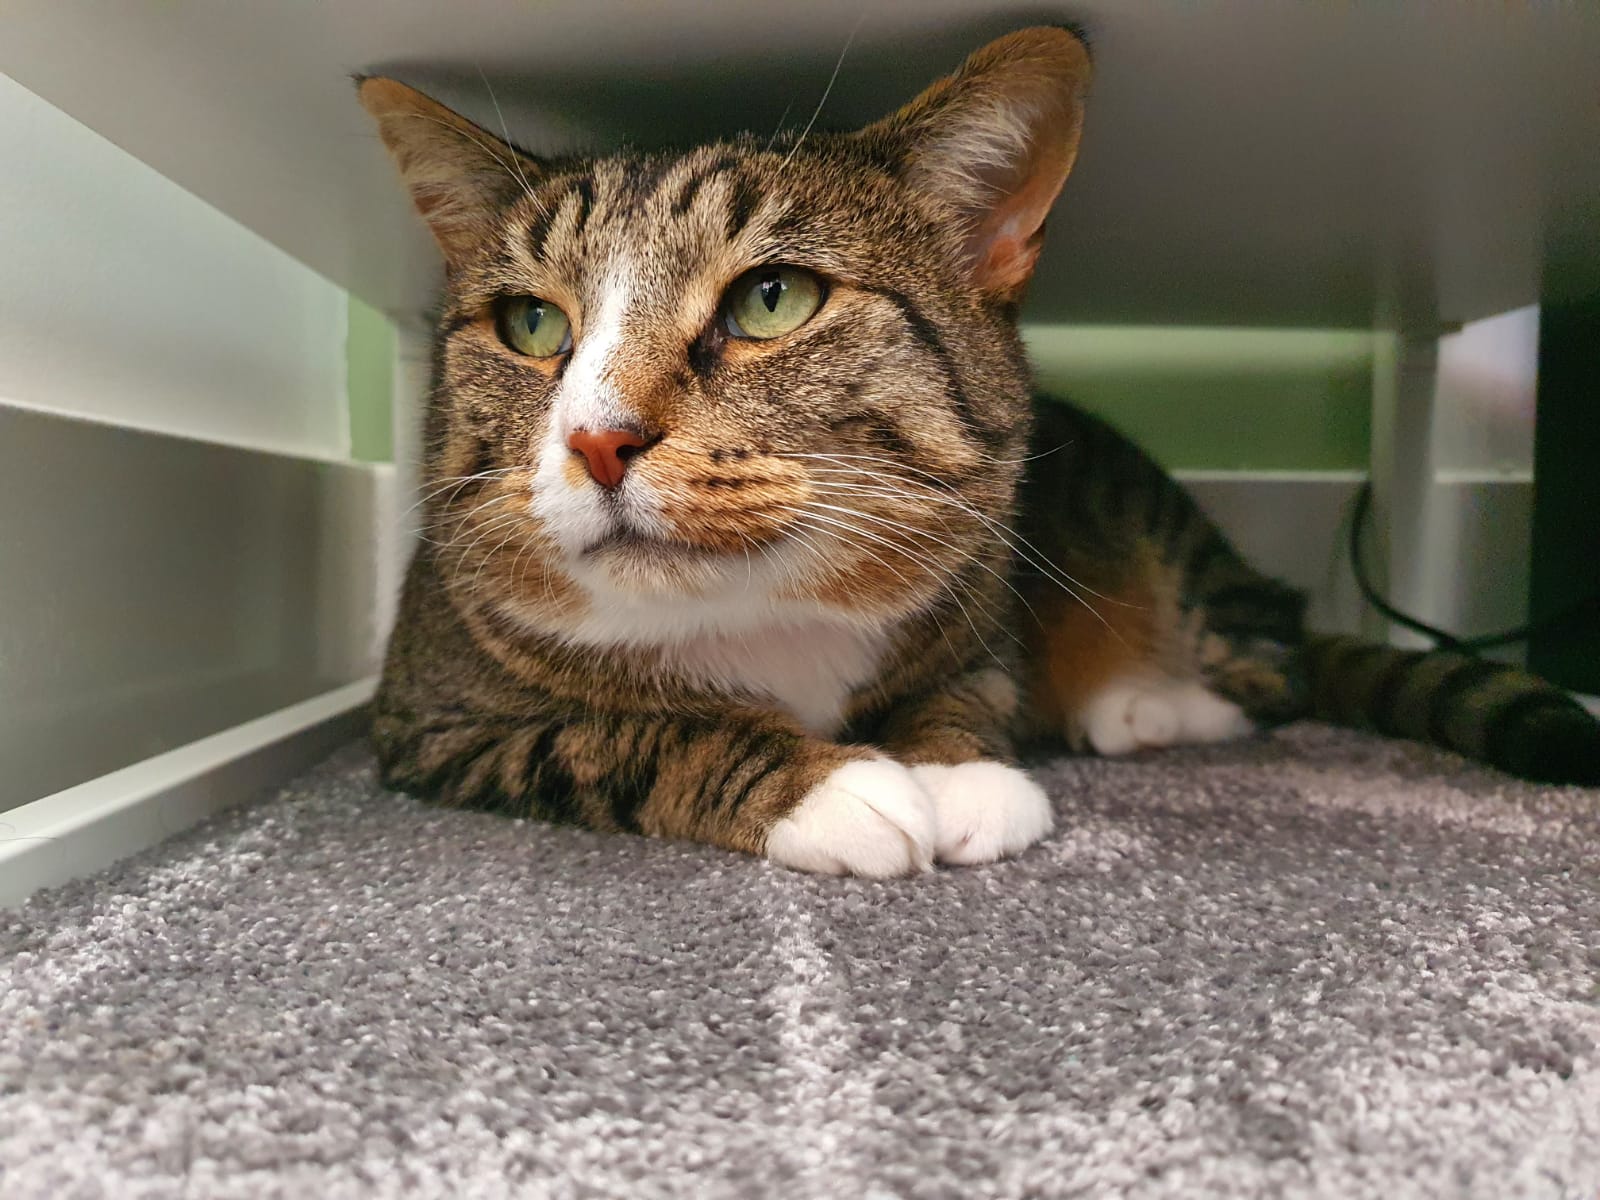
I adopted Ziggy in late 2020. It took me quite a while to get used to his routine and mix it with mine. He consistently jumped on the kitchen counter in search of food, albeit only when no one was around. And I only found out when he tossed the ceramic butter box. It shattered and made a loud bang in the late hours of the night. Thankfully, no one was asleep yet.
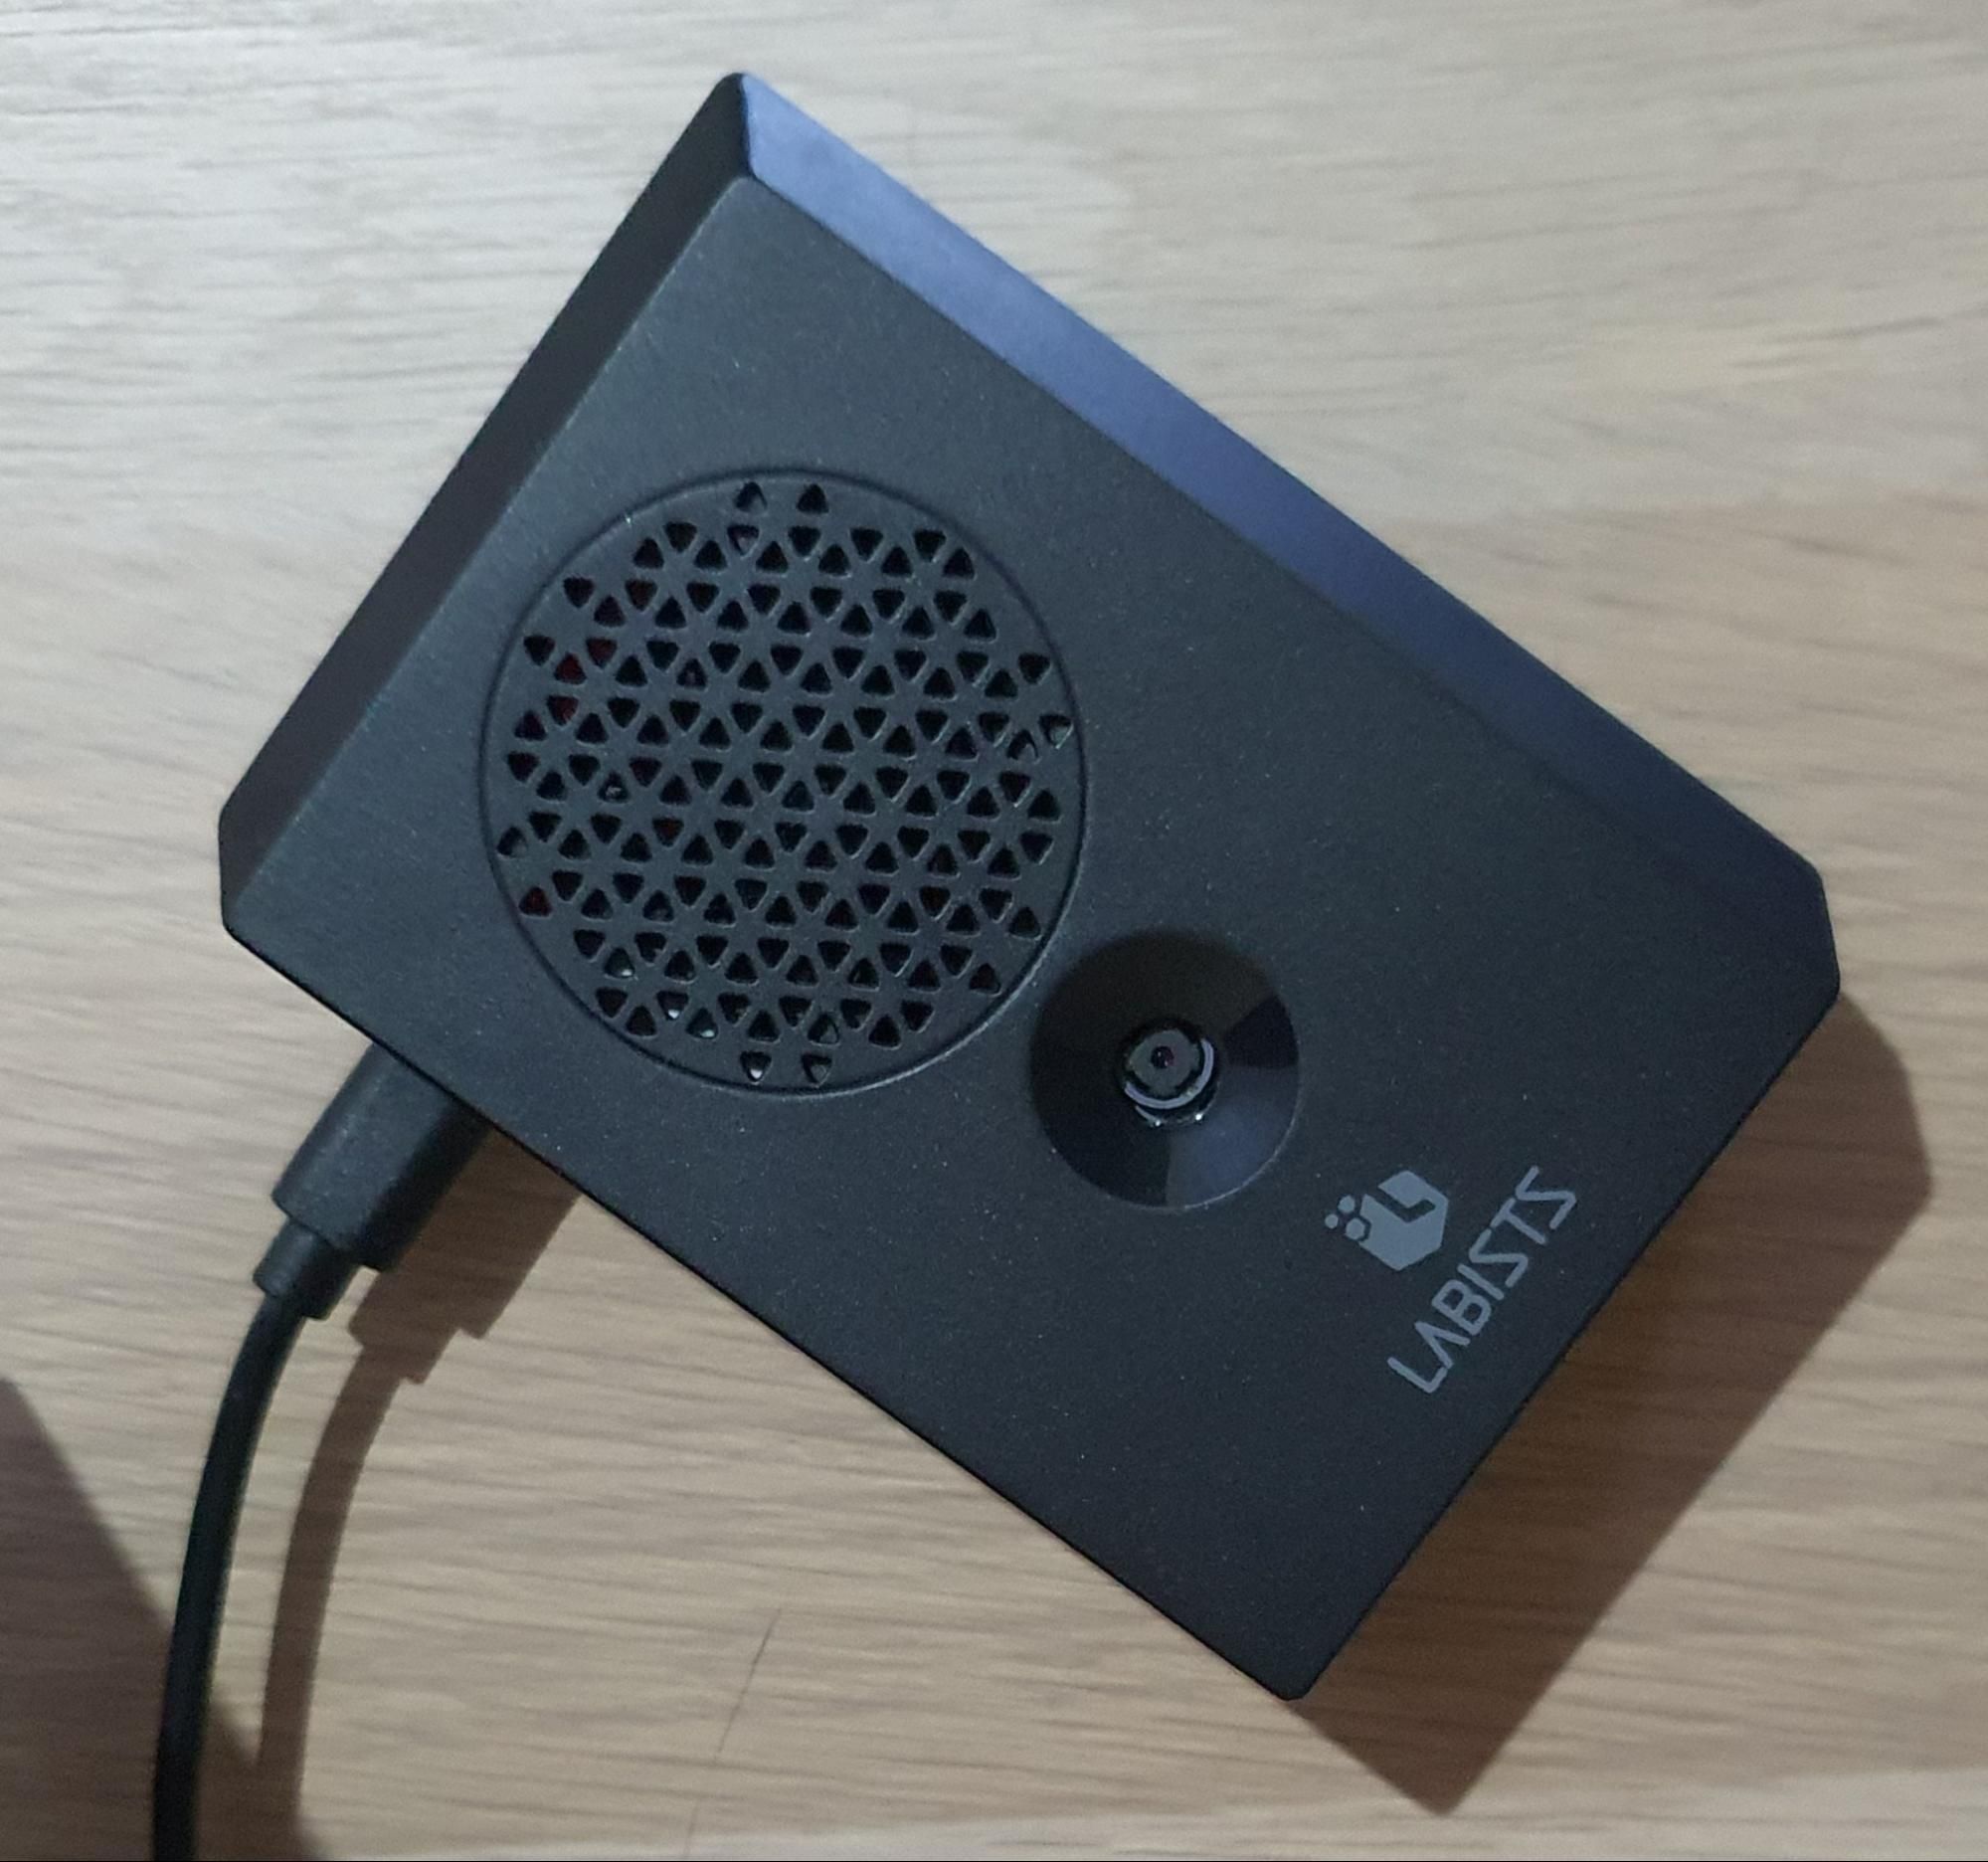
This got me thinking that I should keep an eye on his mischievous behaviour, even when I’m not physically at home. I briefly considered buying a pet cam, but I remembered I had bought a Raspberry Pi a few months before. It was hardly being used, and it had a case (like this) allowing a camera module to be added. I hadn’t found a use for the camera module — until now.
This was a perfect weekend project: I would set up my own pet cam, connect it to the Internet, and make it available for me to check from anywhere in the world. I also wanted to ensure that only I could access it and that it had some easy way to login, possibly using my Google account. The solution? Cloudflare Tunnel and Teams. Cloudflare would help me expose a service running in an internal network using Tunnel while providing a security solution on top of it to keep it secure. Teams on the other hand, would help me by adding access control in the form of Google authentication.
So all I am left to do is configure my Raspberry Pi to be able to run a camera as a web service. That weekend, I started researching for it and made a list of things I needed:
A Cloudflare account with Cloudflare for Teams+Tunnel access.
Internet connection.
In this blog post, I’ll walk you through the process I followed to set everything up for the pet cam. To keep things simple and succinct, I will not cover how to set up your Raspberry Pi, but you should make sure it has Internet access and that you can run shell commands on it, either via SSH or using a VNC connection.
Setup
The first thing we need to do is connect the camera module to the Raspberry Pi. For more detailed instructions, follow the official guide, steps 1 to 3.
After setting up the camera and testing that it works, we need to set it up as a camera with a web server. This is so we can access it at a URL such as https://192.168.0.2:8080 within the local network, to which the Raspberry Pi is also connected. To do that, we will use Motion, a program for setting up the camera module v2 as a web server.
The above commands will update the local packages with new versions from the repositories and then install that version of Motion from Motion’s GitHub project.
Next, we need to configure Motion using:
$ sudo vim /etc/motion/motion.conf
# Find the following lines and update them to following:
# daemon on
# stream_localhost off
# save and exit
After that, we need to set Motion up as a daemon, so it runs whenever the system is restarted:
$ sudo vim /etc/default/motion
# and change the following line
# start_motion_daemon=yes
# save and exit and run the next command
$ sudo service motion start
Great. Now that we have Motion set up, we can see the live feed from our camera in a browser on Raspberry Pi module at the default URL: http://localhost:8081 (the port can be changed in the config edit step above). Alternatively, we can open it on another machine within the same network by replacing 0.0.0.0 with the IP of the Raspberry Pi in the network.
For now, the camera web server is available only within our local network. However, I wanted to keep an eye on Ziggy no matter where I am, as long as I have Internet access and a browser. This is perfect for Cloudflare Tunnel. An alternative would be to open a port in the firewall on the router in my home network, but I hate that idea of having to mess with the router configuration. I am not really an expert at that, and if I leave a backdoor open to my internal network, it can get scary quickly!
The Cloudflare Tunnel documentation takes us through its installation. The only issue is that the architecture of the Raspberry Pi is based on armv7l (32-bit)and there is no package for it in the remote repositories. We could build cloudflared from source if we wanted as it’s an open source project, but an easier route is to wget it.
$ wget https://bin.equinox.io/c/VdrWdbjqyF/cloudflared-stable-linux-arm.tgz
# a quick check of version shall confirm if it installed correctly
$ cloudflared -v
cloudflared version 2021.5.10 (built 2021-05-26-1355 UTC)
Let’s set up our Tunnel now:
$ cloudflared tunnel create camera
Tunnel credentials written to /home/pi/.cloudflared/5f8182ba-906c-4910-98c3-7d042bda0594.json. cloudflared chose this file based on where your origin certificate was found. Keep this file secret. To revoke these credentials, delete the tunnel.

Created tunnel camera with id 5f8182ba-906c-4910-98c3-7d042bda0594
Now we need to configure the Tunnel to forward the traffic to the Motion webcam server:
$ vim /home/pi/.cloudflared/config.yaml
# And add the following.
tunnel: 5f8182ba-906c-4910-98c3-7d042bda0594
credentials-file: /home/pi/.cloudflared/5f8182ba-906c-4910-98c3-7d042bda0594.json

ingress:
  - hostname: camera.imohak.com
    service: http://0.0.0.0:9095
  - service: http_status:404
The Tunnel uuid should be the one created with the command above and so should the path of the credential file. The ingress should have the domain we want to use. In my case I have set up camera.imohak.com as my domain and 404 as the fallback rule.
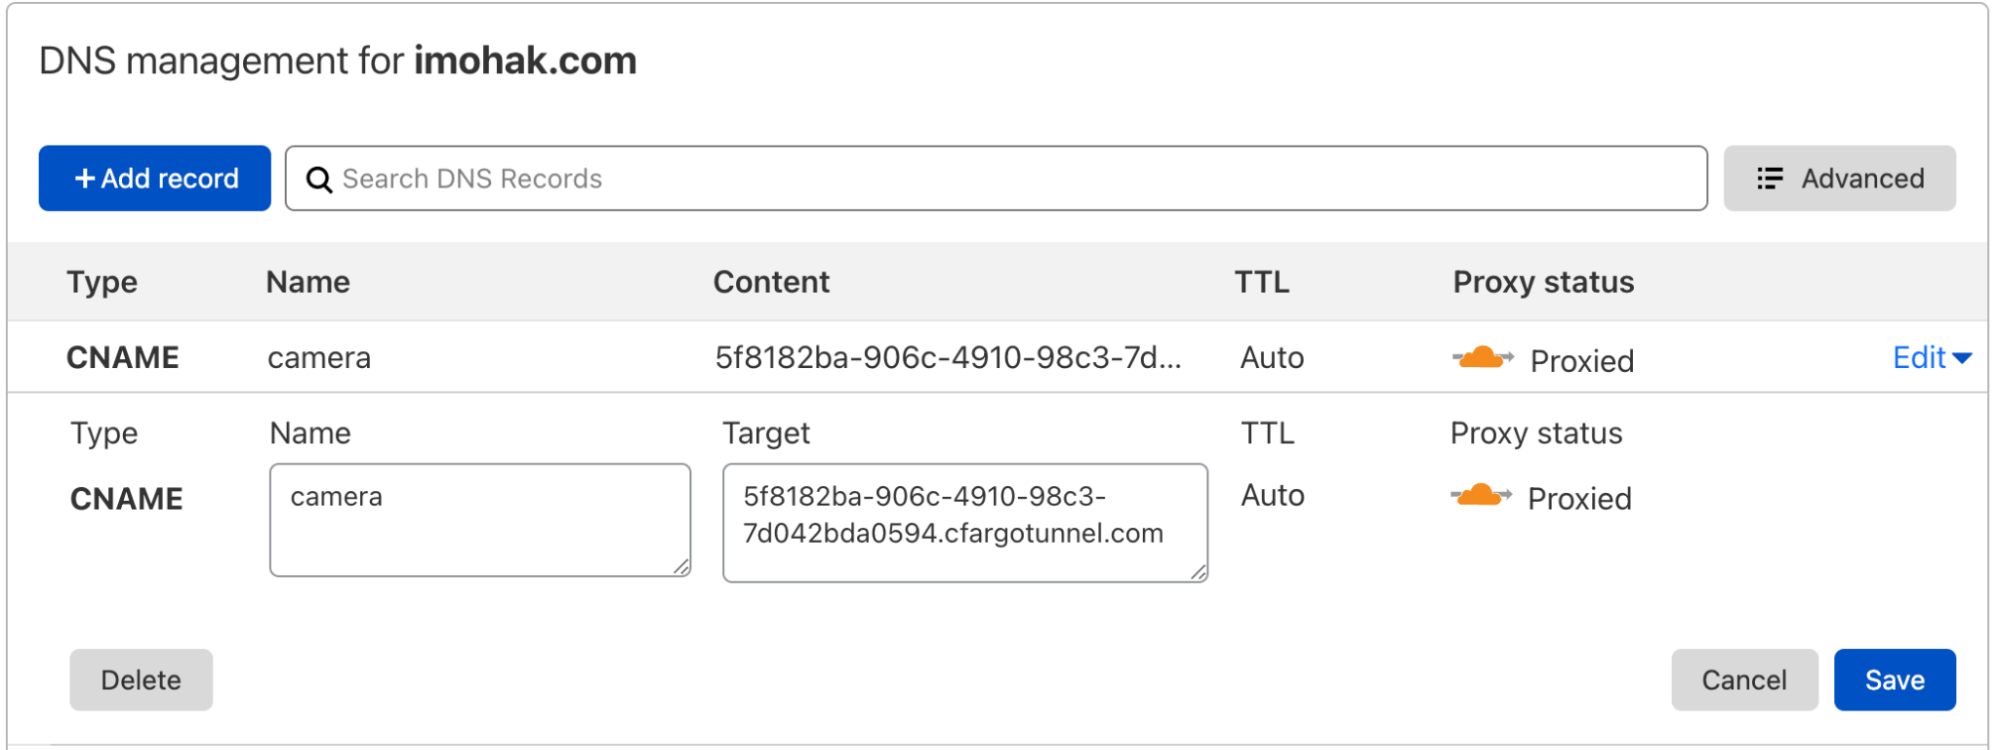
Next, we need to route the DNS to this Tunnel:
$ cloudflared tunnel route dns 5f8182ba-906c-4910-98c3-7d042bda0594 camera.imohak.com
This adds a DNS CNAME record, which can be verified from the Cloudflare dashboard as shown here:
Let’s test the Tunnel!
$ cloudflared tunnel run camera
2021-06-15T21:44:41Z INF Starting tunnel tunnelID=5f8182ba-906c-4910-98c3-7d042bda0594
2021-06-15T21:44:41Z INF Version 2021.5.10
2021-06-15T21:44:41Z INF GOOS: linux, GOVersion: go1.16.3, GoArch: arm
2021-06-15T21:44:41Z INF Settings: map[cred-file:/home/pi/.cloudflared/5f8182ba-906c-4910-98c3-7d042bda0594.json credentials-file:/home/pi/.cloudflared/5f8182ba-906c-4910-98c3-7d042bda0594.json]
2021-06-15T21:44:41Z INF cloudflared will not automatically update when run from the shell. To enable auto-updates, run cloudflared as a service: https://developers.cloudflare.com/argo-tunnel/reference/service/
2021-06-15T21:44:41Z INF Generated Connector ID: 7e38566e-0d33-426d-b64d-326d0592486a
2021-06-15T21:44:41Z INF Initial protocol http2
2021-06-15T21:44:41Z INF Starting metrics server on 127.0.0.1:43327/metrics
2021-06-15T21:44:42Z INF Connection 6e7e0168-22a4-4804-968d-0674e4c3b4b1 registered connIndex=0 location=DUB
2021-06-15T21:44:43Z INF Connection fc83017d-46f9-4cee-8fc6-e4ee75c973f5 registered connIndex=1 location=LHR
2021-06-15T21:44:44Z INF Connection 62d28eee-3a1e-46ef-a4ba-050ae6e80aba registered connIndex=2 location=DUB
2021-06-15T21:44:44Z INF Connection 564164b1-7d8b-4c83-a920-79b279659491 registered connIndex=3 location=LHR
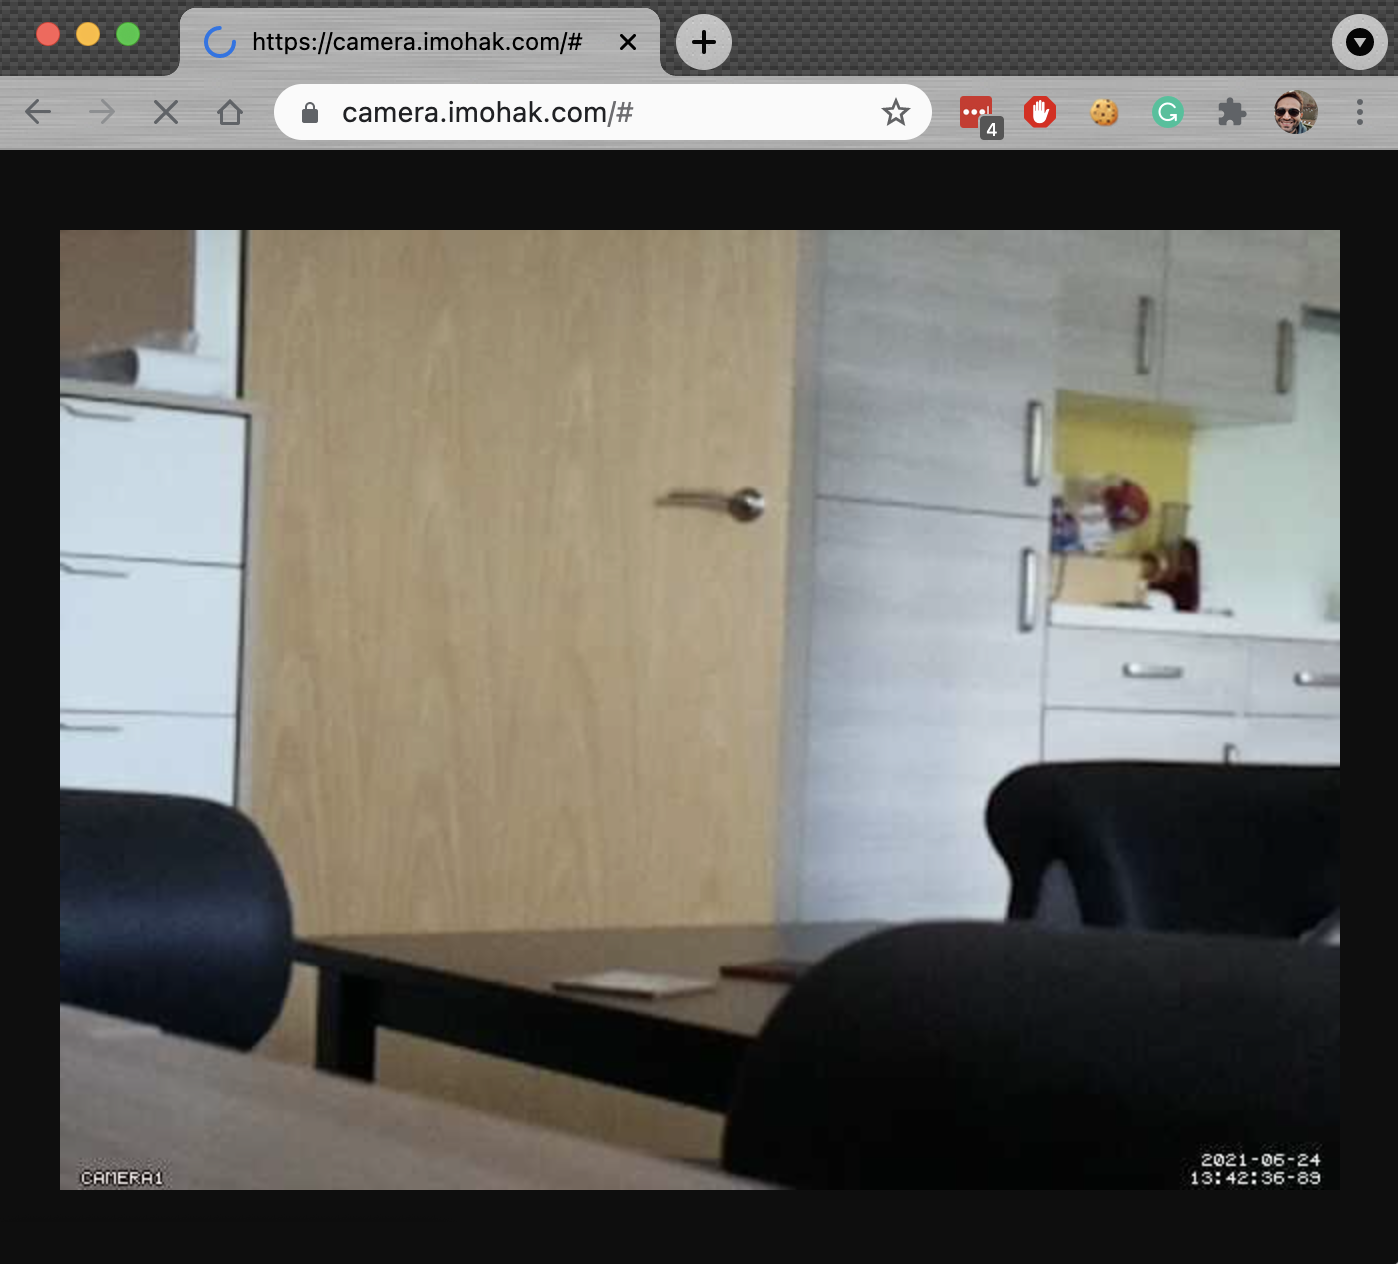
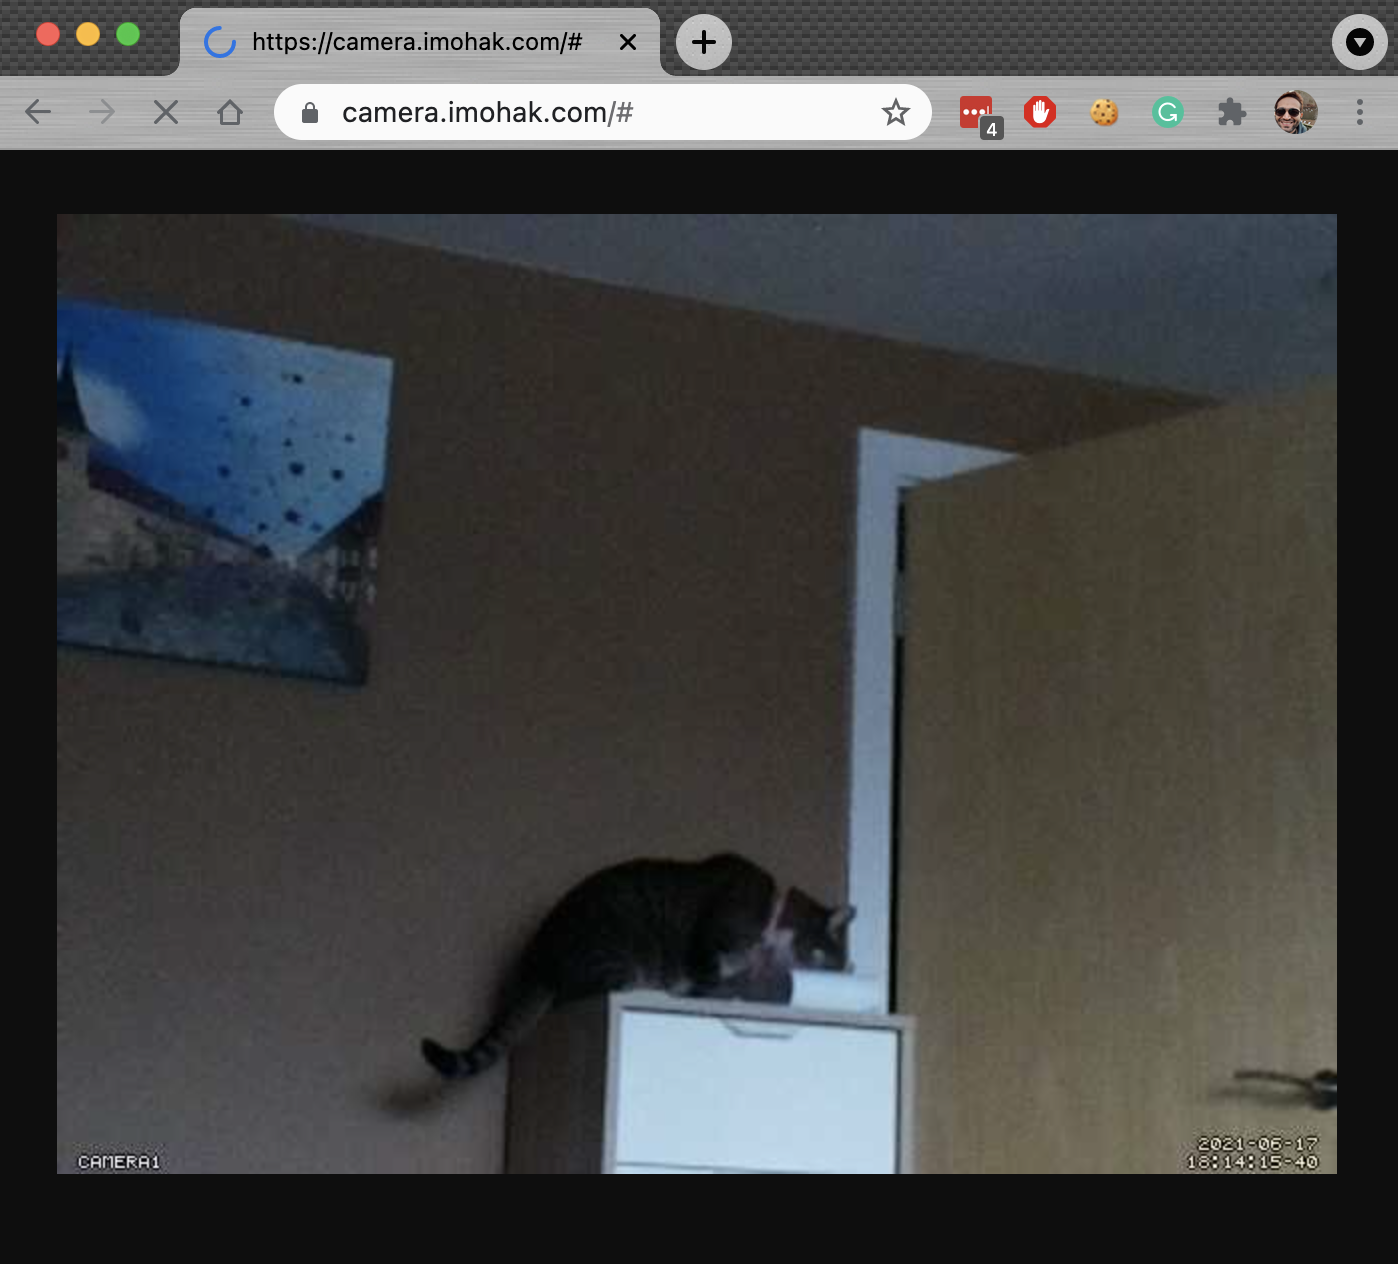
Next, we go to the browser and open the URL camera.imohak.com.
Voilà. Or, not quite yet.
Locking it Down
We still haven’t put any requirement for authentication on top of the server. Right now, anyone who knows about the domain can just open it and look at what is happening inside my house. Frightening, right? Thankfully we have two options now:
Use Motion’s inbuilt authentication mechanisms. However, we shall not choose this option as it’s just another username/password to remember which one can easily forget and who knows if in the future, there is a vulnerability found in the way motion authenticates and my credentials are leaked? We are looking for an SSO using Google which is easy and quick to use and gives us a secure login based on google credentials.
Use Cloudflare Access. Access gives us the ability to create policies based on IP addresses and email addresses, and it lets us integrate different types of authentication methods, such as OTP or Google. In our case, we require authentication through Google.
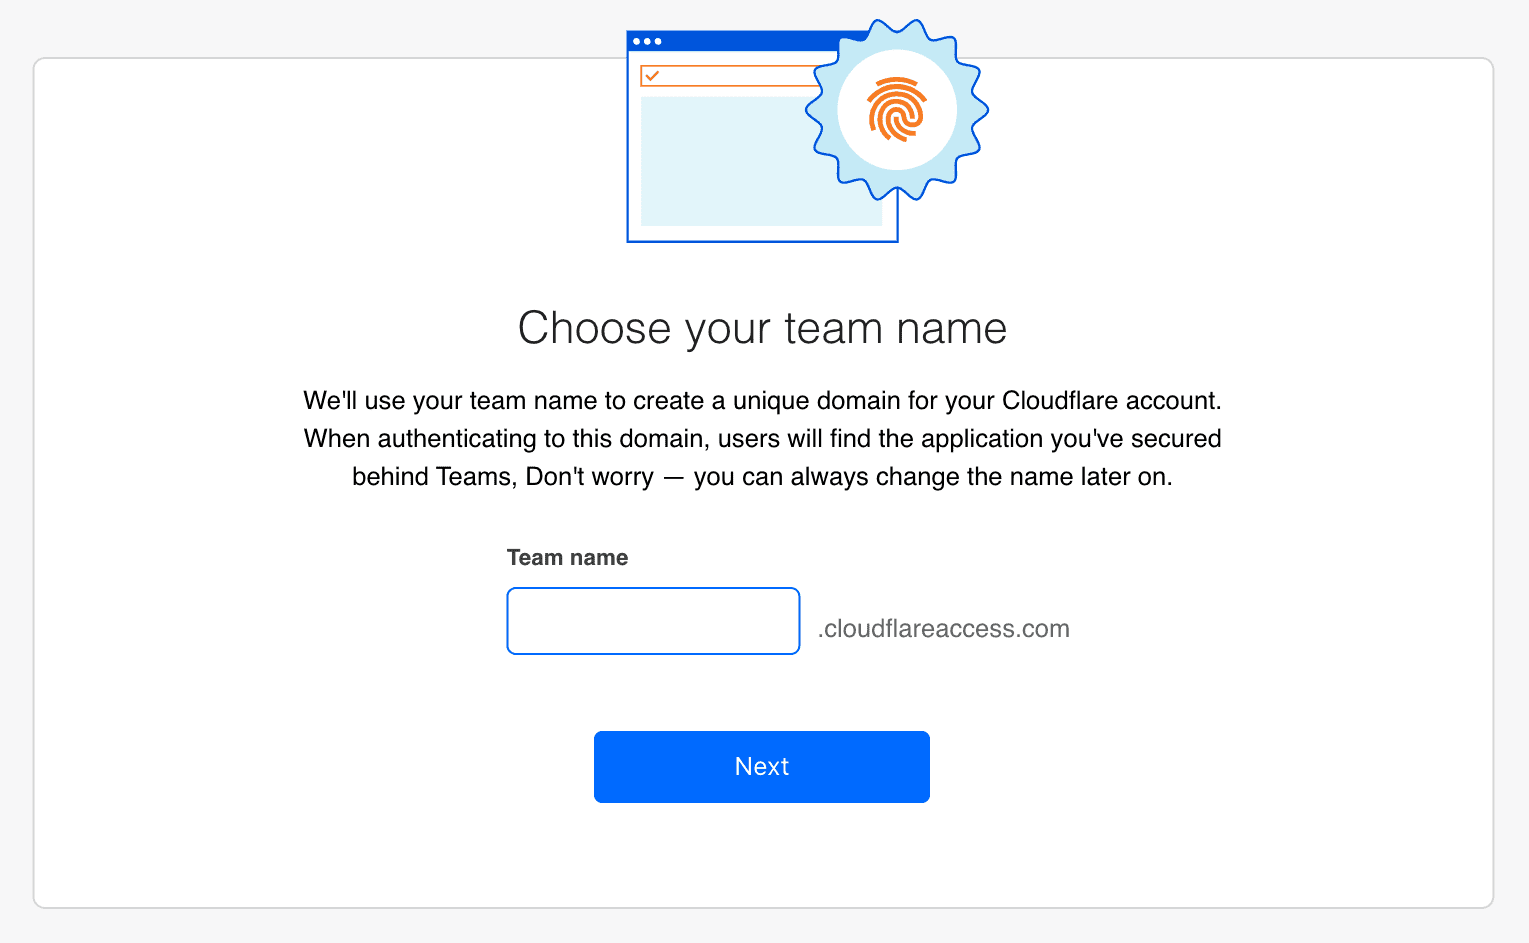
To take advantage of this Cloudflare Access functionality, the first step is to set up Cloudflare for Teams. Visit https://dash.teams.cloudflare.com/, follow the setup guide and choose a team name(imohak in my case).
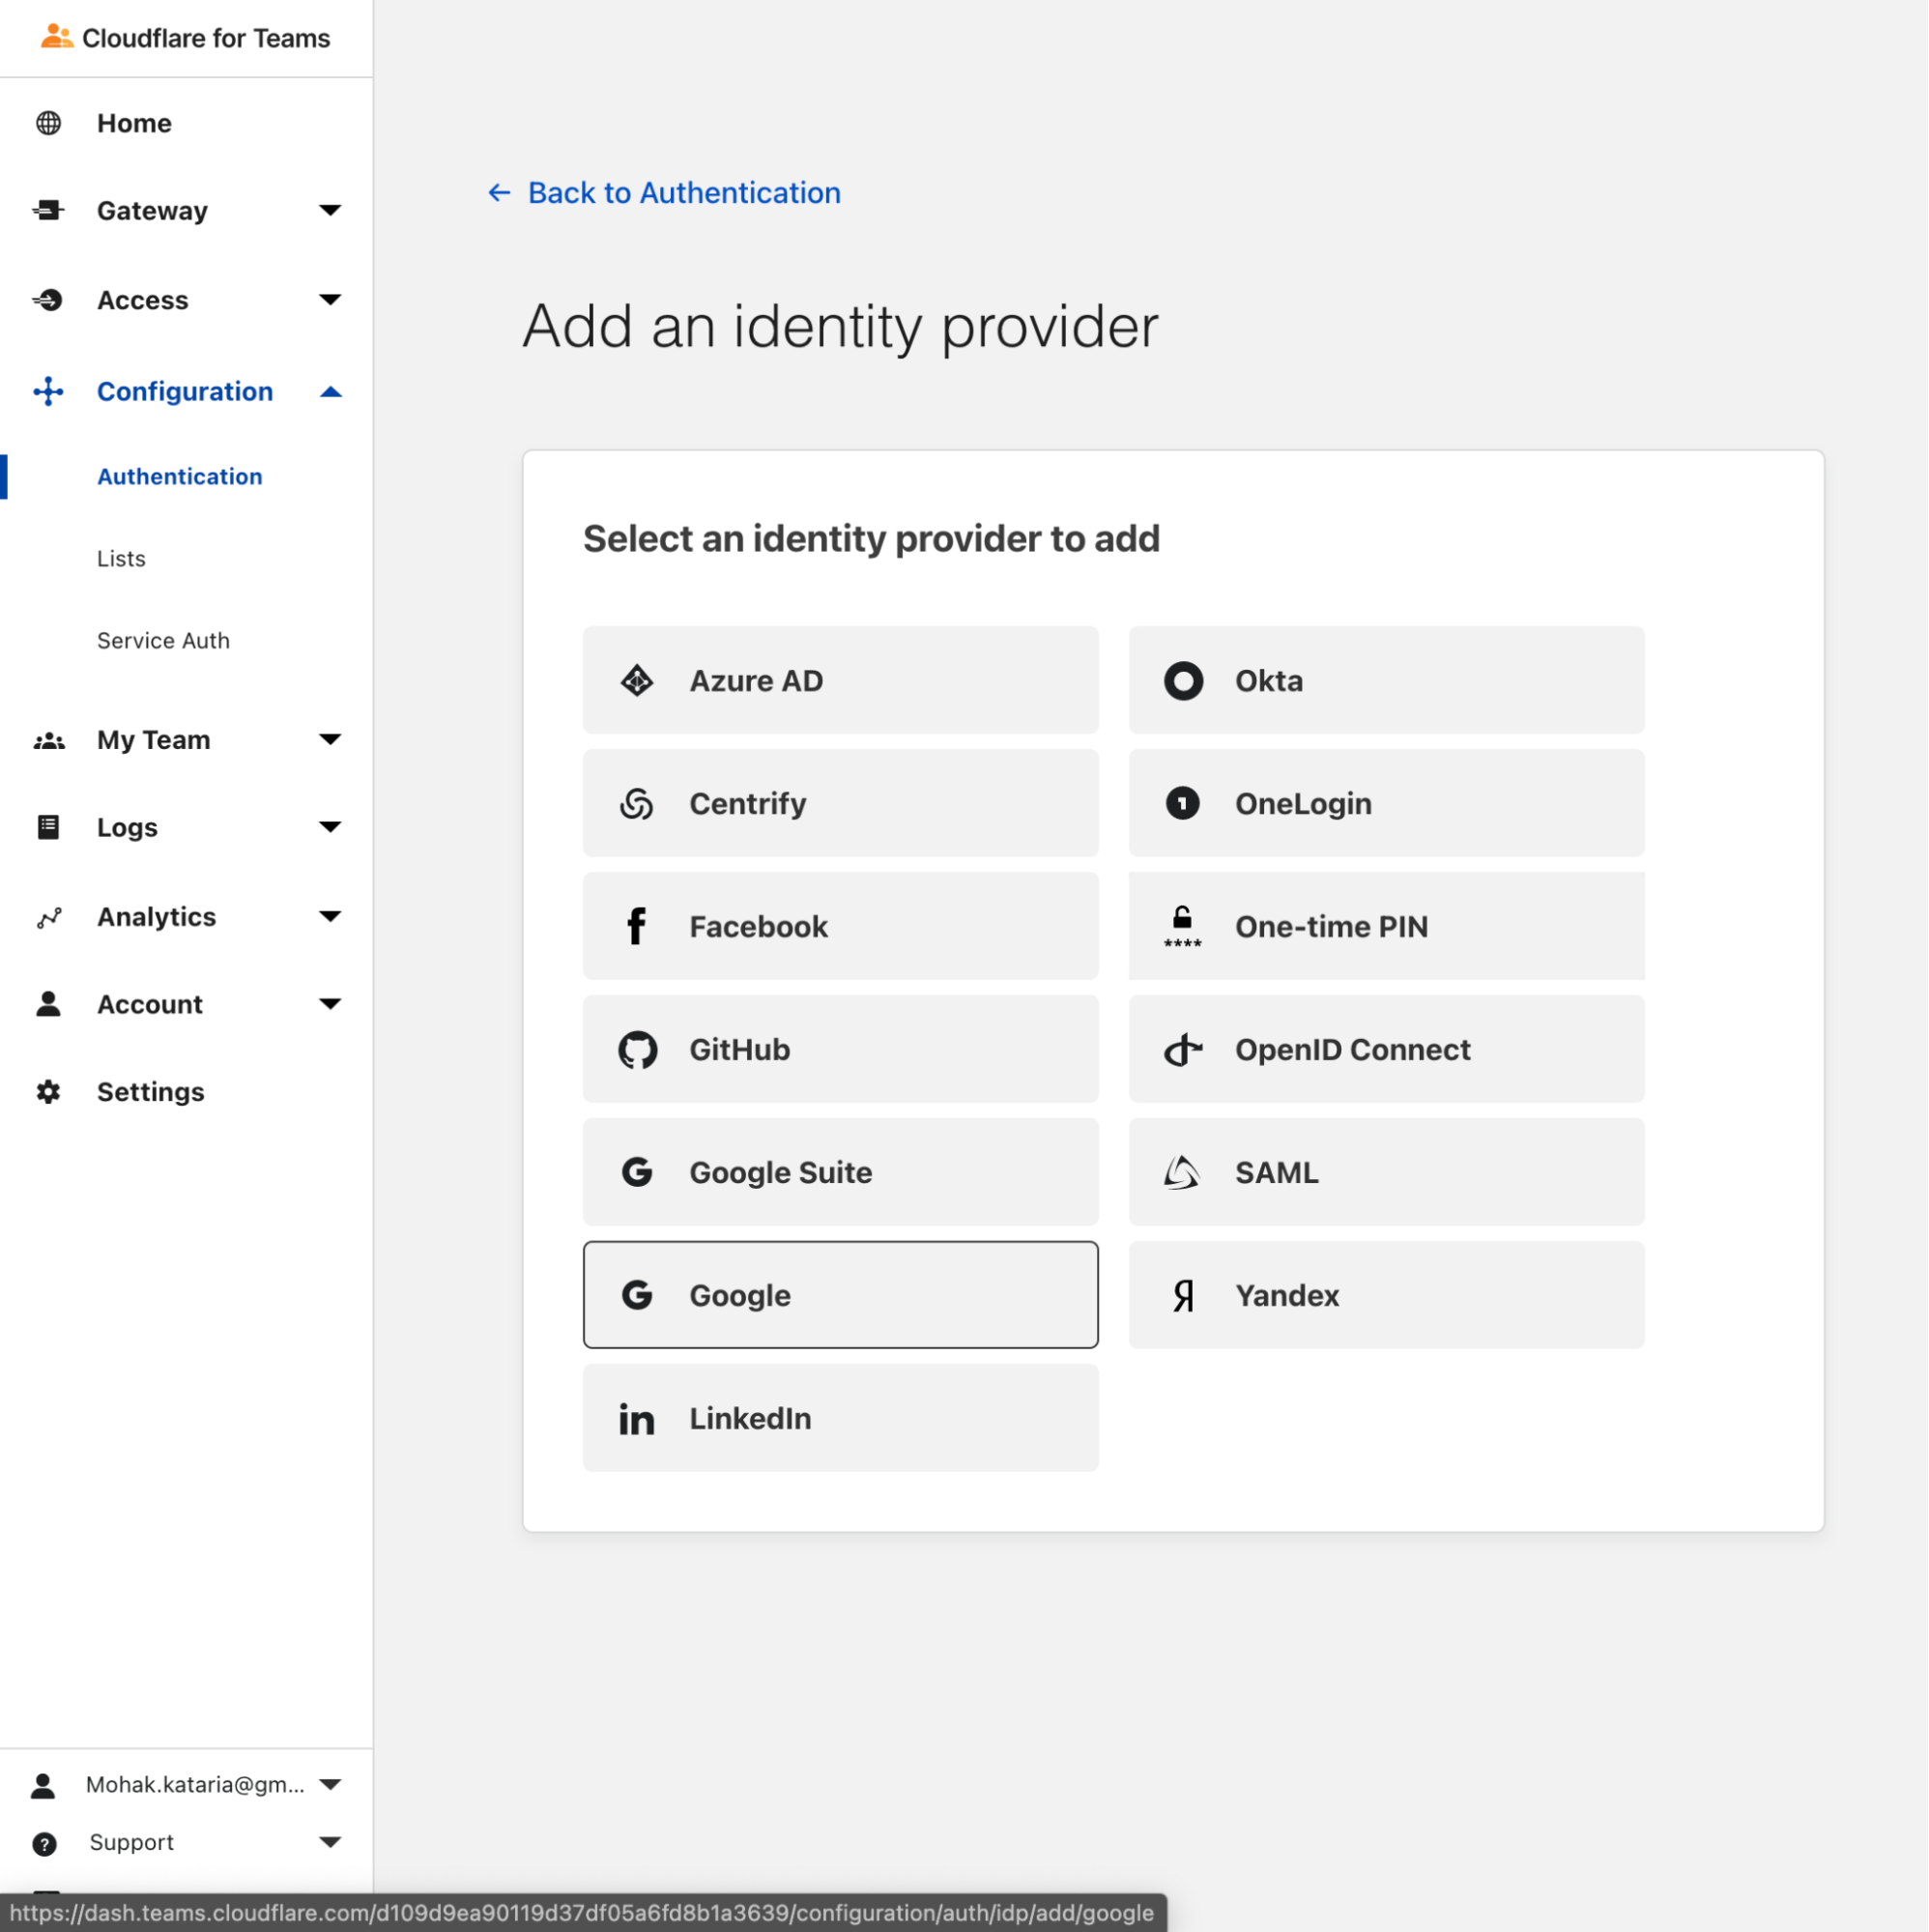
After this, we have two things left to do: add a login method and add an application. Let’s cover how we add a login method first. Navigate to Configuration > Authentication and click on +Add,under the Login tab. The Dashboard will show us a list of identity providers to choose from. Select Google — follow this guide for a walkthrough of how to set up a Google Cloud application, get a ClientID and Client Secret, and use them to configure the identity provider in Teams.
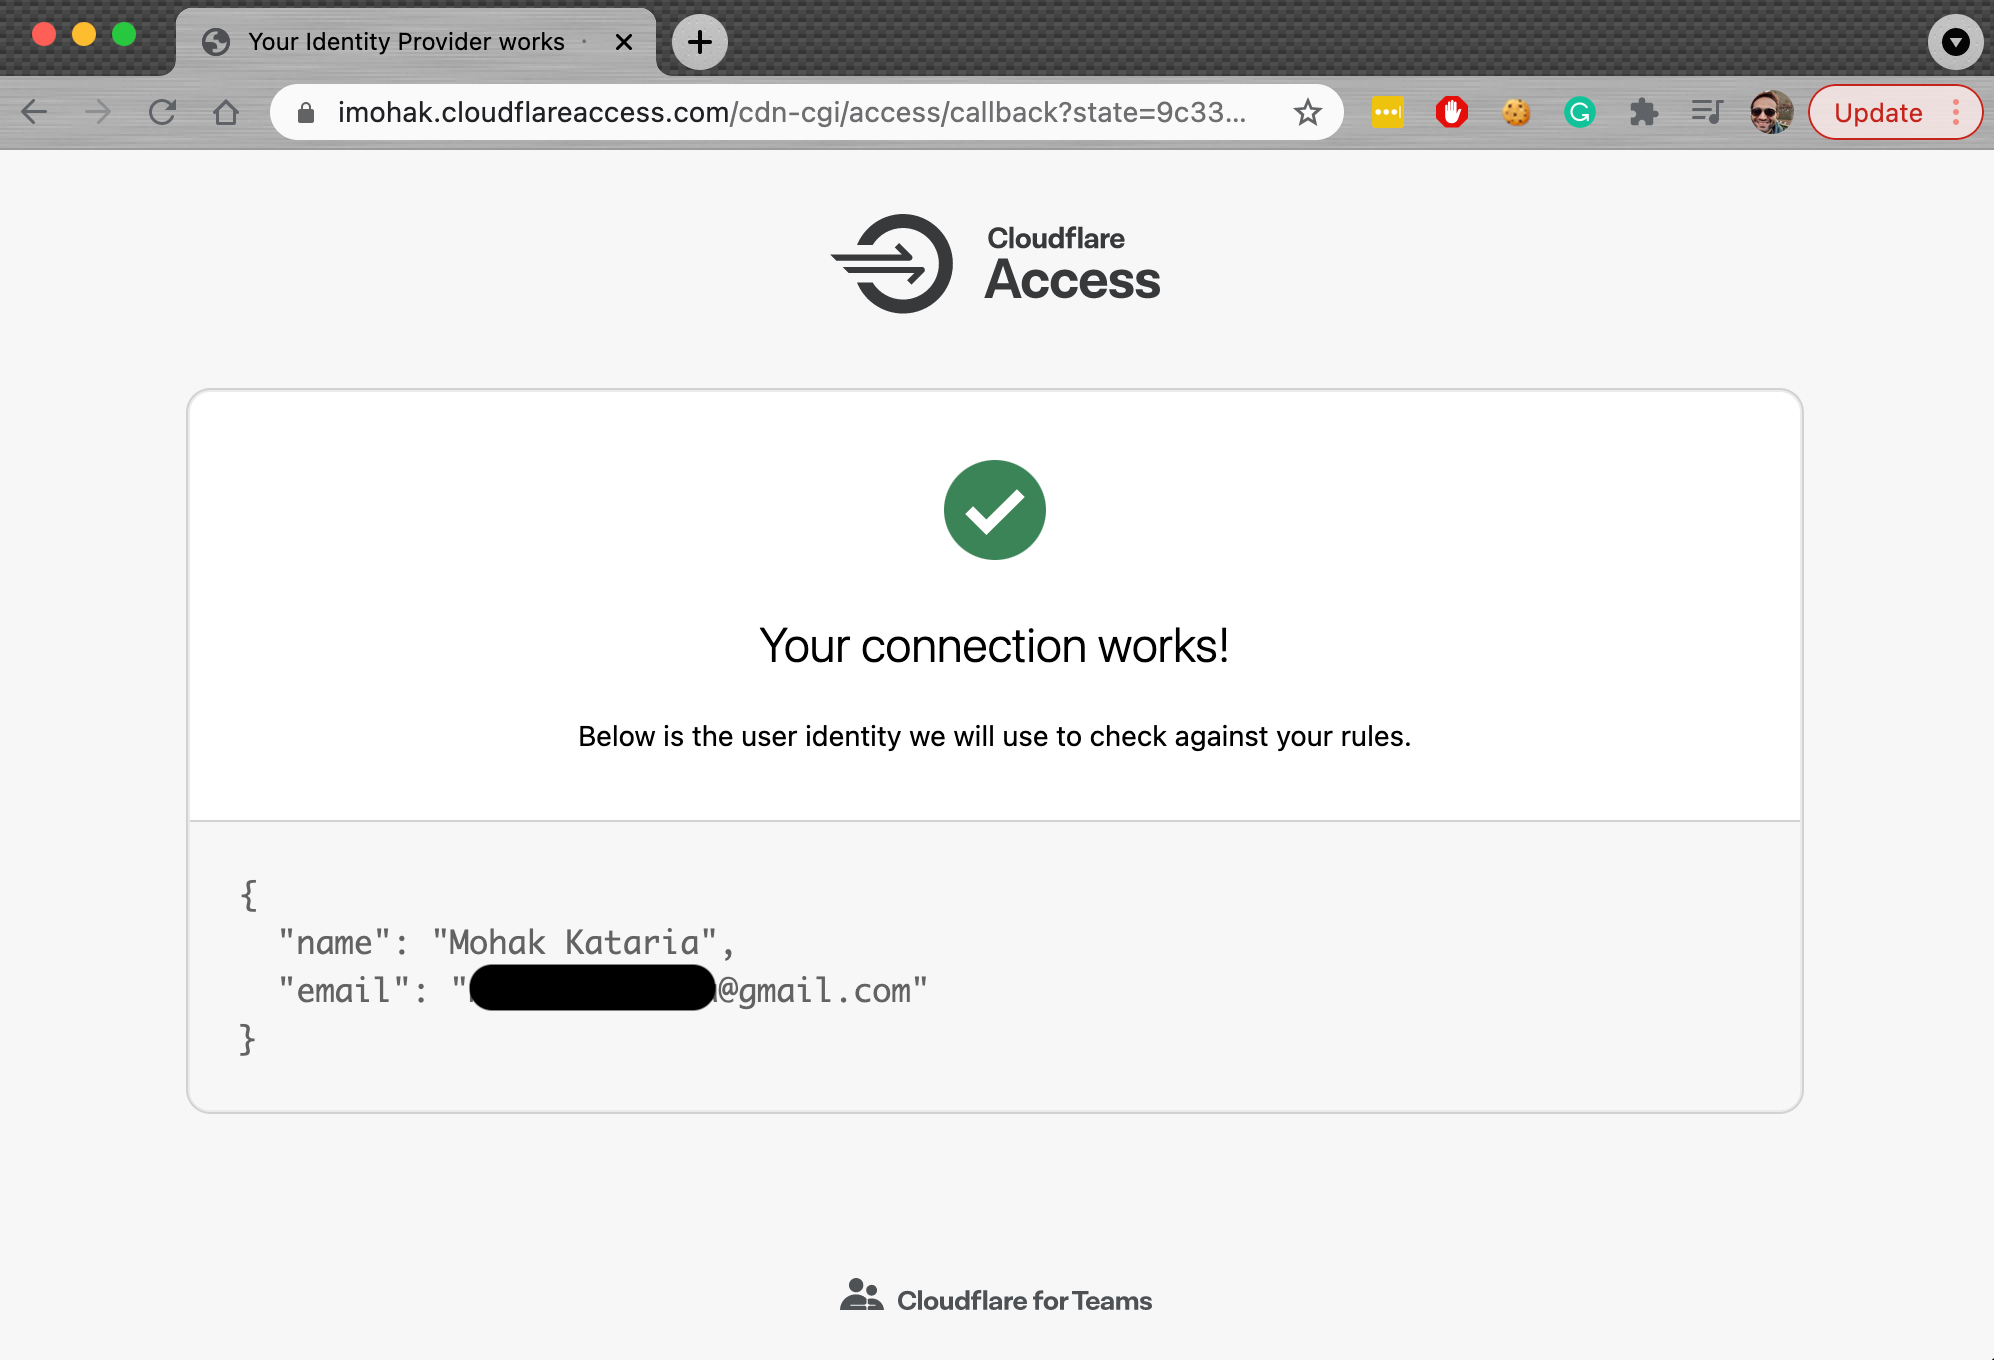
After adding a login method and testing it, we should see a confirmation page like this:
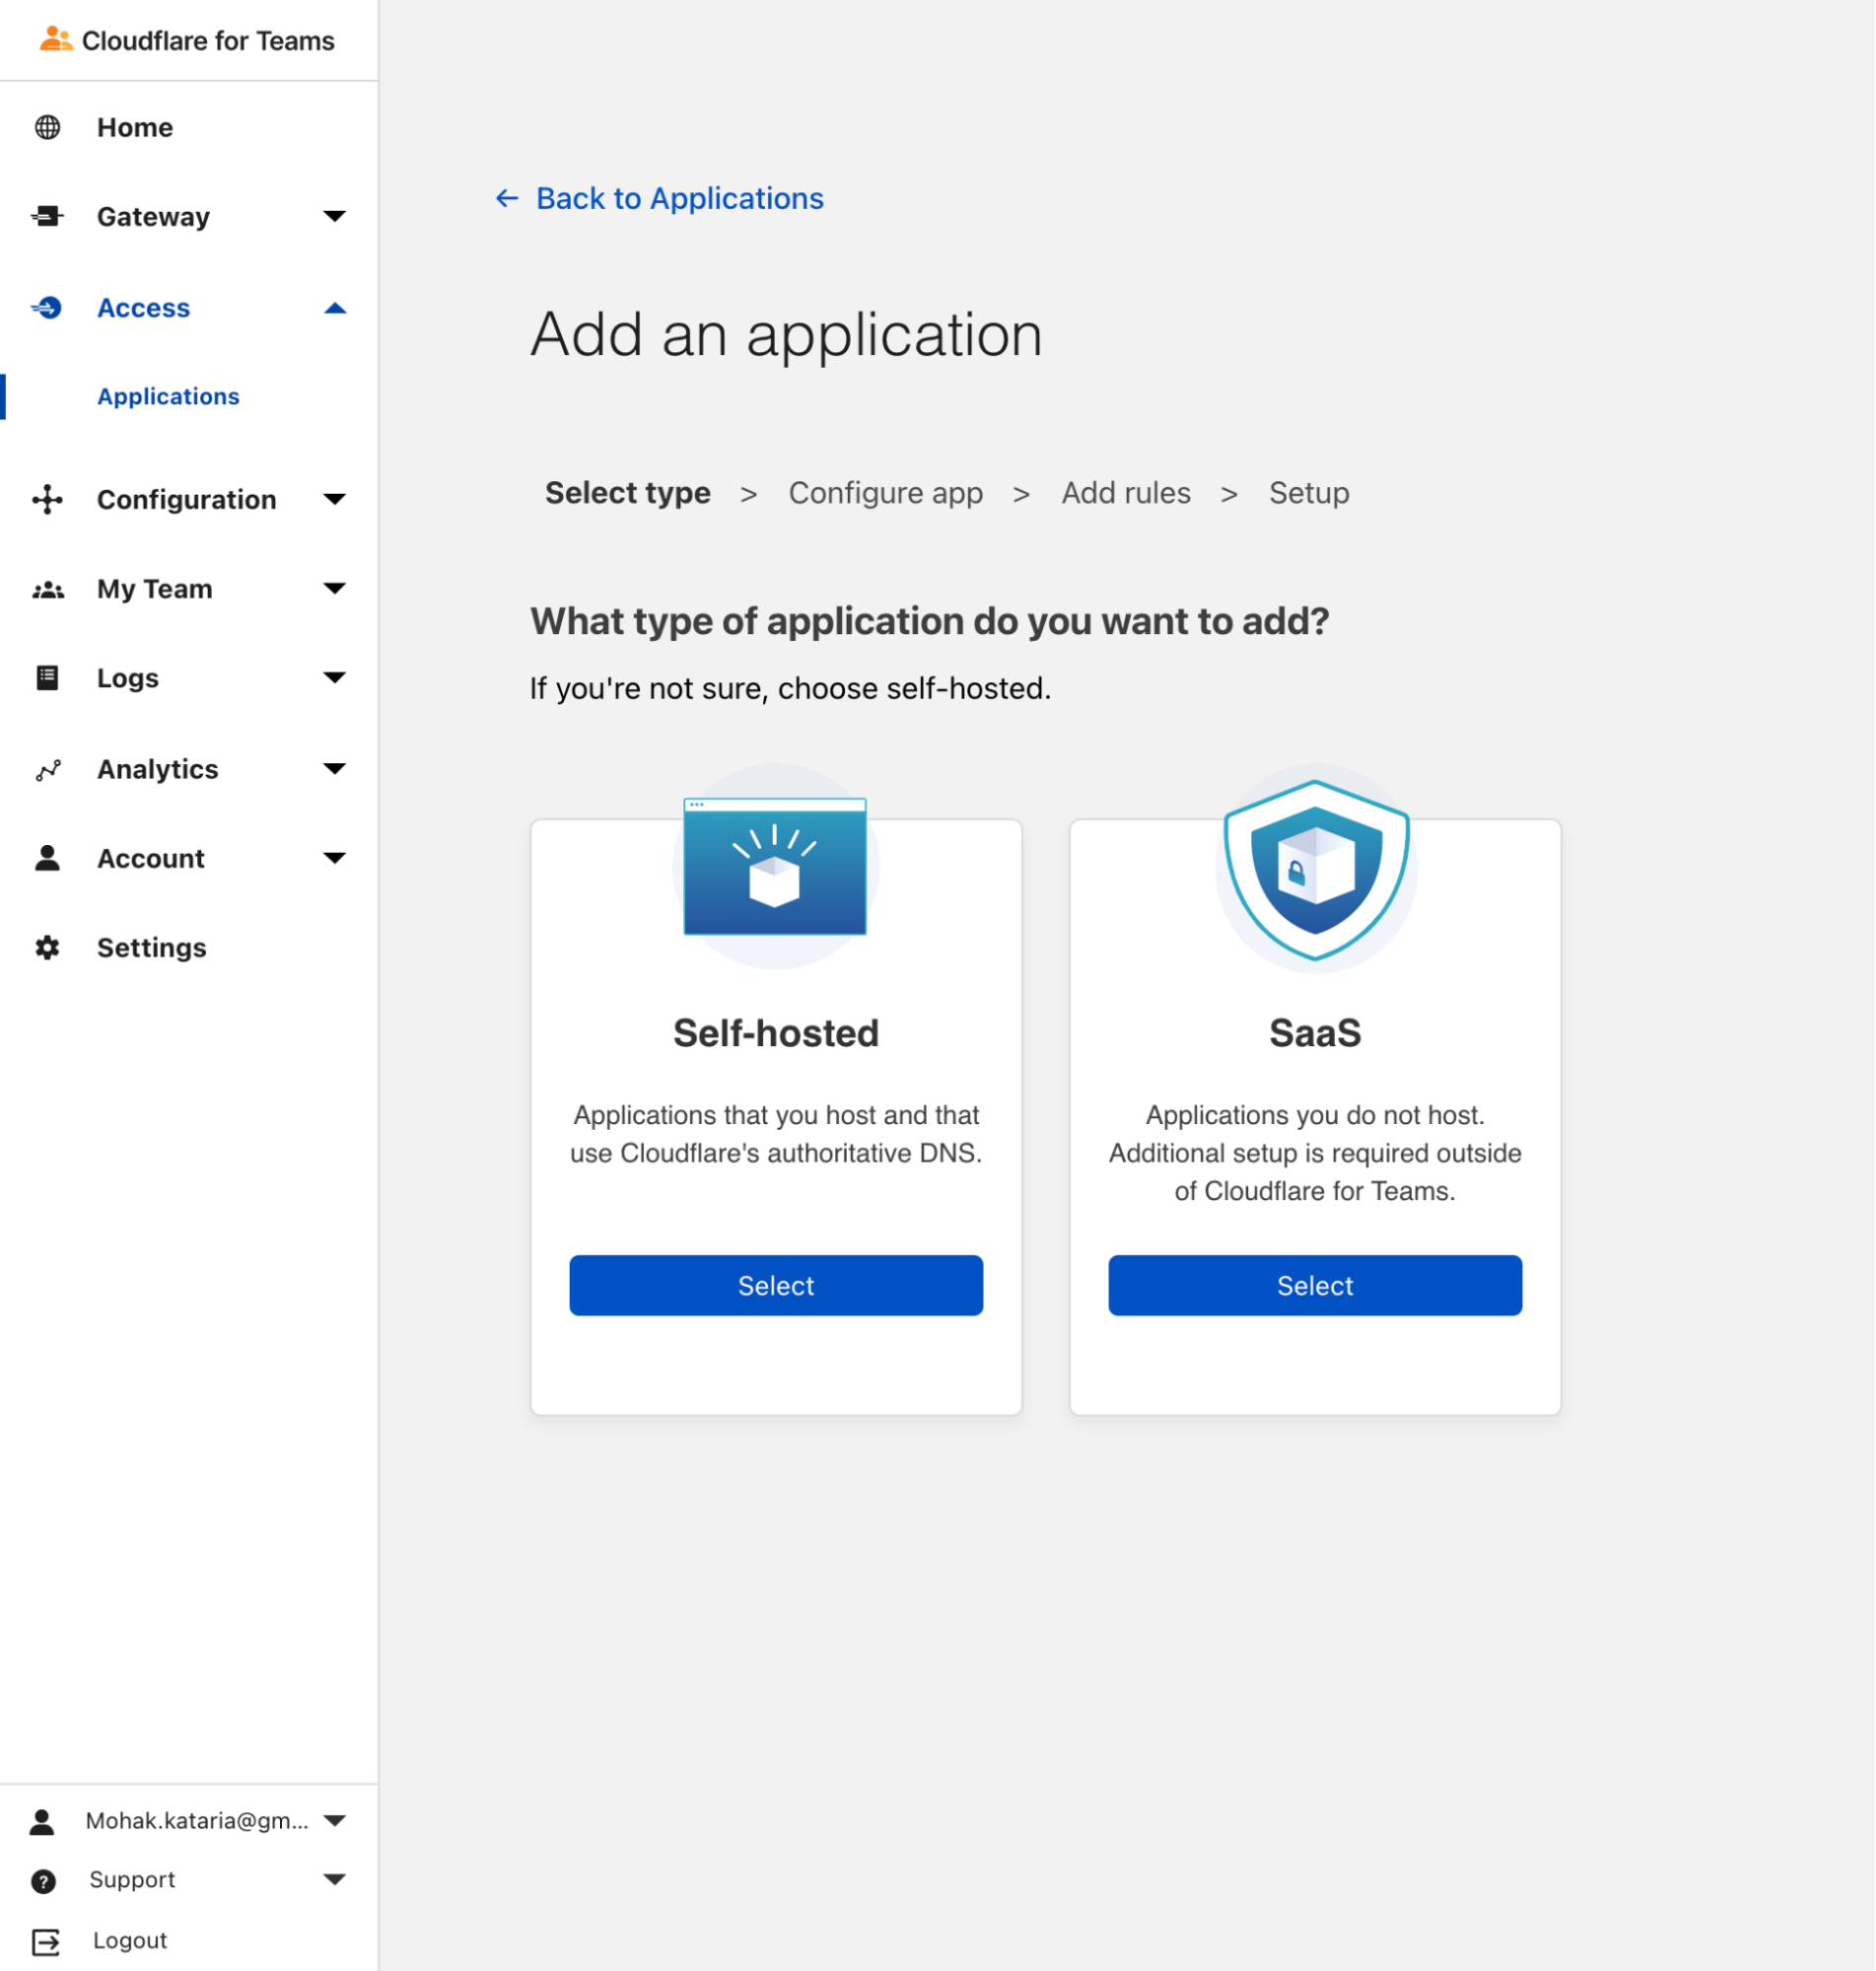
The last thing we need to do is to add the pet-cam subdomain as an application protected behind Teams. This enables us to enforce the Google authentication requirement we have configured before. To do that, navigate to Access > Applications, click on Add an application, and select Self-hosted.
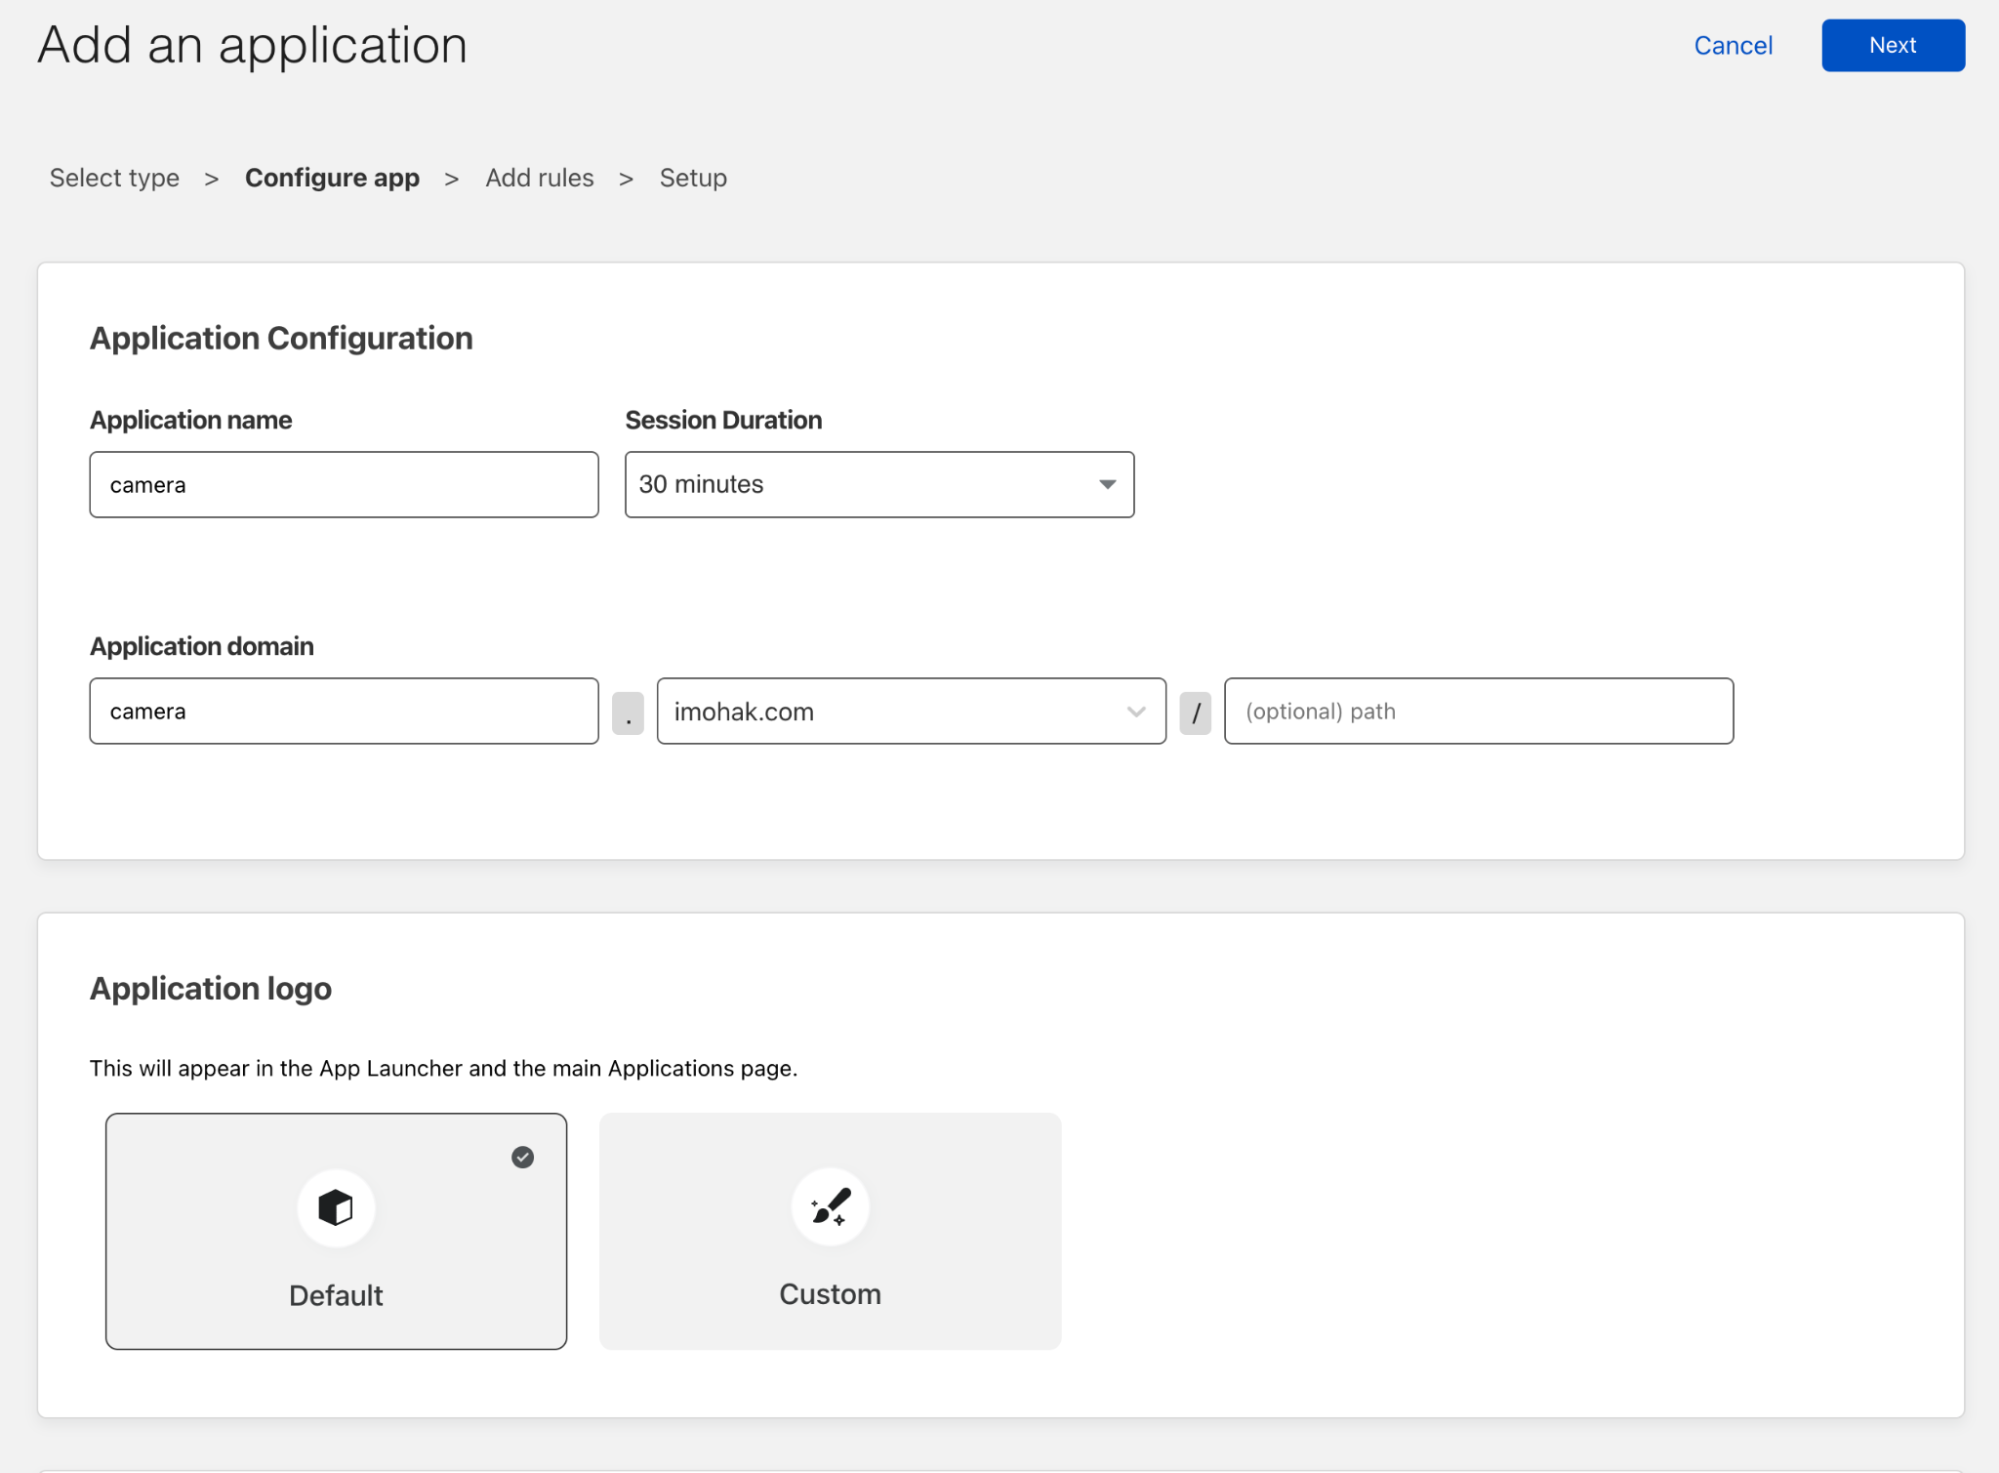
On the next page, we specify a name, session duration and also the URL at which the application should be accessible. We add the subdomain camera.imohak.com and also name the app ‘camera’ to keep it simple.
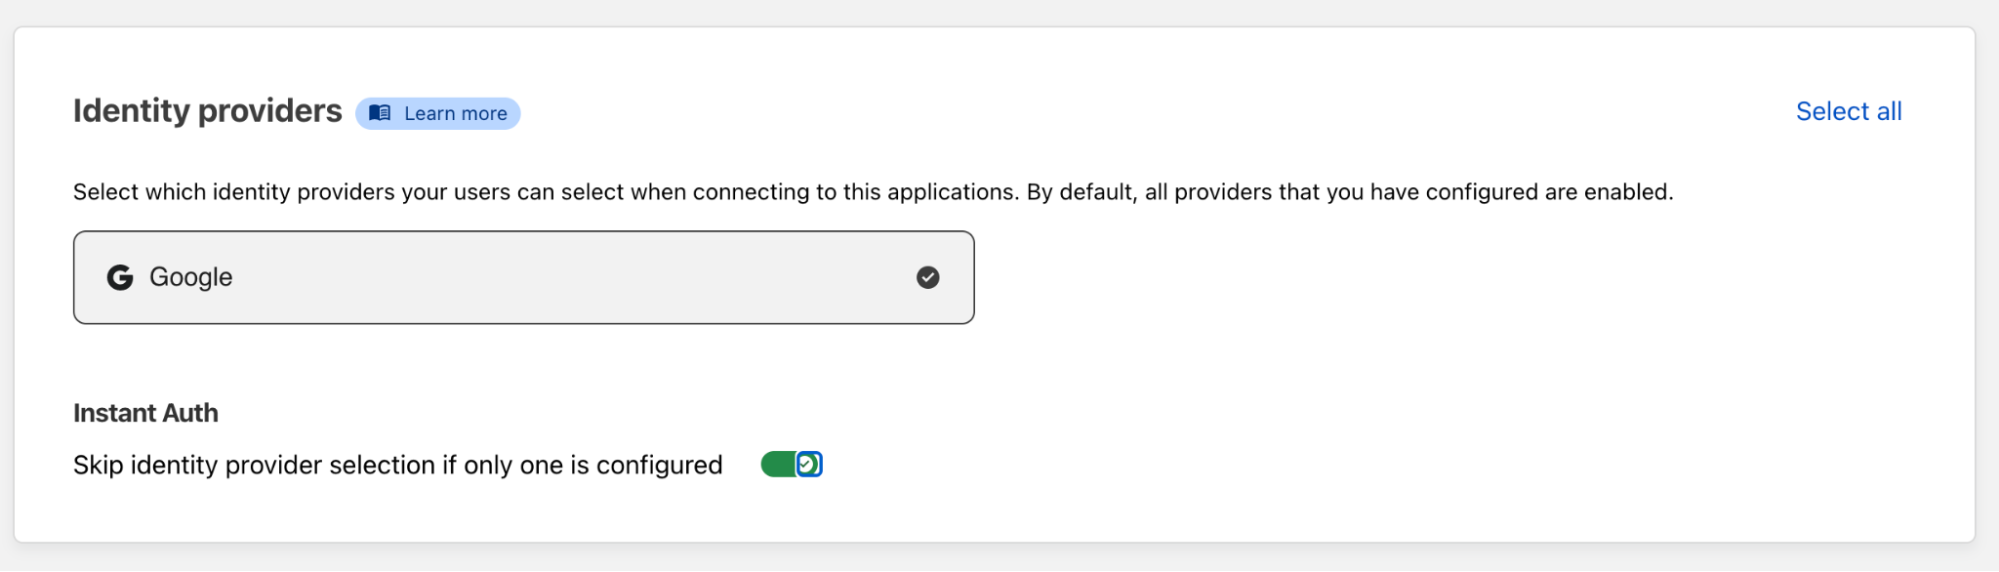
Next, we select Google as an identity provider for this application. Given that we are not choosing multiple authentication methods, I can also enable Instant Auth — this means we don’t need to select Google when we open the URL.
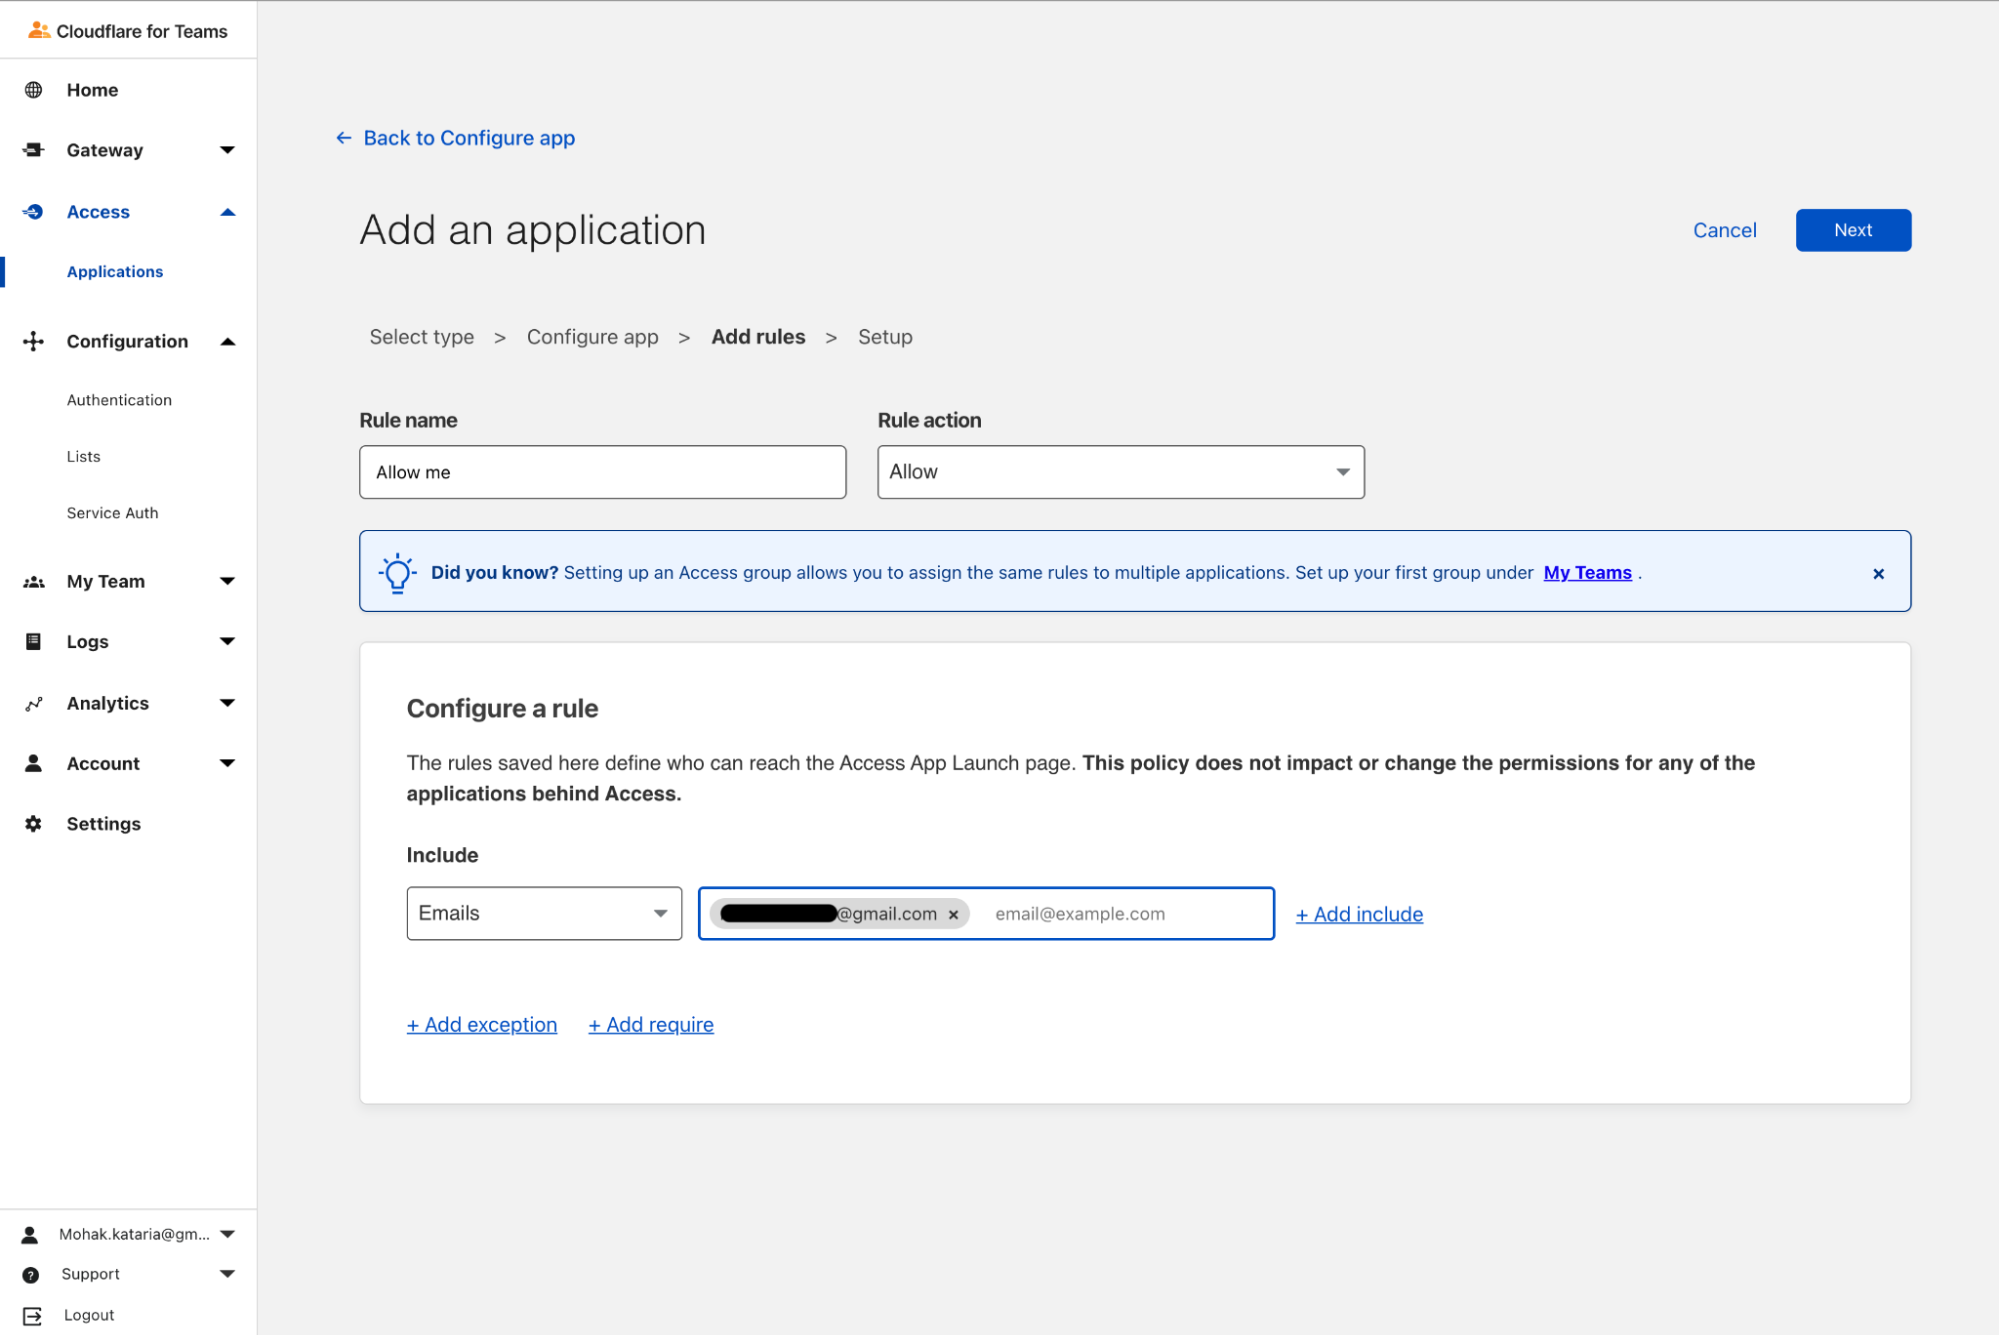
Now we add policies to the application. Here, we add an email check so that after the Google authentication, a check is made to ensure the specified email address is the only one who is able to access the URL. If needed, we can choose to configure other, more complex rules. At this point, we click on Next and finish the setup.
The Result
The setup is now complete. Time to test everything! After opening the browser and entering my URL, voilà. Now, when I visit this URL, I see a Google authentication page and, after logging in, Ziggy eating his dinner.
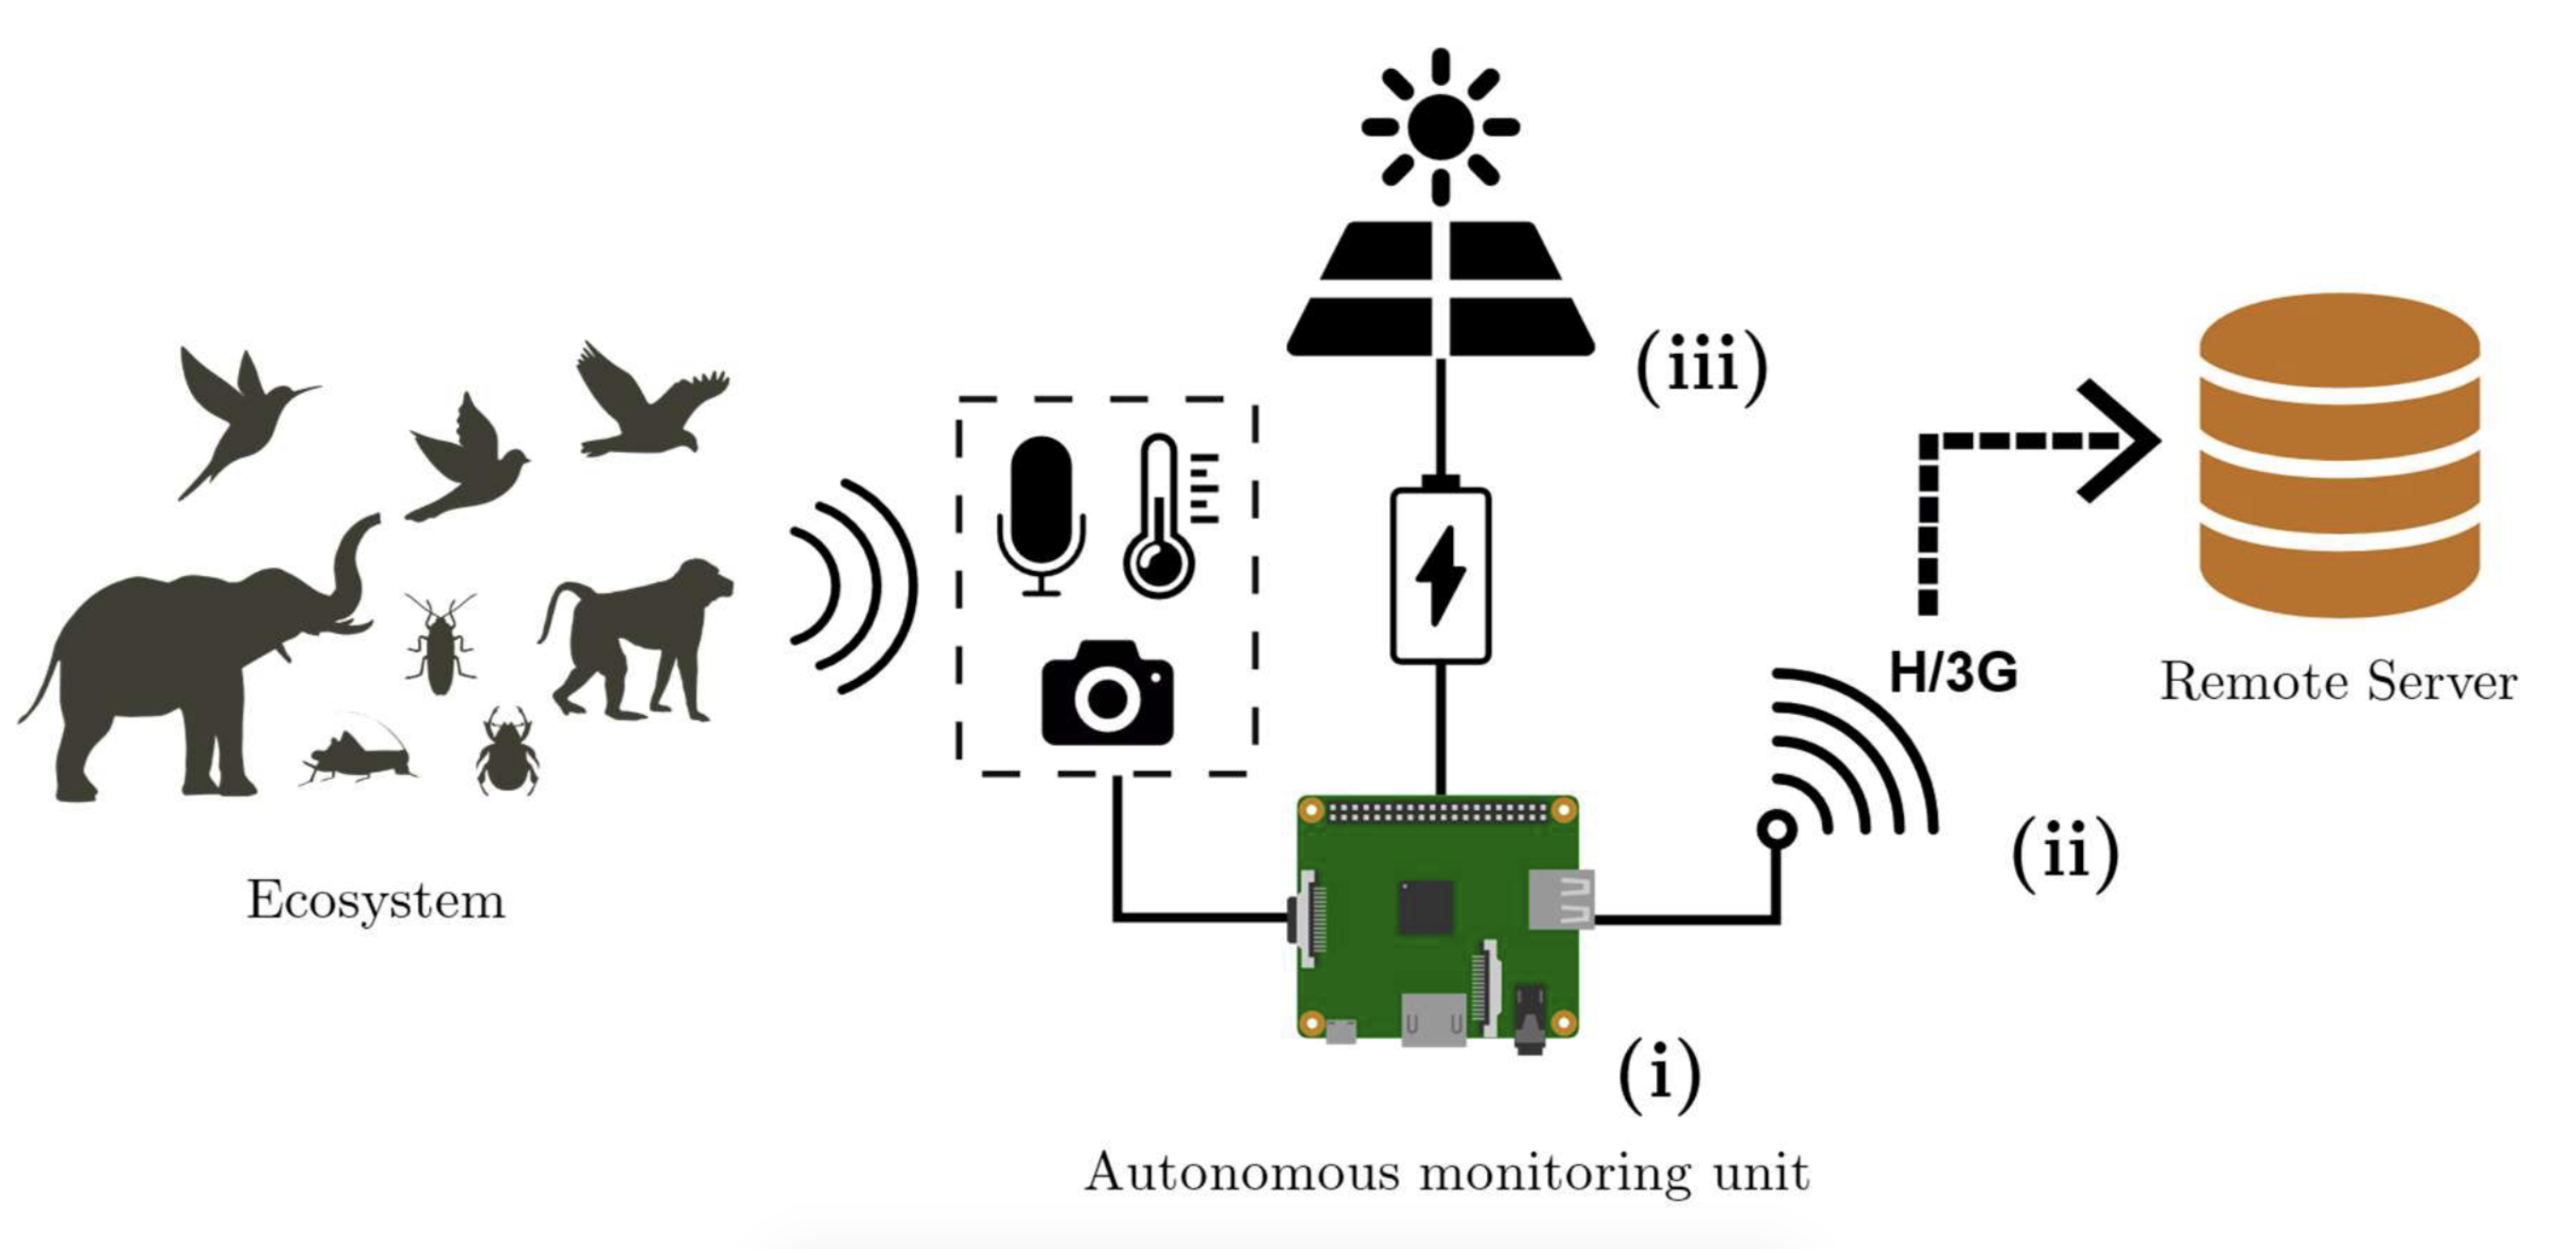
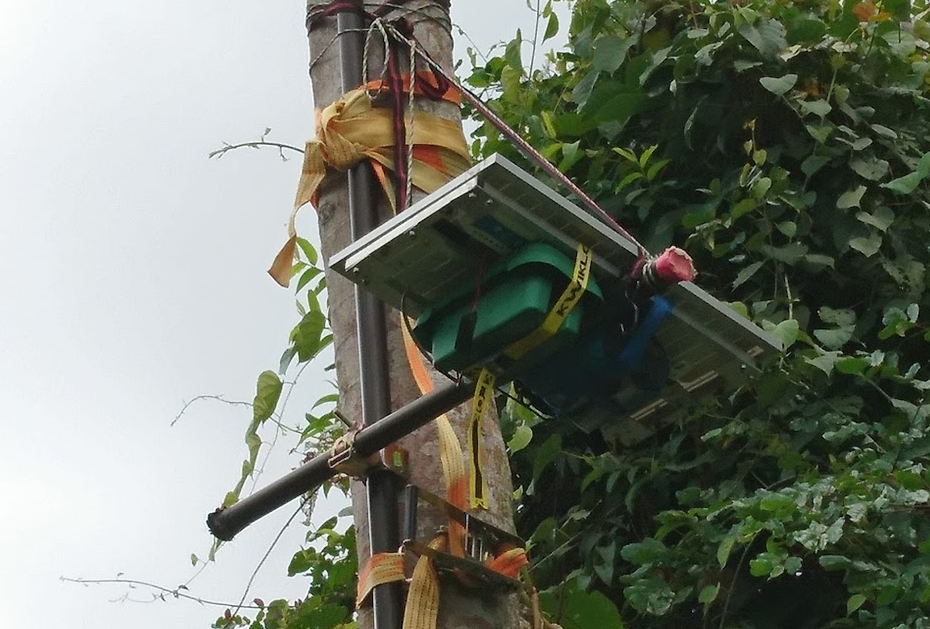
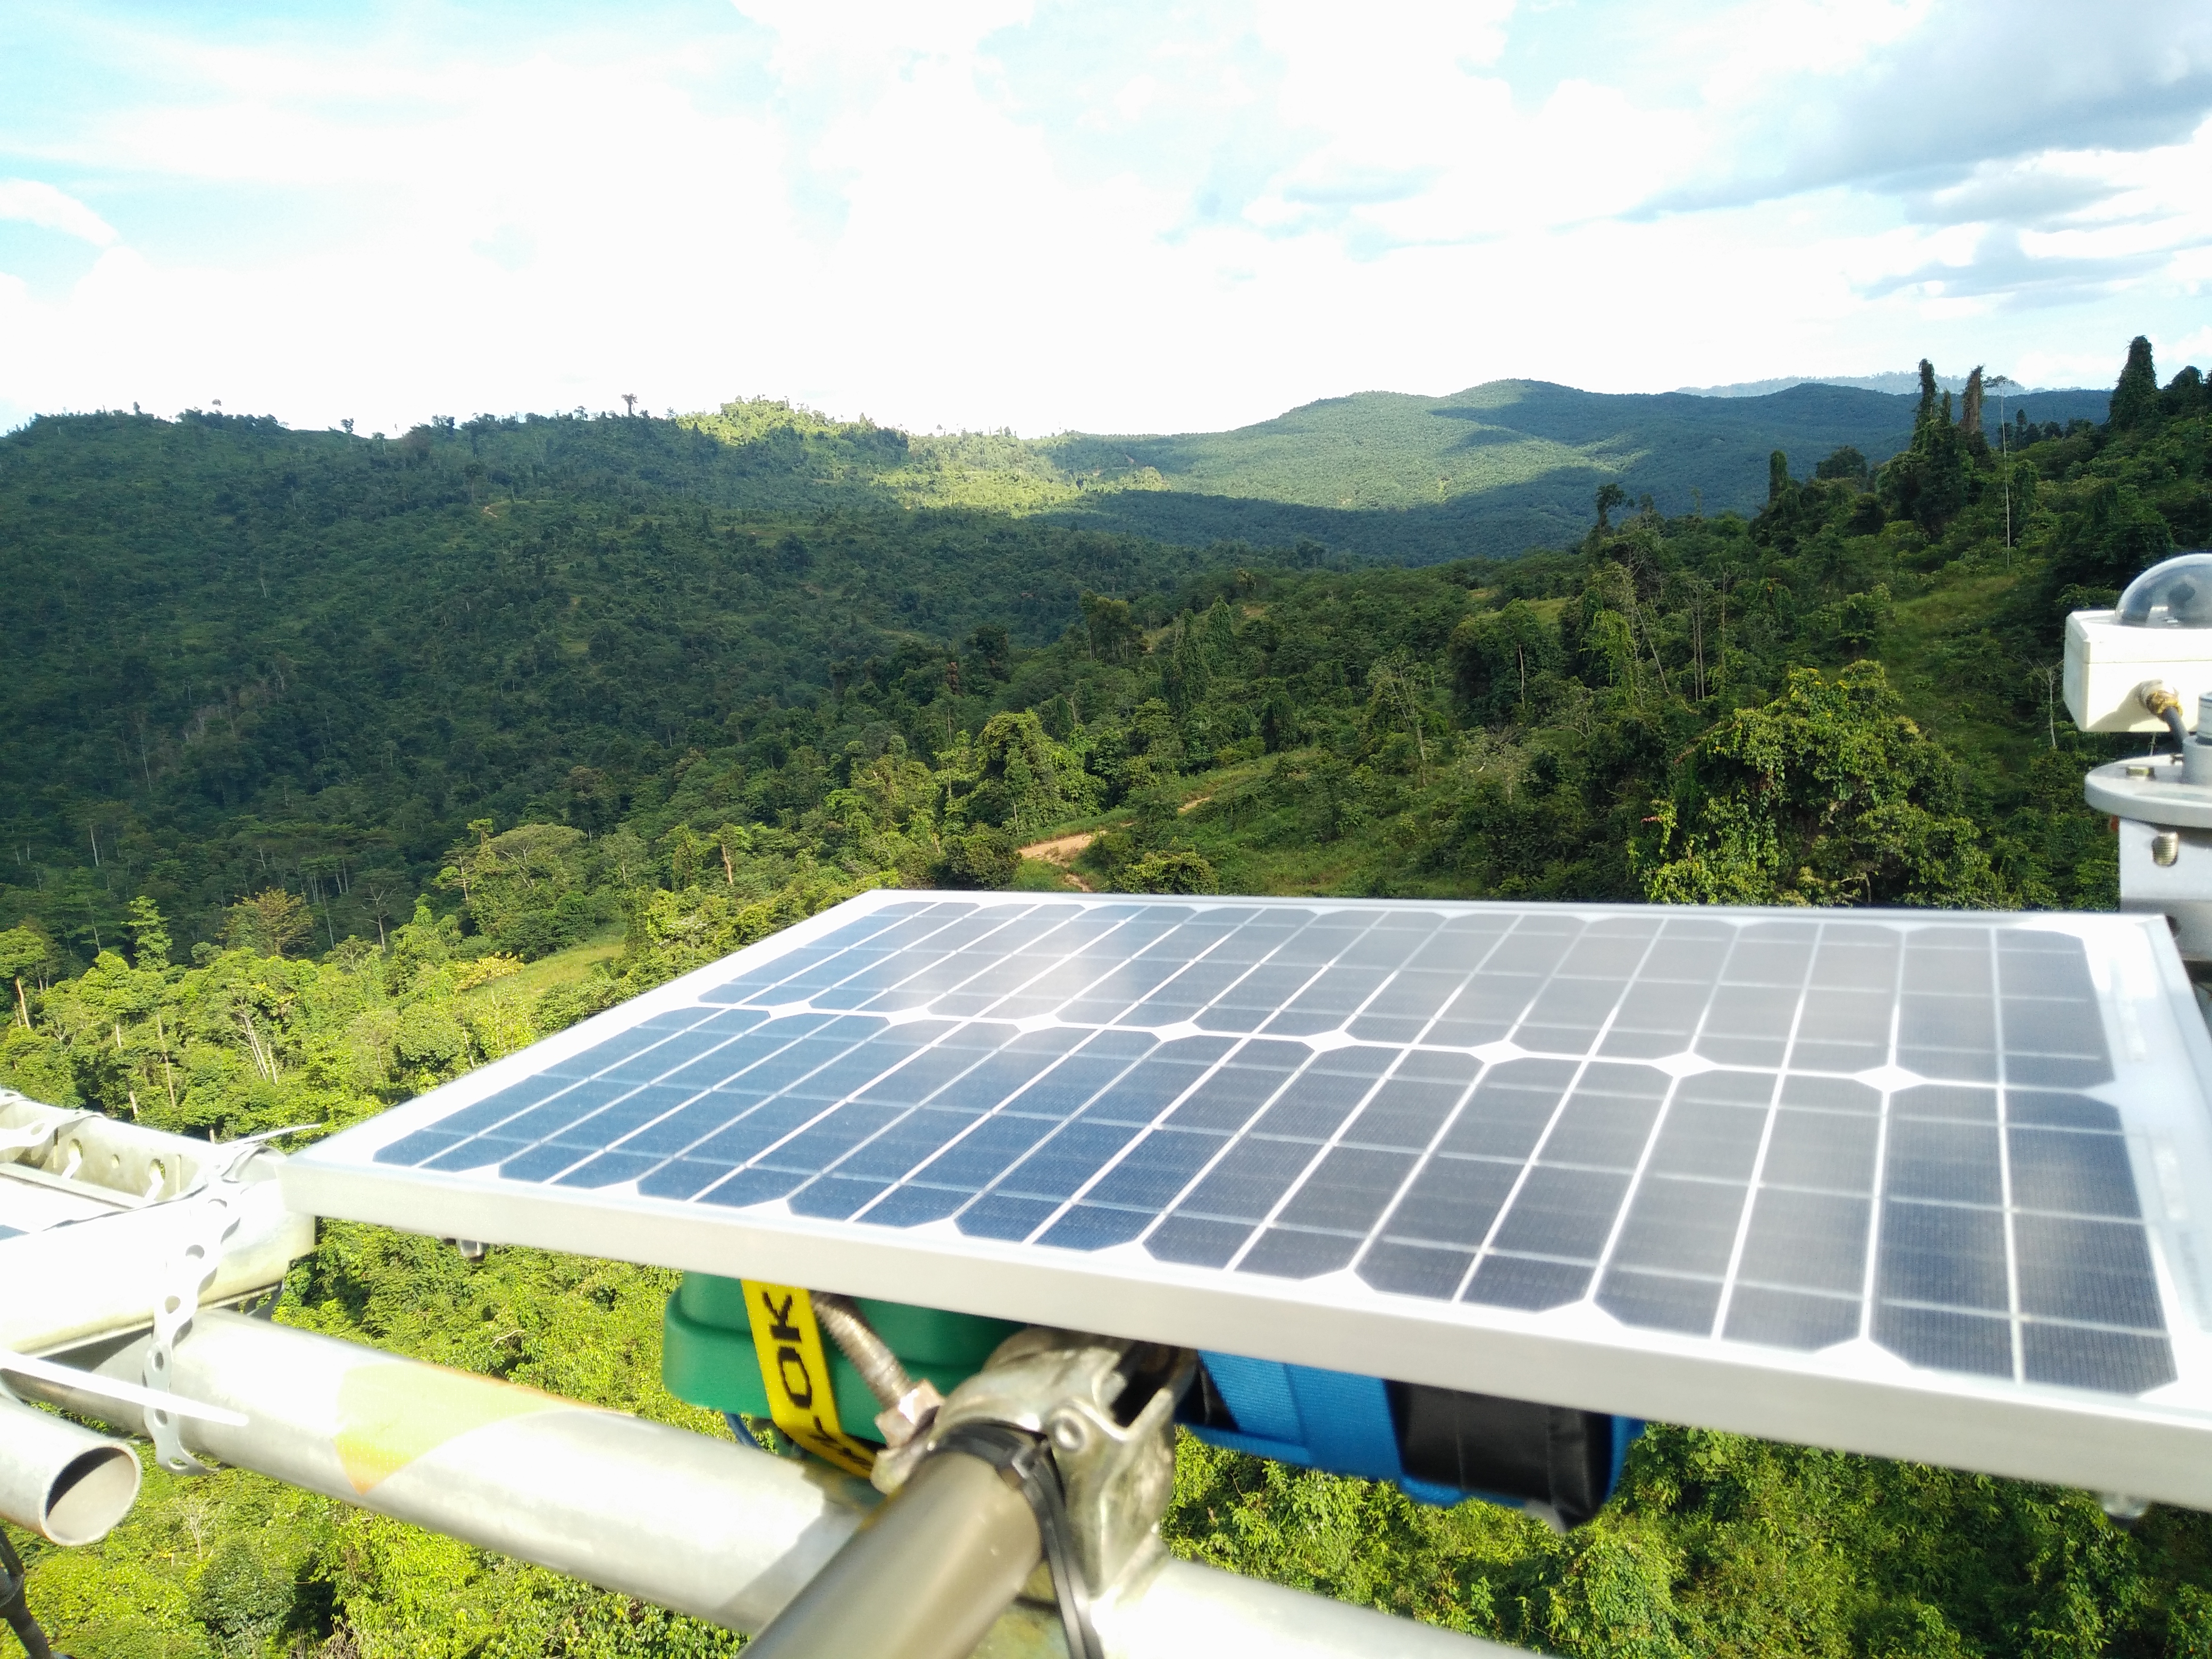
These award-winning, solar-powered audio recorders, built on Raspberry Pi, have been installed in the Borneo rainforest so researchers can listen to the local ecosystem 24/7. The health of a forest ecosystem can often be gaged according to how much noise it creates, as this signals how many species are around.
And you can listen to the rainforest too! The SAFE Acoustics website, funded by the World Wide Fund for Nature (WWF), streams audio from recorders placed around a region of the Bornean rainforest in Southeast Asia. Visitors can listen to live audio or skip back through the day’s recording, for example to listen to the dawn chorus.
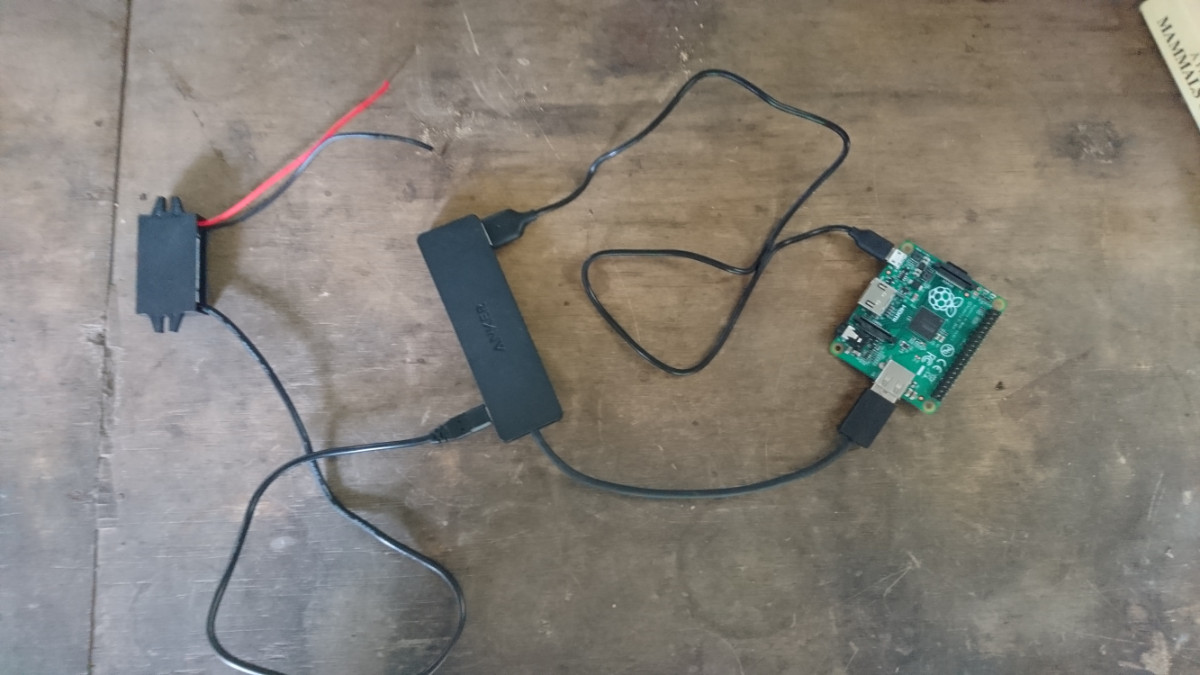
The device records data in the field and uploads it to a central server continuously and robustly over long time-periods. And it was built for around $305.
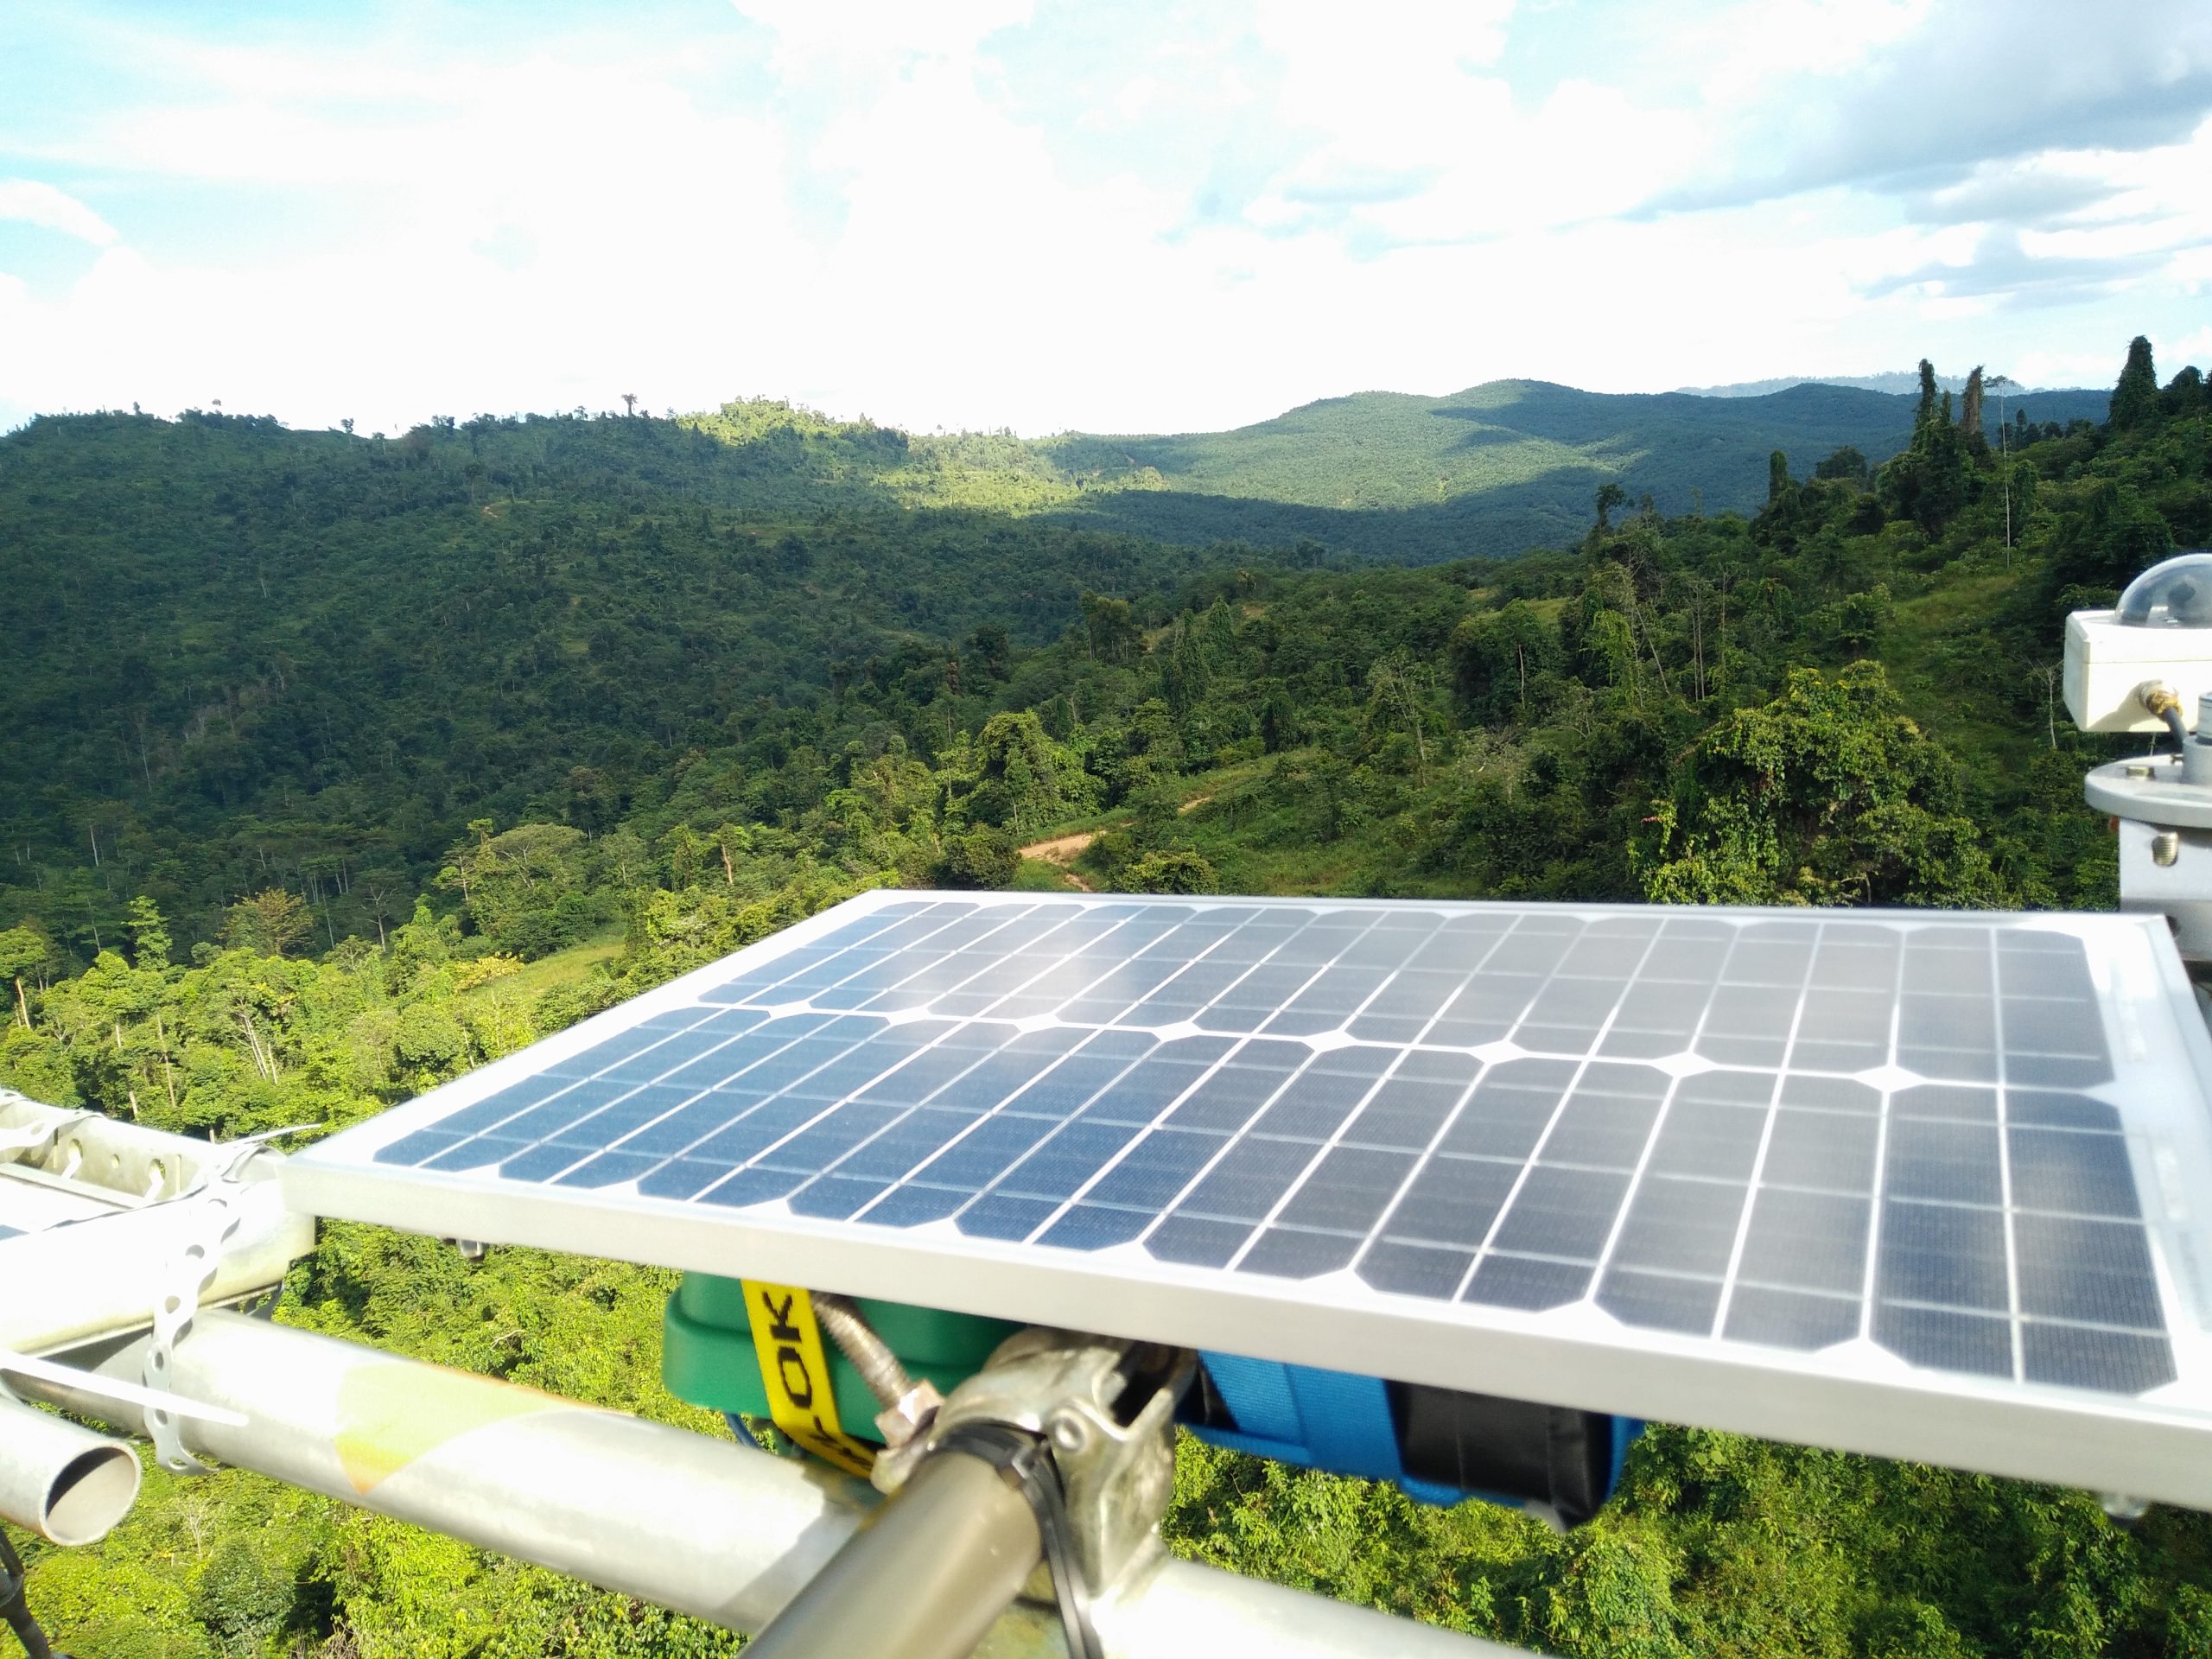
Here’s the full set up in the field. The Raspberry Pi-powered brains of the kit are safely inside the green box
The recorders have been installed by Imperial College London researchers as part of the SAFE Project – one of the largest ecological experiments in the world.
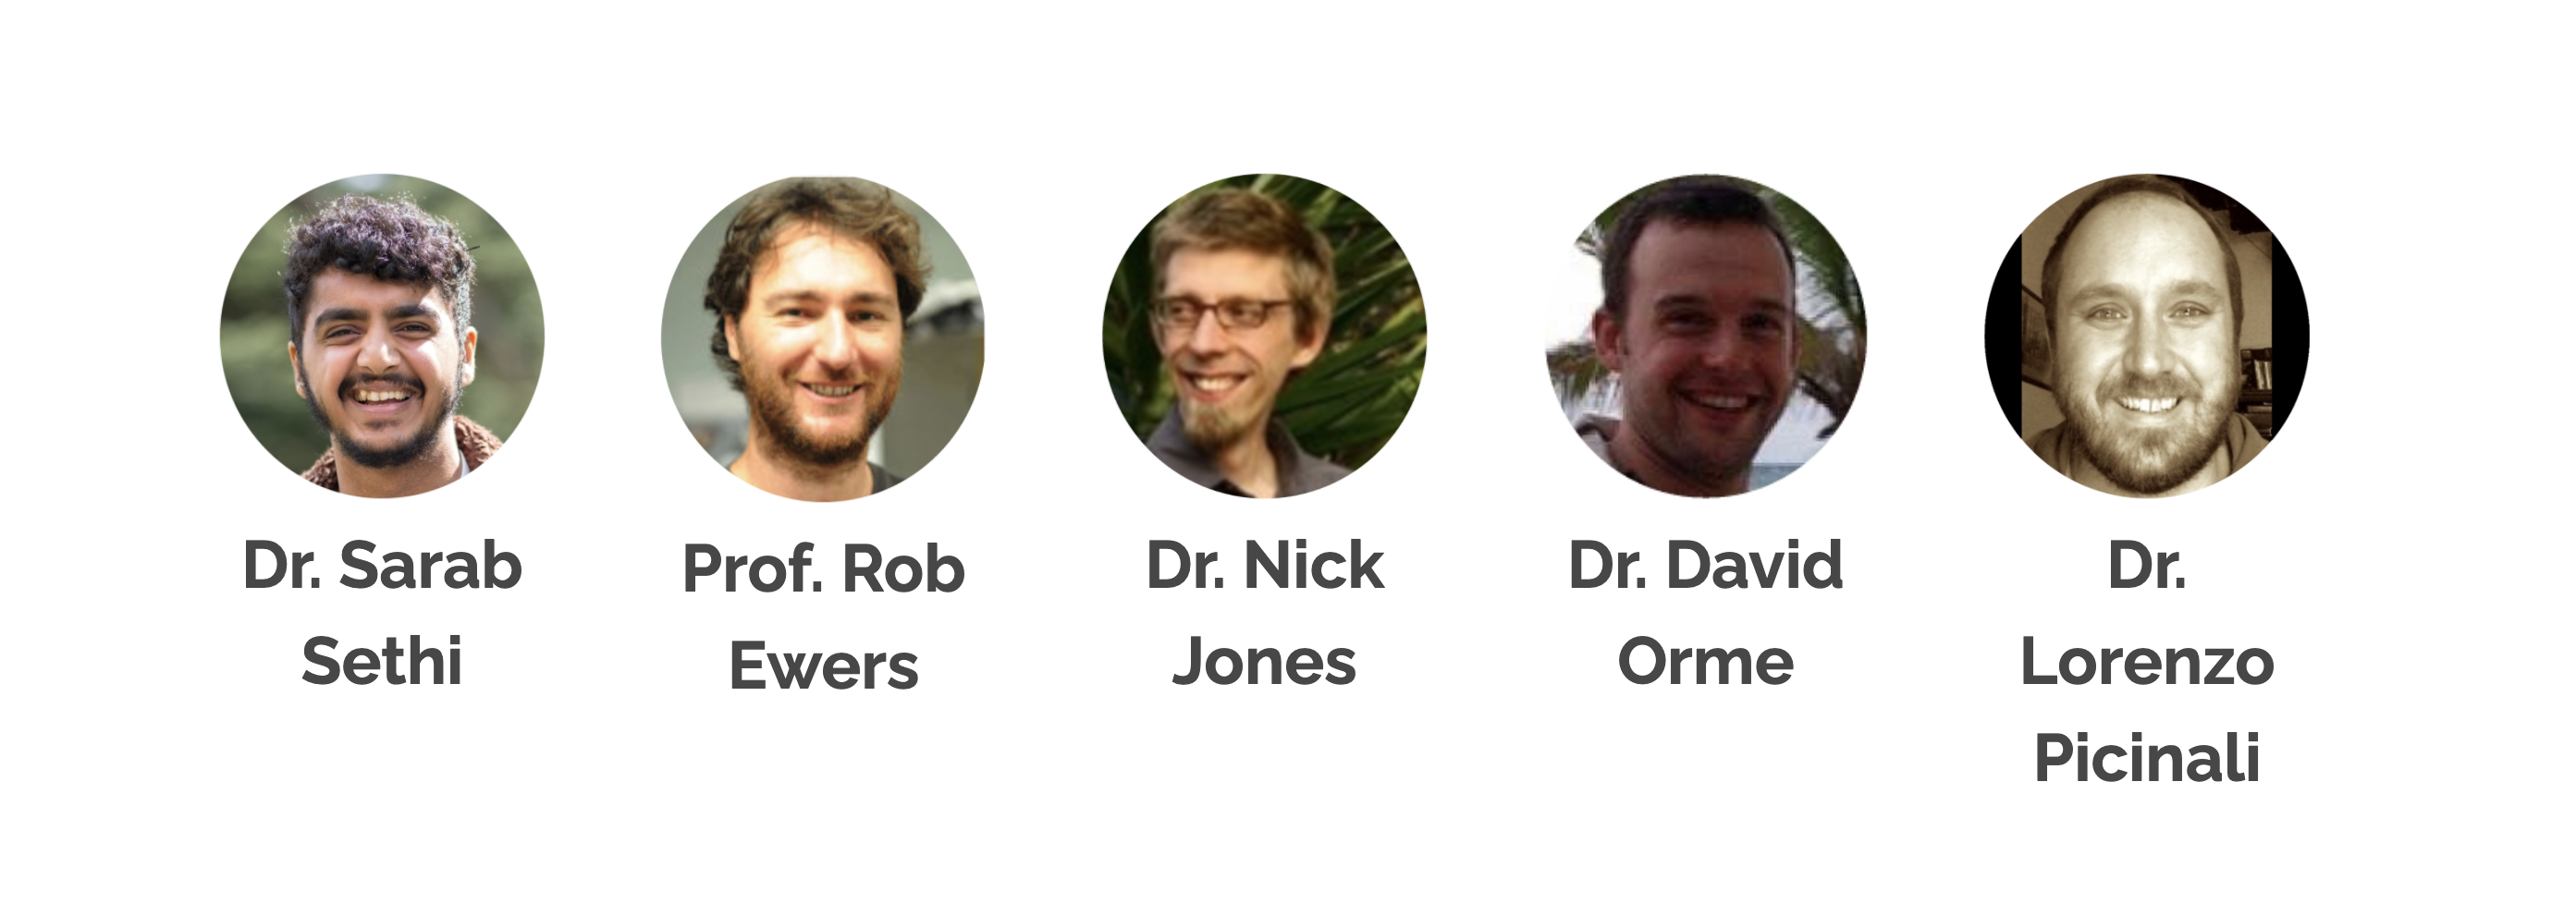
Dr Sarab Sethi designed the audio recorders with Dr Lorenzo Picinali. They wanted to quantify the changes in rainforest soundscape as land use changes, for example when forests are logged. Sarab is currently working on algorithms to analyse the gathered data with Dr Nick Jones from the Department of Mathematics.
The lovely cross-disciplinary research team based at Imperial College London
To provide the best experiences, we use technologies like cookies to store and/or access device information. Consenting to these technologies will allow us to process data such as browsing behavior or unique IDs on this site. Not consenting or withdrawing consent, may adversely affect certain features and functions.
Functional
Always active
The technical storage or access is strictly necessary for the legitimate purpose of enabling the use of a specific service explicitly requested by the subscriber or user, or for the sole purpose of carrying out the transmission of a communication over an electronic communications network.
Preferences
The technical storage or access is necessary for the legitimate purpose of storing preferences that are not requested by the subscriber or user.
Statistics
The technical storage or access that is used exclusively for statistical purposes.The technical storage or access that is used exclusively for anonymous statistical purposes. Without a subpoena, voluntary compliance on the part of your Internet Service Provider, or additional records from a third party, information stored or retrieved for this purpose alone cannot usually be used to identify you.
Marketing
The technical storage or access is required to create user profiles to send advertising, or to track the user on a website or across several websites for similar marketing purposes.


