Post Syndicated from Kedasha Kerr original https://github.blog/2024-03-25-how-to-use-github-copilot-in-your-ide-tips-tricks-and-best-practices/
AI has become an integral part of my workflow these days, and with the assistance of GitHub Copilot, I move a lot faster when I’m building a project. Having used AI tools to increase my productivity over the past year, I’ve realized that similar to learning how to use a new framework or library, we can enhance our efficiency with AI tools by learning how to best use them.
In this blog post, I’ll share some of the daily things I do to get the most out of GitHub Copilot. I hope these tips will help you become a more efficient and productive user of the AI assistant.
| Need a refresher on how to use GitHub Copilot?Since GitHub Copilot continues to evolve in the IDE, CLI, and across GitHub.com, we put together a full guide on using GitHub Copilot with prompt tips and tricks. Get the guide >
Want to learn how best to leverage it in the IDE? Keep on reading. ⤵ |
Beyond code completion
To make full use of the power of GitHub Copilot, it’s important to understand its capabilities. GitHub Copilot is developing rapidly, and new features are being added all the time. It’s no longer just a code completion tool in your editor—it now includes a chat interface that you can use in your IDE, a command line tool via a GitHub CLI extension, a summary tool in your pull requests, a helper tool in your terminals, and much, much more.
In a recent blog post, I’ve listed some of the ways you didn’t know you could use GitHub Copilot. This will give you a great overview of how much the AI assistant can currently do.
But beyond interacting with GitHub Copilot, how do you help it give you better answers? Well, the answer to that needs a bit more context.
Context, context, context
If you understand Large Language Models ( LLMs), you will know that they are designed to make predictions based on the context provided. This means, the more contextually rich our input or prompt is, the better the prediction or output will be.
As such, learning to provide as much context as possible is key when interacting with GitHub Copilot, especially with the code completion feature. Unlike ChatGPT where you need to provide all the data to the model in the prompt window, by installing GitHub Copilot in your editor, the assistant is able to infer context from the code you’re working on. It then uses that context to provide code suggestions.
We already know this, but what else can we do to give it additional context?
I want to share a few essential tips with you to provide GitHub Copilot with more context in your editor to get the most relevant and useful code out of it:
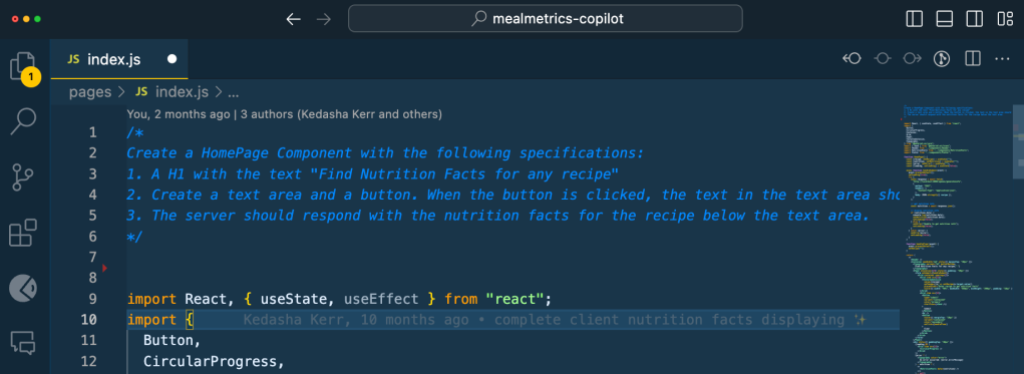
1. Open your relevant files
Having your files open provides GitHub Copilot with context. When you have additional files open, it will help to inform the suggestion that is returned. Remember, if a file is closed, GitHub Copilot cannot see the file’s content in your editor, which means it cannot get the context from those closed files.
GitHub Copilot looks at the current open files in your editor to analyze the context, create a prompt that gets sent to the server, and return an appropriate suggestion.
Have a few files open in your editor to give GitHub Copilot a bigger picture of your project. You can also use #editor in the chat interface to provide GitHub Copilot with additional context on your currently opened files in Visual Studio Code (VS Code) and Visual Studio.
Remember to close unneeded files when context switching or moving on to the next task.
2. Provide a top-level comment
Just as you would give a brief, high-level introduction to a coworker, a top-level comment in the file you’re working in can help GitHub Copilot understand the overall context of the pieces you will be creating—especially if you want your AI assistant to generate the boilerplate code for you to get going.
Be sure to include details about what you need and provide a good description so it has as much information as possible. This will help to guide GitHub Copilot to give better suggestions, and give it a goal on what to work on. Having examples, especially when processing data or manipulation strings, helps quite a bit.
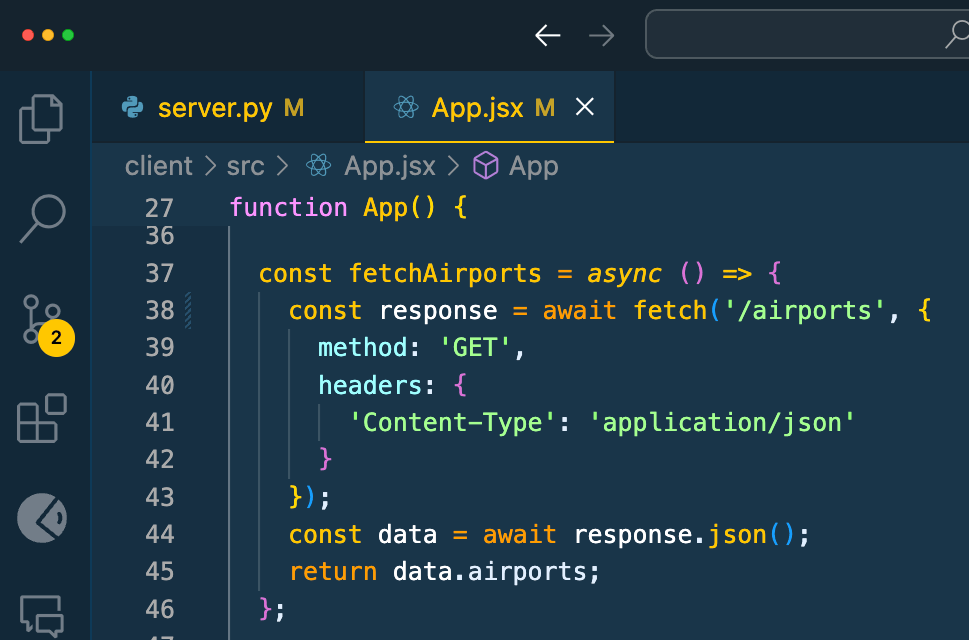
3. Set Includes and references
It’s best to manually set the includes/imports or module references you need for your work, particularly if you’re working with a specific version of a package.
GitHub Copilot will make suggestions, but you know what dependencies you want to use. This can also help to let GitHub Copilot know what frameworks, libraries, and their versions you’d like it to use when crafting suggestions.
This can be helpful to jump start GitHub Copilot to a newer library version when it defaults to providing older code suggestions.
4. Meaningful names matter
The name of your variables and functions matter. If you have a function named foo or bar, GitHub Copilot will not be able to give you the best completion because it isn’t able to infer intent from the names.
Just as the function name fetchData() won’t mean much to a coworker (or you after a few months), fetchData() won’t mean much to GitHub Copilot either.
Implementing good coding practices will help you get the most value from GitHub Copilot. While GitHub Copilot helps you code and iterate faster, remember the old rule of programming still applies: garbage in, garbage out.
5. Provide specific and well- scoped function comments
Commenting your code helps you get very specific, targeted suggestions.
A function name can only be so descriptive without being overly long, so function comments can help fill in details that GitHub Copilot might need to know. One of the neat features about GitHub Copilot is that it can determine the correct comment syntax that is typically used in your programming language for function / method comments and will help create them for you based on what the code does. Adding more detail to these as the first change you do then helps GitHub Copilot determine what you would like to do in code and how to interact with that function.
Remember: Single, specific, short comments help GitHub Copilot provide better context.
6. Provide sample code
Providing sample code to GitHub Copilot will help it determine what you’re looking for. This helps to ground the model and provide it with even more context.
It also helps GitHub Copilot generate suggestions that match the language and tasks you want to achieve, and return suggestions based on your current coding standards and practices. Unit tests provide one level of sample code at the individual function/method level, but you can also provide code examples in your project showing how to do things end to end. The cool thing about using GitHub Copilot long-term is that it nudges us to do a lot of the good coding practices we should’ve been doing all along.
Learn more about providing context to GitHub Copilot by watching this Youtube video:
Inline Chat with GitHub Copilot
Inline chat
Outside of providing enough context, there are some built-in features of GitHub Copilot that you may not be taking advantage of. Inline chat, for example, gives you an opportunity to almost chat with GitHub Copilot between your lines of code. By pressing CMD + I (CTRL + I on Windows) you’ll have Copilot right there to ask questions. This is a bit more convenient for quick fixes instead of opening up GitHub Copilot Chat’s side panel.
This experience provides you with code diffs inline, which is awesome. There are also special slash commands available like creating documentation with just the slash of a button!
Tips and tricks with GitHub Copilot Chat
GitHub Copilot Chat provides an experience in your editor where you can have a conversation with the AI assistant. You can improve this experience by using built-in features to make the most out of it.
8. Remove irrelevant requests
For example, did you know that you can delete a previously asked question in the chat interface to remove it from the indexed conversation? Especially if it is no longer relevant?

Doing this will improve the flow of conversation and give GitHub Copilot only the necessary information needed to provide you with the best output.
9. Navigate through your conversation
Another tip I found is to use the up and down arrows to navigate through your conversation with GitHub Copilot Chat. I found myself scrolling through the chat interface to find that last question I asked, then discovered I can just use my keyboard arrows just like in the terminal!
10. Use the @workspace agent
If you’re using VS Code or Visual Studio, remember that agents are available to help you go even further. The @workspace agent for example, is aware of your entire workspace and can answer questions related to it. As such, it can provide even more context when trying to get a good output from GitHub Copilot.
11. Highlight relevant code
Another great tip when using GitHub Copilot Chat is to highlight relevant code in your files before asking it questions. This will help to give targeted suggestions and just provides the assistant with more context into what you need help with.
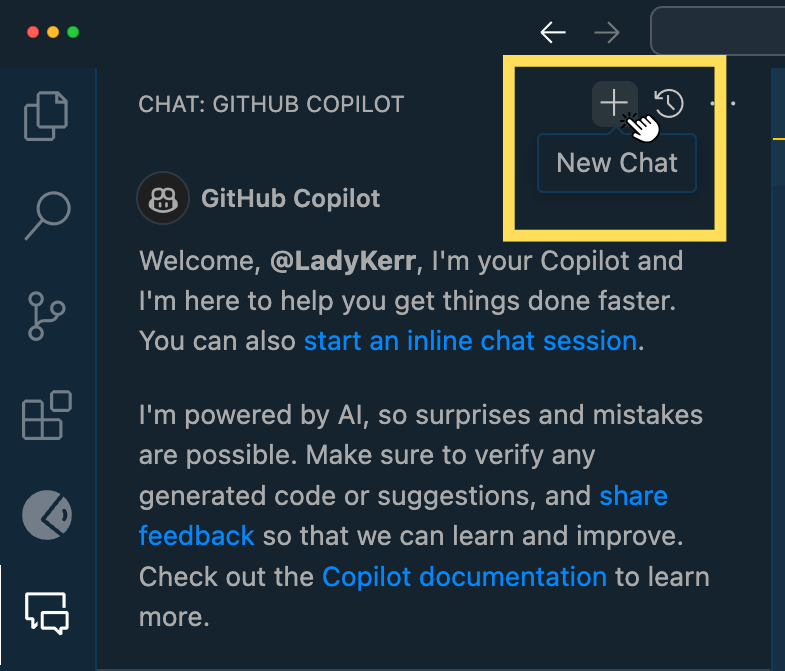
12. Organize your conversations with threads
You can have multiple ongoing conversations with GitHub Copilot Chat on different topics by isolating your conversations with threads. We’ve provided a convenient way for you to start new conversations (thread) by clicking the + sign on the chat interface.
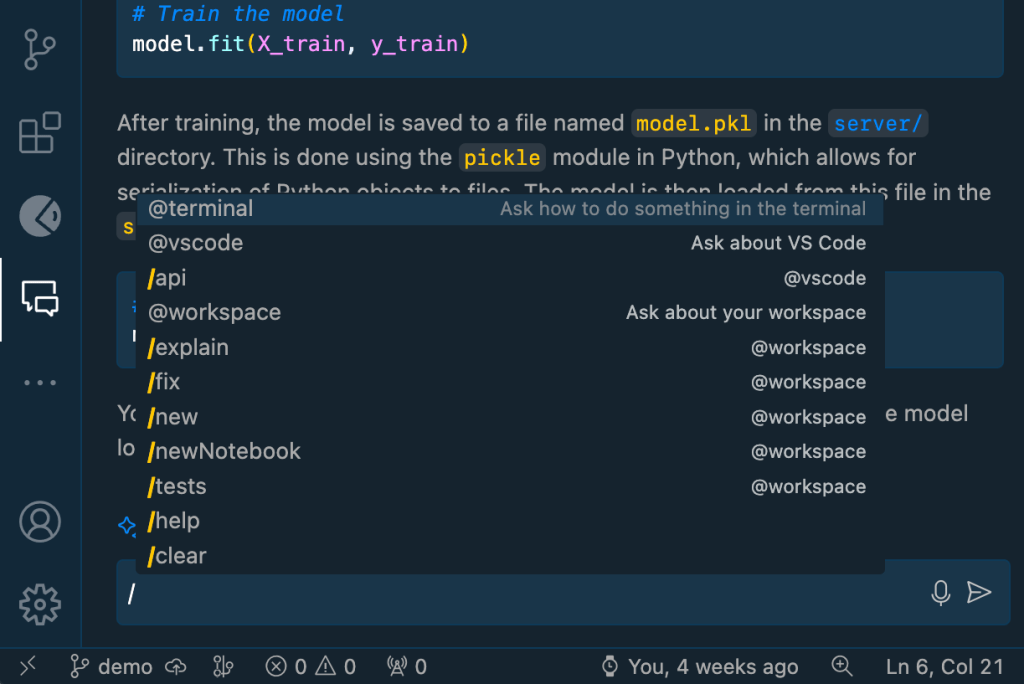
13. Slash Commands for common tasks
Slash commands are awesome, and there are quite a few of them. We have commands to help you explain code, fix code, create a new notebook, write tests, and many more. They are just shortcuts to common prompts that we’ve found to be particularly helpful in day-to-day development from our own internal usage.
| Command | Description | Usage |
| /explain | Get code explanations | Open file with code or highlight code you want explained and type:
|
| /fix | Receive a proposed fix for the problems in the selected code | Highlight problematic code and type:
|
| /tests | Generate unit tests for selected code | Open file with code or highlight code you want tests for and type:
|
| /help | Get help on using Copilot Chat | Type:
|
| /clear | Clear current conversation | Type:
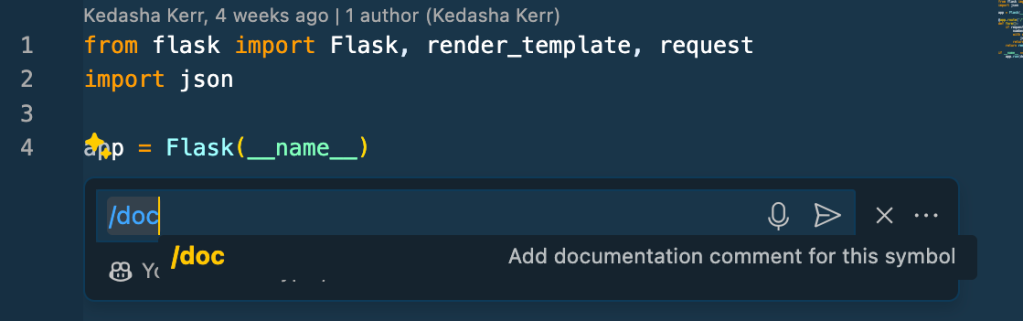
|
| /doc | Add a documentation comment | Highlight code and type:
You can also press CMD+I in your editor and type |
| /generate | Generate code to answer your question | Type:
|
| /optimize | Analyze and improve running time of the selected code | Highlight code and type:
|
| /clear | Clear current chat | Type:
|
| /new | Scaffold code for a new workspace | Type:
|
| /simplify | Simplify the selected code | Highlight code and type:
|
| /feedback | Provide feedback to the team | Type:
|
See the following image for commands available in VS Code:
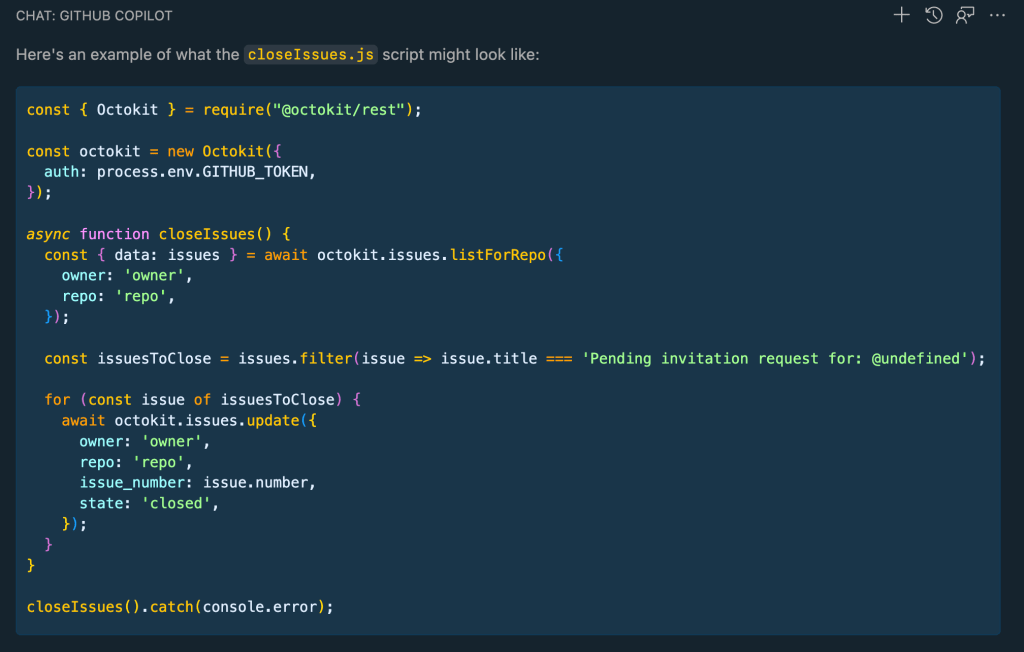
14. Attach relevant files for reference
In Visual Studio and VS Code, you can attach relevant files for GitHub Copilot Chat to reference by using #file. This scopes GitHub Copilot to a particular context in your code base and provides you with a much better outcome.
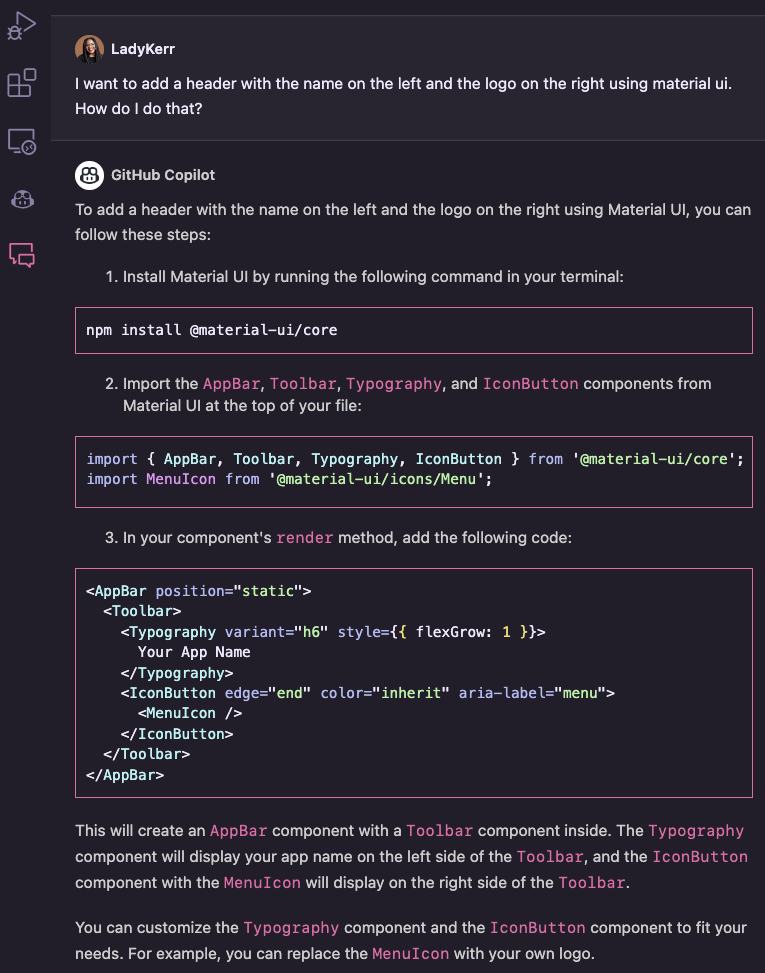
To reference a file, type # in the comment box, choose #file and you will see a popup where you can choose your file. You can also type #file_name.py in the comment box. See below for an example:
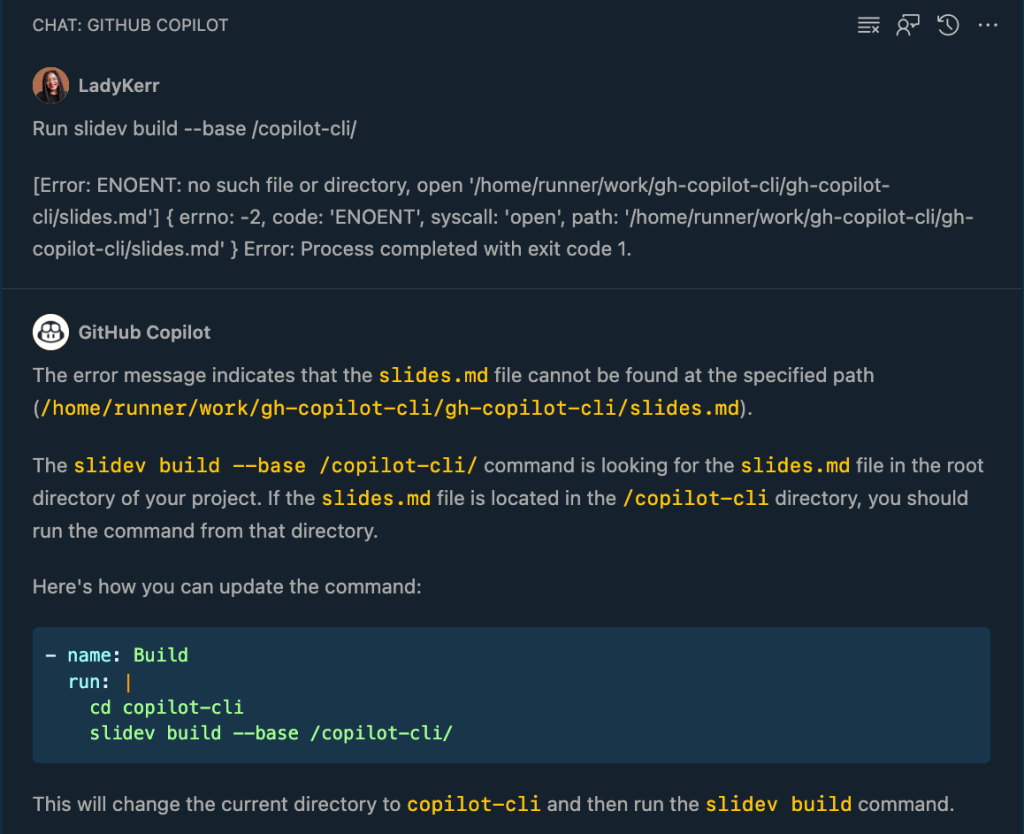
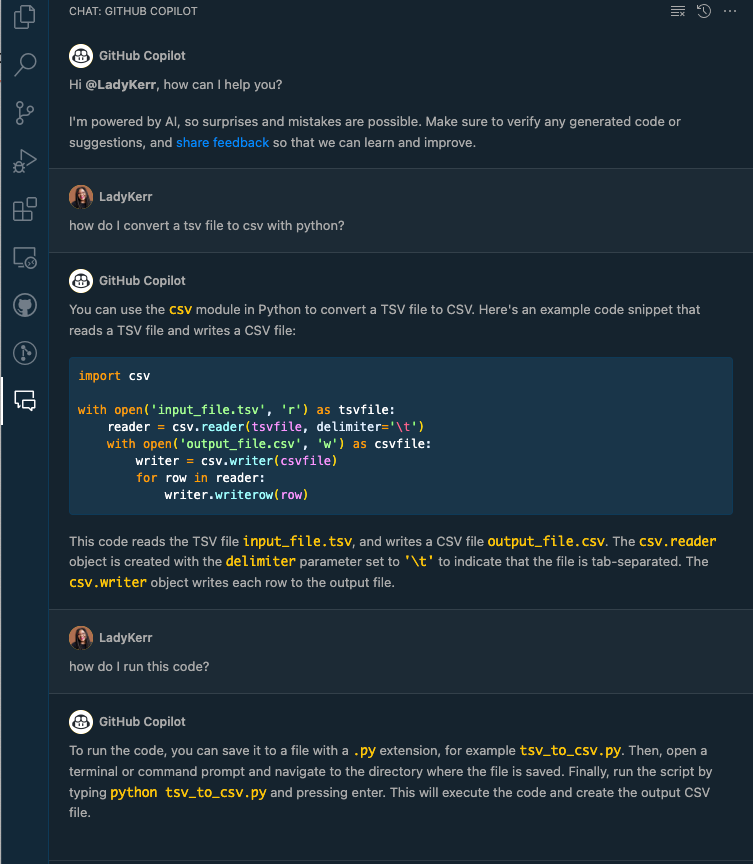
15. Start with GitHub Copilot Chat for faster debugging
These days whenever I need to debug some code, I turn to GitHub Copilot Chat first. Most recently, I was implementing a decision tree and performed a k-fold cross-validation. I kept getting the incorrect accuracy scores and couldn’t figure out why. I turned to GitHub Copilot Chat for some assistance and it turns out I wasn’t using my training data set (X_train, y_train), even though I thought I was:
I’m catching up on my AI/ML studies today. I had to implement a DecisionTree and use the cross_val_score method to evaluate the model’s accuracy score.
I couldn’t figure out why the incorrect values for the accuracy scores were being returned, so I turned to Chat for some help pic.twitter.com/xn2ctMjAnr
— Kedasha is learning about AI + ML ✨ (@itsthatladydev) March 23, 2024
https://platform.twitter.com/widgets.js
I figured this out a lot faster than I would’ve with external resources. I want to encourage you to start with GitHub Copilot Chat in your editor to get debugging help faster instead of going to external resources first. Follow my example above by explaining the problem, pasting the problematic code, and asking for help. You can also highlight the problematic code in your editor and use the /fix command in the chat interface.
Be on the lookout for sparkles!
In VS Code, you can quickly get help from GitHub Copilot by looking out for “magic sparkles.” For example, in the commit comment section, clicking the magic sparkles will help you generate a commit message with the help of AI. You can also find magic sparkles inline in your editor as you’re working for a quick way to access GitHub Copilot inline chat.
Pressing them will use AI to help you fill out the data and more magic sparkles are being added where we find other places for GitHub Copilot to help in your day-to-day coding experience.
Know where your AI assistant shines
To get the best and most out of the tool, remember that context and prompt crafting is essential to keep in mind. Understanding where the tool shines best is also important. Some of the things GitHub Copilot is very good at include boilerplate code and scaffolding, writing unit tests, writing documentation, pattern matching, explaining uncommon or confusing syntax, cron jobs, and regex, and helping you remember things you’ve forgotten and debugging.
But never forget that you are in control, and GitHub Copilot is here as just that, your copilot. It is a tool that can help you write code faster, and it’s up to you to decide how to best use it.
It is not here to do your work for you or to write everything for you. It will guide you and nudge you in the right direction just as a coworker would if you asked them questions or for guidance on a particular issue.
I hope these tips and best practices were helpful. You can significantly improve your coding efficiency and output by properly leveraging GitHub Copilot. Learn more about how GitHub Copilot works by reading Inside GitHub: Working with the LLMs behind GitHub Copilot and Customizing and fine-tuning LLMs: What you need to know.
Harness the power of GitHub Copilot. Learn more or get started now.
The post Using GitHub Copilot in your IDE: Tips, tricks, and best practices appeared first on The GitHub Blog.


