Post Syndicated from Grab Tech original https://engineering.grab.com/turbocharging-grabunlimited-with-temporal
Welcome to the behind-the-scenes story of GrabUnlimited, Grab’s flagship membership program. We undertook the mammoth task of migrating from our legacy system to a Temporal1 workflow-based system, enhancing our ability to handle millions of subscribers with increased efficiency and resilience. The result? A whopping 80% reduction in open production incidents, and most importantly – an improved membership experience for our users. In this first part of the series, you will learn how to design a robust and scalable membership system as we delve into our own experience building one.
What is GrabUnlimited?
The idea behind GrabUnlimited, is pretty simple: you pay a monthly fee, you get monthly benefits as a member (e.g discounted food delivery fee). A membership system plays a key role in enhancing user experience by giving them more value for money, but also by building loyalty, making Grab their go-to app for everyday needs. However, as this program grew and evolved, it brought along unique challenges and opportunities.
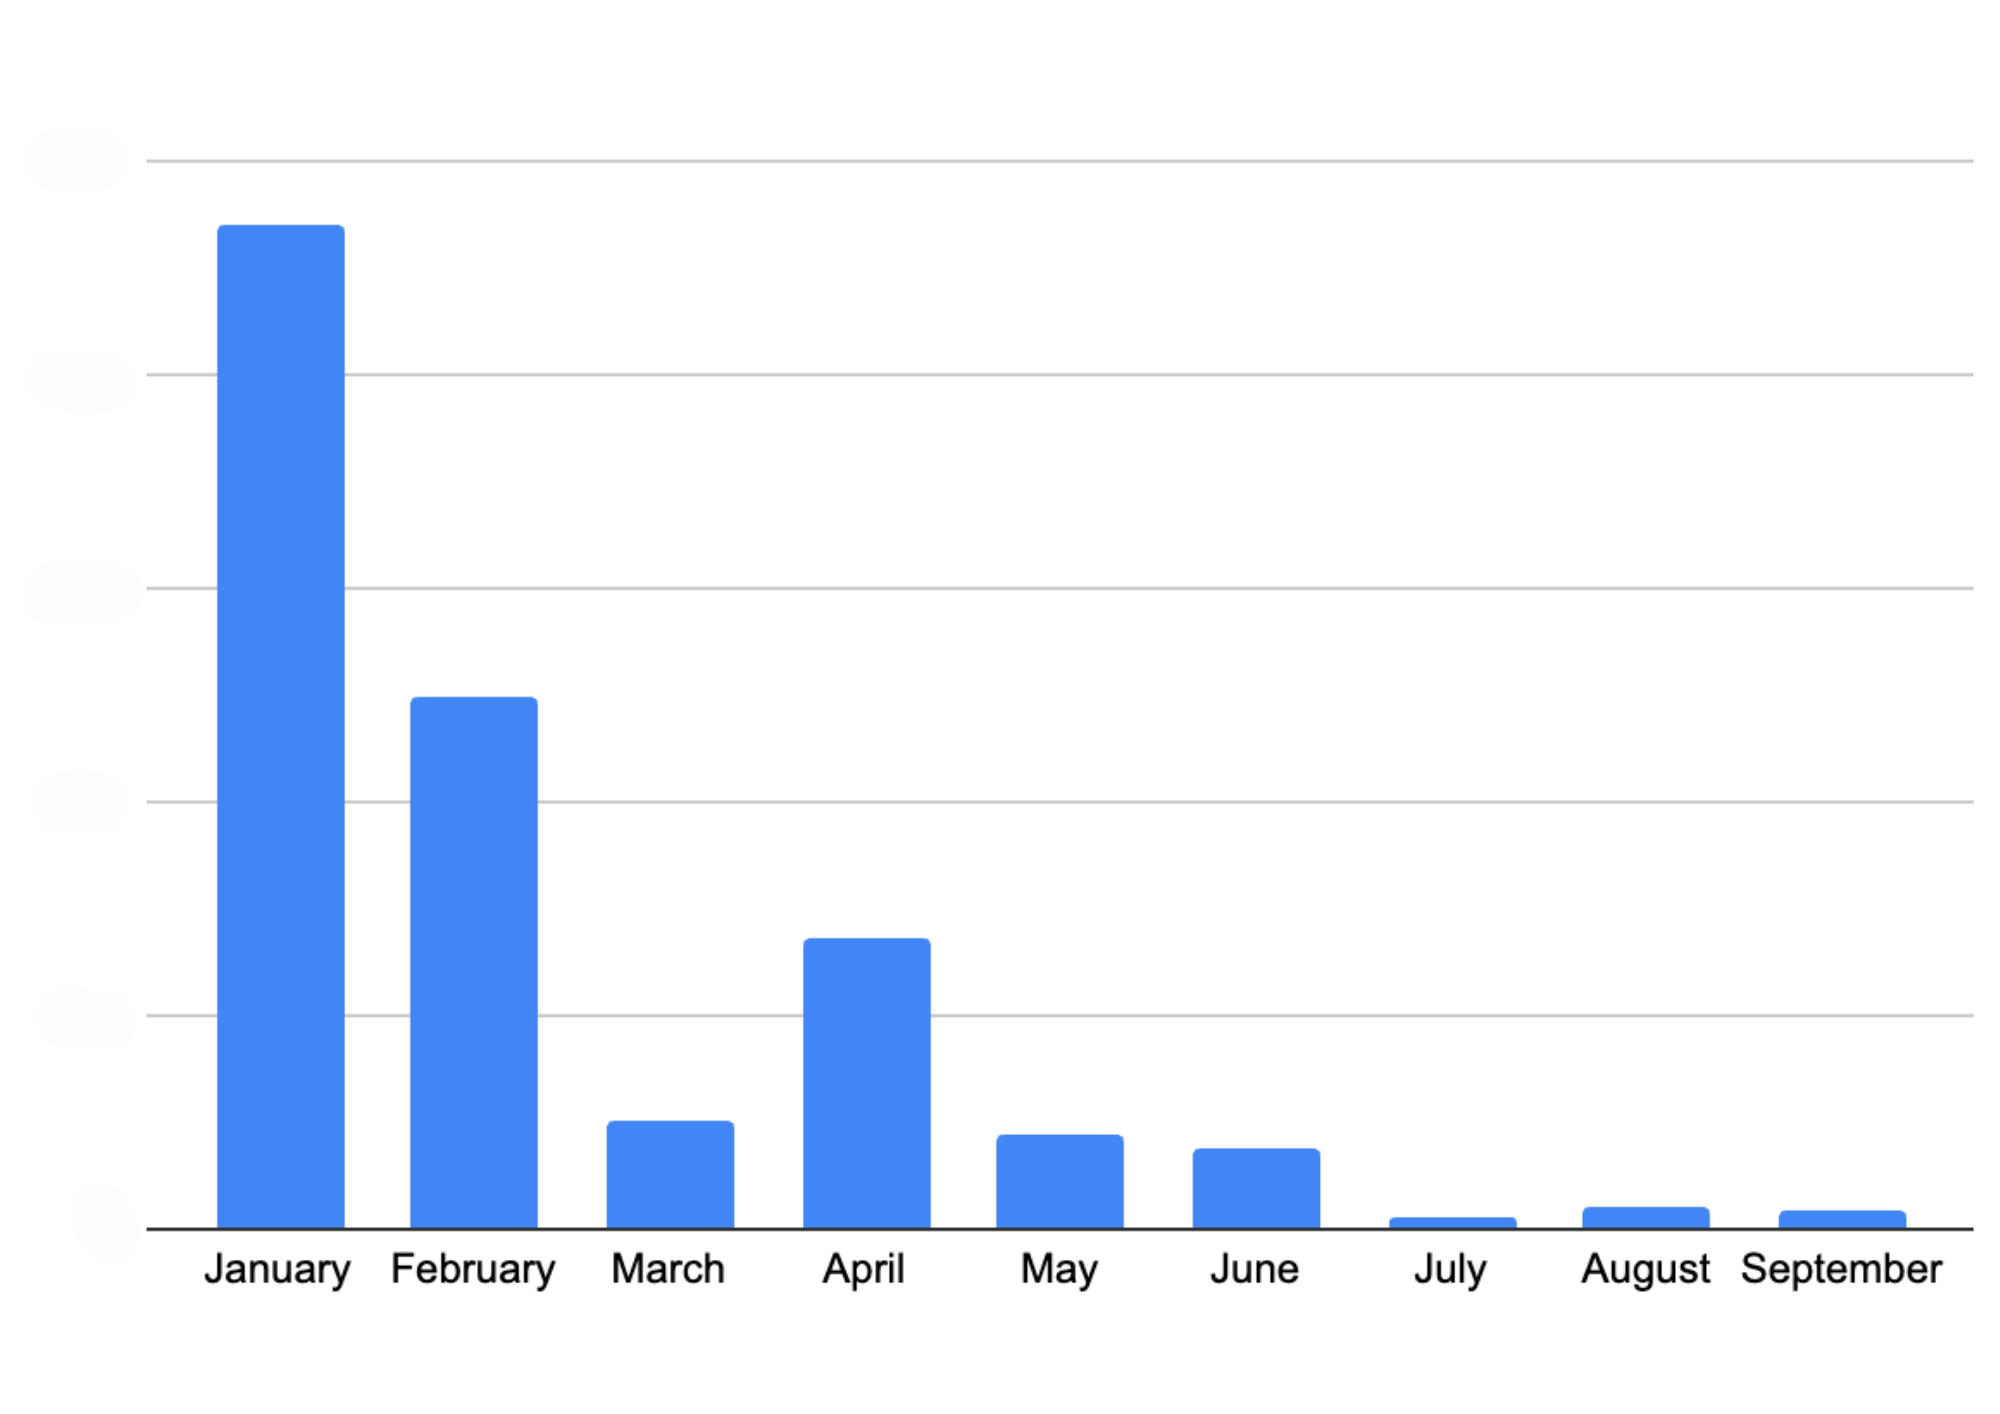
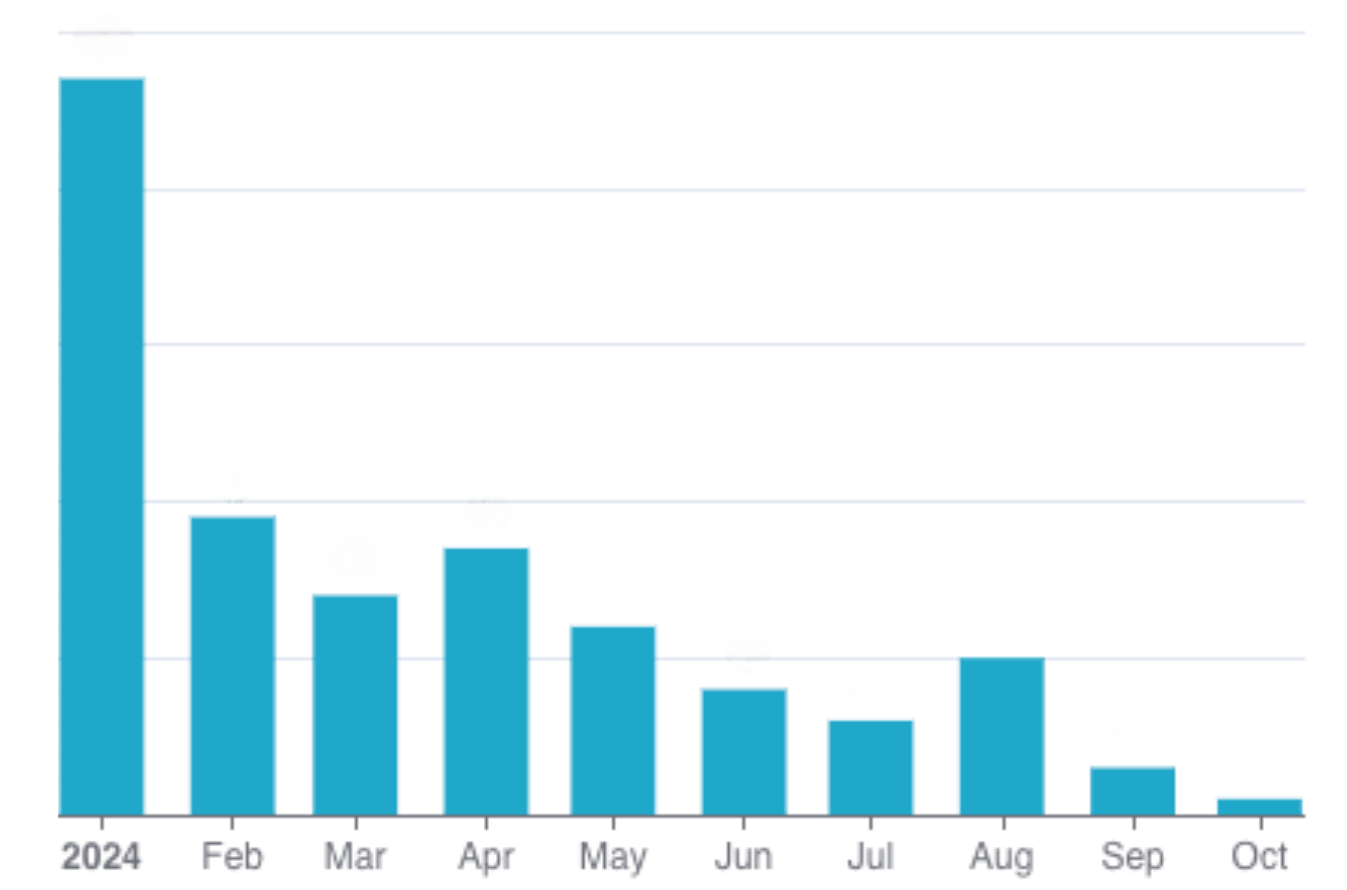
With the initial triumph and significant surge in subscriber count by over 1000% from January 2022 to June 2023 – which we were super proud of! – the architecture that supported GrabUnlimited was starting to show signs of strain. Common subscriber concerns such as not receiving their membership benefits, along with developer issues marked by an increase in service outages highlighted the system’s low resiliency. The culprit? A backend service that, while functional, was not built to efficiently manage the complexities of a rapidly scaling membership model.
Deep dive into our previous system design
As engineers, we know that deciding to migrate any system to a new one is like changing the engine of a running car. It requires meticulous evaluation of the existing systems, a deep dive into the issues and their root causes, and a thorough analysis of potential solutions and their trade-offs.
How was GrabUnlimited designed?
Initially, GrabUnlimited systems were designed for an experiment and not a full-fledged regional product. The idea was to try it out as a minimum viable product over a restricted segment of a few hundred thousand users. Let’s first have a look at how the membership program works.
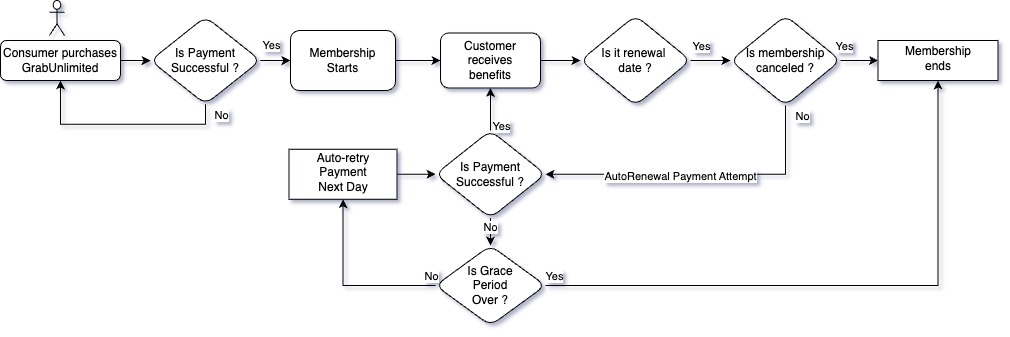
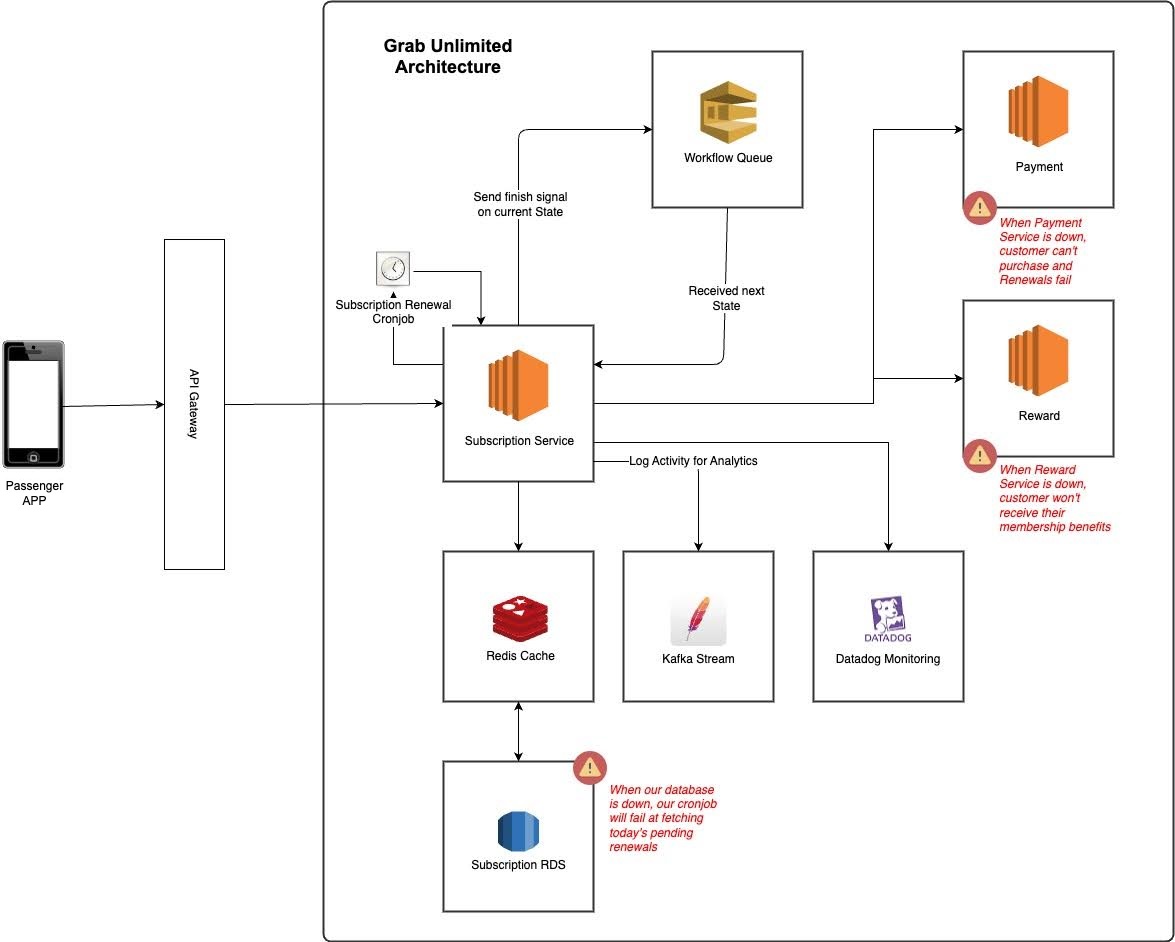
Under the hood, our membership system relies on two main flows
- Membership purchase: The user enrols for a certain duration (e.g 3 months), completes the payment through our Payment service, and receives benefits via our Reward service.
- Membership renewal: A daily cron job2 checks which memberships need renewal, processes the payment, and delivers the benefits.
We employed a state machine3 approach to break down the membership process into smaller chunks called state handlers. For instance, a membership might transition through ‘Init’, ‘Charged’, ‘Rewarded’, and ‘Active’ states. To operate these states, we used Amazon’s Simple Queue Service (SQS). SQS acts as a manager, delegating state handlers to workers (our service) and monitoring the status of the state handler. If a worker fails to complete a task, SQS reassigns the task to another worker, ensuring no task is lost. The load is also spread across multiple workers, helping with scalability.
To safeguard our system against duplicate tasks such as charging the user twice, when a worker takes up a task, it would use a Redis lock4 mechanism with a time-to-live (TTL) of five minutes preventing any other worker from picking up the same task. If a worker fails or crashes, the lock expires and another worker can pick up the job.
So far, so good.
With our success came many challenges
As our subscriber base grew, we experienced an increase in system outages. To address this, we scrutinised metrics like the number of support tickets and gauged the toll on our engineering team. This included the time spent patching up issues and the opportunity cost of not developing new features or improvements.
From our subscribers’ point of view, we saw a steady increase in reported incidents.
- Users were blocked because their membership status was corrupted in our database.
- Memberships were not automatically renewed, or users were not able to resubscribe.
- Users were not receiving their benefits after renewing their membership.
From the engineering team’s perspective, we were dedicating one engineer every week to battle these incidents full time. The on-call engineers were not only tasked with manually fixing all customer reports but were also swamped with frequent system alerts. This situation had three detrimental impacts on our team:
- We were constantly putting out fires instead of addressing the root causes.
- We were spending resources that could have been used to enhance our customers’ experience.
- Our team’s motivation and confidence was taking a big hit.
Finding the architectural culprit
The first step was to clearly identify and understand the issues within our systems. We looked at the frequency of failures and their root cause. From there, we were able to detect recurring patterns, which led us to four major issues in our architecture.
Scalability
Our system’s cron job, which retrieves all daily memberships due for renewal from our database, becomes slower and more resource-intensive as the number of members increases. Despite our attempt to alleviate high database usage by dividing the process into multiple batches and running several cron jobs, we were still experiencing significant surges each time a cron job runs. So our only viable solution was vertical scaling5 of the database. In other words, we had a serious bottleneck in our system.
Concurrency6
Picture this – A user tries to cancel their membership in the middle of the auto-renewal process, and voila, we have what we call a “zombie” state where the membership is both cancelled and renewed. This situation happens due to the limitations of our 5-minute Redis lock. If the renewal process holding the lock doesn’t complete within the timeout, the lock is released, enabling the cancel process to obtain the lock and run concurrently.
Resiliency7
What happens when the Rewards service faces an outage? The user buys a membership but doesn’t receive the rewards. It’s like throwing a party but the guests never arrive. We had three issues here:
- In the event where upstream services had an outage, we relied on SQS’s maximum number of retries without exponential backoff8, causing potential overloads on recovering services.
- Our cron job being housed within the service itself was susceptible to interruptions during outages or service restarts.
- Over time, the logic to transition between states in our state machine became complex and multi-responsibility as more states were added. This made our retry mechanism unreliable due to potential risks of double charging or double awarding users. Which leads us to our fourth culprit.
Idempotency9
Even when some steps could be retried, our system lacked idempotency guarantees – a safety net to ensure that a step could be repeated without unintended side effects. Although our critical upstream systems like Payments and Rewards support idempotency via idempotency keys, our service wasn’t originally designed with this in mind.
- Users could be stuck in a state where the payment succeeded but they didn’t receive their benefits or received them twice, requiring manual intervention from engineers.
- We were not able to auto-retry membership renewals if the cron job, database, or any service had an outage.

For example, consider a state handler “BenefitsAwarding” that follows these steps:
- Generate an idempotency key.
- Calls Reward service to award the first set of benefits to the subscriber using the key.
- Calls Reward service to award the second set of benefits to the subscriber using the key.
If step 3 fails due to an outage, and the step is retried and re-queued in SQS, it would restart from step 1. This generates a new idempotency key, meaning the Reward system wouldn’t recognize the retry and will award Benefits1 twice. One way to fix this with our current design is to substantially increase the number of states in our SQS state machine, to isolate tasks further rather than handling too much logic in a state handler. However, that would mean having hundreds of states making the whole process difficult to maintain.
Ultimately, most incidents traced back to one fundamental issue: Our systems were relying on a sequential process that couldn’t be easily replayed if any incident or disturbance happened during execution. We were placing all our bets on the happy path, a risky gamble indeed.
The Solution: Migrating our system to Temporal
Armed with a clear understanding of the problems and their impacts, we set out to explore potential solutions. This journey led us to consider refactoring our existing system or migrating to a new architecture that another team introduced to us: Temporal.
Enter Temporal
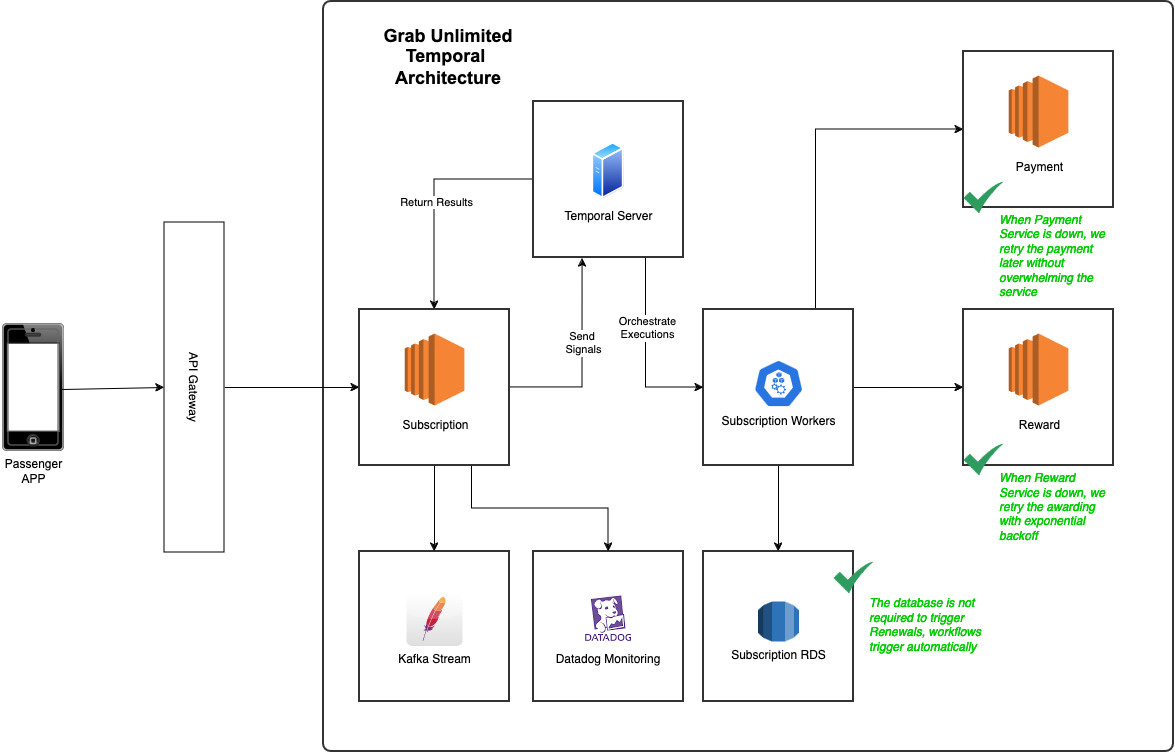
Temporal is an open-source workflow orchestration engine. Think of it as a more robust and battle-tested implementation of our previous SQS architecture. It’s designed to run millions of workflows concurrently and can recover/resume the state of a workflow execution at the exact point of failure even in the event of an outage. It has features like infinite retries, exponential backoff, rate limiting, and observability out of the box. This sounded exactly like what we needed! By using Temporal, we could offload the complexity of managing state transitions, retries, and task concurrency, allowing us to focus on our core business logic.
In order to make the right decision, we meticulously assessed our options over the following criteria: scalability10, reliability11, resiliency12, performance, development effort, cost, security, flexibility13, and testability14. We realised that most of what we needed to build to compensate for our system design gaps was already built into Temporal. Let’s have a sneak peek on how the architecture looks and how it solves all four major culprits we discussed.
Fixing our architecture culprits
Scalability
Let’s start with the easiest fix, remember our old cron job for membership renewals? We replaced it with Timer which allows a workflow to sleep and automatically wake up. Instead of renewing membership by batches, they are now renewed throughout the entire day based on the hour and minute when the user subscribed. What does this mean for us? We no longer need to fetch memberships from our database to trigger renewals. The workflow will resume at the due date to process the renewal, eliminating the database as a bottleneck.
Concurrency
Our legacy Redis lock mechanism was clearly not enough. However, with Temporal, we have alternative solutions to avoid race conditions. What happens if a user tries to cancel while the membership renewal workflow is being triggered? Temporal allows us to assign the same workflow ID to multiple workflows running mutually exclusive operations, ensuring only one operation runs at a time. Basically, we assigned the same workflow ID to both cancellation and renewal workflows, either cancellation happens first, removing the need to renew the consumer membership, or renewal takes the lead, and cancellation only happens after.
Resiliency
Out of the box, Temporal allowed us to put in place a few key resilience mechanisms like exponential backoff and infinite retry which was a key gap in our previous SQS architecture. That was great because we didn’t have to implement these mechanisms on our own and it meant that when calling key upstream services like Payment, we were able to precisely set our retry policies without overwhelming the service in case of an outage on their end.
Idempotency
Remember our fourth culprit from above? Our state handlers with SQS were performing too many tasks simultaneously, which made it risky to trust the retry process. This multi-responsibility nature introduced significant risks, including potential database corruption, double charging, and double awarding of benefits. Further breaking down these steps would result in hundreds of intermediary steps, each requiring careful maintenance and correct sequencing. With Temporal, you can imagine a membership as an ever-running workflow consisting of a sequence of steps that are automatically managed and retried in case of failures.
While this approach didn’t directly resolve idempotency issues, it made the system and the code more readable and allowed us to design steps with single responsibilities. This, in turn, made it simpler for us to develop and ensure these steps were idempotent.
Let’s take a look at our previous example with Temporal.
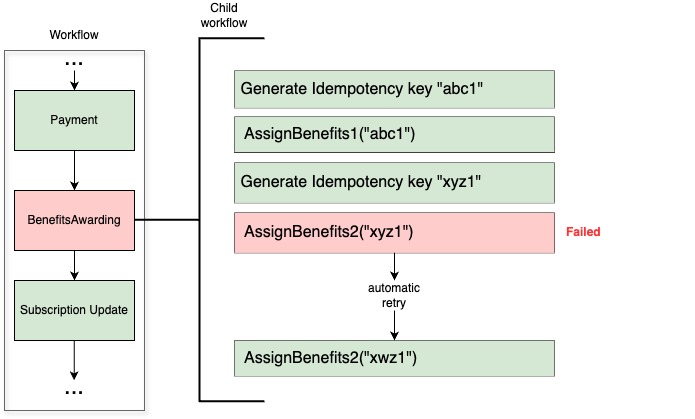
Let’s consider the same use case where a member needs to receive their benefits. The tasks remain the same except we don’t need to persist the idempotency key as it will be in the Temporal workflow state instead.
- Generate idempotency keys.
- Calls Reward service to award the first set of benefits to the subscriber using the key abc1.
- Calls Reward service to award the second set of benefits to the subscriber using the second key xyz1.
If the “AssignBenefits2” step fails, and the process is retried by Temporal, it will restart directly from that step, thus preventing the double awarding we were experiencing with SQS. Thanks to this approach, we largely improved idempotency and resiliency in our system, which also led to great results in decreasing user reported incidents.
Embracing Temporal: Challenges and mindset shift
Transitioning to Temporal was quite a paradigm shift for our team. Rather than managing SQS state transitions, we could now focus on our core business logic while Temporal handled the complexities of state management, error handling, and retries. This change allowed us to streamline development, making our processes more intuitive.
However, this shift wasn’t without its challenges. Temporal features such as Workflow and Activity design, deterministic execution, and built-in retry mechanisms required a steep learning curve. We had to quickly adapt to Temporal’s new way of thinking, and while it took some time to master these tools, they ultimately led to a more robust and scalable system. The transition to Temporal brought not only technical improvements but also a new mindset for solving problems efficiently.
Key takeaways and conclusion
After a thorough analysis, we decided to transition our architecture to Temporal, as it outperformed on nearly every evaluation criteria. Here are the key takeaways from our experience:
- Understand the problem, fix it for the future: Migrating legacy systems requires more than just patching up issues; it demands a deep dive into the root causes. For us, that meant addressing challenges in scalability, resiliency, and concurrency head-on to prevent future headaches.
- Focusing on what matters: By adopting Temporal workflow orchestration, we could shift our focus to what really counts, core business logic. The result? An 80% reduction in production incidents and a much smoother post-migration experience.
- Resilience and flexibility at scale: Temporal provided the infrastructure we needed to handle millions of subscribers with more robust processes for retries, idempotency, and state management. These features played a key role in ensuring the system remained stable and flexible as our user base grew.
- The learning curve pays off: Every system migration has its challenges, but the payoff was transformative. Despite the initial hiccups, moving to Temporal allowed us to scale GrabUnlimited seamlessly while significantly improving both our development processes and the overall user experience.
Stay tuned for Part 2, where we dive into the challenges of the migration and the lessons learned along the way. How did we seamlessly migrate millions of users to this new architecture without disrupting their memberships? How did we implement Temporal without pausing development for months? And what roadblocks did we encounter as we scaled this solution to all our users? We’ll answer these questions and more in the next post.
Nothing would have been possible without the unwavering support of Abegail Nato Alcantara, Andrys Silalahi, Pavel Sidlo, and Renu Yadav.
Join us
Grab is the leading superapp platform in Southeast Asia, providing everyday services that matter to consumers. More than just a ride-hailing and food delivery app, Grab offers a wide range of on-demand services in the region, including mobility, food, package and grocery delivery services, mobile payments, and financial services across 700 cities in eight countries.
Powered by technology and driven by heart, our mission is to drive Southeast Asia forward by creating economic empowerment for everyone. If this mission speaks to you, join our team today!
Definition of terms
-
Temporal: Temporal is an open-source workflow orchestration platform. It allows developers to build scalable and reliable applications using familiar development patterns and easy-to-use tools. ↩
-
Cron job: A cron job is a time-based job scheduler in Unix-like operating systems. Users can schedule jobs (commands or scripts) to run periodically at fixed times, dates, or intervals. ↩
-
State machine: A state machine is a behavioural model used in computer science. It represents a system in terms of states and transitions between those states. ↩
-
Redis lock mechanism: Redis is an in-memory data structure store that can be used as a database, cache, and message broker. A Redis lock mechanism is a way to ensure that only one computer in a distributed network can process a certain piece of code at a time. ↩
-
Vertical scaling: also known as “scaling up”, is the process of adding more resources (such as memory, CPUs, or storage) to an existing server or database to enhance its performance and capacity. Which is different from Horizontal scaling, also known as “scaling out”, the process of adding more servers or nodes to a system to handle increased load. ↩
-
Concurrency: In computing, concurrency is the ability of different parts or units of a program, algorithm, or problem to be executed out-of-order or in partial order, without affecting the final outcome. ↩
-
Resiliency: refers to the ability of a system or application to quickly recover from failures and continue its intended operation without significant interruption. ↩
-
Exponential backoff: Exponential backoff is an algorithm that uses feedback to multiplicatively decrease the rate of some process, in order to gradually find an acceptable rate. In the context of the article, it refers to a strategy for retrying failed tasks with increasing wait times between retries. ↩
-
Idempotency: An operation is idempotent if the result of performing it once is exactly the same as the result of performing it repeatedly without any intervening actions. ↩
-
Scalability: The ability of a system to handle increased workload or demand by adding resources. ↩
-
Reliability: The capacity of a system to consistently perform its intended functions without failure. ↩
-
Resiliency: The ability of a system to recover quickly and effectively from failures or disruptions, ensuring continuity of service. ↩
-
Flexibility: The architecture should be flexible enough to accommodate future changes in requirements. ↩
-
Testability: The architecture should allow for effective testing to ensure the system works as expected. ↩


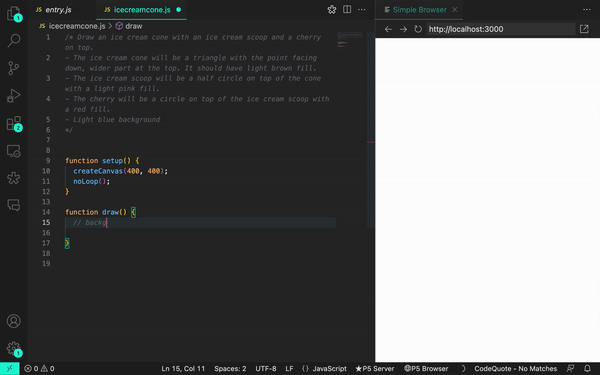
 usando p5.js, uma biblioteca JavaScript para código criativo, continuamos recebendo sugestões irrelevantes ou, às vezes, nenhuma sugestão. Mas quando aprendemos mais sobre a maneira como o GitHub Copilot processa as informações, percebemos que precisávamos ajustar a maneira como nos comunicamos com elas.


 de práctica
 .
.
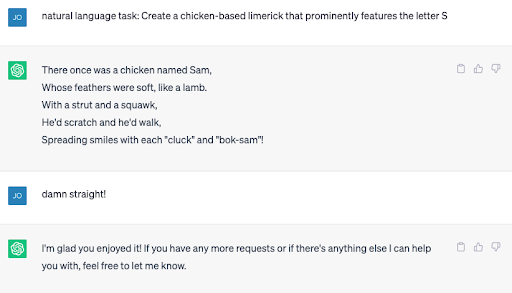
 and the responses from GitHub Copilot


 (@yavorsky_)
 Let’s hear more from