All posts by Rebecca Franks

Get kids coding and learning electronics with Raspberry Pi Pico

Post Syndicated from Rebecca Franks original https://www.raspberrypi.org/blog/kids-coding-electronics-raspberry-pi-pico-free-learning-resource/

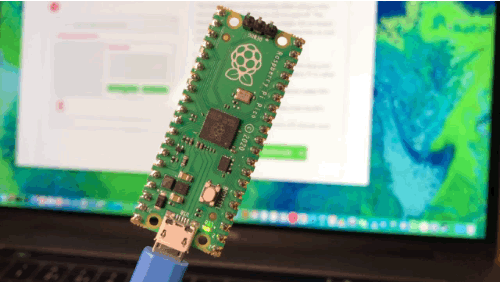
Since the release of the Raspberry Pi Pico microcontroller in 2021, we have seen people all over the world come up with creative Pico-based inventions.

Raspberry Pi Pico with its inbuilt LED blinking.
The Raspberry Pi Pico microcontroller.

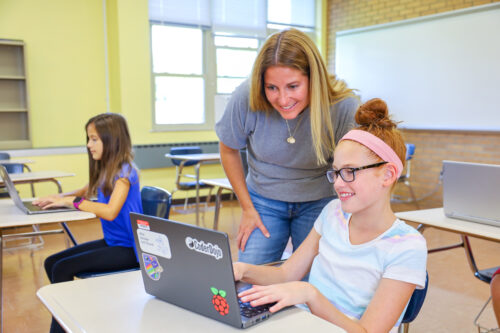
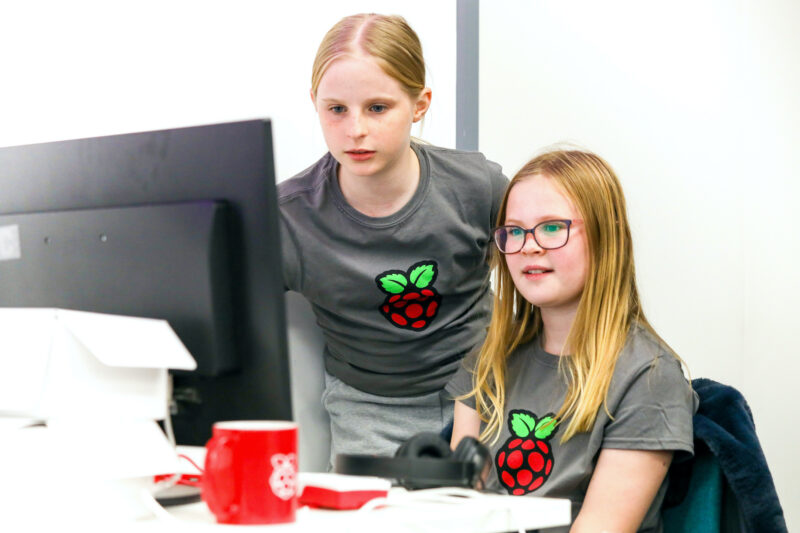
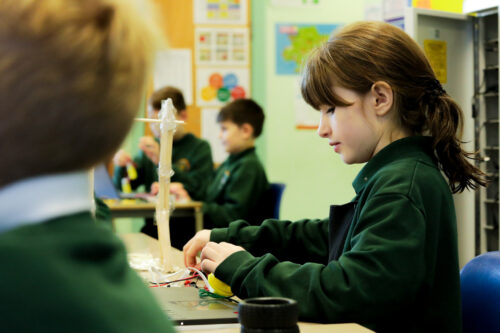
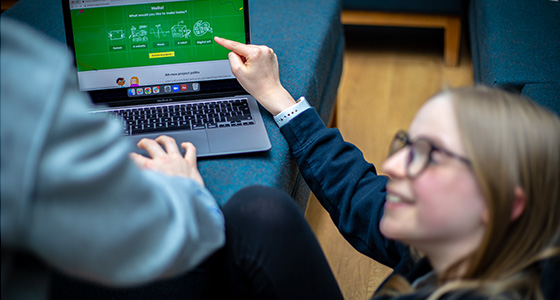
Now, thanks to our brand-new and free ‘Introduction to Raspberry Pi Pico’ learning path, young coders can easily join in and make their own cool Pico projects! This free learning path has six guided projects to help kids to independently develop their coding skills, and their skills in physical computing and electronics.

A girl creates a physical computing project.
Physical computing is a great way to help young people get creative with coding.

In this post, I’ll tell you about Raspberry Pi Pico, what kids can make by following our free ‘Intro to Pico’ path, and what skills they will be learning.

Meet Raspberry Pi Pico

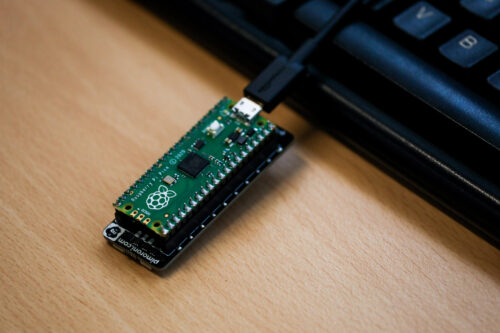
Raspberry Pi Pico is a physical computing device that is low-cost and easy to use. It’s much smaller than any Raspberry Pi computer, and it needs much less power. That’s because it’s not a full computer but instead a microcontroller. That means Pico is a device that you program by writing code on any computer, and then sending that code to Pico via a USB cable.

Raspberry Pi Pico has GPIO pins (like Raspberry Pi computers do). These pins mean it can interact with different types of physical computing components, such as buttons, buzzers, and LEDs.

In the ‘Intro to Raspberry Pi Pico’ path, we’ve designed new digital making projects specifically using Pico. By following the projects in the path, young people learn to make things with different electronic components. They’ll bring to life their own LED fireflies; they’ll make music with a sound machine and dial (a potentiometer); they’ll look after themselves and people around them by making a mood indicator and a heart rate visualiser. To find out more, visit the path, or scroll to the bottom of this post and click on ‘Details about the projects’.

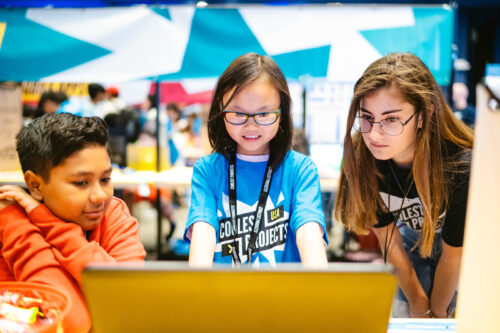
The specially designed structure of our learning paths helps kids become confident and independent coders and digital makers. Through this project path, we want to show young people what is possible with Raspberry Pi Pico and inspire them to continue their digital making journey beyond the six projects. Seeing tech creations from our amazing community is super special to us, and we would love to hear about what your young coders have made with Pico. Kids can share their projects in the path gallery, or you can tag us on social media if you post photos!   

alt=""

Learning skills and independence with our project paths 

While young people make all these Raspberry Pi Pico projects, they will learn the skills and independence to make and code their very own, unique creations with a Pico. We have designed our new project paths to help kids become independent digital makers. As they progress through a path, kids gain new skills, practise what they have learnt, and finally write and follow their own project brief. 

Our learning paths help kids develop many of the skills that are important to all coders and digital makers, no matter how much experience they have: 

  • How to turn an idea on paper into a tech creation
  • How to debug a project
  • How to combine new information with what they already know about digital making 

The learning paths also encourage kids to make projects about the things that matter to them.  

Key questions answered

Who is this path for?

We have written the projects in this path with young people around the age of 9 to 13 in mind. 

Programs for Raspberry Pi Pico are written in a text-based language called MicroPython. That means a young person who wants to start the ‘Intro to Pico’ path needs to be familiar with typing on a keyboard.

A young person codes at a Raspberry Pi computer.

If your kid has never coded in a text-based language before, they could complete our free ‘Introduction to Python‘ project path first, but this is not a prerequisite.

What will young people learn?

To help with the programming aspects of the projects, the instructions in the path tell young people about:  

  • Displaying output
  • Arithmetic expressions
  • Importing from a library
  • While loops
  • Nested if statements
  • Defining and calling functions
  • Events
Raspberry Pi Pico attached with jumper wires to a purple LED.
We still get excited by a flashing LED.

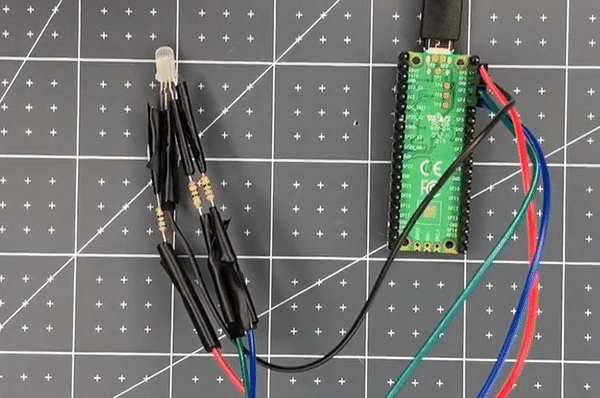
One of the great things about this project path is that it helps young people explore physical computing and electronics. In the ‘Intro to Pico’ path, they’ll use:

  • Single-colour LEDs
  • Multi-colour LEDs (so-called RGB LEDs)
  • Buzzers
  • Switches (including switches the kids will make out of craft materials!)
  • Buttons
  • Potentiometers (dials)

How much time is needed to complete the path?

We’ve designed the path to be completed in around six one-hour sessions, with one hour per project. However, the project instructions encourage kids to upgrade their projects and go further if they wish. This means that they might want to spend a little more time getting their projects exactly as they imagine. 

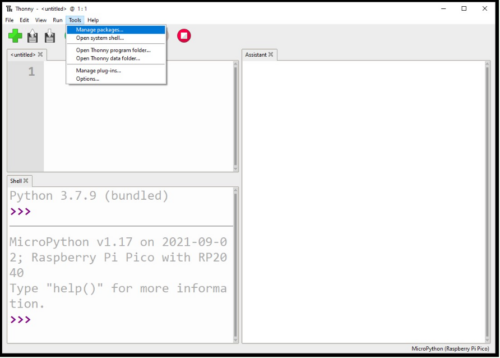
What software is needed for the projects?

Young people need a web browser so they can follow the project instructions. The first two projects in the path provide detailed instructions for how to install the free software needed for the projects. 

alt=""
The projects in the path show you how to program Raspberry Pi Pico using MicroPython in the Thonny software.

What hardware is needed for these projects?

The first step of each project lists what components are needed to create the project. You can purchase a kit from Kitronik or from Pimoroni that includes all of the components used in the path:

‘Intro to Raspberry Pi Pico’ kit list (click here)

  • 1 × soldered Raspberry Pi Pico
  • 1 × USB cable
  • 1 × red LED
  • 1 × blue LED
  • 2 × yellow LEDs
  • 6 × single-colour LEDs (random)
  • 3 × RGB LEDs
  • 15 × 75 ohm resistors (max 220 ohm)
  • 2 × potentiometers
  • 8 × push buttons (optional, these can be made from crafting materials)
  • 15 × pin–socket jumper wires
  • 38 × socket–socket jumper wires
  • 4 × pin–pin jumper wires

What can young people do next?

Explore Python coding with us 

If your young coders enjoy MicroPython, they’ll also love our Python learning paths: ‘Introduction to Python‘ and More Python‘. Both are structured in the same way as our Pico path, and will help young people learn Python while creating their own visual designs.

A girl points happily at a project on the Raspberry Pi Foundation's projects site.
Details about the projects in ‘Intro to Raspberry Pi Pico’

The ‘Intro to Raspberry Pi Pico’ path is structured according to our Digital Making Framework, with three Explore projects, two Design projects, and a final Invent project. You can also check out our learning graph to see the progression of skills and knowledge throughout the path.

Explore project 1: LED firefly


The ‘LED firefly’ project introduces creators to Raspberry Pi Pico while they make their first project with a blinking LED. They program the LED with a blink pattern that is common to fireflies in the wild. To upgrade their projects, creators can place their LED firefly into a glass jar to create a twinkling effect.  

Explore project 2: Party popper


‘Party popper’ introduces creators to the RGB LED and a buzzer. To form the popper, they craft a pull switch out of kitchen foil and cardboard. When the popper is activated, the RGB LED flashes in their chosen colour, and a ‘tada’ sound plays on the buzzer. 

Explore project 3: Beating heart


‘Beating heart’ uses a potentiometer (dial) to control the pulsing speed of an LED. Creators craft their own hearts using red paper and origami before placing the pulsing LED inside. In this way, they create a model of a heart they can use to learn about medicine or to bring to life a favourite toy. 

Design project 1: Mood indicator


In the ‘Mood indicator’ project, kids use switches and an RGB LED to create a device that can communicate a need or a mood to another person. This Design project gives young creators lots of opportunities to use their new skills to create something personal to them.

Design project 2: Sound machine


‘Sound machine’ is a project for kids to work with the different tones that a buzzer can make. They can use the buzzer to create sound effects, or to recreate their favourite songs. Once they have decided on their sounds, they can think about how a user of their project might choose to play them. 

Invent project: Sensory gadget


This project gives creators that chance to pick their favourite elements of the path to create something totally unique to them. They could make all sorts of sensory gadgets, from a Picosaber to a candle that can be blown out. Creators are encouraged to showcase their creations in the path gallery to give other young makers inspiration. 

The post Get kids coding and learning electronics with Raspberry Pi Pico appeared first on Raspberry Pi.

Python coding for kids: Moving beyond the basics

Post Syndicated from Rebecca Franks original https://www.raspberrypi.org/blog/python-coding-for-kids-beyond-the-basics/

We are excited to announce our second new Python learning path, ‘More Python’, which shows young coders how to add real data to their programs while creating projects from a chart of Olympic medals to an interactive world map. The six guided Python projects in this free learning path are designed to enable young people to independently create their own Python projects about the topics that matter to them.

A girl points excitedly at a project on the Raspberry Pi Foundation's projects site.
Two kids are at a laptop with one of our coding projects.

In this post, we’ll show you how kids use the projects in the ‘More Python’ path, what they can make by following the path, and how the path structure helps them become confident and independent digital makers.

Python coding for kids: Our learning paths

Our ‘Introduction to Python’ learning path is the perfect place to start learning how to use Python, a text-based programming language. When we launched the Intro path in February, we explained why Python is such a popular, useful, and accessible programming language for young people.

Because Python has so much to offer, we have created a second Python path for young people who have learned the basics in the first path. In this new set of six projects, learners will discover new concepts and see how to add different types of real data to their programs.

Illustration of different graph types
By following the ‘More Python’ path, young people learn the skills to independently create a data visualisation for a topic they are passionate about in the final project.

Key questions answered

Who is this path for?

We have written the projects in this path with young people around the age of 10 to 13 in mind. To code in a text-based language, a young person needs to be familiar with using a keyboard, due to the typing involved. Learners should have already completed the ‘Introduction to Python’ project path, as they will build on the learning from that path.

Three young tech creators show off their tech project at Coolest Projects.

How do young people learn with the projects? 

Young people need access to a web browser to complete our project paths. Each project contains step-by-step instructions for learners to follow, and tick boxes to mark when they complete each step. On top of that, the projects have steps for learners to:

  • Reflect on what they have covered in the project
  • Share their projects with others
  • See suggestions to upgrade their projects

Young people also have the option to sign up for an account with us so they can save their progress at any time and collect badges.

A young person codes at a Raspberry Pi computer.

While learners follow the project instructions in this project path, they write their code into Trinket, a free web-based coding platform accessible in a browser. Each project contains a link to a starter Trinket, which includes everything to get started writing Python code — no need to install any additional software.

Screenshot of Python code in the online IDE Trinket.
This is what Python code on Trinket looks like.

If they prefer, however, young people also have the option of instead writing their code in a desktop-based programming environment, such as Thonny, as they work through the projects.

What will young people learn?  

To use data in their Python programs, the project instructions show learners how to:

  • Create and use lists
  • Create and use dictionaries
  • Read data from a data file

The projects support learners as they explore new concepts of digital visual media and: 

  • Create charts using the Python library Pygal
  • Plot pins on a map
  • Create randomised artwork

In each project, learners reflect and answer questions about their work, which is important for connecting the project’s content to their pre-existing knowledge.

In a computing classroom, a girl laughs at what she sees on the screen.

As they work through the projects, learners see different ways to present data and then decide how they want to present their data in the final project in the path. You’ll find out what the projects are on the path page, or at the bottom of this blog post.

The project path helps learners become independent coders and digital makers, as each project contains slightly less support than the one before. You can read about how our project paths are designed to increase young people’s independence, and explore our other free learning paths for young coders

How long will the path take to complete?

We’ve designed the path to be completed in around six one-hour sessions, with one hour per project, at home, in school, or at a coding club. The project instructions encourage learners to add code to upgrade their projects and go further if they wish. This means that young people might want to spend a little more time getting their projects exactly as they imagine them.

In a classroom, a teacher and a student look at a computer screen while the student types on the keyboard.

What can young people do next?

Use Unity to create a 3D world

Unity is a free development environment for creating 3D virtual environments, including games, visual novels, and animations, all with the text-based programming language C#. Our ‘Introduction to Unity’ project path for keen coders shows how to make 3D worlds and games with collectibles, timers, and non-player characters.

Take part in Coolest Projects Global

At the end of the ‘More Python’ path, learners are encouraged to register a project they’ve made using their new coding skills for Coolest Projects Global, our free and world-leading online technology showcase for young tech creators. The project they register will become part of the online gallery, where members of the Coolest Projects community can celebrate each other’s creations.

A young coder shows off her tech project for Coolest Projects to two other young tech creators.

We welcome projects from all young people, whether they are beginners or experienced coders and digital makers. Coolest Projects Global is a unique opportunity for young people to share their ingenuity with the world and with other young people who love coding and creating with digital technology.

Details about the projects in ‘More Python’

The ‘More Python’ path is structured according to our Digital Making Framework, with three Explore project, two Design projects, and a final Invent project.

Explore project 1: Charting champions

Illustration of a fast-moving, smiling robot wearing a champion's rosette.

In this Explore project, learners discover the power of lists in Python by creating an interactive chart of Olympic medals. They learn how to read data from a text file and then present that data as a bar chart.

Explore project 2: Solar system

Illustration of our solar system.

In this Explore project, learners create a simulation of the solar system. They revisit the drawing and animation skills that they learned in the ‘Introduction to Python’ project path to produce animated planets orbiting the sun. The animation is based on real data taken from a data file to simulate the speed that the planets move at as they orbit. The simulation is also interactive, using dictionaries to display data about the planets that have been selected.

Explore project 3: Codebreaker

Illustration of a person thinking about codebreaking.

The final Explore project gets learners to build on their knowledge of lists and dictionaries by creating a program that encodes and decodes a message using an Atbash cipher. The Atbash cipher was originally developed in the Hebrew language. It takes the alphabet and matches it to its reverse order to create a secret message. They also create a script that checks how many times certain letters have been used in an encoded message, so that they can discover patterns.

Design project 1: Encoded art

Illustration of a robot painting a portrait of another robot.

The first Design project allows learners to create fun pieces of artwork by encoding the letters of their name into images, patterns, or drawings. Learners can choose the images that will be produced for each letter, and whether these appear at random or in a geometric pattern.

Learners are encouraged to share their encoded artwork in the community library, where there are lots of fun projects to discover already. In this project, learners apply all of the coding skills and knowledge covered in the Explore projects, including working with dictionaries and lists.

Design project 2: Mapping data

Illustration of a map and a hand of someone marking it with a large pin.

In the next Design project, learners access data from a data file and use it to create location pins on a world map. They have six datasets to choose from, so they can use one that interests them. They can also choose from a variety of maps and design their own pin to truly personalise their projects.

Invent project: Persuasive data presentation

Illustration of different graph types

This project is designed to use all of the skills and knowledge covered in this path, and most of the skills from the ‘Introduction to Python’ path. Learners can choose from eight datasets to create data visualisations. They are also given instructions on how to access and prepare other datasets if they want to visualise data about a different topic.

Once learners have chosen their dataset, they can decide how they want it to be displayed. This could be a chart, a map with pins, or a unique data visualisation. There are lots of example projects to provide inspiration for learners. One of our favourites is the ISS Expedition project, which places flags on the ISS depending on the expedition number you enter.

The post Python coding for kids: Moving beyond the basics appeared first on Raspberry Pi.

Coding for kids: Art, games, and animations with our new beginners’ Python path

Post Syndicated from Rebecca Franks original https://www.raspberrypi.org/blog/coding-for-kids-art-games-animations-beginners-python-programming/

Python is a programming language that’s popular with learners and educators in clubs and schools. It also is widely used by professional programmers, particularly in the data science field. Many educators and young people like how similar the Python syntax is to the English language.

Two girls code together at a computer.

That’s why Python is often the first text-based language that young people learn to program in. The familiar syntax can lower the barrier to taking the first steps away from a block-based programming environment, such as Scratch.

In 2021, Python ranked in first place in an industry-standard popularity index of a major software quality assessment company, confirming its favoured position in software engineering. Python is, for example, championed by Google and used in many of its applications.

Coding for kids in Python

Python’s popularity means there are many excellent resources for learning this language. These resources often focus on creating programs that produce text outputs. We wanted to do something different.

Two young people code at laptops.

Our new ‘Introduction to Python’ project path focuses on creating digital visuals using the Python p5 library. This library is like a set of tools that allows you to get creative by using Python code to draw shapes, edit images, and create frame-by-frame animations. That makes it the perfect choice for young learners: they can develop their knowledge and skills in Python programming while creating cool visuals that they’ll be proud of. 

What is in the ‘Introduction to Python’ path?

The ‘Introduction to Python’ project path is designed according to our Digital Making Framework, encouraging learners to become independent coders and digital makers by gently removing scaffolding as they progress along the projects in a path. Paths begin with three Explore projects, in which learners are guided through tasks that introduce them to new coding skills. Next, learners complete two Design projects. Here, they are encouraged to practise their skills and bring in their own interests to personalise their coding creations. Finally, learners complete one Invent project. This is where they put everything that they have learned together and create something unique that matters to them.

""
Emoji, archery, rockets, art, and movement are all part of this Python path.

The structure of our Digital Making Framework means that learners experience the structured development process of a coding project and learn how to turn their ideas into reality. The Framework also supports with finding errors in their code (debugging), showing them that errors are a part of computer programming and just temporary setbacks that you can overcome. 

What coding skills and knowledge will young people learn?

The Explore projects are where the initial learning takes place. The key programming concepts covered in this path are:

  • Variables
  • Performing calculations with variables
  • Using functions
  • Using selection (if, elif and else)
  • Using repetition (for loops)
  • Using randomisation
  • Importing from libraries

Learners also explore aspects of digital visual media concepts:

  • Coordinates
  • RGB colours
  • Screen size
  • Layers
  • Frames and animation

Learners then develop these skills and knowledge by putting them into practice in the Design and Invent projects, where they add in their own ideas and creativity. 

Explore project 1: Hello world emoji

In the first Explore project of this path, learners create an interactive program that uses emoji characters as the visual element.

""

This is the first step into Python and gets learners used to the syntax for printing text, using variables, and defining functions.

Explore project 2: Target practice

In this Explore project, learners create an archery game. They are introduced to the p5 library, which they use to draw an archery board and create the arrows.

""

The new programming concept covered in this project is selection, where learners use if, elif and else to allocate points for the game.

Explore project 3: Rocket launch

The final Explore project gets learners to animate a rocket launching into space. They create an interactive animation where the user is asked to enter an amount of fuel for the rocket launch. The animation then shows if the fuel is enough to get the rocket into orbit.

""

The new programming concept covered here is repetition. Learners use for loops to animate smoke coming from the exhaust of the rocket.

Design project 1: Make a face

The first Design project allows learners to unleash their creativity by drawing a face using the Python coding skills that they have built in the Explore projects. They have full control of the design for their face and can explore three examples for inspiration.

""

Learners are also encouraged to share their drawings in the community library, where there are lots of fun projects to discover already. In this project, learners apply all of the coding skills and knowledge covered in the Explore projects, including selection, repetition, and variables.

Design project 2: Don’t collide!

In the second Design project, learners code a scrolling game called ‘Don’t collide’, where a character or vehicle moves down the screen while having to avoid obstacles.

""

Learners can choose their own theme for the game, and decide what will move down the screen and what the obstacles will look like. In this project, they also get to practice everything they learned in the Explore projects. 

Invent project: Powerful patterns

This project is the ultimate chance for learners to put all of their skills and knowledge into practice and get creative. They design their own unique patterns and create frame-by-frame animations.

""

The Invent project offers ingredients, which are short reminders of all the key skills that learners have gained while completing the previous projects in the path. The ingredients encourage them to be independent whilst also supporting them with code snippets to help them along.

Key questions answered

Who is the Introduction to Python path for?

We have written the projects in the path with young people around the age of 9 to 13 in mind. To code in a text-based language, a young person needs to be familiar with using a keyboard, due to the typing involved. A learner may have completed one of our Scratch paths prior to this one, but this isn’t essential. and we encourage beginner coders to take this path first if that is their choice.

A young person codes at a Raspberry Pi computer.

What software do learners need to code these projects?

A web browser. In every project, starter code is provided in a free web-based development environment called Trinket, where learners add their own code. The starter Trinkets include everything that learners need to use Python and access the p5 library.

If preferred, the projects also include instructions for using a desktop-based programming environment, such as Thonny.

How long will the path take to complete?

We’ve designed the path to be completed in around six one-hour sessions, with one hour per project. However, the project instructions encourage learners to upgrade their projects and go further if they wish. This means that young people might want to spend a little more time getting their projects exactly as they imagine them. 

What can young people do next after completing this path?

Taking part in Coolest Projects Global

At the end of the path, learners are encouraged to register a project they’re making with their new coding skills for Coolest Projects Global, our world-leading online technology showcase for young people.

Three young tech creators show off their tech project at Coolest Projects.

Taking part is free, all online, and beginners as well as more experienced young tech creators are welcome and invited. This is their unique opportunity to share their ingenuity in an online gallery for the world and the Coolest Projects community to celebrate.

Coding more Python projects with us

Coming very soon is our ‘More Python’ path. In this path, learners will move beyond the basics they learned in Introduction to Python. They will learn how to use lists, dictionaries, and files to create charts, models, and artwork. Keep your eye on our blog and social media for the release of ‘More Python’.

The post Coding for kids: Art, games, and animations with our new beginners’ Python path appeared first on Raspberry Pi.